EasyOne Plus Manual - NDD Medical Technologies
EasyOne Plus Manual - NDD Medical Technologies
EasyOne Plus Manual - NDD Medical Technologies

Create successful ePaper yourself
Turn your PDF publications into a flip-book with our unique Google optimized e-Paper software.
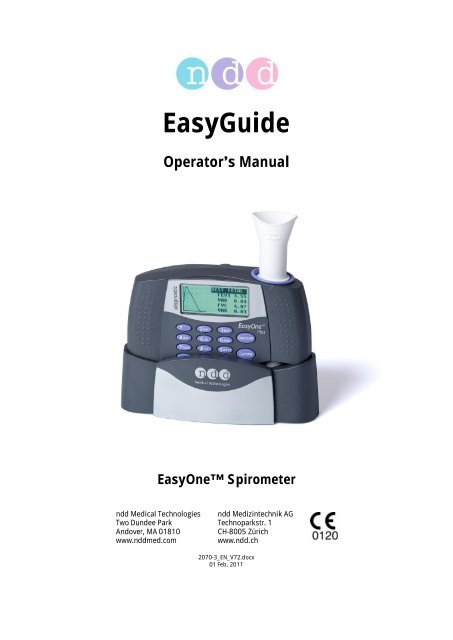
EasyGuide<br />
Operators <strong>Manual</strong><br />
<strong>EasyOne</strong> Spirometer<br />
ndd <strong>Medical</strong> <strong>Technologies</strong> ndd Medizintechnik AG<br />
Two Dundee Park Technoparkstr. 1<br />
Andover, MA 01810<br />
CH-8005 Zürich<br />
www.nddmed.com<br />
www.ndd.ch<br />
2070-3_EN_V72.docx<br />
01 Feb. 2011
EasyGuide Page 1<br />
Contents<br />
1 Introduction ........................................................................................................................................ 2<br />
2 Warning Information ............................................................................................................................ 3<br />
3 Intended Use ....................................................................................................................................... 4<br />
4 Instrument Installation ........................................................................................................................ 4<br />
4.1 Setting Up the Instrument ................................................................................................................................................... 4<br />
4.2 Setting Language, Date, Time, Altitude (above sea level) and Printer Type ......................................................................... 7<br />
4.3 Operating the Keys .............................................................................................................................................................. 7<br />
5 Performing Spirometry ........................................................................................................................ 9<br />
5.1 Preparing the Patient ........................................................................................................................................................... 9<br />
5.2 Measuring the Forced Vital Capacity (FVC) .......................................................................................................................... 9<br />
5.3 Checking the Test Quality .................................................................................................................................................. 10<br />
5.4 Interpreting Results ........................................................................................................................................................... 10<br />
5.5 Printing a Report ................................................................................................................................................................ 11<br />
5.6 Saving and Retrieving Measurements ............................................................................................................................... 11<br />
5.7 Quick Test ......................................................................................................................................................................... 11<br />
5.8 Editing Patient Data ........................................................................................................................................................... 12<br />
6 Specifications.................................................................................................................................... 13<br />
6.1 <strong>EasyOne</strong> Model 2001 Spirometer .................................................................................................................................. 13<br />
6.2 <strong>EasyOne</strong> Model 2010 Cradle (optional)......................................................................................................................... 14<br />
6.3 <strong>EasyOne</strong> Model 2010 Screen Connector (optional) ....................................................................................................... 14<br />
6.4 Accessories ....................................................................................................................................................................... 14<br />
7 Definition of Parameters .................................................................................................................... 15<br />
8 System Configuration ........................................................................................................................ 16<br />
8.1 Test Settings...................................................................................................................................................................... 16<br />
8.2 General Settings ................................................................................................................................................................ 17<br />
8.3 Printer Settings .................................................................................................................................................................. 18<br />
9 Test Types ......................................................................................................................................... 19<br />
9.1 FVC (expiration)................................................................................................................................................................. 19<br />
9.2 FVL (inspiration and expiration) ........................................................................................................................................ 19<br />
9.3 Tidal FVL ............................................................................................................................................................................ 19<br />
9.4 Slow VC ............................................................................................................................................................................. 19<br />
9.5 MVV ................................................................................................................................................................................... 20<br />
9.6 OSHA Cotton Dust Protocol (US units only) ....................................................................................................................... 20<br />
9.7 Disability Protocol (US units only) ..................................................................................................................................... 20<br />
9.8 Post-Test ........................................................................................................................................................................... 20<br />
9.9 Adding a Trial .................................................................................................................................................................... 21<br />
10 Quality Messages and Quality Grades................................................................................................ 22<br />
10.1 Quality Messages .............................................................................................................................................................. 22<br />
10.2 Quality Grades ................................................................................................................................................................... 23<br />
10.3 Best Test Selection ............................................................................................................................................................ 23<br />
11 Interpretation .................................................................................................................................... 24<br />
11.1 NLHEP Interpretation ......................................................................................................................................................... 24<br />
11.2 GOLD/Hardie Interpretation .............................................................................................................................................. 25<br />
12 Predicted Values ................................................................................................................................ 26<br />
12.1 Predicted Values for Adults ............................................................................................................................................... 26<br />
12.2 Predicted Values for Children ............................................................................................................................................ 26<br />
12.3 Ethnic Correction ............................................................................................................................................................... 27<br />
13 Hygiene and Servicing of the Instrument............................................................................................ 27<br />
14 Checking Calibration ......................................................................................................................... 28<br />
15 Troubleshooting Tips ......................................................................................................................... 29<br />
16 Bibliography...................................................................................................................................... 30<br />
17 Electromagnetic Compatibility (EMC) ................................................................................................. 31<br />
Specifications and information contained in this manual are furnished for informational use only and are subject to change at any time without<br />
notice. Copyright© 2011 by ndd Medizintechnik AG, Switzerland. All rights reserved. <strong>EasyOne</strong> and spirette are protected by the following<br />
patents: EP 0597060, EP 0653919, US 5419326, US 5503151, US 5645071, US5647370.
EasyGuide Page 2<br />
1 Introduction<br />
Thank you for choosing the <strong>EasyOne</strong> Spirometer.<br />
With <strong>EasyOne</strong> you have chosen a high quality spirometer that minimizes the need for maintenance<br />
due to its unique ultrasound technology. <strong>EasyOne</strong> does not need calibration and remains consistently<br />
accurate over years. The spirette breathing tube assures perfectly hygienic conditions for every patient<br />
at low cost even if the spirometer is frequently used.<br />
The <strong>EasyOne</strong> Diagnostic Spirometer has two operating modes for you to choose from:<br />
In the Diagnostic mode, <strong>EasyOne</strong> offers you extensive and diverse options for spirometric tests in<br />
accordance with the standards of the European Respiratory Society (ERS) and the American Thoracic<br />
Society (ATS).<br />
In the Frontline mode, <strong>EasyOne</strong> offers you the option of greatly simplified spirometric measurement.<br />
In the NLHEP mode, the <strong>EasyOne</strong> fulfills all requirements of the National Lung Health Education Program<br />
(NLHEP [4]). This mode is a little more restrictive than the Frontline Mode (only FEV6 maneuvers).<br />
The <strong>EasyOne</strong> Frontline Spirometer only offers the Frontline and NLHEP mode. The differences between<br />
the two operating modes are described in the table that follows.<br />
Test modes<br />
Parameters<br />
Quality control<br />
Automatic quality control<br />
Trial storage and display<br />
Report Configuration<br />
Diagnostic mode<br />
FVC (expiratory), F/V Loop (inspiratory<br />
and expiratory), slow VC, MVV, Pre-<br />
Post measurement<br />
US: Unit can be configured to meet<br />
NIOSH/OSHA and Disability reporting<br />
requirements.<br />
FEV1, FVC, FEV1/FVC, FEV6,<br />
FEV1/FEV6, MEF25-75, MEF25, MEF50,<br />
MEF75, PEF, FET, FIVC, PIF, IVC, IRV,<br />
ERV, FEV1/VC, MVV, pre-post % variation,<br />
QC rating<br />
Requires 3 acceptable, reproducible<br />
maneuvers.<br />
Details in Chapter 10.1.<br />
Quality control can also be overridden<br />
manually.<br />
Can store and display the best, or the<br />
best 3 trials, including curves.<br />
Report can be customized for curve<br />
type and size.<br />
Frontline and NLHEP mode<br />
FVC (expiratory), Pre-Post measurement<br />
FEV1, FEV6, FEV1/FEV6, FVC, FEV1/FVC,<br />
PEF, pre-post % variation, QC rating<br />
NLHEP mode: only FEV6, no PEF display<br />
Requires 2 acceptable, reproducible maneuvers.<br />
Details in Chapter 10<br />
Automatic control is always active<br />
Stores and displays only the best trial and<br />
curve<br />
Report is fixed, showing the smaller sized<br />
FV and VT curves<br />
The default setting of the <strong>EasyOne</strong> Spirometer is the Diagnostic Mode. To switch the <strong>EasyOne</strong> into<br />
the Frontline Mode, see Chapter 8 under General Settings.<br />
The <strong>EasyOne</strong>-line Spirometer does not contain the <strong>EasyOne</strong> cradle. Instead it contains the<br />
<strong>EasyOne</strong> Screen Connector in conjunction with the EasyWare software for the PC. The screen connector<br />
can be used to display real time curves on the PC Screen, it can however not be used for direct connection<br />
of <strong>EasyOne</strong> to a printer. The EasyWare manual describes installation and use of the PC software.
EasyGuide Page 3<br />
2 Warning Information<br />
The following terms are used as follows in this document:<br />
Caution:<br />
Please note:<br />
Possibility of injury or serious damage<br />
Important information for avoiding damage to the instrument or facilitating operation<br />
of the instrument<br />
Please note the following information on safe operation of the <strong>EasyOne</strong> spirometer:<br />
Attention. Observe Operators <strong>Manual</strong>.<br />
Single Patient Use.<br />
Caution:<br />
The instrument is not suitable for use in the presence of explosive or flammable gases.<br />
Caution:<br />
Connect only printers and computers that comply with IEC/EN 60950-1 Standards, or<br />
that bear the UL or CSA mark.<br />
Caution:<br />
For AA batteries, do not attempt to charge, connect improperly, or dispose of in fire<br />
as there is possibility of leakage or explosion. Follow manufacturers recommendation<br />
for proper disposal.<br />
Caution:<br />
All users must be trained and adequately instructed in the operation of the device.<br />
Caution:<br />
Calibration and servicing may be carried out only by ndd staff. Do not open the instrument.<br />
Caution:<br />
Pulmonary function tests require maximum effort on the part of the patient and may<br />
lead to sensations of dizziness or giddiness.<br />
Caution:<br />
Do not use the device while it is sitting in the Cradle.<br />
Please note:<br />
Use only alkaline batteries, and remove the batteries from the battery compartment<br />
if you intend not to use the instrument for a long period.<br />
Please note:<br />
The direct printing option from <strong>EasyOne</strong> supports only a limited set of printers.<br />
Please visit the ndd web site www.ndd.ch in order to get the most recent<br />
list of supported printers.
EasyGuide Page 4<br />
Please note:<br />
The product you have purchased should not be disposed of as unsorted municipal<br />
waste. Please utilize your local WEEE collection facilities in the disposition<br />
of this product and otherwise all applicable requirements.<br />
Please note:<br />
Use only authentic ndd disposables to assure accuracy, long-life and full warranty<br />
coverage.<br />
3 Intended Use<br />
The ndd <strong>EasyOne</strong> is designed for conducting simple spirometric measurements on adults and children<br />
over the age of 4 by general practitioners, specialists, in occupational medicine and in hospitals.<br />
The <strong>EasyOne</strong> spirometer is used together with the spirette respiratory tube in order to conduct slow<br />
and forced spirometric maneuvers and MVV tests.<br />
4 Instrument Installation<br />
In case of the <strong>EasyOne</strong> line Spirometer please refer to the EasyWare manual for installation and use<br />
of the PC software.<br />
4.1 Setting Up the Instrument<br />
The <strong>EasyOne</strong> spirometer is delivered with USB cradle, 2 AA batteries, a USB cable, 4 spirette<br />
breathing tubes and a Quickstart CD. The following picture shows the spirometer in combination with a<br />
printer.<br />
The following picture shows the parts supplied with the <strong>EasyOne</strong>-line. It additionally includes the<br />
EasyWare PC software and the screen connector instead of the USB cradle.
EasyGuide Page 5<br />
Install the two AA alkaline batteries (included) in the compartment on the rear of the spirometer, taking<br />
care to match the polarity marking on the batteries with the markings inside the battery compartment.<br />
Caution:<br />
Do not attempt to charge or burn the AA batteries used in the instrument.<br />
Please follow the manufacturer's instructions on battery disposal.<br />
Please note:<br />
Use only alkaline batteries, and remove the batteries from the battery compartment<br />
if you intend not to use the instrument for a long period.<br />
Please note:<br />
A low battery message will alert you when battery power falls below 10%. Data<br />
saved in memory is not lost when battery power is low, or when batteries are<br />
removed.<br />
Install the spirette as shown. Be sure to orient the spirette so that the arrow on the spirette lines<br />
up with the arrow on the spirometer. Push the spirette all the way in to the stop. For maximum hygiene,<br />
consider tearing the spirette bag from the bottom, leaving spirette partially wrapped during<br />
insertion and until the spirometer is handed to the patient. The spirette is easily removed by pushing<br />
it up from the bottom.<br />
Please note:<br />
Use only authentic ndd disposables to assure accuracy, long-life, and full warranty<br />
coverage.
EasyGuide Page 6<br />
If you wish to export data to a PC, or print reports via the PC, connect the <strong>EasyOne</strong> base unit to a PC<br />
using the USB cable. EasyWare or EasyWare Lite must be installed on the PC.<br />
If you wish to print reports using a printer with PictBridge, then connect the <strong>EasyOne</strong> base unit to the<br />
printer using the USB cable. The PictBridge port is normally located on the front side of the printer.<br />
If you wish to print reports using direct printing, then connect the <strong>EasyOne</strong> base unit to the printer<br />
using the USB cable ( in this case the USB port is normally located on the back side of the printer).<br />
Please note that only a very limited number of printers support this printing option.
EasyGuide Page 7<br />
The following picture shows how the <strong>EasyOne</strong> Screen Connector is used:<br />
Caution:<br />
Connect only printers and computers that comply with IEC 60950-1 Standards.<br />
4.2 Setting Language, Date, Time, Altitude (above sea level) and Printer Type<br />
Press the (ON/OFF) key for at least 2 seconds in order to switch on the instrument. The instrument<br />
switches off automatically if no key is pressed for 15 minutes.<br />
If you are switching on the instrument for the first time, you will be prompted to choose a region, the<br />
language and to enter the date, time, altitude above sea level and approximate relative humidity at the<br />
instrument's location. This data is not pre-set. If you intend to print reports, you can also select the<br />
right printer type on the instrument.<br />
The spirometer is delivered with the pre-set default settings. Please refer to Chapter 8 of this User <strong>Manual</strong><br />
for the procedure for changing the settings. Adapting the settings to your needs allows you to get<br />
the most out of your <strong>EasyOne</strong> instrument.<br />
After you have made the above settings when switching on the instrument for the first time, you can<br />
then change any settings at any time using the CONFIGURATION menu item from the main menu.<br />
4.3 Operating the Keys<br />
(ON/OFF) This switches <strong>EasyOne</strong> on or off. Press and hold the key (for at least 2 sec.) until<br />
you hear an audible signal.<br />
(ENTER) This confirms data entry or the selection and moves you to the next entry field.<br />
() Scrolls to the right or down<br />
(0,ESC) Press the key briefly in order to enter (0),<br />
keep the key pressed longer (at least 1 sec.) in order to return to the previous field<br />
with (ESC) or abort the operation,<br />
press the key briefly twice in order to enter a blank (the key function operates only if<br />
letters can be entered).<br />
(2,abc), etc. Press the key briefly in order to enter the digit "2",<br />
press the key briefly in order to enter "A" (the key function operates only if letters can<br />
be entered),<br />
press the key briefly twice in order to enter "B" (the key function operates only if letters<br />
can be entered),<br />
if you press the same key quickly several times consecutively, you will scroll first to
EasyGuide Page 8<br />
the upper-case letters, then to the number and then to the lower-case letters,<br />
umlauts and special characters can be found on key (1).<br />
Please note:<br />
The escape key (Esc-0) is particularly helpful and important in unit navigation.<br />
The escape function requires the key to be pressed and held momentarily. Escape<br />
is useful for moving to previous menus, items, or fields, and escaping a<br />
spirometry test. Pressing this key rapidly in fields where letters are possible,<br />
such as patient name and report header, allows the entry of a blank space or a<br />
zero.
EasyGuide Page 9<br />
5 Performing Spirometry<br />
5.1 Preparing the Patient<br />
Prepare for testing by having the patient loosen tight clothing, remove dentures, and relax. The patient<br />
may sit or stand. If standing you may want to perform testing in an area free of sharp table or counter<br />
edges, or have a chair handy as there is a slight possibility that the patient could faint during the strenuous<br />
spirometry maneuver.<br />
Explain that the purpose of the test is to determine how much air a persons lungs can hold and how<br />
quickly that air can be expelled with a forceful, maximal effort. Since the spirometry test requires active<br />
participation by the patient it is very important to demonstrate the maneuver for the patient. Emphasize<br />
the essential elements of the test:<br />
<br />
<br />
<br />
<br />
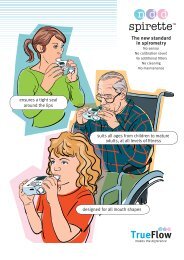
filling lungs completely<br />
sealing lips around the spirette so that there are no leaks, taking care not to block its opening<br />
with teeth or tongue or bite down excessively<br />
blasting out as hard and fast as possible<br />
continue blowing out until the lungs are completely empty<br />
If you are new to spirometry, you should practice testing yourself and others prior to testing patients.<br />
You will learn to recognize a poor effort by observing the patient and/or interpreting the Quality Messages<br />
displayed by the spirometer after each effort. After a poor effort you must explain what went<br />
wrong. Develop enthusiastic coaching techniques to use during the maneuver to maximize your<br />
chances of getting quality results with a minimum number of efforts.<br />
Caution:<br />
Pulmonary function tests require maximum effort on the part of the patient and may<br />
lead to dizziness or giddiness.<br />
5.2 Measuring the Forced Vital Capacity (FVC)<br />
<br />
<br />
<br />
<br />
<br />
<br />
<br />
<br />
<br />
Choose Perform Test in the main menu and then NEW. Confirm with ENTER. The instrument will<br />
now allow you to enter the patient data.<br />
Enter the corresponding patient data line by line. Use the keys as described in Chapter 4.3. Confirm<br />
with ENTER each time.<br />
After entering the patient data, you then move on to the "Test selection" menu. Choose the FVC<br />
test and confirm with ENTER.<br />
Insert a spirette into the instrument. Ensure that the arrow on the spirette is lined up with the<br />
arrow on the instrument.<br />
Once again briefly prepare the patient for the test. When the patient is ready, press ENTER. You<br />
will now hear the sensor buzzing.<br />
The instrument now prompts you to avoid air flow in the spirette since it is setting the baseline.<br />
It is advisable to block off the spirette on one end in order to ensure that the baseline is set<br />
precisely even if the room is draughty. An audible signal will sound when the baseline has been<br />
set. You will see prompt "Blast out" on the screen.<br />
Hand the instrument to the patient. Ask the patient to breathe in deeply, insert the spirette correctly<br />
into his or her mouth. Now ask the patient to exhale as firmly and as quickly as possible,<br />
and continue exhaling until all air has been exhaled.<br />
At the end of the maneuver, you will see a message on the display indicating whether the maneuver<br />
was acceptable. At least three acceptable maneuvers must have been performed before<br />
you see message "Session complete".<br />
Using keys (>) and (
EasyGuide Page 10<br />
If you want to get back to the main menu at any time, press and hold the escape key (esc-0)for 1<br />
second. Repeat this until you reach the main menu.<br />
You can conduct the following tests with <strong>EasyOne</strong>: FVC (expiratory), FVL (inspiratory and expiratory),<br />
Tidal FVL, pre/post tests, slow spirometry and MVV. Please also see Chapter 9. There are also protocols<br />
that ensure that testing complies with the guidelines for NIOSH/OSHA/Cotton Dust and Social Security<br />
Administration Disability evaluations.<br />
5.3 Checking the Test Quality<br />
In order to assess the pulmonary function of the patient, it is necessary to obtain acceptable test quality.<br />
The test quality depends on co-operation of the patient and this, in turn, depends on the quality of<br />
the physician's instructions. Consequently, <strong>EasyOne</strong> incorporates an automatic quality control function<br />
with prompts to facilitate the physician's job of providing the patient with good instructions. After<br />
each maneuver, a message on the screen will inform you as to whether the maneuver was acceptable<br />
or not. If not, the message will guide you on how to coach the patient to do better.<br />
A quality grading from A to F is displayed at the end of the test. It provides information on the overall<br />
quality of the test. Please refer to Chapter 10.2. for further information on the quality grades. The table<br />
below gives you the possible prompts that <strong>EasyOne</strong> provides you with after a maneuver:<br />
Only one of the above prompts is shown after a maneuver. As soon as you see message "Session complete",<br />
you need not conduct further maneuvers. If, even after repeated attempts, it is not possible to<br />
obtain an adequate number of good maneuvers, you should take a break, depending on how the patient<br />
feels or stop measurement. Even after a break, the measurement is stored and can be printed out<br />
under Print results in the main menu. You also have the option of adding tests subsequently. Read<br />
more on this in Chapter 9.6.<br />
5.4 Interpreting Results<br />
When interpreting the results, it is important to allow for the quality rating of the test. The quality ratings<br />
A to C indicate a reliable result. A quality rating between D and F indicates insufficient test quality.<br />
The result must then be interpreted with caution.<br />
As soon as you obtain the message "Test complete" after conducting a test, you can either print out the<br />
report immediately with ENTER or select the DATA field and view the result on the display.
EasyGuide Page 11<br />
On the printed report, parameters that are below the lower limit of normal (LLN) are printed in red and<br />
marked with an asterisk (*). <strong>EasyOne</strong> also offers an automatic interpretation aid. Please refer to<br />
Chapter 11 for further information on this interpretation.<br />
It is possible to deactivate both the QC-Grade function and the Interpretation function.<br />
5.5 Printing a Report<br />
You will require a base unit and a compatible printer in order to print a report directly from <strong>EasyOne</strong>.<br />
With base unit or Screen Connector reports can also be printed via a PC using the software EasyWare.<br />
The type of printing and additional print option can be set in the Printer Settings of the CONFIGURATION<br />
menu (see chapter 8.3).<br />
Immediately after completion of the test, you have the option of printing by selecting the PRINT field<br />
and confirming this with ENTER. You will see message "Please connect device to cradle". Insert the instrument<br />
into the cradle and wait until the print job has been printed. <strong>EasyOne</strong> issues an audible<br />
signal indicating when the instrument can be removed.<br />
You can also print old tests. To do this, select option Print Results, Single Test in the main menu,<br />
choose the required test with key (>) or (
EasyGuide Page 12<br />
It is possible to enter patient data after having performed a quick test. Proceed as described in Chapter<br />
5.8. Once patient data is entered predicted normals will be displayed and printed.<br />
5.8 Editing Patient Data<br />
You have the option of editing or adding patient data after a test has been performed. To do this,<br />
choose Edit Database in the main menu and press ENTER. Choose the desired test with keys () and make the changes.<br />
Please note:<br />
Editing patient data may influence predicted computation and interpretation of<br />
the test result. You should thus recheck the measured result when age, height<br />
or gender are changed.
EasyGuide Page 13<br />
6 Specifications<br />
6.1 <strong>EasyOne</strong> Model 2001 Spirometer<br />
Size:<br />
83 x 158 x 43 millimeters (3.3 x 6.2 x 1.7 inches)<br />
Weight:<br />
255 grams (9 ounces)<br />
Measuring accuracy<br />
Volume: ±2% or 0.050 l<br />
Flow: ±2% or 0.020 l/s, (except PEF)<br />
PEF: ±5% or 0.200 l/s<br />
MVV: ±5% or 5 l/min.<br />
Measuring range:<br />
Volume: ±12 l<br />
Flow: ±16 l/s<br />
Resistance:<br />
approx. 0.3 cm H 2 O/L/s<br />
Display:<br />
64 x 160 graphic display<br />
Data entry:<br />
14-key keyboard<br />
Data memory:<br />
for up to 700 tests<br />
Test modes 'Diagnostic': FVC, FVL, Tidal FVL, Slow VC, MVV, Pre/Post (US devices: OSHA, SSA)<br />
Test modes 'Frontline':<br />
FVC, Pre/Post<br />
Parameters 'Diagnostic': FVC, MVV, FEV6, FEV1, FEV1/FVC, FEV1/FEV6, FEF75 (MEF25), FEF50 (MEF50),<br />
FEF25 (MEF75), MEF25%-75%, PEF, FET, FIVC, PIF, IVC, VC, FEV1/VC, ERV, IRV,<br />
pre-post % variation, Lung Age<br />
Parameters 'Frontline':<br />
FVC, FEV6, FEV1, FEV1/FVC, FEV1/FEV6, PEF, pre-post % variation, Lung Age<br />
Respiratory tube:<br />
Disposable spirette respiratory tube<br />
Measurement principle: Ultrasound transit-time measurement<br />
Predicted:<br />
ERS (ECCS), Roca, Austria, NHANES III, Knudson 1976, Knudson 1983, Crapo,<br />
Morris, Cherniak. Optional: Berglund, Gulsvik, Hedenstroem, Asia 1-4,<br />
JRS2001, Gore, Pereira, Finnish.<br />
Paediatrics: Zapletal, Dockery, Hsu, Polgar. Optional: Hibbert<br />
Power supply: 2 alkaline batteries, type AA, 1.5V<br />
Power consumption:<br />
0.6 W<br />
Battery service life:<br />
approx. 400 tests<br />
Report:<br />
A4 or 8.5 x 11, supports PictBridge standard and direct USB printing in conjunction<br />
with selected printers.<br />
Storage:<br />
Temperature: -40 to 70 °C, Relative humidity: 0% to95%<br />
Ambient pressure: 500 to 1060 hPa<br />
Operating conditions: Temperature: 0 to 40 °C, Relative humidity: 0% to 95%<br />
Ambient pressure: 500 to 1060 hPa<br />
Certifications and standards: CE Declaration of Conformity, see attachment. C CSA US approval, CAN/CSA-<br />
C22. 2 NO. 601.1-M90, S1-94, CSA 601.1 Amendment 2: 1998, UL Std No.<br />
2601.1, FDA 510 (k) approval, K993921<br />
<strong>EasyOne</strong> meets or exceeds the published targets of the European Respiratory<br />
Society (ERS), the American Thoracic Society (ATS) and the National Lung<br />
Health Education Program (NLHEP).<br />
Instrument classification:<br />
Type BF applied part<br />
Life time:<br />
Powered internally with (2) AA alkaline batteries<br />
Short time operation, less than 10 minutes<br />
Instrument not suitable for use in flammable anesthetic gases in mixtures<br />
with O 2 or NO.<br />
7 years
EasyGuide Page 14<br />
6.2 <strong>EasyOne</strong> Model 2010 Cradle (optional)<br />
Size:<br />
119 x 173 x 83 millimeters (4.7 x 6.8 x 3.3 inches)<br />
Weight:<br />
284 grams (10 ounces)<br />
Power supply:<br />
From the batteries of the <strong>EasyOne</strong> spirometer or from USB power<br />
Power consumption: Type 0.15W<br />
Function:<br />
Connects the <strong>EasyOne</strong> spirometer to a printer or PC<br />
Interface:<br />
Standard USB type A and B connectors, for connection to PC or printer.<br />
Pins: 1 = V Bus , 2 = D, 3 = D+, 4 = GND<br />
Storage: Temperature: -40 to 70 °C, Relative humidity: 0% to 95%<br />
Ambient pressure: 500 to 1060 hPa<br />
Operating conditions: Temperature: 0 to 40 °C, Relative humidity: 0% to 95%<br />
Ambient pressure: 500 to 1060 hPa<br />
PC:<br />
The PC must comply with corresponding IEC standard (ex. IEC 60950-1. The<br />
user is responsible that requirements of IEC 60601-1-1 for safety of medical<br />
electrical systems are met.<br />
6.3 <strong>EasyOne</strong> Model 2010 Screen Connector (optional)<br />
Size:<br />
64 x 44 x 25 millimeters (2.5 x 1.7 x 1.0 inches)<br />
Weight:<br />
82 grams (3 ounces)<br />
Power supply:<br />
From USB port<br />
Power consumption: Type 0.15W<br />
Function:<br />
Connects the <strong>EasyOne</strong> spirometer to a PC<br />
Interface:<br />
Standard USB type A connector for connection to PC<br />
Pins: 1 = V Bus , 2 = D, 3 = D+, 4 = GND<br />
Storage: Temperature: -40 to 70 °C, Relative humidity: 0% to 95%<br />
Ambient pressure: 500 to 1060 hPa<br />
Operating conditions: Temperature: 0 to 40 °C, Relative humidity: 0% to 95%<br />
Ambient pressure: 500 to 1060 hPa<br />
PC:<br />
The PC must comply with corresponding IEC standard (ex. IEC 60950-1. The<br />
user is responsible that requirements of IEC 60601-1-1 for safety of medical<br />
electrical systems are met.<br />
6.4 Accessories<br />
2050-1 Case of 50 spirette<br />
2050-5 Case of 200 spirette<br />
2050-6 Case of 75 spirette no wrapping<br />
2040-2 EasyWare USB<br />
2030-2 Calibration syringe<br />
Please note:<br />
Use only authentic ndd disposables to assure accuracy, long-life, and full warranty<br />
coverage.
EasyGuide Page 15<br />
7 Definition of Parameters<br />
FVC<br />
Forced Vital Capacity (expiratory)<br />
FIVC<br />
Forced Vital Capacity (inspiratory)<br />
FEV1<br />
Forced Expiratory Volume (1 sec).<br />
FEV6<br />
Forced Expiratory Volume (6 sec).<br />
FEV1/FVC<br />
Ratio of FEV1 to FVC<br />
FEV1/VC<br />
Ratio of FEV1 to VC taken from SVC test<br />
FEV1/FEV6<br />
Ratio of FEV1 to FEV6<br />
MEF 25<br />
Mid Expir. Flow at 75% of Vital capacity<br />
MEF 50<br />
Mid Expir. Flow at 50% of Vital capacity<br />
MEF 75<br />
Mid Expir. Flow at 25% of Vital capacity<br />
MEF 25-75<br />
Mid Expir. Flow at 25%-75% of Vital capacity<br />
PEF<br />
Peak Expiratory Flow (in l/min or l/sec)<br />
PIF<br />
Peak Inspiratory Flow<br />
FET<br />
Forced Expiratory Time<br />
PRE/POST% variation<br />
Percentage variation of measured values before and<br />
after bronchial spasmolysis<br />
LLN<br />
Lower Limit of Normal<br />
BEV<br />
Back Extrapolated Volume<br />
VT<br />
Tidal Volume<br />
ERV<br />
Expiratory Reserve Volume<br />
IRV<br />
Inspiratory Reserve Volume<br />
VC or VCmax<br />
Maximum Vital Capacity<br />
VCex<br />
Expiratory Vital Capacity<br />
VCin<br />
Inspiratory Vital Capacity<br />
IC<br />
Inspiratory Capacity<br />
MVV<br />
Maximum Voluntary Ventilation (per min.)<br />
Lung Age<br />
Lung Age, see Chapter 17, (8) for reference
EasyGuide Page 16<br />
8 System Configuration<br />
If you wish to change the instrument setting, please choose the Configuration option in the main<br />
menu. You will now be in the Configuration menu. The tables below provide an overview of the setting<br />
options offered to you by <strong>EasyOne</strong>. Choose the option you require.<br />
8.1 Test Settings<br />
Test settings are not available in NLHEP mode (all options are fixed in this mode).<br />
Relates to<br />
Predicted<br />
Additional<br />
pediatrics<br />
Best value<br />
selection<br />
"ValueSel" (*)<br />
Interpretation (*)<br />
Option<br />
See<br />
Specifications<br />
Dockery, Hsu,<br />
Polgar, none<br />
BEST VALUE,<br />
BEST TRIAL<br />
NLHEP, GOLD/<br />
Hardie, none<br />
Default<br />
setting<br />
EU: ERS/Zapletal<br />
US: NHANES-III<br />
None<br />
EU: BEST TRIAL<br />
US: BEST VALUE<br />
NLHEP<br />
Description<br />
You can select your desired predicted values from<br />
the predicted publications listed.<br />
US: Frontline only supports NHANES-III<br />
You have the option of selecting different predicted<br />
values for children than those for adults.<br />
US: Frontline only supports NHANES-III<br />
In BEST VALUE setting, the relevant, best value<br />
from different tests is selected.<br />
BEST TRIAL selects the test which has provided the<br />
best results (see Chapter 10.3).<br />
Automatic interpretation (see Chapter 11) is activated<br />
or deactivated here.<br />
Lung Age (**) yes, no No If set to yes, the lung age is displayed on the<br />
result screen and printed on the report. Lung Age<br />
is only shown if the patient is a smoker. When the<br />
calculated lung age is lower than the patients actual<br />
age, the patients actual age is shown..<br />
Automated Test<br />
QC (*)<br />
Yes, no Yes The automated test QC (see also Chapter 10) is<br />
activated and deactivated here.<br />
FVC selection FVC, FEV6 FVC FEV6 indicates the exhaled volume after 6<br />
seconds. When set to FEV6, <strong>EasyOne</strong> stops the<br />
measurement after 6 seconds. MEF25, MEF50,<br />
MEF75 and MEF25-75 are not reported in that setting.<br />
When set to FVC, <strong>EasyOne</strong> continues the<br />
measurement until end of test criteria are met.<br />
PEF unit l/s, l/min, OFF l/s Peak flow can be specified in litres per minute or in<br />
liters per second. OFF: PEF is not shown.<br />
African ethnic<br />
corr. (***)<br />
75%-110% 88% The predicted value is corrected by this additional<br />
factor if the selected predicted publication does<br />
not specify a separate calculation for this ethnic<br />
group.<br />
Asian ethnic corr. 75%-110% 100% The predicted value is corrected by this additional<br />
factor if the selected predicted publication does<br />
not specify a separate calculation for this ethnic<br />
group.<br />
Hispanic ethnic<br />
corr. (***)<br />
75%-110% 100% The predicted value is corrected by this additional<br />
factor if the selected predicted publication does<br />
not specify a separate calculation for this ethnic<br />
group.<br />
Other ethnic corr. 75%-110% 100% The predicted value is corrected by this additional<br />
factor if the selected predicted publication does<br />
not specify a separate calculation for this ethnic<br />
group.
EasyGuide Page 17<br />
Relates to<br />
Curve storage (*)<br />
Option<br />
all curves, best<br />
curve<br />
Default<br />
setting<br />
Description<br />
best curve When set to ALL <strong>EasyOne</strong> can save up to 8<br />
curves of a test. This is necessary if you want to<br />
print the 3 best curves or if you want to export the<br />
curve data of each trial. Please note that saving all<br />
8 curves uses substantially more memory.<br />
* Only available in Diagnostic Mode<br />
** Only available in Frontline mode.<br />
*** In Frontline US devices not available because NHANES III supports African & Hispanic ethnic groups<br />
8.2 General Settings<br />
Relates to<br />
Option<br />
Default<br />
Setting<br />
Time format 24 hours, am/pm EU:24 hours<br />
US:AM/PM<br />
Date format<br />
Current date<br />
Current time<br />
DD.MM.YY,<br />
DD/MM/YY,<br />
MM/DD/YY<br />
EU:DD.MM.<br />
YY<br />
US:MM/DD/<br />
YY<br />
Description<br />
Sets the time format for 12 or 24 hour.<br />
Sets the data format.<br />
Please enter the correct date at this point and confirm<br />
with ENTER.<br />
Please enter the correct time at this point and confirm<br />
with ENTER.<br />
Alphanumeric ID Yes, no No If the ID you use also consists of letters, please set<br />
to Yes.<br />
Technician ID Yes, no No If you want the technician ID to be saved as well<br />
and listed on the report, please choose Yes.<br />
Syringe volume 1.0l, 1.5l, ...7.0l 3.0l Choose the volume of your syringe if you wish to<br />
use it to conduct a calibration check.<br />
Height unit m/cm, ft/inch EU: m/cm<br />
US: ft/in<br />
Weight unit kg, lbs EU: kg<br />
US: lbs<br />
Age, date of birth Age, birth EU: Birth<br />
US: Age<br />
Language<br />
LCD Contrast<br />
Op. mode<br />
German, English,<br />
others<br />
Diagnostic, Frontline,<br />
NLHEP<br />
English<br />
Temp. unit °C, °F EU: °C<br />
US: °F<br />
Altitude above<br />
sea level<br />
Choose how the unit will indicate height and<br />
altitude.<br />
Choose how the unit will indicate weight.<br />
If you use a database, consider entering the date<br />
of birth so that the age can be calculated correctly<br />
at a later point.<br />
Diagnostic see Chapter 1<br />
Choose the desired language.<br />
Changes the display contrast.<br />
Determines how temperature is reported.<br />
0...4000 m 0 m or ft Set the altitude above sea level of your location.<br />
Rel. humidity 0...100% 40% Enter the average relative humidity at your location.
EasyGuide Page 18<br />
8.3 Printer Settings<br />
Relates to<br />
Printer type<br />
Result data<br />
Number of<br />
Curves<br />
Graph Types<br />
Header<br />
1-4<br />
Option<br />
HP b/w, HP color, Canon<br />
b/w, Canon color,<br />
Epson b/w, Epson<br />
color, Canon 300bw,<br />
Canon 300col,<br />
PictBridge, via PC<br />
3 best values,<br />
best values<br />
3 best curves,<br />
best curve<br />
FV&VT small, FV large,<br />
VT large, FV&VT large<br />
Default<br />
setting<br />
HP b&w<br />
best values<br />
best curve<br />
FV&VT small<br />
Description<br />
Choose the right option to match your available<br />
printer. See Chapter 15 if you have problems.<br />
Via PC should be entered if you want to print using<br />
EasyWare.<br />
You have the choice of printing out only the best<br />
test or the 3 best tests on the report.<br />
Choose if you want to print the 3 best curves of the<br />
tests or only the best curve. It is only possible to<br />
print the 3 best curves if the 3 best curves were<br />
saved (see test settings Save curve data).<br />
Choose what curves you wish to have on the<br />
report.<br />
Optional entry Blank You can enter the name and address of the institution<br />
or other information in 4 lines of 40 characters<br />
each.<br />
Size Default, Letter, A4 Letter PictBridge paper size.<br />
Quality Default, Normal, Draft Draft PictBridge quality. Set to Draft in order to improve<br />
printing speed.
EasyGuide Page 19<br />
9 Test Types<br />
When you enter the patient data or select an existing patient, you will see the Test menu with the following<br />
selection options:<br />
FVC (expiration)<br />
FVL (inspiration and expiration)<br />
Tidal FVL<br />
MVV<br />
Slow VC<br />
It is also possible to add a Post test to a FVC or FVL Test.<br />
The various measurement methods are outlined below. Good co-operation on the part of the patient is<br />
essential with all methods. Consequently, you should explain to the patient clearly beforehand what he<br />
or she has to do and motivate the patient to co-operate. Choose the required measurement method<br />
with keys (>) or (
EasyGuide Page 20<br />
The instrument now prompts you to avoid flow in the spirette while it is setting the baseline. It<br />
is advisable to block off the spirette at one end to ensure the baseline is set precisely. An audible<br />
signal sounds when the zero point is set.<br />
The patient must now insert the spirette into his or her mouth and breathe at rest (about 3-5<br />
breaths) until you hear an audible signal.<br />
The patient must then take a deep inspiration followed by a maximum exhalation.<br />
The instrument stops automatically at the end of the maneuver.<br />
If you are only interested in the vital capacity without determination of the other volumes (ERV, IRV, VT,<br />
IC) the VC maneuver can also be performed without waiting for the acoustic signal.<br />
At the end of the SVC test you can decide to immediately add an FVC test. If you do so the parameter<br />
FEV1/VC (Tiffeneau) is also shown on the printed report of the FVC test.<br />
9.5 MVV<br />
<br />
<br />
<br />
<br />
Insert a spirette into the instrument. Ensure that the arrow on the spirette is lined up with the<br />
arrow on the instrument.<br />
Press ENTER when the patient is ready. You will now hear the sensor buzz.<br />
The instrument now prompts you to avoid flow in the spirette while it is setting the baseline. It<br />
is advisable to block off the spirette at one end to ensure precise setting of the baseline. An<br />
audible signal sounds when the baseline is set.<br />
The patient must then insert the spirette into his or her mouth and must fully inhale and exhale<br />
for an uninterrupted period of at least 12 seconds.<br />
9.6 OSHA Cotton Dust Protocol (US units only)<br />
This is a specialized routine for users who want to ensure that occupational testing and reports meet<br />
the requirements of NIOSH/OSHA. The unit will automatically perform as described here, regardless of<br />
how the configuration is set. When this protocol is chosen testing and reports are affected as follows:<br />
<br />
<br />
<br />
<br />
<br />
<br />
Only FVC tests are performed<br />
Test quality criteria meets the requirements defined by the Cotton Dust Standard<br />
The Knudson 1976 predicted normals are used<br />
The best three tests and Volume-Time curves will be saved and printed<br />
The curves will be printed in large, validation size<br />
There will be no clinical interpretation displayed or printed<br />
9.7 Disability Protocol (US units only)<br />
This is a specialized routine for users who want to ensure that testing associated with disability determinations<br />
meets the requirements of the Social Security Administration. The unit will automatically perform<br />
as described here, regardless of how the configuration is set. When this protocol is chosen testing<br />
and reports are affected as follows:<br />
A multi-flow calibration is required prior to testing<br />
Unit will be accurate to within 1%<br />
Only FVC tests are performed<br />
The best three tests and Volume-Time curves will be saved and printed<br />
The curves will be printed in large, validation size<br />
Report will include the calibration results<br />
There will be no clinical interpretation displayed or printed<br />
9.8 Post-Test<br />
The Post-Test is usually performed to determine the response on bronchodilating asthma medication.<br />
This is done by treating the patient with a bronchodilator after having performed a FVC or FVL test. Approximately<br />
10 to 20 minutes after the medication (when bronchodilator shows effect) a second FVC or<br />
FVL test (post-Test) is performed. The results of the pre-test and the post test are then compared on
EasyGuide Page 21<br />
the result screen and on the test protocol. Post-Tests can only be added to previous tests on the same<br />
day.<br />
To add the Post-test immediately after the FVC or the FVL test select the field POST on the result<br />
screen.<br />
When coming from the main menu you can add a post test to a previous test as follows:<br />
Select Perform Test in the main menu<br />
Choose the field RECALL and press ENTER<br />
Scroll through the list of tests until you get to the desired pre-med test and press ENTER<br />
Select the field POST<br />
Proceed as described in Chapter 9.1 and 9.2<br />
9.9 Adding a Trial<br />
If you would like to add trials to a previous test, e.g. if the patient needed a break, please proceed as<br />
follows:<br />
Select Perform Test in the main menu<br />
Choose the field RECALL and press ENTER<br />
Scroll through the list of tests until you get to the desired test and press ENTER<br />
Select the field ADD<br />
Proceed as described in Chapter 9.1 and 9.2<br />
Please mind that it is only possible to add a trial to a previous test that was performed on the same<br />
day.
EasyGuide Page 22<br />
10 Quality Messages and Quality Grades<br />
10.1 Quality Messages<br />
The quality messages assist you in conducting the measurement. After each test, they provide information<br />
as to whether the test is acceptable or what to do to improve the result.<br />
Message Criterion Recommended action<br />
Dont hesitate Back-extrapolated volume greater than 150<br />
ml or 5% of FVC whichever is greater (for<br />
age 40 ml when<br />
expiration time is
EasyGuide Page 23<br />
10.2 Quality Grades<br />
The quality grades allow you to assess the reliability of the measurement result. Quality grades A to C<br />
indicate a reliable result. A quality grade between D and F indicates inadequate test quality. The result<br />
must then be interpreted with caution.<br />
The quality ratings can be activated or deactivated under Configuration. See also Chapter 8.<br />
The table below defines the criteria for the classification of quality grades:<br />
Rating Criteria in Diagnostic mode Criteria in Frontline and NLHEP mode<br />
A<br />
B<br />
C<br />
D<br />
At least 3 acceptable tests (for age < 6: 2 acceptable)<br />
AND the difference between the best<br />
two FEV1 and FVC values is equal to or less<br />
than 100ml (80ml if FVC < 1.0 L; for age < 6:<br />
80ml or 8% of FVC whichever is greater)<br />
At least 3 acceptable tests (for age < 6: 2 acceptable)<br />
AND the difference between the best<br />
two FEV1 and FVC values is equal to or less<br />
than 150ml (100ml if FVC < 1.0 L; for age < 6:<br />
100ml or 10% of FVC whichever is greater)<br />
At least 2 acceptable tests AND the difference<br />
between the best two FEV1 and FVC values is<br />
equal to or less than 200ml (150ml if FVC < 1.0<br />
L; for age < 6: 150ml or 15% of FVC whichever is<br />
greater)<br />
At least 2 acceptable trials but the results are<br />
not reproducible. Quality message "Result not<br />
reproducible" OR only one acceptable trial.<br />
Quality message: Only one acceptable trial<br />
At least 2 acceptable tests AND the difference<br />
between the two FEV1 and FEV6 values is equal<br />
to or less than 100ml<br />
At least 2 acceptable tests AND the difference<br />
between the two FEV1 and FEV6 values is equal<br />
to or less than 150 ml<br />
At least 2 acceptable tests AND the difference<br />
between the two FEV1 and FEV6 values is equal<br />
to or less than 200 ml<br />
At least 2 acceptable trials but the results are not<br />
reproducible. Quality message "Result not reproducible"<br />
OR only one acceptable test. Quality<br />
message "Only one acceptable trial<br />
F No acceptable test available No acceptable test available<br />
If the Automated Test QC function is activated the instrument determines automatically which trial is<br />
acceptable. For the evaluation of the best trial, the interpretation and the Pre/Post comparison acceptable<br />
trials are used first.<br />
In the Diagnostic mode the Automated Test QC function can be deactivated (see Chapter 8). In this case<br />
each trial can be accepted manually. To do so simply select ACCEPT after the maneuver and the trial will<br />
be considered acceptable.<br />
10.3 Best Test Selection<br />
In the system configuration the best value selection can be set to Best Trial or Best Value. The two<br />
settings are defined as follows:<br />
Best trial:<br />
<strong>EasyOne</strong> selects the trial with the largest sum of FVC and FEV1 (this is suggested by ATS<br />
and ERS).<br />
Best value: The Best column shows the largest FVC (or FEV6) and the largest FEV1 from all acceptable<br />
tests (unless all tests are unacceptable). All other parameters are taken from the best<br />
trial (again defined by the largest sum of FEV1 and FVC).
EasyGuide Page 24<br />
11 Interpretation<br />
Automatic interpretation can be activated (Setting: NLHEP or GOLD/HARDIE) or deactivated under Configuration<br />
(see Chapter 8)<br />
11.1 NLHEP Interpretation<br />
The diagram below describes how the interpretation is determined (see reference [4]).<br />
START<br />
test session<br />
good<br />
no<br />
Caution: Interpret with care<br />
yes<br />
FEV1/FVC<br />
>= LLN<br />
yes<br />
FVC < LLN<br />
no<br />
normal spirometry 4<br />
no<br />
yes<br />
low vital capacity possibly due<br />
to restriction of lung volumes<br />
FEV1<br />
>= LLN<br />
yes<br />
normal spirometry 4<br />
no<br />
FEV1 >= 60%<br />
predicted<br />
yes<br />
mild obstruction<br />
no<br />
FEV1 >= 40%<br />
predicted<br />
yes<br />
moderate obstruction<br />
no<br />
severe obstruction<br />
FVC
YES<br />
EasyGuide Page 25<br />
11.2 GOLD/Hardie Interpretation<br />
The diagram below describes how the interpretation is determined (see reference [11] , [12])<br />
START<br />
Maneuve<br />
r Quality<br />
OK?<br />
NO<br />
No<br />
Interpretation<br />
YES<br />
FEV1/FVC<br />
< FEV1%<br />
limit<br />
FEV1/FVC limit age related:<br />
age < 70 years: 70%<br />
70 80 years: 60%<br />
NO<br />
FVC <<br />
LLN A ND<br />
FEV1 <<br />
LLN<br />
NO<br />
Normal<br />
Spirometry<br />
YES<br />
Obstruction<br />
Smoker? NO<br />
FEV1<br />
>= 80%<br />
Predicted<br />
YES<br />
Mild Obstruction<br />
NO<br />
YES<br />
Normal<br />
Spirometry; At<br />
COPD risk<br />
FEV1<br />
>= 50%<br />
Predicted<br />
YES<br />
Moderate<br />
Obstruction<br />
Restriction<br />
Possible<br />
Restriction<br />
FEV1<br />
>= 30%<br />
Predicted<br />
YES<br />
Severe<br />
Obstruction<br />
NO<br />
Very Severe<br />
Obstruction<br />
END
EasyGuide Page 26<br />
12 Predicted Values<br />
<strong>EasyOne</strong> offers a number of published predicted value tables allowing comparison of the measurement<br />
results. In order to compute the predicted values, it is necessary to enter the sex, age and height<br />
and, in many cases, the ethnic group and the weight of the patient. See also Chapter 8 on selection of<br />
the predicted values.<br />
Where there is no lower limit of normal (LLN) defined within the selected predicted normal, the value<br />
used for LLN is calculated as Predicted Value 1.645 x SEE (standard error of the estimate). If SEE is<br />
not defined LLN of relational parameters, e.g. FEV1/FVC are set to 90% of Predicted Value, LLN of all<br />
other parameters are set to 80% of Predicted Value.<br />
If the patient data lies outside of the range defined in the publication (Age, Height) <strong>EasyOne</strong> uses<br />
extrapolated values. The report explicitly points out that the predicted values are extrapolated values<br />
and that, consequently, particular caution must be taken when interpreting the results.<br />
12.1 Predicted Values for Adults<br />
[1] Morris, James F., Koski, Arthur, Lavon Johnson, Spirometric Standards for Healthy Non-Smoking<br />
Adults, American Review of Respiratory Disease, Volume 10-3, 1971. p.57-67<br />
[2] Morris, James F., Koski, Arthur, Breese, John,'Normal Values and Evaluation of Forced Expiratory<br />
Flow', Am Rev Respir Dis, Vol. 111, 1975, p.755-761<br />
[3] Cherniak, R.M. and Raber M.B. Normal Standards for Ventilatory Function using an Automated<br />
Wedge Spirometer Am Rev Respir Dis, Vol. 106, 1972, p.38-46<br />
[4] Knudson, Ronald J., Ronald Slatin, Michael Lebowitz, Benjamin Burrows, The Maximal Expiratory<br />
flow-Volume Curve, American Review of Respiratory Disease, Volume 113, 1976, p. 587-600.<br />
[5] Knudson, Ronald J., Michael Lebowitz, Holberg Catherine J., Benjamin Burrows, Changes in the<br />
Normal Maximal Expiratory Flow-Volume Curve with Aging, American Review of Respiratory Disease,<br />
Volume 127, 1983, p. 725-734<br />
[6] Crapo, Robert O., Gardner Reed M., Morris Alan H., Reference Spirometric Values Using Techniques<br />
and Equipment that Meets ATS Recommendations, American Review of Respiratory Disease.<br />
Volume 123, 1981, p. 659-674<br />
[7] Forche G., Harnoncourt K., Stadlober E.. Neue spirometrische Bezugswerte für Kinder, Jugendliche<br />
und Erwachsene, Öst. Ärzteztg. 43/15/16 (1988) 40<br />
[8] P.H. Quanjer. Lung Volumes and Forced Ventilatory Flows. Eur Respir J, Vol 6, Suppl 16, p.5-40,<br />
1993<br />
[9] NHANES III: Hankinson, Odencrantz, Fedan, 'Spirometric Reference Values from a Sample of the<br />
General U.S. Population' Am J Respir Crit Care Med, Vol. 159, 1999, p 179-187.<br />
12.2 Predicted Values for Children<br />
[1] Zapletal, T. Paul, M. Samanek. Die Bedeutung heutiger Methoden der Lungenfunktionsdiagnostik<br />
zur Feststellung einer Obstruktion der Atemwege bei Kindern und Jugendlichen. Z. Erkrank.<br />
Atm.-Org., Volume 149, 343-371, 1977<br />
[2] Hsu KHK, Bartholomew PH, Thompson V, Hseih GSJ, Ventilatory Functions of Normal Children<br />
and Young Adults Mexican-American, White, Black. I. Spirometry, J. Pediatrics 1979, 95: p.14-<br />
23<br />
[3] NHANES III: Hankinson, Odencrantz, and Fedan, 'Spirometric Reference Values from a Sample of<br />
the General U.S. Population', Am J Respir Crit Care Med, Vol. 159, 1999, p. 179-187.<br />
[4] Dockery, D.W. et al., Distribution of Forced Vital Capacity and Forced Expiratory Volume in One<br />
Second in Children 6 to 11 Years of Age, American Review of Respiratory Disease. Volume 128,<br />
p. 405-412, 1983<br />
[5] Polgar, Promadhat, Pulmonary Function Testing in Children: Techniques and Standards. W.B.<br />
Saunders Co., Philadelphia, 1971
EasyGuide Page 27<br />
12.3 Ethnic Correction<br />
While some predicted normal studies take into account the differences between certain ethnic groups,<br />
most studies used for spirometry were conducted on Caucasian subjects, and are therefore most appropriate<br />
for use with Caucasian patients. When entering patient information, you are presented with a<br />
list of ethnic options. In the system configuration there are four Ethnic Correction settings that allow<br />
you to customize the amount of adjustment that is made when African-American, Hispanic, Asian, or<br />
other is chosen during patient data entry. The adjustment is made to the Caucasian values.<br />
There is an exception to this function. When specific values are available for the chosen normal and<br />
ethnic group they will be used rather than the correction entered in the configuration. Refer to Section 8<br />
for instructions on setting the Ethnic Correction Configuration.<br />
The American Thoracic Societys publication, Lung Function Testing: Selection of Reference Values and<br />
Interpretative Strategies [8] provide guidance on the subject of ethnic correction. This paper recommends<br />
using 88% of the Caucasian values when testing African-American patients, and provides general<br />
guidance in selecting adjustments for other ethnic groups.<br />
13 Hygiene and Servicing of the Instrument<br />
<strong>EasyOne</strong> has been designed to minimize maintenance and servicing effort if the instrument is used<br />
correctly.<br />
When you use the spirette respiratory tube, you do not need to clean the instrument. Instead of<br />
cleaning, you simply exchange the respiratory tube. In order to ensure absolute hygiene, we recommend<br />
that the spirette be used only once.<br />
Caution:<br />
Always exchange the spirette if you suspect the risk of infection. This is the only<br />
way of absolutely preventing transmission of diseases.<br />
Use a damp cloth to clean the spirometer housing and the base unit. Use a soft cloth and alcohol (e.g.<br />
isopropyl alcohol) for particularly thorough cleaning.<br />
Caution:<br />
Avoid fluid penetrating the spirette holder or the inside of the instrument when<br />
cleaning the spirometer.<br />
Please follow the instructions for changing batteries: Open the battery cover on the backside of the instrument.<br />
Remove the empty batteries. Please insert two new Alkaline batteries (Type AA, 1,5V) into the<br />
battery case and close the battery cover.<br />
Please consult your <strong>EasyOne</strong> dealer or call the ndd Servicing Dept., number +41 (44) 445 29 70 in<br />
the event of defects or malfunctions.<br />
Proceed as follows to check correct operation of your instrument:<br />
1. Check calibration. Please read Chapter 14.<br />
2. Conduct a spirometry test on yourself.<br />
3. Ensure that the results are plausible and that you can print out the report as required.<br />
Consult your <strong>EasyOne</strong> dealer if you encounter problems with one of these points.
EasyGuide Page 28<br />
14 Checking Calibration<br />
Calibration of the instrument can be checked with a syringe using the calibration check function. The<br />
American Thoracic Society (ATS) recommends that calibration be checked every day. The <strong>EasyOne</strong><br />
spirometer requires no calibration, even if used frequently.<br />
To perform a calibration check, you need the optional ndd calibration adapter and an optional calibration<br />
syringe (order number 2030-2), in addition to the spirometer and a spirette. Ensure that the correct<br />
syringe volume is entered in the instruments configuration setting (see also Chapter 8). Proceed as<br />
follows:<br />
<br />
<br />
Choose item Check calibration in the main menu.<br />
Connect the spirometer as shown below using the calibration adapter and the syringe. Ensure<br />
that the piston is fully inserted and at the stop position.<br />
<br />
<br />
<br />
<br />
<br />
Now press ENTER<br />
Wait until the baseline has been set and you hear an audible signal.<br />
Now execute one full inspiratory pump stroke followed by one full expiratory pump stroke at<br />
moderate speed.<br />
After you perform the maneuver, you will see the text "Accuracy confirmed" at the top of the display<br />
and, beneath it, the percentage deviation and the average flow velocity of the pump stroke.<br />
You can repeat the test, print the result or quit the program. The calibration test remains stored<br />
and can also be viewed or printed out later.<br />
If you do not reach ±3% accuracy, please follow the troubleshooting instructions in Chapter 15. Should<br />
you not be able to remedy the defect by following these instructions either, please consult your<br />
<strong>EasyOne</strong> dealer.<br />
Please note:<br />
Field service or internal calibration of this unit is not recommended. Cover<br />
should not be removed except by qualified service personnel.
EasyGuide Page 29<br />
15 Troubleshooting Tips<br />
Should you encounter problems operating your spirometer, please consult the table below.<br />
Problem Possible cause Solution<br />
<strong>EasyOne</strong> cannot be switched<br />
on<br />
When the <strong>EasyOne</strong> is switched<br />
on, you hear three consecutive<br />
tones as a warning signal<br />
When the <strong>EasyOne</strong> is switched<br />
on, you see the following<br />
message on the display: "Selftest<br />
failed"<br />
Every time you switch the instrument<br />
on you are prompted<br />
to enter Date etc.<br />
When you start a test, you see<br />
the following message: "Please<br />
insert spirette correctly"<br />
<strong>EasyOne</strong> is outside of ±3%<br />
when conducting the calibration<br />
check<br />
The curve is missing on the<br />
printout<br />
When printing a report the printer<br />
prints meaningless characters<br />
or the printer does not respond.<br />
When switching on the instrument,<br />
the message device self<br />
test error #20 appears on the<br />
screen<br />
Batteries are dead<br />
Batteries are inserted wrong<br />
Did not press and hold the ON/OFF<br />
key for at least 2 seconds<br />
The spirometer is defective<br />
The spirometer is possibly defective<br />
The internal battery of <strong>EasyOne</strong> is<br />
defective<br />
The spirette is not correctly positioned<br />
The spirette is not correctly positioned<br />
You have not used an ndd adapter<br />
There are leaks in the syringe connection<br />
The specified syringe volume does not<br />
correspond to the actual syringe volume<br />
The ink cartridge of your printer is<br />
empty<br />
In the configuration of your<br />
<strong>EasyOne</strong> a black and white printer<br />
is selected, but you actually use a<br />
color printer<br />
A wrong printer type has been selected<br />
in the settings<br />
The printer cable is not correctly connected<br />
or is defective<br />
The printer is not switched on or is not<br />
ready<br />
<strong>EasyOne</strong> is not correctly positioned<br />
on the base unit<br />
A spirette was inserted while turning<br />
on the instrument OR was not inserted<br />
correctly<br />
Insert new batteries.<br />
Insert the batteries correctly (see<br />
Chapter 4.1.)<br />
Press and hold the ON/OFF key for at<br />
least 2 seconds.<br />
Consult your <strong>EasyOne</strong> dealer.<br />
Turn off and on the spirometer. Try<br />
again. If you receive the same message<br />
again, contact your <strong>EasyOne</strong><br />
dealer.<br />
Consult your <strong>EasyOne</strong> dealer.<br />
Ensure that the triangle on the spirometer<br />
is lined up with the triangle on<br />
the spirette.<br />
Insert the spirette as described in<br />
Chapter 4.1.<br />
Use the ndd calibration adapter.<br />
Check the connections.<br />
Choose the correct syringe volume<br />
under Configuration.<br />
Replace the cartridge.<br />
Go to Configuration, then Report<br />
Settings and select the right printer.<br />
Set the correct printer. Read Chapter<br />
8.2.<br />
Switch off the spirometer and printer.<br />
Check all plug connections.<br />
Ensure that the printer is switched on<br />
and also has paper. Switch the printer<br />
off and back on again.<br />
Insert <strong>EasyOne</strong> correctly into the<br />
base unit.<br />
Try again with the spirette inserted<br />
correctly. If you receive the same<br />
message again, contact your<br />
<strong>EasyOne</strong> dealer.
EasyGuide Page 30<br />
Problem Possible cause Solution<br />
When starting a new test, the<br />
message device selftest error<br />
#14 or #15 appears in the<br />
screen<br />
When switching on the instrument,<br />
the message device self<br />
test error #25 appears on the<br />
screen<br />
The spirette is not positioned correctly<br />
The internal battery of the <strong>EasyOne</strong><br />
may be defect<br />
Insert the spirette as described in<br />
Chapter 4.1.<br />
Switch the <strong>EasyOne</strong> off and on<br />
again. If the same message appears<br />
again please contact your <strong>EasyOne</strong><br />
dealer.<br />
16 Bibliography<br />
[1] American Thoracic Society. Standardization of Spirometry: 1994 Update, Nov. 11, 1994. Am J<br />
Resp Crit Care Med 1995; 152:1107-1136.<br />
[2] Occupational Health and Safety Administration (OSHA), Pulmonary Function Standards for Cotton<br />
Dust, 29 CFR: 1910.1043 Appendix D.<br />
[3] Social Security Administration Disability (SSD) Guidelines, CFR404: Appendix 1 to Subpart P.<br />
[4] Ferguson GT, Enright PL, Buist AS, et al. Office spirometry for lung health assessment in adults: a<br />
consensus statement from the National Lung Health Education Program. Chest 2000; 117:1146-<br />
1161.<br />
[5] ATS Pulmonary Function Laboratory Management and Procedure <strong>Manual</strong>, American Thoracic Society,<br />
New York, NY 10019.<br />
[6] Enright PL, Hyatt RE. Office Spirometry. Lea & Febiger, Philadelphia, 1987.<br />
[7] Hyatt, RE, Scanlon PD, Nakamura M. Interpretation of Pulmonary Function Tests A Practical<br />
Guide. Lippincott Raven, Philadelphia, 1997.<br />
[8] American Thoracic Society. Lung Function Testing: Selection of Reference Values and Interpretative<br />
Strategies, Am Rev Respir Dis 1991; 144:1202-1218.<br />
[9] Morris JF, Temple W. Short Report: Spirometric Lung Age Estimation for Motivating Smoking<br />
Cessation, Preventive Medicine 14. 655-662 (1985).<br />
[10] Polgar, Promadhat, Pulmonary Function Testing in Children: Techniques and Standards. W.B.<br />
Saunders Co., Philadelphia, 1971<br />
[11] Global Strategy for the Diagnosis, Management and Prevention of Chronic Obstructive Pulmonary<br />
Disease, Executive Summary, Updated 2003 (GOLD)<br />
[12] Hardie et. al., Risk of over-diagnosis of COPD in asymptomatic elderly never-smokers Eur Respir<br />
J2002;20: 1117-1122
EasyGuide Page 31<br />
17 Electromagnetic Compatibility (EMC)<br />
Changes or modification to the <strong>EasyOne</strong> system not expressly approved by ndd could cause EMC issues<br />
with this or other equipment. The <strong>EasyOne</strong> system is designed and tested to comply with applicable<br />
regulation regarding EMC and needs to be installed and put into service according to the EMC<br />
information stated as follows.<br />
WARNING<br />
Use of portable phones or other radio frequency (RF) emitting equipment near the system may cause<br />
unexpected or adverse operation.<br />
WARNING<br />
The equipment or system should not be used adjacent to, or stacked with, other equipment. If adjacent<br />
or stacked use is necessary, the equipment or system should be tested to verify normal operation<br />
in the configuration in which it is being used.<br />
Guidance and Manufacturers Declaration Electromagnetic Emissions<br />
The <strong>EasyOne</strong> is intended for use in the electromagnetic environment specified below. It is the responsibility of the customer or user to<br />
ensure that the <strong>EasyOne</strong> is used in such an environment.<br />
Emissions Test Compliance Electromagnetic Environment Guidance<br />
RF emissions<br />
EN 55011<br />
RF emissions<br />
EN 55011<br />
Harmonic Emissions<br />
EN 61000-3-2<br />
Group 1<br />
Class B<br />
Not applicable<br />
The equipment uses RF energy only for its internal function. Therefore, its RF<br />
emissions are very low and are not likely to cause any interference in nearby<br />
electronic equipment.<br />
The equipment is suitable for use in all establishments inclusively in domestic<br />
and those directly connected to the public low-voltage power supply network<br />
that supplies buildings used for domestic purposes.<br />
Voltage fluctuations/Flicker<br />
emissions<br />
EN 61000-3-3<br />
Not applicable<br />
Guidance and Manufacturers Declaration Electromagnetic Immunity<br />
The <strong>EasyOne</strong> is intended for use in the electromagnetic environment specified below. It is the responsibility of the customer or user to<br />
ensure that the <strong>EasyOne</strong> is used in such an environment.<br />
Immunity Test EN 60601 Test Level Compliance Level Electromagnetic Environment Guidance<br />
Electrostatic discharge<br />
(ESD)<br />
EN 61000-4-2<br />
Electrical fast<br />
transient/burst<br />
EN 61000-4-4<br />
Surge<br />
EN 61000-4-5<br />
Voltage dips, short interruptions<br />
and voltage<br />
variations on power<br />
supply input lines<br />
EN 61000-4-11<br />
Power frequency (50/60<br />
Hz) magnetic field<br />
EN 61000-4-8<br />
NOTE:<br />
± 6 kV contact<br />
± 8 kV air<br />
± 2 kV for power supply<br />
lines<br />
±1 kV for input/output<br />
lines<br />
± 6 kV contact<br />
± 8 kV air<br />
The product has no<br />
power supply lines.<br />
The product has no<br />
input or output lines that<br />
require testing.<br />
The product has no<br />
power supply lines.<br />
The product has no<br />
power supply lines<br />
Floors should be wood, concrete or ceramic tile. If<br />
floors are covered with synthetic material, the relative<br />
humidity should be at least 30%.<br />
± 1 kV differential mode<br />
± 2 kV common mode<br />
95% dip in U t )<br />
for 0.5 cycles<br />
40% U t (60% dip in U t )<br />
for 5 cycles<br />
70% U t (30% dip in U t )<br />
for 25 cycles<br />
95% dip in U t )<br />
for 5 s<br />
3 A/m 3 A/m Power frequency magnetic fields should be at levels<br />
characteristics of a typical location in a typical commercial<br />
or hospital environment.<br />
U t is the AC mains voltage prior to application of the test level.
EasyGuide Page 32<br />
Guidance and Manufacturers Declaration Electromagnetic Immunity<br />
The <strong>EasyOne</strong> is intended for use in the electromagnetic environment specified below. It is the responsibility of the customer or user<br />
to assure that the <strong>EasyOne</strong> is used in such an environment.<br />
Immunity Test EN 60601 Test Level Compliance Level Electromagnetic Environment Guidance<br />
Portable and mobile RF communications equipment<br />
should be used no closer to any part of the equipment,<br />
including cables, than the recommended separation<br />
distance calculated from the equation applicable to the<br />
frequency of the transmitter.<br />
Recommended separation distance<br />
Conducted RF<br />
EN 61000-4-6<br />
Radiated RF<br />
EN 61000-4-3<br />
3 Vrms<br />
150 KHz to 80 MHz<br />
3 V/m<br />
80 MHz to 2.5 GHz<br />
3 V rms<br />
3 V/m<br />
d = 1.2<br />
d = 1.2<br />
P<br />
P 80 MHz to 800 MHz<br />
d = 2.3 P 800 MHz to 2.5 GHz<br />
where P is the maximum output power rating of the<br />
transmitter in watts (W) according to the transmitter manufacturer<br />
and d is the recommended separation distance<br />
in meters (m).<br />
Field strengths from fixed RF transmitters, as determined<br />
by an electromagnetic site survey a , should be less than<br />
the compliance level in each frequency range. b<br />
Interference may occur in the vicinity of equipment<br />
marked with the following symbol:<br />
NOTE 1: At 80 MHz and 800 MHz, the higher frequency range applies.<br />
NOTE 2: These guidelines may not apply in all situations. Electromagnetic propagation is affected by absorption and reflection from<br />
structures, objects, and people.<br />
a Field strengths from fixed transmitters, such as base stations for radio (cellular/cordless) telephones and land mobile radio, AM<br />
and FM radio broadcast and TV broadcast cannot be predicted theoretically with accuracy. To assess the electromagnetic environment<br />
due to fixed RF transmitters, an electromagnetic site survey should be considered. If the measured field strength in the<br />
location in which the equipment is used exceeds the applicable RF compliance level above, the equipment should be observed to<br />
verify normal operation. If abnormal performance is observed, additional measures may be necessary, such as re-orienting or relocating<br />
the equipment.<br />
b Over the frequency range 150 KHz to 80 MHz, field strengths should be less than 3 V/m.<br />
Recommended Separation Distances<br />
The table below provides the recommended separation distances (in meters) between portable and mobile RF communication equipment<br />
and the <strong>EasyOne</strong>. The <strong>EasyOne</strong> is intended for use in the electromagnetic environment on which radiated RF disturbances<br />
are controlled. The customer or the user of the <strong>EasyOne</strong> can help prevent electromagnetic interference by maintaining a minimum<br />
distance between portable and mo-bile RF communications equipment (transmitters) and the <strong>EasyOne</strong> as recommended below,<br />
according to the maximum output power of the communications equipment.<br />
Rated Maximum Output Power of<br />
Transmitter in Watts<br />
Separation Distance in Meters (m) According to Frequency of Transmitter<br />
150 kHz to 80 MHz<br />
80 MHz to 800 MHz<br />
800 MHz to 2.5 GHz<br />
d = 1.2<br />
P<br />
d = 1.2<br />
P<br />
d = 2.3<br />
0.01 0.12 0.12 0.23<br />
0.1 0.38 0.38 0.73<br />
1 1.2 1.2 2.3<br />
10 3.8 3.8 7.3<br />
100 12 12 23<br />
For transmitters rated at a maximum output power not listed above, the recommended separation distance [d] in meters (m) can be<br />
estimated using the equation applicable to the frequency of the transmitter, where P is the maximum output power rating of the<br />
transmitter in watts (W) according to the transmitter manufacturer.<br />
Note:<br />
Note:<br />
At 80 MHz and 800 MHz, the separation distance for the higher frequency range applies.<br />
These guidelines may not apply in all instances. Electromagnetic propagation is affected by absorption and reflection from<br />
structures, objects and people<br />
Compliant Cables and Accessories<br />
The product has no accessories which affect EMC compliance.<br />
P
EasyGuide Page 33