Download - Right Stuff Detailing
Download - Right Stuff Detailing
Download - Right Stuff Detailing

You also want an ePaper? Increase the reach of your titles
YUMPU automatically turns print PDFs into web optimized ePapers that Google loves.
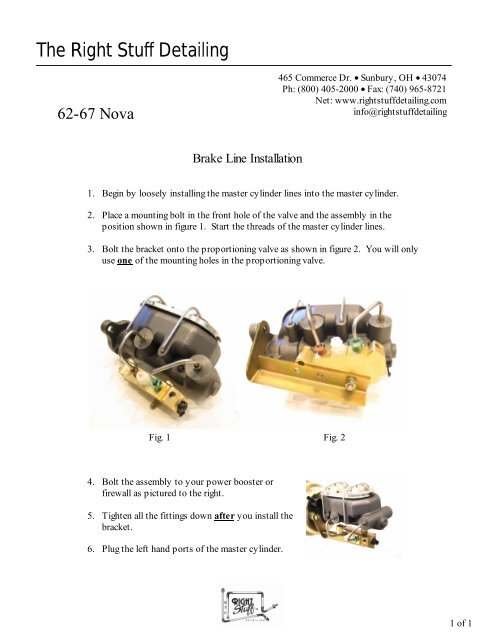
The <strong>Right</strong> <strong>Stuff</strong> <strong>Detailing</strong><br />
62-67 Nova<br />
465 Commerce Dr. • Sunbury, OH • 43074<br />
Ph: (800) 405-2000 • Fax: (740) 965-8721<br />
Net: www.rightstuffdetailing.com<br />
info@rightstuffdetailing<br />
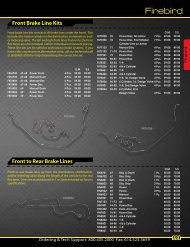
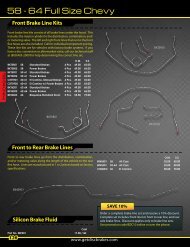
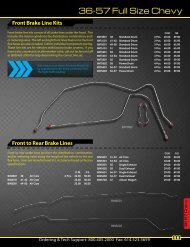
Brake Line Installation<br />
1. Begin by loosely installing the master cylinder lines into the master cylinder.<br />
2. Place a mounting bolt in the front hole of the valve and the assembly in the<br />
position shown in figure 1. Start the threads of the master cylinder lines.<br />
3. Bolt the bracket onto the proportioning valve as shown in figure 2. You will only<br />
use one of the mounting holes in the proportioning valve.<br />
Fig. 1 Fig. 2<br />
4. Bolt the assembly to your power booster or<br />
firewall as pictured to the right.<br />
5. Tighten all the fittings down after you install the<br />
bracket.<br />
6. Plug the left hand ports of the master cylinder.<br />
1 of 1
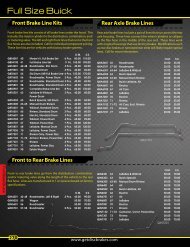
7. Lay the right front line and front to rear crossover line on top of the cross member<br />
and screw the fittings into the proportioning valve as pictured below.<br />
Note: The lines shown in this illustration route the same way for cars with and without power boosters.<br />
8. Screw the right front line into the fender mounted<br />
block. If there are unused ports in the block, plug<br />
them with the supplied fittings.<br />
9. Use the supplied union to join the crossover line<br />
to the front to rear brake line on the passenger’s<br />
side of the car.<br />
10. Screw the left front line into the fender mounted block. You may need to rotate<br />
the block to orient the port to the brake line. If there are unused ports in the<br />
block, plug them with the supplied fittings.<br />
Note: You may have unused plugs after completing the installation.<br />
2 of 2