Cisco Any Connect VPN Client
Cisco Any Connect VPN Client
Cisco Any Connect VPN Client

Create successful ePaper yourself
Turn your PDF publications into a flip-book with our unique Google optimized e-Paper software.
Information Technology<br />
for assistance contact the IT Help Desk<br />
415-581-8802, helpdesk@uchastings.edu<br />
---------------------------------------------------------------------------------------------------------------------------------------<br />
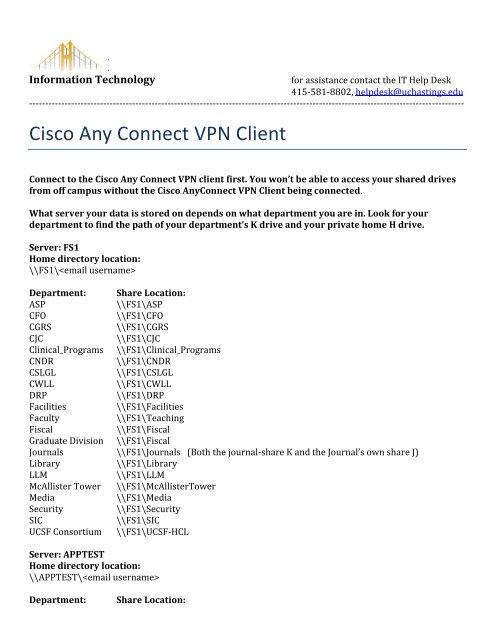
<strong>Cisco</strong> <strong>Any</strong> <strong>Connect</strong> <strong>VPN</strong> <strong>Client</strong><br />
<strong>Connect</strong> to the <strong>Cisco</strong> <strong>Any</strong> <strong>Connect</strong> <strong>VPN</strong> client first. You won’t be able to access your shared drives<br />
from off campus without the <strong>Cisco</strong> <strong>Any</strong><strong>Connect</strong> <strong>VPN</strong> <strong>Client</strong> being connected.<br />
What server your data is stored on depends on what department you are in. Look for your<br />
department to find the path of your department’s K drive and your private home H drive.<br />
Server: FS1<br />
Home directory location:<br />
\\FS1\<br />
Department: Share Location:<br />
ASP<br />
\\FS1\ASP<br />
CFO<br />
\\FS1\CFO<br />
CGRS<br />
\\FS1\CGRS<br />
CJC<br />
\\FS1\CJC<br />
Clinical_Programs \\FS1\Clinical_Programs<br />
CNDR<br />
\\FS1\CNDR<br />
CSLGL<br />
\\FS1\CSLGL<br />
CWLL<br />
\\FS1\CWLL<br />
DRP<br />
\\FS1\DRP<br />
Facilities<br />
\\FS1\Facilities<br />
Faculty<br />
\\FS1\Teaching<br />
Fiscal<br />
\\FS1\Fiscal<br />
Graduate Division \\FS1\Fiscal<br />
Journals \\FS1\Journals (Both the journal-share K and the Journal’s own share J)<br />
Library<br />
\\FS1\Library<br />
LLM<br />
\\FS1\LLM<br />
McAllister Tower \\FS1\McAllisterTower<br />
Media<br />
\\FS1\Media<br />
Security<br />
\\FS1\Security<br />
SIC<br />
\\FS1\SIC<br />
UCSF Consortium \\FS1\UCSF-HCL<br />
Server: APPTEST<br />
Home directory location:<br />
\\APPTEST\<br />
Department:<br />
Share Location:
Academic Dean<br />
Admissions<br />
Advancement<br />
Bookstore<br />
Business Center<br />
Career<br />
Chancellor<br />
Communications<br />
Faculty Support<br />
Financial Aid<br />
Financial Aid<br />
Human Resources<br />
Information Tech<br />
LEOP<br />
LWR & Moot Court<br />
Purchasing<br />
Student Health<br />
Student Services<br />
\\APPTEST\AcDean<br />
\\APPTEST\Admiss<br />
\\APPTEST\Advancement<br />
\\APPTEST\Bookstore<br />
\\APPTEST\BusCtr<br />
\\APPTEST\Career<br />
\\APPTEST\ChanDean<br />
\\APPTEST\Comm<br />
\\APPTEST\Fac<br />
\\APPTEST\FacSupport<br />
\\APPTEST\FinAid<br />
\\APPTEST\HR<br />
\\APPTEST\IT<br />
\\APPTEST\LEOP<br />
\\APPTEST\LWR<br />
\\APPTEST\Purchasing<br />
\\APPTEST\SHS<br />
\\APPTEST\StuSvc<br />
If you don’t see your department in the list above, contact IT. Contact information for IT is at the<br />
top of the page.<br />
Finder options to see your shared and private home drives<br />
The Finder options are being selected so you can see the shared drives in finder and in the<br />
applications that use finder as their file manager.<br />
1. Open Finder<br />
2. Open Finder Preferences. Finder > Preferences<br />
3. Be Sure that all of the “Show these items on the desktop:” are checked
4. Click the Sidebar Button at the top of the Finder Preferences<br />
Check the box under Devices that is your computer’s name.
Add your private home drive<br />
1. Open Finder<br />
2. Go > <strong>Connect</strong> to Server<br />
3. Type in Server Address: smb:///<br />
Ex: smb://FS1/smithm<br />
4. Click the Plus button so your computer remembers the <strong>Connect</strong>ion in the future.<br />
5. Click <strong>Connect</strong><br />
Because of the Bonjour services built-in to the Macs this connection will take about 20 seconds.<br />
If you have saved your email username and password for the server when you connected to it for<br />
the shared drive then you won’t have to enter it again.<br />
6. You are now connected to your private home drive.<br />
Under Finder you can find your private home drive.<br />
On the Desktop you can find your private home drive.
Add the shared drive(s)<br />
1. Open Finder<br />
2. Go > <strong>Connect</strong> to Server<br />
3. Type in Server Address: smb:///<br />
Ex: smb://FS1/IT<br />
YOUR SERVER ADDRESS IS LISTED ABOVE<br />
4. Click the Plus button so your computer remembers the <strong>Connect</strong>ion in the future.<br />
5. Click <strong>Connect</strong><br />
Because of the Bonjour services built-in to the Macs this connection will take about 20 seconds to<br />
connect.<br />
6. You be prompted to “Enter your name password for the server”<br />
<strong>Connect</strong> as: Registered User
Name: your email username<br />
Password: Your email password<br />
Check: “Remember this password in my keychain”<br />
Click <strong>Connect</strong><br />
7. You are now connected to your shared drive.<br />
Under Finder you can find the shared drive:<br />
On the Desktop you can find the shared drive
In the future connect to the <strong>Cisco</strong> <strong>Any</strong><strong>Connect</strong> <strong>VPN</strong> <strong>Client</strong> and then go to Finder > Go ><br />
<strong>Connect</strong> to Server > and Select your shared drive.<br />
In the future connect to the <strong>Cisco</strong> <strong>Any</strong> <strong>Connect</strong> <strong>VPN</strong> <strong>Client</strong> and then go to Finder > Go ><br />
<strong>Connect</strong> to Server > and Select your shared drive.