
Create successful ePaper yourself
Turn your PDF publications into a flip-book with our unique Google optimized e-Paper software.
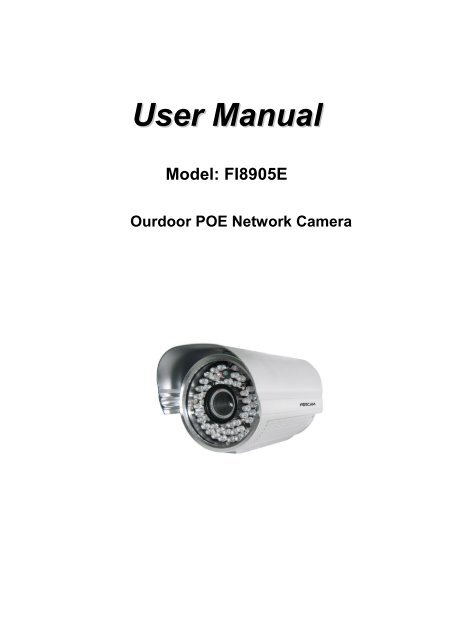
User Manual<br />
Model: FI8905E<br />
Ourdoor POE Network Camera
www.foscam.com<br />
Table of Contents<br />
1 Overviews .......................................................................................................................................................... 2<br />
1.1 Key Features .............................................................................................................................................. 3<br />
1.2 POE (Power over Ethernet) ........................................................................................................................ 3<br />
1.3 Read Before Use ........................................................................................................................................ 4<br />
1.4 Packing Contents ....................................................................................................................................... 4<br />
1.5 Physical Description ................................................................................................................................... 4<br />
2 Surveillance Software GUI ................................................................................................................................ 6<br />
2.1 Login Window ............................................................................................................................................. 6<br />
2.2 Surveillance Window .................................................................................................................................. 8<br />
3 Advanced Camera Settings ............................................................................................................................ 13<br />
3.1 Device Status ............................................................................................................................................ 13<br />
3.2 Alias Settings ............................................................................................................................................ 15<br />
3.3 Date & Time Settings ................................................................................................................................ 15<br />
3.4 User Settings ............................................................................................................................................. 16<br />
3.5 Multi-Device Settings ................................................................................................................................ 17<br />
3.6 Basic Network Settings ............................................................................................................................ 23<br />
3.7 Wireless Settings ...................................................................................................................................... 26<br />
3.8 ADSL ......................................................................................................................................................... 26<br />
3.9 UPnP Settings .......................................................................................................................................... 27<br />
3.10 DDNS Service Settings .......................................................................................................................... 28<br />
3.11 Mail Service Settings .............................................................................................................................. 33<br />
3.12 MSN Setting ........................................................................................................................................... 35<br />
3.13 FTP Service Settings .............................................................................................................................. 37<br />
3.14 Alarm Service Settings ........................................................................................................................... 39<br />
3.15 Upgrade Device Firmware ...................................................................................................................... 45<br />
3.16 Backup & Restore Settings .................................................................................................................... 47<br />
3.17 Restore Factory Settings ........................................................................................................................ 47<br />
3.18 Reboot Device ........................................................................................................................................ 48<br />
3.19 Log .......................................................................................................................................................... 48<br />
3.20 Back ........................................................................................................................................................ 48<br />
Shenzhen <strong>Foscam</strong> Intelligent Technology Co., Limited<br />
1<br />
Tel: 86 755 2674 5668 Fax: 86 755 2674 5168 1
www.foscam.com<br />
4 APPENDIX ...................................................................................................................................................... 49<br />
4.1 Frequently Asked Questions .................................................................................................................... 49<br />
4.2 Default Parameters ................................................................................................................................... 52<br />
4.3 Specifications ............................................................................................................................................ 53<br />
5 OBTAINING TECHNICAL SUPPORT ............................................................................................................ 54<br />
1 Overviews<br />
IPCAM is an integrated POE Network Camera solution. It combines a high quality digital video<br />
Camera with network connectivity and a powerful web server to bring clear to your desktop from<br />
anywhere on your local network or over the Internet.<br />
The basic function of IPCAM is transmitting remote video on the IP network. The high quality<br />
video image can be transmitted with 30fps speed on the LAN/WAN by using MJPEG hardware<br />
compression technology.<br />
The IPCAM is based on the TCP/IP standard. There is a WEB server inside which could support<br />
Internet Explore. Therefore the management and maintenance of your device is simplified by<br />
using the network to achieve the remote configuration, start-up and to upgrade the firmware.<br />
You can use this IPCAM to monitor special places such as your home and your office. Also<br />
controlling the IPCAM and managing image are simple by clicking the website through the<br />
network.<br />
Shenzhen <strong>Foscam</strong> Intelligent Technology Co., Limited<br />
2<br />
Tel: 86 755 2674 5668 Fax: 86 755 2674 5168 2
www.foscam.com<br />
1.1 Key Features<br />
● Powerful high-speed video protocol processor<br />
● High Definition Color CMOS Sensor<br />
● 300K Pixels<br />
● IR night vision ( Range:30m;)<br />
● Optimized MJPEG video compression for transmission<br />
● Multi-level users’ management and passwords definition<br />
● Embedded Web Server for users to visit by IE<br />
● Supports Dynamic IP (DDNS) and UPnP LAN and Internet (ADSL,Cable Modem)<br />
● Motion detection activates alarm<br />
● Supports IR_CUT and the filter change automatically<br />
● POE compliant with POE standards IEEE 802.3af<br />
● Embedded FOSCAM DDNS(dynamic domain name) Service<br />
● Supports image snapshot<br />
● Support multiple network protocols: HTTP/TCP/IP/UDP/STMP/DDNS/SNTP/DHCP/FTP<br />
● Supports Daylight Saving Time<br />
● Supports MSN<br />
● Supports Gmail as sender on mail service settings<br />
● Providing Central Management Software to manage or monitor multi-cameras<br />
1.2 POE (Power over Ethernet)<br />
The Network Camera is POE-compliant, allowing transmission of power and data via a single<br />
Ethernet cable. Such as the following picture: connect the Network Camera to a PoE-enabled<br />
router/ switch via Ethernet cable.<br />
Shenzhen <strong>Foscam</strong> Intelligent Technology Co., Limited<br />
3<br />
Tel: 86 755 2674 5668 Fax: 86 755 2674 5168 3
www.foscam.com<br />
1.3 Read Before Use<br />
Please first verify that all contents received are complete according to the Package Contents<br />
listed below. Before the Network Camera is installed, please carefully read and follow the<br />
instructions in the Quick Installation Guide to avoid damage due to faulty assembly and<br />
installation. This also ensures the product is used properly as intended.<br />
1.4 Packing Contents<br />
● IPCAM×1<br />
● DC Power Supply×1<br />
● Mounting bracket×1(option)<br />
● CD×1<br />
● Quick Installation Guide×1<br />
● Warranty Card×1<br />
● Network Cable×1<br />
1.5 Physical Description<br />
Front Panel<br />
1 LENS: CMOS sensor with fixed focus lens<br />
2 Infrared LED: 60 IR LEDs<br />
Figure 1.1<br />
Shenzhen <strong>Foscam</strong> Intelligent Technology Co., Limited<br />
4<br />
Tel: 86 755 2674 5668 Fax: 86 755 2674 5168 4
www.foscam.com<br />
Back View<br />
Figure 1.2<br />
1 LAN: RJ-45/10-100 Base T<br />
2 RESET BUTTON: Press and hold down the RESET BUTTON for 10 seconds. Release the<br />
power button and IP camera will be reset back to the factory default parameter.<br />
3 Power: DC 5V/2A Power supply<br />
Bottom View<br />
There are up to three labels located on the body of the camera; this is an important feature of<br />
original <strong>Foscam</strong> cameras. If your camera does not have labels as shown in Figure 1.3 ,it may be<br />
a clone one. Cloned <strong>Foscam</strong> cameras can not use original firmware and are not eligible for<br />
warranty or technical services.<br />
FOSCAM domain name<br />
Figure 1.3<br />
Shenzhen <strong>Foscam</strong> Intelligent Technology Co., Limited<br />
5<br />
Tel: 86 755 2674 5668 Fax: 86 755 2674 5168 5
www.foscam.com<br />
2 Surveillance Software GUI<br />
Please refer to the Quick Installation Guide if you install the camera at first time. After finishing<br />
quick installation, you can take time to learn the operation of the software.<br />
2.1 Login Window<br />
1<br />
2<br />
3<br />
4<br />
5<br />
6<br />
Figure 2.1<br />
Please check the login window above, it was divided to 6 sections from no. 1 to 6.<br />
Section1 Select Language<br />
FOSCAM camera supports up to multi-languages, such as English, Spanish, Deutsch and so on.<br />
You can select the language you need via pull down the dropdown toolbar and click on the<br />
language to switch.<br />
Shenzhen <strong>Foscam</strong> Intelligent Technology Co., Limited<br />
6<br />
Tel: 86 755 2674 5668 Fax: 86 755 2674 5168 6
www.foscam.com<br />
Section2 FOSCAM Website Link<br />
There is an access link to <strong>Foscam</strong> website homepage, if you need tech support you can contact<br />
<strong>Foscam</strong> directly.<br />
Section3 ActiveX Mode<br />
If your PC is windows based OS, such as Windows XP, Windows7, Windows Vista and you are<br />
using IE-based browsers like IE6, IE7, IE8, please choose IE ActiveX Mode login mode.<br />
.<br />
Section4 Server Push Mode<br />
If you are using non-IE based browser, like Firefox, Safari, Google Chrome please choose<br />
Server Push Mode mode.<br />
Section5 Mobile Phone<br />
If you are using the Mobile to access the camera, here you need to select Mobile Phone login<br />
mode.<br />
Section6 Note<br />
Note that when you login the camera, please select the corresponding login mode.<br />
Shenzhen <strong>Foscam</strong> Intelligent Technology Co., Limited<br />
7<br />
Tel: 86 755 2674 5668 Fax: 86 755 2674 5168 7
www.foscam.com<br />
2.2 Surveillance Window<br />
Select the ActiveX mode and you will enter the surveillance window.<br />
1<br />
2<br />
6<br />
3<br />
4<br />
5<br />
Section1 Device Name<br />
Figure 2.2<br />
7<br />
Default device name is Anonymous. You can define a name for your camera as you like (Please<br />
go to chapter 3.1 and read how to set it)<br />
Section2 Multi-Device Window<br />
The firmware inside the camera supports up to maximum of 9 cameras being monitoring at the<br />
same time. You can add other cameras in multi-device setting (read chapter 3.5).<br />
Shenzhen <strong>Foscam</strong> Intelligent Technology Co., Limited<br />
8<br />
Tel: 86 755 2674 5668 Fax: 86 755 2674 5168 8
www.foscam.com<br />
. Figure 2.3<br />
Section3 Image Parameters Settings<br />
OSD<br />
OSD is used to add timestamp on the video. There are five text colors to choose from: Black, red,<br />
yellow, white, blue.<br />
Add OSD on record<br />
Shenzhen <strong>Foscam</strong> Intelligent Technology Co., Limited<br />
9<br />
Tel: 86 755 2674 5668 Fax: 86 755 2674 5168 9
www.foscam.com<br />
Select this option if you want to add a timestamp to recordings.<br />
Resolution<br />
1) 320x240-------QVGA<br />
2) 640x480-------VGA<br />
There are two resolutions, the bigger one (VGA) is 640x480 pixels, and the smaller one (QVGA)<br />
is 320x240 pixels. The bigger the resolution, the better of the image quality is, but the lower the<br />
frame rate is. If you are accessing the camera via internet and want to get more fluent video<br />
streaming, please select resolution QVGA 320x240.<br />
Mode<br />
1) 50HZ ---------Indoor surveillance (Region: Europe, China)<br />
2) 60HZ ---------Indoor surveillance (Region: USA, Canada)<br />
3) Outdoor-------Outdoor surveillance (Region: All over the world)<br />
There are three options within the menu of Mode: 50HZ, 60HZ and Outdoor. It depends on the<br />
frequency of the electricity and surveillance model (indoors & outdoor). Please choose outdoor<br />
mode, when the camera was installed outside.<br />
Fps<br />
1) Max---------- Maximum frame rate<br />
2) 20fps, 15fps, 10fps, 5fps,4fps,3fps,2fps,1fps, 5fps, 1fps ,1/2fps,1/3fps,1/4fps,1/5fps-------<br />
customized frame rate<br />
You can choose option within the menu of Fps to adjust the frame rate. It is often used in LAN<br />
network when you want to lower the frame rate, so that you can save more bandwidth.<br />
Brightness<br />
Default parameter is 6, you can adjust the brightness of the image by clicking plus or minus<br />
button.<br />
Contrast<br />
Default parameter is 4, you can adjust the contrast of the image by clicking plus or minus button.<br />
Flip & Mirror<br />
You can flip the image by enabling Flip button, or mirror the image by enabling Mirror button.<br />
Shenzhen <strong>Foscam</strong> Intelligent Technology Co., Limited<br />
10<br />
Tel: 86 755 2674 5668 Fax: 86 755 2674 5168 10
www.foscam.com<br />
Section4 IR Lights Buttons<br />
: Click this icon, all the IR lights will turn on.<br />
: Click this icon to turn off IR lights.<br />
Section5 Device Management<br />
Device Management ------Path to Administrator Control Panel, Click it, and it will lead to<br />
Administrator Control Panel.<br />
Section6 Record & Snapshot & Full Screen Buttons<br />
1 2 3<br />
1------Record Button Click it and it pop-up a path-setting window, you can select the storage<br />
path and the record file name. At the same time the record icon changes to ,, Click it again<br />
and stop recording.<br />
2------Snapshot Click it to make snapshot and it pop-up a window which picture you snapshot,<br />
right click in the window and save the picture to anywhere you want.<br />
3------Full Screen Click it to make full-screen, or you can double click the surveillance screen<br />
to make full-screen.<br />
Section7 Play/Stop Buttons<br />
1 2<br />
1------Play Click it to play the video of the camera<br />
2------Stop Click it to stop the video of the camera<br />
Shenzhen <strong>Foscam</strong> Intelligent Technology Co., Limited<br />
11<br />
Tel: 86 755 2674 5668 Fax: 86 755 2674 5168 11
www.foscam.com<br />
Record and multi-device function are controlled by ActiveX controller, therefore Firefox or<br />
Google Chrome, Safari browsers will not allow these functions.<br />
For Firefox, Google Chrome, Safari, you should select the Server Push Mode and you can see<br />
the following screen:<br />
Figure 2.4<br />
Shenzhen <strong>Foscam</strong> Intelligent Technology Co., Limited<br />
12<br />
Tel: 86 755 2674 5668 Fax: 86 755 2674 5168 12
www.foscam.com<br />
3 Advanced Camera Settings<br />
Click the bar “Device Management”, goes to Administrator Control Panel to make advanced<br />
camera settings.<br />
3.1 Device Status<br />
Figure 3.1<br />
1------Device ID MAC ID of the camera by wired connection<br />
2-----Device Firmware Version System Firmware version of the camera<br />
3-----Device Web UI Version Web UI firmware version of the camera<br />
4-----Alias Name of the camera<br />
5-----Alarm Status The status of Alarm Service Setting<br />
6-----DDNS Status The status of DDNS Setting<br />
7-----UPnP Status The status of UPnP Setting<br />
8-----MSN Status The status of MSN Setting<br />
Shenzhen <strong>Foscam</strong> Intelligent Technology Co., Limited<br />
13<br />
Tel: 86 755 2674 5668 Fax: 86 755 2674 5168 13
www.foscam.com<br />
Another Way:<br />
Double click the the icon “IP Camera.exe” , select the camera IP, right click and select<br />
the Basic Properties, you can also see the Firmware Version and MAC Address, such as the<br />
following screen:<br />
Figure 3.2<br />
Figure 3.3<br />
Shenzhen <strong>Foscam</strong> Intelligent Technology Co., Limited<br />
14<br />
Tel: 86 755 2674 5668 Fax: 86 755 2674 5168 14
www.foscam.com<br />
3.2 Alias Settings<br />
Default alias is Anonymous. You can define a name for your camera here such as apple. Click<br />
Submit to save your changes. The alias name supports special characters.<br />
Click the option here to<br />
modify the device name<br />
Enter the device name as you<br />
like. Use different names to<br />
identify multi-cameras<br />
Figure 3.4<br />
3.3 Date & Time Settings<br />
Choose the time zone of your country. You can choose Sync with NTP Server or Sync with PC<br />
Time. If your country implements the Daylight Saving Time, that option can also be selected.<br />
Go to Data &Time Settings<br />
Figure 3.5<br />
Select the time zone belong<br />
to your region<br />
Shenzhen <strong>Foscam</strong> Intelligent Technology Co., Limited<br />
15<br />
Tel: 86 755 2674 5668 Fax: 86 755 2674 5168 15
www.foscam.com<br />
3.4 User Settings<br />
Here you can create users and set permission levels, visitor, operator or administrator.<br />
Click Submit to save these settings. The camera will reboot.<br />
You can set different<br />
permission levels, but at<br />
least one administrator<br />
Figure 3.6<br />
Here you can also set one important file locations for the camera, the Alarm Record Path.<br />
Simply click Browse and choose the path to the required folder.<br />
The Alarm Record Path location is used to store automatically recorded files when the camera<br />
is activated by motion. (See set motion alarm. Figure 3.35) The default path for Alarm Record<br />
Path is C:\Documents and Settings\All Users\Documents.<br />
NOTE: In Windows7 or Vista, if you cannot set the paths.:<br />
Windows7 or Vista's security level is higher than Windows XP/2000.For "set record path"<br />
function, user should add the Device IP address to the Internet Explorer's 'Trusted sites' first. The<br />
step is: IE browserToolInternet ProperSecurityTrusted sitesSitesAdd<br />
Shenzhen <strong>Foscam</strong> Intelligent Technology Co., Limited<br />
16<br />
Tel: 86 755 2674 5668 Fax: 86 755 2674 5168 16
www.foscam.com<br />
3.5 Multi-Device Settings<br />
If you want to view multi-surveillance screens on one window, you need to login one camera, and<br />
set it as the main device, and do Multi-Device Settings, add other cameras to the first one<br />
camera. Before you do multi-cams settings, you need to assign different port such as 81, 82, 83,<br />
84, 85, 86, 87, 88 to the cameras if there is 8 cams installed.<br />
The firmware within the camera can support a maximum of 9 devices monitoring all at the same<br />
time.<br />
3.5.1 Add cameras in LAN<br />
In Multi-Device Settings page, you can see all devices searched in LAN. The 1st Device is the<br />
default one. You can add more cameras in the list in LAN for monitoring. The camera’s software<br />
supports up to 9 IP Cameras online simultaneously. Click The 2nd Device and click the item in<br />
the Device List in LAN, the Alias, Host and Http Port will be filled in the boxes below<br />
automatically. Enter the correct username and password then click Add. Add more cameras in<br />
the same way. After all cameras have been added, choose Submit.<br />
1 Click it, alias, host and HTTP<br />
Port will be filled in the following<br />
boxes automatically<br />
2 Enter the User name and<br />
password of the 2nd camera<br />
3 Click Add to take effect<br />
Figure 3.7a<br />
Shenzhen <strong>Foscam</strong> Intelligent Technology Co., Limited<br />
17<br />
Tel: 86 755 2674 5668 Fax: 86 755 2674 5168 17
www.foscam.com<br />
Click Submit after add all cameras<br />
Figure 3.7b<br />
Back to Surveillance Windows, and click Four Windows option, you will see four cameras you<br />
added.<br />
Figure 3.8<br />
Shenzhen <strong>Foscam</strong> Intelligent Technology Co., Limited<br />
18<br />
Tel: 86 755 2674 5668 Fax: 86 755 2674 5168 18
www.foscam.com<br />
Figure 3.9<br />
3.5.2 Add cameras in WAN<br />
If you want to view all cameras via the internet(remote computer), you will need to add them<br />
using DDNS domain name. Firstly, make sure all of the cameras you added can be accessed<br />
through the internet. (Read How to configure DDNS settings in chapter 3.10)<br />
Login to the first camera using a DDNS domain name and port.<br />
Shenzhen <strong>Foscam</strong> Intelligent Technology Co., Limited<br />
19<br />
Tel: 86 755 2674 5668 Fax: 86 755 2674 5168 19
www.foscam.com<br />
Use DDNS domain name and port to login<br />
Make sure each camera you need<br />
add could login with DDNS name<br />
and port<br />
Figure 3.10<br />
If you have several cameras, you can use the same DDNS domain name; you only need to set a<br />
different port number for each camera.<br />
Click Multi-Device Settings. Choose The 2nd Device. Fill in the 2nd camera’s name, DDNS<br />
domain name, port number. Enter user name and password and then choose Add. (Figure 3.11)<br />
NOTE: Here the Host must be entered as the second camera’s DDNS domain name, not its LAN<br />
IP.<br />
Shenzhen <strong>Foscam</strong> Intelligent Technology Co., Limited<br />
20<br />
Tel: 86 755 2674 5668 Fax: 86 755 2674 5168 20
www.foscam.com<br />
1<br />
2<br />
3<br />
4<br />
Figure 3.11<br />
1----- The 2nd camera’s name<br />
2----- Fill in the 2nd camera’s DDNS host not LAN IP<br />
3 ---- Enter the 2nd camera’s user name and password<br />
4---- Click Add button and to take effect<br />
Add the other cameras in the same way. Click Submit to save.<br />
Shenzhen <strong>Foscam</strong> Intelligent Technology Co., Limited<br />
21<br />
Tel: 86 755 2674 5668 Fax: 86 755 2674 5168 21
www.foscam.com<br />
Click submit after finishing all settings<br />
Figure 3.12<br />
Return to video window. You will see all of the cameras accessible through the internet.<br />
When you are away from home, you can use the first camera’s DDNS domain name and port to<br />
view all the cameras via internet.<br />
Figure 3.13<br />
Shenzhen <strong>Foscam</strong> Intelligent Technology Co., Limited<br />
22<br />
Tel: 86 755 2674 5668 Fax: 86 755 2674 5168 22
www.foscam.com<br />
3.6 Basic Network Settings<br />
If you want to set a static IP for the camera, select Basic Network Settings. Keep the camera in<br />
the same subnet of your router or computer.<br />
Figure 3.14<br />
Changing settings here is the same as using the IP Camera Tool. (Figure 3.17/3.18)<br />
It is recommended that you use the subnet mask, gateway and DNS server from your locally<br />
attached PC. If you don’t know the subnet mask, gateway and DNS server, you can check your<br />
computer’s local area connection as follows:<br />
Control PanelNetwork ConnectionsLocal Area Connections Choose<br />
SupportDetails.<br />
Shenzhen <strong>Foscam</strong> Intelligent Technology Co., Limited<br />
23<br />
Tel: 86 755 2674 5668 Fax: 86 755 2674 5168 23
www.foscam.com<br />
Figure 3.15<br />
Figure 3.16<br />
If you don’t know the DNS server, you can use the same settings as the Default Gateway.<br />
Shenzhen <strong>Foscam</strong> Intelligent Technology Co., Limited<br />
24<br />
Tel: 86 755 2674 5668 Fax: 86 755 2674 5168 24
www.foscam.com<br />
Another way to change the camera’s LAN IP and HTTP Port no.<br />
Open the IP Camera Tool, select the camera you want to change the port no, right click on the IP<br />
address link, and goes to Option ”Network Configuration”, it pops up another dialogue showed as<br />
the following screen<br />
Select the camera you<br />
want to change the LAN<br />
IP or port no, right click<br />
Figure 3.17<br />
Figure 3.18<br />
IP Address: Fill in the IP address assigned and make sure it is in the same subnet as your<br />
computer or router. (I.e. the first three sections are the same)<br />
Subnet Mask: The default subnet mask of the equipment in our LAN is: 255.255.255.0.You can<br />
find the subnet mask in the basic information of your router or the locally-attached of your PC.<br />
Gateway: Make sure it is in the same subnet with PC’s IP address. The gateway is your router’s<br />
LAN IP.<br />
DNS Server: IP address of your ISP network provider. You can find the DNS server in your<br />
router or check the locally-attached address of your computer. Your PC contains your PC’s IP<br />
address, gateway and DNS server. Normally, there are two DNS servers. Here you can also set<br />
the DNS server the same with gateway.<br />
Shenzhen <strong>Foscam</strong> Intelligent Technology Co., Limited<br />
25<br />
Tel: 86 755 2674 5668 Fax: 86 755 2674 5168 25
www.foscam.com<br />
Http Port: The default Lan port is 80.You can set another port number, such as port 8005,<br />
8100.etc.<br />
User&Password: Default administrator user name is admin with no password.<br />
If the prompt “Subnet doesn’t match, dbclick to change!” appears, please enable DHCP set<br />
camera’s IP address and gateway once again.<br />
3.7 Wireless Settings<br />
The network camera is POE-compliant, allowing transmission of power and data via a single<br />
network cable, so here cannot allow to use Wireless function.<br />
3.8 ADSL<br />
Figure 3.19<br />
If you are connecting the camera directly to a ADSL modem, you can do ADSL settings with your<br />
ADSL account &password provided by the ISP, then make the camera connected to the network.<br />
Shenzhen <strong>Foscam</strong> Intelligent Technology Co., Limited<br />
26<br />
Tel: 86 755 2674 5668 Fax: 86 755 2674 5168 26
www.foscam.com<br />
Enter the ADSL user<br />
and password<br />
Figure 3.20<br />
3.9 UPnP Settings<br />
Choose Using UPnP to MAP Port and then click Submit.<br />
Figure 3.21<br />
The camera’s software will be configured for port forwarding. There may be issues with your<br />
routers security settings, and sometimes may error. We recommend you configure port<br />
forwarding manually on your router(Figure 3.26).<br />
Shenzhen <strong>Foscam</strong> Intelligent Technology Co., Limited<br />
27<br />
Tel: 86 755 2674 5668 Fax: 86 755 2674 5168 27
www.foscam.com<br />
3.10 DDNS Service Settings<br />
FOSCAM camera has embedded a unique DDNS domain name when producing, and you can<br />
directly use the domain name, you can also use the third party domain name.<br />
FOSCAM domain name<br />
Here take camera.myfoscam.org for example. Go to option of DDNS Service Settings on the<br />
administrator panel, you can see the domain name.<br />
Figure 3.22<br />
Now you can use http:// Domain name + HTTP Port to access the camera via internet.<br />
Take hostname camera.myfoscam.org and HTTP Port no. 88 for example, the accessing link<br />
of the camera via internet would be http:// camera.myfoscam.org:88<br />
Third Party Domain Name Settings<br />
User can also use third part DDNS, such as www.no-ip.com. ,www. dyndns.com<br />
Here take www.no-ip.com for example:<br />
1 Step 1, Go to the website www.no-ip.com to create a free hostname<br />
Firstly: Login on www.no-ip.com and click No-IP Free to register.<br />
Shenzhen <strong>Foscam</strong> Intelligent Technology Co., Limited<br />
28<br />
Tel: 86 755 2674 5668 Fax: 86 755 2674 5168 28
www.foscam.com<br />
Click here to register<br />
Figure 3.23<br />
Please register an account step by step according to instructions on www.no-ip.com<br />
After registration, please login your email which used to register. You will receive an email from<br />
website, please click the link to activate your ACCOUNT as indicated in email.<br />
Secondly: Login the link with the registered username and password to create your<br />
domain name.<br />
Shenzhen <strong>Foscam</strong> Intelligent Technology Co., Limited<br />
29<br />
Tel: 86 755 2674 5668 Fax: 86 755 2674 5168 29
www.foscam.com<br />
Figure 3.24<br />
Figure 3.25<br />
Please create the domain name step by step according to instructions on www.no-ip.com<br />
Step 2, DO DDNS Service Settings within the Camera<br />
Please set DDNS Service Settings within the camera by hostname, a user name and<br />
password you’ve got from www.no-ip.com<br />
Shenzhen <strong>Foscam</strong> Intelligent Technology Co., Limited<br />
30<br />
Tel: 86 755 2674 5668 Fax: 86 755 2674 5168 30
www.foscam.com<br />
Take hostname ycxgwp.no-ip.info, user name foscam, password foscam2012 for example.<br />
Firstly, goes to option of DDNS Service Settings on the administrator panel.<br />
Secondly, select No-Ip as a server in the Third Party DDNS..<br />
Thirdly, fill foscam as DDNS user, fill password foscam2012 as DDNS password, fill<br />
ycxgwp.no-ip.info as DDNS domain and server URL, Then click save to make effect. The<br />
camera will restart and to take the DDNS settings effective.<br />
Fourthly, after the restart, login the camera, and go to option of Device Status on the<br />
administrator panel, and check if the DDNS status is successful.<br />
If failed, please double check if you have input the correct hostname, user name, and<br />
password, and try to redo the settings.<br />
Note<br />
If you have set Third Party DDNS successfully ,the <strong>Foscam</strong> Domain Name will be invalid. The<br />
Third Party DDNS and the <strong>Foscam</strong> Domain Name cannot work at the same time, the last time<br />
you configured will take effect.<br />
2 Do port forwarding within the router<br />
Example: The camera’s LAN IP address is http://192.168.1.35:88 ,<br />
Firstly, login the router, goes to the menu of Port Forwarding or Port Trigger (or named Virtue<br />
Server on some brands of router). Take Linksys brand router as an example, Login the<br />
router, and goes to Applications & Gaming->Single Port Forwarding.<br />
Secondly, Create a new column by LAN IP address & HTTP Port No. of the camera within the<br />
router showed as below.<br />
Shenzhen <strong>Foscam</strong> Intelligent Technology Co., Limited<br />
31<br />
Tel: 86 755 2674 5668 Fax: 86 755 2674 5168 31
www.foscam.com<br />
Figure 3.26<br />
3 Use domain name to access the camera via internet<br />
After the port forwarding is finished, you can use the domain name+ http no. to access the<br />
camera via internet. Take hostname ycxgwp.no-ip.info and http no. 88for example, the<br />
accessing link of the camera via internet would be http:// ycxgwp.no-ip.info:88<br />
Shenzhen <strong>Foscam</strong> Intelligent Technology Co., Limited<br />
32<br />
Tel: 86 755 2674 5668 Fax: 86 755 2674 5168 32
www.foscam.com<br />
3.11 Mail Service Settings<br />
If you want the camera to send emails when motion has been detected, Mail Service Settings<br />
will need to be configured.<br />
2<br />
1<br />
3<br />
4<br />
6<br />
Figure 3.27<br />
5<br />
1----- Sender Mailbox for sender must support SMTP<br />
2----- Receiver Mailbox for receiver need not support SMTP,you can set 4 receivers<br />
3----- SMTP Server/ Port Enter SMTP server for sender. SMTP port is usually set as 25.<br />
Some SMTP servers have their own port, such as 587 or 465 and Transport Layer Security<br />
usually is None. If you use Gmail, Transport Layer Security must be set to TLS or STARTTLS<br />
and SMTP Port must be set to 465 or 25 or 587, which port you choose should be decided by<br />
which Transport Layer Security you select.<br />
4---- SMTP user ID account of the sender email address<br />
5----Submit Click Submit to take effect<br />
6----Test Click Test to see if SMTP has been successfully configured.<br />
NOTE: Click Submit first before choosing Test.<br />
Click Test to see if SMTP has been successfully configured.<br />
Shenzhen <strong>Foscam</strong> Intelligent Technology Co., Limited<br />
33<br />
Tel: 86 755 2674 5668 Fax: 86 755 2674 5168 33
www.foscam.com<br />
.<br />
Figure 3.28<br />
If the test fails with one of the following errors after clicking Test, verify that the information you<br />
entered is correct and again select Test .<br />
1) Cannot connect to the server<br />
2) Network Error. Please try later<br />
3) Server Error<br />
4) Incorrect user or password<br />
5) The sender is denied by the server. Maybe the server need to authenticate the user, please<br />
check it and try again<br />
6) The receiver is denied by the server. Maybe because of the anti-spam privacy of the server<br />
7) The message is denied by the server. Maybe because of the anti-spam privacy of the server<br />
8) The server does not support the authentication mode used by the device<br />
Report Internet IP by Mail—If selected, you will receive emails which contains internet IP<br />
information such as When the camera is powered or the Internet IP has changed. (For example:<br />
IPCAM's urls is http://119.123.207.96:8068). Make sure the port is mapped to the router<br />
correctly.<br />
Shenzhen <strong>Foscam</strong> Intelligent Technology Co., Limited<br />
34<br />
Tel: 86 755 2674 5668 Fax: 86 755 2674 5168 34
www.foscam.com<br />
3.12 MSN Setting<br />
If you want the camera send its current internet IP address to you or your friends, please set<br />
MSN settings.<br />
Acquire an MSN ID for the IPCAM first, then follow the instructions as per Figure 3.29.<br />
Fill in the user and<br />
password of the MSN<br />
ID you applied for your<br />
camera<br />
MSN ID in this list can<br />
chat with the camera<br />
Figure 3.29<br />
Click Submit and go to the “Device Status” screen and verify the MSN settings are succeed.<br />
Shenzhen <strong>Foscam</strong> Intelligent Technology Co., Limited<br />
35<br />
Tel: 86 755 2674 5668 Fax: 86 755 2674 5168 35
www.foscam.com<br />
Figure 3.30<br />
When the MSN ID in the Friends list login the MAN, he can chat with camera. For example:<br />
<strong>Foscam</strong>13(this account contained in the Friends list) log in MSN, and double click the camera’s<br />
account (foscam31), then enter “url?”, the camera will send it’s current IP address to you.<br />
Figure 3.31<br />
Note: Create a new MSN account for the camera, do not use the same MSN account as you<br />
would like to chat with your friends. When the camera login uses the MSN account, this account<br />
cannot be used for anything else when the camera works.<br />
Shenzhen <strong>Foscam</strong> Intelligent Technology Co., Limited<br />
36<br />
Tel: 86 755 2674 5668 Fax: 86 755 2674 5168 36
www.foscam.com<br />
3.13 FTP Service Settings<br />
If you want to upload images to your FTP server,you can set FTP Service Settings.<br />
Figure 3.32<br />
Figure 3.33<br />
FTP server: If your FTP server is located on the LAN, you can set as Figure 3.32.<br />
If you have an FTP server which you can access on the internet, you can set as Figure 3.33.<br />
FTP Port: Usually the port is 21.<br />
Shenzhen <strong>Foscam</strong> Intelligent Technology Co., Limited<br />
37<br />
Tel: 86 755 2674 5668 Fax: 86 755 2674 5168 37
www.foscam.com<br />
FTP Upload Folder: Make sure that the folder you plan to store images exists as the camera<br />
can’t create the folder itself. Also, the folder must be read/writable.<br />
FTP Mode: The camera supports standard (POST) mode and passive (PASV) mode<br />
Upload Image Now: This option will upload images continuously when you enable the checkbox<br />
Enable Set Filename: When you enable this option the uploaded image will be named<br />
according to the filename you enter. The next image will overwrite the filename of the previous<br />
image. Hence there will only be one image, the last uploaded.<br />
Filename: See the above option.<br />
Note: You cannot change the name of the alarm image.<br />
Upload Interval refers to the time between the current image and the next image being<br />
uploaded.<br />
Click Submit to save these settings. Click Test, the following screen displays if successful.<br />
Figure 3.34<br />
The following errors may occur:<br />
1) Can not connect to the server. Check if the FTP Server is correct.<br />
2) Network Error. Please try later.<br />
3) Server Error.<br />
4) Incorrect user or password. Check the username and password.<br />
5) Cannot access the folder. Verify the folder exists and your account is authorized<br />
6) Error in PASV mode. Verify the server supports PASV mode.<br />
7) Error in PORT mode. PASV mode should be selected if the device is behind a NAT.<br />
8) Cannot upload file. Verify your account is authorized<br />
If an error occurs check the parameters you entered are correct. The filename format of the<br />
image is similar to 00606E8C1930(sarah)_0_20100728114350_25.jpg<br />
Check if your FTP server supports this file name format.<br />
Shenzhen <strong>Foscam</strong> Intelligent Technology Co., Limited<br />
38<br />
Tel: 86 755 2674 5668 Fax: 86 755 2674 5168 38
www.foscam.com<br />
3.14 Alarm Service Settings<br />
IP Camera supports Motion Detection Alarmed, when the motion has been detected, it will<br />
send email alerts or upload images or record.<br />
1<br />
2<br />
3<br />
Figure 3.35<br />
1---- If you want to set Motion Detection Alarmed ,select the checkbox<br />
2---- The larger the number, the higher the motion sensitivity will be<br />
3---- Select this option to reduce false alarms when light changes<br />
If motion is detected after you enable Motion Detection Armed, the Alarm Status will turn to<br />
Motion Detect Alarm.<br />
Shenzhen <strong>Foscam</strong> Intelligent Technology Co., Limited<br />
39<br />
Tel: 86 755 2674 5668 Fax: 86 755 2674 5168 39
www.foscam.com<br />
Here you can see the alarm status<br />
Figure 3.36<br />
There are four alarm indicators:<br />
1) Camera will send emails when motion is activated.<br />
If you want to receive images when motion is detected, you must set Mail Service Settings first.<br />
(Figure 3.27) Then set motion alarm as follows:<br />
Figure 3.37<br />
2) Upload images via FTP server when motion trigger.<br />
To upload images to an FTP server when motion is detected, you must set FTP Service<br />
Settings(Figure 3.32/3.33) first and then set motion alarm as pictured below<br />
Shenzhen <strong>Foscam</strong> Intelligent Technology Co., Limited<br />
40<br />
Tel: 86 755 2674 5668 Fax: 86 755 2674 5168 40
www.foscam.com<br />
Select this option<br />
Set an interval for images to upload<br />
Figure 3.38<br />
3) You can hear the beep sound when the alarm has been detected.<br />
Select this option<br />
Figure 3.39<br />
4) The camera will record automatically for one minute after motion is detected. You<br />
can find the recording file in the folder which you set previously. (Figure 3.6)<br />
Shenzhen <strong>Foscam</strong> Intelligent Technology Co., Limited<br />
41<br />
Tel: 86 755 2674 5668 Fax: 86 755 2674 5168 41
www.foscam.com<br />
Select the checkbox<br />
Figure 3.40<br />
When you enable motion alarm, the camera will<br />
record automatically and store the recording<br />
file to the folder you configured. This icon is<br />
used to control whether the folder opens or not.<br />
Alarm Scheduler:<br />
Here are two ways to set the alarm.<br />
1) Alarm at any time when motion is detected.<br />
Don’t select Scheduler. Click Submit and the camera will alarm at any time when motion is<br />
detected.<br />
Figure 3.41<br />
Another Way: select Scheduler, and click “set All”, you will see all time boxes turn blue as in the<br />
following picture. Click Submit and the camera will alarm at any time when motion is detected.<br />
Shenzhen <strong>Foscam</strong> Intelligent Technology Co., Limited<br />
42<br />
Tel: 86 755 2674 5668 Fax: 86 755 2674 5168 42
www.foscam.com<br />
Figure 3.42<br />
2) Specify an alarm schedule.<br />
If you want the camera to alarm during set times select Scheduler and set time range.<br />
If you want to select one serial area, you can click any number between 00 and 23 on the first<br />
row, the corresponding column will be selected and it will turn blue. For example, click the<br />
number “06” on the first row, you can see the column turn blue. That means the camera will<br />
alarm when motion is detected between 6 and 7 o’clock every day. Click the number“06” on the<br />
second row, you can cancel the corresponding column you set. And it will turn grey.<br />
Shenzhen <strong>Foscam</strong> Intelligent Technology Co., Limited<br />
43<br />
Tel: 86 755 2674 5668 Fax: 86 755 2674 5168 43
www.foscam.com<br />
Figure 3.43<br />
If you want to select discrete area, you click the left button on the box of time range. It will turn<br />
blue. If you want to delete it, just click the left button and it will turn grey.<br />
Figure 3.44<br />
Shenzhen <strong>Foscam</strong> Intelligent Technology Co., Limited<br />
44<br />
Tel: 86 755 2674 5668 Fax: 86 755 2674 5168 44
www.foscam.com<br />
3.15 Upgrade Device Firmware<br />
When you upgrade the camera, please upgrade system firmware first and then upgrade the Web<br />
UI.<br />
Upgrade<br />
firmware<br />
system<br />
Upgrade Web UI<br />
Figure 3.45<br />
Click Browse, choose the correct bin file and then click Submit to upgrade.<br />
Don’t shut down the power during upgrade until the IP camera tool finds the camera again.<br />
Upgrade Firmware by IP Camera Tool<br />
Double click the IP Camera Tool shot icon<br />
, select the Camera IP that you want to<br />
upgrade the firmware. Then select Upgrade Firmware and enter the username and password,<br />
choose the firmware file, and upgrade.<br />
Shenzhen <strong>Foscam</strong> Intelligent Technology Co., Limited<br />
45<br />
Tel: 86 755 2674 5668 Fax: 86 755 2674 5168 45
www.foscam.com<br />
Figure 3.46<br />
Enter the User name and<br />
password<br />
Figure 3.47<br />
CAUTION: If your camera works well with the current firmware, we recommend not upgrading.<br />
Please don’t upgrade the firmware unnecessarily. Your camera may be damaged if<br />
misconfigured during an upgrade.<br />
NOTE:<br />
1) Please ensure you have download the correct firmware package for your camera before<br />
upgrading. Read the upgrade documentation (readme.txt file) in the upgrade package before you<br />
upgrade.<br />
2)Upon downloading the firmware check the sizes of the .bin files. They must match the size in<br />
the readme.txt file. If not, please download the firmware again until the sizes are the same. Your<br />
camera will not function correctly if a corrupt .bin file is used.<br />
3) Normally, only Device WEB UI need to be upgrade, please do not try to upgrade the Device<br />
Firmware.<br />
Shenzhen <strong>Foscam</strong> Intelligent Technology Co., Limited<br />
46<br />
Tel: 86 755 2674 5668 Fax: 86 755 2674 5168 46
www.foscam.com<br />
4) Never shut down the power of the camera during upgrade until the IP camera restart and get<br />
connected.<br />
3.16 Backup & Restore Settings<br />
Click Submit to save all the parameters you have set. These parameters will be stored in a bin<br />
file for future use. The bin file can be reloaded to restore the parameters that were set.<br />
Click Submit to store<br />
parameters<br />
Load the parameters bin<br />
file<br />
Figure 3.48<br />
3.17 Restore Factory Settings<br />
All parameters will return to factory settings if selected.<br />
Figure 3.49<br />
Shenzhen <strong>Foscam</strong> Intelligent Technology Co., Limited<br />
47<br />
Tel: 86 755 2674 5668 Fax: 86 755 2674 5168 47
www.foscam.com<br />
3.18 Reboot Device<br />
Click Reboot Device to reboot the camera. This is similar to unplugging the power to the<br />
camera.<br />
3.19 Log<br />
The log record shows who accessed the camera and when. (Figure 3.50).<br />
Figure 3.50<br />
3.20 Back<br />
This will take you back to the surveillance window.<br />
Shenzhen <strong>Foscam</strong> Intelligent Technology Co., Limited<br />
48<br />
Tel: 86 755 2674 5668 Fax: 86 755 2674 5168 48
www.foscam.com<br />
4 APPENDIX<br />
4.1 Frequently Asked Questions<br />
NOTE: Always verify network connections are working by checking the status of the indicators<br />
on the network server, hub, exchange and network card.<br />
4.1.1 I have forgotten the administrator username and/or password<br />
To reset the administrator username and password, press and hold down the RESET BUTTON<br />
for 10 seconds. Releasing the reset button, username and password will turn to the factory<br />
default administrator username and password. Please power on the camera before reset<br />
Default administrator username: admin<br />
Default administrator password: No password<br />
4.1.2 Subnet doesn’t match, dbclick to change<br />
If IP Camera Tool shows the error information “Subnet doesn’t match, dbclick to change!” select<br />
Obtain IP from DHCP server.<br />
If this error still exists after obtain IP from DHCP server, check your local area connection of your<br />
computer and verify the, subnet, gateway of the camera which should be the same subnet of<br />
your computer.<br />
4.1.3 No Pictures Problems<br />
The video streaming is transmitted by the ActiveX controller. If ActiveX controller isn’t installed<br />
correctly you will see no video image. There are two ways to resolve this problem:<br />
1) Re-install “IP Camera Tool” and activeX control(recommendable).<br />
Shenzhen <strong>Foscam</strong> Intelligent Technology Co., Limited<br />
49<br />
Tel: 86 755 2674 5668 Fax: 86 755 2674 5168 49
www.foscam.com<br />
2) <strong>Download</strong> ActiveX controller and set security setting of IE: IE browserToolInternet<br />
ProperSecurityCustom LevelActiveX control and Plug-ins. The first three options should<br />
be set to be “Enable”, The ActiveX programs read by the computer will be stored. As follows:<br />
Enable: <strong>Download</strong> unsigned ActiveX controls<br />
Enable: Initialize and script ActiveX controls not marked as safe<br />
Enable: Run ActiveX controls and plu-ins<br />
Figure 4.1<br />
If you allow the activeX to run, but still can not see living video, only a red cross in the center of<br />
the video.. Please change another port number to try. Don’t use port 80, use port 85, 8005.etc.<br />
Figure 4.2<br />
Shenzhen <strong>Foscam</strong> Intelligent Technology Co., Limited<br />
50<br />
Tel: 86 755 2674 5668 Fax: 86 755 2674 5168 50
www.foscam.com<br />
NOTE: Make sure that your firewall or anti-virus software does not block the camera or ActiveX.<br />
If you can not see live video, try shutting down the firewall or anti-virus software and try again.<br />
4.1.4 Can’t access IP camera on internet<br />
Possible reasons why camera is not accessible on the internet:<br />
1 ActiveX controller is not installed correctly<br />
2 The port which the camera uses is blocked by a Firewall or Anti-virus software, try changing to<br />
another port number. (Figure 4.2)<br />
3 Port forwarding is not successful (Figure 3.26)<br />
Double check these settings and make sure they are correct.<br />
4.1.5 IP Camera Tool could not find camera’s IP<br />
Verify that the network cable securely fastened to the camera.<br />
Make sure DHCP is enabled on your router, don’t enable MAC address filter.<br />
Make sure that the firewall or anti-virus software does not block the camera. You can add the<br />
camera as a trusted site on your firewall or anti-virus software.<br />
4.1.6 UPnP always failed<br />
UPnP only contains port forwarding in our recent software. Sometimes, it may fail to port<br />
forwarding automatically because of the firewall or anti-virus software. It may also be due to the<br />
router’s security settings. We recommend manually configuring port forwarding. You can view<br />
your camera on internet successfully after you do port forwarding manually in your router.<br />
4.1.7 Couldn’t find the shortcut on the desktop after install IP camera tool<br />
If you use Windows7 or Vista and the shortcut is missing after installing the IP camera tool,<br />
check the path of the IP Camera program.<br />
For example, as it was pointing to C:\Windows\System32\IPCamera.exe.<br />
Please fix this by pointing the shortcut to the correct path<br />
C:\Windows\SysWOW64\IPCamera.exe. After this you could use the shortcut without any<br />
problems.<br />
4.1.8 I can’t change the record path<br />
When you use Windows7 or Vista, you may be not able to change the record path for the<br />
security settings of computer. Please add the camera as a trusted site to resolve this issue. The<br />
step are<br />
IE browserToolInternet ProperSecurityTrusted sitesSitesAdd<br />
Shenzhen <strong>Foscam</strong> Intelligent Technology Co., Limited<br />
51<br />
Tel: 86 755 2674 5668 Fax: 86 755 2674 5168 51
www.foscam.com<br />
4.1.9 I can’t find multi-device settings and record icon<br />
Record and multi-device function are controlled by ActiveX controller.<br />
These functions are not available in Firefox, Google Chrome and Safari.<br />
4.1.10 I can’t see other cameras which in multi-device when remote access<br />
If you want to view all the cameras on the WAN, please verify that each camera added in the<br />
multi-device settings can be accessed by using the DDNS name and port number.Use the DDNS<br />
domain name to fill in the host checkbox, not camera’s LAN IP. (for more details: How to add<br />
cameras in WAN)<br />
4.1.11 Only see black screen or undefined characters when using remote<br />
login<br />
If you could access the login page remotely, this indicates that your DDNS settings are correct. If<br />
you are unable to see live video but only some undefined characters, this may be due to internet<br />
speed issues.<br />
4.2 Default Parameters<br />
Default network Parameters<br />
IP address: obtain dynamically<br />
Subnet mask: 255.255.255.0<br />
Gateway: obtain dynamically<br />
DHCP: Disabled<br />
DDNS: Embedded FOSCAM domain name<br />
Username and password<br />
Default administrator username: admin<br />
Default administrator password: No password<br />
Shenzhen <strong>Foscam</strong> Intelligent Technology Co., Limited<br />
52<br />
Tel: 86 755 2674 5668 Fax: 86 755 2674 5168 52
www.foscam.com<br />
4.3 Specifications<br />
ITEMS<br />
FI8905E<br />
Image Sensor Image Sensor High Definition Color CMOS Sensor<br />
Display Resolution 640 x 480 Pixels(300k Pixels)<br />
Lens<br />
f:4mm<br />
Mini. Illumination 0.5Lux<br />
Lens Lens Type Glass Lens<br />
IR_CUT<br />
Filter can switch automatically<br />
Video Image Compression MJPEG<br />
Image Frame Rate 15fps(VGA),30fps(QVGA)<br />
Resolution<br />
640 x 480(VGA), 320 x 240(QVGA)<br />
Flip Mirror Images Vertical / Horizontal<br />
Light Frequency 50Hz, 60Hz or Outdoor<br />
Video Parameters Brightness, Contrast<br />
Communication Ethernet One 10/100Mbps RJ-45<br />
Supported Protocol HTTP,FTP,TCP/IP,UDP,SMTP,DHCP,PPPoE,DDNS,UPnP,GPRS<br />
Infrared Light<br />
60 IR LEDs, Night visibility up to 30 meters<br />
Dimension<br />
245(L)X196(W)X112(H)mm.<br />
Gross Weight<br />
1150 g(carton box package)<br />
Net Weight<br />
900g (accessories included)<br />
Power Power Supply DC 5V/2.0A (EU,US,AU adapter or other types optional)<br />
Power Consumption 5.5 Watts (Max.)<br />
POE Standard<br />
IEEE 802.3af<br />
POE<br />
Input Voltage<br />
DC 36V~DC 57V<br />
Output Voltage DC 5V<br />
Output Power<br />
15.4W (Max.)<br />
Wiring standards 100M BASE-T<br />
Environment Operate Temper. 0°~ 55°C (32°F ~ 131°F)<br />
Operating Humidity 20% ~ 85% non-condensing<br />
Storage Temper. -10°C ~ 60°(14°F ~ 140°F)<br />
Storage Humidity 0% ~ 90% non-condensing<br />
PC Requirements CPU 2.0GHZ or above<br />
Memory Size<br />
256MB or above<br />
Display Card<br />
64M or above<br />
Supported OS<br />
Microsoft Windows 2000/XP/Vista/Windows7-32bit/ Windows7-64<br />
bit/ MAC<br />
Browser<br />
IE6.0, IE7.0, IE8.0, IE9.0, Firefox1.0, Firefox2.0, Google Chrome,<br />
Safari or other standard browsers<br />
Certification CE,FCC<br />
Shenzhen <strong>Foscam</strong> Intelligent Technology Co., Limited<br />
53<br />
Tel: 86 755 2674 5668 Fax: 86 755 2674 5168 53
www.foscam.com<br />
5 OBTAINING TECHNICAL SUPPORT<br />
While we hope your experience with the IPCAM network camera is enjoyable and easy to use,<br />
you may experience some issues or have questions that this User’s Guide has not answered.<br />
If you have problem with FOSCAM IP camera, please first contact FOSCAM reseller for solving<br />
the problems. If our reseller cannot provide service, pls contact our service department:<br />
tech@foscam.com .<br />
Shenzhen <strong>Foscam</strong> Intelligent Technology Co., Limited<br />
54<br />
Tel: 86 755 2674 5668 Fax: 86 755 2674 5168 54