London Olympic Games Activity Booklet - Zart Art
London Olympic Games Activity Booklet - Zart Art
London Olympic Games Activity Booklet - Zart Art

Create successful ePaper yourself
Turn your PDF publications into a flip-book with our unique Google optimized e-Paper software.
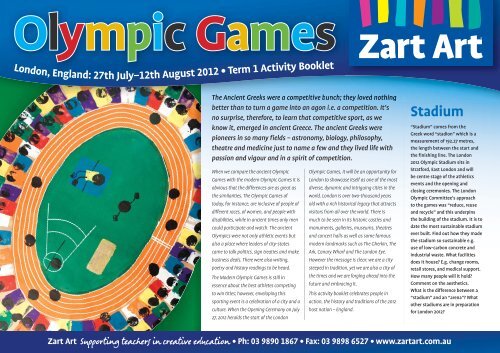
<strong>Olympic</strong> <strong>Games</strong><br />
<strong>London</strong>, England: 27th July–12th August 2012 • Term 1 <strong>Activity</strong> <strong>Booklet</strong><br />
The Ancient Greeks were a competitive bunch; they loved nothing<br />
better than to turn a game into an agon i.e. a competition. It’s<br />
no surprise, therefore, to learn that competitive sport, as we<br />
know it, emerged in ancient Greece. The ancient Greeks were<br />
pioneers in so many fields – astronomy, biology, philosophy,<br />
theatre and medicine just to name a few and they lived life with<br />
passion and vigour and in a spirit of competition.<br />
When we compare the ancient <strong>Olympic</strong><br />
<strong>Games</strong> with the modern <strong>Olympic</strong> <strong>Games</strong> it is<br />
obvious that the differences are as great as<br />
the similarities. The <strong>Olympic</strong> <strong>Games</strong> of<br />
today, for instance, are inclusive of people of<br />
different races, of women, and people with<br />
disabilities, while in ancient times only men<br />
could participate and watch. The ancient<br />
<strong>Olympic</strong>s were not only athletic events but<br />
also a place where leaders of city-states<br />
came to talk politics, sign treaties and make<br />
business deals. There were also writing,<br />
poetry and history readings to be heard.<br />
The Modern <strong>Olympic</strong> <strong>Games</strong> is still in<br />
essence about the best athletes competing<br />
to win titles; however, enveloping this<br />
sporting event is a celebration of a city and a<br />
culture. When the Opening Ceremony on July<br />
27, 2012 heralds the start of the <strong>London</strong><br />
<strong>Olympic</strong> <strong>Games</strong>, it will be an opportunity for<br />
<strong>London</strong> to showcase itself as one of the most<br />
diverse, dynamic and intriguing cities in the<br />
world. <strong>London</strong> is over two-thousand years<br />
old with a rich historical legacy that attracts<br />
visitors from all over the world. There is<br />
much to be seen in its historic castles and<br />
monuments, galleries, museums, theatres<br />
and concert halls as well as some famous<br />
modern landmarks such as The Gherkin, The<br />
Ark, Canary Wharf and The <strong>London</strong> Eye.<br />
However the message is clear: we are a city<br />
steeped in tradition, yet we are also a city of<br />
the times and we are forging ahead into the<br />
future and embracing it.<br />
This activity booklet celebrates people in<br />
action, the history and traditions of the 2012<br />
host nation – England.<br />
Stadium<br />
“Stadium” comes from the<br />
Greek word “stadion” which is a<br />
measurement of 192.27 metres,<br />
the length between the start and<br />
the finishing line. The <strong>London</strong><br />
2012 <strong>Olympic</strong> Stadium sits in<br />
Stratford, East <strong>London</strong> and will<br />
be centre stage of the athletics<br />
events and the opening and<br />
closing ceremonies. The <strong>London</strong><br />
<strong>Olympic</strong> Committee’s approach<br />
to the games was “reduce, reuse<br />
and recycle” and this underpins<br />
the building of the stadium. It is to<br />
date the most sustainable stadium<br />
ever built. Find out how they made<br />
the stadium so sustainable e.g.<br />
use of low-carbon concrete and<br />
industrial waste. What facilities<br />
does it house? E.g. change rooms,<br />
retail stores, and medical support.<br />
How many people will it hold?<br />
Comment on the aesthetics.<br />
What is the difference between a<br />
“stadium” and an “arena”? What<br />
other stadiums are in preparation<br />
for <strong>London</strong> 2012?<br />
<strong>Zart</strong> <strong>Art</strong> Supporting teachers in creative education • Ph: 03 9890 1867 • Fax: 03 9898 6527 • www.zartart.com.au
<strong>London</strong><br />
Eye<br />
Metallic<br />
Patty Pan Eye<br />
Collage<br />
The <strong>London</strong> Eye is one of<br />
the most popular tourist<br />
destinations in <strong>London</strong>. It is<br />
a giant observation wheel<br />
and looks like a gigantic bike<br />
wheel with 32 egg-shaped<br />
glass capsules sitting at<br />
intervals around it. However,<br />
photos fail to provide an<br />
appreciation of its size. Each<br />
capsule can accommodate<br />
25 passengers, totalling<br />
800 passengers per ride. In<br />
the capsule you have 360°<br />
panoramic views of <strong>London</strong><br />
– you can see landmarks<br />
such as Buckingham Palace,<br />
St Paul’s Cathedral and the<br />
Houses of Parliament, and<br />
on a clear day you can see 40<br />
km into the distance. One<br />
rotation takes 30 minutes<br />
and it is slow enough to<br />
pick up passengers without<br />
stopping. The beauty is not<br />
so much in the structure but<br />
in the panoramic views the<br />
structure offers. Find out<br />
more facts about The Eye.<br />
Blown Food<br />
Dye ‘Eye’<br />
Materials<br />
Cartridge Paper A2, Form Cuts/<br />
Mountboard Tags, Food Dye, Liquicryl<br />
Fluorescent Paint, <strong>Zart</strong> School Colours,<br />
Paper Plate 23cm, Cotton Filters, Straws<br />
1. Trace around a Paper Plate onto a<br />
sheet of Cartridge Paper to create the<br />
shape of the eye.<br />
2. Draw the lines of perspective to<br />
shape the tree lined pathway that<br />
leads to the Eye.<br />
3. Use Form Cuts to stamp print<br />
around the circle of the Eye. Stamp<br />
the Eye’s supports inside, and the<br />
carriages around the outside of the<br />
circle. Use Cotton Filters to stamp<br />
inside the circle.<br />
4. Print the brick pathway that leads<br />
to the Eye.<br />
5. Trail Food Dye lines within the two<br />
triangles that have been created on<br />
each side of the Eye by the lines of<br />
perspective. Blow into these lines<br />
using a Straw to create a canopy of<br />
trees.<br />
Printed Collage<br />
Materials<br />
Cover Paper 38 x 51cm, Form Cuts/Mountboard Tags, Liquicryl<br />
Fluorescent Paint, Straws, Tissue Paper<br />
1. Create The Eye as above.<br />
2. Glue down straws to represent trees lining the sides of the<br />
pathway.<br />
3. Stamp print the canopy of trees.<br />
4. Cut tissue leaves and glue them to the branches of the trees.<br />
Materials<br />
Cover Paper 38 x51cm, <strong>Zart</strong> School<br />
Colours, Liquicryl Fluorescent Paint,<br />
Metallic Patty Pans, Paper Plate<br />
23cm, Tissue Paper Assorted, Tissue<br />
Circles, Form Cuts/Mountboard Tags,<br />
Cotton Filters<br />
1. Trace around a Paper Plate to<br />
create the circle of the Eye.<br />
2. Use <strong>Zart</strong> School Colours and<br />
Form Cuts to stamp the circle and<br />
inside supports of the Eye. Then<br />
print trees around the Eye.<br />
3. Stamp print the coloured<br />
lights of the Eye using Liquicryl<br />
Fluorescent and Cotton Filters.<br />
4. Glue Metallic Patty Pans for<br />
carriages around the outside of<br />
the Eye.<br />
5. Tear and glue green Cover Paper<br />
for the base of the Eye.<br />
6. Collage the foliage of trees with<br />
torn tissue shapes.<br />
7. Add a Tissue Circle to the skyline<br />
for a sun and tear tissue shapes to<br />
extend from it.<br />
2<br />
www.zartart.com.au
Big Ben<br />
Dry Pastel<br />
Big Ben<br />
Big Ben<br />
Money Box<br />
Big Ben’s clock tower,<br />
designed by Charles Barry, is<br />
one of the most recognizable<br />
landmarks of <strong>London</strong>. It<br />
stands 96.3 metres at the<br />
north end of the Gothic<br />
looking Westminster Palace<br />
which is also the Houses of<br />
Parliament. On New Year’s<br />
Eve in <strong>London</strong> huge crowds<br />
traditionally gather around<br />
the clock and wait to herald<br />
in the New Year. It is the<br />
biggest four-face chime<br />
clock in the world, with the<br />
dials measuring 23 feet in<br />
diameter. Big Ben chimed for<br />
the first time in 1859 and is<br />
believed to have been named<br />
after Benjamin Hall who was<br />
in charge of its installation.<br />
The name refers to the<br />
biggest bell (there are also<br />
four smaller bells) and not<br />
to the tower. It has broken<br />
down several times, once<br />
when the snow affected its<br />
mechanism. Find out more<br />
about Big Ben.<br />
Character<br />
Clocks<br />
Materials<br />
Cardboard Squares - Coloured, Paper<br />
Circles 180mm, Paper Circles 120mm,<br />
Magiclay, <strong>Zart</strong> Poster Colours,<br />
Wooden Spills<br />
1. Glue a Small Paper Circle onto a<br />
large Paper Circle.<br />
2. Write the numerals of the clock<br />
face on to the large Paper Circle.<br />
3. Glue the circles on to a<br />
Cardboard Square.<br />
4. Roll and shape Magiclay to<br />
create facial features and add<br />
these to the small Paper Circle.<br />
5. Paint the eyes with <strong>Zart</strong> Poster<br />
Colours.<br />
6. Add hands to the clock face and<br />
Wooden Spills for decoration.<br />
Big Ben<br />
Collaged<br />
Rubbings<br />
Materials<br />
Cover Paper 38 x 51cm, Cartridge<br />
Paper A4, Kinder Squares Glossy,<br />
Rubbing Plates, Oil Pastels, Paper<br />
Circles 180mm, Paper Circles 120mm,<br />
Yoken Permanent Markers, Wooden<br />
Spills<br />
1. Use Oil Pastels with Rubbing<br />
Plates to cover a sheet of Cartridge<br />
Paper.<br />
2. Glue a small Paper Circle to a<br />
large Paper Circle and glue these<br />
on to a Kinder Square.<br />
3. Write the numerals of the clock<br />
face on to the large Paper Circle.<br />
4. Cut the patterned papers created<br />
from your rubbings into various<br />
shapes for the top of the clock.<br />
5. Glue all pieces to a sheet of<br />
Cover Paper.<br />
6. Add hands to the clock and<br />
Wooden Spills to decorate.<br />
Materials<br />
Cover Paper 51 x 76cm, Cover Paper<br />
A4, Mungyo Dry Pastels, Rubbing<br />
Plates, Oil Pastels, Magiclay,<br />
Cardboard Ring /Circle template,<br />
Metallic Kinder Squares, Yoken<br />
Metallic Marker, <strong>Zart</strong> Poster Colours,<br />
Yoken Permanent Marker<br />
1. Fold a sheet of Cover Paper in<br />
half lengthways. Cut along the<br />
fold.<br />
2. Use Mungyo Pastels to create a<br />
coloured skyline on the half sheet<br />
of Cover Paper.<br />
3. Press out the pieces from the<br />
Cardboard Ring /Circle template.<br />
4. Cover the circle with Magiclay<br />
and press into a Rubbing Plate.<br />
5. Paint the textured Magiclay<br />
circle and the surrounding square<br />
stencil with <strong>Zart</strong> Poster Colours.<br />
6. Glue the square stencil to a<br />
Metallic Kinder Square and cut off<br />
the excess paper.<br />
7. Glue the textured and painted<br />
circle to the metallic square.<br />
8. Use a Permanent Marker to write<br />
in the numerals of the clock face<br />
on to the metallic square.<br />
9. Use Rubbing Plates and Oil<br />
Pastels to create various textured<br />
patterns onto a sheet of A4 Cover<br />
Paper.<br />
10. Use the textured papers to cut<br />
various shapes to form Big Ben’s<br />
tower.<br />
11. Glue all shapes and the clock<br />
face to the coloured skyline.<br />
12. Glue hands to the clock face.<br />
Materials<br />
Cardboard Money Box, Shimmer<br />
Paint, Cardboard Squares Coloured,<br />
Corrugated Wave Card<br />
1. Fold, shape and glue the<br />
Cardboard Money Box.<br />
2. Paint the Cardboard Money Box<br />
with Shimmer Paint.<br />
3. Use Cardboard Squares<br />
Coloured and Corrugated Wave<br />
Card to decorate Big Ben.<br />
Ph: 03 9890 1867 • Fax: 03 9898 6527<br />
3
The Mascots<br />
Felt Figure Mascot<br />
Poly People Mascot<br />
The mascots, Wenlock and Mandeville, are<br />
two shiny, futuristic, genderless, mouthless,<br />
alien-like creatures created for the digital it age.<br />
Their Cyclops eye acknowledges the<br />
iPhone,<br />
digital and webcam generation and the<br />
orange light on their forehead is a nod to the<br />
<strong>London</strong> black cab and gives them a <strong>London</strong><br />
identity.<br />
Their design is a deliberately bold<br />
and innovative move away from the<br />
cute and fluffy mascots of previous<br />
<strong>Olympic</strong> <strong>Games</strong>, after forty focus<br />
groups made up of children<br />
expressed little interest in human and animal<br />
mascots.<br />
The names of the mascots are taken from<br />
Britain’s historic links to the <strong>Olympic</strong>s.<br />
The seeds for creating the Modern <strong>Olympic</strong><br />
<strong>Games</strong> were planted when Baron Pierre de<br />
Coubertin watched the Wenlock <strong>Games</strong> in<br />
the village of Much Wenlock in Shropshire<br />
in 1890. Mandeville has been named after a<br />
hospital in Buckinghamshire. It was there in<br />
the 1940’s that a Dr Ludwig Guttmann tmann<br />
set up a spinal unit for ex-soldiers<br />
and encouraged those under<br />
his care to take up sport. The<br />
event was a precursor for the<br />
Paralympics.<br />
•Find out more about these two mascots by<br />
visiting the official <strong>London</strong> <strong>Olympic</strong> website.<br />
http://www.mylondon2012.com/<br />
Materials<br />
Felt – Grey, Yellow, Poly Ball 40mm,<br />
Thick Perle #5 Cotton, Polyester<br />
Filling, Chenille Stem, Fabric Netting,<br />
Magiclay<br />
1. Cut from 2 pieces of grey felt,<br />
a<br />
shape to represent a droplet of<br />
steel.<br />
2. Stitch the Felt pieces together<br />
using a running stitch with Cotton<br />
thread.<br />
3. Leave an opening to insert<br />
Polyester Filling. Stitch this<br />
opening closed when the shape<br />
is<br />
filled.<br />
4. Cut a Poly Ball in half. Glue half<br />
the Poly Ball onto the stitched<br />
figure to represent a Camera eye.<br />
5. Glue yellow felt pieces onto the<br />
shape for the taxi light, arms and<br />
feet.<br />
6. Make accessories for an <strong>Olympic</strong><br />
Sport of your choice with Chenille<br />
Stems and Magiclay.<br />
Materials<br />
Poly People, Magiclay Coloured,<br />
Shimmer Paint, Yoken Permanent<br />
Marker<br />
1. Use small pieces of Magiclay<br />
to extend shapes from the head<br />
of a Poly People form.<br />
2. Paint the Poly Cone with<br />
Shimmer Paint.<br />
3. Add decorative features to the<br />
Mascot with Magiclay.<br />
4. Draw an eyeball on to the<br />
head with a Permanent Marker.<br />
Collage Mascot<br />
Materials<br />
Adhesive Foil Industrial Look, Metallic<br />
Pearl Foil, Poly Ball 40mm, Yoken<br />
Permanent Marker, Supertac by <strong>Zart</strong><br />
1. Fold a sheet of Adhesive Foil<br />
Industrial Look in half.<br />
2. Cut a symmetrical shape from<br />
the folded sheet for the body of<br />
your mascot.<br />
3. Add cut out shapes to the body<br />
from the Industrial Foil and the<br />
Metallic Pearl Foil.<br />
4. Create a camera eye for the<br />
mascot with half a Poly Ball. Draw<br />
the pupil onto the Poly Ball with a<br />
Permanent Marker<br />
4<br />
www.zartart.com.au
People in Action<br />
…and in First Place!!<br />
Central to the <strong>Olympic</strong> <strong>Games</strong> are<br />
the athletes i.e. people in action. The<br />
ancient Greeks saw beauty in the<br />
graceful movements and muscular<br />
bodies of their athletes and enjoyed<br />
watching them perform naked with<br />
only olive oil rubbed onto their<br />
skin. Choose a sport and look at<br />
images of the different body<br />
positions that are required for a<br />
particular event. Talk about the<br />
precision of movements, the<br />
stretching of muscles and the<br />
strength and stamina required. Find<br />
out about the diet and regime of<br />
these athletes. See if you can get a<br />
class member to “freeze” into some<br />
of these positions for a series of<br />
quick sketches.<br />
Focus: Positive and negative shapes<br />
Two of the elements of art are Space<br />
and Shape, they work together to<br />
form a work of art. There are many<br />
shapes but only two kinds of space:<br />
positive and negative. Positive spaces<br />
are those occupied by the main<br />
subjects of the work. The Negative<br />
spaces are the areas around and<br />
behind the positive spaces. Stencil<br />
work is an excellent way to explore<br />
positive and negative space.<br />
Show examples of positive and<br />
negative spaces in artworks. Look at<br />
Rubin’s vase in which the negative<br />
space around the vase forms the<br />
silhouette of two faces looking at<br />
each other.<br />
Ready, Set, Go – Running<br />
Materials<br />
Cover Paper A3 , Cartridge Paper<br />
A3, Oil Pastels, People in Action<br />
Rubbing Plates, Glossy Kinder<br />
Squares<br />
1. On a sheet of Cartridge<br />
Paper, take multiple rubbings<br />
of the runner from the People<br />
People in Action<br />
1. Select a Cardboard People<br />
in Action figure to use in your<br />
collage.<br />
2. Create a positive and<br />
negative image by using<br />
the selected figure and the<br />
sheet it was pressed from and<br />
smudge dry pastels into and<br />
around each of the stencils.<br />
Use a finger to smudge the<br />
dry pastel around the positive<br />
shape and then inside the<br />
negative stencil.<br />
3. The negative stencil will<br />
create a positive shape of<br />
colour and the positive stencil<br />
in Action Rubbing Plate.<br />
2. Cut out rubbings and<br />
arrange them on a sheet of<br />
Cover Paper.<br />
3. Collage background<br />
scenery and flags using Kinder<br />
Squares.<br />
will create a negative shape<br />
of colour.<br />
4. Use the negative stencil to<br />
colour additional figures on<br />
to a sheet of Cartridge Paper<br />
to be cut out and used for the<br />
collage.<br />
5. Arrange all figures on to<br />
the background using off<br />
cuts of Polystyrene to lift the<br />
foreground figures away from<br />
the background.<br />
6. Use assorted colours in<br />
Cover Paper to display the<br />
work.<br />
<strong>Olympic</strong> Sport<br />
Materials<br />
Cover Paper, <strong>Zart</strong> School Colours,<br />
Permanent markers, Pastels,<br />
Rubbing Plates, Acetate Sheets,<br />
Rollers<br />
1. Observe and discuss the<br />
work of Frank Stella – Jarama 11<br />
2. Prepare a set of papers to<br />
represent objects, sounds,<br />
movements or feelings of an<br />
<strong>Olympic</strong> Sport.<br />
3. Papers may be painted,<br />
collaged or printed and explore<br />
the elements of line, colour,<br />
pattern or shape.<br />
4. Use these papers to<br />
represent an <strong>Olympic</strong> sport in<br />
a 3D way.<br />
Ph: 03 9890 1867 • Fax: 03 9898 6527<br />
5
Castles<br />
Castles dominate the European<br />
landscape and stand tall in the<br />
heart of <strong>London</strong>. They were built<br />
to protect people during the<br />
latter part of a period in history<br />
called the Dark Ages when the<br />
Vikings pillaged Europe. Castles<br />
were also the status symbol of<br />
the privileged class i.e. the king<br />
and his nobles; their looming<br />
presence over the farming<br />
landscape emphasized power<br />
and authority. A castle was the<br />
residence of the lord and his<br />
family and during times of war<br />
it was also a fortress for the<br />
neighbouring villagers.<br />
Castles have special features that<br />
were devised to protect their<br />
inhabitants. Can you name these<br />
features? (E.g. the portcullis,<br />
drawbridge, moat, battlements<br />
and keep). Find out what castles<br />
there are in <strong>London</strong>. Which ones<br />
do the royal family reside in?<br />
(Look at e.g. Buckingham Palace,<br />
Kensington Palace and The Tower<br />
of <strong>London</strong>).<br />
Who is in<br />
the Castle<br />
(Rapunzel?)<br />
Materials<br />
Cover Paper, Corrugated Card, Mosaic<br />
Squares Giant, Poly Ball 40mm, Yoken<br />
Permanent Markers, Wool Tops, Corrugated<br />
Construction Strips<br />
1. Roll a cylinder of Corrugated Card.<br />
Staple it together. Cut out windows by<br />
cutting small rectangles from around the<br />
cylinder.<br />
2. Fringe the base of the cylinder and glue<br />
it to a sheet of Cover Paper. Decorate the<br />
tower with Mosaic Squares and Corrugated<br />
Construction Strips<br />
3. Create a head appearing from a window.<br />
Use half a Poly Ball. Draw eyes on with a<br />
Permanent Marker.<br />
4. Glue on Wool Tops to create hair.<br />
Concertina<br />
Castles<br />
Materials<br />
A4 Cartridge Paper, A4 Cover Paper, Rubbing<br />
Blocks, Rubbing Plates, Mungyo Dry Pastels,<br />
Prockey Markers<br />
1. Cover a sheet of A4 Cartridge Paper with<br />
rubbings taken from Rubbing Plates using<br />
Rubbing Blocks.<br />
2. Use Prockey Markers to draw towers,<br />
drawbridges, battlements and gatehouses<br />
on to the printed paper.<br />
3. Cut around the drawn castles.<br />
4. Smudge Mungyo Pastels over a sheet of<br />
A4 Cover Paper to create an atmospheric<br />
sky.<br />
5. Glue the castle to the background sky<br />
and fold in half.<br />
Castle<br />
Reflections<br />
Materials<br />
Cover Paper 38 x 51cm, Cover Paper A4 Black,<br />
Rubbing plates, <strong>Zart</strong> School Colours, <strong>Zart</strong><br />
Rubbing Blocks, Corrugated Card<br />
1. Observe the work of William Turner –<br />
Northam Castle on the River Tweed. Discuss<br />
the symmetrical nature of the work<br />
created by reflections.<br />
2. Fold a sheet of Cover Paper in half<br />
lengthwise. Open and sponge on <strong>Zart</strong><br />
School Colours.<br />
3. Refold the paper and smooth the fold<br />
over with the side of your hand. Open to<br />
reveal the symmetrical print. Cut along the<br />
fold when dry.<br />
4. Cut along the smudged edge/outline of<br />
the print to create the rolling hills.<br />
5. Cover a sheet of Black Cover Paper with<br />
rubbings using <strong>Zart</strong> Rubbing Blocks.<br />
6. Cutting two identical images from the<br />
Black Cover Paper make a collection of<br />
castle parts. Some ideas to include may<br />
be towers, gatehouses, battlements and<br />
drawbridges.<br />
7. Arrange the castle parts onto the<br />
printed background to create two identical<br />
images, one being the reflection of the<br />
other. Glue in place.<br />
8. Draw in arrow slits with a black pastel.<br />
9. Prop up some towers with cardboard<br />
underneath.<br />
10. Glue castles opposite one another<br />
divided by a river when placed on blue<br />
Cover Paper.<br />
6<br />
www.zartart.com.au
Pearly Kings<br />
and Queens<br />
of <strong>London</strong><br />
Elizabeth II is not the only one who<br />
holds the title of queen in <strong>London</strong>. Each<br />
borough of <strong>London</strong>, as well as the city of<br />
<strong>London</strong> and the city of Westminster, have<br />
a pearly king and queen. They belong<br />
to families of the working class who are<br />
committed to raise money for charities.<br />
They are easily recognizable from their<br />
outfit - a black suit on which tens of<br />
thousands of pearl buttons have been<br />
sewn. The buttons are sewn in using<br />
certain motifs; the horseshoe symbolises<br />
luck; the dove peace, the heart charity<br />
and the cross faith. This tradition was<br />
started by an orphan, Henry Croft, who<br />
wanted to help others. While he was<br />
sweeping the marketplace of <strong>London</strong> he<br />
would pick up the pearl buttons from the<br />
ground and then he sewed them on to his<br />
hat. This made him easily recognizable<br />
and helped promote his charity work so<br />
he was spurred on to continue sewing<br />
more buttons on his clothes. Today the<br />
“Pearlies” still do a lot of charity work in<br />
<strong>London</strong> to help working class <strong>London</strong>ers.<br />
What could we pick up from the ground<br />
to sew on to clothes? A can ring? Coins?<br />
What motifs would you have on your<br />
pearly suit?<br />
Pearly King<br />
Materials<br />
Paper Doll Shapes, Felt, Kindy Glitz, Joggle Eyes<br />
10mm, Budget Fineliner, Pearl Sequins in a Jar<br />
1. Create a costume for the Pearly King to wear<br />
using Felt and Pearl Sequins.<br />
2. Use the Kindy Glitz to embellish a design of<br />
pearl decorations to cover the suit.<br />
3. Add Joggle Eyes to the head and draw on a<br />
nose and mouth with a Budget Fineliner.<br />
The<br />
Queen<br />
Queen Elizabeth II is one<br />
of the most recognizable<br />
faces on this planet. She<br />
has reigned over Great<br />
Britain for almost 60 years,<br />
making her the second<br />
longest reigning monarch<br />
in British history (Queen<br />
Victoria ruled for 63 years).<br />
She is queen of many<br />
other countries as well.<br />
Find out which countries<br />
she is queen of. What are<br />
her duties? How did she<br />
become queen? Did she<br />
ever come to Australia?<br />
Does she get paid? Who<br />
is her representative in<br />
Australia? Who will inherit<br />
her title?<br />
Queen for a<br />
Day<br />
Materials<br />
Cover Paper A4, Doyleys, Doyleys<br />
Metallic, Patterned Metallic Paper,<br />
Jewels, Pre-cut Mount A5, Liquitemp<br />
Metallic Paint, Low Melt Glue Gun<br />
1. Use a photograph or a digital<br />
image of a head as a starting point<br />
for your design.<br />
2. Collage Doyleys and Patterned<br />
Metallic Papers around the head to<br />
create a royal costume. Glue this<br />
collage onto a sheet of Cover Paper.<br />
3. Use a glue gun to trail glue<br />
around a Pre-cut Mount. Allow to<br />
dry. Paint the Pre-cut Mount with<br />
Metallic Liquitemp Paint and a dry<br />
brush.<br />
4. Glue the Queen into the<br />
decorated Pre-cut Mount.<br />
5. Add jewels to decorate.<br />
Ph: 03 9890 1867 • Fax: 03 9898 6527<br />
7
Knights<br />
Knights had an elevated position in<br />
English society and still do. The concept<br />
of knighthood came into being during the<br />
Middle Ages. A knight was a man usually<br />
of noble birth who after an apprenticeship<br />
as a page and a squire was placed in a high<br />
military rank and bound to chivalrous<br />
conduct. He was a mounted soldier who<br />
served the king. However, not all men<br />
who were knights were born into the title;<br />
sometimes if a man had shown great<br />
courage and skill in defending his country,<br />
the king would “knight” him i.e. give him<br />
a title, a parcel of land and maybe even a<br />
castle. Today a knight is not obligated to<br />
defend his country; he inherits the title<br />
and estate simply because of birth order<br />
i.e. being the first born male of the family.<br />
Discuss how the female siblings might feel<br />
about this in today’s world. How would you<br />
feel if your parents left almost everything<br />
to the eldest child?<br />
History is a sequence of change and<br />
continuity and it shows us that there is<br />
a reason for everything. The knights of<br />
medieval England wore heavy armour to<br />
protect themselves in battle. Over time<br />
armour changed from “chain mail” (which<br />
was a mesh of tiny interlocking rings) to<br />
plate armour. Plate armour was sword<br />
proof but became obsolete when there<br />
were changes in weaponry, specifically the<br />
invention of guns. Look at the different<br />
armour worn by the knights over time.<br />
What do British military men wear today?<br />
Embossed<br />
Knight<br />
Materials<br />
Embossing Foil, Cover Paper,<br />
Flex-It Mesh<br />
1. Use Embossing Foil to cut<br />
out various shapes to collage<br />
a knight.<br />
2. Pattern shapes with lines to<br />
emboss in patterns.<br />
3. Crimp some pieces of<br />
Embossing Foil to use in the<br />
collage.<br />
4. Arrange all pieces on to a<br />
sheet of Cover Paper and glue<br />
in place.<br />
Paper Knight<br />
Materials<br />
Cover Paper, Metallic Pattern<br />
Paper Silver, Silver Kinder Squares,<br />
Doyleys Silver, Metallic Corrugated<br />
Card Roll Silver, Hologram Round<br />
Sequins in a Jar, Embossing Foil<br />
1. Use assorted papers to cut<br />
and collage a knight.<br />
2. Use Embossing Foil to create<br />
a shield, patterning with line.<br />
Beefeater<br />
Collage<br />
Materials<br />
Cover Paper A4, Kinder Squares Glossy,<br />
Yoken Metallic Markers, Yoken Permanent<br />
Marker, Kindy Glitz, Paper Face Shape,<br />
Joggle Eyes 20mm, Guinea Fowl Feathers,<br />
Doyleys<br />
1. Explore various uniforms that are<br />
worn by the Beefeaters. Design a new<br />
uniform for a Beefeater<br />
2. Add lines and patterns to Cover<br />
Paper with Metallic Markers and black<br />
Permanent markers.<br />
3. Cut Kinder Squares to add to the<br />
design. Add a decorative collar using<br />
Doyleys.<br />
4. Glue Joggle Eyes on to the Paper<br />
Face and draw on the nose and mouth<br />
with a Permanent Marker.<br />
5. Create a hat from Cover Paper and<br />
decorate with feathers.<br />
6. Use Kindy Glitz to add patterns to<br />
the uniform and allow to dry.<br />
<strong>Zart</strong> Little People Beefeater<br />
Materials<br />
<strong>Zart</strong> Little People, Acrylic<br />
Wool, Doyleys, Felt, Wool<br />
Tops, Joggle Eyes, Yoken<br />
Permanent Marker, Kindy<br />
Glitz, Wooden Wheel,<br />
Budget Fineliners<br />
1. Colour the shoes with a<br />
Permanent Marker.<br />
2. Wind Acrylic Wool<br />
around each leg and glue<br />
to secure the ends.<br />
3. Cut a costume from Felt.<br />
4. Use a Permanent<br />
Marker and Kindy Glitz on<br />
felt to create a decorative<br />
design for the costume.<br />
5. Cut a paper Doyley to<br />
create a collar for the<br />
costume.<br />
6. To create a hat, cover a<br />
Wooden Wheel with felt.<br />
Glue the wheel to a larger<br />
circle of felt to create the<br />
brim of the hat.<br />
7. Use Wool Tops to<br />
create hair.<br />
8. Add Joggle<br />
Eyes.<br />
9. Draw in the<br />
nose and mouth<br />
with the Budget<br />
Fineliners.<br />
8<br />
www.zartart.com.au
Stonehenge<br />
Stonehenge is one of the most<br />
iconic ancient structures in England,<br />
sitting 137 km south west of<br />
<strong>London</strong> in Wiltshire, it is a circular<br />
configuration of stones. It was<br />
possibly built by the Druids, Greeks<br />
and Atlanteans C. 2500 BC but for<br />
what purpose is still a great mystery<br />
because very little information<br />
exists about these peoples and their<br />
lifestyles. Some people believed that<br />
Stonehenge was built as an altar for<br />
sacrifice; others speculate it was a<br />
tool for astronomical observations.<br />
Interestingly, the circle has been<br />
aligned to coincide with midsummer<br />
sunrise and midwinter sunset;<br />
the southerly and northerly rising<br />
of the moon is also seen; and its<br />
builders have taken mathematical<br />
and geometrical considerations<br />
into account. The building of<br />
Stonehenge can lead to enriching<br />
problem solving discussion. Ask<br />
students to get into groups and find<br />
out: What is Stonehenge built of?<br />
Where did the stones come from?<br />
How do you think these stones were<br />
transported? How do you think they<br />
erected the structure? What do you<br />
think it was used for? Each group<br />
could report back to the class.<br />
Oil Pastel & Food Dye<br />
Stonehenge<br />
Materials<br />
A3 Cartridge Paper, Moonrock<br />
Paper, Cover Paper 38 x 51cm,<br />
Food Dye, Oil Pastels<br />
1. Observe the work of<br />
Constable’s painting of<br />
Stonehenge.<br />
2. Create a double Rainbow<br />
using the colours of the<br />
spectrum onto a sheet of<br />
Cartridge Paper.<br />
3. Paint Food Dye over the<br />
rainbow in blue and green.<br />
4. Drag pastels over a sheet of<br />
Moonrock Paper in colours of<br />
rocks.<br />
Stonehenge Diorama<br />
Materials<br />
Paper Plate 23cm, Fluorescent Oil<br />
Pastels, Oil Pastels, Plasticine -<br />
grey, Tissue Paper, Supertac<br />
1. Colour half a Paper Plate in<br />
sky<br />
colours using Oil Pastels.<br />
2. Cut the Paper Plate into the<br />
centre. Overlap the cut flaps<br />
and staple in place to form a<br />
CUT<br />
5. Cut a series of rectangles<br />
to use for the rocks of<br />
Stonehenge.<br />
6. Glue the rectangles in<br />
assorted positions onto the<br />
background.<br />
7. Glue the artwork onto a<br />
sheet of Cover Paper.<br />
cone. Press down the overlap to<br />
make a stable base.<br />
3. Cover the uncoloured area<br />
of the plate with green Tissue<br />
Paper.<br />
4. Create stones and rocks with<br />
grey Plasticine and glue these<br />
into the diorama<br />
COLOUR HERE<br />
Ph: 03 9890 1867 • Fax: 03 9898 6527<br />
9
Also try these starting points to further engage your students!<br />
Rubbing Plate – People in Action<br />
A sturdy plastic rubbing plate featuring<br />
four different people in action designs.<br />
4 designs GR096<br />
Each .................................$11.99<br />
Cardboard Human Mannikins<br />
This flat pack of cardboard human bodies<br />
can be assembled using the Paper Fasteners<br />
supplied. Create people in action.<br />
48cm approx.<br />
CB850<br />
Pkt of 10 .......................... $13.87<br />
Wooden Figure on a Stand<br />
This wooden figure with adjustable arms<br />
is ready to decorate as an athlete in their<br />
national dress or sporting uniform. Paint,<br />
glue or stitch costumes on to the figure.<br />
15cm<br />
CN800<br />
Each ...................................$2.51<br />
Cardboard People in Action<br />
These pre-cut cardboard templates<br />
include 4 different figures in action. The<br />
sturdy card may be painted, printed on<br />
and easily decorated, as well as being a<br />
suitable drawing surface. Use the<br />
template to trace around to create your<br />
own figures.<br />
20cm high<br />
CB864<br />
Pkt of 10 .......................... $14.50<br />
Cardboard Money Boxes<br />
Decorate this flat pack cardboard money<br />
box and assemble. Use paint and card to<br />
collage a Big Ben in celebration of <strong>London</strong><br />
hosting the <strong>Olympic</strong> <strong>Games</strong> in 2012.<br />
15 x 7cm BW923<br />
Pkt of 10 ............................ $7.50<br />
10<br />
www.zartart.com.au<br />
Champions Read – Book Week<br />
2012 Available from June 2012<br />
Book Week visual art activities based on<br />
the theme “Champions Read”, and the<br />
books short listed in the Early Childhood<br />
and Picture Book categories by the CBCA<br />
2012. This publication will be free for<br />
every Book Week Workshop attendee.<br />
BK623<br />
Each .................................$39.95<br />
Cardboard Baubles Medallion<br />
Cardboard shapes pre-cut to create<br />
<strong>Olympic</strong> medallions in gold, silver or<br />
bronze. Decorate with paint, sequins,<br />
decorative papers or marker pens.<br />
7cm diameter<br />
CB858<br />
Pkt of 30 ............................ $8.52<br />
bulk Multiples of 5 pkts<br />
buy Each pkt ......................$8.09<br />
Pre-Cut Mounts Double Sided<br />
– Black & White<br />
Quality cardboard. Mount medallions and<br />
write messages on the frames.<br />
85 x 124mm* (Suits A6 size) CB465<br />
Pkt of 10 ............................ $4.66<br />
bulk Multiples of 10 pkts<br />
buy Each pkt ......................$4.19<br />
125 x 178mm* (Suits A5 size) CB460<br />
Pkt of 10 ............................ $7.14<br />
bulk Multiples of 10 pkts<br />
buy Each pkt ......................$6.43<br />
190 x 270mm* (Suits A4 size) CB455<br />
Pkt of 10 .......................... $11.95<br />
bulk Multiples of 10 pkts<br />
buy Each pkt ................... $10.76<br />
270 x 395mm* (Suits A3 size) CB450<br />
Pkt of 10 .......................... $19.86<br />
bulk Multiples of 10 pkts<br />
buy Each pkt ................... $18.05<br />
* inside window measurement<br />
All prices exclude GST
Get prepared for the 2012 <strong>London</strong> <strong>Olympic</strong> <strong>Games</strong>!<br />
Pre-Cut Cardboard Monsters<br />
Create a range of mythical beasts from<br />
English legends and folklore with these<br />
pre-cut patterned card shapes. Recreate<br />
some of the amazing creatures from<br />
English literature such as the Harry Potter<br />
series. 10 different patterns included<br />
20 x A4 sheets CB842<br />
Pkt of 580 shapes ........... $25.46<br />
Calico Flags<br />
These pre-cut flags are hemmed and<br />
ready to decorate to represent flags of<br />
countries from around the world. Use<br />
Dual Fabric Paint and Paint Pens.<br />
30 x 43cm MT095<br />
Pkt of 10 .......................... $13.97<br />
Cardboard Shields<br />
Press out shapes and decorate with mixed<br />
media. Ceate a crest for your country or<br />
for the <strong>Olympic</strong> <strong>Games</strong>. 4 designs<br />
138mm height<br />
CB882<br />
Pkt of 80 ......................... $12.97<br />
Cardboard Puppet Doll<br />
These pre-cut cardboard templates<br />
include moveable arms and legs for easy<br />
puppet making. Create your own mascots<br />
for the <strong>London</strong> <strong>Olympic</strong> <strong>Games</strong>. Decorate<br />
each part before assembling with the<br />
Paper Fasteners supplied.<br />
22cm high<br />
CB844<br />
Pkt of 10 .......................... $12.95<br />
<strong>Olympic</strong> <strong>Games</strong><br />
PD Workshops<br />
The Modern <strong>Olympic</strong> <strong>Games</strong> is still in<br />
essence about the best athletes competing<br />
to win titles; however, enveloping this<br />
sporting event is a celebration of a city<br />
and a culture. When the Opening<br />
Ceremony on July 27, 2012 heralds the start<br />
of the <strong>London</strong> <strong>Olympic</strong> <strong>Games</strong>, it will be<br />
an opportunity for <strong>London</strong> to showcase<br />
itself as one of the most diverse, dynamic<br />
and intriguing cities in the world. With<br />
this in mind, these hands-on workshops<br />
will embrace the diversity of <strong>London</strong><br />
through the visual arts in celebration of<br />
the <strong>Olympic</strong> <strong>Games</strong>. The activities will<br />
encompass different media and skill levels<br />
to suit classroom, library and art teachers.<br />
After-School Workshops<br />
Date: Thursday 1 March or Thursday 19 April<br />
Levels: 1–4<br />
Time: 4.20pm–7.00pm<br />
Venue: <strong>Zart</strong> <strong>Art</strong><br />
Address: 4/41 Lexton Road, Box Hill North<br />
Consultant: Deanne Clark<br />
Cost: $70.00<br />
Catering: Tea & coffee provided.<br />
Cardboard Rings & Circles<br />
A sturdy cardboard ring with inner circle<br />
that can be used as a starting point for<br />
many creative artworks. Create the<br />
<strong>Olympic</strong> rings by decorating in blue,<br />
yellow, black, green and red. 50 of each:<br />
the ring and the inner circle.<br />
11cm rings, 8cm circles CB852<br />
Pkt of 50 ............................ $9.37<br />
Cardboard Fold-Up Dolls<br />
Make a wonderful display of dolls dressed<br />
in national costumes or sporting<br />
uniforms with these cardboard fold-up<br />
dolls. 6 doll shapes in one sheet.<br />
11 x 44cm CB878<br />
Pkt of 25 ............................ $7.97<br />
Cardboard Stained Glass<br />
Frames<br />
Press out shapes and overlay over<br />
colourful backgrounds of traditional<br />
old-English designs. Sheets can be cut<br />
into halves or quarters. 40 templates<br />
provided (2 per sheet)<br />
A4<br />
CB935<br />
Pkt of 20 sheets .............. $14.45<br />
Cardboard Triangular Mosaics<br />
An easy way to introduce and make<br />
figures in action. An ideal activity for the<br />
<strong>Olympic</strong> <strong>Games</strong> and other sporting<br />
events. Use a combination of triangles to<br />
make up squares and rectangles which<br />
may be used for body parts. 10 different<br />
patterns included<br />
20 x A4 sheets CB838<br />
Pkt of 2000 ..................... $16.15<br />
Full Day Workshops<br />
Date: Tuesday 6 March or Monday 23 April<br />
Levels: 1–4<br />
Time: 9.20am–3.00pm<br />
Venue: <strong>Zart</strong> <strong>Art</strong><br />
Address: 4/41 Lexton Road, Box Hill North<br />
Consultant: Deanne Clark<br />
Cost: $140.00<br />
Catering: A light lunch will be provided.<br />
Please advise any dietary requirements.<br />
Parking is offsite; please request a parking<br />
map of local area.<br />
All prices exclude GST<br />
Ph: 03 9890 1867 • Fax: 03 9898 6527<br />
11
Please photocopy this form<br />
eShop: Online shopping also available<br />
FAX TO: 03 9898 6527 Please visit www.zartart.com.au<br />
www.zartart.com.au<br />
all prices in exclude gst<br />
This order must be accompanied by an official school/organisational purchase order and<br />
signed by the appropriate p person.<br />
<strong>Zart</strong> <strong>Olympic</strong>s <strong>Activity</strong> Flyer Order Form<br />
Minimum order $50.00<br />
Excluding GST<br />
Orders below this value will incur a processing charge<br />
of $8.95 (ex GST) in addition to freight charges<br />
CODE Product Name and Description QTY Unit price Total<br />
Signature: TOTAL<br />
Purchase Order Number:<br />
(Required to process this order)<br />
Name Department<br />
t<br />
School/Organisation<br />
Address<br />
Phone Number<br />
Do you want to pick up this order from<br />
our <strong>Zart</strong> Customer Service Centre?<br />
YES pick up<br />
Email Address<br />
To help serve you better, what is the best time to contact you regarding this order?<br />
Pick up time/day:<br />
How to use this form<br />
To help us process this<br />
order promptly please print<br />
neatly, with a black or blue<br />
pen only. Clearly identify<br />
the item, colour, size and<br />
quantity required.<br />
Fax to:<br />
(+61) 3 9898 6527<br />
Email to:<br />
zartart@zartart.com.au<br />
Delivery Date<br />
required: / /<br />
State Postcode