VA 09 63 40 Stone Flooring
VA 09 63 40 Stone Flooring
VA 09 63 40 Stone Flooring

Create successful ePaper yourself
Turn your PDF publications into a flip-book with our unique Google optimized e-Paper software.
10-11<br />
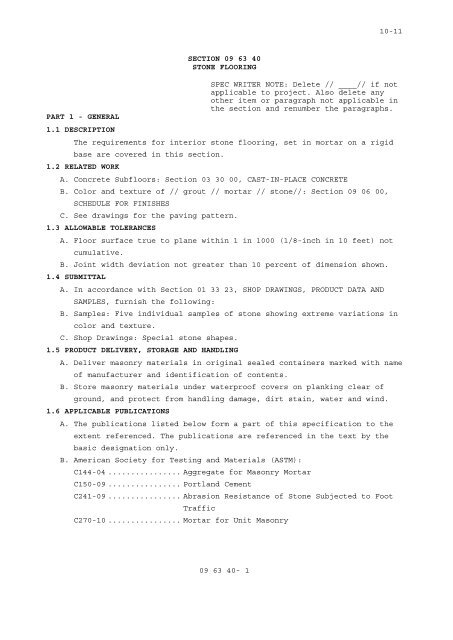
PART 1 - GENERAL<br />
1.1 DESCRIPTION<br />
SECTION <strong>09</strong> <strong>63</strong> <strong>40</strong><br />
STONE FLOORING<br />
SPEC WRITER NOTE: Delete // ____// if not<br />
applicable to project. Also delete any<br />
other item or paragraph not applicable in<br />
the section and renumber the paragraphs.<br />
The requirements for interior stone flooring, set in mortar on a rigid<br />
base are covered in this section.<br />
1.2 RELATED WORK<br />
A. Concrete Subfloors: Section 03 30 00, CAST-IN-PLACE CONCRETE<br />
B. Color and texture of // grout // mortar // stone//: Section <strong>09</strong> 06 00,<br />
SCHEDULE FOR FINISHES<br />
C. See drawings for the paving pattern.<br />
1.3 ALLOWABLE TOLERANCES<br />
A. Floor surface true to plane within 1 in 1000 (1/8-inch in 10 feet) not<br />
cumulative.<br />
B. Joint width deviation not greater than 10 percent of dimension shown.<br />
1.4 SUBMITTAL<br />
A. In accordance with Section 01 33 23, SHOP DRAWINGS, PRODUCT DATA AND<br />
SAMPLES, furnish the following:<br />
B. Samples: Five individual samples of stone showing extreme variations in<br />
color and texture.<br />
C. Shop Drawings: Special stone shapes.<br />
1.5 PRODUCT DELIVERY, STORAGE AND HANDLING<br />
A. Deliver masonry materials in original sealed containers marked with name<br />
of manufacturer and identification of contents.<br />
B. Store masonry materials under waterproof covers on planking clear of<br />
ground, and protect from handling damage, dirt stain, water and wind.<br />
1.6 APPLICABLE PUBLICATIONS<br />
A. The publications listed below form a part of this specification to the<br />
extent referenced. The publications are referenced in the text by the<br />
basic designation only.<br />
B. American Society for Testing and Materials (ASTM):<br />
C144-04 ................ Aggregate for Masonry Mortar<br />
C150-<strong>09</strong> ................ Portland Cement<br />
C241-<strong>09</strong> ................ Abrasion Resistance of <strong>Stone</strong> Subjected to Foot<br />
Traffic<br />
C270-10 ................ Mortar for Unit Masonry<br />
<strong>09</strong> <strong>63</strong> <strong>40</strong>- 1
10-11<br />
PART 2 - PRODUCTS<br />
2.1 MATERIALS<br />
A. <strong>Stone</strong> Slabs: // Granite// Bluestone // with abrasion resistance of at<br />
least 25 as measured by ASTM C241. <strong>Stone</strong> slabs to be uniform in quality<br />
and texture, free from shale, excess mica, seams, sealing and<br />
disintegration.<br />
B. Portland Cement: ASTM C150.<br />
C. Coloring Pigments: Pure mineral pigments, lime proof and non-fading;<br />
added to // grout // mortar // by the manufacturer. Job colored // grout<br />
// and mortar // is not acceptable.<br />
2.2 MORTAR<br />
ASTM C270, Type S. No admixtures permitted. Type N lime is not<br />
permitted.<br />
2.3 GROUT<br />
One part portland cement and three parts sand by volume. Mix with enough<br />
water for flowability.<br />
PART 3 - EXECUTION<br />
3.1 APPLICABLE<br />
A. General: Do not use stone slabs with chips, cracks, discoloration or<br />
other visible defects.<br />
B. Installation with Portland Cement Grout:<br />
1. Spread and screed mortar setting bed mixture 13 mm to 25 mm (1/2-inch<br />
to 1-inch) in thickness true to plane.<br />
2. Limit setting bed to minimum amount which can be covered with stone<br />
before initial set.<br />
3. Apply 1 mm (1/32-inch) layer of neat cement paste over setting bed.<br />
Set and level each stone immediately. Tamp stone to completely<br />
contact setting bed.<br />
4. Grout joints as soon as initial set is achieved. Place grout in<br />
joints, strike flush and tool slightly concave.<br />
5. Cure grout by maintaining in a damp condition for seven days.<br />
C. Installation with Portland Cement Mortar:<br />
1. Install in full bed joint. Remove excess mortar. Strike joints<br />
flush with top surface of stone and tool slightly concave.<br />
2. Cure mortar by maintaining in a damp condition for seven days.<br />
- - - E N D - - -<br />
<strong>09</strong> <strong>63</strong> <strong>40</strong>- 2