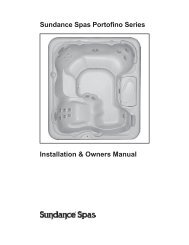
2012 680 Series Owners Manual - Sundance Spas
2012 680 Series Owners Manual - Sundance Spas
2012 680 Series Owners Manual - Sundance Spas

Create successful ePaper yourself
Turn your PDF publications into a flip-book with our unique Google optimized e-Paper software.
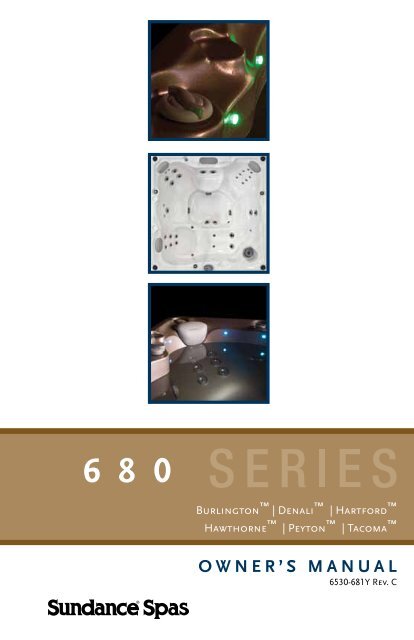
<strong>680</strong><br />
Burlington | Denali | Hartford <br />
Hawthorne | Peyton | Tacoma <br />
OWNER’S MANUAL<br />
6530-681Y Rev. C
Attention New Spa Owner!<br />
Congratulations on the purchase of your new <strong>Sundance</strong> ® <strong>680</strong> <strong>Series</strong> spa! The<br />
following is a list of automated functions and maintenance recommendations<br />
for your new spa. Automated functions have been listed below in an attempt to<br />
suppress any operational concerns you may have during startup and the first 24<br />
hours of ownership! Maintenance recommendations are listed in an attempt to<br />
stress their importance in protecting your new spa.<br />
Automated Operations<br />
Approximately two minutes after power is applied to the spa, the first filtration/heating<br />
cycle turns on pump 1. With two pump models, an automatic five minute “blow-out”<br />
function also activates pump 2 for a period of five minutes to flush all lines. Then, after<br />
five minutes, pump 2 turns off and pump 1 continues to operate for the duration of the<br />
cycle.<br />
Note: This function only occurs during the first filtration/heating cycle each day.<br />
Maintain Healthy Spa Water<br />
Always maintain your spa’s water chemistry within the following parameters:<br />
with CLEARRAY<br />
pH 7.4-7.6 7.4-7.6<br />
without CLEARRAY<br />
Free chlorine no less than 1.0 ppm 3.0-4.0 ppm<br />
Free Bromine no less than 2.0 ppm 2.0-4.0 ppm<br />
Total Alkalinity 100-120 ppm 100-120 ppm<br />
Calcium Hardness 150-250 ppm 150-250 ppm<br />
IMPORTANT: CLEARRAY Water Purification System is factory installed. If<br />
the CLEARRAY system is altered or is not operating efficiently then follow the<br />
“without CLEARRAY” water chemistry parameters as defined by the Association<br />
of Pool and Spa Professionals. CLEARRAY requires an annual lamp replacement<br />
to properly sanitize your water.<br />
! TO DECREASE RISK OF INFECTION OR DISEASE! Always maintain<br />
your spa filter as outlined below to ensure healthy spa water. Refer to page 36 for<br />
additional information.<br />
Required Filter Maintenance<br />
Your new spa is equipped with an advanced water filtration system that provides<br />
unsurpassed water quality! To ensure maximum water quality at all times, you<br />
should clean and reuse both filter cartridges every month or as needed. See page<br />
36 for detailed filter cleaning/replacement instructions.<br />
Required Water Maintenance<br />
! TO DECREASE RISK OF INFECTION OR DISEASE! You should replace<br />
the spa’s water every 3 months. The frequency depends on a number of variables<br />
including frequency of use, number of users, and attention paid to water quality<br />
maintenance. You will know it is time for a change when you cannot control sudsing<br />
and/or you can no longer get the normal feel or sparkle to the water, even though<br />
the key water balance measurements are all within the proper parameters. See<br />
pages 41-42 for additional information.
<strong>680</strong> SERIES<br />
Table of Contents<br />
1.0 Important Spa Owner Information ............................................ 1<br />
2.0 FCC Notice .................................................................................. 1<br />
3.0 Important Safety Instructions for all Spa <strong>Owners</strong> .................. 2<br />
3.1 Entrapment Risk .......................................................................... 6<br />
3.2 Hyperthermia ............................................................................... 7<br />
3.3 Important CSA Safety Instructions (Canada only) ....................... 8<br />
3.4 General Electrical Safety Instructions .......................................... 8<br />
4.0 Choosing A Location ................................................................. 9<br />
4.1 Outdoor Location ....................................................................... 10<br />
4.2 Indoor Location ...........................................................................11<br />
5.0 Power Requirements ............................................................... 12<br />
5.1 North American 60 Hz Power Options ....................................... 12<br />
5.2 Export 50 Hz Power Options ..................................................... 14<br />
6.0 Electrical Wiring Instructions ................................................. 15<br />
7.0 Spa Fill Up Procedure .............................................................. 18<br />
8.0 Control Functions .................................................................... 23<br />
8.1 Control Panel ............................................................................. 23<br />
8.2 General Spa Features And Controls .......................................... 24<br />
8.3 General Spa Features And Controls (Peyton)........................... 25<br />
9.0 Operating Instructions ............................................................ 26<br />
9.1 Setting Water Temperature ........................................................ 26<br />
9.2 Activate Pumps .......................................................................... 27<br />
9.3 SunGlow Light Operation (Denali and Tacoma Models) ........ 27<br />
9.4 Multi-Colored LED Light System Operation<br />
(Burlington, Hartford, Hawthorne, and Peyton Models) ............. 28<br />
9.5 Adjusting Individual Jet Flow ..................................................... 29<br />
9.6 Selecting Desired Massage Action ............................................ 29<br />
9.7 Air Controls ................................................................................ 29<br />
9.8 Optional Audio System .............................................................. 29<br />
10.0 Automatic Filtration Cycles .................................................... 30<br />
10.1 Standard Filtration/Heating Modes For Models<br />
Without Circulation Pump Option .............................................. 30<br />
10.2 Standard Filtration/Heating Modes For Models<br />
With Circulation Pump Option ................................................... 30<br />
© <strong>Sundance</strong> <strong>Spas</strong>, Inc. All Rights Reserved
<strong>680</strong> SERIES<br />
10.3 Economy Filtration/Heating Modes (F4-F6)............................... 30<br />
10.4 Lock Modes (L1-L2)................................................................... 30<br />
10.5 Selecting The Filtration/Heating Mode ...................................... 31<br />
10.6 Filtration Modes for <strong>Spas</strong> Without Circulation Pump Option ..... 31<br />
10.7 Filtration Modes for <strong>Spas</strong> With Circulation Pump Option .......... 32<br />
10.8 Programming the Circulation Pump Filtration Cycle<br />
(For <strong>Spas</strong> Equipped with a Circulation Pump) ........................... 33<br />
10.9 Programming the CLEARRAY (Ultraviolet) Water<br />
Purification System .................................................................... 34<br />
11.0 Spa Maintenance...................................................................... 36<br />
11.1 Cleaning The Filter .................................................................... 36<br />
11.2 Draining and Refilling ................................................................ 37<br />
11.3 Pillow Care (All Models Except Denali) ..................................... 38<br />
11.4 Cleaning The Spa Interior .......................................................... 38<br />
11.5 Maintaining The Cover .............................................................. 39<br />
11.6 Maintaining The Synthetic Cabinet ............................................ 39<br />
11.7 Winterizing ................................................................................. 40<br />
11.8 Restarting Your Spa in Cold Weather ........................................ 41<br />
12.0 Water Quality Maintenance ..................................................... 41<br />
12.1 pH Control ................................................................................. 41<br />
12.2 Sanitizing ................................................................................... 42<br />
12.3 CLEARRAY Water Purification System ................................. 42<br />
12.4 CLEARRAY Lamp Replacement and Quartz<br />
Tube Maintenance ..................................................................... 43<br />
13.0 Error Conditions/Error Messages .......................................... 46<br />
13.1 Summer Logic (<strong>Spas</strong> With Circulation Pump Option) ................ 46<br />
13.2 Panel Displays SN1 ................................................................... 46<br />
13.3 Panel Displays SN2 ................................................................... 46<br />
13.4 Panel Flashes FL1 or FL2 (<strong>Spas</strong> Without Circulation<br />
Pump Option) ............................................................................ 46<br />
13.5 Panel Flashes FL1 or FL2 (<strong>Spas</strong> With Circulation<br />
Pump Option) ............................................................................ 47<br />
13.6 Panel Displays COL................................................................... 47<br />
13.7 Panel Displays ICE .................................................................... 47<br />
13.8 Panel Displays OH .................................................................... 47<br />
13.9 Panel Displays - - - .................................................................... 48<br />
13.10 Panel Displays BLB ................................................................... 48
<strong>680</strong> SERIES<br />
14.0 Troubleshooting Procedures .................................................. 48<br />
14.1 None of the Components Operate (e.g. Pump, Light) ............... 48<br />
14.2 Pump Does Not Operate but Light Does ................................... 48<br />
14.3 Poor Jet Action .......................................................................... 49<br />
14.4 Water is Too Hot ........................................................................ 49<br />
14.5 No Heat ..................................................................................... 49<br />
15.0 North American Denali/Tacoma Convertible<br />
Circuit Diagram (60 Hz) ........................................................... 50<br />
16.0 North American Burlington Circuit Diagram (60 Hz) ............ 51<br />
17.0 North American Peyton Circuit Diagram (60 Hz) .................. 52<br />
18.0 North American Hartford and Hawthorne Models<br />
(60 Hz) ....................................................................................... 53<br />
19.0 Export Denali/Tacoma Circuit Diagram (50 Hz) ..................... 54<br />
20.0 Export Burlington Circuit Diagram (50 Hz) ............................ 55<br />
21.0 Export Peyton Circuit Diagram (50 Hz) .................................. 56<br />
22.0 Export Hartford and Hawthorne Circuit Diagram<br />
(50 Hz) ....................................................................................... 57
......
<strong>680</strong> SERIES<br />
1.0 Important Spa Owner Information<br />
Your <strong>Sundance</strong> ® <strong>680</strong> <strong>Series</strong> spa is constructed to the highest standards<br />
and is capable of providing many years of trouble-free use. However,<br />
because heat retentive materials are utilized to insulate the spa for<br />
efficient operation, an uncovered spa surface and wall fittings directly<br />
exposed to sunlight and high temperatures for an extended period<br />
are subject to permanent damage or discoloration. Damage caused<br />
by exposing the spa to this abuse is not covered under warranty.<br />
We recommend that you always keep the spa full of water when it is<br />
exposed to direct sunlight and that you keep the <strong>Sundance</strong> premium<br />
insulating cover in place at all times when the spa is not in use. Read<br />
and carefully follow the requirements for your spa’s support base found<br />
in Section 4.0 titled, “Choosing a Location” (page 9).<br />
<strong>Sundance</strong> constantly strives to offer the finest spas available,<br />
therefore modifications and enhancements may be made which<br />
affect the specifications, illustrations and/or instructions contained<br />
herein.<br />
2.0 FCC Notice<br />
This equipment has been tested and found to comply with the limits for<br />
a Class B Digital Device, pursuant to Part 15 of the FCC Rules. These<br />
limits are designed to provide reasonable protection against harmful<br />
interference in a residential installation. This equipment generates, uses<br />
and can radiate radio frequency energy and, if not installed and used<br />
in accordance with the instructions, may cause harmful interference to<br />
radio communications. However, there is no guarantee that interference<br />
will not occur in a particular installation. If this equipment does cause<br />
harmful interference to radio or television reception, which can be<br />
determined by turning the equipment off and on, the user is encouraged<br />
to try to correct the interference by one or more of the following<br />
measures:<br />
1. Rearrange or relocate the receiving antenna.<br />
2. Increase the separation between the equipment and receiver<br />
3. Connect the equipment into an outlet on a circuit different from the<br />
circuit connected.<br />
4. Consult the dealer or an experienced radio/TV technician for help.<br />
Changes or modifications not expressly approved by the party<br />
responsible for FCC compliance could void the user’s authority to<br />
operate this equipment.<br />
Page 1
<strong>680</strong> SERIES<br />
3.0 Important Safety Instructions for all Spa <strong>Owners</strong><br />
READ AND FOLLOW ALL INSTRUCTIONS CAREFULLY!<br />
This spa was manufactured to meet the standards and specifications<br />
outlined in the “Virginia Graeme Baker Pool and Spa Safety Act” (VGB<br />
Safety Act). When installing and using this spa, basic safety precautions<br />
should always be followed, including:<br />
1. ! DANGER: RISK OF SEVERE INJURY OR DROWNING!<br />
• Extreme caution must be exercised to prevent unauthorized access<br />
by children.<br />
• To avoid accidents, ensure that children do not use this spa unless<br />
supervised at all times. Adult supervision is a critical safety factor in<br />
preventing children from drowning.<br />
• Use the straps and clip tie downs to secure the spa cover when not<br />
in use. This will help discourage unsupervised children from entering<br />
the spa. Keep the spa cover secure in high-wind conditions.<br />
• There is no representation that the cover, clip tie-downs, or actual<br />
locks will prevent access to the spa.<br />
2. ! DANGER: RISK OF SEVERE INJURY OR DROWNING!<br />
• Keep hair, loose articles of clothing or hanging jewelry away from suction<br />
fittings, rotating jets or other moving components to avoid entrapment<br />
that could lead to drowning or severe injury.<br />
• Never use the spa unless all suction guards, filter, filter lid, or skimmer<br />
assembly are installed to prevent body and/or hair entrapment.<br />
• Never operate or use the spa if the filter, filter lid, or skimmer assembly<br />
are broken or any part of the skimmer assembly is missing. Please<br />
contact your dealer or nearest service center for service.<br />
• The suction fittings and suction covers in this spa are sized to match the<br />
specific water flow created by the pump(s). If it is necessary to replace<br />
the suction fittings, suction covers or pump(s), be sure that the flow rates<br />
are compatible and are in compliance with the VGB Safety Act.<br />
• Never replace a suction fitting or suction cover with one rated less<br />
than the flow rate marked on the original suction fitting. Using improper<br />
suction fittings or suction covers can create a body or hair suction<br />
entrapment hazard that may lead to drowning or severe injury.<br />
3. ! DANGER: RISK OF SEVERE INJURY FROM ELECTRIC<br />
SHOCK OR DEATH FROM ELECTROCUTION!<br />
• Install the spa at least 5 feet (1.5m), from all metal surfaces. As an<br />
alternative, a spa may be installed within 5 feet of metal surfaces<br />
if each metal surface is permanently connected (bonded) by a<br />
minimum No. 8 AWG (8.4 mm²) solid copper conductor attached<br />
to the wire connector on the grounding lug, inside the equipment<br />
compartment on the equipment box.<br />
Page 2
<strong>680</strong> SERIES<br />
• A grounding wire connector is provided on this unit to connect a<br />
minimum No. 8 AWG (8.4 mm²) solid copper conductor between<br />
this unit and any metal equipment, metal enclosures of electrical<br />
equipment, metal water pipe, or conduit within 5 feet (1.5m) of the<br />
unit.<br />
• Never permit any electrical appliance, such as a light, telephone,<br />
radio, television, etc. within 5 feet (1.5m) of a spa unless such<br />
appliances are built-in by the manufacturer.<br />
• Never bring any electrical appliances into or near the spa.<br />
• Never operate any electrical appliances from inside the spa or when<br />
you are wet.<br />
• The electrical supply for this product must include a suitably rated<br />
switch or circuit breaker to open all ungrounded supply conductors<br />
to comply with section 422-20 of the National Electrical Code/USA,<br />
ANSI/NFPA 70. The disconnecting means must be readily accessible<br />
and visible to the spa occupant but installed at least 5 feet (1.5m),<br />
from the spa.<br />
• The electrical circuit supplied for the hot tub must include a suitable<br />
ground fault circuit interrupter (GFCI) as required by NEC Article<br />
<strong>680</strong>-42.<br />
4. ! WARNING: RISK OF SEVERE INJURY OR DEATH!<br />
• Extreme caution must be exercised to prevent diving or jumping<br />
into the spa or slipping and falling, which could result in<br />
unconsciousness, drowning, or serious injury. Remember that wet<br />
surfaces can be very slippery.<br />
• Never stand, walk or sit on the top railing of the spa.<br />
5. ! WARNING: RISK OF HYPERTHERMIA (OVER-HEATING)<br />
CAUSING SEVERE INJURY, BURNS, WELTS OR DEATH!<br />
• Water temperature in excess of 104°F (40°C) may be injurious to<br />
your health.<br />
• Refer to Section 3.2 Hyperthermia for specific causes and symptoms<br />
of this condition.<br />
• The water in the spa should never exceed 104°F (40°C). Water<br />
temperatures between 100°F (38°C) and 104°F (40°C) are<br />
considered safe for a healthy adult.<br />
• Lower water temperatures are recommended for young children<br />
(children are especially sensitive to hot water) and when spa use<br />
may exceed 10 minutes.<br />
• The Consumer Products Safety Commission/USA has stated that the<br />
water temperature in a spa should not exceed 104°F (40°C).<br />
• Always test the spa water temperature before entering the spa.<br />
The user should measure the water temperature with an accurate<br />
thermometer since the tolerance of water temperature-regulating<br />
devices may vary as much as +/- 5°F (2°C).<br />
Page 3
<strong>680</strong> SERIES<br />
6. ! WARNING: RISK OF SEVERE INJURY OR DEATH!<br />
• Since excessive water temperatures have a high potential for<br />
causing fetal damage during the early months of pregnancy, if<br />
pregnant or possibly pregnant, consult your physician before using a<br />
spa.<br />
• Pregnant or possibly pregnant women should limit spa water<br />
temperatures to 100°F (38°C).<br />
• Persons suffering from obesity or a medical history of heart disease,<br />
low or high blood pressure, circulatory system problems, diabetes,<br />
infectious diseases or immune deficiency syndromes should consult<br />
a physician before using a spa.<br />
• If you experience breathing difficulties in association with using or<br />
operating your spa, discontinue use and consult your physician.<br />
• Persons using medication should consult a physician before using<br />
a spa since some medication may induce drowsiness, while other<br />
medication may affect heart rate, blood pressure, and circulation.<br />
• Persons suffering from any condition requiring medical treatment, the<br />
elderly, or infants should consult with a physician before using a spa.<br />
• The use of alcohol, drugs, or medication before or during spa use<br />
may lead to unconsciousness with the possibility of drowning.<br />
7. ! WARNING: RISK OF SEVERE INJURY OR DEATH!<br />
• Prolonged immersion in a spa may be injurious to your health.<br />
• Observe a reasonable time limit when using the spa. Exposures<br />
at higher temperatures can cause high body temperature (overheating).<br />
Symptoms may include dizziness, nausea, fainting,<br />
drowsiness, and reduced awareness. These effects could possibly<br />
result in drowning or serious injury.<br />
• Never use a spa immediately following strenuous exercise. Enter<br />
and exit the spa slowly. Wet surfaces can be slippery.<br />
8. ! WARNING: TO DECREASE RISK OF INFECTION OR<br />
DISEASE!<br />
• To reduce the risk of contracting a waterborne illness (e.g. an infection,<br />
bacteria or virus) and/or respiratory ailments, maintain water<br />
chemistry within the parameters listed on the inside cover of this<br />
manual and consult with a licensed engineer regarding proper ventilation<br />
if installed indoors or in an enclosed area.<br />
• People with infectious diseases should not use a spa to avoid water<br />
contamination, which could result in spreading infections to others.<br />
• Always shower before and after using your spa. Maintain water<br />
chemistry in accordance with manufacturer’s instructions. Failure<br />
to do so may result in contracting a waterborne illness (e.g. an<br />
infection, bacteria or virus).<br />
Page 4
<strong>680</strong> SERIES<br />
9. ! WARNING: In addition to maintenance of filters and water<br />
chemistry, proper ventilation is recommended to reduce the risk of<br />
contracting a waterborne illness (e.g. an infection, bacteria or virus)<br />
and/or respiratory ailments that could be present in the air or water.<br />
Consult a licensed architect or building contractor to determine your<br />
specific needs if installing your hot tub indoors.<br />
10. CAUTION: TO DECREASE RISK OF PRODUCT DAMAGE.<br />
• Maintain water chemistry in accordance with manufacturer’s<br />
instructions.<br />
• Proper chemical maintenance of spa water is necessary to maintain<br />
safe water and prevent possible damage to spa components.<br />
11. ! WARNING: RISK OF SEVERE INJURY OR DEATH!<br />
The appliance is not intended for use by persons (including children)<br />
with reduced physical, sensory or mental capabilities, or lack of<br />
experience or knowledge, unless they have been given supervision<br />
or instruction concerning use of the appliance by a person<br />
responsible for their safety.<br />
12. NOTE: This spa is not intended nor designed to be used in a<br />
commercial or public application. The spa buyer shall determine<br />
whether there are any code restrictions on the use or installation<br />
of this spa since local code requirements vary from one locality to<br />
another.<br />
Hot Tub Safety Literature<br />
To ensure you have a safe and enjoyable hot tub experience,<br />
learn all you can about hot tub safety and emergency procedures.<br />
Especially useful are the brochures listed below:<br />
• Children Aren’t Waterproof<br />
• Pool and Spa Emergency Procedures For Infants and Children<br />
• Layers of Protection<br />
• The Sensible Way to Enjoy Your Spa or Hot Tub<br />
The Association of Pool and Spa Professionals publishes these<br />
brochures. To acquire a brochure:<br />
• Ask your hot tub dealer (they may have copies)<br />
• Go to http://apsp.org<br />
• Conduct your own search on the internet<br />
• Write to the following address:<br />
The Association of Pool and Spa Professionals<br />
2111 Eisenhower Avenue<br />
Alexandria VA 22314<br />
703.838.0083<br />
Page 5
<strong>680</strong> SERIES<br />
3.1 Entrapment Risk<br />
The Consumer Products Safety Commission/USA has reported that<br />
users of pools and spas have become entrapped (stuck) to drain and/or<br />
suction fittings causing death, drowning, or serious injury (see diagram<br />
below). This spa was manufactured to meet the standards and specifications<br />
outlined in the “Virginia Graeme Baker Pool and Spa Safety Act”<br />
(VGB Safety Act). Entrapment risk can be minimized if proper precautions<br />
are taken.<br />
!<br />
DANGER: RISK OF PERSONAL INJURY OR DEATH!<br />
Never operate the spa if a suction fitting, suction cover, filter,<br />
filter lid or skimmer assembly are broken, damaged or missing.<br />
Models Burlington,<br />
Hartford, Hawthorne<br />
Models Denali,<br />
Peyton, Tacoma<br />
Filter, Filter<br />
Lid, Skimmer<br />
Assembly<br />
(location and<br />
style vary by<br />
models)<br />
Suction Fittings,<br />
Suction Covers<br />
(locations vary<br />
by models)<br />
1. ! DANGER: RISK OF SEVERE INJURY OR DROWNING!<br />
Hair entrapment: May occur if hair is entangled, knotted or snagged<br />
in a drain suction or skimmer assembly. This has been reported in<br />
persons who when submerge themselves underwater, allowing hair<br />
to come close and/or within the reach of the suction fittings, suction<br />
covers or skimmer assembly.<br />
• Keep hair away from suction fittings, suction covers, filter, filter lid or<br />
skimmer assembly.<br />
• Children are at risk for hair entrapment if swimming under water.<br />
• Never allow children to play or get near the suction fittings, suction<br />
covers, filter, filter lid or skimmer assembly.<br />
2. ! DANGER: RISK OF SEVERE INJURY OR DROWNING!<br />
Limb entrapment: May occur when a limb becomes entrapped,<br />
inserted or sucked into a suction or outlet opening.<br />
• Always keep suction fittings, suction covers, filter, filter lid<br />
or skimmer assembly in place when operating to avoid limb<br />
entrapment.<br />
• Never allow children to play or get near the suction fittings, suction<br />
covers, filter, filter lid or skimmer assembly.<br />
Page 6
<strong>680</strong> SERIES<br />
3. ! DANGER: RISK OF SEVERE INJURY OR DROWNING!<br />
Body entrapment: May occur when part of the torso becomes<br />
entrapped, inserted or sucked into a suction or outlet opening.<br />
• Never allow children to play or get near the suction fittings, suction<br />
covers, filter, filter lid or skimmer assembly.<br />
4. ! DANGER: RISK OF SEVERE INJURY OR DROWNING!<br />
Evisceration (disembowelment) entrapment: May occur when the<br />
buttocks becomes entrapped, inserted or sucked into a suction or<br />
outlet opening.<br />
• Never sit on suction fittings, suction covers, filter, filter lid or skimmer<br />
assembly.<br />
• Never allow children to play or get near the suction fittings, suction<br />
covers, filter, filter lid or skimmer assembly.<br />
5. ! DANGER: RISK OF SEVERE INJURY OR DROWNING!<br />
Mechanical entrapment: May occur when jewelry, swimsuit, or<br />
hair accessories become entangled, knotted or snagged in a drain<br />
suction or skimmer assembly.<br />
• Never allow your jewelry, swimsuit, or hair accessories to come<br />
close to the suction fittings, suction covers or skimmer assembly.<br />
• Never allow children to play or get near the suction fittings, suction<br />
covers, filter, filter lid or skimmer assembly.<br />
3.2 Hyperthermia<br />
Prolonged immersion in hot water may induce hyperthermia (overheating).<br />
The use of alcohol or drugs can greatly increase the risk of<br />
fatal hyperthermia in spas. A description of the causes, symptoms, and<br />
effects of hyperthermia are as follows:<br />
Hyperthermia occurs when the internal temperature of the body reaches<br />
a level several degrees above the normal body temperature of 98.6°F<br />
(37°C). The symptoms of hyperthermia include drowsiness, lethargy<br />
(fatigue), and an increase in the internal temperature of the body (feeling<br />
of being too hot). The effects of hyperthermia include:<br />
• Unawareness of impending hazard;<br />
• Failure to perceive heat;<br />
• Failure to recognize the need to exit spa;<br />
• Physical inability to exit spa;<br />
• Fetal damage in pregnant women; and<br />
• Unconsciousness and danger of drowning.<br />
Page 7
<strong>680</strong> SERIES<br />
A Warning Sign is provided in your warranty packet. Please install at<br />
a location near your spa, where it is visible to users of the spa. For<br />
additional or replacement Warning Signs please contact your local<br />
<strong>Sundance</strong> spas dealer and reference item number #6530-082.<br />
3.3 Important CSA Safety Instructions (Canada only)<br />
When using this electrical equipment, basic safety precautions should<br />
always be followed, including the following:<br />
1. READ AND FOLLOW ALL INSTRUCTIONS.<br />
2. A green colored terminal or a terminal marked G, Gr, Ground,<br />
Grounding or the symbol* is located inside the supply terminal<br />
box or compartment. To reduce the risk of electric shock, this<br />
terminal must be connected to the grounding means provided in<br />
the electric supply service panel with a continuous copper wire<br />
equivalent in size to the circuit conductors that supply this equipment<br />
(*IEC Publication 417, Symbol 5019).<br />
3. At least two lugs marked “Bonding Lugs” are provided on the<br />
external surface or on the inside of the supply terminal box/<br />
compartment. To reduce the risk of electric shock, connect the local<br />
common bonding grid in the area of the spa to these terminals with<br />
an insulated or bare copper conductor not smaller than No. 6 AWG<br />
(10 mm²).<br />
4. All field-installed metal components such as rails, ladders, drains or<br />
other similar hardware within 10 feet (3m) of the spa shall be bonded<br />
to the equipment grounding buss with copper conductors not smaller<br />
than No. 6 AWG (10 mm²).<br />
5. SAVE THESE INSTRUCTIONS.<br />
3.4 General Electrical Safety Instructions<br />
Your new <strong>Sundance</strong> ® spa is equipped with a “state-of-the-art” equipment<br />
system. It contains the most advanced safety and self-protective<br />
equipment in the industry. Nonetheless, this spa must be installed<br />
properly to ensure dependable usage. Please contact your local<br />
<strong>Sundance</strong> dealer or local building department should you have any<br />
questions regarding your installation.<br />
Proper grounding is extremely important. <strong>Sundance</strong> spas are equipped<br />
with a current collector system. A pressure wire connector is provided<br />
on the surface of the control box, located outside the equipment door<br />
(Figure B, page 17) to permit connection of a bonding wire between<br />
this point and any ground metal equipment, metal water pipe or conduit<br />
within 5 feet (1.5m) of the spa, or copper clad grounding rod buried<br />
Page 8
<strong>680</strong> SERIES<br />
within 5 feet (1.5m) of the spa. Bonding wire must be at least No. 8 AWG<br />
(8.4 mm²) solid copper wire. This is a most important safety assurance<br />
feature.<br />
Before installing your spa, check with your local building department to<br />
insure installation conforms to local building codes.<br />
120/240 Volt Denali And Tacoma Convertible Models<br />
A spa connected to a 120 VAC electrical service must be located close<br />
enough to a grounded, grounding-type electrical outlet so that the<br />
included 10 foot (3m) power cord can be plugged directly into it. DO NOT<br />
USE AN EXTENSION CORD as this could cause damage to the spa’s<br />
equipment due to insufficient voltage. The power supplied to this spa<br />
must be a dedicated circuit with no other appliances or lights sharing the<br />
power provided by the circuit.<br />
4.0 Choosing A Location<br />
IMPORTANT: Because of the combined weight of the spa, water<br />
and users, it is extremely important that the base upon which the<br />
spa rests be smooth, flat, level and capable of uniformly supporting<br />
this weight, without shifting or settling, for the entire time the spa<br />
is in place. If the spa is placed on a surface which does not meet<br />
these requirements, damage to the skirt and/or the spa shell<br />
may result. Damage caused by improper support is not covered<br />
under warranty. It is the responsibility of the spa owner to assure<br />
the integrity of the support over time. We recommend a poured,<br />
reinforced concrete slab with a minimum thickness of 4 inches<br />
(10 cm). Wood decking is also acceptable provided it is<br />
constructed so that it meets the requirements outlined above.<br />
!<br />
WARNING: For spas that are to rest on balconies,<br />
roofs or other platforms not specifically tied into main<br />
structural support, consult a professional Structural<br />
Engineer with experience in this type of application.<br />
The spa must be installed in such a manner as to provide drainage away<br />
from it. Placing the spa in a depression without provisions for proper<br />
drainage could allow rain, overflow and other casual water to flood the<br />
equipment and create a wet condition in which it would sit in. For spas<br />
Page 9
<strong>680</strong> SERIES<br />
which will be recessed into a floor or deck, install so as to permit access<br />
to the equipment, either from above or below, for servicing. Make certain<br />
that there are no obstructions which would prevent removal of all side<br />
cabinet panels and access to the jets components, especially on the side<br />
with the equipment bay.<br />
!<br />
CAUTION: If the spa is indoors or located in an enclosed area,<br />
proper ventilation should be discussed with an Engineer or authority<br />
competent enough to understand the necessary provisions needed<br />
to vent moist or heated air and air associated with chemical odors<br />
outdoors. When the spa is in use considerable amounts of<br />
moisture will escape potentially causing mold and mildew. This<br />
can cause health risk. Over time, this can damage certain surfaces,<br />
surroundings, and equipment.<br />
4.1 Outdoor Location<br />
In selecting the ideal outdoor location for your spa, we suggest that you<br />
take into consideration the following:<br />
• The proximity to changing area and shelter (especially in regions<br />
subject to cold weather).<br />
• The pathway to and from your spa (this should be free of debris so<br />
that dirt and leaves are not easily tracked into the spa).<br />
• The closeness to trees and shrubbery (remember that leaves and<br />
birds could create extra work in keeping the spa clean).<br />
• A sheltered environment (less wind and weather exposure can result<br />
in lowered operation and maintenance costs).<br />
• The overall enhancement of your environment. It is preferable not to<br />
place the spa under an unguttered roof overhang since run-off water<br />
will shorten the life expectancy of the spa cover.<br />
• For spas that are to rest on balconies, roofs or other platforms not<br />
specifically tied into main structural support, consult a professional<br />
Structural Engineer with experience in this type of application.<br />
• In the unlikely event that you should ever need to access or gain<br />
entry to any portion of the spa for servicing, it is highly recommended<br />
that you plan your outdoor installation to provide full access to the<br />
entire spa. Please take this into consideration when placing the spa<br />
in a deck or enclosed by a surrounding.<br />
• Consider locating your spa away from any reflective surface or glass<br />
to prevent any damage to the synthetic skirt.<br />
Page 10
<strong>680</strong> SERIES<br />
4.2 Indoor Location<br />
For indoor installations many factors need to be considered before<br />
installing a spa indoors:<br />
!<br />
WARNING: In addition to maintenance of filters and water<br />
chemistry, proper ventilation is recommended to reduce the<br />
risk of contracting a waterborne illness (e.g. an infection,<br />
bacteria or virus) and/or respiratory ailments that could be<br />
present in the air or water. Consult a licensed architect<br />
or building contractor to determine your specific needs if<br />
installing your hot tub indoors.<br />
• PROPER FOUNDATION: Consult a Structural Engineer when<br />
considering a foundation that will adequately support the spa<br />
the entire time it is in place. Proper support is critical especially if<br />
the spa is to rest on a second story or higher. For spas that are to<br />
rest on balconies, roofs or other platforms not specifically tied into the<br />
main structural support, you should consult a professional Structural<br />
Engineer with experience in this type of application.<br />
• PROPER DRAINAGE: It is extremely important to have in place<br />
measures to sufficiently handle excessive water spillage. Be<br />
sure the flooring in which the spa rests on has adequate drainage<br />
and can handle draining of the entire contents of the spa. Be sure<br />
to make provisions for ceilings or any other structures that may be<br />
below the spas installation. Areas around your spa can become wet<br />
or moist so all flooring and subsequent furniture, walls and adjacent<br />
structures should be able to withstand or resist water and moisture.<br />
• PROPER VENTILATION: Proper ventilation should be discussed<br />
with an Engineer or authority competent enough to understand<br />
the necessary provisions needed to vent moist or heated air and<br />
air associated with chemical odors outdoors. When the spa is in<br />
use considerable amounts of moisture will escape potentially causing<br />
mold and mildew, over time this can damage certain surfaces and or<br />
surroundings.<br />
• SUFFICIENT ACCESS: In the unlikely event that you should ever<br />
need to access or gain entry to any portion of the spa for servicing,<br />
it is highly recommended that you plan your indoor installation to<br />
provide full access to the entire spa.<br />
• WARRANTY: Damage caused by not following these guidelines<br />
or any improper installation not in accordance with local codes or<br />
authorities is not covered under the spas warranty. Please consult<br />
your local state or city building ordinances.<br />
Page 11
<strong>680</strong> SERIES<br />
5.0 Power Requirements<br />
<strong>Sundance</strong> ® spas are designed to provide optimum<br />
performance and flexibility of use when connected to the<br />
maximum electrical service listed on pages 12-14. If<br />
you prefer, your dealer can perform a minor circuit board<br />
modification to allow your spa to accept an electrical service<br />
other than the factory setting.<br />
Note: Refer to pages 50-57 for circuit board configuration details or<br />
contact your authorized <strong>Sundance</strong> dealer.<br />
5.1 North American 60 Hz Power Options<br />
North American Denali/Tacoma 1-Pump Convertible Models (60 Hz)<br />
120V/15A* 240V/30A* 240V/40A**<br />
Voltage: 120 VAC 240 VAC 240 VAC<br />
# of Wires: 3 (15A GFCI Cord - 4 (Hard 4 (Hard<br />
US Models Only*) Wired Only) Wired Only)<br />
Frequency: 60 Hz 60 Hz 60 Hz<br />
Current Draw: 12A 21A 30A<br />
Circuit Breaker: 15A, 1-Pole 30A, 2-Pole 40A, 2-Pole<br />
CAUTION (For 4-wire, 240 VAC Heater Operation): Move the red wire on the<br />
main terminal strip (TB1) from position #1 to position #3. Make certain wires are<br />
connected exactly as shown in Figure D (page 17) before applying power.<br />
Failure to do so will result in damage to the circuit board and/or related components<br />
and void the manufacturer’s warranty.<br />
* In the 15A/30A configuration, the heater will not operate at the same<br />
time as the high-speed jets pump. The factory setting is 120V/15A.<br />
*Note: all Canadian spas must be hard wired (120 VAC or 240 VAC)<br />
per CSA Canadian standards (page 8).<br />
** If the spa is to be operated on 40A service, remove the jumper JP1 #1-2<br />
on the circuit board to allow the heater to operate at the same time as the<br />
high-speed jets pump (page 50).<br />
Page 12
<strong>680</strong> SERIES<br />
North American Burlington 1-Pump Models (60 Hz)<br />
240V/40A*<br />
240V/50A**<br />
Voltage: 240 VAC 240 VAC<br />
# of Wires: 3 3<br />
Frequency: 60 Hz 60 Hz<br />
Current Draw: 26A 36A<br />
Circuit Breaker: 40A, 2-Pole 50A, 2-Pole<br />
* In the 40A configuration, the heater will not operate while the jets pump is<br />
running in high speed.<br />
** In the 50A configuration, the heater will operate while the jets pump is<br />
running in high speed. This is the factory setting.<br />
North American Hartford/Hawthorne/Peyton 2-Pump Models (60 Hz)<br />
240V/40A* 240V/50A** 240V/60A***<br />
Voltage: 240 VAC 240 VAC 240 VAC<br />
# of Wires: 3 3 3<br />
Frequency: 60 Hz 60 Hz 60 Hz<br />
Current Draw: 26A 36A 45A<br />
Circuit Breaker: 40A, 2-Pole 50A, 2-Pole 60A, 2-Pole<br />
* In 40A configuration, the heater will not operate while either jets pump is<br />
running in high speed. Note: pump 2 runs only in high speed.<br />
** In 50A configuration, the heater will not operate while both jets pumps are<br />
running in high speed. Note: pump 2 runs only in high speed. This is<br />
the factory setting.<br />
*** In 60A configuration, the heater will operate while both jets pumps are<br />
running in high speed. Note: pump 2 runs only in high speed.<br />
Page 13
<strong>680</strong> SERIES<br />
5.2 Export 50 Hz Power Options<br />
Export Burlington/Denali/Tacoma 1-Pump Models (50 Hz)<br />
230V/20A*<br />
230V/30A**<br />
Voltage: 230 VAC 230 VAC<br />
# of Wires: 3 3<br />
Frequency: 50 Hz 50 Hz<br />
Current Draw: 15A 21A<br />
Circuit Breaker: 20A 30A<br />
* In the 20A configuration, the heater will not operate while the jets pump<br />
is running in high speed. This is the factory setting.<br />
** In the 30A configuration, the heater will operate while the jets pump is<br />
running in high speed.<br />
Export Hartford/Hawthorne/Peyton 2-Pump Models (50 Hz)<br />
230V/20A* 230V/30A** 230V/40A***<br />
Voltage: 230 VAC 230 VAC 230 VAC<br />
# of Wires: 3 3 3<br />
Frequency: 50 Hz 50 Hz 50 Hz<br />
Current Draw: 15A 23A 29A<br />
Circuit Breaker: 20A 30A 40A<br />
* In the 20A configuration, the heater will not operate while either jets pump<br />
is running in high speed. This is the factory setting.<br />
** In the 30A configuration, the heater will not operate while both jets pumps<br />
are running in high speed.<br />
*** In the 40A configuration, the heater will operate while both jets pumps are<br />
running in high speed.<br />
Page 14
<strong>680</strong> SERIES<br />
6.0 Electrical Wiring Instructions<br />
IMPORTANT NOTICE: The electrical wiring of this spa<br />
must meet the requirements of the National Electrical Code/<br />
USA (NEC) and any applicable state or local codes. The<br />
electrical circuit must be installed by a qualified electrician<br />
and approved by a local building/electrical inspection authority.<br />
1. Convertible 120/240V Denali/Tacoma Models Only:<br />
• ! DANGER: TO DECREASE THE RISK OF SHOCK,<br />
PRODUCT DAMAGE OR ELECTRICAL FIRE.<br />
120V “Plug-in” Operation: This spa must operate on the supplied 10<br />
feet (3m) 120V GFCI cord at its original length or must be hard-wired<br />
for longer runs. NEVER USE AN EXTENSION CORD FOR ANY<br />
REASON!<br />
• Convertible 120/240V Heater Operation: The included 120V GFCI<br />
cord must be discarded for 240V heater operation. This spa must<br />
be hard-wired. Supplying power to either configuration above<br />
which is not in accordance with these instructions will void both the<br />
independent testing agency listing and the manufacturer’s warranty.<br />
2. Dedicated 240V Burlington, Hartford and Hawthorne Models:<br />
This spa must be permanently connected (hard-wired) to the power<br />
supply. No plug-in connections or extension cords are to be used<br />
in conjunction with the operation of this spa. Supplying power to<br />
the spa which is not in accordance with these instructions will void<br />
both the independent testing agency listing and the manufacturer’s<br />
warranty.<br />
3. The power supplied to this spa must be a dedicated circuit with no<br />
other appliances or lights sharing the power provided by the circuit.<br />
4. To determine the current, voltage and wire size required, refer to<br />
Section 5.0 “Power Requirements” (pages 12-14).<br />
• Wire size must be appropriate per NEC and/or local codes.<br />
• We recommend type THHN wire.<br />
• All wiring must be copper to ensure proper connections. Do not use<br />
aluminum wire.<br />
• When using wire larger than #6 (10 mm²), add a junction box near<br />
the spa and reduce to short lengths of #6 (10 mm²) wire to connect to<br />
the spa.<br />
Page 15
WARNING!<br />
DONOT LOOK AT LIT BULB<br />
SEVERE EYE DAMAGE<br />
OR BLINDNESS CAN OCCUR<br />
<strong>680</strong> SERIES<br />
5. The electrical supply for this product must include a suitably rated<br />
switch or circuit breaker to open all ungrounded supply conductors<br />
to comply with Section 422-20 of the National Electrical Code/USA,<br />
ANSI/NFPA 70. The disconnecting means must be readily accessible<br />
to the spa’s occupant but installed at least 5 feet (1.5m) from spa<br />
water.<br />
6. The electrical circuit supplied for the spa must include a suitable<br />
ground fault circuit interrupter (GFCI) as required by NEC Article<br />
<strong>680</strong>-42.<br />
7. To gain access to the spa’s power terminal block, remove the screws<br />
securing the cabinet panel on the side of the spa under the control<br />
panel. Then remove the four control box door screws and door<br />
(Figures A-B, pages 16-17).<br />
8. Select the power supply inlet you want to use (Figure A). Feed power<br />
cable to control box, then install it through the large opening provided<br />
in the bottom side of the box.<br />
9. Connect wires, color to color, on terminal blocks TB1 and TB3<br />
(Figures C-F, page 17). TIGHTEN SECURELY! All wires must be<br />
hooked up securely or damage could result.<br />
10. Install control box door and screws and reinstall the cabinet side<br />
panels.<br />
Figure A<br />
Equipment Area<br />
7<br />
1<br />
4<br />
8<br />
6<br />
3<br />
9<br />
2 2<br />
5 5<br />
Note: Equipment location (such as pumps,<br />
CLEARRAY system, drain, heater etc.) varies<br />
by model.<br />
1. Control Box<br />
2. Power Supply Inlet(s)<br />
3. 2-Speed Pump<br />
4. Heater<br />
5. Pump Drain Plugs<br />
6. 1-Speed Pump<br />
7. Control Panel<br />
8. CLEARRAY (Ultraviolet) Water Purification<br />
System<br />
9. Electronic Ballast (For the CLEARRAY System)<br />
(Model shown with Hi-Flow heater and no circulation<br />
pump)<br />
Page 16
<strong>680</strong> SERIES<br />
Figure B<br />
Control Box<br />
2<br />
TB1<br />
1<br />
3<br />
1. Terminal Block<br />
2. Bonding Lug<br />
3. Grounding Terminal<br />
Figure C<br />
Figure D<br />
Power In<br />
WHT<br />
1<br />
BLK<br />
2<br />
3<br />
GRN<br />
TB1<br />
WHT<br />
RED<br />
BLK<br />
BLK<br />
to Circuit<br />
Board<br />
North American Denali/Tacoma Convertible<br />
Models: 120 VAC, 3-Wire Connection (60 Hz)<br />
Power In<br />
WHT<br />
1<br />
BLK<br />
2<br />
RED<br />
3<br />
GRN<br />
TB1<br />
BLK<br />
BLK<br />
to Circuit<br />
Board<br />
WHT<br />
RED<br />
RED<br />
Move Red<br />
Wire Here<br />
North American Denali/Tacoma Convertible<br />
Models: 240 VAC, 4-Wire Connection (60 Hz)<br />
CAUTION (For 4-wire 240 VAC Heater Operation): Move the red wire on the main terminal<br />
strip (TB1) from position #1 to position #3. Make certain wires are connected exactly as shown<br />
in Figure D before applying power. Failure to do so will result in damage to the circuit board<br />
and/or related components and void the manufacturer’s warranty.<br />
Figure E<br />
Figure F<br />
Power In<br />
TB1<br />
RED<br />
1<br />
BLK<br />
2<br />
Green<br />
RED<br />
RED<br />
BLK<br />
BLK<br />
to Circuit<br />
Board<br />
TB3<br />
Power In<br />
TB1<br />
1<br />
2<br />
Green<br />
BLUE<br />
BLUE<br />
BROWN<br />
BROWN<br />
to Circuit<br />
Board<br />
TB3<br />
North American Models :<br />
240 VAC, 3-Wire Connection (60 Hz)<br />
All Export Models:<br />
230 VAC, 3-Wire (50 Hz)<br />
Page 17
<strong>680</strong> SERIES<br />
7.0 Spa Fill Up Procedure<br />
For best results, read each step in its entirety before proceeding with that<br />
step.<br />
1. Prepare The Spa For Filling<br />
• Clear all debris from the spa. (Although the spa shell has been<br />
polished at the factory, you may want to treat it with a specially<br />
formulated spa cleaner). Consult your authorized <strong>Sundance</strong> dealer<br />
for additional information prior to filling spa.<br />
• Remove filter/skimmer lid (pages 24 and 25), then remove<br />
filter cartridge as outlined in Section 11.1 (page 36).<br />
2. Fill Spa<br />
• Place the end of your garden hose into the empty filter bucket.<br />
CAUTION: TO DECREASE BUILD UP ON COMPONENTS AND<br />
MINIMIZE ACRYLIC DAMAGE.<br />
Never fill with water from a water softener. If your water is extremely<br />
“hard”, it is preferable to fill half-way with hard water and the rest of<br />
the way with softened water. Water that is too soft can be corrosive<br />
to metal components.<br />
• ! WARNING: TO DECREASE RISK OF INFECTION OR<br />
DISEASE.<br />
Fill hot tub with clean tap water from garden hose, to reduce risk of<br />
contracting a waterborne illness (e.g. an infection, bacteria or virus)<br />
and/or respiratory ailments. Fill until water covers all jets but does not<br />
touch the bottom of the lowest headrest. (DO NOT OVERFILL!)<br />
IMPORTANT: Always fill your spa through the filter bucket after<br />
draining. Failure to do so may cause air to be trapped in either<br />
pump, preventing the pump from circulating water. Remove the<br />
hose and replace the filter cartridge. Note: DO NOT overtighten filter<br />
cartridge, finger tight only!<br />
3. Turn On Power<br />
Turn on power to spa at the home’s circuit breaker to start boot up<br />
sequence (Section 9.0, page 26). The heater and filter pump will<br />
automatically activate after several seconds. If the control panel LED<br />
flashes water temperature and “COL” or “ICE” this is normal, refer to<br />
page 47 for additional information.<br />
Note: “COL” and “ICE” will only appear when the spa is in Economy<br />
mode.<br />
Page 18
<strong>680</strong> SERIES<br />
4. Activate Jets Pumps<br />
Turn on all jets pump(s) to ensure proper mixing when<br />
adding start-up chemicals in step 5.<br />
1 2<br />
5. Add Start-Up Chemicals<br />
Add the spa water chemicals as recommended by your authorized<br />
<strong>Sundance</strong> dealer. See Section titled “Water Quality Maintenance”<br />
(page 41) for general guidance.<br />
!<br />
WARNING: RISK OF POISONING OR DEATH.<br />
Never leave chemicals opened and accessible to anyone.<br />
Use chemicals according to the vendors instructions. Always<br />
store chemicals in a safe and/or locked location. Keep away<br />
from and out of reach of children.<br />
6. Establish A Stable Sanitizer Reading<br />
Establish a stable sanitizer reading no less than 1.0 ppm chlorine<br />
or 2.0 ppm bromine. To ensure healthy water conditions, always<br />
maintain a constant sanitizer reading within the levels recommended<br />
on the inside cover of this manual. If sanitizer levels cannot be<br />
stabilized, perform the decontamination procedure steps 9-15 on the<br />
following page.<br />
Note: The “decontamination procedure” steps 9-15 should also be used<br />
after the spa has been “Winterized” (Section 11.7, page 40) or has<br />
been sitting without power for an extended period.<br />
7. Set Spa To Heat<br />
To warm spa water to a comfortable temperature, follow<br />
these steps:<br />
• The LED display on the control panel displays the actual temperature<br />
of the spa water. Press either the COOLER ( ) or WARMER<br />
( ) button once to display the “set” temperature for 5 seconds.<br />
If you want the water to heat to a different temperature, simply press<br />
COOLER or WARMER within 5 seconds. The set temperature<br />
increases or decreases by one degree each time one of these<br />
buttons is pressed.<br />
• The heater will turn off when the temperature corresponding to the<br />
thermostat setting is achieved.<br />
Page 19
<strong>680</strong> SERIES<br />
Important Heater Details:<br />
• The maximum temperature for which the spa can be set is 104°F<br />
(40°C) and the minimum is 65°F (18°C).<br />
• For North American (60 Hz) 2-pump spas powered by a 40 amp<br />
service, jets pump #1 must be set to low speed and jets pump #2<br />
must be turned off to operate the heater.<br />
• For Export (50 Hz) 2-pump spas powered by a 20 amp service,<br />
jet pump #1 must be set to low speed and jets pump #2 must be<br />
turned off to operate the heater.<br />
• Setting the thermostat at maximum will not accelerate the heating<br />
process. This will only result in a higher ultimate temperature.<br />
• The heater operates until the water reaches the programmed “set<br />
temperature”, then turns off. The heater will reactivate after the<br />
water cools to approximately 1.5° below the “set temperature.”<br />
8. Place Cover On Spa<br />
• Keeping the insulating cover in place anytime the spa is not in<br />
use will reduce the time required for heating, thereby minimizing<br />
operating costs.<br />
• The time required for initial heat-up will vary depending on the<br />
starting water temperature.<br />
!<br />
DANGER: RISK OF PERSONAL INJURY.<br />
Check water temperature carefully before entering hot tub!<br />
Excessive water temperature can cause burns, welts and<br />
body temperature to rise, hyperthermia (over-heating).<br />
Decontamination Procedure (Steps 9-15)<br />
Steps 9-15 below are only required when sanitizer levels are unstable<br />
after performing steps 1-6 above. Disregard steps 9-15 below if sanitizer<br />
levels remain stable within the levels recommended on the inside cover<br />
of this manual.<br />
9. Add 2.5 ounces (71 g) of sodium dichlor for every 100 gallons (378<br />
Liters) of water. Refer to the table below for approximate water fill<br />
volume by model.<br />
!<br />
CAUTION: RISK OF PERSONAL INJURY OR SPA DAMAGE!<br />
Never add chlorine tablets (trichlor) or acid to your hot tub<br />
for any reason! These chemicals may damage components<br />
within your hot tub, burn or irritate your skin, create a rash,<br />
and void the manufacturer warranty for your spa.<br />
Page 20
<strong>680</strong> SERIES<br />
Water Volume by Model<br />
Average<br />
Sodium<br />
Model Fill Volume* Dichlor<br />
Denali...................................230 Gal ( 871 L)........................... 6.0 oz.<br />
Tacoma.................................147 Gal ( 557 L)........................... 4.0 oz.<br />
Burlington.............................350 Gal (1,325 L)........................... 9.0 oz.<br />
Hartford................................390 Gal (1,476 L)......................... 10.0 oz.<br />
Hawthorne............................430 Gal (1,628 L)..........................11.0 oz.<br />
Peyton..................................340 Gal (1,287 L)........................... 9.0 oz.<br />
*Use average fill volume for chemical maintenance<br />
10. Leave spa cover open during this step to allow<br />
excessive chemical vapors to exit spa, protecting plastic<br />
knobs and pillows on Burlington, Hartford, Hawthorne,<br />
Peyton and Tacoma models from chemical attack. If spa<br />
is indoors, open doors and windows for proper<br />
ventilation. Turn on all spa jets pumps for one hour, open<br />
all air controls. On Burlington, Hartford, Hawthorne and<br />
Peyton (Figure A) and Denali (Figure B) models, place<br />
the Massage Selector or Diverter Jet in their center<br />
“combo” position as shown (right).<br />
Note: You will need to press the jets pump button(s) every<br />
20 minutes since these functions have an automatic 20<br />
minute time-out function that turns them off.<br />
Massage Selector<br />
B<br />
Figure A<br />
Figure B<br />
Set all air controls<br />
to their full open<br />
counterclockwise<br />
position<br />
!<br />
WARNING: BECAUSE OF THE RISK OF INHALING<br />
CHEMICAL VAPORS.<br />
• To decrease the risk of injury, drowning or entrapment,<br />
never leave your hot tub unattended for any reason while<br />
the cover is open and accessible, especially to small<br />
children and animals!<br />
• Precautions should be taken to minimize your exposure<br />
to chemical vapors (that could cause lung, brain, or skin<br />
damage).<br />
11. Turn off power to the spa at the circuit breaker, then drain spa as<br />
outlined in Section 11.2 (page 37).<br />
12. Refill spa with clean tap water from garden hose until water covers<br />
all jets. (DO NOT OVERFILL!)<br />
Page 21
<strong>680</strong> SERIES<br />
CAUTION: TO DECREASE BUILD UP ON COMPONENTS AND<br />
MINIMIZE ACRYLIC DAMAGE.<br />
Never fill with water from a water softener. If your water is extremely<br />
“hard”, it is preferable to fill half-way with hard water and the rest of<br />
the way with softened water. Water that is too soft can be corrosive<br />
to metal components.<br />
13. Consult your authorized <strong>Sundance</strong> dealer for chemical recommendations,<br />
then add chemicals to spa water to achieve a constant sanitizer<br />
reading within the levels recommended on the inside cover of<br />
this manual.<br />
14. Turn on all jets pump(s) when adding chemicals to ensure proper<br />
mixing and leave your spa cover open until the sanitizer level<br />
becomes stable to protect pillows and plastic knobs from chemical<br />
attack. Refer to the inside cover of the manual.<br />
!<br />
WARNING: RISK OF PERSONAL INJURY.<br />
• To decrease the risk of injury, entrapment or drowning,<br />
never leave your hot tub unattended for any reason,<br />
especially if while the cover is open and accessible to<br />
small children and animals!<br />
• To decrease the risk of contracting a waterborne illness<br />
(e.g. an infection, bacteria or virus) and/or respiratory<br />
ailments, maintain water chemistry within 6 step<br />
parameters. If you or other bathers experience such a<br />
condition, discontinue use and seek immediate medical<br />
attention.<br />
15. Establish a sanitizer reading no less than 1.0 ppm free chlorine<br />
or 2.0 ppm bromine, then allow the hot tub to set undisturbed for<br />
8 hours. Retest water after 8 hours to determine if sanitizer levels<br />
are stable. If sanitizer levels are stable, your spa is ready for use.<br />
To ensure healthy water conditions, always maintain a constant<br />
sanitizer reading within the levels recommended on the inside cover<br />
of this manual. If sanitizer levels are not stable at this time, it will be<br />
necessary to repeat this procedure in its entirety (steps 1-15) until<br />
stable sanitizer readings are achieved.<br />
IMPORTANT: If the CLEARRAY water purification system is<br />
removed from the hot tub or is not operating effectively follow the<br />
“without CLEARRAY” water chemistry parameters as defined by the<br />
Association of Pool and Spa Professionals.<br />
16. After adequate sanitizer levels are achieved, close all spa air controls<br />
to maximize heat retention when spa is not in use.<br />
Page 22
<strong>680</strong> SERIES<br />
8.0 Control Functions<br />
8.1 Control Panel<br />
A. LED Display: Can display current<br />
water temperature (default display),<br />
water temperature set point, selected<br />
filtration/heating mode, and error<br />
messages.<br />
B. Heat Indicator: Lit when heater is on.<br />
2 Pump Panel Shown<br />
C. Warmer ( ) Button: Increases water temperature set point.<br />
D. Cooler ( ) Button: Decreases water temperature set point.<br />
E. Jets 1 Button: Turns jets pump #1 on and off. Press once for low<br />
speed; press a second time for high speed; press a third time to turn<br />
pump off.<br />
F. Jets 2 Button (if equipped): Turns jets pump #2 on and off. Press<br />
once for high speed; press a second time to turn pump off.<br />
G. Light Button:<br />
• Denali and Tacoma Models: Turns underwater light on in random<br />
mode or in one of six solid colors. Refer to Section 9.3 (page 27)<br />
for details.<br />
• Burlington, Hartford, Hawthorne, and Peyton Models: Turns<br />
underwater light (if equipped) and accent lights on in one of three<br />
random modes or one of seven solid colors. Refer to Section 9.4<br />
(page 28) for details.<br />
Operation Details<br />
• Temperature Adjustment: 65 to 104°F (18 to 40°C). Factory default<br />
setting is 100°F (38°C).<br />
• All lighting systems run for 1 hour then shut off.<br />
• Jets 1/Jets 2 Button Operation: Jets run for 20 minutes after<br />
activated, then turn off automatically to conserve energy. Simply<br />
press either jets button to continue operation for an additional 20<br />
minutes.<br />
Page 23
<strong>680</strong> SERIES<br />
8.2 General Spa Features And Controls<br />
4<br />
12 3 6<br />
3<br />
2 13 2<br />
15<br />
13<br />
15<br />
14<br />
12<br />
7<br />
5<br />
16 13<br />
8<br />
11<br />
15<br />
8<br />
14<br />
4<br />
4<br />
3<br />
8<br />
9a<br />
10<br />
3<br />
14<br />
15<br />
17<br />
13<br />
2 13<br />
1<br />
9b<br />
2<br />
12 12<br />
12<br />
Hartford model illustrated - Jet locations and features will vary<br />
by model. Specifications subject to change without notice.<br />
1. Control Panel<br />
2. Headrest Pillows (4 ea.)<br />
3. Air Controls (4 ea.)<br />
4. Cup Holders (6 ea.)<br />
5. Massage Selector (1 ea.)<br />
6. Waterfall<br />
7. Waterfall control valve (1 ea.)<br />
8. Suction Fittings<br />
9. Lighting System Options:<br />
• LED lighting system includes LED<br />
footwell light (9a)<br />
• Multiple LED accents lights (9b qty<br />
22).<br />
10. Gravity Drain: Fitting functions as<br />
floor gravity drain, heater return and<br />
CLEARRAY purification system return.<br />
11. Filter lid with four cup holders and two<br />
underlying filter cartridges.<br />
• <strong>Spas</strong> without the circulation pump<br />
option utilize both filter cartridges for<br />
jets pump 1.<br />
• <strong>Spas</strong> with the circulation pump option<br />
utilize one filter cartridge closest to<br />
waterfall valve (7) for jets pump 1 and<br />
the second cartridge for the circulation<br />
pump.<br />
12. Optional audio system speakers (4 ea.)<br />
and AM/FM/iPod stereo deck (1 ea.)<br />
located on front spa skirt.<br />
13. DX Jets (10 ea.)<br />
14. DVX Jets (10 ea.)<br />
15. DL Jets (15 ea.)<br />
16. DST Jet (1 ea.)<br />
17. DXL Jets (6 ea.)<br />
Page 24
8.3 General Spa Features And Controls (Peyton Model)<br />
<strong>680</strong> SERIES<br />
11<br />
6<br />
4<br />
11<br />
5<br />
2<br />
12 2<br />
8<br />
8<br />
12 15<br />
13 14<br />
8<br />
3 3<br />
4<br />
8<br />
7<br />
8<br />
14<br />
13<br />
7<br />
13<br />
4<br />
8<br />
17<br />
13<br />
8<br />
9<br />
7<br />
8<br />
2<br />
16<br />
17<br />
13<br />
17<br />
8<br />
1<br />
8<br />
11 11<br />
3<br />
11<br />
Jet locations and features may vary. Specifications subject to<br />
change without notice.<br />
10<br />
1. Control Panel<br />
2. Headrest Pillows (3 ea.)<br />
3. Air Controls (3 ea.)<br />
4. Cup Holders (3 ea.)<br />
5. Waterfall<br />
6. Waterfall control valve (1 ea.)<br />
7. Suction Fittings<br />
8. Multiple LED accents lights (10 ea.)<br />
9. Gravity Drain: Fitting functions as<br />
floor gravity drain, heater return and<br />
CLEARRAY purification system return.<br />
10. Filter skimmer with one underlying<br />
filter cartridge (Filter needs periodic<br />
cleaning)<br />
11. Optional audio system speakers (4 ea.)<br />
and AM/FM/iPod stereo deck (1 ea.)<br />
located on front spa skirt.<br />
12. DX Jets (4 ea.)<br />
13. DVX Jets (11 ea.)<br />
14. DL Jets (8 ea.)<br />
15. DXT Jets (2 ea.)<br />
16. DXL Jets (6 ea.)<br />
17. DV Jets (4 ea.)<br />
Page 25
<strong>680</strong> SERIES<br />
9.0 Operating Instructions<br />
The spa control system has automatic functions that operate upon<br />
start-up and normal operation to protect the system. Upon power up, the<br />
readout displays the following information:<br />
1. Control panel displays current software<br />
release (e.g. 3.59 or 5.58 depending on<br />
spa model), then;<br />
2. Control panel displays “888” and all<br />
indicator LEDs are lit, permitting visual<br />
inspection of all display segments and<br />
indicator lights for proper operation.<br />
3. After the initial start-up sequence ends, the<br />
actual water temperature is displayed. If<br />
water temperature at this time is less then<br />
the factory default temperature setting of<br />
100°F (38°C) and the spa is set to either of the standard filtration/<br />
heating modes (pages 31 and 32), the heater will turn on and run<br />
until the water temperature rises to the factory setting, then turn off.<br />
Note: It is common for the heater to turn on after the spa is first filled<br />
because tap water is often very cold.<br />
9.1 Setting Water Temperature<br />
The spa’s thermostat provides optimum control of water<br />
temperature. The temperature setpoint (set temperature)<br />
can be adjusted from 65°F to 104°F (18°C<br />
to 40°C). To raise the set temperature, press<br />
the WARMER ( ) button. To lower the<br />
set temperature, press the COOLER ( )<br />
button. The first press of either button displays<br />
the set temperature. To access the overtemp<br />
feature that allows the spa to reach 106°F<br />
(41°C) follow the steps below (Figure 1).<br />
1.<br />
2.<br />
3.<br />
Spa with<br />
Circulation<br />
Pump Option<br />
Spa without<br />
Circulation<br />
Pump Option<br />
Figure 1<br />
!<br />
WARNING: RISK OF HYPERTHERMIA (OVER-HEATING)<br />
CAUSING SEVERE INJURY, BURNS, WELTS OR DEATH!<br />
Water temperature in excess of 104°F (40°C) may be<br />
injurious to your health.<br />
A. Press and hold the WARMER ( ) button then;<br />
B. Press and hold the JETS 1 ( ) button at the same time for 2<br />
seconds. You will see the temperature rise to 106°F (41°C) on the<br />
LED display. To lower the temperature, press the COOLER ( )<br />
button.<br />
Page 26
<strong>680</strong> SERIES<br />
C. When the overtemp feature has been activated, the white decimal<br />
point after the last digit will flash on and off every second as an<br />
indicator for being in the overtemp mode.<br />
Note: Once the temperature goes below 104°F (40°C) and you would<br />
like to raise the temperature to 106°F (41°C) again, you will have to<br />
repeat the steps above.<br />
9.2 Activate Pumps<br />
The JETS 1 button activates the jets pump 1. The first press<br />
activates in low speed, the second press activates high<br />
speed, and the third press shuts the pump off. The JETS 2<br />
button (if equipped) activates jets pump 2 which only<br />
operates in high speed. When manually activated, both<br />
pumps automatically turn off in 20 minutes.<br />
1 2<br />
9.3 SunGlow Light Operation (Denali and Tacoma Models)<br />
The spa light offers 6 constant color variations and a unique random<br />
mode for enhanced spa enjoyment. Press the Light button once to turn<br />
the spa light on in Random mode, then repeatedly press the button to<br />
turn the light off or to select one of 6 constant colors as illustrated below.<br />
Random<br />
OFF<br />
Red<br />
OFF<br />
Green<br />
OFF<br />
Blue<br />
Off<br />
Teal<br />
OFF<br />
Violet<br />
OFF<br />
Orange<br />
OFF<br />
You must press the LIGHT button within 5 seconds between each “off”<br />
or “color” selection to prevent it from resetting. Pressing the button<br />
after 5 seconds restarts the sequence in Random mode. This mode<br />
automatically changes the light color every 8 to 20 seconds.<br />
Note: Any time the spa light is manually turned on, it will automatically<br />
turn off after approximately 1 hour. If you desire more light at this time,<br />
simply turn the light back on.<br />
Page 27
<strong>680</strong> SERIES<br />
9.4 Multi-Colored LED Light System Operation (Burlington,<br />
Hartford, Hawthorne, and Peyton Models)<br />
The multi-colored LED spa light offers seven constant color variations<br />
and three unique random modes for enhanced spa enjoyment. Press<br />
the light button once to activate the first light mode Random Fade, then<br />
continue pressing the button to either turn the light off or to select one<br />
of seven constant colors, random solid color mode or strobe mode as<br />
illustrated.<br />
Press<br />
Once<br />
= RANDOM FADE<br />
= off<br />
= NEAR WHITE<br />
= off<br />
= LIGHT BLUE<br />
= off<br />
= VIOLET<br />
= off<br />
= DARK BLUE<br />
= off<br />
= LIME GREEN<br />
Light Operation Tips:<br />
You must press the light button within 3<br />
seconds of any “off” condition or the light<br />
sequence will revert back to “Random<br />
Fade” mode, when reactivated.<br />
Any time the spa light is manually<br />
activated, it will remain on for 1 hour then<br />
automatically shut off.<br />
= off<br />
= DARK GREEN<br />
= off<br />
= RED<br />
= off<br />
= RANDOM SOLID<br />
= off<br />
Lights display different solid color every 5-6 seconds<br />
= STROBE<br />
= off<br />
Lights flash “strobe” in white color<br />
Page 28
<strong>680</strong> SERIES<br />
9.5 Adjusting Individual Jet Flow<br />
The water flow through certain jets in your spa can be adjusted<br />
or turned off by rotating the outside jet ring. These jets include:<br />
• DXL Jet<br />
• DL Jet<br />
• DX Jet<br />
• DV Jet<br />
DST Jet<br />
Other jets also offer an adjustable center nozzle that allows you<br />
to change the water discharge angle. Simply tilt the center nozzle<br />
in these jets to the desired angle to customize your personal<br />
massage. These jets include:<br />
• DXL Jet<br />
• DVX Jet<br />
• DST Jet<br />
• DV Jet<br />
Note: Always keep at least 6 adjustable jets open at all times to ensure<br />
proper filtration characteristics within spa.<br />
9.6 Selecting Desired Massage Action<br />
All models (except Tacoma) incorporate a massage selector<br />
valve or Diverter Jet that allows you to customize the massage<br />
and performance by diverting water between various jet<br />
systems within the spa. Simply turn valve to positions A, B or<br />
C to divert water pressure to various jet groups.<br />
Note: The valve is intended to operate in positions A<br />
(Combo), B, or C for optimum performance. It is considered<br />
normal for sound levels within the valve to increase between<br />
these positions due to the large amounts of water flowing<br />
through it. For optimum filtration benefits, always leave<br />
this valve in position A when the spa is covered and select<br />
positions B or C for maximum jet performance during spa use.<br />
9.7 Air Controls<br />
Certain jet systems have their own air control. Each<br />
control introduces air into the water lines that supply that<br />
specific jet group. Simply turn the air control selection<br />
to open or close. To minimize heat loss, all air controls<br />
should be closed when the spa is not in use.<br />
9.8 Optional Audio System<br />
Models equipped with the optional audio system offer<br />
enhanced spa enjoyment. These models include a<br />
high-quality AM/FM/iPod® stereo receiver with four highquality<br />
marine speakers for unsurpassed sound quality and<br />
long-life. Refer to the manufacturers operating instructions<br />
included in the warranty pack.<br />
DVX Jet<br />
DV Jet<br />
Burlington, Hartford,<br />
Hawthorne, and<br />
Peyton models<br />
B<br />
A<br />
Denali model<br />
C<br />
Burlington, Hartford,<br />
Hawthorne,<br />
and Peyton models<br />
Denali model<br />
Page 29
<strong>680</strong> SERIES<br />
10.0 Automatic Filtration Cycles<br />
The control system activates a programmable “Standard” or “Economy”<br />
filtration cycle to remove debris from your spa. These cycles use the low<br />
speed pump, skimmer basket, and filter cartridge quickly clear “skim”<br />
the water of debris and minimize their “bathtub ring” affect. Apart from<br />
their filtration benefit, each mode also effects the operation of your spa’s<br />
heater. Refer to Sections 10.1-10.3 below for additional information.<br />
10.1 Standard Filtration/Heating Modes For Models Without<br />
Circulation Pump Option<br />
Standard filtration/heating modes (F1-F3) are typically selected by<br />
customers in cold climates where heat up times are extended due<br />
to lower ambient temperatures. In either of these modes, the set<br />
temperature regulates the water temperature. The low-speed jets pump<br />
1 and heater turn on as needed. After the programmed set temperature<br />
is reached, the heater and low speed pump turn off; only to turn back on<br />
during a heat call and/or during the next programmed filtration/heating<br />
cycle.<br />
10.2 Standard Filtration/Heating Modes For Models With<br />
Circulation Pump Option<br />
Standard filtration/heating modes (F0-F3) are typically selected by<br />
customers in cold climates where heat up times are extended due<br />
to lower ambient temperatures. In either of these modes, the water<br />
temperature is regulated by the set temperature. The 24-hour circulation<br />
pump and heater turn on as needed.<br />
10.3 Economy Filtration/Heating Modes (F4-F6)<br />
Economy filtration/heating modes are typically selected by customers in<br />
warm climates where heat up times are minimized due to higher ambient<br />
temperatures. In these modes, the water temperature is regulated by the<br />
set temperature only during a programmed filtration/heating cycle. The<br />
heater will turn on only when there is a heat call during a programmed<br />
filtration/heating cycle.<br />
Note: These modes consume less energy than standard modes F1-F3<br />
outlined above.<br />
10.4 Lock Modes (L1-L2)<br />
These modes are designed for use during spa service or to prevent<br />
unauthorized use.<br />
Page 30
<strong>680</strong> SERIES<br />
10.5 Selecting The Filtration/Heating Mode<br />
Press and hold both control panel WARMER ( ) and<br />
COOLER ( ) buttons at the same time, then release.<br />
Then press either WARMER ( ) or COOLER ( ) button to select<br />
filtration/heating mode F1-F6 or lock modes L1-L2 on the following<br />
pages.<br />
10.6 Filtration Modes for <strong>Spas</strong> Without Circulation Pump Option<br />
If your spa is equipped with the circulation pump option, disregard this<br />
section and refer to page 32 for filter cycle programming details.<br />
During the filtration/heating cycle the Jets pump 1 low speed will activate.<br />
Standard Filtration/Heating Modes (F1-F3)<br />
F1 4 hours of filtration/heating per day (one 2-hour cycle every<br />
12 hours).<br />
F2 6 hours of filtration/heating per day (one 2-hour cycle every<br />
8 hours).<br />
F3 8 hours of filtration/heating per day (one 2-hour cycle every<br />
6 hours).<br />
Economy Filtration/Heating Modes (F4-F6)<br />
F4 4 hours of filtration/heating per day (one 2-hour cycle every<br />
12 hours).<br />
F5 6 hours of filtration/heating per day (one 2-hour cycle every<br />
8 hours).<br />
F6 8 hours of filtration/heating per day (one 2-hour cycle every<br />
6 hours).<br />
Lock Modes (L1-L2)<br />
L1 Lock Out (disables all spa functions to permit filter<br />
cleaning).<br />
L2 Lock Mode (disables the jets and light buttons to prevent<br />
unauthorized use of spa). Filtration/heating cycle will<br />
continue to operate as programmed in this mode. The<br />
temperature display flashes when this function is enable.<br />
Example: the “F3” filtration/heating cycle was enabled prior to<br />
choosing lock mode. The spa continues to perform the “F3” cycle<br />
until lock mode is canceled, allowing another cycle to be selected.<br />
Filter Cycle Setup Example<br />
To set a time for the first filtration/heating cycle, simply turn power on to<br />
the spa two minutes prior to the desired time. Example: If you desire your<br />
first filtration/heating cycle to begin at 10:00 AM turn off power to the spa<br />
and turn it back on again at 9:58 AM.<br />
Note: Start time is approximate and may vary slightly from day to day.<br />
Page 31
<strong>680</strong> SERIES<br />
10.7 Filtration Modes for <strong>Spas</strong> With Circulation Pump Option<br />
If your spa is not equipped with the circulation pump option, disregard<br />
this section and refer to page 31 for filter cycle programming details.<br />
During the filtration/heating cycle the jets pump 1 low speed will activate.<br />
Standard Filtration/Heating Modes (F0-F3)<br />
(Heater automatically turns on during any heat call while in<br />
any Standard mode).<br />
F0 5 minutes of filtration per day (one 5 minute “Blow-Out”<br />
cycle every 24 hours to purge all plumbing lines)<br />
F1 1 hour of filtration per day (one 30-minute cycle every<br />
twelve hours); this is the factory default setting.<br />
F2 1.5 hours of filtration per day (one 30-minute cycle every<br />
eight hours).<br />
F3 2 hours of filtration per day (one 30-minute cycle every six<br />
hours).<br />
Economy Filtration/Heating Modes (F4-F6)<br />
(Heater can only turn on during an active filter cycle while in<br />
any economy mode).<br />
F4 1 hour of filtration/heating per day (one 30-minute cycle<br />
every twelve hours).<br />
F5 1.5 hours of filtration/heating per day (one 30-minute<br />
cycle every eight hours).<br />
F6 2 hours of filtration/heating per day (one 30-minute cycle<br />
every six hours).<br />
Lock Modes (L1-L2)<br />
L1 Lock Out (disables all spa functions to permit filter<br />
cleaning).<br />
L2 Lock Mode (disables the jets and light buttons to prevent<br />
unauthorized use of spa). Filtration/heating cycle will<br />
continue to operate as programmed in this mode. The<br />
temperature display flashes when this function is enable.<br />
Example: the “F3” filtration/heating cycle was enabled prior to<br />
choosing lock mode. The spa continues to perform the “F3” cycle<br />
until lock mode is canceled, allowing another cycle to be selected.<br />
Filter Cycle Setup Example<br />
To set a time for the first filtration/heating cycle, simply turn power on to<br />
the spa two minutes prior to the desired time. Example: If you desire your<br />
first filtration/heating cycle to begin at 10:00 AM turn off power to the spa<br />
and turn it back on again at 9:58 AM.<br />
Note: Start time is approximate and may vary slightly from day to day.<br />
Page 32
<strong>680</strong> SERIES<br />
10.8 Programming the Circulation Pump Filtration Cycle (For<br />
<strong>Spas</strong> Equipped with a Circulation Pump)<br />
Press and hold the Jets pump 1 ( ) and Cooler ( ) button at the<br />
same time for 3 seconds to access the circulation pump programming.<br />
Continually press the Warmer ( ) button to scroll up through the<br />
cycles below. Then select a cycle and press the Jets pump 1 ( )<br />
button to activate that cycle. Upon pressing the jets pump 1 button the<br />
system will save your selection, exit the program menu and return to the<br />
main menu.<br />
Note: After 10 seconds the programming screen will revert back to the<br />
temperature if no buttons are pressed. You cannot have more than one<br />
circulation pump cycle activated at a time.<br />
0 hours of circulation per day<br />
4 hours of circulation per day<br />
8 hours of circulation per day<br />
12 hours of circulation per day<br />
16 hours of circulation per day<br />
20 hours of circulation per day<br />
24 hours of circulation per day (recommended<br />
factory default setting)<br />
Note: The recommended factory default setting for the <strong>680</strong> <strong>Series</strong> is 24<br />
hours. This setting should not be altered. Running the circulation pump<br />
less that the factory recommended time may result in issues with water<br />
quality maintenance.<br />
Page 33
<strong>680</strong> SERIES<br />
10.9 Programming the CLEARRAY (Ultraviolet) Water Purification<br />
System<br />
A. Programming the CLEARRAY System (U) or Corona Discharge<br />
Ozone (O3)<br />
Press and hold the Jets pump 1 ( ) and Cooler ( ) button at the<br />
same time for 3 seconds. Scroll pass the circulation pump programming<br />
menus by pressing the Warmer button, Figure 1.<br />
Note: If your spa is not equipped with a circulation pump you will not<br />
need scroll through the circulation pump programming menus. You will<br />
enter the sanitizing system program, Figure 2.<br />
Figure 1: Menus for spas equipped with a circulation pump.<br />
Press Press Press Press Press<br />
Press<br />
Will select “O3”<br />
option and exit<br />
menu.<br />
1<br />
Press<br />
Press<br />
Press<br />
Will take you back<br />
to “C0” option.<br />
Figure 2: Menus for spas NOT equipped with a circulation pump.<br />
Press<br />
Press<br />
or<br />
or<br />
1. After the last cycle, “C6”, the LED screen will display “U” or “O3.”<br />
If the LED screen is displaying “U” then pressing the Jets pump<br />
1 will change the sanitizing system from “U” to “O3” and exit the<br />
programming menu. If the LED screen is displaying “O3” then<br />
pressing the Jets pump 1 will change the sanitizing system from “O3”<br />
to “U” and exit the programming menu. You will see one of the two<br />
configurations below:<br />
A. C0, C1, C2, C3, C4, C5, C6, U, 365 (duration countdown timer)<br />
B. C0, C1, C2, C3, C4, C5, C6, O3, =<br />
Note: For the O3 option the “=” disables the duration countdown timer.<br />
2. If you do not wish to change the option do not press any buttons and<br />
after 10 seconds the display will return to the main menu.<br />
Note: If the CLEARRAY System has been selected, when the<br />
time allotted has expired (365 days) the display screen will<br />
flash between the water temperature and “blb.” At this time the UV lamp<br />
lamp must be replaced, the quartz tube must be cleaned and the<br />
duration countdown timer needs to be reset.<br />
Page 34
<strong>680</strong> SERIES<br />
B. Resetting the duration countdown timer (CLEARRAY System<br />
only)<br />
Once the duration countdown timer for the CLEARRAY System has<br />
reached zero, you will need to reset the it, replace the UV lamp lamp and<br />
clean the quartz tube.<br />
To reset the duration countdown timer:<br />
Press Press Press Press Press<br />
Press<br />
Press<br />
Press<br />
Press<br />
1<br />
Will reset the timer<br />
to 365 days and exit<br />
the menu<br />
1. Press and hold the Jets pump 1 ( ) and Cooler ( ) button at the<br />
same time for 3 seconds.<br />
2. Press the Warmer ( ) button until the display shows “0.”<br />
3. If the timer has reached “0”, pressing the Jets pump 1 ( ) button<br />
will reset it. If the timer is not at “0” pressing the Jets pump 1<br />
button will not reset it.<br />
Note: If the spa power is interrupted, the duration countdown timer is not<br />
affected. The number of days remaining is stored in the memory and will<br />
continue to countdown once power is regained.<br />
4. If the duration countdown timer is not at “0” and you need to reset it:<br />
A. Press and hold the Jets pump 1 and Cooler buttons at the same<br />
time for 3 seconds.<br />
B. Press the Warmer button to scroll to “U.”<br />
C. Press the Jets pump 1 button to switch from “U” to “O3.”<br />
D. Press and hold the Jets pump 1 and Cooler buttons at the same<br />
time for 3 seconds.<br />
E. Press the Warmer button to scroll to “O3.”<br />
F. Press the Jets pump 1 button to switch from “O3” to “U.” The<br />
timer has been reset to 365 days.<br />
Page 35
<strong>680</strong> SERIES<br />
11.0 Spa Maintenance<br />
Proper and regular maintenance of your spa will help it retain its beauty<br />
and performance. Your authorized <strong>Sundance</strong> dealer can supply you with<br />
all the information, supplies, and accessory products you will need to<br />
accomplish this.<br />
! DANGER: RISK OF SEVERE INJURY OR DROWNING<br />
BY ENTRAPMENT!<br />
• Keep hair, loose articles of clothing or hanging jewelry away<br />
from suction fittings, rotating jets or other moving components to<br />
avoid entrapment that could lead to drowning or severe injury.<br />
• Never use the spa unless all suction guards, filter, filter lid, or<br />
skimmer assembly are installed to prevent body and/or hair<br />
entrapment.<br />
• Never operate or use the spa if the filter, filter lid, or skimmer<br />
assembly are broken or any part of the skimmer assembly is missing.<br />
Please contact your dealer or nearest service center for service.<br />
• The suction fittings and suction covers in this spa are sized<br />
to match the specific water flow created by the pump(s). If it<br />
is necessary to replace the suction fittings, suction covers or<br />
pump(s), be sure that the flow rates are compatible and are in<br />
compliance with the VGB Safety Act page 2.<br />
• Never replace a suction fitting or suction cover with one rated<br />
less than the flow rate marked on the original suction fitting.<br />
Using improper suction fittings or suction covers can create<br />
a body or hair suction entrapment hazard that may lead to<br />
drowning or severe injury.<br />
• <strong>Owners</strong> must alert all spa users to the potential risk of Hair,<br />
Limb, Body, Evisceration (disembowelment), and Mechanical<br />
Entrapment, page 6.<br />
11.1 Cleaning The Filter<br />
DANGER: TURN POWER TO SPA OFF!<br />
TO DECREASE RISK OF DEATH, DROWNING,<br />
OR ENTRAPMENT, NEVER OPERATE SPA<br />
WHEN FILTER IS NOT PROPERLY INSTALLED<br />
OR IF SKIMMER ASSEMBLY IS DAMAGED OR<br />
ALTERED!<br />
A. Burlington, Hartford, and Hawthorne<br />
Models:<br />
Your spa is equipped with two filter cartridges<br />
which are utilized as follows:<br />
• <strong>Spas</strong> equipped with the optional circulation<br />
pump use cartridge 1 for the circulation pump and cartridge 2 for jets<br />
pump 1.<br />
Page 36<br />
To Remove: Turn<br />
Counterclockwise<br />
Cartridge 1 Cartridge 2<br />
Spa Filter Bay<br />
To Install: Turn<br />
Clockwise
<strong>680</strong> SERIES<br />
• <strong>Spas</strong> not equipped with the optional circulation pump use both filter<br />
cartridges for jets pump 1.<br />
During spa use or an automatic filter cycle, water flows through the<br />
spa skimmer and into both polyester mesh filter cartridges to trap<br />
suspended particles and oils on their surface pleats. To ensure optimum<br />
performance, it is necessary to remove and clean both filter cartridges<br />
once a month or sooner depending on spa use and water quality.<br />
B. Denali, Peyton and Tacoma Models:<br />
Your <strong>Sundance</strong> spa is equipped with a skimmer basket and<br />
filter cartridge located in the skimmer/filter well. Filtering<br />
is accomplished when the pump turns on in low speed<br />
to initiate water flow through the skimmer basket and<br />
polyester mesh filter cartridge. As this happens, suspended<br />
particles become trapped on the filter’s surface. To ensure<br />
optimum performance, it is necessary to remove and clean<br />
the skimmer basket once a week and filter cartridge once a<br />
month or sooner, depending on usage and water quality.<br />
SPA SHELL<br />
C. Cleaning Procedure (for All Models):<br />
1. Turn off power to the spa at the home’s breaker panel or select<br />
the L1 “Lock” mode (page 30) to disable all spa functions.<br />
2. Remove the filter strainer lid or skimmer assembly.<br />
3. Remove the filter cartridge by rotating it counterclockwise to<br />
unthread it from the filter wall fitting, then lift it straight up to remove<br />
from filter well.<br />
4. Using a garden hose with a high-pressure nozzle to rinse debris from<br />
the filter pleats beginning at the top and working your way downward.<br />
Continue, one section at a time, until you have rinsed all of the filter’s<br />
pleats.<br />
Periodically, the filter cartridge will need a more thorough cleaning to<br />
remove imbedded oils and minerals. For this, we suggest cleaning as<br />
above and then soaking the cartridge overnight in a plastic container<br />
filled with a solution of water and a specially formulated filter cleanser<br />
available from your authorized <strong>Sundance</strong> dealer. The average life<br />
expectancy of a <strong>Sundance</strong> filter cartridge is approximately two years<br />
with proper care and water quality maintenance. A replacement cartridge<br />
may be purchased from your dealer.<br />
11.2 Draining and Refilling<br />
About every 3 months, you will want to replace the spa’s water. The<br />
frequency depends on a number of variables including the amount of<br />
use, attention paid to water quality maintenance, etc. You will know it is<br />
time for a change when you cannot control sudsing and/or you can no<br />
longer get the normal feel or sparkle to the water even though the key<br />
water balance measurements are all within the proper parameters.<br />
Page 37
<strong>680</strong> SERIES<br />
CAUTION! READ THIS BEFORE DRAINING: To prevent<br />
! damage to the spa’s components, turn off power to the<br />
spa at the circuit breaker before draining it. Do not turn<br />
the power back on until your spa has been refilled. There are<br />
certain precautions to keep in mind when draining your spa.<br />
If it is extremely cold, and the spa is outdoors, freezing could<br />
occur in the lines or the equipment (see “WINTERIZING”,<br />
page 40). On the other hand, if it is hot outdoors, do not<br />
leave the spa’s surface exposed to direct sunlight.<br />
To drain your spa, perform the following steps (actual<br />
drain may vary from one shown). Turn off power<br />
to spa at breaker.<br />
1. Locate and remove the synthetic cabinet door<br />
screws and door. The door is located directly<br />
below the control panel and is easily identified by Figure A<br />
it’s vertical cooling slots.<br />
2. Locate drain hose line attached to 2 x 4 wood slat<br />
(Figure A) with tie wraps.<br />
2<br />
3. Cut tie wraps and pull drain hose from equipment 1<br />
area (Figure B).<br />
4. Hold drain hose above water line, then unthread<br />
Figure B<br />
drain cap (1) from hose using a counterclockwise<br />
rotation (Figure B). Place hose on ground making<br />
sure to direct water away from spa. If equipped,<br />
turn valve (2) counterclockwise to open the valve<br />
(Figure C).<br />
5. After spa has completely drained, reinstall<br />
Figure C<br />
drain cap on drain valve finger tight! DO NOT<br />
OVERTIGHTEN! If equipped turn valve (2)<br />
clockwise to close the valve.<br />
6. Place drain hose back inside the spa equipment bay.<br />
7. Reinstall synthetic cabinet door and screws.<br />
8. After refilling spa, turn on power and follow the “Spa Fill Up<br />
Procedure” (page 18).<br />
11.3 Pillow Care (All Models Except Denali)<br />
Remove and clean the headrest pillows as needed with soapy water using<br />
a cloth or soft-bristle brush. To maintain water resistance and luster, apply<br />
a quality vinyl conditioner once a month. Always remove the pillows when<br />
adding chemical shock treatment to the spa water. The pillows can be<br />
returned to the spa when the sanitizer reading is stable as recommended<br />
on the inside cover of the manual.<br />
11.4 Cleaning The Spa Interior<br />
To preserve the sheen of your spa’s surface, it is crucial that you avoid<br />
using abrasive cleaners or cleaners which have adverse chemical effect<br />
Page 38
<strong>680</strong> SERIES<br />
on the surface. If you are not certain as to the suitability of a particular<br />
cleanser, consult your authorized <strong>Sundance</strong> dealer. Regardless of the<br />
cleanser used, use extreme care to assure that no soap residue is left on<br />
the surface. This could cause severe sudsing when the spa is refilled.<br />
11.5 Maintaining The Cover<br />
Using the <strong>Sundance</strong> insulating spa cover anytime the spa is not in<br />
use will significantly reduce your operating costs, heat-up time and<br />
maintenance requirements. To prolong the life of the cover, handle it with<br />
care and clean it regularly. Below are the care instructions.<br />
A. To Clean and Condition the Vinyl Cover<br />
1. Use a garden hose to loosen debris and dirt.<br />
2. Using a large sponge or a soft bristle brush, use diluted or mild soap<br />
and scrub the vinyl top. Rinse clean and do not allow soap to dry on<br />
cover. Do not use soap on the underside of the cover.<br />
3. Please check with your <strong>Sundance</strong> Spa Dealer for recommended<br />
cover care and conditioning products. Condition using non-petroleum<br />
based conditioners to keep the vinyl supple and threads/stitching<br />
from drying out. Do not use solvents, abrasive cleaners or strong<br />
detergents. Do not use products that contain silicone or alcohol.<br />
B. Additional Care and Maintenance Instructions:<br />
1. Debris can accumulate on the spa cover. Removal of snow or other<br />
debris will help to avoid breakage of the foam cores.<br />
2. Be sure to lock the cover straps to secure the cover from unwanted<br />
or accidental entry.<br />
3. Do not place heavy objects on the vinyl.<br />
4. Do not walk, sit or stand on the cover.<br />
5. Do not drag or use the flaps/skirt or the cover lock straps to remove<br />
the cover.<br />
6. Use only recommended cover lift systems.<br />
7. Use only chemicals and cleaners recommended by <strong>Sundance</strong> <strong>Spas</strong>.<br />
8. Remember to keep spa covered when not in use. Maintaining proper<br />
water levels assures efficient operation and efficient electrical usage.<br />
9. Do not expose your spa to the sun for extended periods of time as<br />
UV rays can damage the interior surface.<br />
10. Use caution when removing cover. Before removing cover, assure all<br />
locks have been released to avoid lock breakage and or cover strap<br />
damage.<br />
11.6 Maintaining The Synthetic Cabinet<br />
Your new spa’s synthetic cabinet requires little or no maintenance of any<br />
kind. To clean, simply wipe cabinet with a clean towel and mild soap solution.<br />
CAUTION: Never spray cabinet with a garden hose for any<br />
reason since this action may induce an electrical short in the<br />
spa’s electrical equipment.<br />
Page 39
<strong>680</strong> SERIES<br />
11.7 Winterizing<br />
Your <strong>Sundance</strong> ® spa is designed to automatically protect itself against<br />
freezing when operating properly. During periods of severe freezing<br />
temperatures, you should check periodically to be certain that the<br />
electrical supply to the spa has not been interrupted. In extreme, bitter<br />
cold weather less than -20°F (-29°C), choose the F3 “Standard” filtration/<br />
heating mode to prevent freezing (pages 31-32).<br />
If you do not intend to use your spa, or if there is a prolonged power<br />
outage during periods of severe freezing temperatures, it is important<br />
that all water be removed from the spa and equipment to protect<br />
against damage from freezing.<br />
Expert winterization of your spa is highly recommended, contact your<br />
authorized <strong>Sundance</strong> dealer. In emergency situations, damage can be<br />
minimized by taking the following steps:<br />
Page 40<br />
CAUTION: TURN OFF POWER TO HOT TUB!<br />
1. Turn off power to the spa.<br />
2. Follow the directions on page 37 for draining the spa.<br />
3. Turn the massage/diverter selector(s) into the middle combo position<br />
to allow the water in the plumbing lines to drain, see page 29.<br />
4. Turn the waterfall valve to the open position to allow the water in the<br />
plumbing lines to drain, see page 29.<br />
5. As the water level drops below the seats, use whatever means<br />
necessary to get the water out of the recessed seating areas and into<br />
the footwell, such as a wet/dry vacuum.<br />
6. When the water level ceases to drop, use whatever means available<br />
to remove any remaining water from the footwell, such as a wet/dry<br />
vacuum.<br />
7. Remove the equipment-side cabinet panel and locate the drain plugs<br />
in the front of the pump(s) (Figure A, page 16). Remove these<br />
plugs to allow the water to drain out of the pumps and heater.<br />
Note: Approximately one to two gallons will be released during this<br />
procedure. Use a wet/dry vacuum or other means to keep this from<br />
flooding the equipment compartment. Replace the pump drain plugs.<br />
8. Loosen hose clamp at bottom of CLEARRAY system and pull hose<br />
off of CLEARRAY fitting (twist the hose back and forth while pulling<br />
downward). Tip hose down and allow to drain, then reinstall hose<br />
and clamp. Remove the cover of the CLEARRAY system to access<br />
the UV lamp and quartz tube. Remove and store the UV lamp in a<br />
safe location. Remove and dry off the quartz tube then reinstall it.<br />
Depending on the length of time, consider replacing the UV lamp<br />
when you resume use of your hot tub.<br />
9. Re-install cabinet side panels and cover spa so that no casual<br />
moisture can enter into it.<br />
Consult your authorized <strong>Sundance</strong> dealer if you have any questions<br />
regarding winter use or winterizing.
<strong>680</strong> SERIES<br />
11.8 Restarting Your Spa in Cold Weather<br />
If you want to start up your spa after it has sat empty for a time in freezing<br />
temperatures, be aware that the water remaining in certain sections of the<br />
piping may still be frozen. This situation will block water flow preventing the<br />
spa from operating properly and possibly damaging the equipment. We<br />
recommend you consult your authorized <strong>Sundance</strong> dealer for guidance<br />
before attempting to re-start your spa under these conditions.<br />
12.0 Water Quality Maintenance<br />
To decrease the risk of contracting a waterborne illness (e.g. an infection,<br />
bacteria or virus) and/or respiratory ailments, maintain water quality<br />
within specified limits. This will enhance your enjoyment and prolong<br />
the life of the hot tub’s equipment. Doing so requires regular attention<br />
because the water chemistry involved is a balance of several factors.<br />
Procrastination in regard to water maintenance will result in poor and<br />
potentially unhealthful conditions for soaking and even damage to your<br />
hot tub investment. For specific guidance on maintaining water quality,<br />
consult your Authorized <strong>Sundance</strong> <strong>Spas</strong> dealer who can recommend<br />
appropriate chemical products for sanitizing and maintaining your hot<br />
tub.<br />
!<br />
WARNING: FAILURE TO MAINTAIN WATER QUALITY<br />
WILL:<br />
• Increase risk of contracting a waterborne illness (e.g. an<br />
infection bacteria or virus) and/or respiratory ailments.<br />
• Damage the equipment, components and spa shell, which<br />
are not covered under the hot tub’s warranty.<br />
CAUTION: Never store hot tub chemicals inside the hot tub’s equipment<br />
bay. The equipment bay may reach elevated temperatures,<br />
this is where high voltage electronic devices are located. This area<br />
is not intended for storage of any kind.<br />
12.1 pH Control<br />
pH is a measure of relative acidity or alkalinity of water and is measured<br />
on a scale of 0 to 14. The midpoint of 7 is said to be neutral, above which<br />
is alkaline and below which is acidic. In spa water, it is very important to<br />
maintain a slightly alkaline condition of 7.4 to 7.6 pH. Problems become<br />
proportionately severe the further outside of this range the water gets.<br />
A low pH will be corrosive to metals in the spa equipment. A high pH will<br />
cause minerals to deposit on the interior surface (scaling). In addition,<br />
the ability of the sanitation agents to keep the spa clean is severely<br />
affected as the pH moves beyond the ideal range. That is why almost all<br />
spa water test kits contain a measure for pH as well as sanitizer.<br />
Page 41
120 - 230V<br />
<strong>680</strong> SERIES<br />
12.2 Sanitizing<br />
To destroy bacteria and organic compounds in the spa water, a sanitizer<br />
must be used regularly. Chlorine and bromine are the two most popular<br />
sanitizers used to date. Many other additives are available for your spa.<br />
Some are necessary to compensate for out-of-balance water; some aid<br />
in cosmetic water treatment and others simply alter the feel or smell of<br />
the water. Your authorized <strong>Sundance</strong> dealer can advise you on the use of<br />
these additives. When adding spa shock (chlorine or non-chlorine) or pH<br />
balancing chemicals activate the jets pump(s) and leave the spa cover<br />
open for a minimum of 20 minutes. By doing this you will allow excessive<br />
chemical vapors to exit the spa, protecting pillows and plastic knobs from<br />
chemical attack.<br />
!<br />
WARNING: RISK OF PERSONAL INJURY, DROWNING<br />
OR ENTRAPMENT!<br />
Never leave your hot tub unattended for any reason while the<br />
cover is open and accessible, especially to small children and<br />
animals!<br />
CAUTION: RISK OF PERSONAL INJURY OR SPA DAMAGE!<br />
Never add chlorine tablets (trichlor) or acid to your hot tub<br />
for any reason! These chemicals may damage components<br />
within your hot tub, burn or irritate your skin, create a rash<br />
and void the manufacturer warranty for your spa.<br />
WARNING!<br />
12.3 CLEARRAY Water Purification System<br />
DO NOT LOOK AT LIT BULB<br />
SEVERE EYE DAMAGE<br />
OR BLINDNESS CAN OCCUR<br />
Your new hot tub has our water purification system factory<br />
installed that will begin disinfecting your water instantly.<br />
CLEARRAY Water Purification System is exclusive<br />
technology utilizing natural ultraviolet technology to sanitize your<br />
water, disinfecting bacteria, viruses, and algae in portable hot<br />
tubs. The ultraviolet light otherwise know as UV-C or germicidal<br />
light inactivates the microorganisms by disrupting the DNA so that<br />
it cannot reproduce and is considered lifeless. The ballast is the<br />
power supply for the purification system; it has two LED indicator<br />
lights the green indicating incoming power flow and the red<br />
indicating the system is properly working. CLEARRAY is standard<br />
for all models.<br />
• (For models with a circulation pump): The CLEARRAY System<br />
only runs when the circulation pump is running and shuts off when<br />
either jets pump is manually activated during spa use. The system<br />
will remain off for 5 minutes after both jets pumps time out or are<br />
manually turned off, then resume operations if the circulation pump is<br />
programmed to run.<br />
• (For models without a circulation pump): The CLEARRAY System<br />
only runs when the jets pump 1 is running.<br />
Page 42
WARNING!<br />
DO NOT LOOK AT LIT BULB<br />
SEVERE EYE DAMAGE<br />
OR BLINDNESS CAN OCCUR<br />
<strong>680</strong> SERIES<br />
After a year the lamp must be replaced. If the UV timer has been<br />
programmed correctly a message will appear on the LED display when<br />
the time allotted has expired. In order to clear the “blb” message a new<br />
UV lamp needs to be installed and the timer must be reset (Section 10.9,<br />
page 34).<br />
Note: In order to access the CLEARRAY unit, the front synthetic panel or<br />
the stereo panel and the right corner panel need to be removed.<br />
12.4 CLEARRAY Lamp Replacement and Quartz Tube<br />
Maintenance<br />
Important: It is MANDATORY that the UV lamp is replaced and the<br />
quartz tube be cleaned every 12 months to maintain optimum<br />
performance.<br />
9 10<br />
1 2<br />
4<br />
6 7<br />
8<br />
3<br />
13<br />
5<br />
11<br />
Figure 1<br />
12<br />
!<br />
DANGER: TURN THE SPA BREAKER TO THE OFF<br />
POSITION!<br />
!<br />
WARNING: ALLOW LAMP TO COOL DOWN PRIOR TO<br />
REMOVING FROM QUARTZ TUBE.<br />
DANGER: NEVER LOOK AT THE LIT BULB. THIS CAN<br />
!<br />
CAUSE SEVERE EYE DAMAGE OR BLINDNESS.<br />
UV lamp replacement and quartz tube maintenance:<br />
Note: Location of CLEARRAY System and connection<br />
may vary by model.<br />
1. Turn the breaker to the spa OFF. We recommend<br />
that you drain your spa. Disconnect the<br />
CLEARRAY System from the controller, Figure 2.<br />
2. Once the UV lamp has cooled off remove the<br />
CLEARRAY System enclosure cover (10) and<br />
gasket (9) by removing the four screws (11).<br />
SPA CONTROLLER<br />
Connection<br />
UV Unit<br />
Figure 2<br />
Page 43
<strong>680</strong> SERIES<br />
!<br />
DANGER: NEVER REMOVE COVER WITHOUT FIRST<br />
TURNING OFF AT POWER SOURCE.<br />
Figure 3<br />
7<br />
Figure 4<br />
Figure 5<br />
8<br />
4<br />
5<br />
4<br />
3. Remove the black lamp boot (8) by sliding it over the cable away<br />
from the quartz seal compression nut (7), Figure 3.<br />
4. Slowly remove the UV lamp (4) out of the quartz tube.<br />
5. Remove lamp socket (5) from the UV lamp (4), Figure 4.<br />
6. Remove the quartz seal compression nut (7) by turning it<br />
counterclockwise, Figure 3. Use a pair of channel-lock pliers if<br />
needed, Figure 5. You will notice that there is a<br />
stainless steel compression washer (6) that slides<br />
over the quartz tube. Save the washer (6) for later<br />
use, Figure 6. There is also a black seal ring (13),<br />
grasp the black seal ring; slowly and carefully<br />
remove the quartz tube.<br />
7. Now you are ready to clean or replace the quartz tube (2). For the<br />
cleaning of the quartz tube (2), follow steps 8 and 9 then proceed to step<br />
10. For replacing of the quartz tube (2), skip steps 8 and 9 and proceed<br />
to step 10.<br />
8. Cleaning quartz tube: Clean the quartz tube by wiping until clear<br />
using a paper towel or a dry cotton cloth. If needed a household tub<br />
and shower lime removal product can be used.<br />
!<br />
WARNING: Do not use abrasive cleaners as they can<br />
scratch the quartz tube surface.<br />
9. Rinse the quartz tube with clean water to completely remove any<br />
cleaning products that were used in step 4.<br />
10. Replacing quartz tube: You will notice that the new quartz tube does<br />
not have a black cushion on the domed end as the old quartz tube<br />
does. This is normal as the cushion was provided with the original<br />
quartz tube to protect it from breakage during transportation. Install the<br />
black seal ring (13) over the opened end of the quartz tube. Place the<br />
new quartz tube (2) into the water chamber (1) with the domed end<br />
first making sure it is inserted and seated inside the quartz end holder.<br />
Only a small portion will be exposed when it is seated correctly.<br />
2<br />
7<br />
6<br />
13<br />
Figure 6<br />
Page 44
120 - 230V<br />
<strong>680</strong> SERIES<br />
11. Reinstall the compression washer (6) over the open end of the quartz<br />
tube (2). Push it against the quartz black seal ring (13).<br />
12. Reinstall and hand tighten the quartz seal compression nut (7) by<br />
turning it clockwise.<br />
13. Refill your spa.<br />
14. System Test 1: Assure there is no water dripping from the seal<br />
compression nut (7). If water is visible, STOP and tighten the<br />
compression nut (7) using a pair of channel lock pliers to a maximum<br />
of 1/4 turn. If that does not fix the leak, then repeat quartz tube<br />
maintenance process from step 1 through step 13. Make sure there<br />
is no water leaking before proceeding to step 15.<br />
15. System Test 2: Turn breaker back ON. Turn on the pump to<br />
circulate the water through the CLEARRAY System. Wait for 5<br />
minutes and assure no water is dripping. If water is visible, STOP, fix<br />
the leak by repeating quartz tube maintenance process from step 1<br />
through step 14. Make sure there is no water visible and turn the<br />
pump and breaker OFF BEFORE proceeding to step 16.<br />
16. Reconnect the lamp socket (5) to the new UV lamp (4) make sure<br />
you use the latex glove provided when handling the UV lamp.<br />
Note: Align pins on UV lamp (4) to the receptacle holes on the lamp<br />
socket (5) before inserting the pins completely into socket holes. Failure<br />
to do so will damage the UV lamp.<br />
!<br />
WARNING: DO NOT TOUCH THE NEW UV LAMP WITH<br />
YOUR BARE HAND. Oil on your skin will cause hot spot on<br />
the UV lamp and shorten the life of your UV lamp. Use the<br />
provided latex glove to handle the UV lamp.<br />
17. Slide the new UV lamp (4) back inside the quartz tube, Figure 3.<br />
18. Reinstall the black lamp boot (8) back over the quartz seal compression<br />
nut (7).<br />
19. Reinstall the enclosure cover (10) with gasket (9) and secure with the<br />
screws.<br />
20. Reconnect the CLEARRAY System to the controller and turn on the<br />
power to the spa.<br />
21. Properly dispose of the old UV lamp.<br />
WARNING: This CLEARRAY System includes a UV lamp,<br />
!<br />
which contains mercury. Dispose of the lamp in accordance<br />
with disposal laws. See www.lamprecycle.org.<br />
22. Once power is activated you can check the ballast<br />
(12), Figure 7, to see if the CLEARRAY System<br />
is functioning. A solid green light indicates that<br />
Indicator<br />
Lights<br />
the CLEARRAY System is being provided power and should<br />
always be on. A solid red light indicates that UV lamp is<br />
activated.<br />
Figure 7<br />
Page 45
<strong>680</strong> SERIES<br />
13.0 Error Conditions/Error Messages<br />
Your spa has a self-diagnostic control system. The system will automatically<br />
display the following if a problem is detected. Always insist on<br />
genuine <strong>Sundance</strong> replacement parts.<br />
13.1 Summer Logic (<strong>Spas</strong> With Circulation Pump<br />
Option)<br />
When the actual spa water temperature reaches up to 2°F<br />
(1°C) above the set temperature, the spa goes into “summer<br />
logic.” The circulation pump will turn off automatically,<br />
if running, to avoid adding additional heat to the water,<br />
eventually creating an overheat condition. This setting is not userprogrammable.<br />
Note: The summer logic does not take effect until the spa water<br />
temperature reaches 95°F (35°C). This condition is more likely in<br />
excessively hot weather. Remember, the spa’s ability to cool is directly<br />
affected by the ambient temperature. An excessively hot ambient<br />
temperature may prevent the spa from cooling down because it’s<br />
fully insulated construction is designed to retain heat and to minimize<br />
operating costs.<br />
13.2 Panel Displays SN1<br />
Open sensor (heater is disabled) or shorted sensor (spa<br />
is deactivated). The high-limit temperature sensor is not<br />
functioning. Your authorized <strong>Sundance</strong> dealer must repair this.<br />
13.3 Panel Displays SN2<br />
Open or shorted sensor (heater disabled). The temperature<br />
sensor is not functioning. Your authorized <strong>Sundance</strong> dealer<br />
must repair this.<br />
13.4 Panel Flashes FL1 or FL2 (<strong>Spas</strong> Without<br />
Circulation Pump Option)<br />
A flashing “FL1” display means the pressure switch is not<br />
closed when the jets pump 1 is activated. Proper water<br />
flow is inhibited or the pressure switch has malfunctioned. A flashing<br />
“FL2” display means the pressure switch is malfunctioning closed. In<br />
either case, the heater is deactivated. To correct condition, perform to the<br />
following:<br />
1. Verify water level is one inch below lowest pillow. Add water if<br />
necessary.<br />
2. Check for clogged or excessively dirty filter cartridges (Section 11.1,<br />
page 36).<br />
3. Purge “air lock” from jets pump 1 by loosening the upper pump head<br />
drain screw (Figure A, page 16) for a few seconds to release trapped<br />
air, then retighten drain screw. FINGER TIGHT ONLY!<br />
4. If problem persists, contact your authorized <strong>Sundance</strong> dealer.<br />
Page 46
<strong>680</strong> SERIES<br />
13.5 Panel Flashes FL1 or FL2 (<strong>Spas</strong> With Circulation<br />
Pump Option)<br />
A flashing “FL1” display means the flow switch is<br />
malfunctioning open, the circulation pump filter cartridge<br />
1 is excessively dirty or an “air lock” condition has occurred<br />
at the circulation pump intake. A flashing “FL2”<br />
display means the flow switch is malfunctioning closed. In either case, the<br />
spa heater will deactivate and jets pump #1 may also deactivate. To correct<br />
condition perform the following:<br />
1. Verify water level is 1" below lowest pillow. Add water if necessary.<br />
2. Check for clogged or excessively dirty filter cartridges (Section 11.1,<br />
page 36).<br />
3. Purge “air lock” from circulation pump intake by removing filter<br />
cartridge 1 (page 36). Hold your garden hose over the filter<br />
cartridge 1 wall fitting (with grate) while using a rag as a seal around<br />
hose end. Ask a helper to turn on water for 30 seconds, then turn off.<br />
Reinstall filter cartridge 1 and check spa (Section 11.1, page 36).<br />
4. If the circulation pump is not running, turn power off at the main<br />
breaker, then turn power back on. This will reset the circulation pump<br />
priming cycle. Once the pump is primed, the error should clear.<br />
5. If problem persists, contact your authorized <strong>Sundance</strong> dealer.<br />
13.6 Panel Displays COL<br />
Cool Condition - Temperature has dropped 20°F (11°C)<br />
below the current set temperature. The pump and heater<br />
have been activated to bring the temperature to within 15°F (8°C) of the<br />
set temperature. No corrective action is required.<br />
Note: During cold periods, you may consider increasing the number of<br />
filtration cycles (pages 31-32).<br />
13.7 Panel Displays ICE<br />
Freeze Protection - A potential freeze condition has been<br />
detected. No action is required. The pump and heater will<br />
operate to circulate and warm water through the plumbing spa is out of<br />
danger. See “Winterizing” Section 11.7 for details (page 40).<br />
13.8 Panel Displays OH<br />
!<br />
WARNING: RISK OF HYPERTHERMIA<br />
(OVER-HEATING) CAUSING SEVERE INJURY,<br />
BURNS, OR WELTS.<br />
Water temperature is above acceptable limits. DO NOT ENTER SPA!<br />
Water temperature has reached 112°F (44°C) and the low speed pump<br />
has activated to circulate water through heater.<br />
Page 47
<strong>680</strong> SERIES<br />
13.9 Panel Displays - - -<br />
WARNING: RISK OF HYPERTHERMIA (OVER-<br />
! HEATING) CAUSING SEVERE INJURY, BURNS,<br />
OR WELTS.<br />
Water temperature is above acceptable limits. DO NOT ENTER SPA!<br />
The safety “Watchdog” software has been triggered and the spa is<br />
deactivated. A problem has been detected which could cause damage to<br />
the spa or its components. Contact your authorized <strong>Sundance</strong> dealer.<br />
13.10 Panel Displays BLB<br />
UV lamp needs to be replaced. The message will flash<br />
between “blb” and the water temperature. The timer for the<br />
UV lamp must also be reset, refer to Section 10.9, page 34. A new UV<br />
lamp can be purchased from a local <strong>Sundance</strong> <strong>Spas</strong> dealer.<br />
14.0 Troubleshooting Procedures<br />
In the event your spa is not working the way it should, please first review<br />
all the installation and operating instructions in this manual and check the<br />
message on the panel display. If you are still not satisfied it is working<br />
properly, please follow the appropriate troubleshooting instructions below.<br />
Note: If any of the supply cords to the accessories are damaged, they<br />
must be replaced by authorized service personnel.<br />
14.1 None of the Components Operate (e.g. Pump, Light)<br />
Check the following when none of the spa components operate<br />
(e.g. jets pumps or light):<br />
1. Is there power to the spa?<br />
2. Is the household circuit breaker tripped?<br />
3. Call your authorized dealer.<br />
14.2 Pump Does Not Operate but Light Does<br />
Press the JETS 1 Button:<br />
1. If no water movement is detected, make sure power is going to<br />
the spa and check the water level. If it does not solve the problem,<br />
contact your authorized <strong>Sundance</strong> dealer.<br />
2. The main pump operates but no water flows to jets. Pump may not be<br />
properly primed. This can happen after the spa is drained and refilled.<br />
A. Press the JETS 1 button several times, never leaving the motor<br />
on for more than 5 to 10 seconds at a time. Turn power off and<br />
let the air out removing the filter cartridge. Refer to Section 11.1<br />
(page 36). Make certain you reinstall the filter cartridge before<br />
turning on spa power and restarting the jets pump.<br />
Page 48
14.3 Poor Jet Action<br />
1. Press the JETS 1 button to make certain the pump #1 is on.<br />
2. Open all air control to the “on” position.<br />
3. Check for dirty filter. Clean, if necessary.<br />
4. Make sure jets are all the way open.<br />
14.4 Water is Too Hot<br />
Reduce thermostat setting.<br />
<strong>680</strong> SERIES<br />
14.5 No Heat<br />
1. Check thermostat setting.<br />
2. Keep the spa cover in place while heating.<br />
3. Check the settings to see if your spa is in economy filtration/heating<br />
mode (pages 31-32).<br />
Should checking the above steps fail to correct the problem, please call<br />
your dealer so that they may arrange service.<br />
We build the best spas in the industry. Nonetheless, we are always<br />
striving to improve the quality and features of our products. Your input as<br />
a <strong>Sundance</strong> spa owner is a cherished part of this process. If you have<br />
any comments or suggestions, or if you wish to be informed on any new<br />
products for your spa, please write to us.<br />
CONGRATULATIONS on your good taste and welcome to the happiest<br />
and most relaxed family in the world!<br />
Page 49
<strong>680</strong> SERIES<br />
15.0 North American Denali/Tacoma Convertible<br />
Circuit Diagram (60 Hz)<br />
This wiring diagram is used for all North American Denali/Tacoma<br />
120/240 VAC (60 Hz) convertible power models.<br />
J1 Logic Jumper Settings<br />
JP1 1-2 ON = 30A Logic (4-wire 120/240 VAC operation only)<br />
JP1 1-2 OFF = 40A Logic (4-wire 120/240 VAC operation only)<br />
JP1 7-8 ON = °C Temperature Display<br />
JP1 7-8 OFF = °F Temperature Display<br />
Control<br />
Panel<br />
CLEARRAY<br />
J21<br />
Spa Light<br />
BLK J12<br />
J20<br />
8<br />
6<br />
4<br />
2<br />
J1<br />
7<br />
5<br />
3<br />
1<br />
J2<br />
Temperature Sensor<br />
Hi-limit/Freeze Sensor<br />
J14<br />
J3<br />
Pressure Switch<br />
BLK<br />
J16<br />
Transformer<br />
120 VAC<br />
Plug-in<br />
GFCI<br />
Cord (US<br />
Models<br />
Only) OR<br />
Hard<br />
Wire<br />
WHT<br />
BLK<br />
GROUND<br />
GRN<br />
TB1<br />
F1<br />
20A<br />
250V<br />
SC-20<br />
BLK<br />
1<br />
BLK<br />
2<br />
3<br />
J11<br />
WHT<br />
WHT<br />
J6<br />
WHT<br />
WHT<br />
J15<br />
J5<br />
J13<br />
RED*<br />
F1<br />
K5 K7 K8<br />
Heater IN Heater OUT<br />
J17 J7 J8 J9 J10<br />
Main Pump RED BLK<br />
BLK WHT<br />
LO HI<br />
RED<br />
RED BLK<br />
This device complies with Part 15 of the<br />
FCC rules. Operation is subject to the<br />
following two conditions:<br />
1. This device may not cause harmful<br />
interference.<br />
2. This device must accept any inteference<br />
received including interference that may<br />
cause undesired operation.<br />
Heater<br />
1.0 kW @ 120 VAC (3-wire connection)<br />
4.0 kW @ 240 VAC (4-wire connection)<br />
Standard 3-Wire 120 VAC Connection (60 Hz, 1 Phase, 15A Service)<br />
Use copper conductors ONLY. Use min 6 AWG, 75ºC wire size must be appropriate per<br />
NEC and/or local codes.<br />
WARNING, ELECTRICAL SHOCK HAZARD EXISTS! Always remove power to spa before wiring<br />
and/or configuring the circuit board<br />
Hard<br />
Wire<br />
Only<br />
WHT<br />
BLK<br />
RED<br />
GROUND<br />
GRN<br />
TB1<br />
WHT<br />
1<br />
BLK<br />
2<br />
3<br />
To circuit board<br />
RED*<br />
RED*<br />
Optional 4-Wire 240/120 VAC Convertible Heater Connection<br />
1. Remove and discard the factory installed GFCI Cord.<br />
2. Move RED* wire from TB1 position #1 to TB1 position #3 as shown below.<br />
3. Permanently connect to the power supply. Use copper conductors ONLY.<br />
Wire size must be appropriate per NEC and/or local codes.<br />
4. If hot tub is to be operated on 30A service, make sure the jumper provided<br />
at location JP1 #1 & 2 on the circuit board is installed. If hot tub is to be<br />
operated on 40A service, remove the jumper JP1 #1 & 2 on the circuit board.<br />
EXTERNAL SERVICE PANEL<br />
BOX DISCONNECT MEANS<br />
MUST BE LOCATED NO CLOSER<br />
THAN 5 FT. (1.52m) FROM THE<br />
INSIDE WALLS OF THE SPA AND<br />
WITHIN SIGHT OF SPA<br />
MAIN POWER<br />
ON//OFF SHUTOFF<br />
SWITCH<br />
Page 50
<strong>680</strong> SERIES<br />
16.0 North American Burlington Circuit Diagram (60 Hz)<br />
This wiring diagram is used for all North American Burlington models with<br />
or without the circulation pump option. (Circuit board diagram is shown<br />
with the circulation pump option.)<br />
LED Lighting<br />
System DCU<br />
BLK<br />
WHT<br />
CLEARRAY<br />
WHT<br />
BLK<br />
Circ.<br />
Pump<br />
C<br />
WHT<br />
BLK<br />
WHT<br />
LO<br />
BLK<br />
Pump 1<br />
RED<br />
HI<br />
J20<br />
J21<br />
J11<br />
J12<br />
J13<br />
J14<br />
J15<br />
J16<br />
J17<br />
J18<br />
J19<br />
RED<br />
J6<br />
TB1<br />
1<br />
GRN<br />
Transformer<br />
240 VAC<br />
K1<br />
K2<br />
Control Panel<br />
J1<br />
J2<br />
JP1<br />
8 7<br />
6 5<br />
4 3<br />
2 1<br />
Logic Jumper Settings<br />
JP1 1-2 ON = 40A Logic<br />
JP1 1-2 OFF = 50A Logic (Factory Default Setting)<br />
JP1 3-4 ON = 2 Pump Operation<br />
JP1 3-4 OFF = 1 Pump Operation<br />
JP1 5-6 ON = Not Used<br />
JP1 5-6 OFF = Not Used<br />
JP1 7-8 ON = °C Temperature Display<br />
JP1 7-8 OFF = °F Temperature Display<br />
Temperature sensor<br />
Hi - limit / freeze sensor<br />
K3<br />
K4<br />
J3<br />
Flow Switch<br />
K5<br />
J4<br />
K6 K7 K8<br />
This device complies with Part 15 of the<br />
FCC rules. Operation is subject to the<br />
following two conditions:<br />
1. This device may not cause harmful<br />
interference.<br />
2. This device must accept any inteference<br />
received including interference that may<br />
cause undesired operation.<br />
F1<br />
BLK<br />
J5<br />
F1<br />
30A, 250V<br />
SC-30<br />
J7 J8 J9 J10<br />
RED BLK RED BLK<br />
Heater<br />
5.5 kW<br />
240 VAC<br />
2<br />
Power Supply<br />
(Optional)<br />
Stereo<br />
(Optional)<br />
RED<br />
BLK<br />
Standard 240 VAC, 3-Wire Connection (60Hz, 1-Phase Service)<br />
USE COPPER CONDUCTORS ONLY. USE MIN. 6 AWG, 75ºC WIRE SIZE.<br />
WIRE SIZE MUST BE APPROPRIATE PER NEC AND/OR LOCAL CODES.<br />
EXTERNAL SERVICE PANEL<br />
BOX DISCONNECT MEANS<br />
MUST BE LOCATED NO CLOSER<br />
THAN 5 FT. (1.52m) FROM THE<br />
INSIDE WALLS OF THE SPA AND<br />
WITHIN SIGHT OF SPA<br />
MAIN POWER<br />
ON//OFF SHUTOFF<br />
SWITCH<br />
Page 51
<strong>680</strong> SERIES<br />
17.0 North American Peyton Circuit Diagram (60 Hz)<br />
This wiring diagram is used for all North American Peyton models.<br />
LED Lighting<br />
System DCU<br />
CLEARRAY<br />
LO<br />
Pump 1<br />
HI<br />
Pump 2<br />
HI<br />
EXTERNAL SERVICE PANEL<br />
BOX DISCONNECT MEANS<br />
MUST BE LOCATED NO CLOSER<br />
THAN 5 FT. (1.52m) FROM THE<br />
INSIDE WALLS OF THE SPA AND<br />
WITHIN SIGHT OF SPA<br />
MAIN POWER<br />
ON//OFF SHUTOFF<br />
SWITCH<br />
BLK<br />
WHT<br />
WHT<br />
BLK<br />
WHT<br />
BLK<br />
RED<br />
WHT<br />
BLK<br />
J11<br />
J12<br />
J13<br />
J14<br />
J15<br />
J20<br />
J21<br />
Transformer<br />
240 VAC<br />
K1<br />
K2<br />
K3<br />
K4<br />
Control Panel<br />
J1<br />
J2<br />
J3<br />
JP1<br />
8 7<br />
6 5<br />
4 3<br />
2 1<br />
Logic Jumper Settings<br />
JP1 1-2 ON = 40A Logic<br />
JP1 1-2 OFF = 50A Logic (Factory Default Setting)<br />
JP1 3-4 ON = 2 Pump Operation<br />
JP1 3-4 OFF = 1 Pump Operation<br />
JP1 5-6 ON = 60A Logic (Remove JP1 1-2 Jumper)<br />
JP1 5-6 OFF = Leave Off for 40A or 50A Logic<br />
JP1 7-8 ON = Celsius Temperature Display<br />
JP1 7-8 OFF = Fahrenheit Temperature Display<br />
Temperature sensor<br />
Hi - limit / freeze sensor<br />
Pressure switch<br />
J16<br />
J17<br />
J18<br />
K5<br />
J4<br />
K6 K7 K8<br />
This device complies with Part 15 of the<br />
FCC rules. Operation is subject to the<br />
following two conditions:<br />
1. This device may not cause harmful<br />
interference.<br />
2. This device must accept any inteference<br />
received including interference that may<br />
cause undesired operation.<br />
J19<br />
F1<br />
RED<br />
J6<br />
BLK<br />
J5<br />
J7 J8 J9 J10<br />
F1<br />
30A, 250V<br />
SC-30<br />
RED BLK RED BLK<br />
TB1<br />
1<br />
2<br />
Power Supply<br />
(Optional)<br />
Stereo<br />
(Optional)<br />
Heater<br />
5.5 kW<br />
240 VAC<br />
GRN<br />
RED<br />
BLK<br />
Standard 240 VAC, 3-Wire Connection (60 Hz, 1-Phase Service)<br />
USE COPPER CONDUCTORS ONLY. USE MIN 6 AWG, 75ºC WIRE SIZE MUST<br />
BE APPROPRIATE PER NEC AND/OR LOCAL CODES. THE MAX<br />
SUPPLY CONNECTOR AMPACITY IS 60A. THE AMPERE RATING<br />
OF SUPPLY CONDUCTOR OVERCURRENT PROTECTIVE DEVICE IS 60A.<br />
Page 52
<strong>680</strong> SERIES<br />
18.0 North American Hartford and Hawthorne Models<br />
(60 Hz)<br />
This wiring diagram is used for all North American Hartford and<br />
Hawthorne with or without the circulation pump option. (Circuit board<br />
diagram is shown with the circulation pump option.)<br />
LED Lighting<br />
System DCU<br />
CLEARRAY<br />
Circ.<br />
Pump<br />
C<br />
LO<br />
Pump 1<br />
HI<br />
Pump 2<br />
HI<br />
EXTERNAL SERVICE PANEL<br />
BOX DISCONNECT MEANS<br />
MUST BE LOCATED NO CLOSER<br />
THAN 5 FT. (1.52m) FROM THE<br />
INSIDE WALLS OF THE SPA AND<br />
WITHIN SIGHT OF SPA<br />
MAIN POWER<br />
ON//OFF SHUTOFF<br />
SWITCH<br />
BLK<br />
WHT<br />
WHT<br />
BLK<br />
WHT<br />
BLK<br />
WHT<br />
BLK<br />
RED<br />
WHT<br />
BLK<br />
J11<br />
J12<br />
J13<br />
J14<br />
J15<br />
J20<br />
J21<br />
Transformer<br />
240 VAC<br />
K1<br />
K2<br />
K3<br />
K4<br />
Control Panel<br />
J1<br />
J2<br />
J3<br />
JP1<br />
8 7<br />
6 5<br />
4 3<br />
2 1<br />
Logic Jumper Settings<br />
JP1 1-2 ON = 40A Logic<br />
JP1 1-2 OFF = 50A Logic (Factory Default Setting)<br />
JP1 3-4 ON = 2 Pump Operation<br />
JP1 3-4 OFF = 1 Pump Operation<br />
JP1 5-6 ON = 60A Logic (Remove JP1 1-2 Jumper)<br />
JP1 5-6 OFF = Leave Off for 40A or 50A Logic<br />
JP1 7-8 ON = Celsius Temperature Display<br />
JP1 7-8 OFF = Fahrenheit Temperature Display<br />
Temperature sensor<br />
Hi - limit / freeze sensor<br />
Flow switch<br />
J16<br />
J17<br />
J18<br />
K5<br />
J4<br />
K6 K7 K8<br />
This device complies with Part 15 of the<br />
FCC rules. Operation is subject to the<br />
following two conditions:<br />
1. This device may not cause harmful<br />
interference.<br />
2. This device must accept any inteference<br />
received including interference that may<br />
cause undesired operation.<br />
J19<br />
F1<br />
RED<br />
J6<br />
BLK<br />
J5<br />
F1<br />
30A, 250V<br />
SC-30<br />
J7 J8 J9 J10<br />
RED BLK RED BLK<br />
Heater<br />
5.5 kW<br />
240 VAC<br />
TB1<br />
1<br />
2<br />
Power Supply<br />
(Optional)<br />
Stereo<br />
(Optional)<br />
GRN<br />
RED<br />
BLK<br />
Standard 240 VAC, 3-Wire Connection (60 Hz, 1-Phase Service)<br />
USE COPPER CONDUCTORS ONLY. USE MIN 6 AWG, 75ºC WIRE SIZE MUST<br />
BE APPROPRIATE PER NEC AND/OR LOCAL CODES. THE MAX<br />
SUPPLY CONNECTOR AMPACITY IS 60A. THE AMPERE RATING<br />
OF SUPPLY CONDUCTOR OVERCURRENT PROTECTIVE DEVICE IS 60A.<br />
Page 53
<strong>680</strong> SERIES<br />
19.0 Export Denali/Tacoma Circuit Diagram (50 Hz)<br />
This wiring diagram is used for all Export Denali/Tacoma models.<br />
J1 Logic Jumper Settings<br />
JP1 1-2 ON = 20A Logic (Factory Setting)<br />
JP1 1-2 OFF = 30A Logic<br />
JP1 7-8 ON = °C Temperature Display (Factory Setting)<br />
JP1 7-8 OFF = °F Temperature Display<br />
Control<br />
Panel<br />
J20<br />
J21<br />
Spa Light<br />
BLU J12<br />
8<br />
6<br />
4<br />
2<br />
7<br />
5<br />
3<br />
1<br />
J1<br />
Temperature Sensor<br />
J2<br />
Hi-limit/Freeze Sensor<br />
CLEARRAY<br />
J14<br />
J3<br />
Pressure Switch<br />
BRN<br />
J16<br />
Transformer<br />
230 VAC<br />
J11<br />
F1*<br />
F1<br />
20A<br />
250V<br />
SC-20<br />
BLU<br />
J15<br />
J5<br />
J13<br />
BRN<br />
J6 Heater IN Heater OUT<br />
J17 J7 J8 J9 J10<br />
BRN<br />
Main Pump<br />
BLU<br />
LO<br />
K5 K7 K8<br />
BLK<br />
BLU<br />
BLU<br />
BRN<br />
THERM<br />
SWITCH<br />
Heater<br />
2.7kW @ 230 VAC<br />
GROUND<br />
Hard<br />
Wire<br />
Only<br />
BRN<br />
GRN<br />
HI<br />
BRN<br />
BLU<br />
TB1<br />
2<br />
BRN 1<br />
BLU<br />
BLU<br />
BRN<br />
BRN<br />
Standard 3-Wire 230 VAC Connection (50 Hz, 1 Phase Service)<br />
Use copper conductors ONLY. Use min 6 AWG, 75º C. Wire size must be<br />
appropriate per NEC and/or local codes.<br />
Page 54
<strong>680</strong> SERIES<br />
20.0 Export Burlington Circuit Diagram (50 Hz)<br />
This wiring diagram is used for all Export Burlington models with or<br />
without the circulation pump option. (Circuit board diagram is shown with<br />
the circulation pump option.)<br />
LED Lighting<br />
System DCU<br />
CLEARRAY<br />
Circ.<br />
Pump<br />
LO<br />
Pump 1<br />
HI<br />
C<br />
BLK<br />
WHT<br />
BLU<br />
BRN<br />
BLU<br />
BRN<br />
BLU<br />
BRN<br />
BLK<br />
J20<br />
J21<br />
J11<br />
J12<br />
J13<br />
J14<br />
J15<br />
J16<br />
J17<br />
J18<br />
J19<br />
BLU<br />
J6<br />
TB1<br />
1<br />
GRN<br />
Transformer<br />
230 VAC<br />
K1<br />
K2<br />
Control Panel<br />
J1<br />
J2<br />
JP1<br />
8 7<br />
6 5<br />
4 3<br />
2 1<br />
Logic Jumper Settings<br />
JP1 1-2 ON = 20A Logic<br />
JP1 1-2 OFF = 30A Logic<br />
JP1 3-4 ON = 2 Pump Operation<br />
JP1 3-4 OFF = 1 Pump Operation<br />
JP1 5-6 ON = Not Used<br />
JP1 5-6 OFF = Not Used<br />
JP1 7-8 ON = Celsius Temperature Display<br />
JP1 7-8 OFF = Fahrenheit Temperature Display<br />
Temperature sensor<br />
Hi - limit / freeze sensor<br />
K3<br />
Flow switch<br />
J3<br />
K4<br />
K5<br />
J4<br />
K6 K7 K8<br />
F1<br />
BRN<br />
J5<br />
F1<br />
20A, 250V<br />
SC-20<br />
J7 J8 J9 J10<br />
BLU BRN BLU BRN<br />
Heater<br />
2.7 kW @<br />
230 VAC<br />
2<br />
Power Supply<br />
(Optional)<br />
Stereo<br />
(Optional)<br />
BLU<br />
BRN<br />
230 VAC 3-Wire Connection (50 Hz, 1-Phase Service)<br />
USE COPPER CONDUCTORS ONLY. USE MIN 6 AWG, 75ºC. WIRE<br />
SIZE MUST BE APPROPRIATE PER NEC AND/OR LOCAL CODES.<br />
Page 55
<strong>680</strong> SERIES<br />
21.0 Export Peyton Circuit Diagram (50 Hz)<br />
This wiring diagram is used for all Export Peyton models.<br />
LED Lighting<br />
System DCU<br />
CLEARRAY<br />
LO<br />
Pump 1<br />
HI<br />
Pump 2<br />
HI<br />
BLK<br />
WHT<br />
BLU<br />
BRN<br />
BLU<br />
BRN<br />
BLK<br />
BLU<br />
BRN<br />
J20<br />
J21<br />
J11<br />
J12<br />
J13<br />
J14<br />
J15<br />
J16<br />
J17<br />
J18<br />
J19<br />
BLU<br />
J6<br />
TB1<br />
1<br />
GRN<br />
Transformer<br />
240 VAC<br />
K1<br />
K2<br />
Control Panel<br />
J1<br />
J2<br />
JP1<br />
8 7<br />
6 5<br />
4 3<br />
2 1<br />
Logic Jumper Settings<br />
JP1 1-2 ON = 20A Logic<br />
JP1 1-2 OFF = 30A Logic<br />
JP1 3-4 ON = 2 Pump Operation<br />
JP1 3-4 OFF = 1 Pump Operation<br />
JP1 5-6 ON = 40A Logic (Remove JP1 1-2 Jumper)<br />
JP1 5-6 OFF = Leave Off for 20A or 30A Logic<br />
JP1 7-8 ON = Celsius Temperature Display<br />
JP1 7-8 OFF = Fahrenheit Temperature Display<br />
Temperature sensor<br />
Hi - limit / freeze sensor<br />
K3<br />
K4<br />
J3<br />
Pressure switch<br />
K5<br />
J4<br />
K6 K7 K8<br />
F1<br />
BRN<br />
J5<br />
J7 J8 J9 J10<br />
F1<br />
20A, 250V<br />
SC-20<br />
2<br />
Power Supply<br />
(Optional)<br />
BLU BRN BLU BRN<br />
Stereo<br />
(Optional)<br />
Heater<br />
2.7 kW @<br />
230 VAC<br />
BLU<br />
BRN<br />
230 VAC 3-Wire Connection (50 Hz, 1-Phase Service)<br />
USE COPPER CONDUCTORS ONLY. USE MIN 6 AWG, 75ºC<br />
WIRE SIZE MUST BE APPROPRIATE PER NEC AND/OR LOCAL CODES<br />
Page 56
<strong>680</strong> SERIES<br />
22.0 Export Hartford and Hawthorne Circuit Diagram<br />
(50 Hz)<br />
This wiring diagram is used for all Export Hartford and Hawthorne models<br />
with or without the circulation pump option. (Circuit board diagram is<br />
shown with the circulation pump option.)<br />
LED Lighting<br />
System DCU<br />
CLEARRAY<br />
Circ.<br />
Pump<br />
LO<br />
Pump 1<br />
HI<br />
Pump 2<br />
HI<br />
C<br />
BLK<br />
WHT<br />
BLU<br />
BRN<br />
BLU<br />
BRN<br />
BLU<br />
BRN<br />
BLK<br />
BLU<br />
BRN<br />
J20<br />
J21<br />
J11<br />
J12<br />
J13<br />
J14<br />
J15<br />
J16<br />
J17<br />
J18<br />
J19<br />
BLU<br />
J6<br />
TB1<br />
1<br />
GRN<br />
Transformer<br />
240 VAC<br />
K1<br />
K2<br />
Control Panel<br />
J1<br />
J2<br />
JP1<br />
8 7<br />
6 5<br />
4 3<br />
2 1<br />
Logic Jumper Settings<br />
JP1 1-2 ON = 20A Logic<br />
JP1 1-2 OFF = 30A Logic<br />
JP1 3-4 ON = 2 Pump Operation<br />
JP1 3-4 OFF = 1 Pump Operation<br />
JP1 5-6 ON = 40A Logic (Remove JP1 1-2 Jumper)<br />
JP1 5-6 OFF = Leave Off for 20A or 30A Logic<br />
JP1 7-8 ON = Celsius Temperature Display<br />
JP1 7-8 OFF = Fahrenheit Temperature Display<br />
Temperature sensor<br />
Hi - limit / freeze sensor<br />
K3<br />
K4<br />
J3<br />
Flow switch<br />
K5<br />
J4<br />
K6 K7 K8<br />
F1<br />
BRN<br />
J5<br />
F1<br />
20A, 250V<br />
SC-20<br />
J7 J8 J9 J10<br />
BLU BRN BLU BRN<br />
Heater<br />
2.7 kW @<br />
230 VAC<br />
2<br />
Power Supply<br />
(Optional)<br />
Stereo<br />
(Optional)<br />
BLU<br />
BRN<br />
230 VAC 3-Wire Connection (50 Hz, 1-Phase Service)<br />
USE COPPER CONDUCTORS ONLY. USE MIN 6 AWG, 75ºC<br />
WIRE SIZE MUST BE APPROPRIATE PER NEC AND/OR LOCAL CODES<br />
Page 57