Fashion Accessories - Priscilla's Crochet
Fashion Accessories - Priscilla's Crochet
Fashion Accessories - Priscilla's Crochet

You also want an ePaper? Increase the reach of your titles
YUMPU automatically turns print PDFs into web optimized ePapers that Google loves.
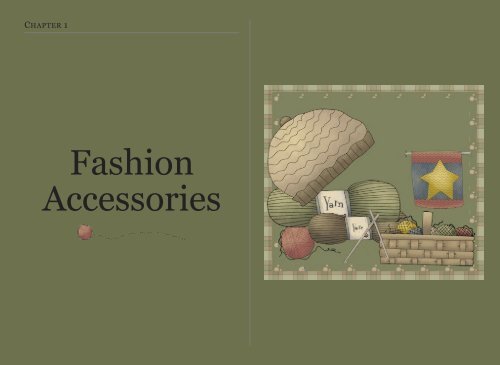
CHAPTER 1<br />
<strong>Fashion</strong><br />
<strong>Accessories</strong>
FASHION ACCESSORIES SECTION 1<br />
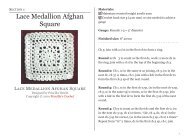
Button Bracelet<br />
Materials:<br />
Size 10 crochet cotton thread<br />
<strong>Crochet</strong> hook size 8<br />
1/2” diameter flat buttons with 2 holes (Number of buttons:<br />
S=12, M=13, L=14) 1/2” lucite rings (Number of rings:<br />
S=12, M=13, L=14)<br />
<br />
Sizes: S-M-L<br />
Pattern Note: Each button is attached to the top of a ring.<br />
The bracelet is worked along one side, then back up the other<br />
side.<br />
BUTTON BRACELET <br />
Designed by Priscilla Hewitt<br />
Copyright © 1999 Priscilla’s <strong>Crochet</strong><br />
<br />
Directions: <br />
Attach thread to the hook with the usual slip knot.<br />
<br />
First button and ring: Insert hook through the top of the<br />
first hole of the button, then through a lucite ring, yo, pull up<br />
a loop through the ring and the button, yo, pull through both<br />
loops on hook; work 12 sc in the ring; insert hook through the<br />
second hole in the same button and through the same lucite<br />
ring, yo, pull up a loop through the ring and the button, yo,<br />
pull through both loops on the hook. Leave the rest of the ring<br />
unworked.<br />
2
<br />
Next button(s) and ring(s): Insert hook through the top of<br />
the first hole of the next button, then through a new lucite<br />
ring, yo, pull up a loop through the ring and the button, yo,<br />
pull through both loops on hook; work 12 sc in the ring; insert<br />
hook through the second hole in the same button and through<br />
the same lucite ring, yo, pull up a loop through the ring and<br />
the button, yo, pull through both loops on the hook. Leave the<br />
rest of the ring unworked. Repeat this step until you have all<br />
the buttons and rings attached along one side. Do not fasten<br />
off.<br />
<br />
Continuing in the last button and last ring: Insert hook<br />
into the same hole of the same button and through the ring,<br />
yo, pull up a loop through the ring and the button, yo, pull<br />
through both loops on hook; work 12 sc in the ring; insert<br />
hook through the next hole in the same button and through<br />
the same lucite ring, yo, pull up a loop through the ring and<br />
the button, yo, pull through both loops on the hook.<br />
<br />
Next button(s) and ring(s): Insert hook into the next hole<br />
of the next button and through the ring, yo, pull up a loop<br />
through the ring and the button, yo, pull through both loops<br />
on hook; work 12 sc in the ring; insert hook through the next<br />
hole in the same button and through the same lucite ring, yo,<br />
pull up a loop through the ring and the button, yo, pull<br />
through both loops on the hook. Repeat this step until you’ve<br />
completed the second side of the bracelet (both holes in each<br />
button should contain 2 sc’s); join with a sl st to the first sc.<br />
Fasten off, leaving a long tail for sewing. Thread needle with<br />
tail and sew together the 2 sc’s in each of the holes in first and<br />
last buttons to form the bracelet into a ring. Knot securely.<br />
Weave in ends.<br />
Happy <strong>Crochet</strong>ing!<br />
3
FASHION ACCESSORIES SECTION 2<br />
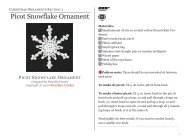
Chignon Net<br />
Materials:<br />
Size 10 crochet cotton thread<br />
<strong>Crochet</strong> hook size 8 (1.25 mm)<br />
Large, thin, clasp-less ponytail elastic<br />
To work a trtr: Yo 4 times, insert hook in indicated st and<br />
pull up a loop, (yo and pull through 2 loops on hook) 5 times.<br />
CHIGNON NET<br />
Designed by Priscilla Hewitt <br />
Copyright © 2001 Priscilla’s <strong>Crochet</strong><br />
Ch 8, join with a sl st in the first ch to form a ring.<br />
<br />
Round 1: Ch 7 to count as the first trtr and the first ch 1,<br />
(trtr, ch 1) 19 times in the ring; join with a sl st in the 6th ch of<br />
the beginning ch 7.<br />
<br />
Round 2: Sl st into the first ch-1 sp, ch 1, sc in the same sp,<br />
ch 3, (sc in the next ch-1 sp, ch 3) 19 times; join with a sl st in<br />
the first sc.<br />
<br />
Round 3: Sl st into the first ch-3 sp, ch 6 to count as the first<br />
dc and the first ch 3, dc in the same sp, (dc, ch 3, dc) in each<br />
remaining ch-3 sp around; join with a sl st in the 3rd ch of the<br />
beginning ch 6.<br />
<br />
Round 4: Sl st into the first ch-3 sp, ch 1, (sc, ch 3, sc, ch 1) in<br />
4
the same sp, (sc, ch 3, sc, ch 1) in each remaining ch-3 sp<br />
around; join with a sl st in the first sc.<br />
<br />
Round 5: Sl st into the first ch-3 sp, ch 1, (sc, ch 5) in the<br />
same sp, (sc, ch 5) in each remaining ch-3 sp around; join<br />
with a sl st in the first sc.<br />
<br />
Round 6: Sl st into the first ch-5 sp, ch 7 to count as the first<br />
trtr and the first ch 1, (trtr, ch 1, trtr, ch 2) in the same sp,<br />
(trtr, ch 1, trtr, ch 1, trtr, ch 2) in each remaining ch-5 sp<br />
around; join with a sl st in the 6th ch of the beginning ch 7.<br />
<br />
Round 7: Sl st in each of the next (ch 1, trtr, ch 1, trtr), sl st<br />
into the next ch-2 sp, (ch 6, sc in the next ch-2 sp) 19 times; ch<br />
3; join with a dc in the first sc to form the first ch-6 sp of the<br />
next round.<br />
<br />
Rounds 8-10: Ch 1, sc in the first ch-6 sp, (ch 6, sc in the<br />
next ch-6 sp) 19 times; ch 3; join with a dc in the first sc to<br />
form the first ch-6 sp of the next round.<br />
<br />
Round 11: Ch 1, sc in the first ch-6 sp, (ch 6, sc in the next<br />
ch-6 sp) 19 times; ch 6; join with a sl st in the first sc.<br />
<br />
Round 12: Sl st into the first ch-6 sp, ch 1, (sc around both<br />
the same loop AND the ponytail elastic) 3 times, *sc around<br />
both the next loop AND the ponytail elastic, (sc around both<br />
the same loop AND the ponytail elastic) 2 times* Repeat from<br />
* to * 18 times; join with a sl st in the first sc. Fasten off.<br />
Weave in ends.<br />
Happy <strong>Crochet</strong>ing!<br />
5
FASHION ACCESSORIES SECTION 3<br />
Chrysanthemum Scrunchie<br />
Materials:<br />
Worsted weight “soft” yarn or sport yarn<br />
<strong>Crochet</strong> hook size G<br />
Large pony tail elastic<br />
CHRYSANTHEMUM SCRUNCHIE <br />
Designed by Priscilla Hewitt<br />
Copyright © 2000 Priscilla’s <strong>Crochet</strong><br />
Round 1: Join yarn to elastic with a sc, (ch 5, sc in the ring)<br />
39 times; ch 5, join with a sl st to the first sc.<br />
<br />
Round 2: Sl st into the first ch 5 sp, ch 2, work 5 dc in the<br />
same space, ch 2, sl st in the same space, (sl st in the next ch 5<br />
sp, ch 2, 5 dc in the same space, ch 2, sl st in the same space)<br />
39 times; join with a sl st to the first sl st. Fasten off. Weave in<br />
ends.<br />
Happy <strong>Crochet</strong>ing!<br />
6
FASHION ACCESSORIES SECTION 4<br />
Fingerless Gloves<br />
Materials:<br />
About 1 1⁄2 ounces Lustersheen (alternate yarns might include<br />
size 8 cotton thread, light sport weight yarn, or 2-3<br />
strands of size 10 thread held together)<br />
<strong>Crochet</strong> hook size D (3 mm) or size needed to achieve<br />
gauge<br />
Yarn needle<br />
Pattern note: The "ch 2" at the end of the rows does not<br />
count as the first dc in the next row.<br />
FINGERLESS GLOVES<br />
Designed by Priscilla Hewitt<br />
Copyright © 2001 Priscilla’s <strong>Crochet</strong><br />
Gauge Swatch <br />
Ch 12.<br />
<br />
Row 1: Dc in the 3rd ch from hook and in each of the next 9<br />
ch's; ch 2, turn. (10 dc)<br />
Rows 2-5: Dc in each dc across; ch 2, turn. (10 dc) Fasten off.<br />
<br />
Finished size of gauge swatch: 2" wide x 1 7/8" high.<br />
To work a dc dec over 2 sts: Yo insert hook in first indicated<br />
st and pull up a loop, yo and pull through 2 loops on<br />
hook, yo insert hook in next indicated st and pull up a loop, yo<br />
7
and pull through 2 loops on hook, yo and pull through all 3 remaining<br />
loops on hook.<br />
each of the next 5 sc, dc in each of the next 13 dc, 2 dc in the<br />
last dc; ch 18 for middle finger loop, turn. (25 sts)<br />
Gloves<br />
Make 2 Starting at the pinkie side of the top of the glove, ch 22<br />
<br />
Row 1: Dc in the 3rd ch from hook and in each of the next 9<br />
ch's, sc in each of the next 5 ch's, dc in each of the last 5 ch's;<br />
ch 2, turn. (20 sts) Mark the side facing you on row 1 as the<br />
right side<br />
<br />
Row 2: Dc in each of the first 5 dc, sc in the back loop only of<br />
each of the next 5 sc, dc in each of the next 9 dc, 2 dc in the<br />
last dc; ch 2, turn. (21 sts)<br />
<br />
Row 3: 2 dc in the first dc, dc in each of the next 10 dc, sc in<br />
the back loop only of each of the next 5 sc, dc in each of the<br />
last 5 dc; ch 2, turn. (22 sts)<br />
<br />
Row 4: Dc in each of the first 5 dc, sc in the back loop only of<br />
each of the next 5 sc, dc in each of the next 11 dc, 2 dc in the<br />
last dc; ch 2, turn. (23 sts)<br />
<br />
Row 5: 2 dc in the first dc, dc in each of the next 12 dc, sc in<br />
the back loop only of each of the next 5 sc, dc in each of the<br />
last 5 dc; ch 2, turn. (24 sts)<br />
<br />
Row 6: Dc in each of the first 5 dc, sc in the back loop only of<br />
Row 7: Dc in each of the first 15 dc, sc in the back loop only of<br />
each of the next 5 sc, dc in each of the last 5 dc; ch 2, turn. (25<br />
sts)<br />
<br />
Row 8: Dc in each of the first 5 dc, sc in the back loop only of<br />
each of the next 5 sc, dc in each of the next 15 dc; ch 2, turn.<br />
(25 sts)<br />
Row 9: Dc dec over the first 2 sts, dc in each of the next 13 dc,<br />
sc in the back loop only of each of the next 5 sc, dc in each of<br />
the last 5 dc; ch 2, turn. (24 sts)<br />
<br />
Row 10: Dc in each of the first 5 dc, sc in the back loop only<br />
of each of the next 5 sc, dc in each of the next 12 dc, dc dec<br />
over the last 2 sts; ch 2, turn. (23 sts)<br />
Row 11: Dc dec over the first 2 sts, dc in each of the next 11<br />
dc, sc in the back loop only of each of the next 5 sc, dc in each<br />
of the last 5 dc; ch 2, turn. (22 sts)<br />
<br />
Row 12: Dc in each of the first 5 dc, sc in the back loop only<br />
of each of the next 5 sc, dc in each of the next 10 dc, dc dec<br />
over the last 2 sts; ch 2, turn. (21 sts)<br />
8
Row 13: Dc dec over the first 2 sts, dc in each of the next 9<br />
dc, sc in the back loop only of each of the next 5 sc, dc in each<br />
of the last 5 dc; ch 2, turn. (20 sts)<br />
<br />
Row 14: Dc in each of the first 5 dc, sc in the back loop only<br />
of each of the next 5 sc, dc in each of the next 10 dc; ch 9 for<br />
the thumb loop, turn. (20 sts)<br />
Row 23: Skip the first sl st, dc in each of the next 10 dc, sc in<br />
the back loop only of each of the next 5 sc, dc in each of the<br />
last 5 dc; ch 2, turn. (20 sts)<br />
<br />
Rows 24-29: (Repeat rows 16-17) 3 times. Do not chain 2 at<br />
the end of row 29. Mark the side facing you on row 29 as the<br />
right side. Fasten off, leaving an 18" yarn tail for sewing.<br />
Row 15: Sc in the 2nd ch from hook (mark this first sc with a<br />
safety pin) and in each of the next 7 ch's, dc in each of the<br />
next10 dc, sc in the back loop only of each of the next 5 sc, dc<br />
in each of the last 5 dc; ch 2, turn. (20 sts)<br />
<br />
Row 16: Dc in each of the first 5 dc, sc in the back loop only<br />
of each of the next 5 sc, dc in each of the next 10 dc; ch 2, turn.<br />
(20 sts)<br />
Finishing<br />
Right glove: With the right sides of rows 1 and 29 facing<br />
each other, sew seam closed along the 20 sts of row 1 and the<br />
20 sts of row 29. Remove markers. Turn right side out.<br />
<br />
Left glove: With the wrong sides of rows 1 and 29 facing<br />
each other, sew seam closed along the 20 sts of row 1 and the<br />
20 sts of row 29. Remove markers. Turn right side out.<br />
Row 17: Dc in each of the first 10 dc, sc in the back loop only<br />
of each of the next 5 sc, dc in each of the last 5 dc; ch 2, turn.<br />
(20 sts)<br />
<br />
Rows 18-21: (Repeat rows 16-17) 2 times.<br />
<br />
Row 22: Dc in each of the first 5 dc, sc in the back loop only<br />
of each of the next 5 sc, dc in each of the next 10 dc, sl st in the<br />
marked sc on row 15 to close the thumb loop; ch 1, turn. (21<br />
sts)<br />
Cuff edging: With the glove turned right side out, join yarn<br />
with a sc in the side of any row on the cuff end, ch 2, (sc in the<br />
next row end, ch 2) 28 times; join with a sl st in the first sc.<br />
Fasten off. Weave in ends.<br />
Happy <strong>Crochet</strong>ing!<br />
9
SECTION 5<br />
“Forever in Blue Jeans”<br />
Scrunchie<br />
Materials:<br />
Aunt Lydia's "Denim" Quick <strong>Crochet</strong> in 2 colors (A and B)<br />
<strong>Crochet</strong> hook size G<br />
Large ponytail elastic<br />
Attach color A to the hook with a slip knot.<br />
<br />
Round 1: Attach yarn to the ponytail elastic with a sl st, ch 2<br />
(does not count as the first hdc), work 40 hdc around the elastic;<br />
join with a sl st in the front loop only of the first hdc.<br />
"FOREVER IN BLUE JEANS" SCRUNCHIE<br />
Designed by Priscilla Hewitt<br />
Copyright © 2001 Priscilla’s <strong>Crochet</strong><br />
Pattern note: If you look at the hdc in round 1, you'll see<br />
a front loop, a back loop, and on the back of the stitch there's<br />
what I call a "bonus" (third) loop. Round 2 will be worked in<br />
the front loop only, round 3 will be worked in the back loop<br />
only, and round 4 will be worked in the "bonus" loop only.<br />
Round 2: Ch 5, hdc in the 3rd ch from hook, (dc in the front<br />
loop only of the next hdc, ch 2, hdc from the side into the top<br />
of the dc) 39 times; join with a sl st in the 3rd ch of the beginning<br />
ch 5. Fasten off color A.<br />
<br />
Round 3: Attach color B with a sl st in the back loop only of<br />
any hdc on round 1, ch 7, dc in the 3rd ch from hook, (trc in<br />
10
the back loop only of the next hdc, ch 3, dc from the side into<br />
the top of the trc) 39 times; join with a sl st in the 4th ch of the<br />
beginning ch 7. Fasten off color B.<br />
Round 4: Attach color A with a sl st in the "bonus" loop only<br />
of any hdc on round 1, ch 5, hdc in the 3rd ch from hook, (dc<br />
in the "bonus" loop only of the next hdc, ch 2, hdc from the<br />
side into the top of the dc) 39 times; join with a sl st in the 3rd<br />
ch of the beginning ch 5. Fasten off. Weave in all ends.<br />
Happy <strong>Crochet</strong>ing!<br />
11
FASHION ACCESSORIES SECTION 6<br />
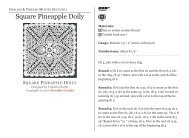
Irish Rose Scrunchie-<br />
Keeper<br />
This keeper will hold MANY scrunchies, and you don’t have<br />
to remove all the scrunchies to get the one you want. Just<br />
slide the strap through the rings until the button is beside the<br />
scrunchie you want to remove!<br />
Materials :<br />
About 2 ounces of white worsted weight acrylic yarn<br />
<strong>Crochet</strong> hook size G<br />
Two 2” lucite rings<br />
One 1” lucite ring<br />
One 3/4” white button<br />
Yarn needle<br />
Needle & white thread<br />
IRISH ROSE SCRUNCHIE-KEEPER<br />
Designed by Priscilla Hewitt<br />
Copyright © 2000 Priscilla’s <strong>Crochet</strong><br />
Rose <br />
Ch 4; join with a sl st to the first ch to form a ring.<br />
<br />
Round 1: (Sc in the ring, ch 3) 8 times; join with a sl st to the<br />
first sc.<br />
Round 2: (Sc, ch 1, 3 dc, ch 1, sc) in each ch 3 space around;<br />
do not join.<br />
12
Round 3: Working behind round 2, (bpsc around the post of<br />
the next sc on round 1, ch 4) 8 times; join with a sl st to the<br />
first bpsc.<br />
<br />
Round 4: (Sc, ch 1, 5 dc, ch 1, sc) in each ch 4 space around;<br />
do not join.<br />
Round 5: Working behind round 4, (bpsc around the post of<br />
the next bpsc on round 3, ch 5) 8 times; join with a sl st to the<br />
first bpsc.<br />
<br />
Round 6: (Sc, ch 1, 7 dc, ch 1, sc) in each ch 5 space around;<br />
do not join.<br />
Round 7: Working behind round 6, (bpsc around the post of<br />
the next bpsc on round 3, ch 3) 8 times; join with a sl st to the<br />
first bpsc.<br />
<br />
Round 8: (Attaching rings) Lay one of the 2” lucite rings<br />
over the back of the rose. Attach ring by working 5 sc in each<br />
of the next 4 ch-3 spaces AND around the ring. Lay the second<br />
2” ring on top of the first ring. Attach second ring by working<br />
5 sc in each of the next 4 ch-3 spaces AND around both rings.<br />
Join with a sl st to the first sc. Fasten off. Weave in ends.<br />
<br />
Row 1: Dc in the 3rd ch from hook, trc in each remaining ch<br />
across; turn.<br />
Row 2: Sl st in each st across, sl st in each of the 2 ch’s at the<br />
tip of the strap, working in loop of foundation ch, sl st in each<br />
st across. Fasten off. Weave in ends. (The sl st’s help keep the<br />
strap from stretching.)<br />
Finishing <br />
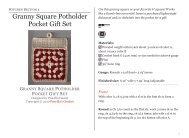
With yarn and yarn needle, sew 1” ring to the top of the rose,<br />
as indicated in the back photo, for the hanger. With needle<br />
and thread, sew the button to the end of the strap on the 2nd<br />
and 3rd from the last trc’s. Insert strap between the rings on<br />
the rose. Button closed, using the space between the 1st and<br />
2nd trc’s as a buttonhole.<br />
Strap <br />
Ch 110.<br />
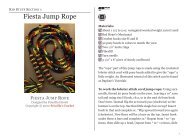
Front of Irish Rose<br />
13
(Back)<br />
Happy <strong>Crochet</strong>ing!<br />
14
FASHION ACCESSORIES SECTION 7<br />
One-Round Ruffled<br />
Scrunchie<br />
Materials:<br />
Worsted weight “soft” yarn (or yarn of your choice)<br />
<strong>Crochet</strong> hook size E (or hook of your choice)<br />
Ponytail elastic<br />
<br />
Round 1: Join yarn to the ponytail elastic with a sl st, ch 7, sc<br />
in the 4th ch from hook, (trc around the ponytail elastic, ch 3,<br />
sc in the top of the trc) 60 times (or as many times as necessary<br />
for the desired fullness of the ruffle); join with a sl st to<br />
the 4th ch of the beginning ch 7. Fasten off. Weave in ends.<br />
ONE-ROUND RUFFLED SCRUNCHIE<br />
Designed by Priscilla Hewitt<br />
Copyright © 2000 Priscilla’s <strong>Crochet</strong><br />
Happy <strong>Crochet</strong>ing!<br />
15
SECTION 8<br />
Peek A Boo Scrunchie<br />
Materials:<br />
Three colors of a worsted weight "soft" yarn (A, B and C)<br />
<strong>Crochet</strong> hook size G<br />
Large ponytail elastic<br />
Attach color A to the hook with a slip knot.<br />
<br />
Round 1: Attach yarn to the ponytail elastic with a sl st, ch 2<br />
(does not count as the first hdc), work 40 hdc around the elastic;<br />
join with a sl st in the front loop only of the first hdc.<br />
PEEK A BOO SCRUNCHIE<br />
Designed by Priscilla Hewitt<br />
Copyright © 2001 Priscilla’s <strong>Crochet</strong><br />
Pattern note: If you look at the hdc in round 1, you'll see<br />
a front loop, a back loop, and on the back of the stitch there's<br />
what I call a "bonus" (third) loop. Round 2 will be worked in<br />
the front loop only, round 3 will be worked in the back loop<br />
only, and round 4 will be worked in the "bonus" loop only<br />
Round 2: Ch 3, (sl st in the front loop only of the next hdc, ch<br />
3) 39 times; join with a sl st in the first sl st. Fasten off color A.<br />
Round 3: Attach color B with a sl st in the back loop only of<br />
any hdc on round 1, ch 1, hdc in the same st as joining, ch 5,<br />
(hdc in the back loop only of the next hdc on round 1, ch 5) 39<br />
times; join with a sl st in the first hdc. Fasten off color B.<br />
16
Round 4: Attach color C with a sl st in the "bonus" loop only<br />
of any hdc on round 1, ch 2, dc in the same st as joining, ch 7,<br />
(dc in the "bonus" loop only of the next hdc on round 1, ch 7)<br />
39 times; join with a sl st in the first dc. Fasten off. Weave in<br />
ends.<br />
Happy <strong>Crochet</strong>ing!<br />
17
FASHION ACCESSORIES SECTION 9<br />
Pool Scrunchies<br />
Materials for each scrunchie:<br />
Ten yards Needloft 100% nylon plastic canvas yarn<br />
<strong>Crochet</strong> hook size G (4.00 mm)<br />
Any size pony tail elastic<br />
POOL SCRUNCHIES<br />
Designed by Priscilla Hewitt<br />
Copyright © 2001 Priscilla’s <strong>Crochet</strong><br />
Teal Scrunchie <br />
Round 1: (Sc around the ponytail elastic, ch 5, sl st in the 5th<br />
ch from hook) as many times as needed to completely cover<br />
the ponytail elastic; join with a sl st in the first sc. Fasten off.<br />
Weave in ends.<br />
<br />
Orange Scrunchie <br />
Round 1: (Sc around the ponytail elastic, ch 4, dc in the 3rd<br />
ch from hook, ch 1) as many times as needed to completely<br />
cover the ponytail elastic; join with a sl st in the first sc. Fasten<br />
off. Weave in ends.<br />
<br />
Burgundy Scrunchie <br />
Round 1: Join yarn to the ponytail elastic with a sl st, ch 5 to<br />
count as the first dc and the first ch 2, hdc in the 3rd ch from<br />
hook, (dc around the ponytail elastic, ch 2, hdc in the top of<br />
the last dc) as many times as needed to completely cover the<br />
ponytail elastic; join with a sl st in the first sc. Fasten off.<br />
Weave in ends.<br />
18
Happy <strong>Crochet</strong>ing!<br />
19
FASHION ACCESSORIES SECTION 10<br />
Rolling Cables Scrunchie<br />
Materials:<br />
Worsted weight yarn<br />
<strong>Crochet</strong> hook size G<br />
Large pony tail elastic<br />
ROLLING CABLES SCRUNCHIE <br />
Designed by Priscilla Hewitt<br />
Copyright © 2000 Priscilla’s <strong>Crochet</strong><br />
<br />
Round 1: Attach yarn to elastic with a sl st, ch 1, 45 sc around<br />
the elastic; join with a sl st to the first sc.<br />
<br />
Round 2: Ch 1, sc in the same st as joining, ch 3, sk 2 dc, sc<br />
in the next dc, turn, sc in each of the 3 chs, turn, sc in the 2nd<br />
skipped dc, *ch 3, sk next unworked dc, sc in the next dc, turn,<br />
sc in each of the 3 chs, turn, sc(behind cable) in the last<br />
skipped dc* Repeat from * to * 19 times; ch 3, sc (in front of<br />
the first cable) in the first skipped dc of the round, turn, sc in<br />
each of the 3 chs, turn, join with a sl st to the first sc. (22 cables)<br />
Fasten off. Weave in ends.<br />
Happy <strong>Crochet</strong>ing!<br />
20
FASHION ACCESSORIES SECTION 11<br />
Ruffled Thread Scrunchie<br />
Materials:<br />
Size 10 crochet cotton thread<br />
<strong>Crochet</strong> hook size 6<br />
One of the larger, thicker pony tail elastics to match the<br />
color of the thread<br />
Round 1: Work an even number of sc around the pony tail<br />
elastic to cover generously (I think I worked about 104 sc);<br />
join with a sl st to the first sc.<br />
Round 2: Ch 1, sc in the same st as joining, (ch 3, skip next<br />
sc, sc in the next sc) around ending with ch 3, join with a sl st<br />
to the beginning sc.<br />
RUFFLED THREAD SCRUNCHIE<br />
Designed by Priscilla Hewitt<br />
Copyright © 1999 Priscilla’s <strong>Crochet</strong><br />
Round 3: Sl st into the first ch 3 loop, ch 4 to count as the<br />
first dc and the first ch 1, (dc, ch 1) 2 times in the same loop;<br />
(dc, ch 1) 3 times in each ch 3 loop around; join with a sl st to<br />
the third ch of the beginning ch 4.<br />
Round 4: Sl st into the first ch 1 space, ch 1, sc in the same<br />
space, (ch 3, sc in the next ch 1 space) around, ending with ch<br />
3, join with a sl st to the first sc.<br />
<br />
Round 5: Sl st into the first ch 3 loop, ch 1, sc in the same<br />
21
loop, (ch 3, sc in the next ch 3 loop) around, ending with, ch 3,<br />
join with a sl st to the first sc. Fasten off. weave in ends.<br />
Happy <strong>Crochet</strong>ing!<br />
22
FASHION ACCESSORIES SECTION 12<br />
Spring Fling Scrunchie<br />
Materials:<br />
Aunt Lydia’s Denim (or a "soft" worsted weight yarn)<br />
<strong>Crochet</strong> hook size G<br />
Large, thick ponytail elastic<br />
<br />
Round 1: Work 40 sc around the ponytail elastic; join with a<br />
sl st to the back loop only of the first sc.<br />
<br />
Round 2: Ch 5, sl st in the front loop only of the same sc as<br />
joining, turn, work 7 sc in the ch-5 space, turn, (sl st in the<br />
back loop only of the next sc, ch 5, sl st in the front loop only<br />
of the same sc, turn, work 7 sc in the ch-5 space, turn) 39<br />
times; join with a sl st in the first sl st. Fasten off. Weave in<br />
ends.<br />
SPRING FLING SCRUNCHIE<br />
Designed by Priscilla Hewitt<br />
Copyright © 2000 Priscilla’s <strong>Crochet</strong><br />
Happy <strong>Crochet</strong>ing!<br />
23
FASHION ACCESSORIES SECTION 13<br />
Summer Cotton Bracelet<br />
Materials:<br />
A few yards of Speed-Cro-Sheen<br />
<strong>Crochet</strong> hook size E<br />
Your favorite bracelet closure findings<br />
Tapestry needle<br />
SUMMER COTTON BRACELET<br />
Designed by Priscilla Hewitt <br />
Copyright © 2001 Priscilla’s <strong>Crochet</strong><br />
To work the lobster stitch: Ch 2, sc in the 2nd ch from<br />
hook Don't turn. Instead flip the sc toward you (clockwise) so<br />
the bottom is on the top. See that little single bar on top? Insert<br />
hook in that and complete sc. *Flip upward toward you<br />
again (clockwise). Now there will be 2 bars on the top. Insert<br />
hook under those 2 bars and complete sc.* Repeat from * to *<br />
for desired length.<br />
<br />
Leaving a 6" yarn tail at the start and finish of the piece, work<br />
in lobster stitch until you reach the length desired for your<br />
bracelet. Fasten off with a sl st through the last double bar.<br />
Finishing: Thread needle with yarn tail and take several<br />
stitches around one side of the closure finding; knot and<br />
weave in end. Repeat on the other end of the braid.<br />
Happy <strong>Crochet</strong>ing!<br />
24