FI8918W Quick Installation Guide
FI8918W Quick Installation Guide
FI8918W Quick Installation Guide

Create successful ePaper yourself
Turn your PDF publications into a flip-book with our unique Google optimized e-Paper software.
V46.01<br />
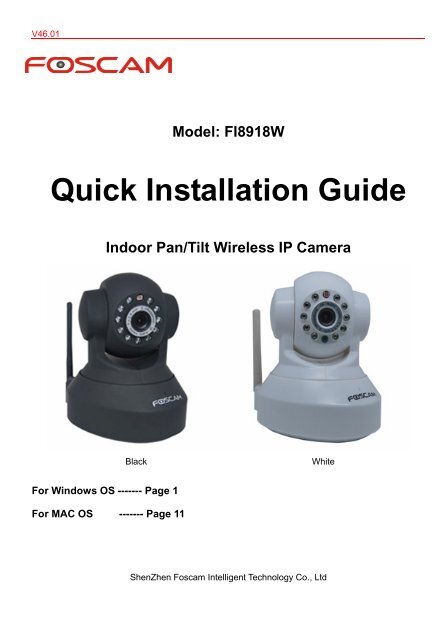
Model: <strong>FI8918W</strong><br />
<strong>Quick</strong> <strong>Installation</strong> <strong>Guide</strong><br />
Indoor Pan/Tilt Wireless IP Camera<br />
Black<br />
White<br />
For Windows OS ------- Page 1<br />
For MAC OS ------- Page 11<br />
ShenZhen Foscam Intelligent Technology Co., Ltd
<strong>FI8918W</strong> <strong>Quick</strong> <strong>Installation</strong> <strong>Guide</strong><br />
<strong>Quick</strong> <strong>Installation</strong> <strong>Guide</strong> - For Windows OS<br />
Package Contents<br />
• IP Camera <strong>FI8918W</strong> .x 1<br />
• DC Power Adapter (5V-2.0A) .x 1<br />
• Network Cable x 1<br />
• Wi-Fi Antenna .x 1<br />
• Mounting Bracket .x 1<br />
• <strong>Quick</strong> <strong>Installation</strong> <strong>Guide</strong> x 1<br />
• CD-ROM with Setup Software .x 1<br />
• Warranty Card x 1<br />
<strong>Quick</strong> <strong>Installation</strong> Diagram<br />
<strong>Quick</strong> <strong>Installation</strong> <strong>Guide</strong> Flow Chart<br />
Hardware <strong>Installation</strong><br />
Software<br />
<strong>Installation</strong><br />
Login the Camera<br />
Wireless Connection Setup<br />
Remote Access Setup<br />
Other Settings<br />
P.12<br />
www.foscam.com - 1 -
Start <strong>Installation</strong><br />
1. Hardware <strong>Installation</strong><br />
<strong>FI8918W</strong> <strong>Quick</strong> <strong>Installation</strong> <strong>Guide</strong><br />
1) Open the package. Take out the camera out of the box carefully.<br />
2) Mount the antenna. Then take the Wi-Fi antenna, mount it on the SMA connector on the back<br />
of the camera, screw the antenna to the bottom, and make the antenna stand vertically.<br />
Figure 1.1 Mount the antenna<br />
Figure 1.2 Plug the network cable<br />
3) Get the camera connected to the router, and get it powered.<br />
Use the network cable to connect the camera to the router or the switch in the LAN network at your<br />
home or your office. Plug in the power. The green network light at the rear of the camera will blink<br />
and the camera will automatically pan/tilt. The red power light will also turn on.<br />
2. Software <strong>Installation</strong><br />
Insert the CD into the CD drive of your computer and find the folder “For Windows OS”. Select the IP<br />
Camera Tool folder. Double click IPCamSetup.exe to install, it pops up a window as below (Fig.1.3).<br />
Just click button “Next” to finish the installation.<br />
Figure 1.3 Click Next, next to continue the installation<br />
www.foscam.com - 2 -
<strong>FI8918W</strong> <strong>Quick</strong> <strong>Installation</strong> <strong>Guide</strong><br />
Figure 1.4 Click Close to finish installation, and get computer restarted<br />
A shortcut icon will appear on your desktop after the IP Camera Tool software installation is<br />
successfully completed.<br />
3. Login the Camera<br />
Figure 1.5 Shortcut icon<br />
Double click the IP Camera Tool icon and the following screen should appear.<br />
Figure 1.6 IP Camera Tool Windows<br />
The IP camera tool should find the camera’s IP automatically after you plug in the network cable. If<br />
not, please make sure that DHCP is enabled on your router and that MAC address filtering, firewalls<br />
and anti-virus are disabled temporarily until the camera is set up.<br />
Double click the LAN IP address of the camera, it pops up a login window.<br />
www.foscam.com - 3 -
<strong>FI8918W</strong> <strong>Quick</strong> <strong>Installation</strong> <strong>Guide</strong><br />
Default user is admin<br />
No password<br />
If you use IE browser, select this login<br />
If you use Firefox,Google Chrome, Safari ,<br />
select this login<br />
Note<br />
Figure 1.7 Enter user name: admin, no password, and click login<br />
There are two login methods. One is IE ActiveX Mode, the other is Server Push<br />
Mode for Safari, Firefox, Google Chrome. Please choose IE ActiveX Mode if you are using IE<br />
browser now.<br />
Figure 1.8 Surveillance Windows<br />
Enter user name: admin, no password, and click Submit. Congratulations! You have succeeded in<br />
accessing in the camera by wired connection. Just leave all the menus alone before you finish the<br />
quick installation.<br />
Note<br />
The default user name is admin with no password.<br />
www.foscam.com - 4 -
<strong>FI8918W</strong> <strong>Quick</strong> <strong>Installation</strong> <strong>Guide</strong><br />
If you are unable to see a live video, please make sure to allow ActiveX to run when prompted. (For<br />
more details, see the User Manual).<br />
If you only see a black screen with a red cross in the center, please try another port number instead<br />
of the default “port 80” .You may want to try port 85, 8005, etc.<br />
If you are still unable to see a live video, try shutting down any firewall or anti-virus software on your<br />
computer.<br />
4. Wireless Connection Settings<br />
Step 01) Please choose “For Administrator” and click “Wireless LAN Settings”. Then enable<br />
“Using Wireless LAN”.<br />
Click the Scan button and the camera will detect all WIFI devices around the area. It should also<br />
display your router in the list. (Figure 1.9)<br />
If the camera is not able to detect any WIFI device, please click the Scan button again. Make sure to<br />
wait 1 to 2 minutes before selecting the Scan button again.<br />
Figure 1.9 Wireless LAN Settings<br />
Step 02) Click the SSID of your router in the list, the corresponding information (SSID & Encryption)<br />
will be filled in the following boxes automatically.<br />
You will only need to fill in the share key. Make sure that SSID, Encryption and share key you filled in<br />
for the camera are exactly the same for your router.<br />
www.foscam.com - 5 -
<strong>FI8918W</strong> <strong>Quick</strong> <strong>Installation</strong> <strong>Guide</strong><br />
Figure 2.0 Wireless LAN Settings<br />
Step 03) Please click on the Submit button after all settings have been entered. The camera will<br />
reboot after the camera has completed the reboot process, wait 10 seconds and disconnect the<br />
network cable.<br />
The LAN IP address will disappear on the window of IP Camera Tool when the camera gets restarted.<br />
Just wait for around 1 minute, the camera will get wireless connection, and the LAN IP of the camera<br />
will be showed again on the window of the IP Cam Tool. You have done wireless connection of the<br />
camera successfully.If the camera has a dynamic IP, after the wireless settings ,the IP will be<br />
changed.<br />
Note<br />
If fail to make WiFi connection, please refer to seller or us for help.<br />
5. Remote Access Settings<br />
We have been able to access the camera within the LAN network, but how to access the camera via<br />
WAN or via internet? We have to do Remote Access Settings before we want to access the<br />
camera outside the LAN network.<br />
5.1 Static IP user<br />
Static IP users do not need to set DDNS service settings for remote access. When you have finished<br />
connecting the camera using LAN and port forwarding, you can access the camera directly from the<br />
Internet by the WAN IP and port number.<br />
• How to Obtain the WAN IP from a public website<br />
To obtain your WAN IP address, enter the following URL in your browser:<br />
http://www.whatismyip.com.The webpage at this address will show you the current WAN IP.<br />
Figure 2.1 Get to know the WAN IP address of the router<br />
www.foscam.com - 6 -
<strong>FI8918W</strong> <strong>Quick</strong> <strong>Installation</strong> <strong>Guide</strong><br />
Access the IP Camera from the Internet<br />
You can access the IP Camera from the Internet (remote access). Enter the WAN IP address and<br />
port number in IE browser or other browsers you use. For example, Http:// 183.37.28.254:85<br />
Note<br />
Make sure port mapping (or also known as port forwarding) is successful. You can do port<br />
mapping in two ways.<br />
1) Enter the setting page of the router to enable UPNP function. Then login the camera as<br />
administrator, choose UPnP Settings to enable UPNP and make sure the state is “UPnP success”.<br />
2) Do port forwarding manually. (details: Fig.2.5)<br />
If your router has a Virtual Server, it will do port mapping. Please add the camera’s LAN IP and port<br />
which you set in basic network settings to the Virtual map list.<br />
Note: If you plug the camera in a router, it will have dynamic IP address and you need to set DDNS<br />
service settings to view it remotely.<br />
5.2 How to configure Remote Access Settings (For dynamic IP user)<br />
1 Step 1 Go to the website www.no-ip.com to create a free hostname<br />
Firstly: Login on www.no-ip.com and click No-IP Free to register.<br />
Click here to register<br />
Figure 2.2 Register a user name on www.no-ip.com<br />
Please register an account step by step according to instructions on www.no-ip.com<br />
www.foscam.com - 7 -
<strong>FI8918W</strong> <strong>Quick</strong> <strong>Installation</strong> <strong>Guide</strong><br />
After registration, please login your email which used to register. You will receive an email from<br />
website, please click the link to activate your ACCOUNT as indicated in email.<br />
Secondly: Login the link with the registered username and password to create your domain<br />
name.<br />
Figure 2.3 Login the link to create a domain name<br />
Figure 2.4 Create a domain name<br />
Please create the domain name step by step according to instructions on www.no-ip.com<br />
www.foscam.com - 8 -
2 Step 2, DO DDNS Service Settings within the Camera<br />
<strong>FI8918W</strong> <strong>Quick</strong> <strong>Installation</strong> <strong>Guide</strong><br />
Please set DDNS Service Settings within the camera by hostname, a user name and password<br />
you’ve got from www.no-ip.com<br />
Take hostname ycxgwp.no-ip.info, user name foscam, password foscam2012 for example.<br />
Firstly, goes to option of DDNS Service Settings on the administrator panel.<br />
Secondly, select No-Ip as a server.<br />
Thirdly, fill foscam as DDNS user, fill password foscam2012 as DDNS password, fill<br />
ycxgwp.no-ip.info as DDNS domain and server URL, Then click save to make effect. The camera<br />
will restart and to take the DDNS settings effective.<br />
Fourthly, after the restart, login the camera, and go to option of Device Info on the administrator<br />
panel, and check if the DDNS status is successful.<br />
Note<br />
If failed, please double check if you have input the correct hostname, user name,<br />
and password, and try to redo the settings.<br />
3 Step 3,Make Port Forwarding of the HTTP Port of the camera<br />
What is port forwarding?<br />
If you have no concept of Port Forwarding, please open the webpage<br />
http://portforward.com/help/portforwarding.htm to learn some knowledge of Port Forwarding.<br />
Or Use Google to check out what is port forwarding.<br />
How to do port forwarding within the router<br />
Example: The camera’s LAN IP address is http://192.168.1.35:88 ,<br />
Firstly, login the router, goes to the menu of Port Forwarding or Port Trigger (or named Virtue<br />
Server on some brands of router). Take Linksys brand router as an example, Login the router,<br />
and goes to Applications & Gaming->Single Port Forwarding.<br />
Secondly, Create a new column by LAN IP address & HTTP Port No. of the camera within the router<br />
showed as below.<br />
www.foscam.com - 9 -
<strong>FI8918W</strong> <strong>Quick</strong> <strong>Installation</strong> <strong>Guide</strong><br />
Figure2.5 Port forwarding<br />
4Step 4, Use domain name to access the camera via internet<br />
After the port forwarding is finished, you can use the domain name+ http no. to access the camera<br />
via internet. Take hostname ycxgwp.no-ip.info for example, the accessing link of the camera via<br />
internet would be http:// ycxgwp.no-ip.info:88<br />
How to test if the accessing link is working<br />
1) Just enter http:// Domain name + HTTP Port on the IE bar, to see if the camera is accessible.<br />
2) Send the link http:// Domain name + HTTP Port to your friend to have a test, to check if the<br />
camera is accessible<br />
6. Other Settings<br />
Congratulations!<br />
You have finished the quick installation of the camera. You can take time to play the camera.<br />
Please refer to the electronic user manual burned in the CD-ROM for other settings.<br />
Other advanced software settings, such as Alarm Service Settings, Mail Service Settings,<br />
User Settings,<br />
If you have problem with FOSCAM IP camera, please first contact FOSCAM reseller for<br />
solving the problems. If our reseller cannot provide service, pls contact our service<br />
department: tech@foscam.com .<br />
www.foscam.com - 10 -
<strong>FI8918W</strong> <strong>Quick</strong> <strong>Installation</strong> <strong>Guide</strong><br />
<strong>Quick</strong> <strong>Installation</strong> <strong>Guide</strong> - For MAC OS<br />
Package Contents<br />
• IP Camera <strong>FI8918W</strong> .x 1<br />
• DC Power Adapter (5V-2.0A) .x 1<br />
• Network Cable x 1<br />
• Wi-Fi Antenna .x 1<br />
• Mounting Bracket .x 1<br />
• <strong>Quick</strong> <strong>Installation</strong> <strong>Guide</strong> x 1<br />
• CD-ROM with Setup Software .x 1<br />
• Warranty Card x 1<br />
<strong>Quick</strong> <strong>Installation</strong> Diagram<br />
<strong>Quick</strong> <strong>Installation</strong> <strong>Guide</strong> Flow Chart<br />
Hardware <strong>Installation</strong><br />
Software<br />
<strong>Installation</strong><br />
Login the Camera<br />
Wireless Connection Setup<br />
Remote Access Setup<br />
Other Settings<br />
P.12<br />
www.foscam.com - 11 -
Start <strong>Installation</strong><br />
<strong>FI8918W</strong> <strong>Quick</strong> <strong>Installation</strong> <strong>Guide</strong><br />
1. Hardware <strong>Installation</strong><br />
1) Open the package. Take out the camera out of the box carefully.<br />
2) Mount the antenna. Then take the Wi-Fi antenna, mount it on the SMA connector on the back<br />
of the camera, screw the antenna to the bottom, and make the antenna stand vertically.<br />
Figure 1.1 Mount the antenna<br />
Figure 1.2 Plug the network cable<br />
3) Get the camera connected to the router, and get it powered.<br />
Use the network cable to connect the camera to the router or the switch in the LAN network at your<br />
home or your office. Plug in the power. The green network light at the rear of the camera will blink<br />
and the camera will automatically pan/tilt. The red power light will also turn on.<br />
2. Software <strong>Installation</strong><br />
Insert the CD in your CD drive of your laptop and find the folder “For MAC OS”. Select the IP Camera<br />
Tool folder. Copy the IP camera tool to your MAC and start the program.<br />
3. Login the Camera<br />
Figure 1.3 Shortcut icon<br />
Double click the IP Camera Tool icon and the following screen should appear.<br />
Figure 1.4 IP Camera Tool Windows<br />
The IP camera tool should find the camera’s IP automatically after you plug in the network cable. If<br />
not, please make sure that DHCP is enabled on your router and that MAC address filtering, firewalls<br />
and anti-virus are disabled temporarily until the camera is set up.<br />
www.foscam.com - 12 -
<strong>FI8918W</strong> <strong>Quick</strong> <strong>Installation</strong> <strong>Guide</strong><br />
Double click the LAN IP address of the camera, it pops up a login window.<br />
The default user is admin<br />
No password<br />
Select this login<br />
Figure 1.5 Enter user name: admin, no password, and click login<br />
Note<br />
There are two login methods. One is IE ActiveX Mode, the other is Server Push<br />
Mode for Safari, Firefox, Google Chrome. Please choose Server Push Mode if you are using<br />
Safari browser now.<br />
Figure 1.6 Enter user name: admin, no password again, and click login<br />
www.foscam.com - 13 -
<strong>FI8918W</strong> <strong>Quick</strong> <strong>Installation</strong> <strong>Guide</strong><br />
Figure 1.7 Device Status Windows<br />
Click Live Video. You can now see live streaming video.<br />
Note<br />
Figure 1.8 Surveillance Windows<br />
The default user name is admin with no password.<br />
www.foscam.com - 14 -
4. Wireless Connection Settings<br />
<strong>FI8918W</strong> <strong>Quick</strong> <strong>Installation</strong> <strong>Guide</strong><br />
Step 01) Please choose “For Administrator” and click “Wireless LAN Settings”. Then enable<br />
“Using Wireless LAN”.<br />
Click the Scan button and the camera will detect all WIFI devices around the area. It should also<br />
display your router in the list. (Figure 1.9)<br />
If the camera is not able to detect any WIFI device, please click the Scan button again. Make sure to<br />
wait 1 to 2 minutes before selecting the Scan button again.<br />
Figure 1.9 Wireless LAN Settings<br />
Step 02) Click the SSID of your router in the list, the corresponding information (SSID & Encryption)<br />
will be filled in the following boxes automatically.<br />
You will only need to fill in the share key. Make sure that SSID, Encryption and share key you filled in<br />
for the camera are exactly the same for your router.<br />
Figure 2.0 Wireless LAN Settings<br />
Step 03) Please click on the Submit button after all settings have been entered. The camera will<br />
reboot after the camera has completed the reboot process, wait 10 seconds and disconnect the<br />
network cable.<br />
www.foscam.com - 15 -
<strong>FI8918W</strong> <strong>Quick</strong> <strong>Installation</strong> <strong>Guide</strong><br />
The LAN IP address will disappear on the window of IP Camera Tool when the camera gets restarted.<br />
Just wait for around 1 minute, the camera will get wireless connection, and the LAN IP of the camera<br />
will be showed again on the window of the IP Cam Tool. You have done wireless connection of the<br />
camera successfully. If the camera has a dynamic IP, after the wireless settings, the IP will be<br />
changed.<br />
Note<br />
If fail to make WiFi connection, please refer to seller or us for help.<br />
5. Remote Access Settings<br />
We have been able to access the camera within the LAN network, but how to access the camera via<br />
WAN or via internet? We have to do Remote Access Settings before we want to access the<br />
camera outside the LAN network.<br />
5.1 Static IP user<br />
Static IP users do not need to set DDNS service settings for remote access. When you have finished<br />
connecting the camera using LAN and port forwarding, you can access the camera directly from the<br />
Internet by the WAN IP and port number.<br />
• How to Obtain the WAN IP from a public website<br />
To obtain your WAN IP address, enter the following URL in your browser:<br />
http://www.whatismyip.com.The webpage at this address will show you the current WAN IP.<br />
Figure 2.1 Get to know the WAN IP address of the router<br />
Access the IP Camera from the Internet<br />
You can access the IP Camera from the Internet (remote access). Enter the WAN IP address and<br />
port number in IE browser or other browsers you use. For example, Http:// 183.37.28.254:85<br />
www.foscam.com - 16 -
<strong>FI8918W</strong> <strong>Quick</strong> <strong>Installation</strong> <strong>Guide</strong><br />
Note<br />
Make sure port mapping (or also known as port forwarding) is successful. You can do port<br />
mapping in two ways.<br />
3) Enter the setting page of the router to enable UPNP function. Then login the camera as<br />
administrator, choose UPnP Settings to enable UPNP and make sure the state is “UPnP success”.<br />
4) Do port forwarding manually. (details: Fig.2.5)<br />
If your router has a Virtual Server, it will do port mapping. Please add the camera’s LAN IP and port<br />
which you set in basic network settings to the Virtual map list.<br />
Note: If you plug the camera in a router, it will have dynamic IP address and you need to set DDNS<br />
service settings to view it remotely.<br />
5.2 How to configure Remote Access Settings (For dynamic IP user)<br />
1 Step 1 Go to the website www.no-ip.com to create a free hostname<br />
Firstly: Login on www.no-ip.com and click No-IP Free to register.<br />
Click here to register<br />
Figure 2.2 Register a user name on www.no-ip.com<br />
Please register an account step by step according to instructions on www.no-ip.com<br />
After registration, please login your email which used to register. You will receive an email from<br />
website, please click the link to activate your ACCOUNT as indicated in email.<br />
www.foscam.com - 17 -
<strong>FI8918W</strong> <strong>Quick</strong> <strong>Installation</strong> <strong>Guide</strong><br />
Secondly: Login the link with the registered username and password to create your domain<br />
name.<br />
Figure 2.3 Login the link to create a domain name<br />
Figure 2.4 Create a domain name<br />
Please create the domain name step by step according to instructions on www.no-ip.com<br />
www.foscam.com - 18 -
2 Step 2, DO DDNS Service Settings within the Camera<br />
<strong>FI8918W</strong> <strong>Quick</strong> <strong>Installation</strong> <strong>Guide</strong><br />
Please set DDNS Service Settings within the camera by hostname, a user name and password<br />
you’ve got from www.no-ip.com<br />
Take hostname ycxgwp.no-ip.info, user name foscam, password foscam2012 for example.<br />
Firstly, goes to option of DDNS Service Settings on the administrator panel.<br />
Secondly, select No-Ip as a server.<br />
Thirdly, fill foscam as DDNS user, fill password foscam2012 as DDNS password, fill<br />
ycxgwp.no-ip.info as DDNS domain and server URL, Then click save to make effect. The camera<br />
will restart and to take the DDNS settings effective.<br />
Fourthly, after the restart, login the camera, and go to option of Device Info on the administrator<br />
panel, and check if the DDNS status is successful.<br />
Note<br />
If failed, please double check if you have input the correct hostname, user name,<br />
and password, and try to redo the settings.<br />
3 Step 3,Make Port Forwarding of the HTTP Port of the camera<br />
What is port forwarding?<br />
If you have no concept of Port Forwarding, please open the webpage<br />
http://portforward.com/help/portforwarding.htm to learn some knowledge of Port Forwarding.<br />
Or Use Google to check out what is port forwarding.<br />
How to do port forwarding within the router<br />
Example: The camera’s LAN IP address is http://192.168.1.35:88 ,<br />
Firstly, login the router, goes to the menu of Port Forwarding or Port Trigger (or named Virtue<br />
Server on some brands of router). Take Linksys brand router as an example, Login the router,<br />
and goes to Applications & Gaming->Single Port Forwarding.<br />
Secondly, Create a new column by LAN IP address & HTTP Port No. of the camera within the router<br />
showed as below.<br />
www.foscam.com - 19 -
<strong>FI8918W</strong> <strong>Quick</strong> <strong>Installation</strong> <strong>Guide</strong><br />
Figure2.5 Port forwarding<br />
4Step 4, Use domain name to access the camera via internet<br />
After the port forwarding is finished, you can use the domain name+ http no. to access the camera<br />
via internet. Take hostname ycxgwp.no-ip.info for example, the accessing link of the camera via<br />
internet would be http://ycxgwp.no-ip.info:88<br />
How to test if the accessing link is working<br />
1) Just enter http:// Domain name + HTTP Port on the IE bar, to see if the camera is accessible.<br />
2) Send the link http:// Domain name + HTTP Port to your friend to have a test, to check if the<br />
camera is accessible<br />
6. Other Settings<br />
Congratulations!<br />
You have finished the quick installation of the camera. You can take time to play the camera.<br />
Please refer to the electronic user manual burned in the CD-ROM for other settings.<br />
Other advanced software settings, such as Alarm Service Settings, Mail Service Settings,<br />
User Settings,<br />
If you have problem with FOSCAM IP camera, please first contact FOSCAM reseller for<br />
solving the problems. If our reseller cannot provide service, pls contact our service<br />
department: tech@foscam.com .<br />
ShenZhen Foscam Intelligent Technology Co., Ltd<br />
www.foscam.com - 20 -