

MAINTENANCE MANUAL - Meritor
MAINTENANCE MANUAL - Meritor
MAINTENANCE MANUAL - Meritor

Create successful ePaper yourself
Turn your PDF publications into a flip-book with our unique Google optimized e-Paper software.
Assembly and Installation<br />
6. Verify that the seal has been correctly installed<br />
on the slip yoke by rotating the seal.<br />
When the seal is installed correctly, the seal<br />
will rotate easily.<br />
• If the seal does not rotate easily: Remove the<br />
seal and reinstall it.<br />
7. Install the steel shroud over the seal by hand.<br />
Figure 4.5.<br />
• If it appears that a mallet is needed to install<br />
the shroud: It is likely the seal has not been<br />
installed correctly.Repeat Step 6.<br />
Figure 4.5<br />
MXL<br />
4007593a<br />
Installation<br />
Universal Joint<br />
WARNING<br />
Use a brass or synthetic mallet for assembly<br />
and disassembly procedures. Do not hit steel<br />
parts with a steel hammer. Pieces of a part can<br />
break off. Serious personal injury and damage<br />
to components can result.<br />
1. Install the universal joint cross into the yoke.<br />
2. Install the two bearing cups through the yoke<br />
bores and onto the universal joint cross trunnions.<br />
If necessary, use a copper or brass<br />
hammer to tap the bearing caps until they are<br />
fully seated.<br />
3. Hand-tighten the capscrews through the bearing<br />
cover plate and into the slip yoke.<br />
4. Use a torque wrench to alternately tighten the<br />
capscrews to the correct specifications. Refer<br />
to Table A.<br />
5. Repeat Step 1 to Step 3 to install the universal<br />
joint cross into the weld yoke.<br />
Figure 4.5<br />
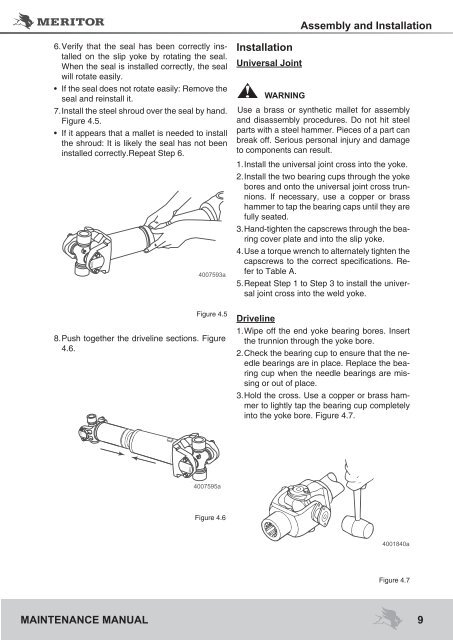
8. Push together the driveline sections. Figure<br />
4.6.<br />
Driveline<br />
1. Wipe off the end yoke bearing bores. Insert<br />
the trunnion through the yoke bore.<br />
2. Check the bearing cup to ensure that the needle<br />
bearings are in place. Replace the bearing<br />
cup when the needle bearings are missing<br />
or out of place.<br />
3. Hold the cross. Use a copper or brass hammer<br />
to lightly tap the bearing cup completely<br />
into the yoke bore. Figure 4.7.<br />
MXL<br />
MXL<br />
4007595a<br />
Figure 4.6<br />
4001840a<br />
Figure 4.7<br />
<strong>MAINTENANCE</strong> <strong>MANUAL</strong><br />
9


