HandNet for Windows Manual - Security Technologies
HandNet for Windows Manual - Security Technologies
HandNet for Windows Manual - Security Technologies

You also want an ePaper? Increase the reach of your titles
YUMPU automatically turns print PDFs into web optimized ePapers that Google loves.
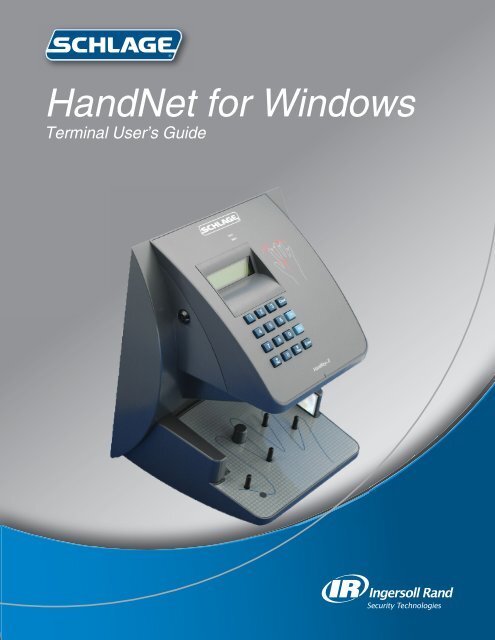
<strong>HandNet</strong> <strong>for</strong> <strong>Windows</strong><br />
Terminal User’s Guide
© 2009 Schlage Biometrics, Inc.<br />
You may not reproduce, copy, or redistribute this manual in any <strong>for</strong>m without written permission<br />
from Schlage Biometrics, Inc.<br />
HandKey and <strong>HandNet</strong> are trademarks of Schlage Biometrics, Inc.<br />
<strong>Windows</strong> is a trademark of Microsoft Corporation.<br />
ii
Table of Contents<br />
Getting Started.................................................................................................1<br />
Introduction......................................................................................................................1<br />
What <strong>HandNet</strong> Does.......................................................................................................1<br />
Registering <strong>HandNet</strong>......................................................................................................1<br />
New Features in Version 2.0...........................................................................................1<br />
Getting Help in <strong>HandNet</strong>..................................................................................................3<br />
For Basic Topics..............................................................................................................3<br />
For Groups of Topics on a Single Theme........................................................................3<br />
Screens and Menus........................................................................................................3<br />
When to Use the Index and When to Search..................................................................3<br />
Marking a Topic to Return to...........................................................................................3<br />
Getting In and Getting Out..............................................................................................4<br />
Starting <strong>HandNet</strong> ...........................................................................................................4<br />
Logging into <strong>HandNet</strong>.....................................................................................................4<br />
Changing the Initial Login Name and Password.............................................................4<br />
Logging out of <strong>HandNet</strong>..................................................................................................5<br />
Exiting <strong>HandNet</strong>..............................................................................................................5<br />
Getting Started Overview................................................................................................6<br />
Procedure <strong>for</strong> Getting Started and Setting Up................................................................6<br />
Menus and Navigation..................................................................... 7<br />
Toolbar .............................................................................................................................7<br />
Turning the Toolbar On and Off.......................................................................................7<br />
Options on the Toolbar....................................................................................................7<br />
Tiling the Display <strong>Windows</strong>.............................................................................................9<br />
Example of <strong>Windows</strong> that are NOT Tiled........................................................................9<br />
Example of <strong>Windows</strong> that ARE Tiled..............................................................................9<br />
Menu Overviews.............................................................................................................10<br />
Pulling Down Menus with the Keyboard instead of the Mouse ....................................10<br />
Main Menu Bar.............................................................................................................10<br />
File Menu......................................................................................................................11<br />
Reports Menu...............................................................................................................13<br />
Site Menu......................................................................................................................14<br />
Reader Menu................................................................................................................15<br />
User Menu....................................................................................................................17<br />
View Menu....................................................................................................................18<br />
Window Menu...............................................................................................................20<br />
Help Menu....................................................................................................................21<br />
System Wide Settings.................................................................... 22<br />
General System Settings...............................................................................................22<br />
Name of System...........................................................................................................22<br />
Amount of Activity to Show...........................................................................................22<br />
Disable All Sites............................................................................................................22<br />
iii
iv<br />
What User Changes Can Come from Readers............................................................23<br />
Whether Users can be Added at the Reader................................................................23<br />
Whether to Revise the Stored Images of Users’ Hands................................................23<br />
Who Can Use <strong>HandNet</strong>..................................................................................................24<br />
Adding or Changing an Operator..................................................................................24<br />
Which Options the Operator Can Use..........................................................................24<br />
Deleting an Operator....................................................................................................24<br />
Which Messages Trigger Alarms..................................................................................25<br />
Messages That Cause Alarms......................................................................................25<br />
Alarms Sounds.............................................................................................................25<br />
When Past Activity Gets Archived................................................................................26<br />
What Archiving Is..........................................................................................................26<br />
When <strong>HandNet</strong> Reminds You to Make and Archive......................................................26<br />
What NOT to Archive....................................................................................................27<br />
Exporting Activity When Archiving................................................................................27<br />
When Users Get Imported and Exported.....................................................................28<br />
User Import/Export Tab.................................................................................................28<br />
Setting Up <strong>for</strong> Common Situations...............................................................................28<br />
Import Settings.............................................................................................................29<br />
Export Settings.............................................................................................................30<br />
“Typical” Settings..........................................................................................................30<br />
Getting Exported Users to Another Computer..............................................................30<br />
Setting Up Sites and Readers....................................................... 31<br />
Seeing Sites and Readers in the Network Window.....................................................31<br />
Understanding the Icons to the Left of the Name.........................................................31<br />
Changing How the Readers are Sorted........................................................................31<br />
Rearranging or Resizing the Columns..........................................................................31<br />
Setting Up Sites, Overview............................................................................................33<br />
What a Site Is...............................................................................................................33<br />
Be<strong>for</strong>e You Enable a Site..............................................................................................33<br />
Adding or Changing a Site............................................................................................34<br />
Adding a Site................................................................................................................34<br />
Changing a Site............................................................................................................34<br />
Name............................................................................................................................34<br />
Type of Connection.......................................................................................................34<br />
Serial Port Connection..................................................................................................35<br />
Modem Connection.......................................................................................................36<br />
IP Address....................................................................................................................39<br />
Enabling the Site...........................................................................................................40<br />
To Enable the Site Later...............................................................................................40<br />
Setting Up Readers, Overview......................................................................................41<br />
Be<strong>for</strong>e You Enable the Reader......................................................................................41<br />
Selecting Readers........................................................................................................41<br />
Renaming a Reader......................................................................................................41<br />
Setting Up a New Reader...............................................................................................42<br />
Getting Started.............................................................................................................42
Name and Address Screen...........................................................................................42<br />
Configuration................................................................................................................43<br />
Changing Reader Settings with Reader Properties....................................................45<br />
Getting to the Reader Settings.....................................................................................45<br />
General.........................................................................................................................45<br />
Settings.........................................................................................................................46<br />
Configuration................................................................................................................47<br />
Auxiliary (AUX) Settings................................................................................................48<br />
Passwords....................................................................................................................50<br />
Action Queue................................................................................................................51<br />
Extended Setup............................................................................................................51<br />
In<strong>for</strong>mation....................................................................................................................53<br />
Configuring the Physical Reader..................................................................................54<br />
Getting to the Setup Menu in the Reader.....................................................................54<br />
Changing the Reader Address.....................................................................................55<br />
Changing the Serial Settings and Baud Rate...............................................................56<br />
Changing the IP Address in a Reader with an Ethernet Card......................................58<br />
Resending In<strong>for</strong>mation to a Reader..............................................................................60<br />
Why You Might Need to Resend In<strong>for</strong>mation................................................................60<br />
Getting to the Download Option....................................................................................60<br />
Confirming That You Want to Send In<strong>for</strong>mation to the Reader.....................................60<br />
Settings That Control User Access.............................................. 61<br />
Setting Up Time Zones...................................................................................................61<br />
What Time Zones Are...................................................................................................61<br />
When You Need to Set Up Time Zones........................................................................61<br />
When You Don’t Need to Set Up Time Zones...............................................................61<br />
Getting to the List of Time Zones..................................................................................62<br />
Adding or Changing Time Zones..................................................................................62<br />
Deleting Time Zones.....................................................................................................62<br />
Time Zone Definition Screen........................................................................................62<br />
Examples of Time Zone Settings..................................................................................64<br />
Setting Up Holidays.......................................................................................................65<br />
When You Need to Set Up Holidays.............................................................................65<br />
When You Don’t Need to Set Holidays Up....................................................................65<br />
Adjusting Holidays Each Year.......................................................................................65<br />
Getting to the Holidays List...........................................................................................65<br />
Adding or Changing Holidays ......................................................................................65<br />
Deleting Holidays..........................................................................................................66<br />
Setting Up Access Profiles............................................................................................67<br />
When You Need to Set Up Access Profiles...................................................................67<br />
When You Don’t Need to Set Up Access Profiles.........................................................67<br />
Getting to the List of Access Profiles............................................................................67<br />
Adding an Access Profile..............................................................................................67<br />
New Access Profile Wizard, Screen 1..........................................................................68<br />
New Access Profile Wizard, Screen 2..........................................................................68<br />
v
vi<br />
New Access Profile Wizard, Screen 3..........................................................................68<br />
Changing an Access Profile..........................................................................................69<br />
Access Profile Override Box.........................................................................................70<br />
Deleting an Access Profile............................................................................................70<br />
Adding and Maintaining Users..................................................... 71<br />
Users Window.................................................................................................................71<br />
Understanding the Icons to the Left of the Name.........................................................71<br />
Changing How the User List is Sorted..........................................................................71<br />
Rearranging Columns in the User Window...................................................................71<br />
Changing Column Width...............................................................................................72<br />
Columns of In<strong>for</strong>mation in the User Window.................................................................72<br />
Adding Users Overview.................................................................................................74<br />
Be<strong>for</strong>e You Add Users...................................................................................................74<br />
Choosing How to Add the Users...................................................................................74<br />
Adding a User Who Has Access Without Hand Recognition........................................74<br />
Allowing Users to be Added at the Reader...................................................................75<br />
Preventing Users from Being Added at Readers..........................................................75<br />
Adding a Single New User.............................................................................................76<br />
Beginning the Process..................................................................................................76<br />
Name/ID Screen...........................................................................................................77<br />
<strong>Security</strong> Screen............................................................................................................78<br />
Custom Entries Screen.................................................................................................80<br />
What to Do Next...........................................................................................................80<br />
Adding a Group of Users at Once.................................................................................81<br />
Beginning the Process..................................................................................................81<br />
Number of Users to Add and Starting ID......................................................................82<br />
<strong>Security</strong> Options...........................................................................................................83<br />
Progress Bar.................................................................................................................85<br />
What to Do Next...........................................................................................................85<br />
Teaching Users How to Place Their Hands on Readers..............................................86<br />
Correct Hand Placement..............................................................................................86<br />
Left Hand Placement....................................................................................................86<br />
Enrolling Users...............................................................................................................87<br />
Using the Enroll Option on the Reader Menu...............................................................87<br />
<strong>Manual</strong>ly Enrolling Users Using the Reader Command Menus....................................87<br />
Changing Users..............................................................................................................90<br />
Overview.......................................................................................................................90<br />
Renaming Users...........................................................................................................90<br />
User Properties, General..............................................................................................90<br />
User Properties, <strong>Security</strong>..............................................................................................92<br />
User Properties, Custom..............................................................................................94<br />
When You Are Done......................................................................................................94<br />
Changing Access <strong>for</strong> Many Users at Once..................................................................95<br />
Import TZ Option...........................................................................................................95<br />
Caution.........................................................................................................................95<br />
File Format....................................................................................................................95
User Database Properties..............................................................................................96<br />
What In<strong>for</strong>mation Is Shown...........................................................................................96<br />
Adding Custom User Entries........................................................................................97<br />
Getting to the List of Custom Entries............................................................................97<br />
Adding a New Entry......................................................................................................97<br />
Deleting a Custom Entry...............................................................................................97<br />
Changing the Order of the Entries................................................................................97<br />
Converting Users from MS-DOS <strong>HandNet</strong> or <strong>HandNet</strong>+.............................................98<br />
To Convert <strong>HandNet</strong> Plus Users...................................................................................98<br />
To Convert MS-DOS <strong>HandNet</strong> Users...........................................................................98<br />
Importing and Exporting Users....................................................................................99<br />
Getting User In<strong>for</strong>mation from a Reader.......................................................................99<br />
Importing Users from Another Copy of <strong>HandNet</strong>..........................................................99<br />
Exporting Users to Another Copy of <strong>HandNet</strong>............................................................100<br />
Monitoring Ongoing Activity....................................................... 101<br />
Activity Window............................................................................................................101<br />
Rearranging or Resizing Columns in the Activity Window..........................................101<br />
Getting More Detail about an Activity in the Activity Window......................................101<br />
Getting to and Acknowledging Alarms......................................................................103<br />
Getting to the Alarms List...........................................................................................103<br />
Acknowledging an Alarm............................................................................................103<br />
What Situations Cause Alarms...................................................................................103<br />
Creating and Printing Custom Activity Views...........................................................104<br />
Creating a Custom Activity View.................................................................................104<br />
Removing a Custom Activity View..............................................................................104<br />
Printing an Activity Report Based on an Activity Window...........................................105<br />
Creating a Custom Activity Report from the Reports Menu.......................................105<br />
Printing an Activity Report from the Reports Menu....................................................105<br />
Condition Screens <strong>for</strong> Creating Custom Activity Views/Reports............................107<br />
General.......................................................................................................................107<br />
Date............................................................................................................................107<br />
Time............................................................................................................................108<br />
Sites............................................................................................................................109<br />
Readers......................................................................................................................110<br />
Users..........................................................................................................................110<br />
Message Types...........................................................................................................111<br />
Messages...................................................................................................................112<br />
Archiving Past Activity................................................................................................113<br />
What Archiving Is........................................................................................................113<br />
Effect of Archiving on Reports....................................................................................113<br />
Making the Archive.....................................................................................................113<br />
Exporting Activity........................................................................................................115<br />
Why Export Activity.....................................................................................................115<br />
Avoiding Exporting the Same In<strong>for</strong>mation Twice.........................................................115<br />
Activity Messages........................................................................................................116<br />
Command Menus in the Reader.................................................................................116<br />
vii
Activity Messages.......................................................................................................116<br />
Other Ongoing Activities............................................................. 124<br />
Reader Maintenance....................................................................................................124<br />
Cleaning Readers.......................................................................................................124<br />
Recalibrating Readers................................................................................................124<br />
Making Backups...........................................................................................................126<br />
Why Make Backups....................................................................................................126<br />
Making Backups a Scheduled Event..........................................................................126<br />
How to Make a Backup of Your <strong>HandNet</strong> In<strong>for</strong>mation.................................................126<br />
Reporting and Exporting In<strong>for</strong>mation........................................................................127<br />
Printing or Viewing Reports........................................................................................127<br />
Getting In<strong>for</strong>mation from <strong>HandNet</strong> Database Files.....................................................127<br />
Locking and Unlocking Doors.....................................................................................128<br />
Automatically Unlocking a Door on a Scheduled Basis..............................................128<br />
Unlocking a Door on a Non-Scheduled Basis.............................................................128<br />
Locking a Door so it can’t be Opened from the Reader..............................................128<br />
Locking an Unlocked Door..........................................................................................128<br />
Turning an Auxiliary Device On or Off........................................................................129<br />
<strong>Manual</strong>ly Turning an Auxiliary Device On...................................................................129<br />
<strong>Manual</strong>ly Turning an Auxiliary Device Off...................................................................129<br />
Troubleshooting........................................................................... 130<br />
Answers to Common Questions.................................................................................130<br />
Enroll Option Disabled................................................................................................130<br />
No Current Record Message......................................................................................130<br />
Problems Connecting to a Site by Modem.................................................................130<br />
Program Claims to be a Demonstration Version.........................................................131<br />
Software Expired........................................................................................................131<br />
Unable to Acknowledge an Alarm...............................................................................132<br />
User Often Rejected...................................................................................................132<br />
Index.............................................................................................. 133<br />
viii
Getting Started<br />
Introduction<br />
What <strong>HandNet</strong><br />
Does<br />
Registering<br />
<strong>HandNet</strong><br />
New Features in<br />
Version 2.0<br />
How to tell if I<br />
have access to<br />
the new features<br />
<strong>HandNet</strong> <strong>for</strong> <strong>Windows</strong> lets you control and monitor many connected HandKey<br />
readers. In this one program, you can control who can use each reader and<br />
when. You can also monitor activity and alarms <strong>for</strong> all readers at once.<br />
After the first time you use this Version of <strong>HandNet</strong>, you have fourteen days to<br />
register it. You must register it even if you registered your previous Version of<br />
<strong>HandNet</strong>. If you do not register it within fourteen days, you will not be able to<br />
log into the program. The process should only take a minute.<br />
1. If you have not logged into <strong>HandNet</strong> yet, log in; see page 4.<br />
2. If the registration screen is not shown, pick Register<br />
from the File menu, and click the Print the registration<br />
<strong>for</strong>m button on that screen.<br />
3. Fill the <strong>for</strong>m out and fax it to the number at the top<br />
of the <strong>for</strong>m. Once we receive your completed <strong>for</strong>m,<br />
we will fax an activation code back to you within two<br />
business days (since it could take two days <strong>for</strong> us<br />
to send your code back, please print and send the<br />
registration <strong>for</strong>m now; do not wait until day fourteen).<br />
4. Pick Register from the File menu, enter the activation<br />
code we sent, and click the Activate button. Once<br />
you do this, <strong>HandNet</strong> is permanently functional.<br />
<strong>HandNet</strong> <strong>for</strong> <strong>Windows</strong> Version 2.0 provides a number of<br />
new features, but these are only available to you if you purchased the upgrade<br />
to the full feature set. If you did not purchase this upgrade and you would like<br />
to, please contact your dealer; once you pay <strong>for</strong> the upgrade, we will send you a<br />
new access code to enter on the Registration screen. Once you enter this code,<br />
all the new features are immediately available to you.<br />
1. From the main menu bar, click the Help menu, and then click About<br />
<strong>HandNet</strong> <strong>for</strong> <strong>Windows</strong>.<br />
2. Check the bottom of the box that pops up. To be able to use the new<br />
features, the last line must say You may use all features of this software.<br />
If this line says Your current license does not let you use the enroll..., you<br />
must contact your dealer and upgrade your license be<strong>for</strong>e you can use<br />
the new features (once you upgrade, we willsend you an access code that<br />
makes these feature available).<br />
1
Getting Started<br />
The new features<br />
Enrolling Users from <strong>HandNet</strong>: Previously, to enroll a user you had to go to a<br />
features reader, enter command mode on the reader, and enroll the user.<br />
Now, if you have a reader that is near the computer, you can add the user<br />
in <strong>HandNet</strong>, select the reader to enroll at, and pick Enroll from the Reader<br />
menu without ever having to deal with command mode on the reader; see<br />
page 87.<br />
User Access <strong>for</strong> a Limited Time Period: <strong>HandNet</strong> now lets you specify that a<br />
user’s access should start and stop at certain days or times. For example,<br />
if a contractor needs access to your facility, you can now set the access<br />
to expire on the day that the contract ends. This gives you more complete<br />
control of who can access readers and when; see page 93.<br />
Import/Export Users: If you have more than one computer system running<br />
<strong>HandNet</strong> and you want users added on one system to be available to the<br />
others, <strong>HandNet</strong> now lets you export user in<strong>for</strong>mation from one program<br />
and import it into another; see page 99.<br />
Exporting Activity <strong>for</strong> External Report Generation: If you want to create custom<br />
activity reports using some external report tool, Export Activity on the File<br />
menu sends all of your current activity to an access database file called<br />
expactvt.mdb; see page 116. While the main <strong>HandNet</strong> database files are<br />
password protected <strong>for</strong> security reasons, this file is not so you can open<br />
it and access any in<strong>for</strong>mation in it at will. You can also set <strong>HandNet</strong> up to<br />
automatically export activity whenever you archive activity.<br />
* * * * *<br />
2
<strong>HandNet</strong> <strong>for</strong> <strong>Windows</strong><br />
Getting Help in <strong>HandNet</strong><br />
The online help has the same in<strong>for</strong>mation that is in this manual. To get help in<br />
<strong>HandNet</strong>, press F1. This brings up help <strong>for</strong> the screen you are on. From there,<br />
you can use the contents, index, or search tabs at the left of the help window to<br />
find any topic.<br />
For Basic Topics<br />
For Groups of<br />
Topics on a<br />
Single Theme<br />
Screens and<br />
Menus<br />
When to Use the<br />
Index and When<br />
to Search<br />
Marking a Topic<br />
to Return to<br />
Click the Contents tab at the top of the left pane, click a book to open and click a<br />
topic. Not every topic is in the Contents tab, so if you do not find what you need,<br />
try the Index or Search tabs.<br />
In addition to the contents you can also click on the pull-down list right under the<br />
Previous/Next buttons (in the bottom middle of the header). This list contains a<br />
number of important groups of topics. Once you are on one of these topics, the<br />
Next and Previous buttons work as well.<br />
On menus and screens in this help, click any option on the screen to jump to<br />
help on that item.<br />
Use the index <strong>for</strong> main themes like adding a reader or enrolling a user. Use the<br />
search <strong>for</strong> minor points. For example, if you type enroll on the Index tab, you get<br />
three main topics that deal with enrolling users. On the Search tab, enroll gets<br />
you nearly thirty topics where enroll appears somewhere in the text. For main<br />
topics, the index gets you to what you want more directly. On the other hand, if<br />
you remembered that a screen somewhere said something about the number of<br />
tries a user gets be<strong>for</strong>e having access denied, the Search tab would check the<br />
entire text and find this detail <strong>for</strong> you. Use the Index tab to find items that are<br />
likely to be a main topic; use the search tab to find minor points.<br />
To mark a topic in the help that you want to come back to:<br />
1. Go to the topic that you want to mark.<br />
2. Click the Favorites tab at the top of the left pane.<br />
3. Click the Add button at the bottom of the pane. This adds the topic to your<br />
favorites list.<br />
To get back to any marked topic later:<br />
1. Click the Favorites tab at the top of the left pane of the help window.<br />
2. Double-click the topic.<br />
3
Getting Started<br />
Getting In and Getting Out<br />
Starting<br />
<strong>HandNet</strong><br />
Logging into<br />
<strong>HandNet</strong><br />
To start <strong>HandNet</strong>, either click the <strong>HandNet</strong> icon on your <strong>Windows</strong> desktop, or<br />
click the Start menu on your <strong>Windows</strong> taskbar, highlight Programs, and highlight<br />
and click <strong>HandNet</strong> <strong>for</strong> <strong>Windows</strong>.<br />
<strong>HandNet</strong> requires you to log in be<strong>for</strong>e you can make any changes; this prevents<br />
unauthorized people from changing in<strong>for</strong>mation. If you are not logged in, you<br />
can look at the lists of activity, users, and readers (network), but you cannot<br />
change any in<strong>for</strong>mation and cannot use any other options.<br />
1. Click Login on the Toolbar, or<br />
pick Login from the File menu.<br />
The program brings up this box:<br />
2. Type your name and password,<br />
and click OK.<br />
If this is a new system: Use<br />
a name of 1234 and a password of new (change this name and password<br />
immediately so unauthorized people cannot user the program).<br />
After initial setup: If you <strong>for</strong>get your name or password, see your supervisor or<br />
security administrator.<br />
Passwords are NOT case sensitive. For example, if your password is narnia,<br />
then Narnia and NARNIA would also work.<br />
After you are done using <strong>HandNet</strong>, be sure to log out again so unauthorized<br />
operators will not be able to use the program.<br />
Changing the<br />
Initial Login<br />
Name and<br />
Password<br />
<strong>HandNet</strong> comes set up with a login name of 1234 with a password of NEW.<br />
This lets you get into <strong>HandNet</strong> when you first start using it, but this is not<br />
secure; anyone may read this manual and find this name and password. To keep<br />
unauthorized users from using <strong>HandNet</strong>, change this password be<strong>for</strong>e you add<br />
any other in<strong>for</strong>mation.<br />
1. Click the View menu.<br />
2. Click Settings.<br />
3. Click the Operators tab.<br />
4. Click the operator named 1234 and then click Edit. This takes you to the<br />
Operator Definition screen, which has settings <strong>for</strong> this user.<br />
5. Change the Name to your name, and change the Password to something<br />
you will remember but that no one else will be able to guess. Click OK to<br />
return to the list of operators.<br />
Remember the name and password you enter; if you <strong>for</strong>get it, you will not be<br />
able to get into <strong>HandNet</strong>. Do not change any other settings; this user is set up<br />
to use any option in <strong>HandNet</strong>; if you uncheck any boxes, you will not be able to<br />
use the corresponding options.<br />
6. Click the Close button at the bottom of the box to close System Settings.<br />
4
<strong>HandNet</strong> <strong>for</strong> <strong>Windows</strong><br />
Logging out of<br />
<strong>HandNet</strong><br />
Log out of <strong>HandNet</strong> when you are done using it. This prevents unauthorized<br />
people from changing in<strong>for</strong>mation. Someone who is not logged in can look at<br />
the lists of activity (including alarms), users, and readers, but cannot change<br />
any in<strong>for</strong>mation or use any other options.<br />
To log out, click the Logout button on the Toolbar or pick Login again from the<br />
File menu to uncheck it.<br />
Exiting <strong>HandNet</strong><br />
For security purposes, you should generally log out of <strong>HandNet</strong> when you<br />
are done making changes so unauthorized people cannot add users or make<br />
changes. However, unless you are going to install a new Version of the<br />
<strong>HandNet</strong> software, or you need to restart the computer <strong>HandNet</strong> is running on,<br />
you do not typically want to exit from the <strong>HandNet</strong> program. If you exit (that is,<br />
shut down the program), you disconnect it from all readers. While all readers<br />
will continue to record activity and give access as appropriate, the program<br />
will not receive any in<strong>for</strong>mation from the readers or process any alarms during<br />
the time that <strong>HandNet</strong> is not running. Because of this, you would usually leave<br />
<strong>HandNet</strong> running all the time.<br />
* * * * *<br />
5
Getting Started<br />
Getting Started Overview<br />
Procedure <strong>for</strong><br />
Getting Started<br />
and Setting Up<br />
Q<br />
U<br />
I<br />
C<br />
K<br />
S<br />
T<br />
E<br />
P<br />
S<br />
Getting Started with <strong>HandNet</strong> <strong>for</strong> <strong>Windows</strong><br />
1. Log in; see page 4.<br />
2. If you have not done so yet, register <strong>HandNet</strong>. <strong>HandNet</strong> will not let<br />
you log in after fourteen days if you do not register it; see page 1.<br />
3. Change the initial password so unauthorized users will not be able<br />
to use the program; see page 4.<br />
4. If you have been using readers without <strong>HandNet</strong> and you want to<br />
get the users from the reader(s):<br />
1. Pick Settings from the View menu.<br />
2. Click the <strong>Security</strong> tab.<br />
3. Check the box by Do not delete unauthorized<br />
enrollments.<br />
This prevents <strong>HandNet</strong> from deleting the users from the readers<br />
when you enable them (you will import the users from the reader<br />
later, after setting up the readers and sites). If you did not change<br />
this setting, when you enabled the site and reader, <strong>HandNet</strong> would<br />
regard all of the users in the reader as unauthorized (because they<br />
were not in <strong>HandNet</strong> yet), and it would delete them from the reader.<br />
5. Set up site(s), that is, groups of connected readers; see page 33.<br />
6. Set up readers; see page 42.<br />
7. If you want to control which days and times users can access<br />
readers, set up time zones (see page 61) and holidays (see page 65).<br />
8. If you have set up time zones and holidays, or if you want to give<br />
some users access through some readers but not others, set up<br />
access profiles; see page 67.<br />
9. If you have previously been using one of our older MS-DOS<br />
products (<strong>HandNet</strong> Plus or <strong>HandNet</strong>), convert the users; see page 98<br />
(if you have been using <strong>HandNet</strong> <strong>for</strong> <strong>Windows</strong> 1.09 or later, you do<br />
not need to convert anything; this Version of <strong>HandNet</strong> automatically<br />
updates in<strong>for</strong>mation <strong>for</strong> the new Version).<br />
10. If you have been previously using readers without one of the<br />
<strong>HandNet</strong> products and you need to get users from the reader(s),<br />
upload users from the reader(s); see Getting User In<strong>for</strong>mation from<br />
a Reader on page 99.<br />
11. Add users; see page 74.<br />
12. Enroll the users; see page 87.<br />
13. When you are done using <strong>HandNet</strong>, be sure to log out so<br />
unauthorized people will not be able to add or change anything; see<br />
page 5.<br />
6
Menus and Navigation<br />
Toolbar<br />
The toolbar looks like this:<br />
If you are not logged in yet, the first button will be a login button and a number<br />
of the other will be disabled.<br />
Turning the<br />
Toolbar On and<br />
Off<br />
Options on the<br />
Toolbar<br />
Toolbar on the View menu turns it on or off.<br />
You see this button if you are not logged in yet. Click this button to<br />
login to <strong>HandNet</strong>; see page 4. Without logging in, you cannot make<br />
any changes or do anything other than look at basic in<strong>for</strong>mation.<br />
Once you log in, the first button changes to the Logout button. If<br />
you are going away from the computer, logging out prevents making<br />
unauthorized changes. If anyone could possibly get access to the<br />
computer in your absence, logging out is an important security<br />
precaution.<br />
The main button lets you generate a custom activity report; see<br />
Creating a Custom Activity Report from the Reports Menu on page 105.<br />
The small arrow to the right pulls down the Reports menu; see page 13.<br />
This lets you archive older activity; see page 113.<br />
This opens the Activity window; see page 101. The Activity window lists<br />
all actions you take in <strong>HandNet</strong>, and actions or alarms from each<br />
reader. If the Activity window is already open and behind another<br />
window, this brings it to the front.<br />
This opens the Users window; see page 71. This lists everyone who<br />
is potentially able to access readers. If the Users window is already<br />
open and behind another window, this brings it to the front.<br />
This opens the Network window; see page 31. The Network window<br />
lists all of your sites, readers, and their current status. If the network<br />
window is already open and behind another window, this brings it to<br />
the front.<br />
7
Menus and Navigation<br />
This takes you to the access profile settings; see page 67. Access<br />
profiles let you control which readers different types of users have<br />
access to and when.<br />
This takes you to the holidays settings; see page 65. If users have<br />
different access on holidays than on other days, the holidays settings<br />
identify when those days are.<br />
This takes you to the settings that let you define different periods of<br />
time when users can have access; see page 61 (in <strong>HandNet</strong>, we call<br />
these time zones, but there is no connection to the time zones we<br />
usually think of that have to do with different times around the world).<br />
This pops up the online help <strong>for</strong> <strong>HandNet</strong>. The help contains the<br />
same in<strong>for</strong>mation as this manual but arranged in a slightly different<br />
<strong>for</strong>mat. To get help <strong>for</strong> the screen you are on, you can also press F1<br />
anywhere in <strong>HandNet</strong>. The help has a complete index and also lets<br />
you search <strong>for</strong> specific text; see page 3.<br />
* * * * *<br />
8
<strong>HandNet</strong> <strong>for</strong> <strong>Windows</strong><br />
Tiling the Display <strong>Windows</strong><br />
<strong>HandNet</strong> lets you keep open the Activity window, the Users window, and the<br />
Network window (which shows sites and readers). If you have more than one<br />
window open, Tile Horizontally on the Window menu adjusts the open windows<br />
so they fill the Handnet window from side to side, and so they do not overlap<br />
and cover each other up.<br />
Example of<br />
<strong>Windows</strong> that<br />
are NOT Tiled<br />
Notice that the front windows cover up parts of the windows behind them and<br />
that the windows do not fill up the screen from side to side.<br />
Example of<br />
<strong>Windows</strong> that<br />
ARE Tiled<br />
Notice that none of these windows cover any parts of the other, and that the<br />
windows now fill up the screen from side to side.<br />
* * * * *<br />
9
Menus and Navigation<br />
Menu Overviews<br />
Pulling Down Menus<br />
with the Keyboard<br />
instead of the Mouse<br />
Main Menu Bar<br />
If you prefer working from the keyboard rather than clicking with the mouse, you<br />
can hold the ALT key down and then type the underlined letter in the choice. For<br />
example, to open the View menu, you would hold ALT down and type V (this is<br />
often the first letter in the option, but not always).<br />
The main menu bar looks like this:<br />
These menu options are briefly summarized below. The following pages contain<br />
more detail on the options on these menus.<br />
File: The File menu lets you log in and out, generate reports, archive older<br />
activity, import setup in<strong>for</strong>mation, and shut the program down; see page 11.<br />
Site: The Site menu lets you add and change settings <strong>for</strong> sites (groups of<br />
connected readers); see page 14.<br />
Reader: The Reader menu lets you add new readers, delete readers, and<br />
rename readers in the <strong>HandNet</strong> network. You can also unlock, relock, and<br />
lockup the selected reader, enroll a user at the selected reader, activate and<br />
deactivate an auxiliary device, and send (download) time, time zones, users,<br />
and setup configuration to selected readers; see page 15.<br />
User: The User menu lets you add users, delete users, rename users, change<br />
in<strong>for</strong>mation <strong>for</strong> a selected user, and create custom entries to collect additional<br />
in<strong>for</strong>mation about users; see page 17.<br />
View: The View menu lets you open the Users, Activity, and Network windows<br />
(the Activity window lists both activity and alarms; the Network window lists all<br />
of your sites and readers). The View menu also lets you turn the toolbar on or<br />
off. And it lets you get to access profiles, holidays, activity filters, time zones,<br />
and system settings (you do not need these options on an ongoing basis;<br />
these are normally only used when setting the program up); see page 18.<br />
Window: The Window menu lets you switch between open windows, tile open<br />
windows horizontally on the screen, or switch panes within the Network<br />
window; see page 20.<br />
Help: The Help menu lets you pop up the help system you are looking at now<br />
(you can also press F1 to pop up Help); see page 21.<br />
10
<strong>HandNet</strong> <strong>for</strong> <strong>Windows</strong><br />
File Menu<br />
The File menu lets you log in and out, generate reports,<br />
archive older activity, import setup in<strong>for</strong>mation, and shut<br />
the program down.<br />
Login: You must log in to <strong>HandNet</strong> be<strong>for</strong>e you can do<br />
anything other than look at in<strong>for</strong>mation; see page<br />
4. You must log in to acknowledge alarms, add sites<br />
and readers, add or change users. When you are<br />
done using the program, click this same option again<br />
to log out so unauthorized operators cannot use the<br />
program.<br />
Reports: This brings up another menu that lists several<br />
standard reports, and that lets you create custom<br />
reports based on the activity that you see in the Activity window; see page 13.<br />
Archive: This takes older in<strong>for</strong>mation from the current activity file and stores<br />
it in a separate file. Once you archive in<strong>for</strong>mation, the activity is no longer<br />
visible in the Activity window, but you can still generate reports based on the<br />
archives.<br />
Convert Handnet+: If you have been using <strong>HandNet</strong>+ or <strong>HandNet</strong> (our older<br />
MS-DOS programs), and are just switching to <strong>HandNet</strong> <strong>for</strong> <strong>Windows</strong>, this<br />
converts user in<strong>for</strong>mation from <strong>HandNet</strong>+ and adds it to the user list in<br />
<strong>HandNet</strong> <strong>for</strong> <strong>Windows</strong>. In<strong>for</strong>mation imported includes: user name, user ID<br />
number, authority level, and reject threshold; see page 98.<br />
Register: After the first time you use this Version of <strong>HandNet</strong>, you have fourteen<br />
days to register it. You must register it even if you registered your previous<br />
Version of <strong>HandNet</strong>. If you do not register it within fourteen days, you will not<br />
be able to log into the program. The process should only take a minute. To<br />
register <strong>HandNet</strong>:<br />
1. If the registration screen is not shown, pick Register from the File<br />
menu, and print the registration <strong>for</strong>m.<br />
2. Fill the <strong>for</strong>m out and fax it to the number at the top of the <strong>for</strong>m. Once<br />
we receive your completed <strong>for</strong>m, we will fax an activation code back to<br />
you within two business days (since this could take two days <strong>for</strong> us to<br />
send your code back, please print and send the registration <strong>for</strong>m now;<br />
do not wait until day fourteen).<br />
3. Pick Register from the File menu, enter the activation code we<br />
sent, and click the Activate button. Once you do this, <strong>HandNet</strong> is<br />
permanently functional.<br />
Import TZ: This lets you change the access profile to Always or Never <strong>for</strong> many<br />
users based on in<strong>for</strong>mation in a text file; see Changing Access <strong>for</strong> Many<br />
Users at Once on page 95.<br />
Import Users: If you have readers connected to several different computers<br />
(each with its own copy of <strong>HandNet</strong>) and if users added to one system need<br />
to be available on the others, Import Users lets you bring in users that were<br />
added or changed in another copy of <strong>HandNet</strong>; see page 99. If all of your<br />
readers are connected to a single copy of <strong>HandNet</strong>, you do not need this<br />
feature.<br />
11
Menus and Navigation<br />
Export Activity: If you want to create custom activity reports using some<br />
external report tool, Export Activity sends all of your current activity to an<br />
access database file called expactvt.mdb; see page 115. The main <strong>HandNet</strong><br />
database files are password protected <strong>for</strong> security reasons, but this file is not,<br />
so you can open it and access any in<strong>for</strong>mation in it. If you are only going to<br />
generate reports with Activity Reports on the File menu, you do not need this<br />
option; using it would only create a file that you do not need.<br />
Exit: This closes the <strong>HandNet</strong> program, disconnecting it from all readers.<br />
All readers will continue to be able to open doors, but the program will<br />
not receive any in<strong>for</strong>mation from the readers or process any alarms while<br />
<strong>HandNet</strong> is not running. Unless you are going to install a new Version of<br />
the <strong>HandNet</strong> software, or you need to restart the computer that <strong>HandNet</strong><br />
is running on, you do not want to exit the <strong>HandNet</strong> program. For security<br />
purposes, you would generally logout so unauthorized people cannot add<br />
users or make changes, but you would leave the <strong>HandNet</strong> program running<br />
all the time.<br />
12
<strong>HandNet</strong> <strong>for</strong> <strong>Windows</strong><br />
Reports Menu<br />
To get to the reports menu, click Reports on the<br />
File menu. This menu lets you create custom<br />
activity reports and print several stock reports.<br />
Activity: This lets you create reports based on<br />
any activity recorded by <strong>HandNet</strong>. This includes<br />
any in<strong>for</strong>mation in the Activity window and any<br />
activity that you have chosen to archive. You<br />
can customize these reports to include only the<br />
in<strong>for</strong>mation you need; see Creating and Printing<br />
Custom Activity Views on page 105.<br />
Users: This lists all of the users in the system. The report includes each user’s<br />
name, ID number, authority level, reject level, and access profile. It also<br />
indicates the last reader used, the last access time, and whether the user is<br />
enrolled. You can use this report to see if a user is enrolled and to make sure<br />
one user is not enrolled with multiple ID numbers. If you have created custom<br />
user entries, this report does NOT show any of them.<br />
Access Profiles: If you have set up different access profiles to give different<br />
types of users access to different readers or at different times, then this<br />
report can help you see whether you have set your access profiles up the<br />
way you wanted. This report lists each access profile, sites and readers the<br />
profile gets access to, and the time zone that users can access each reader;<br />
see page 67 <strong>for</strong> more about setting up access profiles.<br />
Holidays: This list all of the holidays you have set up in <strong>HandNet</strong>. It lists the<br />
name of each holiday, the month, and the date. This report helps you make<br />
sure you have correctly added all holidays <strong>for</strong> the year (if you have set up<br />
any time zones to prevent access on holidays, or to give different access on<br />
holidays than on other days, the Holidays list identifies when those holidays<br />
are. If you do not give different access on holidays than on other days, you<br />
do not need to set holidays up or print this report); see page 65 <strong>for</strong> more about<br />
setting up holidays.<br />
Network: This report tells whether each site is enabled and connection<br />
in<strong>for</strong>mation (communications port, baud rate, phone number or IP address,<br />
time adjustment, and modem speaker status). It also lists readers at the site,<br />
whether they are enabled, and their addresses. This report is used during<br />
setup to make sure the network is set up properly.<br />
Time Zones: This lists all of the different user access period that you have<br />
set up (though we call these access periods time zones, they have no<br />
connection to the time zones we usually think of that have to do with different<br />
times around the world). The report includes the name of each time zone, the<br />
time periods it includes, and the days of the week those time periods apply.<br />
During setup, this report helps you see if you have set up all of the necessary<br />
time zones and configured them correctly (if you do not need to limit access<br />
by day or time -that is, if all users may use the readers twenty-four hours a<br />
day, seven days a week if they wanted- then you do not need time zones);<br />
see page 61 <strong>for</strong> more about setting up time zones.<br />
13
Menus and Navigation<br />
Site Menu<br />
In <strong>HandNet</strong>, a site refers to a group of up to<br />
thirty-two connected readers. Put another<br />
way, one reader is physically connected to the<br />
computer (by network, serial cable, or modem),<br />
and up to thirty-one additional readers can be<br />
daisy chained to that first reader; that is, a cable<br />
runs from the first reader to the second, another<br />
cable runs from the second to the third, and so<br />
on. We call this chain of readers a site. A site<br />
does not have any connection to a particular building or location; these readers<br />
could be in one building or in more than one building (if the buildings are close<br />
enough to run a cable from one to the other), and one building could have one<br />
or many sites.<br />
Add Site: This adds a new site to the <strong>HandNet</strong> network; see page 34. You must<br />
set up a site in <strong>HandNet</strong> be<strong>for</strong>e you can set up readers.<br />
Delete: If you have selected a site in the Network window, Delete removes the<br />
site and all readers assigned to it. <strong>HandNet</strong> will ask you to confirm that you<br />
want to delete the site. Make sure that you have selected the appropriate site<br />
since, if you continue, you will not be able to undo the deletion unless you<br />
have made a backup of the files that contain your site and reader in<strong>for</strong>mation<br />
(see page 126 <strong>for</strong> more about making backups).<br />
Rename: If you have selected a site in the Network window, this lets you<br />
rename that site (you can also just click once on the site name in the Network<br />
window and rename it there without using this option). Renaming a site does<br />
not change any of its properties, and does not require you to set anything up<br />
again; it only changes the name that appears in the lists on the screen and in<br />
reports that you generate. You might want to rename a site if you discovered<br />
that the original name is not clear.<br />
Properties: This takes you to a window with three tabs that let you look at or<br />
change settings related to how the site is connected to the computer with the<br />
<strong>HandNet</strong> software; see Changing a Site on page 34 <strong>for</strong> further detail.<br />
14
<strong>HandNet</strong> <strong>for</strong> <strong>Windows</strong><br />
Reader Menu<br />
The Reader menu lets you add new readers, delete<br />
readers, and rename readers in the <strong>HandNet</strong><br />
network. You can also unlock, relock, and lockup<br />
the selected reader, enroll a user at the selected<br />
reader, activate and deactivate auxiliary output, and<br />
send (download) time, time zones, users, and setup<br />
configuration to selected readers.<br />
To do anything here, except add a reader, you must<br />
select one or more readers first.<br />
Add Reader: This lets you add and configure a<br />
reader to the <strong>HandNet</strong> network; see page 42 (you<br />
must set up a site be<strong>for</strong>e you can add readers in<br />
<strong>HandNet</strong>).<br />
Unlock: When you highlight Unlock on the Reader menu, you see another<br />
menu with two choices: Indefinite and Timed.<br />
Indefinite unlocks the door connected to that reader and leaves it unlocked<br />
until you choose Relock on the Reader menu to lock it again. If you regularly<br />
want a door unlocked during certain hours, pick properties from the Reader<br />
menu and go to the Configuration screen. In the Auto Unlock Time Zone you<br />
can indicate when the door should be automatically unlocked. The program<br />
will automatically lock the door again at the end of the time zone.<br />
Timed unlocks the door connected to that reader and leaves it unlocked only<br />
<strong>for</strong> the number of seconds specified on the Configuration page in the Reader<br />
Properties (that is, it unlocks the door <strong>for</strong> the same number of seconds that<br />
the door would be unlocked if it were opened by a reader).<br />
See Locking and Unlocking Doors on page 130 <strong>for</strong> more about these options.<br />
Relock: If you have unlocked a door with Unlock, Indefinite option, this locks it<br />
again; see page 128.<br />
Lockup: This disables the lock on the door <strong>for</strong> the selected reader. The reader<br />
will still let users enter their ID numbers and still verify hands, but the door<br />
will stay locked even <strong>for</strong> valid users. The door will stay locked until you choose<br />
Unlock or Relock; see page 128.<br />
Auxiliary Output: If an auxiliary device is connected to a reader, this lets you<br />
turn that device on or off <strong>for</strong> the selected reader; see page 129. Auxiliary Output<br />
can control local lighting, trigger a third party alarm system, activate a bell,<br />
and so on.<br />
Download: This lets you send in<strong>for</strong>mation to the selected readers. While<br />
<strong>HandNet</strong> automatically sends the appropriate in<strong>for</strong>mation to readers,<br />
occasionally you will need to use this when correcting a problem with a<br />
reader; see Resending In<strong>for</strong>mation to a Reader on page 60.<br />
15
Menus and Navigation<br />
Upload (Users): This lets you get user in<strong>for</strong>mation from the selected readers.<br />
You would do this if you had been using a reader independent of the <strong>HandNet</strong><br />
program and now wanted to add all of the users stored in that reader to the<br />
program; see Getting User In<strong>for</strong>mation from a Reader on page 99.<br />
Delete: This removes the selected readers from the <strong>HandNet</strong> network.<br />
Rename: This renames the selected reader. Renaming the reader does not<br />
change any of its properties and does not require you to set anything up<br />
again; it only changes the name that appears in the lists on the screen and in<br />
reports that you generate. You might rename a reader if you discovered that<br />
the original name was not clear or if you changed the purpose of the areas<br />
the reader gave access to.<br />
Properties: This takes you to a window with a number of tabs that let you look at<br />
or change a number of settings related to the reader; see Changing Reader<br />
Settings with Reader Properties on page 45.<br />
16
<strong>HandNet</strong> <strong>for</strong> <strong>Windows</strong><br />
User Menu<br />
The User menu lets you add users, delete<br />
users, rename users, change in<strong>for</strong>mation <strong>for</strong><br />
a selected user, and create custom entries<br />
to collect additional in<strong>for</strong>mation about users<br />
(if you have already set up users in a reader<br />
that you are connecting to <strong>HandNet</strong>, do<br />
not recreate those users; you can Upload<br />
Users from the reader; see Getting User<br />
In<strong>for</strong>mation from a Reader on page 99).<br />
To change, delete, or rename users, select<br />
a user first on the list of users (<strong>for</strong> the list of users, pick Users from the View<br />
menu, or press CTRL-U).<br />
Add New: This lets you add new users; see page 74. After you add the user, you<br />
must enroll the user (see page 87) be<strong>for</strong>e the user will have access through the<br />
readers.<br />
Delete: This lets you remove a user from the program. You would do this if you<br />
never wanted that user to be able to use any of the readers in the <strong>HandNet</strong><br />
network (if you might need the user again but want to keep the user from<br />
using any of the readers, you can also change the user’s access profile to<br />
Never).<br />
Rename: This lets you rename the selected user. You would use this if you<br />
entered the user’s name incorrectly. You would also use this if you added<br />
multiple users at once. When you use Add multiple new users to add a<br />
number of users automatically, the program uses the ID number <strong>for</strong> the name.<br />
You would want to rename these users so you could identify which ID is <strong>for</strong><br />
which user.<br />
Properties: This lets you look at or change in<strong>for</strong>mation <strong>for</strong> the selected user;<br />
see Changing Users on page 90.<br />
DB Properties: This gives you a summary of the total numbers of enrolled<br />
and unenrolled users. It also lets you add custom entries so you can collect<br />
additional in<strong>for</strong>mation about users. For example, depending on your needs,<br />
you might collect emergency phone numbers, birthdays, employment start<br />
dates, or any other in<strong>for</strong>mation you needed about your users; see Adding<br />
Custom User Entries on page 97.<br />
17
Menus and Navigation<br />
View Menu<br />
The View menu lets you open the Users,<br />
Activity, and Network windows (the Activity<br />
window lists both activity and alarms; the<br />
Network window lists all of your sites and<br />
readers). The View menu also lets you turn the<br />
toolbar on or off.<br />
It also lets you get to access profiles, holidays,<br />
activity filters, time zones, and system settings.<br />
You do not need these options on an ongoing<br />
basis; they are normally only used when<br />
setting <strong>HandNet</strong> up.<br />
Toolbar: This turns the toolbar off if it is on<br />
and turns it on if it is off. The toolbar has<br />
icons that help you quickly get to common<br />
options; see page 7. The toolbar is shown<br />
when you start <strong>HandNet</strong>. A check is shown by this option when the toolbar is<br />
displayed.<br />
Activity: This opens the Activity window (or brings it to the front if it is already<br />
open and behind other windows). This lets you see recent activity and<br />
alarms. If you have created any activity filters to create lists of specific types<br />
of activities, these views are also available here. The tabs at the bottom<br />
of this window let you switch between the activity list, the alarm list, and<br />
any custom views you have created; see page 101 <strong>for</strong> more about the Activity<br />
window.<br />
Users: This opens the Users window (or brings it to the front if it is already open<br />
and behind other windows). This window lists everyone who could potentially<br />
gain access through a hand reader; see page 71 <strong>for</strong> more about the users<br />
window (there is no connection between this list and the operators authorized<br />
to use <strong>HandNet</strong>; <strong>for</strong> people who can use <strong>HandNet</strong>, see the Operators tab in<br />
System Settings on page 24).<br />
Network: This opens the Network window (or brings it to the front if it is already<br />
open and behind other windows). This window lists all of your sites and<br />
readers; see page 31 <strong>for</strong> more about the Network window.<br />
Access Profiles: If some users can only use certain hand readers and/or<br />
only use them at certain times or on certain days, access profiles define<br />
when each type of user can use each reader. For example, suppose your<br />
maintenance staff should have access to the maintenance rooms seven days<br />
a week, your office staff should have access to the office but only during<br />
business hours, and your supervisors should have access to everything at<br />
any time. You would create three access profiles: one <strong>for</strong> supervisors, one<br />
<strong>for</strong> office staff, and one <strong>for</strong> maintenance personnel. These profiles would<br />
identify which readers each group could use. In these profiles you would also<br />
identify which time periods each group could use the different readers (you<br />
would set up these time periods first using time zones). After creating these<br />
different profiles, whenever you added a user, you would just identify which<br />
group the user was a part of, and the access profile <strong>for</strong> that group would<br />
automatically give the appropriate access; see page 67 <strong>for</strong> more on setting up<br />
access profiles.<br />
18
<strong>HandNet</strong> <strong>for</strong> <strong>Windows</strong><br />
To limit access to certain days or times, you must set up time zones be<strong>for</strong>e<br />
creating access profiles.<br />
If you want all users to be able to use every reader any time, you do not need<br />
to set up access profiles. <strong>HandNet</strong> comes set up with an Always profile that<br />
lets users use any reader in the system twenty-four hours per day, seven<br />
days per week. It also has a Never profile that does not let the user verify at<br />
any reader at any time.<br />
Holidays: If you have set up any time zones to prevent access on holidays<br />
or to give different access on holidays than on other days, the holidays list<br />
identifies when those holidays are. If you do not give different access on<br />
holidays than on other days, you do not need to use this option; see page 65 <strong>for</strong><br />
more on setting up holidays.<br />
Time Zones: If you want some users to be able to use certain readers only<br />
during certain hours or on certain days of the week, time zones let you<br />
identify when access is available. For example, suppose some users should<br />
only to be able to gain access through certain readers between 8:00 AM and<br />
5:00 PM, Monday through Friday. You would create a time zone that identified<br />
these times and days, associate that time zone with appropriate readers<br />
using an access profile, and then assign that access profile to the users. After<br />
you did this, users with that access profile would only have access during the<br />
times you identified in the time zone; see page 61 <strong>for</strong> more on setting up time<br />
zones.<br />
If you do not need to limit access by day or time (that is, if users could use<br />
the readers twenty-four hours a day, seven days a week if they wanted), then<br />
you do not need to set up time zones.<br />
Activity Filters: This lets you customize the in<strong>for</strong>mation you see in an activity<br />
window by letting you identify the dates, times, sites, readers, users,<br />
message types, and messages you want to see. For example, suppose<br />
you want to see who’s come in through the main entrance without having to<br />
wade through messages related to activity at other readers. You could create<br />
an activity profile that listed activity only from the main entrance reader and<br />
only if the activity was Identity verified (the message you get when someone<br />
enters an ID and the hand is recognized). You would then be able to choose<br />
this view and see only this activity. Activity filters can be much more complex<br />
than this; they can filter or limit an activity list to include any subset of<br />
in<strong>for</strong>mation you need (after you create an activity filter, a tab at the bottom<br />
of the activity window will list the name of the filter; just click that tab <strong>for</strong> the<br />
corresponding in<strong>for</strong>mation); see Creating a Custom Activity View on page 105<br />
<strong>for</strong> more in<strong>for</strong>mation.<br />
Settings: This lets you look at or change system-wide settings; see page 22.<br />
This includes the name of the system, security, who can use <strong>HandNet</strong>, which<br />
messages trigger alarms, when old messages should be archived, and<br />
settings <strong>for</strong> importing and exporting users.<br />
19
Menus and Navigation<br />
Window Menu<br />
The Window menu lets you switch between<br />
open windows, tile open windows horizontally on<br />
the screen, or switch panes within the Network<br />
window.<br />
You will see a check mark to the left of the window<br />
that is currently active.<br />
Switch Panes: If the Network window is open,<br />
Switch Panes switches you back and <strong>for</strong>th<br />
between the list of sites in the left pane of the window, and the list of readers<br />
in the right pane of the window. This is primarily useful <strong>for</strong> users who cannot<br />
use a mouse; if you can use a mouse, it is easier to just click the pane you<br />
want. If the Network window is not open, this choice does not do anything.<br />
Tile Horizontally: This adjusts any open windows so they fill the <strong>HandNet</strong><br />
window from side to side and so they do not overlap and cover each other up.<br />
If you are not sure what tiling is, see the example on page 9.<br />
Activity: This choice is only here if you have the Activity window open. This<br />
makes the Activity window the active window (if the Activity window is not<br />
open, open it by typing CTRL-A or by picking Activity from the View menu).<br />
The Activity window shows the activity log, error messages, and any custom<br />
activity views you have created; see page 101 <strong>for</strong> more about the Activity<br />
window.<br />
Network: This choice is only here if you have the Network window open. This<br />
makes the Network window the active window. The Network window lists<br />
sites and readers (if the Network window is not open, open it by typing<br />
CTRL-N or by picking Network from the View menu); see page 31 <strong>for</strong> more<br />
about the Network window.<br />
Users: This choice is only here if you have the Users window open. This makes<br />
the Users window the active window (if the Users window is not open, open<br />
it by typing CTRL-U or by picking Users from the View menu); see page 71 <strong>for</strong><br />
more about the Users window.<br />
20
<strong>HandNet</strong> <strong>for</strong> <strong>Windows</strong><br />
Help Menu<br />
Instead of going to the Help<br />
menu, you can press F1 from<br />
any screen in <strong>HandNet</strong>. This<br />
takes you to help <strong>for</strong> the screen<br />
you are on. If you need help on<br />
something else, you can use the Contents, Index, or Search tabs at the left of<br />
the window to find what you need.<br />
Help Topics: This brings you into the help <strong>for</strong> <strong>HandNet</strong>. The Help menu contains<br />
the same in<strong>for</strong>mation as this manual, but it lets you more easily search and<br />
jump from topic to topic; see page 3.<br />
About <strong>HandNet</strong> <strong>for</strong> <strong>Windows</strong>: This brings up a screen with copyright<br />
in<strong>for</strong>mation, the Version of the program, the product serial number, and the<br />
name of the person or company the product is licensed to (unless you need<br />
to give your serial number or the program Version number to one our support<br />
representatives, or unless you need to check to see if you are licensed to<br />
use all the features of the program, you probably will not need to come to this<br />
screen).<br />
* * * * *<br />
21
System Wide Settings<br />
General System Settings<br />
Settings on the View menu lets you control setup issues that are not related<br />
to specific sites or readers. This includes the name of the system, what user<br />
changes should be allowed at readers, who can use Handnet, which messages<br />
trigger alarms, when old messages should be archived, and settings <strong>for</strong><br />
importing and exporting users.<br />
To get to the General tab, pick Settings from the View menu.<br />
Name of System<br />
Amount of<br />
Activity to Show<br />
Disable All Sites<br />
Name: This shows the name that appears above the list of sites in the Network<br />
window.<br />
Number of Activity Records to Display: This shows how many of the most<br />
recent activities to list in the Activity window. <strong>HandNet</strong> stores activities even<br />
after they are no longer listed in the Activity window; those that are no longer<br />
shown are still stored and still included if you print a report.<br />
Disable All Sites: Check this box if you need to quickly prevent <strong>HandNet</strong><br />
from trying to communicate with any site. You might check this if you were<br />
servicing a number of sites at once.<br />
* * * * *<br />
22
<strong>HandNet</strong> <strong>for</strong> <strong>Windows</strong><br />
What User Changes Can Come from Readers<br />
To get to the <strong>Security</strong> tab, pick Settings from the View menu, and then click the<br />
<strong>Security</strong> tab.<br />
Whether Users<br />
can be Added at<br />
the Reader<br />
Do not delete unauthorized enrollments: When this is not checked<br />
(<strong>HandNet</strong>’s initial setting) you can only add new users in <strong>HandNet</strong>; you<br />
cannot add a new user directly at the reader (you can add a user at a reader<br />
if the user is in <strong>HandNet</strong> so you can enroll the user, but if you add a user<br />
at the reader that has not been added in <strong>HandNet</strong>, <strong>HandNet</strong> will delete the<br />
new user). If you want to be able to add and enroll a new user at a reader<br />
without adding the user in <strong>HandNet</strong> first, check this box. If you allow this,<br />
and if you add a new user from the reader, the user will be given the access<br />
profile selected in the entry below (you can change the access profile on the<br />
<strong>Security</strong> tab in User Properties; see page 92).<br />
Access profile assigned to unauthorized enrolls: Indicate what access<br />
profile should be given to a user who is added at a reader (if you do not want<br />
the user to be able to access any readers until you change them in <strong>HandNet</strong>,<br />
choose Never).<br />
Whether to<br />
Revise the<br />
Stored Images<br />
of Users’ Hands<br />
Update user templates received from readers: When you enroll a user,<br />
<strong>HandNet</strong> stores a template that contains in<strong>for</strong>mation about the shape of<br />
the user’s hand. If this box is checked, then each time a user gains access,<br />
<strong>HandNet</strong> updates this template. This means that if the user’s hand changes<br />
gradually (<strong>for</strong> example, if the user gains or loses a significant amount of<br />
weight over time), the image of the user’s hand in <strong>HandNet</strong> will automatically<br />
be gradually adjusted as well. If there are gradual changes, checking<br />
this prevents users from having access problems as their hands become<br />
increasingly different from the original image. If you do not check this, then<br />
readers will always compare the user’s hand to the original image created<br />
when you enrolled the user. We recommend having this checked.<br />
* * * * *<br />
23
System Wide Settings<br />
Who Can Use <strong>HandNet</strong><br />
The Operators tab lists those people<br />
who are authorized to use the<br />
<strong>HandNet</strong> program. When you click<br />
Add or Edit, the program brings up<br />
the Operator Definition box where you<br />
control which tasks the operator is<br />
allowed to do in <strong>HandNet</strong>.<br />
To get to this screen, pick Settings<br />
from the View menu, and then click the<br />
Operators tab.<br />
Adding or<br />
Changing an<br />
Operator<br />
You see this box when you add or<br />
edit an operator. It has the name<br />
and password the operator must<br />
use to log into <strong>HandNet</strong>. The boxes<br />
that are checked control which<br />
types of activities the operator can<br />
do.<br />
Name: Enter the name that the<br />
operator will enter on the<br />
Login screen; see page 4. If<br />
the operator is also a user in<br />
<strong>HandNet</strong> (so s/he can gain<br />
access through readers), the<br />
name you enter here does NOT<br />
have be the same as the name<br />
in User Properties.<br />
Password: Enter the password that the operator will enter on the Login screen.<br />
Passwords are NOT case sensitive. For example, if the password is narnia,<br />
Narnia and NARNIA would work identically.<br />
Which Options<br />
the Operator<br />
Can Use<br />
Access Rights: Check the corresponding boxes to determine which tasks the<br />
operator can do in <strong>HandNet</strong>. When you add a new operator, all of the boxes<br />
are unchecked; unless you check them, the operator will be able to do little<br />
more than look at in<strong>for</strong>mation on the screen.<br />
Click OK to save your changes and return to the list of operators.<br />
Deleting an<br />
Operator<br />
To delete an operator so that person will no longer have access to <strong>HandNet</strong>,<br />
click the operator in the list and click Delete. <strong>HandNet</strong> does NOT ask you to<br />
confirm this deletion, so make sure you have highlighted the right operator<br />
be<strong>for</strong>e you click delete.<br />
If the operator is also a user and if you do not want the user to have access to<br />
readers anymore, you must also delete the person from the user list.<br />
* * * * *<br />
24
<strong>HandNet</strong> <strong>for</strong> <strong>Windows</strong><br />
Which Messages Trigger Alarms<br />
The Alarms tab controls which activities generate alarms in <strong>HandNet</strong>. To get to<br />
this screen, pick Settings from the View menu, and then click the Alarms tab.<br />
Messages That<br />
Cause Alarms<br />
Alarms Sounds<br />
Messages Which Cause Alarms: Check each message that should generate<br />
an alarm. What you check here only determines what triggers an alarm in<br />
the <strong>HandNet</strong> program; if you are connected to an auxiliary or external alarm<br />
system, actions that trigger external alarms are controlled by the Auxiliary<br />
(AUX) Settings (see page 48) and Extended Setup (see page 51) tabs in Reader<br />
Properties.<br />
Enable Alarm Sounds: If this is checked, then when an alarm situation occurs,<br />
a loud, siren-like alarm sound will begin and continue until you acknowledge<br />
the alarm. If this is not checked, when an alarm situation occurs, you will<br />
see a red flashing message at the bottom of the screen but will not hear any<br />
sound.<br />
* * * * *<br />
25
System Wide Settings<br />
When Past Activity Gets Archived<br />
What Archiving<br />
Is<br />
Archiving is moving past activity from the current activity file to a separate file.<br />
This keeps the activity file smaller and faster while still keeping the in<strong>for</strong>mation<br />
available <strong>for</strong> reports if needed. The Archive tab controls when <strong>HandNet</strong> reminds<br />
you to archive past activity, where it will make the archive file if you do not<br />
choose another location, and the minimum amount of activity to keep available<br />
in the current activity file.<br />
You can make an archive at any time use Archive on the File menu; see page 113.<br />
To get to the Archives tab, pick Settings from the View menu, and then click the<br />
Archives tab.<br />
When <strong>HandNet</strong><br />
Reminds You<br />
to Make and<br />
Archive<br />
Archive Notification Occurs: This controls when <strong>HandNet</strong> reminds you to<br />
make an archive.<br />
When archive file size is bigger than... reminds you only when there is<br />
enough activity <strong>for</strong> the archive file to reach the size you enter. How long it<br />
will take depends on the amount of activity.<br />
After ___ days... reminds you make an archive on a regular basis regardless<br />
of the amount of activity during that period. For example, if you wanted to<br />
make an archive once a year, you could select this option and enter 365 <strong>for</strong><br />
the number of days.<br />
On day ___of each month reminds you make an archive once a month. If you<br />
want to include all activity from a particular month in the archive, and you<br />
also want to keep a number of days worth of recent activity available in the<br />
activity window, then you might want to do this later than the first of the<br />
month and change the To date to the last day of the previous month when<br />
you make the archive. For example, if you wanted to keep activity from the<br />
past week in the current activity, then you might not make your monthly<br />
archive until the 8th of the month. That way, when you have made your<br />
archive through the end of the previous month, the past week would still be<br />
in the current activity.<br />
26
<strong>HandNet</strong> <strong>for</strong> <strong>Windows</strong><br />
Default Archive Directory: This shows the drive and directory (folder) that is<br />
automatically filled in <strong>for</strong> the file location when you make the archive. This is<br />
initially set to the same folder that the <strong>HandNet</strong> program is in, but you can<br />
change this if you wish.<br />
What NOT to<br />
Archive<br />
Exporting<br />
Activity When<br />
Archiving<br />
Do Not Archive the Latest __ Events: This indicates how many events or<br />
activities to keep in the current activity file. You can choose from 1-500. When<br />
you make an archive, <strong>HandNet</strong> this number of the most recent events in the<br />
activity file. If you want to keep more events than this in the current activity<br />
file, you can do this when you make the archive by changing the To date. For<br />
example, if you always wanted to keep at least the activity <strong>for</strong> the past week,<br />
when you make the archive, you could set the To date a week in the past.<br />
Export Transactions: If you check this, then whenever you make an archive,<br />
<strong>HandNet</strong> exports all the transactions being archived to an access database<br />
file called expactvt.mdb (you can also export transactions with Export Activity<br />
on the File menu; see page 115). While the main <strong>HandNet</strong> database files are<br />
password protected <strong>for</strong> security reasons, this file is not. This lets you create<br />
custom activity reports using the activity from <strong>HandNet</strong> using external report<br />
generating tools. If you are only going to generate reports with Activity<br />
Reports on the File menu, you do not need to check this box; doing so would<br />
only create a file that you do not need.<br />
* * * * *<br />
27
System Wide Settings<br />
When Users Get Imported and Exported<br />
User Import/<br />
Export Tab<br />
The User Import/Export tab is only available if you have purchased the upgrade<br />
to the full feature set of Version 2.0.<br />
This tab controls what user in<strong>for</strong>mation is imported and exported, and whether<br />
imports are automatic or manual. You only need this tab if you have readers<br />
connected to several different computers (each with its own copy of <strong>HandNet</strong>)<br />
and if users added to one system to be available on the others. If all of your<br />
readers are connected to a single copy of <strong>HandNet</strong>, you do not need this<br />
feature.<br />
To get to this screen, pick Settings from the View menu, and then click the User<br />
Setting Up<br />
<strong>for</strong> Common<br />
Situations<br />
Import/Export tab.<br />
If all of your readers are connected to a single copy of <strong>HandNet</strong>: You do not<br />
need this feature. Click the Typically Disabled Settings button to make sure that<br />
the import and export features are both turned off.<br />
If you have <strong>HandNet</strong> running on several computers and you want to be<br />
able to add, change or delete users from any of those computers: Click the<br />
Typically Enabled Settings button to turn both the import and export features on.<br />
If you have multiple computers with <strong>HandNet</strong> but you only want users<br />
added, changed, deleted, or enrolled on this computer: Check the Enroll,<br />
Update, and Delete boxes in the Export column, and uncheck all of the boxes in<br />
the Import side of the screen. This causes <strong>HandNet</strong> to export users but prevents<br />
changes from elsewhere from being imported.<br />
If you have multiple computers with <strong>HandNet</strong> but you only want users<br />
added, changed, deleted, or enrolled on another computer: Check the<br />
Create, Modify, Delete and Enroll boxes in the Import column, and uncheck all<br />
of the boxes in the Export side of the screen (you can also enable Auto Import<br />
if you wish). This keeps <strong>HandNet</strong> from creating an export file that you do not<br />
need, and enables it to import changes from another computer.<br />
28
<strong>HandNet</strong> <strong>for</strong> <strong>Windows</strong><br />
Import Settings<br />
Types: This controls what user in<strong>for</strong>mation <strong>HandNet</strong> will import. Make sure that<br />
you select the correct choices here be<strong>for</strong>e you try to import. When <strong>HandNet</strong><br />
imports, it empties the Import file, discarding those user records that do not<br />
meet the conditions you have checked here.<br />
Create: If this box is checked and <strong>HandNet</strong> finds a new user in the<br />
Import file, <strong>HandNet</strong> adds that user to your database. If this box is not<br />
checked, <strong>HandNet</strong> will not import any new users.<br />
Modify: If this box is checked and <strong>HandNet</strong> finds a user in the Import file<br />
with the same ID number as a user that you already have, <strong>HandNet</strong><br />
replaces the in<strong>for</strong>mation <strong>for</strong> the user you have with the user in the<br />
Import file. If this box is not checked and <strong>HandNet</strong> finds a user in the<br />
Import file with the same ID number as a user that you already have,<br />
<strong>HandNet</strong> will not change the user that you have. If you do not have<br />
this checked, you could end up with different in<strong>for</strong>mation <strong>for</strong> a user on<br />
different computers.<br />
Delete: If this box is checked and <strong>HandNet</strong> finds a user marked <strong>for</strong><br />
deletion in the Import file, <strong>HandNet</strong> deletes that user from your<br />
computer as well. If you do not have this checked, you could end<br />
up users that are still on your computer that are not in the copies of<br />
<strong>HandNet</strong> running on the other computers.<br />
Enroll: If this box is checked and <strong>HandNet</strong> finds a newly enrolled user in<br />
the Import file, <strong>HandNet</strong> imports the user and the template (image of<br />
the user’s hand). If you do not check this, you will have to enroll new<br />
users on each computer where they are imported.<br />
Empty Templates: If <strong>HandNet</strong> finds a user that is not enrolled in the Import<br />
file, and it finds a user with the same ID number that is enrolled, this<br />
entry controls what <strong>HandNet</strong> will do. Ignore if enrolled keeps the enrolled<br />
Version of the user that you already have rather than replacing the user<br />
with the unenrolled user. Allow overwrite replaces the enrolled user with the<br />
unenrolled one; this means that the user will have to be enrolled again (to<br />
avoid this, on the computer that is exporting the users, do not check Add New<br />
on the Export side and make sure Empty Templates on the Export side is set<br />
to Skip. This way, users will not be exported until they are enrolled).<br />
Auto Import:<br />
Enable: If you check the Enable box, <strong>HandNet</strong> automatically import users<br />
whenever it finds an import.mdb file in the <strong>HandNet</strong> directory. If this box<br />
is not checked, then <strong>HandNet</strong> only import users when you pick Import<br />
Users from the File menu; see page 99.<br />
Show Notification: If you check this box and the Enable box above<br />
is also checked, then when <strong>HandNet</strong> automatically imports users, it<br />
shows a message on the screen that lets you know that users are<br />
being imported. If you do not check this box, then <strong>HandNet</strong> just<br />
imports the users without popping a message up (either way, <strong>HandNet</strong><br />
also records the activity in the Activity window). If the Enable box is not<br />
checked above, this entry does not apply.<br />
29
System Wide Settings<br />
Export Settings<br />
Types: This controls what user in<strong>for</strong>mation <strong>HandNet</strong> exports.<br />
Add New: If this box is checked and you add a user, <strong>HandNet</strong> exports the<br />
user. Normally you do not want this box checked; you usually want<br />
<strong>HandNet</strong> to wait until the user is enrolled be<strong>for</strong>e exporting the user. If<br />
you have this checked, <strong>HandNet</strong> exports the unenrolled user.<br />
Enroll: If this box is checked, then <strong>HandNet</strong> exports a new user after the<br />
user is enrolled.<br />
Update: If this box is checked and change in<strong>for</strong>mation <strong>for</strong> a user, <strong>HandNet</strong><br />
exports the changed in<strong>for</strong>mation. This can help keep user in<strong>for</strong>mation<br />
the same on all of the computers.<br />
Delete: If this box is checked and you delete a user, <strong>HandNet</strong> exports<br />
the fact that the user was deleted. If the other copies of <strong>HandNet</strong> are<br />
set up to import deletions, then the user will be removed from those<br />
computers as well.<br />
Empty Templates: If you add or change a user that has not been enrolled yet,<br />
this controls whether or not <strong>HandNet</strong> will export it. Normally you only want<br />
<strong>HandNet</strong> to export users after they are enrolled, so you would leave this set to<br />
Skip.<br />
“Typical”<br />
Settings<br />
These buttons automatically check the appropriate options <strong>for</strong> two situations:<br />
Typically Enabled Settings: This checks the appropriate boxes <strong>for</strong> a<br />
computer to be able to automatically import and export users.<br />
Typically Disabled Settings: This unchecks all of the boxes; this is<br />
appropriate <strong>for</strong> any user who is not running <strong>HandNet</strong> on more than one<br />
computer.<br />
See Setting Up <strong>for</strong> Common Situations on page 28 <strong>for</strong> more on common setups.<br />
Getting<br />
Exported Users<br />
to Another<br />
Computer<br />
See Importing Users from Another Copy of <strong>HandNet</strong> on page 99 <strong>for</strong> more on how<br />
to get the exported user in<strong>for</strong>mation to the other computer so you can import<br />
them there.<br />
* * * * *<br />
30
Setting Up Sites and Readers<br />
Seeing Sites and Readers in the Network Window<br />
The Network window lists every site and reader that you have added in<br />
<strong>HandNet</strong>. To open this window, pick Network from the View menu or press<br />
CTRL-N.<br />
The left pane lists all of your sites (that is groups of connected readers). The<br />
right pane lists all of the readers in the currently selected site (to list all readers<br />
<strong>for</strong> all sites, click <strong>HandNet</strong> System at the top of the left pane).<br />
Understanding<br />
the Icons to the<br />
Left of the Name<br />
Changing How<br />
the Readers are<br />
Sorted<br />
Rearranging or<br />
Resizing the<br />
Columns<br />
You see one of these icons to the left of each reader’s name:<br />
The green light indicates that this reader is currently connected and<br />
communicating with <strong>HandNet</strong>.<br />
The black dot indicates that <strong>HandNet</strong> communicates with this reader by<br />
modem, and <strong>HandNet</strong> is not currently connected with the reader (when<br />
<strong>HandNet</strong> connects with the readers in that site depends on what you<br />
have on the Schedule tab in Site Properties).<br />
The empty circle indicates that you have not enabled this reader. This is<br />
the case when you are setting a new reader up (you enable a reader on<br />
the General tab in Reader Properties. You must also enable the site on<br />
the General tab in the Site Properties).<br />
The red light indicates that there is a communication problem between<br />
<strong>HandNet</strong> and the reader. The reader may not be configured correctly, or<br />
there may be a problem with the way the reader is connected.<br />
You can sort the list of readers using the in<strong>for</strong>mation in any column by clicking<br />
on the column heading. For example, to sort the list alphabetically by name,<br />
click on the name heading. If you click on the same heading again, it will sort<br />
the list in reverse order; <strong>for</strong> example, using the name, it would sort from Z to A.<br />
You can also sort by address (this might be useful if you wanted to find the next<br />
available number <strong>for</strong> a new reader), by status (this could be useful to group all of<br />
the readers that are not enabled or that are having communication problems), or<br />
by site if you clicked <strong>HandNet</strong> System at the top of the site list to list all readers<br />
from all sites at once.<br />
To move any column, click the column heading and hold the mouse down. With<br />
the mouse held down, drag the column heading to the left or right (see the<br />
User’s window in the online help <strong>for</strong> an example of this).<br />
You can also change the width of a column by pointing to the edge of the<br />
column heading, holding the mouse down, and then dragging the edge of the<br />
column to the desired position. This lets you fit more columns in the window.<br />
31
Setting Up Sites and Readers<br />
F5 restores all columns to the width they had when you started <strong>HandNet</strong>. If you<br />
want <strong>HandNet</strong> to save the new column widths, exit the <strong>HandNet</strong> program and<br />
come back in. <strong>HandNet</strong> then uses your changed column widths as the new<br />
standard or default.<br />
* * * * *<br />
32
<strong>HandNet</strong> <strong>for</strong> <strong>Windows</strong><br />
Setting Up Sites, Overview<br />
What a Site Is<br />
In <strong>HandNet</strong>, a site refers to a group of up to thirty-two connected readers. Put<br />
another way, one reader is physically connected to the computer (by network,<br />
serial cable, or modem), and up to thirty-one additional readers can be daisy<br />
chained to that first reader; that is, a cable runs from the first reader to the<br />
second, another cable runs from the second to the third, and so on. We call<br />
this chain of readers a site. A site does not have any connection to a particular<br />
building or location; these readers could be in one building or in more than one<br />
building (if the buildings are close enough to run a cable from one to the other),<br />
and one building could have one or many sites.<br />
You control access to each reader separately, so having readers with unrelated<br />
purposes in one site is fine; the site designation merely indicates that the<br />
readers are physically connected to each other.<br />
There are two parts to setting up a site and readers: you must physically set the<br />
readers up and connect them to each other and to the computer, and you must<br />
add the site and readers in <strong>HandNet</strong>. This help only explains adding the site in<br />
<strong>HandNet</strong>. For help setting up and connecting the readers, see the manual that<br />
came with the readers.<br />
Be<strong>for</strong>e You<br />
Enable a Site<br />
If you have been using readers without <strong>HandNet</strong> and you want to get the users<br />
from the reader(s), follow these steps BEFORE enabling the site and reader:<br />
1. Pick Settings from the View menu.<br />
2. Click the <strong>Security</strong> tab.<br />
3. Check the box by Do not delete unauthorized enrollments (see page 23<br />
<strong>for</strong> more about what this option does; after you have gotten your users<br />
from the reader, you may want to check this box again).<br />
If you enable both the site and the reader without changing this setting,<br />
<strong>HandNet</strong> regards all of the users in the reader as unauthorized (because they<br />
are not in <strong>HandNet</strong> yet) and deletes them from the reader. Once it deletes them,<br />
there is no way to get them back without adding and enrolling the users again.<br />
* * * * *<br />
33
Setting Up Sites and Readers<br />
Adding or Changing a Site<br />
Q<br />
U<br />
I<br />
C<br />
K<br />
S<br />
T<br />
E<br />
P<br />
S<br />
Adding a Site in <strong>HandNet</strong><br />
1. Click Site on the main menu bar at the top of the screen, and then pick Add<br />
Site. This starts the New Site Wizard.<br />
2. Complete each screen and then click the Next button at the bottom of the<br />
screen. The screens that you see in this process vary depending on whether<br />
the site is connected to the computer by a serial cable, through a network, or<br />
by a modem.<br />
3. On the final screen, indicate whether to enable site<br />
If the site is physically set up and connected: Enable the site now. Check<br />
the Enable Site box and then click Finish.<br />
If the site is not physically set up yet: Enable the site later. To do this, you<br />
will open the Network window, double-click the site in the left pane<br />
of the window to open up the site properties, check the Enabled box,<br />
and then click OK.<br />
Adding a Site<br />
Changing a Site<br />
Name<br />
Click Site on the main menu bar at the top of the screen, and then pick Add Site.<br />
This starts the New Site Wizard.<br />
Click a site in the left pane of the Network window, pick Properties from the Site<br />
menu, and then click the tab with the in<strong>for</strong>mation you need to change.<br />
This is the first screen in the process of adding a new site. Enter a name that<br />
identifies the site, and then click the Next button.<br />
Type of<br />
Connection<br />
When adding a new site, this screen lets you indicate how <strong>HandNet</strong> will<br />
communicate with the site.<br />
34
<strong>HandNet</strong> <strong>for</strong> <strong>Windows</strong><br />
Serial Port: To connect to a site by running a cable from your computer to<br />
the reader, you must have a free serial port on your computer. See the<br />
HandKey manual <strong>for</strong> more on the requirements <strong>for</strong> the cable. This first<br />
reader must have an address of zero (and no other reader in the site can<br />
have an address of zero).<br />
Modem: To connect to a site by modem, the first reader in the site must have a<br />
modem installed in it (contact your dealer <strong>for</strong> more in<strong>for</strong>mation). This first<br />
reader must have an address of zero (and no other reader in the site can<br />
have an address of zero).<br />
IP Network: To connect to a site through your network, you must have a TCP/<br />
IP network with static IP addresses. Your computer must have a network<br />
card and be connected to the network. If the network is faster than<br />
10baseT, you must have a switching hub. The first reader in the site must<br />
have an ethernet card (contact your dealer <strong>for</strong> more in<strong>for</strong>mation). This<br />
first reader will automatically have an address of zero (no other reader<br />
in the site can have an address of zero), and you must enter a unique IP<br />
address in the reader; see Configuring the Physical Reader on page 54 <strong>for</strong><br />
more detail on this.<br />
Serial Port<br />
Connection<br />
To connect to a site by running a cable from your computer to the reader, you<br />
must have a free serial port on your computer; see the HandKey manual <strong>for</strong><br />
more on the requirements <strong>for</strong> the cable. This first reader must have an address<br />
of zero (and no other reader in the site can have an address of zero).<br />
when adding a new site<br />
when changing a site<br />
Serial Port: Click this and pick the serial port that the cable from the reader<br />
is connected to. If you pick the wrong port here, <strong>HandNet</strong> will not be able to<br />
communicate with the reader. If you have several sites, each must be connected<br />
to a different serial port. <strong>HandNet</strong> only lists ports set up on your computer that<br />
are not already used <strong>for</strong> communicating with another site. If you click this and<br />
get a blank list, all of the serial ports are already used. Contact the person who<br />
services your computer hardware if you need to add additional serial ports.<br />
Baud Rate: Click this and pick the baud rate, we recommend 9600. While<br />
19200 should theoretically be faster, because of the way the reader sends<br />
in<strong>for</strong>mation, this does not result in any real gain. The speed here must match<br />
the speed set in the reader; see Configuring the Physical Reader on page 54 <strong>for</strong><br />
more detail on how to change the baud rate in the reader.<br />
35
Setting Up Sites and Readers<br />
Modem<br />
Connection<br />
To connect to a site by modem, the first reader in the site must have a modem<br />
installed in it (contact your dealer <strong>for</strong> more in<strong>for</strong>mation). This first reader must<br />
have an address of zero (and no other reader in the site can have an address of<br />
zero).<br />
when adding a new site<br />
when changing a site<br />
Serial Port: If you have an external modem, click this and pick the serial port<br />
your modem is connected to; this is usually (but not always) COM1 or COM2.<br />
If you have an internal modem, it is usually connected to COM3 or COM4.<br />
<strong>HandNet</strong> only lists ports that are set up on your computer and that are not<br />
already used <strong>for</strong> communicating with another site.<br />
Baud Rate: Choose 9600 if you are connecting to a HandKey II or HandKey<br />
CR; choose 2400 if connecting to a HandKey.<br />
Modem Init String: If you need <strong>HandNet</strong> to send any commands to the modem<br />
be<strong>for</strong>e dialing, enter the appropriate codes here. The modem must be set up<br />
<strong>for</strong> no data compression, no error correction, an appropriate baud rate, and<br />
auto answer. The manual that came with your modem explains the various<br />
commands that work with your modem. An inappropriate init string can prevent<br />
the modem from connecting. Try connecting without any init string to see if you<br />
can communicate; you modem may be automatically set up correctly. If you<br />
have problems getting your modem to connect and communicate with the site,<br />
here are init strings that have worked <strong>for</strong> some modems:<br />
36<br />
Typical Modem Strings<br />
Rockwell Chip Set Modems<br />
US Robotics Sportster 14.4 F/M<br />
Everex 2400E<br />
AT&F&C1&D2X1V1E0<br />
AT&C1&D2X1V1E0<br />
AT&C1X1VE0<br />
AT&D2E0&Q0N0S37=5<br />
AT&F0<br />
AT&FX0&C1&D2&H0&N6&K0S0=0<br />
AT&F<br />
Hayes Accura 14,400 1200 Baud AT&F&C1&D2&K0S0=0S37=5<br />
2400 Baud AT&F&C1&D2&K0S0=0S37=6<br />
Hayes Optima 14,400 1200 Baud AT&F&C1&D2&K0S0=0S37=5<br />
Practical Peripherals<br />
PM144MTII<br />
Practical Peripherals<br />
14.4 FXSA<br />
2400 Baud AT&F&C1&D2&K0S0=0S37=6<br />
1200 Baud AT&F&C1&D2&K0S0=0S37=5<br />
2400 Baud AT&F&C1&D2&K0S0=0S37=6<br />
1200 Baud AT&D2E0&Q0N0S37=5<br />
2400 Baud AT&D2E0&Q0N0S37=6
<strong>HandNet</strong> <strong>for</strong> <strong>Windows</strong><br />
Cardinal 33.6 V.34/V.FC 1200 Baud ATE0S37=5&C1&D2&K0<br />
Multitech Model MT1932ZPX<br />
2400 Baud ATE0S37=6&C1&D2&K0<br />
Zoom Model cc4336 2400 Baud AT&Q0&K0+MS=2<br />
AT&F&C1&D2X1V1E0&E0&E3&E7&E8<br />
&E10&E12&E14$MB1200$SB1200<br />
Phone Number: If you have to dial some digit to get an outside line, enter this<br />
digit followed by a comma be<strong>for</strong>e the phone number. If the number is a<br />
long distance number, enter the one and the area code as appropriate. For<br />
example, if you had to dial a nine <strong>for</strong> an outside line, and the number was<br />
long distance and required one and an area code, you would enter the<br />
number like this:<br />
9, 1-802-555-1212<br />
You do not have to enter the dashes; they do not make a difference. You could<br />
equally well enter the number above like this:<br />
9,18025551212<br />
Time Adjustment: If this site is in a different time zone, enter the number of<br />
hours the time difference is. For example, if you are in New York and<br />
were setting up a connection with a site in Cali<strong>for</strong>nia, you would enter -3<br />
since in Cali<strong>for</strong>nia it is three hours earlier than in New York. If you are in<br />
Cali<strong>for</strong>nia and setting up a connection with a site in New York, you would<br />
enter 3 since it is three hours later in New York. Only do this if you want all<br />
times reflecting the time zone you are currently in.<br />
Modem Speaker On During Dial: If you check this box, when <strong>HandNet</strong><br />
connects to this site, it turns the modem speaker on so you can hear<br />
it dialing and connecting. If there is a problem connecting, turning the<br />
modem speaker on can help identify where the problem is. Unless you<br />
are having a problem connecting, we do not recommend checking this<br />
box.<br />
37
Setting Up Sites and Readers<br />
Scheduling a<br />
Connection Time<br />
Adding a New<br />
Scheduled<br />
Connection Time<br />
If you are connecting to sites by<br />
modem, this screen shows when<br />
<strong>HandNet</strong> is scheduled to connect<br />
with each site. You can only change<br />
the connection time <strong>for</strong> the current<br />
site (this screen does not apply<br />
if you are not communicating by<br />
modem; if you connect by serial port<br />
or through a network, <strong>HandNet</strong> stays<br />
connected to the site continuously<br />
and does not need a scheduled<br />
connection time).<br />
When you choose to add a new schedule time, you<br />
see this screen:<br />
Enable this schedule item: This box must be<br />
checked <strong>for</strong> <strong>HandNet</strong> to make the connection.<br />
Only uncheck this box if the modem is not set up<br />
yet at the site and you do not want <strong>HandNet</strong> to try<br />
to communicate with the site.<br />
Connect Time: Enter the time that you want<br />
<strong>HandNet</strong> to try to connect. This must be at least one minute later than<br />
the disconnect time <strong>for</strong> the previous connection. For example, if another<br />
connection is scheduled to end at 5:00, the new connection can be<br />
scheduled <strong>for</strong> 5:01, but not <strong>for</strong> 5:00. If the phone lines are busy when<br />
<strong>HandNet</strong> tries to connect, it will keep trying until it makes a connection (or<br />
reaches the Disconnect Time).<br />
Disconnect Time: If you uncheck this box, <strong>HandNet</strong> will stay connected to this<br />
site continuously. Since the modem will be continuously connected to that<br />
site, you will not be able to schedule a connection to any other site; if you<br />
need more than one connection, this must be checked. When you enter a<br />
disconnect time, it must be after the start time. For example, you cannot<br />
schedule a connection to both begin and end at 5:00; if the connection<br />
begins at 5:00, the disconnect time must be 5:01 or later.<br />
When you enter the disconnect time, allow enough time <strong>for</strong> <strong>HandNet</strong> to<br />
download all of the potential activity in the reader. The reader can send<br />
about 100 events a minute. This means that if the reader were full (with<br />
5000 events), it could take up to an hour to get all of the activity. The<br />
amount of activity you have each day and the number of times you connect<br />
to reader during the day determine how long your connection must be.<br />
When <strong>HandNet</strong> reaches the disconnect time, it disconnects even if there<br />
is still activity that the reader needs to send. When <strong>HandNet</strong> disconnects,<br />
if the reader is not done sending activity, a few activities would be lost.<br />
If there is regularly more activity at the reader than the connection time<br />
allows <strong>for</strong>, the reader’s memory would eventually fill up, at which point<br />
additional activity would also cause activity to be lost. To avoid this, make<br />
sure the time between the Connect Time and the Disconnect Time is long<br />
enough to get all of the activity.<br />
38
<strong>HandNet</strong> <strong>for</strong> <strong>Windows</strong><br />
Changing or Deleting<br />
a Scheduled<br />
Communication Time<br />
If You Get a Message<br />
that the Time<br />
Conflicts<br />
Even though <strong>HandNet</strong> lets you see the scheduled connection times <strong>for</strong> all sites,<br />
<strong>HandNet</strong> only lets you change a scheduled time <strong>for</strong> the site with which you are<br />
currently working. To change a scheduled time <strong>for</strong> a different site, you must go<br />
to the properties <strong>for</strong> that site, select the scheduled time there, and then click the<br />
Edit button.<br />
If the time that you enter conflicts with the time that <strong>HandNet</strong> is already<br />
scheduled to communicate with a different site, you see a message like this:<br />
Make sure that each other scheduled connection has a disconnect time. If you<br />
schedule a connection with no end time, <strong>HandNet</strong> would never disconnect from<br />
that site, so it would not be possible to schedule another connection. If you want<br />
to have more than one scheduled connection, each connection must have a<br />
disconnect time.<br />
Also make sure the connect time is at least one minute later than the disconnect<br />
time <strong>for</strong> the previous connection. For example, if another connection is<br />
scheduled to end at 5:00, the new connection can be scheduled <strong>for</strong> 5:01, but<br />
not <strong>for</strong> 5:00.<br />
IP Address<br />
You see this screen if you indicate that <strong>HandNet</strong> will communicate with this site<br />
through a network.<br />
when adding a new site<br />
when changing a site<br />
IP address: Each site must have a unique IP address. Ask your network<br />
administrator <strong>for</strong> an appropriate address. The address you enter here must<br />
match the address you enter in the reader; see Configuring the Physical Reader<br />
on page 54 <strong>for</strong> more on how to change the address in the reader.<br />
Port: This entry no longer applies; it is always grayed out.<br />
39
Setting Up Sites and Readers<br />
Enabling the<br />
Site<br />
This is the final screen that you see in the New Site Wizard (when you go back<br />
to Site Properties to change this site, this is on the General tab).<br />
Enable Site: You must enable the site be<strong>for</strong>e <strong>HandNet</strong> can communicate with<br />
the readers in it, but you might not want to enable it yet. Please read the<br />
sections below if you are not sure.<br />
If the site is not<br />
physically set up<br />
yet<br />
If you have been<br />
using readers<br />
independently of<br />
<strong>HandNet</strong> and you<br />
need to get users<br />
from the readers<br />
If the site is not physically set up yet, do not enable it; you do not want <strong>HandNet</strong><br />
to repeatedly try to communicate with something that is not there. This would<br />
slow the system down.<br />
If you have been using readers independently of <strong>HandNet</strong> and if you want to get<br />
the users from the readers into <strong>HandNet</strong>, you also do NOT want to enable the<br />
site until you have set <strong>HandNet</strong> to accept users from the reader that are<br />
not in <strong>HandNet</strong>. To do this:<br />
1. Click Finish without checking the Enable Site box.<br />
2. Pick Settings from the View menu.<br />
3. Click the <strong>Security</strong> tab.<br />
4. Check the box by Do not delete unauthorized enrollments (see page 23<br />
<strong>for</strong> more about what this option does; after you have gotten users from<br />
the reader, you may want to check this box again).<br />
If you enable both the site and the reader without changing this setting,<br />
<strong>HandNet</strong> will regard all of the users in the reader as unauthorized (because they<br />
are not in <strong>HandNet</strong> yet) and it will delete them from the reader. Once it deletes<br />
them, there is no way to get them back without adding and enrolling the users<br />
again.<br />
If you are ready<br />
to connect<br />
To Enable the<br />
Site Later<br />
If the site is physically set up and you do not need to get users from the readers<br />
(or if you have already changed the setting above), then you can enable the site<br />
now. Check the Enable Site box and then click Finish.<br />
After you leave this screen, you can enable the site by doing this:<br />
1. Open the Network window.<br />
2. Double-click the site in the left pane of the window to open up the site<br />
properties (or click once and pick Properties from the Site menu).<br />
3. Check the Enabled box and then click OK.<br />
* * * * *<br />
40
<strong>HandNet</strong> <strong>for</strong> <strong>Windows</strong><br />
Setting Up Readers, Overview<br />
There are two parts to setting up readers: 1) physically setting the readers up<br />
and connecting them to each other and to the computer; and 2) adding the site<br />
and readers in <strong>HandNet</strong>. This manual only explains adding the site and readers<br />
in <strong>HandNet</strong>. For help setting up and wiring readers, see the manual that came<br />
with the readers.<br />
Be<strong>for</strong>e You<br />
Enable the<br />
Reader<br />
Be<strong>for</strong>e you add readers, you must set up the site they are connected to; see<br />
page 34.<br />
If you have been using readers without <strong>HandNet</strong> and you want to get users from<br />
the reader(s), follow these steps BEFORE enabling the site and reader:<br />
1. Pick Settings from the View menu.<br />
2. Click the <strong>Security</strong> tab.<br />
3. Check the box by Do not delete unauthorized enrollments (see page 23 <strong>for</strong><br />
more about what this option does; after you have gotten your users from<br />
the reader, you may want to check this box again).<br />
If you enable the site and the reader without changing this setting, <strong>HandNet</strong><br />
regards all users in the reader as unauthorized (because they are not in<br />
<strong>HandNet</strong> yet) and deletes them. Once it deletes them, there is no way to get<br />
them back without adding and enrolling the users again.<br />
Selecting<br />
Readers<br />
Most options on the Reader menu are disabled until you select a reader.<br />
To select a single reader: Click that reader in the list.<br />
To select multiple readers that are together on the list: Click the first reader<br />
in the group, hold the SHIFT key down, and click the last reader that you<br />
want to select.<br />
To select multiple readers that are not together on the list: Click the first<br />
reader to select, hold the CTRL key down, and click each other reader that<br />
you want to select.<br />
Renaming a<br />
Reader<br />
You might rename a reader if you discovered that the original name was not<br />
clear or if you changed the purpose of the areas the reader gave access to.<br />
Renaming the reader does not change any of its properties and does not<br />
require you to set anything up again; it only changes the name that appears in<br />
the lists on the screen and in reports that you generate.<br />
To rename a reader:<br />
1. If the Network window is not open, pick Network from the View menu (or<br />
press CTRL-N).<br />
2. Click the reader in the right pane of the Network window.<br />
3. Pick Rename from the Reader menu (you could also right click and pick<br />
Rename, or you could double-click the reader and change the name in<br />
the Reader Properties).<br />
* * * * *<br />
41
Setting Up Sites and Readers<br />
Setting Up a New Reader<br />
Q<br />
U<br />
I<br />
C<br />
K<br />
S<br />
T<br />
E<br />
P<br />
S<br />
Adding a New Reader<br />
1. Click Reader in the main menu bar at the top of the screen, and then pick<br />
Add New. This starts the New Reader Wizard.<br />
2. On the second screen of the New Reader Wizard, indicate whether you<br />
want to set the reader up by going through each configuration screen,<br />
or whether you want to copy the settings from another reader. Copy the<br />
settings from another if the settings are identical or even similar to the<br />
other reader (if you copy settings, you can use Properties on the Reader<br />
menu to make changes).<br />
3. If you are setting up the reader by going through each configuration<br />
screen, see the different tabs in the Reader Properties <strong>for</strong> help with<br />
particular entries. Click the Next button at the bottom of the screen to<br />
continue with the next screen.<br />
4. Make sure that the address in the reader matches the address you<br />
entered on the first reader properties screen; see Configuring the Reader<br />
<strong>for</strong> more details.<br />
5. Once the reader is physically connected and set up correctly, enable<br />
the reader. To do this, open the Network window, double-click the site in<br />
the right pane of the window to open the Reader Properties, check the<br />
Enabled box, and then click OK.<br />
Getting Started<br />
Name and<br />
Address Screen<br />
When you pick Add New... from the Reader menu, <strong>HandNet</strong> starts the New<br />
Reader Wizard. This takes you through the process of adding the reader.<br />
This is the first screen that you see when adding a new reader:<br />
Enter the reader’s name: Enter any name that clearly describes the reader’s<br />
function and location. This name is used in the Activity window and in<br />
activity reports to identify where activity took place.<br />
Choose the site where the new reader is located: Click this to pick the site<br />
(group of readers) that this reader is connected to. You must set the site up<br />
be<strong>for</strong>e you can add the reader.<br />
42<br />
This reader is physically configured <strong>for</strong> address: <strong>HandNet</strong> automatically<br />
fills in the first available address that has not been used yet in this site.<br />
For example, if you already have readers 0, 1, and 2 in this site, <strong>HandNet</strong><br />
automatically fills in an address of 3. You can change this if you wish. The<br />
first reader in each site my be reader 0; other readers in the site can use<br />
any number up to 254. Readers do not need to be numbered sequentially.<br />
For example, your readers could be numbered 0, 1, 2, 3... or they could<br />
be numbered 0, 100, 110, 137... Within a site, each reader must have a
<strong>HandNet</strong> <strong>for</strong> <strong>Windows</strong><br />
unique number. For example, you cannot have two readers in the same<br />
site that both use the address of 1. However, you can reuse numbers in<br />
different sites. For example, if you have twenty sites, you could have a<br />
reader with an address of 1 in each of them.<br />
Make sure the<br />
address matches the<br />
address in the reader<br />
Never put more than<br />
32 readers in a site<br />
The number here must match the address entered in the reader; see<br />
Configuring the Physical Reader on page 54 <strong>for</strong> more on how to set the address<br />
up in the reader.<br />
Even though <strong>HandNet</strong> allows numbers from 0 to 254, you should never have<br />
more than thirty-two readers in a site. While it is sometimes technically possible<br />
to connect more than thirty-two readers, not all readers support this, and<br />
even <strong>for</strong> readers that do, connecting more than this causes unacceptably slow<br />
response times from readers. The software was not designed to handle more<br />
than this, and we cannot guarantee results with more than thirty-two readers.<br />
If you feel that more than thirty-two readers in a single site is essential <strong>for</strong><br />
you, please contact us to discuss your situation first; in nearly all cases, the<br />
preferable (and sometimes only) solution is to set up additional site(s).<br />
Click Next to go on to the next screen. This button is disabled until you have<br />
filled in all of the entries on this screen.<br />
Configuration<br />
This is the second screen that you see in the process of adding a new reader.<br />
This screen lets you choose whether you want to set the reader up by going<br />
through each configuration screen in the reader properties, or whether you<br />
want to copy the settings from another reader. Copy the settings from another<br />
reader if the settings are identical or even similar to the other reader. If you copy<br />
the settings from another reader, and you want to make the settings slightly<br />
different, you can use Properties on the Reader menu to make changes; see<br />
page 45.<br />
Configure the new reader: This lets you go through each of the Reader<br />
Properties screens so you can choose the appropriate settings on each.<br />
The Reader Properties screens are explained starting on page 45. You would<br />
choose this <strong>for</strong> the first reader you add. You would also choose this if you<br />
wanted very different settings from the other readers. For example, if other<br />
readers are set to trigger an auxiliary alarm after certain events and you<br />
do not want this reader to trigger an alarm, or if other readers have an<br />
automatic unlock time and you do not want that <strong>for</strong> this reader, then you<br />
might want to use this option.<br />
Copy the configuration from another reader: If another reader has the same<br />
or nearly the same settings as you want <strong>for</strong> this reader, copying settings<br />
from the other reader is faster. It also protects you from accidentally<br />
43
Setting Up Sites and Readers<br />
making the settings slightly different if you want readers configured exactly<br />
the same way.<br />
If you choose this option, click the reader in the list to copy the settings<br />
from and then click the Finish button (the Next button changes to a Finish<br />
button when you choose this option).<br />
When you copy the configuration from another reader, <strong>HandNet</strong> does NOT<br />
enable the reader. You must go to the General tab in the Reader Properties<br />
to enable the reader be<strong>for</strong>e <strong>HandNet</strong> will communicate with it; see page 45.<br />
If you copy the settings from another reader, and you want to make the<br />
settings slightly different, you can use Properties on the Reader menu to<br />
make changes; see page 45.<br />
* * * * *<br />
44
<strong>HandNet</strong> <strong>for</strong> <strong>Windows</strong><br />
Changing Reader Settings with Reader Properties<br />
Getting to the<br />
Reader Settings<br />
General<br />
Click a reader in the right pane of the Network window, and pick Properties from<br />
the Reader menu (or just double-click the reader in the Network window). You<br />
are initially on the General tab; click any other tab to jump to the corresponding<br />
screen.<br />
This screen contains the reader’s name<br />
and address, the site the reader is a<br />
part of, and whether or not the reader is<br />
currently enabled and connected.<br />
Name: The name is to help you identify<br />
the reader. Changing the name<br />
does not affect any of the reader’s<br />
other settings or connection. If you<br />
change the name of the reader,<br />
the new name is used in activity<br />
reports <strong>for</strong> activity at that reader,<br />
even if the activity occurred be<strong>for</strong>e<br />
the name change.<br />
Site: This is the site (that is, the group of up to thirty-two readers) that this<br />
reader is associated with.<br />
Address: The number here can be from 0 to 254. If the site is connected by IP<br />
Network, the first reader in the site (the one with the ethernet card) must<br />
be reader 0. Other readers can use any number and do not need to be<br />
numbered sequentially. For example, your readers could be numbered<br />
0, 1, 2, 3... or they could be numbered 0, 100, 110, 137.... You can use<br />
the same reader number in more than one site. For example, if you have<br />
twenty sites, you could have a Reader One in each of them.<br />
The number here must match the address entered in the reader; see<br />
Configuring the Physical Reader on page 54 <strong>for</strong> more on how to set the<br />
address up in the reader.<br />
Even though <strong>HandNet</strong> allows numbers from 0 to 254, you should<br />
never have more than thirty-two readers in a site. While it is sometimes<br />
technically possible to connect more than thirty-two readers, not all<br />
readers support this, and even <strong>for</strong> readers that do, connecting more<br />
than this causes unacceptably slow response times from readers. The<br />
software was not designed to handle more than this, and we cannot<br />
guarantee results with more than thirty-two readers. If you feel that more<br />
than thirty-two readers in a single site is essential <strong>for</strong> you, please contact<br />
us to discuss your situation first; in nearly all cases, the preferable (and<br />
sometimes only) solution is to set up additional site(s).<br />
Enabled: This should be checked once reader setup is done and users should<br />
have access through the reader. Leave this unchecked if you do not want<br />
<strong>HandNet</strong> to try to communicate with the reader at this point.<br />
If you have been using readers without <strong>HandNet</strong> and you want to get the<br />
users from the reader, follow these steps BEFORE enabling the site and<br />
reader:<br />
45
Setting Up Sites and Readers<br />
1. Pick Settings from the View menu.<br />
2. Click the <strong>Security</strong> tab.<br />
3. Check the box by Do not delete unauthorized enrollments (see page<br />
23 <strong>for</strong> more about what this option does. After you have gotten your<br />
users from the reader, you may want to check this box again).<br />
If you enable both the site and the reader without changing this setting,<br />
<strong>HandNet</strong> will regard all of the users in the reader as unauthorized<br />
(because they are not in <strong>HandNet</strong> yet) and it will delete them from the<br />
reader. Once it deletes them, there is no way to get them back without<br />
adding and enrolling the users again.<br />
Status: This indicates whether the reader<br />
is connected.<br />
Settings<br />
This screen controls the reader’s<br />
display and other factors that affect<br />
what happens when the user enter<br />
an ID number at the reader.<br />
12 Hour Display: If you check this, the<br />
reader displays times after noon<br />
using the numbers one through<br />
twelve; if it is not checked, it uses<br />
twenty-four hour time. For example, if<br />
this is checked 5:00 PM displays on<br />
the reader as 5:00; if this is not checked, 5:00 PM displays as 17:00.<br />
Display System Status: Do not check this option unless asked to by one of<br />
our support staff. This displays technical in<strong>for</strong>mation on the reader display<br />
about the status of different aspects of the reader. It is not relevant to<br />
normal use of the reader.<br />
Beeper On: If this is checked, the reader beeps each time you press a button<br />
on it; if this is not checked, the reader does not beep. In a high security<br />
setting, you might want the beeps off to make it harder <strong>for</strong> a casual<br />
observer to figure out how many digits are in the ID number. In other<br />
contexts, your choice here depends only on your preference; some people<br />
like the beeps since it lets them know that they have not missed the button;<br />
others prefer not to hear them.<br />
Time and Attendance Mode: Do not check this option. If you check this, the<br />
reader asks users <strong>for</strong> additional in<strong>for</strong>mation related to time and attendance<br />
tracking (whether one is coming in or out or leaving <strong>for</strong> a job, the job<br />
number you are working on, etc.). However, <strong>HandNet</strong> is currently NOT able<br />
to store or track this in<strong>for</strong>mation.<br />
Emulate Card Reader: If you want the readers to send output directly to a lock<br />
and unlock it, leave this unchecked. If you have an access control panel<br />
and want the reader to send in<strong>for</strong>mation <strong>for</strong>matted like card output to that<br />
control panel, check this box.<br />
Facility Code: This only applies if you are emulating a card reader.<br />
46
<strong>HandNet</strong> <strong>for</strong> <strong>Windows</strong><br />
ID Length: If all of your user IDs are the same length, you can enter the number<br />
of digits here so that users do not have to press ENTER or YES after<br />
typing the ID at the reader. For example, if all of your IDs are four digits<br />
long, then you could enter 4 here. Then, at the reader, once the user<br />
had entered four digits, the reader would ask the user to place the hand<br />
(assuming the ID was valid). Without this, the user would have to type<br />
the four digits and then press the ENTER or YES button on the reader.<br />
However, if you use a duress code (see below), do not enter a number<br />
here. This is because the duress code adds a digit; if your IDs are four<br />
digits, the user will have to be able to enter five digits if they ever need the<br />
duress code. If you are using a duress code, leave this set to ten.<br />
Number of Tries: If a user enters a valid ID number but the users hand does<br />
not match the image stored, the reader does not give access. This entry<br />
controls how many times the user can try to get access be<strong>for</strong>e the reader<br />
will block the user’s ID and not allow further tries. This prevents someone<br />
from making repeated tries to gain access with someone else’s ID number.<br />
Normally three is a good setting here; it allows <strong>for</strong> two retries if the user did<br />
not place the hand correctly, but limits the number of attempts someone<br />
can make.<br />
If the user does not gain access after the number of tries here, the reader<br />
no longer accepts that user’s ID until another user successfully gains<br />
access through that reader.<br />
Duress Code: A duress code is single digit that users can enter be<strong>for</strong>e the ID<br />
number to indicate that they are in danger or that someone else is <strong>for</strong>cing<br />
them to open the door. For example, suppose that you set zero up as a<br />
duress code. If a user is being <strong>for</strong>ced to let someone into the building,<br />
instead of entering the regular ID of 1234, the user would enter 01234.<br />
The system would still grant access as it would <strong>for</strong> the normal ID, but it<br />
would also trigger an alarm. This could be merely the alarm in the <strong>HandNet</strong><br />
program, or, it could also trigger an external alarm through the Auxiliary<br />
Settings; see page 49.<br />
Zero (0) is often a good digit <strong>for</strong> the duress code because you cannot begin<br />
a user ID with zero if you enroll users from the command menus on the<br />
reader (while <strong>HandNet</strong> distinguishes between 5 and 0005, the process of<br />
adding a user from the reader command menu does not. This means that if<br />
you create a user with an ID of 0005 in <strong>HandNet</strong> and try to enroll that user<br />
with the command menus on the reader, when you type 0005, the reader<br />
would think you were enrolling User Five. This would not correspond with<br />
0005 in <strong>HandNet</strong>).<br />
Configuration<br />
This screen controls how closely the<br />
typical user’s hand must match the<br />
image that is stored, how long the<br />
door can stay open, and when (if<br />
ever) the door should be automatically<br />
unlocked.<br />
Reject threshold: The lower this number<br />
is, the more closely the user’s hand<br />
must match the image or template of<br />
the hand stored in <strong>HandNet</strong>. Thirty<br />
47
Setting Up Sites and Readers<br />
(the lowest possible number) requires the hand shape and position to<br />
match very closely; two hundred fifty (the highest possible number) will<br />
grant access if the hand match is close but not exactly the same. One<br />
hundred is good <strong>for</strong> most contexts; enter a lower number if you have an<br />
especially high security situation. You can either enter a number or drag the<br />
pointer.<br />
If particular users have trouble placing their hands consistently because of<br />
arthritis or some other hand condition, you can override the reader’s setting<br />
<strong>for</strong> an individual user on the <strong>Security</strong> tab in the User Properties; see page 93.<br />
Lock Open For: This is the number of seconds the door stays unlocked once a<br />
user’s hand is recognized.<br />
Door Switch Shunt: This is the number of seconds the door can be open be<strong>for</strong>e<br />
potentially triggering an alarm. The Alarms tab in System Properties (see<br />
page 25) and the Door Alarm on the Auxiliary (AUX) Settings (see below)<br />
and Extended Settings (see page 51) tabs control whether this causes an<br />
alarm.<br />
Auto Unlock Time Zone: This controls when (if ever) the door is automatically<br />
unlocked. For example, you might want a door unlocked during normal<br />
business hours, and you might want the door to require hand recognition<br />
<strong>for</strong> access during other hours. You would set up a time zone that reflected<br />
the hours you wanted the door open and then pick that time zone here<br />
(see page 61 <strong>for</strong> more on setting up time zones). When you reached the start<br />
time, <strong>HandNet</strong> would unlock the door, and when you reached the end of<br />
the time zone, <strong>HandNet</strong> would lock it again. Leave this set to Never if you<br />
always want the door locked.<br />
Auxiliary (AUX)<br />
Settings<br />
Readers can communicate with<br />
auxiliary devices like alarms, lights, or<br />
security cameras. HandKey readers<br />
can communicate with one auxiliary<br />
device; this screen controls when and<br />
under what conditions output is sent to<br />
that device. HandKey II and HandKey<br />
CR readers can communicate with<br />
up to three auxiliary devices; this<br />
screen controls the output to the first;<br />
the Extended Setup tab (see page<br />
51) controls output to the second and<br />
third.<br />
To get to this screen, click a reader in<br />
the right pane of the Network window,<br />
pick Properties from the Reader menu,<br />
and then click the Auxiliary (AUX) Settings tab.<br />
Set Auxiliary Alarm On: Even though this says Set Auxiliary Alarm On, the device<br />
does not have to be an alarm; this can trigger any type of auxiliary device.<br />
If a condition occurs and the corresponding box is checked, <strong>HandNet</strong> turns<br />
auxiliary output on if it is during the time zone selected at the bottom of the<br />
column on the right.<br />
48
<strong>HandNet</strong> <strong>for</strong> <strong>Windows</strong><br />
Auxiliary Input 1: This occurs if the reader receives input from an auxiliary<br />
input device. This is irrelevant if you do not have an auxiliary input<br />
device connected to the reader.<br />
Auxiliary Input 2: This occurs if the reader receives input from the second<br />
auxiliary input device (HandKey II and HandKey CR support two<br />
auxiliary input devices; HandKey readers support just one). This is<br />
irrelevant if you do not have a second auxiliary input device connected<br />
to the reader.<br />
Invalid Access: This occurs if someone repeatedly entered a valid ID at a<br />
reader, and each time the reader does NOT recognize the user’s hand<br />
(at the reader, the user would see the message ID Refused, and the<br />
Activity window would show the message Access Denied). The number<br />
of times that a user can try be<strong>for</strong>e this occurs depends on the Number<br />
of Tries entry on the Settings tab in the Reader Properties; see page 47.<br />
If this occurs, someone might be trying to gain access with someone<br />
else’s ID.<br />
Tamper: This occurs if someone has shaken the reader roughly or opened<br />
the reader. Unless someone was servicing the reader, this message<br />
generally warrants further investigation.<br />
Power Failure: This occurs if the reader loses power from an external source.<br />
While this could just be due to an ordinary power failure, sometimes<br />
someone trying to gain invalid access will cut power in an attempt to<br />
disable alarm systems.<br />
Duress Alarm: This occurs if a user entered the duress code. This code<br />
indicates that the user is in trouble or that someone is <strong>for</strong>cing the user<br />
to give him/her access; see page 47 <strong>for</strong> more on setting up a duress<br />
code.<br />
Door Alarm: This occurs if the door connected to the reader is <strong>for</strong>ced open,<br />
or if the door is kept open <strong>for</strong> longer than allowed based on the Door<br />
Switch Shunt Time on the Configuration tab in the Reader Properties;<br />
see page 48.<br />
F1 / F2 Key: This occurs if the corresponding key was pressed on the reader<br />
keypad (HandKey II and HandKey CR have F1 and F2 keys to the right<br />
of the number keys. The HandKey reader does not have these buttons,<br />
what you check here does not make any difference <strong>for</strong> that type of<br />
reader).<br />
Time Zone Violation: This occurs if a user enters a valid ID at a reader, but<br />
the user is not authorized to have access during the hours or days of<br />
the week based on the time zone associated with the reader in the<br />
access profile.<br />
Try Again: This occurs if a user enters a valid ID at a reader, but the reader<br />
does not recognize the user’s hand (this situation causes the Identity<br />
Unknown message in the Activity window). This could be just the result<br />
of incorrect hand placement (if this happens repeatedly, <strong>HandNet</strong><br />
generates the Invalid Access condition above.)<br />
49
Setting Up Sites and Readers<br />
Clear Auxiliary Alarm On: If the auxiliary device is turned on, this controls<br />
whether it will be shut off when someone gains valid access (that is, enters<br />
a valid ID number and has his/her hand recognized). If this is checked,<br />
the alarm (or other auxiliary output) is turned off when a valid user gains<br />
access through that reader; if this is not checked, the output continues until<br />
the time entered in the following entry ends or until you go to the Reader<br />
menu, highlight Auxiliary Output, and pick Off; see page 129.<br />
Auxiliary Alarm Timeout: This indicates the number of seconds that the auxiliary<br />
device should be on <strong>for</strong>.<br />
Auxiliary Alarm Time Zone: This controls when <strong>HandNet</strong> should turn output<br />
to an auxiliary device on. For example, if the auxiliary device is a set of<br />
floodlights, it would only help to turn the lights on if the condition occurred<br />
at night. To do this, you would create a time zone <strong>for</strong> night hours, and<br />
then assign that time zone here (see page 61 <strong>for</strong> more on setting up time<br />
zones). If this says Always, <strong>HandNet</strong> turns output on <strong>for</strong> the auxiliary device<br />
whenever the checked condition(s) occur.<br />
Passwords<br />
What is available<br />
on the different<br />
reader menus<br />
This screen controls the passwords needed to access the menus available through<br />
entered command mode on the reader. Generally the passwords below are<br />
adequate since a user must be set up with the appropriate authority level on the<br />
<strong>Security</strong> tab in User Properties (see page 92), and the user must know how to get<br />
to these menus in the reader be<strong>for</strong>e the passwords below would do any good.<br />
1. Service: This lets you recalibrate the reader and change the reader’s status<br />
display.<br />
2. Setup: This lets you control reader setup issues including how the reader is<br />
connected to your computer network, what language the reader displays in,<br />
the date/time, etc.<br />
3. Management: This lets you list users.<br />
4. Enrollment: This lets you add or remove users.<br />
5. <strong>Security</strong>: This lets you control the passwords <strong>for</strong> the reader menus, change<br />
time zones, enroll users who do not need hand access, etc.<br />
For more detail, see the reader manual.<br />
50
Action Queue<br />
If the reader is not connected to <strong>HandNet</strong><br />
continuously (typically only the case if<br />
<strong>HandNet</strong> communicates with the reader<br />
by modem), this screen lists changes<br />
that have not been sent to the reader yet.<br />
These actions will be sent to the reader<br />
the next time the modem connects.<br />
To get to this screen, click a reader in the<br />
right pane of the Network window, pick<br />
Properties from the Reader menu, and<br />
click the Action Queue tab.<br />
<strong>HandNet</strong> <strong>for</strong> <strong>Windows</strong><br />
If there is been a change that requires that certain actions NOT be sent to the<br />
reader, you can select those actions in the list and click Delete.<br />
Extended Setup<br />
Readers can turn auxiliary devices like<br />
alarms, lights, or security cameras on or<br />
off. HandKey II and HandKey CR readers<br />
can communicate with up to three auxiliary<br />
devices; this screen controls the output<br />
to the second and third auxiliary devices;<br />
the Auxiliary (AUX) Settings tab controls<br />
output to the first; see page 48. If you have<br />
a HandKey (instead of a HandKey II or<br />
HandKey CR), this screen does not apply<br />
since the HandKey only supports one<br />
auxiliary device.<br />
Ready String: This is the text that appears in the reader display when the<br />
reader is ready and waiting <strong>for</strong> the user to enter an ID. For example, if you<br />
want the readers to read Enter ID instead of Ready you could change the<br />
text here. You can enter up to fourteen characters. If you want this text<br />
centered in the reader’s display, add spaces be<strong>for</strong>e the text if needed.<br />
Log I/O Events: This entry only applies to the HandPunch. We do not<br />
recommend connecting a HandPunch to <strong>HandNet</strong>. The HandPunch is<br />
used <strong>for</strong> tracking time and attendance, which is not what <strong>HandNet</strong> is <strong>for</strong>. If<br />
you do connect a HandPunch and this box is checked, the reader records<br />
all activity (including invalid access attempts, door alarms, accessing<br />
command mode on the reader, etc.); if you do not have this checked,<br />
the HandPunch only records successful accesses. If you have an ID3D<br />
HandKey, HandKey II, or HandKey CR, the reader records all activity<br />
regardless of whether this is checked or not.<br />
AUX1/AUX2<br />
Aux1 contains the settings <strong>for</strong> the second auxiliary device that can be<br />
connected to a HandKey II or HandKey CR reader; Aux2 contains the settings<br />
<strong>for</strong> the third (the settings <strong>for</strong> the first are on the Auxiliary (AUX) Settings tab; see<br />
page 48).<br />
Alarm On: Even though this says Alarm On, the device does not have to be an<br />
alarm; this could trigger any type of auxiliary device. If a condition occurs<br />
and the corresponding box is checked, <strong>HandNet</strong> turns auxiliary output on<br />
if it is during the time zone selected at the bottom of the column on the<br />
right.<br />
51
Setting Up Sites and Readers<br />
Auxiliary Input 1: This occurs if the reader receives input from an auxiliary<br />
input device. This is irrelevant if you do not have an auxiliary input<br />
device connected to the reader.<br />
Auxiliary Input 2: This occurs if the reader receives input from the second<br />
auxiliary input device (HandKey II and HandKey CR support two<br />
auxiliary input devices; HandKey readers support just one). This is<br />
irrelevant if you do not have a second auxiliary input device connected<br />
to the reader.<br />
Door Alarm: This occurs if the door connected to the reader is <strong>for</strong>ced open,<br />
or if the door is kept open <strong>for</strong> longer than allowed based on the Door<br />
Switch Shunt Time on the Configuration tab in the Reader Properties;<br />
see page 48.<br />
Duress Alarm: This occurs if a user entered the duress code. This code<br />
indicates that the user is in trouble or that someone is <strong>for</strong>cing the user<br />
to give him/her access; see page 47 <strong>for</strong> more on setting up a duress<br />
code.<br />
F1 / F2 Key: This occurs if the corresponding key was pressed on the reader<br />
keypad (HandKey II and HandKey CR have F1 and F2 keys to the<br />
right of the number keys. The HandKey reader does not have these<br />
buttons, what you check here does not make any difference <strong>for</strong> that<br />
type of reader).<br />
Invalid Access: This occurs if someone repeatedly entered a valid ID at<br />
a reader, and each time the reader does NOT recognize the user’s<br />
hand (at the reader, the user would see the message ID Refused, and<br />
the Activity window would show the message Access Denied). The<br />
number of times that a user can try be<strong>for</strong>e this occurs depends on the<br />
Number of Tries entry on the Settings tab in the Reader Properties.<br />
If this occurs, someone might be trying to gain access with someone<br />
else’s ID.<br />
Power Failure: This occurs if the reader loses power from an external<br />
source. While this could just be due to an ordinary power failure,<br />
sometimes someone trying to gain invalid access will cut power in an<br />
attempt to disable alarm systems.<br />
Tamper: This occurs if someone has shaken the reader roughly or opened<br />
the reader. Unless someone was servicing the reader, this message<br />
generally warrants further investigation.<br />
Time Zone Violation: This occurs if a user enters a valid ID at a reader, but<br />
the user is not authorized to have access during the hours or days of<br />
the week based on the time zone associated with the reader in the<br />
access profile.<br />
Try Again: This occurs if a user enters a valid ID at a reader, but the reader<br />
does not recognize the user’s hand. This could be just the result of<br />
incorrect hand placement (if someone repeatedly entered a valid ID<br />
at a reader, and each time the reader does NOT recognize the user’s<br />
hand, this would generate the Invalid Access condition above).<br />
52
<strong>HandNet</strong> <strong>for</strong> <strong>Windows</strong><br />
Clear Auxiliary Alarm On: If the auxiliary device is turned on, this controls<br />
whether it will be shut off when someone gains valid access (that is,<br />
enters a valid ID number and has his/her hand recognized). If this is<br />
checked, the alarm (or other auxiliary output) is turned off when a valid<br />
user gains access through that reader; if this is not checked, the output<br />
continues until the time entered in the following entry ends or until you go<br />
to the Reader menu, highlight Auxiliary Output, and pick Off; see page 129.<br />
Timeout: This indicates the number of seconds that the auxiliary device should<br />
be on <strong>for</strong>.<br />
Time Zone: This controls when <strong>HandNet</strong> should turn output to an auxiliary<br />
device on. For example, if the auxiliary device are a set of floodlights, it<br />
would only help to turn the lights on if the condition occurred at night. To<br />
do this, you would create a time zone <strong>for</strong> night hours, and then assign<br />
that time zone here (see page 61 <strong>for</strong> more on setting up time zones). If this<br />
says Always, <strong>HandNet</strong> turns output on <strong>for</strong> the auxiliary device whenever<br />
the checked condition(s) occur.<br />
In<strong>for</strong>mation<br />
This screen contains in<strong>for</strong>mation about the reader. A key piece of in<strong>for</strong>mation<br />
on this screen is the Users<br />
Enrolled/Capacity: this reflects<br />
the amount of available space<br />
in the reader. For example, the<br />
screen below reflects a reader<br />
with 498 users and space <strong>for</strong> up<br />
to 512 users. You could only add<br />
fourteen more users be<strong>for</strong>e this<br />
reader reached its limit. If you<br />
were approaching this limit, you<br />
would want to consider a memory<br />
upgrade <strong>for</strong> the reader so it would<br />
have space <strong>for</strong> additional users.<br />
Most of the other in<strong>for</strong>mation<br />
on this screen is helpful if your<br />
reader needs service, but not<br />
relevant to the ongoing use of the reader.<br />
To get to this screen, click a reader in the right pane of the Network window,<br />
pick Properties from the Reader menu, and then click the In<strong>for</strong>mation tab.<br />
* * * * *<br />
53
Setting Up Sites and Readers<br />
Configuring the Physical Reader<br />
While most of the in<strong>for</strong>mation in the reader is controlled through <strong>HandNet</strong>, you<br />
must initially set up certain settings in the reader so it can communicate with<br />
<strong>HandNet</strong>. You do this through the command menus on the reader.<br />
For readers with a network (ethernet) card: The IP address in this reader<br />
must match the IP address on the Connection tab in Site Properties; see<br />
page 39.<br />
For a reader connected by serial port or connected as part of a chain<br />
of readers: The address in the reader must match the address on the<br />
General tab in Reader Properties; see page 45. The serial settings must<br />
also be correct, and the baud rate must match the baud rate on the<br />
Connection tab in Site Properties; see page 35.<br />
We do not recommend changing any other settings through the reader<br />
command menus. All other settings can be controlled through Reader<br />
Properties in <strong>HandNet</strong>; see page 45 (if you were to make other changes directly<br />
in the reader, these would be overridden by the settings in <strong>HandNet</strong> when you<br />
enabled the reader).<br />
Getting to the<br />
Setup Menu in<br />
the Reader<br />
1. Enter command mode on the reader:<br />
If you have a HandKey II or HandKey CR reader: Press CLEAR, and<br />
then press ENTER.<br />
If you have an ID3D HandKey reader: Press # AND * (you can press<br />
them at the same time, or one after the other).<br />
If you have not used the reader with <strong>HandNet</strong> be<strong>for</strong>e, or if you have used it with<br />
<strong>HandNet</strong> and cleared its memory, the display looks like this.<br />
ENTER PASSWORD<br />
Type the password <strong>for</strong> the setup menu and press ENTER or #. If you have not<br />
changed it, the password is two (2).<br />
If you have previously used the reader with <strong>HandNet</strong> and are reconfiguring it <strong>for</strong><br />
another site or location, you may see:<br />
READY:<br />
*:<br />
If the display looks like this, type your user ID and press ENTER or #. The<br />
reader will ask you to place your hand. Once you place it, you should then see<br />
the Enter Password display shown above. Type the password <strong>for</strong> the Setup<br />
menu and press ENTER or #. If you have not changed it, the password is two<br />
(2).<br />
54
Changing the<br />
Reader Address<br />
<strong>HandNet</strong> <strong>for</strong> <strong>Windows</strong><br />
You must set the address in readers that are connected to the computer by<br />
a serial cable, and in readers that are connected to another reader (that is,<br />
readers that are not the first reader in the site). You cannot change the address<br />
in a reader that has an ethernet card; these readers automatically have an<br />
address of zero (0).<br />
The following steps are specific to the HandKey II and CR; the menus are<br />
slightly different in other readers. Please see the manual that came with the<br />
reader if you are not sure how to find the correspond settings in your reader.<br />
1. If you have not already done so, follow the steps on page 54 <strong>for</strong> getting to the<br />
reader setup menu.<br />
2. Press the * / NO button until the display looks like this:<br />
SET ADDRESS<br />
* NO YES #<br />
3. Press the # / YES button. The display will look like this:<br />
RDR ADD ID 1<br />
NEW?:<br />
4. Type the new address. The address you enter must match the address on<br />
the General tab in Reader Properties; see page 45. Press YES or ENTER.<br />
The display returns to:<br />
SET ADDRESS<br />
* NO YES #<br />
5. If you are done changing settings, press CLEAR to leave the Reader<br />
Command menu. If you need to change others settings, press NO until you<br />
get to the next setting you need to change.<br />
55
Setting Up Sites and Readers<br />
Changing the<br />
Serial Settings<br />
and Baud Rate<br />
You must have appropriate serial settings and baud rate in readers that are<br />
connected to the computer by a serial cable, and in readers that are connected<br />
to another reader (that is, readers that are not the first reader in the site). These<br />
settings do not apply to a reader with an ethernet card.<br />
The following steps are specific to the HandKey II and CR; the menus are<br />
slightly different in other readers. Please see the manual that came with the<br />
reader if you are not sure how to find the correspond settings in your reader.<br />
1. If you have not already done so, follow the steps on page 54 <strong>for</strong> getting to the<br />
reader setup menu.<br />
2. Press the NO button until the display looks like this:<br />
SET SERIAL<br />
* NO YES #<br />
3. Press the YES button. The display will look like this:<br />
SET RS-485/422?<br />
* NO YES #<br />
4. Typically you will answer YES here. The display now asks <strong>for</strong> the baud<br />
rate. The baud rate here must match the rate on the Connection tab in Site<br />
Properties. Generally 9600 is appropriate.<br />
If you have a HandKey II or HandKey CR:<br />
The display will show the baud rate:<br />
SET RS-485/422?<br />
* NO YES #<br />
To accept the rate shown and continue, press YES. To change the rate,<br />
press NO to cycle through the choices until you find the one you want.<br />
If you have an ID3D HandKey: The baud rate is represented by a code:<br />
baud rate code baud rate code<br />
38.4K 0 2400 4<br />
19.2 1 1200 5<br />
9600 2 600 6<br />
4800 3 300 7<br />
For example, <strong>for</strong> 9600, you would enter the code of two (2).<br />
5. The reader will display:<br />
SET RS-232?<br />
* NO YES #<br />
56
<strong>HandNet</strong> <strong>for</strong> <strong>Windows</strong><br />
Unless you have a printer connected directly to the reader, you would typically<br />
answer NO here. If you have a printer directly connected to this reader, answer<br />
YES (most users working with <strong>HandNet</strong> print from <strong>HandNet</strong> rather than<br />
connecting a printer directly to the reader). The only other time you might say<br />
YES here was if you had a single reader connected directly to <strong>HandNet</strong> with a<br />
serial port; there is a way to wire the connection to use RS-232 (if this were the<br />
case, you would say YES, pick the appropriate baud rate, and then indicate that<br />
RS-232 was connected to 1-Host (that is, <strong>HandNet</strong>)).<br />
6. Once you are done, you see the Set Serial display again:<br />
SET SERIAL<br />
* NO YES #<br />
7. Press CLEAR to leave the command menu.<br />
57
Setting Up Sites and Readers<br />
Changing the<br />
IP Address in a<br />
Reader with an<br />
Ethernet Card<br />
You must set the IP address in a reader with an ethernet card. Be<strong>for</strong>e you do<br />
this, get the appropriate IP address and gateway (if needed) from your network<br />
administrator. If you have a WAN (wide area network), you also need the subnet<br />
mask; only certain subnet masks are supported; see the table below.<br />
1. If you have not already done so, follow the steps on page 54 <strong>for</strong> getting to the<br />
reader setup menu.<br />
2. Press the NO button until the display looks like this:<br />
SET SERIAL<br />
* NO YES #<br />
3. Press the YES button. The display will look like this:<br />
IP ADDRESS<br />
000.000.000.000<br />
If the display says Set RS-485/422? at this point, the reader does NOT have<br />
a network card. Contact your dealer if you need to get one.<br />
4. Quickly type the correct address; if you pause <strong>for</strong> more than about four<br />
seconds while entering the IP address, the reader advances to the next<br />
display without saving your change. The address will have four parts<br />
separated by periods. Enter each part as three digits; if one part has<br />
less that four digits, add zeros be<strong>for</strong>e that part of the number to make<br />
it three digits. You do not have to enter the periods. For example, if your<br />
administrator gave you the address 192.9.210.10, you would enter:<br />
192 009 210 010<br />
This address must match the IP address on the Connection tab in Site<br />
Properties; see page 39. Press YES or ENTER. The display will now look like<br />
this:<br />
GATEWAY<br />
000.000.000.000<br />
5. If your network administrator has told you to enter a gateway, do so;<br />
otherwise press YES or ENTER. As with the IP address, if you change this,<br />
you must type fairly quickly; if you pause <strong>for</strong> more than about four seconds<br />
while entering the gateway, the reader advances to the next display without<br />
saving your change. Once press ENTER, you see:<br />
HOST BITS: 0<br />
NEW?<br />
6. If you are communicating over a LAN (local area network), type zero (0)<br />
<strong>for</strong> the Host Bits and press YES or ENTER. If you have a WAN, enter the<br />
number from the table below that corresponds to your subnet mask (only the<br />
subnet masks listed are currently supported). If you are not sure, check with<br />
your network administrator.<br />
58
For this<br />
subnet mask:<br />
Enter this <strong>for</strong><br />
the host bits:<br />
For this<br />
subnet mask:<br />
<strong>HandNet</strong> <strong>for</strong> <strong>Windows</strong><br />
Enter this <strong>for</strong><br />
the host bits:<br />
255.255.255.255 0 255.255.224.0 13<br />
255.255.255.254 1 255.255.192.0 14<br />
255.255.255.252 2 255.255.128.0 15<br />
255.255.255.248 3 255.255.0.0 16<br />
255.255.255.240 4 255.254.0.0 17<br />
255.255.255.224 5 255.252.0.0 18<br />
255.255.255.192 6 255.248.0.0 19<br />
255.255.255.128 7 255.240.0.0 20<br />
255.255.255.0 8 255.224.0.0 21<br />
255.255.254.0 9 255.192.0.0 22<br />
255.255.252.0 10 255.128.0.0 23<br />
255.255.248.0 11 255.0.0.0 24<br />
255.255.240.0 12<br />
7. The reader will display:<br />
9600 BAUD<br />
* NO YES #<br />
The speed you choose should match the baud rate you are setting in the<br />
rest of the readers in this site. Generally 9600 is appropriate. To accept the<br />
rate shown and continue, press YES. To change the rate, press NO to cycle<br />
through the choices until you find the one you want.<br />
Once you press YES, the reader display returns to:<br />
SET SERIAL<br />
* NO YES #<br />
8. If you missed one of the settings because the reader display changed too<br />
quickly <strong>for</strong> you, press YES to go through the settings again. If you are done<br />
changing settings, press CLEAR to leave the command menus.<br />
9. If you need the changes to take effect immediately, disconnect the power<br />
from the reader, wait a few seconds, and then connect the power again. This<br />
resets the reader. If you do not do this, it may take up to six minutes <strong>for</strong> the<br />
changes to take effect.<br />
* * * * *<br />
59
Setting Up Sites and Readers<br />
Resending In<strong>for</strong>mation to a Reader<br />
Why You Might<br />
Need to Resend<br />
In<strong>for</strong>mation<br />
Getting to the<br />
Download<br />
Option<br />
While <strong>HandNet</strong> automatically sends the appropriate in<strong>for</strong>mation to readers,<br />
occasionally you will need to use this when correcting a problem with a reader.<br />
You can do this with Download on the Reader menu.<br />
To do this, select one or more readers, and go to the<br />
Reader menu, click Download, and then click the type of<br />
in<strong>for</strong>mation to send.<br />
Time: This sends the current time from the computer<br />
to the selected reader(s). You typically only need to<br />
use this option if the time changed (<strong>for</strong> example, <strong>for</strong><br />
Daylight Savings Time). You can select all of your<br />
readers and send the time to all of them at once, or you can select specific<br />
readers.<br />
Time Zones: This sends time zone and holiday in<strong>for</strong>mation to the selected<br />
reader(s). You need to download this in<strong>for</strong>mation if you change Time Zones<br />
(page 61) or Holidays (see page 65).<br />
Setup: This sends configuration in<strong>for</strong>mation to the selected readers. In most<br />
cases this is done automatically.<br />
Users: After adding users, you need to download them to the hand readers so<br />
the readers will recognize the new users. This sends all current users to the<br />
selected readers.<br />
All: This sends Time, Time Zones, Setup, and User in<strong>for</strong>mation to the selected<br />
reader(s). You would use this when you set up a new reader so the reader<br />
had all the needed in<strong>for</strong>mation.<br />
Confirming That<br />
You Want to Send<br />
In<strong>for</strong>mation to the<br />
Reader<br />
Whenever you choose to download in<strong>for</strong>mation to readers, <strong>HandNet</strong> asks you to<br />
confirm that you want to download to the selected reader. Click YES to continue.<br />
* * * * *<br />
60
Settings That Control User Access<br />
Setting Up Time Zones<br />
What Time<br />
Zones Are<br />
When You Need<br />
to Set Up Time<br />
Zones<br />
Time zones are periods of time on different days of the week when users<br />
can have access. There is no connection between what we call time zones in<br />
<strong>HandNet</strong> and the time zones we usually think of that have to do with different<br />
times around the world. This does not have anything to do with Eastern, Central,<br />
Mountain, or Pacific time; it only has to do with controlling which hours of the<br />
day access is available through readers.<br />
If you want some users to be able to use certain readers only during certain<br />
hours or on certain days of the week, time zones let you identify when access is<br />
available. For example, suppose some users should only be able to gain access<br />
through certain readers between 8:00 AM and 5:00 PM, Monday through Friday.<br />
You would create a time zone that identified these times and days, associate<br />
that time zone with appropriate readers using an access profile, and then assign<br />
that access profile to the users. After you did this, users with that access profile<br />
would only have access during the times you identified in the time zone.<br />
You can also use time zones to determine when certain doors should be<br />
automatically unlocked; see Automatically Unlocking a Door on a Scheduled<br />
Basis on page 128.<br />
If users should have different access on holidays than on other days, you can<br />
set different hours <strong>for</strong> holidays in the time zone. You will have to also set up<br />
holidays; see page 65.<br />
When You Do<br />
not Need to Set<br />
Up Time Zones<br />
If you do not need to limit access by day or time (that is, if users could use the<br />
readers twenty-four hours a day, seven days a week if they wanted), and if you<br />
do not want doors to unlock automatically, you do not need to set up time zones.<br />
61
Settings That Control User Access<br />
Getting to the List<br />
of Time Zones<br />
1. Click the View menu.<br />
2. Click Time Zones. You see a screen like the one below (though the time<br />
zones listed will be different). From here you can add, change, or delete time<br />
zones.<br />
Adding or<br />
Changing Time<br />
Zones<br />
Deleting Time<br />
Zones<br />
Time Zone<br />
Definition Screen<br />
The first time zone is Always and the last (#61) is Never; you cannot change<br />
either of these.<br />
To add a time zone, click one of the blank lines in the time zone list and click<br />
Edit. To change a time zone, click the time zone to change and click Edit.<br />
Change the Time Zone Definition screen (see below) as needed and then click<br />
OK to return to this list. You can then add or change another or click Close when<br />
done.<br />
Click the time zone and click Delete. The program asks if you are sure you want<br />
to delete the time zone. Click Yes.<br />
If you try to delete a time zone and get a message that the time zone is used in<br />
an access profile, you must close the time zone window, go to access profiles<br />
and select a different time zone <strong>for</strong> each reader that had this time zone selected<br />
if you still want to delete it.<br />
This screen determines what hours access is available on different days of the<br />
week. A time zone is active if the time is equal to or after the start time and<br />
be<strong>for</strong>e the stop time, and if the day of the week matches one of those checked.<br />
Name: Enter a name that will be clear to you so that when you associate the<br />
time zone with a reader in an access profile, you will be sure to pick the right<br />
one.<br />
You can assign four different periods in each time zone if you need them; <strong>for</strong><br />
example, if you want to give access during different hours on different days. Be<br />
sure to leave lines that you do not need blank.<br />
62
<strong>HandNet</strong> <strong>for</strong> <strong>Windows</strong><br />
Start/Stop Times: Enter hours after noon using military time. Use the chart below<br />
or see the examples if you need help. Times are divided into tenths of an hour,<br />
so <strong>HandNet</strong> rounds minutes to the nearest six minute interval. For example, if<br />
you enter 8:02, the program rounds this to 8:00; if you enter 8:03, the program<br />
rounds it to 8:06.<br />
Enter on the Time<br />
Zone screen<br />
Enter on the Time<br />
Zone screen<br />
noon 12:00 7:00 PM 19:00<br />
1:00 PM 13:00 8:00 PM 20:00<br />
2:00 PM 14:00 9:00 PM 21:00<br />
3:00 PM 15:00 10:00 PM 22:00<br />
4:00 PM 16:00 11:00 PM 23:00<br />
5:00 PM 17:00 midnight 00:00 if a start time;<br />
24:00 if a stop time<br />
6:00 PM 18:00<br />
If a time zone must cross midnight (<strong>for</strong> example, if you want to give access<br />
between 8:00 PM and 4:00 AM), you must use two lines to create that access<br />
time. The first line would give access from 20:00 to 24:00 (that is, 8:00 PM to<br />
midnight), and the next line would give access on the same days of the week<br />
from 0:00 to 4:00 (that is, midnight to 4:00 AM). See the third example on the<br />
following page.<br />
Days of the Week: Check the boxes <strong>for</strong> each of the day of the week that access<br />
should be available. The letters over the boxes correspond to the days of the<br />
week (Sunday through Saturday); H stands <strong>for</strong> holiday. If access is different on<br />
holidays than on other days, you must also set up holidays; see page 65. See<br />
the examples on the following page.<br />
Click OK when done.<br />
63
Settings That Control User Access<br />
Examples of<br />
Time Zone<br />
Settings<br />
These settings give access between 8:00 AM and 6:00 PM, Monday through<br />
Friday. They do not give any access on Saturday, Sunday, or Holidays. The blue<br />
bar in the center section of the screen shows when access is available.<br />
The following settings give access from 7:00 to 11:30 in the morning on<br />
weekdays, from 1:30 in the afternoon to 6:00 PM also on weekdays, from 9:00<br />
in the morning to 1:30 in the afternoon on Saturdays, and from 5:00 PM to<br />
midnight on Sundays and holidays.<br />
The following settings show how to cross midnight. This gives access from 8:00<br />
PM through 4:00 AM any day of the week. Notice that this requires two lines<br />
to set up: the first going from 8:00 PM to midnight, and the next going from<br />
midnight to 4:00 AM.<br />
* * * * *<br />
64
<strong>HandNet</strong> <strong>for</strong> <strong>Windows</strong><br />
Setting Up Holidays<br />
When You<br />
Need to Set Up<br />
Holidays<br />
When You Do not<br />
Need to Set Up<br />
Holidays<br />
Adjusting<br />
Holidays Each<br />
Year<br />
Getting to the<br />
Holidays List<br />
Adding or<br />
Changing<br />
Holidays<br />
If you want to prevent access on holidays or to give different access on holidays<br />
than on other days, the holidays list identifies when those holidays are. When<br />
you reach a holiday in the list, <strong>HandNet</strong> applies the holiday access times instead<br />
of the regular access times (if you set holidays up, you will also have to set up<br />
time zones to indicate what access users should have on different days; see<br />
page 61 <strong>for</strong> more on setting up time zones).<br />
If you do not give different access on holidays than on other days, you do not<br />
need to set up any holidays.<br />
If you set holidays up, remember to return to the holidays setup at the beginning<br />
of each year to adjust each holiday that is celebrated on a different date than<br />
the previous year. For example, Thanksgiving, Memorial Day, and Labor Day are<br />
on different dates each year. Also, while holidays like Christmas and New Year’s<br />
are always on the same date, when these holidays fall on a weekend, the day<br />
they are taken off is sometimes on a different date.<br />
1. Click View from the Main Menu bar.<br />
2. Click Holidays. You see a list like this one below. From here you can add,<br />
change, or delete holidays.<br />
To add a holiday, click Add; to change a holiday, click the holiday in the list and<br />
then click Edit. When you add or edit, you see this screen:<br />
Name: Enter a name to help you identify the holiday.<br />
Month: Click this entry and pick the month from the<br />
list (you could also press TAB from the Name<br />
entry and then type the first letter of the month.<br />
If more than one month begins with the same<br />
letter, typing that letter cycles through those<br />
months).<br />
Day: Click this entry and pick the day from the list (you could also press TAB<br />
from the Month entry and then type the first digit. For example, if you want<br />
to get to twenty-five, you would type two (2) several times. The first time you<br />
type two (2), the date would show 2; when you type two (2) a second time,<br />
you would see 20; typing two again would switch to 21; you would repeat<br />
this until you got to the number you need).<br />
65
Settings That Control User Access<br />
Click OK when each entry is correct.<br />
Deleting<br />
Holidays<br />
To delete a holiday: Click the holiday in the list and click Delete.<br />
* * * * *<br />
66
Setting Up Access Profiles<br />
When You<br />
Need to Set Up<br />
Access Profiles<br />
<strong>HandNet</strong> <strong>for</strong> <strong>Windows</strong><br />
If some users can only use certain hand readers and/or only use them at certain<br />
times or on certain days, access profiles define when each type of user can<br />
use each reader. For example, suppose your maintenance staff should have<br />
access to the maintenance rooms seven days a week, your office staff should<br />
have access to the office but only during business hours, and your supervisors<br />
should have access to everything at any time. You would create three access<br />
profiles: one <strong>for</strong> supervisors, one <strong>for</strong> office staff, and one <strong>for</strong> maintenance<br />
personnel. These profiles would identify which readers each group could use. In<br />
these profiles you would also identify which time periods each group could use<br />
each reader (you would set up these time periods first using Time Zones). After<br />
creating these different profiles, whenever you added a user, you would just<br />
identify which group the user was a part of, and the access profile <strong>for</strong> that group<br />
would automatically give the appropriate access.<br />
To limit access to certain days or times, you must set up time zones be<strong>for</strong>e<br />
creating access profiles; see page 61 <strong>for</strong> more on setting up time zones.<br />
When You Do<br />
Not Need to<br />
Set Up Access<br />
Profiles<br />
Getting to the<br />
List of Access<br />
Profiles<br />
If you want all users to be able to use every reader any time, you do not need<br />
to set up access profiles. <strong>HandNet</strong> comes set up with an Always profile that lets<br />
users use any reader in the system twenty-four hours per day, seven days per<br />
week (it also has a Never profile that does not let the user verify at any reader at<br />
any time).<br />
1. Click the View menu from the main menu bar.<br />
2. Click Access Profiles. You see a screen like the one below (though the<br />
profiles listed will be different). From here you can add, change, or delete<br />
access profiles.<br />
The Default Time Zone shown on this list does NOT reflect the time zones<br />
associated with the readers in this profile; it only reflects the time zone<br />
that <strong>HandNet</strong> initially picks if you associate another reader with this profile.<br />
Except <strong>for</strong> the Always profile, this column always says Never.<br />
Adding an<br />
Access Profile<br />
Click the Add button to add an access profile. This starts the New Access Profile<br />
Wizard.<br />
67
Settings That Control User Access<br />
New Access<br />
Profile Wizard,<br />
Screen 1<br />
You see the New Access Profile Wizard when you add a new access profile to<br />
the list of access profiles.<br />
Name: Enter a name that describes the group of users that this access<br />
profile will be used <strong>for</strong>. For example, if this profile gives access that is<br />
appropriate <strong>for</strong> all of your maintenance staff, you could use that <strong>for</strong> the<br />
name. The important thing is <strong>for</strong> the name to be clear so that you do not give<br />
inappropriate access to users.<br />
Click the Next button to go to the next screen.<br />
New Access<br />
Profile Wizard,<br />
Screen 2<br />
The second screen in the New Access Profile Wizard lists all of your readers<br />
(typically you will have many more than the two shown in the example below).<br />
Select each reader that you want to give access to with this profile, and then<br />
click Next.<br />
New Access<br />
Profile Wizard,<br />
Screen 3<br />
The third and final New Access Profile Wizard screen shows all of the readers<br />
that you selected on the previous screen (if you discover that you missed a<br />
reader on the previous screen, click the Back button to return to the list of all<br />
readers and select it there).<br />
68
<strong>HandNet</strong> <strong>for</strong> <strong>Windows</strong><br />
When you come to this screen, each reader has a time zone of Never; you must<br />
change the time zone <strong>for</strong> each reader to give access to that reader through this<br />
profile.<br />
To associate time zones with the readers:<br />
1. Select one or more readers on the list. If you <strong>for</strong>get to select readers,<br />
<strong>HandNet</strong> still lets you do the following step but it will not have any effect.<br />
2. Click on the entry under Choose one or more readers... and select a time<br />
zone there. <strong>HandNet</strong> uses that time zone <strong>for</strong> each selected reader.<br />
If you need to associate a different time zone with some readers, repeat these<br />
steps until you have specified a time zone <strong>for</strong> each reader. For example,<br />
suppose you were creating an access profile <strong>for</strong> maintenance workers, and<br />
suppose these workers had access to building entrances and maintenance<br />
facilities twenty-four hours a day, but they only had access to the business<br />
offices during normal business hours. You would select the entrance and<br />
maintenance readers and associate a time zone of Always with them. You would<br />
then select the business office readers and associate your normal business<br />
hours time zone with those readers.<br />
Changing an<br />
Access Profile<br />
To change an access profile, click it on<br />
the list and then click the Edit button.<br />
That brings up a list of readers that<br />
have been associated with the profile.<br />
The list looks like this:<br />
To add another reader to those<br />
associated with this profile:<br />
Click the Add button to bring up<br />
the Access Profile Override box<br />
(shown on the following page). Complete the entries there and click OK.<br />
To change the time zone a reader is accessible with this profile: Click the<br />
reader in the list and click Edit to bring up the Access Profile Override box.<br />
Click the Time Zone entry, select the appropriate time zone, and then click<br />
OK.<br />
To change the time zone <strong>for</strong> several readers at once: Hold the CTRL key<br />
down and click each reader that you want to change the time zone. When all<br />
the appropriate readers are selected, click Edit. This brings up the Access<br />
Profile Override box but you can only change the Time Zone entry. Click the<br />
Time Zone entry, select the appropriate time zone, and then click OK.<br />
To remove one or more readers from this access profile: Select the<br />
reader(s) in the list and click Delete.<br />
Click Close to return to the list of profiles.<br />
69
Settings That Control User Access<br />
Access Profile<br />
Override Box<br />
You see this same screen whether you are adding a reader to a profile or editing<br />
a reader that you have added previously (when adding the entries are initially<br />
blank; when editing, the entries are filled in with your previous choices).<br />
Reader: Click this to choose a reader that should be associated with this profile.<br />
This only lists readers that have not already been added to this profile.<br />
If you click this and an empty pick box comes up, then you have already<br />
added all readers to this profile. This entry is disabled if you are changing<br />
several readers at once.<br />
Time Zone: Click this and pick the time zone that the users with this profile<br />
should have access to the selected reader(s). If you have selected several<br />
readers, this changes all of them at once.<br />
Click OK to return to the list of readers in this profile.<br />
Deleting an<br />
Access Profile<br />
To delete an access profile, click the profile on the list and click the Delete<br />
button. <strong>HandNet</strong> does not ask you to confirm the deletion, so make sure you<br />
pick the right one.<br />
If you get a message that the access profile you are trying to delete is still<br />
assigned to a user, go to the list of users, double-click the user to go to the User<br />
Properties, click the <strong>Security</strong> tab, and select a different access profile <strong>for</strong> the<br />
user there. The message only lists the last user that the profile was assigned to,<br />
so there may be other users that also use the profile. Check the list of users to<br />
see if any other users use that profile (click the heading of the profile column in<br />
the user list to sort by profile; that will put all users with each profile together). If<br />
you find any other users using the profile you want to delete, select a different<br />
profile <strong>for</strong> each of them as well. Once no users are using the profile, you can<br />
return to this option and delete the profile.<br />
* * * * *<br />
70
Adding and Maintaining Users<br />
Users Window<br />
The users window lists every user that is in <strong>HandNet</strong>. To open this window, pick<br />
Users from the View menu or press CTRL-U.<br />
Understanding<br />
the Icons to the<br />
Left of the Name<br />
Changing How<br />
the User List is<br />
Sorted<br />
Rearranging<br />
Columns in the<br />
User Window<br />
No icon indicates that the user is enrolled able to use any readers<br />
permitted by the access profile.<br />
The no access icon indicates that the user is not enrolled yet and hence<br />
will not have access to any readers. You must enroll the user to give<br />
access; see page 87.<br />
The green light indicates that the user currently has access, and that the<br />
limited access feature was used to so this access will automatically expire<br />
at some point; see page 93 <strong>for</strong> more about limited access.<br />
The black dot indicates that the limited access feature was used to set a<br />
begin and end date/time <strong>for</strong> this user’s access, and the user does NOT<br />
have access because the access period has not started yet; see page 93 <strong>for</strong><br />
more about limited access.<br />
The red light indicates that the limited access feature was used to set a<br />
begin and end date/time <strong>for</strong> this user’s access, and the user does NOT<br />
have access because the access period has ended; see page 93 <strong>for</strong> more<br />
about limited access.<br />
You can sort the list of users using the in<strong>for</strong>mation in any column by clicking on<br />
the column heading. For example, to sort the user list alphabetically by name,<br />
click on the name heading. If you click on the same heading again, it will sort<br />
the list in reverse order (<strong>for</strong> example, using the name, it would sort from Z to A).<br />
Usually sorting by name or ID is most useful, but occasionally you might sort<br />
by another column to put all similar users together. For example, if you were<br />
preparing to change or delete a particular access profile, you might sort by the<br />
access profile column so that all users with that profile would be together on the<br />
list.<br />
To move any column, click the column heading and hold the mouse down. With<br />
the mouse held down, drag the column heading to the left or right; see the<br />
online help <strong>for</strong> an example of this.<br />
71
Adding and Maintaining Users<br />
You might want to move columns to keep important in<strong>for</strong>mation like user IDs<br />
out of view, or, if you have created custom user entries, you might want to move<br />
them to where you can see them, since they are initially out of view.<br />
Changing<br />
Column Width<br />
F5 restores all columns to the positions they had when you started <strong>HandNet</strong>. If<br />
you want <strong>HandNet</strong> to save the new column positions, exit the <strong>HandNet</strong> program<br />
and come back in. <strong>HandNet</strong> then uses your changed column positions as the<br />
new standard or default.<br />
You can also change the width of a column by pointing to the edge of the<br />
column heading, holding the mouse down, and then dragging the edge of the<br />
column to the desired position. This lets you fit more columns in the window<br />
(or, if you wanted to hide in<strong>for</strong>mation from the casual observer, you could make<br />
columns wider to push other columns out of view); see the online help <strong>for</strong> an<br />
example of this.<br />
Columns of<br />
In<strong>for</strong>mation in<br />
the User Window<br />
F5 restores all columns to the widths they had when you started <strong>HandNet</strong>. If<br />
you want <strong>HandNet</strong> to save the new column widths, exit the <strong>HandNet</strong> program<br />
and come back in. <strong>HandNet</strong> then uses your changed column widths as the new<br />
standard or default.<br />
User ID: The ID number the user must enter at the reader to gain access.<br />
Access Profile: The profile determines which readers the user can access<br />
and when. You set up access profiles using Access Profiles on the View<br />
menu. You can change a user’s access profile on the <strong>Security</strong> tab in User<br />
Properties; see page 92.<br />
Authority Level: This indicates whether the user is allowed to access the<br />
command menus on the readers. For most users, this should say None. You<br />
can change a user’s authority level on the <strong>Security</strong> tab in User Properties;<br />
see page 92.<br />
Reject Threshold: The reject threshold controls how closely a user’s hand<br />
must match the stored hand profile <strong>for</strong> the user to gain access. If this says<br />
Default, then <strong>HandNet</strong> uses the Reject Threshold on the Configuration tab<br />
in the Reader Properties (see page 47). If this says Default* (with an asterisk),<br />
this means the user does not need hand recognition to gain access<br />
because the user was set up with a special enrollment; see page 76. If this<br />
shows a number, someone chose to override the standard reject threshold<br />
on the <strong>Security</strong> tab in User Properties; see page 93. A lower number requires<br />
a very precise match to gain access; a high number requires the hand to<br />
match less exactly. Thirty is the lowest number possible; 250 is the highest.<br />
One might use a lower number <strong>for</strong> users with access to the highest security<br />
areas; one might need a higher number if a user had arthritis or other hand<br />
condition that made it impossible to consistently place the hand on the<br />
reader in exactly the same position.<br />
Last Site: This lists the last site where the user gained access. This is blank <strong>for</strong><br />
a new user who has not accessed a reader yet.<br />
Last Reader: This lists the last reader the user gained access through. This is<br />
blank <strong>for</strong> a new user who has not accessed a reader yet.<br />
Last Time Used: This shows the date and time of the user’s last access.<br />
72
<strong>HandNet</strong> <strong>for</strong> <strong>Windows</strong><br />
Limited State: This says Unlimited <strong>for</strong> users who are not set up to only have<br />
access <strong>for</strong> a limited period of time, that is, <strong>for</strong> users whose access will<br />
continue indefinitely. For users who are set up to only have access <strong>for</strong> a<br />
limited period of time, this says Waiting if the access period has not started<br />
yet, Limiting if the user currently has access, and Expired if the user’s<br />
access period has ended; see page 93 <strong>for</strong> more about limited access.<br />
Limited Start Time: If this user has been set up to have access <strong>for</strong> a limited<br />
period of time, this shows the date and time that the user’s access begins.<br />
<strong>HandNet</strong> will not give the user access be<strong>for</strong>e this date/time. This is blank <strong>for</strong><br />
other users; see page 93 <strong>for</strong> more about limited access.<br />
Limited End Time: If this user has been set up to have access <strong>for</strong> a limited<br />
period of time, this shows the date and time that the user’s access ends.<br />
<strong>HandNet</strong> will not give the user access after this date/time. This is blank <strong>for</strong><br />
other users; see page 93 <strong>for</strong> more about limited access.<br />
Additional Custom Columns: If you created any custom user entries, those<br />
columns would be listed as well; see page 97 <strong>for</strong> more about adding custom<br />
entries.<br />
* * * * *<br />
73
Adding and Maintaining Users<br />
Adding Users Overview<br />
Be<strong>for</strong>e You Add<br />
Users<br />
Choosing How<br />
to Add the Users<br />
If you are going to limit access to specific time periods or specific readers, set<br />
up Time Zones (see page 61) and Access Profiles (see page 67) be<strong>for</strong>e you set<br />
your users up.<br />
If you have already set up users in a stand alone reader: You do not need to<br />
add users; you can upload user in<strong>for</strong>mation from the reader; see Getting User<br />
In<strong>for</strong>mation from a Reader on page 99.<br />
If you have been using one of our MS-DOS <strong>HandNet</strong> products (<strong>HandNet</strong><br />
or <strong>HandNet</strong> Plus): You do not need to add users; you can import them from<br />
<strong>HandNet</strong>(+); see page 98.<br />
If you only have one user to add, if you do not assign ID numbers<br />
sequentially, if you are adding users with different access profiles, if you<br />
want to fill in custom entries when adding the users, or if users choose<br />
their own ID numbers: Add a single new user; see page 76.<br />
If a user needs access without hand recognition: Add a single new user and<br />
choose the Special Enrollment option. Be<strong>for</strong>e you do this, read Adding a User<br />
Who Has Access Without Hand Recognition below.<br />
If you have many new users with the same access profile and you want<br />
automatically assigned ID numbers: Add multiple new users; see page 81.<br />
Adding a User<br />
Who Has Access<br />
Without Hand<br />
Recognition<br />
If a user has severe arthritis, missing fingers, or other hand de<strong>for</strong>mities that<br />
keep the user’s hand from being recognized, you can give the user access<br />
without hand recognition (if you choose this, the reader still asks the user<br />
to place a hand on the reader so it will not be apparent to others that hand<br />
recognition is not required, but the reader does not check the image of the hand;<br />
it gives access regardless of whose hand is placed there). Since bypassing<br />
hand recognition gives you reduced security, only use this as a last resort.<br />
Try these options first:<br />
If the user only has a problem with the right hand: Enroll the user using<br />
the left hand (the user will place the hand palm up on the reader).<br />
If the user has all of his/her fingers and is just having trouble with<br />
placing the hand consistently: On the <strong>Security</strong> screen in User<br />
Properties, check Override the reader’s reject threshold, and drag the<br />
pointer to the far right (the Less Sensitive side). This causes the reader<br />
to be more tolerant of what it considers a match <strong>for</strong> that user’s hand.<br />
If these options are not possible, or if you try them and they do not work, then<br />
you will have to set the user up so that hand recognition is not required. To do<br />
this, follow the steps below.<br />
1. If you have already added this user, open the User window, click the user<br />
once, press the DEL key (or pick Delete from the User menu), and confirm<br />
that you want to delete the user.<br />
2. Click the User menu and then click Add New…. This takes you to the first<br />
screen of the New User Wizard.<br />
74<br />
3. Check the Special Enrollment box. Since this option does give lower
<strong>HandNet</strong> <strong>for</strong> <strong>Windows</strong><br />
security, <strong>HandNet</strong> asks you to confirm that you want to do this; click Yes.<br />
4. Click the Next button.<br />
5. Complete the rest of the process just as you would <strong>for</strong> any other new user.<br />
6. Since the reader does not have to recognize this user’s hand, you do not<br />
need to enroll this user; once you click Finish, the process is done <strong>for</strong> this<br />
user.<br />
Allowing Users<br />
to be Added at<br />
the Reader<br />
<strong>HandNet</strong> is initially set up to only allow new users to be added in the program;<br />
you can enroll a user at a reader, but you cannot add a new user there. If you<br />
want to be able to add and enroll a new user at a reader without adding the user<br />
to <strong>HandNet</strong> first, do this:<br />
1. Click the View menu.<br />
2. Click Settings.<br />
3. Click the <strong>Security</strong> tab.<br />
4. Check the box by Do not delete unauthorized enrollments.<br />
5. Underneath this, indicate what access profile should be given to a user who<br />
is added at a reader (if you do not want the user to be able to access any<br />
readers until you change them in <strong>HandNet</strong>, choose Never).<br />
6. Click the OK button at the bottom of the box.<br />
Preventing<br />
Users from<br />
Being Added at<br />
Readers<br />
Follow the steps above to get to the <strong>Security</strong> tab and make sure that Do not<br />
delete unauthorized enrollments is NOT checked.<br />
* * * * *<br />
75
Adding and Maintaining Users<br />
Adding a Single New User<br />
Q<br />
U<br />
I<br />
C<br />
K<br />
S<br />
T<br />
E<br />
P<br />
S<br />
Adding a Single User<br />
1. Click the User menu and then click Add New.... This takes you to the<br />
first screen of the New User Wizard.<br />
2. Add a single new user is automatically selected, so click Next to<br />
continue.<br />
3. On the Name/ID screen, enter the name and the ID number you are<br />
assigning to that user, and then click Next to continue.<br />
4. On the <strong>Security</strong> screen, choose the access profile, authority level,<br />
and other security options. If you have set up custom user entries,<br />
click Next; otherwise click Finish.<br />
5. If you see the Custom entries screen, fill in the column on the right<br />
and then click Finish.<br />
6. Once you are done adding the user, you must enroll the user be<strong>for</strong>e<br />
the user will have access; see page 87.<br />
Beginning the<br />
Process<br />
To begin adding a new user, pick Add New... from the User menu.<br />
Special Enrollment: Check this box only if the user has severe hand<br />
de<strong>for</strong>mities that require you to give the user access without hand<br />
recognition. This box is disabled if you are adding multiple users; if you are<br />
enrolling a user without hand access, you must add a single user.<br />
Click Next to continue.<br />
76
<strong>HandNet</strong> <strong>for</strong> <strong>Windows</strong><br />
Name/ID Screen<br />
This is the second screen in the process of adding a single new user:<br />
Name: Enter the user’s name.<br />
If you want to sort the list of users by last name: Enter the last name<br />
first. For example, if the user’s name is Sam Gamgee, you would enter<br />
Gamgee, Sam.<br />
If you have two users with the same name: You must enter a unique name<br />
<strong>for</strong> each user. If two users have the same name, you might add a middle<br />
initial, or you might add a job description after each. For example, if<br />
you have two users named John Jones, you might enter something like<br />
Jones, John (engineer) and Jones, John (maintenance).<br />
ID Number: Each number must be unique (if you could give the same number<br />
to two users, the reader would not know which was trying to gain access).<br />
Longer numbers are slightly more secure, but four or five digits are<br />
generally adequate in context where user’s must enter the number. You<br />
may enter up to ten digits if you do not use a duress code, or up to nine<br />
digits if you do use a duress code. If you use a duress code, make sure<br />
that you do not create an ID that begins with that digit (see page 47 <strong>for</strong> more<br />
about duress codes). If you have set up an ID length on the Settings tab in<br />
the Reader Properties (see page 46), make sure that you do not create an<br />
ID that is longer than this.<br />
If you use Wiegand card readers: Enter the ID number that is stored on the<br />
card.<br />
Do not begin an ID with 0 (zero) if you are going to enroll the user with the<br />
command menus on the reader: <strong>HandNet</strong> lets you enroll a user by either<br />
picking Enroll from the Reader menu, or by using the Command menus<br />
on the reader (see page 88 <strong>for</strong> more about these options). If you are going<br />
to use the command menus on the reader, the ID Number should not<br />
begin with zero (0). While <strong>HandNet</strong> distinguishes between 5 and 0005, the<br />
process of adding a user from the reader command menu does not. This<br />
means that if you create a user with an ID of 0005 in <strong>HandNet</strong> and try to<br />
enroll that user with the command menus on the reader, when you type<br />
0005, the reader thinks you are enrolling user 5. This will not correspond<br />
with 0005 in <strong>HandNet</strong>. If you are going to use Enroll on the Reader menu,<br />
you can begin an ID with zero (0) (if you are never going to begin an ID<br />
with zero, this might be a good choice <strong>for</strong> a duress code if you use one).<br />
77
Adding and Maintaining Users<br />
<strong>Security</strong> Screen<br />
This screen controls what this user has access to and when.<br />
Select an access profile to control which readers the user can use at what<br />
times: Click this entry <strong>for</strong> a list of available access profiles. If this user can<br />
use all readers at all times, choose Always. If you do not want the user<br />
to be able to use any readers, choose Never. For other access, select<br />
the appropriate profile. You must set access profiles up be<strong>for</strong>e they are<br />
available here; see page 67 <strong>for</strong> more on setting up access profiles.<br />
Select an authority level to allow users to access reader commands:<br />
This determines what the user can do at the reader. Each higher level<br />
gives access to the lower levels as well. For example, a user with an<br />
authority level of four can also use the Level 1, 2 and 3 menus. Except<br />
<strong>for</strong> recalibrating the reader (part of Level 1), and enrolling a user if you<br />
have not purchased the upgrade to the full feature set, <strong>HandNet</strong> can<br />
control every setting in the reader, so there is generally no need to control<br />
settings through the reader menus.<br />
None: This lets the reader gain access through the reader, but not use<br />
the command menus in the reader to change the reader’s settings.<br />
This choice is appropriate <strong>for</strong> most users.<br />
(1) Service: This lets you recalibrate the reader and change the reader’s<br />
status display.<br />
(2) Setup: This lets you control reader setup issues including how the<br />
reader is connected to your computer network, what language the<br />
reader displays in, the date/time, etc.<br />
(3) Management: This lets you list users.<br />
(4) Enrollment: This lets you add or remove users.<br />
(5) <strong>Security</strong>: This lets you control the passwords <strong>for</strong> the reader menus,<br />
change time zones, enroll users who do not need hand access, etc.<br />
See the HandKey manual <strong>for</strong> more on directly changing settings through the<br />
reader.<br />
78
<strong>HandNet</strong> <strong>for</strong> <strong>Windows</strong><br />
Limited Access<br />
Enable limited access: This gives a user access <strong>for</strong> a specific date range. For<br />
example, suppose a contractor or temporary employee was going to be<br />
working in your building <strong>for</strong> a month. Or suppose an employee gave notice<br />
that s/he was leaving <strong>for</strong> a new job in two weeks. Once this period was<br />
over, you would not want these users to have access. Rather than having<br />
to remember to disable the user on the appropriate date, this option lets<br />
you set a start and end date/time so the user is automatically enabled and<br />
disabled at the appropriate points.<br />
To set up start and end date/times, check the box by this button and then<br />
click the Edit Access button (this button only works if you have checked<br />
the box). This takes you to the Edit Limited Access screen:<br />
To change either start or end date or time, click the corresponding entry<br />
and pick from the list that comes up.<br />
This option is disabled if you have not purchased the license upgrade to<br />
the full feature set of Version 2.0.<br />
This option is NOT <strong>for</strong> limiting access to specific readers or <strong>for</strong> specific<br />
times of the day; to control that, use the Access Profiles entry.<br />
Override the reader’s reject threshold (<strong>for</strong> users with special<br />
requirements): For users with a physical condition like arthritis that<br />
prevents them from placing their hands on the reader in exactly the same<br />
way each time, this option lets you control how exact the hand match must<br />
be <strong>for</strong> the reader to grant access.<br />
Normally you would not change this when adding the user. Instead, add<br />
and enroll the user, and then see if the user is having trouble gaining<br />
access. If a user is having trouble getting access consistently, go to the<br />
<strong>Security</strong> tab in the User Properties and change this entry there. You would<br />
check this box and then slide the pointer further to the right (the Less<br />
Sensitive side). If a user has a really severe hand condition, it is possible<br />
to give access without hand recognition, but because this offers reduced<br />
security, that should only be a last resort.<br />
79
Adding and Maintaining Users<br />
Custom Entries<br />
Screen<br />
You only see this screen if you have set up any custom user entries (see page<br />
97). The entries on this screen vary depending on what you have set up. For each<br />
entry on this screen, type the in<strong>for</strong>mation in the Value column.<br />
Click Finish when done.<br />
What to Do Next<br />
The next step is to enroll the user; see page 87.<br />
* * * * *<br />
80
<strong>HandNet</strong> <strong>for</strong> <strong>Windows</strong><br />
Adding a Group of Users at Once<br />
You would add a group of users at once if you have to add many new users<br />
with the same access profile and other security access options, and if you want<br />
<strong>HandNet</strong> to automatically assign sequential ID numbers (if each user needs a<br />
different access profile, if you need to assign non-sequential ID numbers, or if<br />
you want to fill in custom user entries while adding the users, add single users<br />
instead; see Adding a Single New User on page 76).<br />
Q<br />
U<br />
I<br />
C<br />
K<br />
S<br />
T<br />
E<br />
P<br />
S<br />
Adding Multiple Users<br />
1. Click the User menu and then click Add New.... This takes you to the<br />
first screen of the New User Wizard.<br />
2. Click Add multiple new users, and then click Next.<br />
3. On the screen that asks <strong>for</strong> the number of users and starting ID, enter<br />
the number of users to create, and the ID number <strong>for</strong> the first new user.<br />
Click Next to continue.<br />
4. On the <strong>Security</strong> screen, choose the access profile to assign to each<br />
of the new users. If needed, you can change the authority level and<br />
limited access. Do NOT change the user reject threshold. If you need to,<br />
you can later change this individually <strong>for</strong> a user who is having access<br />
problems. Click Next to continue.<br />
5. The next screen shows the progress in adding the users. Once the<br />
process is done, click Finish.<br />
6. You need to enroll the users be<strong>for</strong>e they have access. Typically, you will<br />
also rename the users since adding multiple users at once uses the ID<br />
number <strong>for</strong> the name.<br />
7. If you have set up custom user entries, you will also want to edit the<br />
Properties <strong>for</strong> each user, click the Custom tab, and fill the appropriate<br />
in<strong>for</strong>mation in there.<br />
Beginning the<br />
Process<br />
To begin adding a new user, pick Add New... from the User menu.<br />
Click the Radio button by Add Multiple Users, and then click the Next button.<br />
81
Adding and Maintaining Users<br />
Number of<br />
Users to Add<br />
and Starting ID<br />
After you choose to add multiple users at once on the first screen of the New<br />
User Wizard, you see this screen.<br />
Number of users to create: Enter the number of users you want to add.<br />
User ID to start with: Enter the starting user ID number. Use the number of<br />
digits that you would like <strong>for</strong> the final ID. For example, if you always want<br />
a five-digit ID number and you want to start with 1, enter 00001 rather<br />
than just 1. If you enter 00001, <strong>HandNet</strong> will use 00002 next, then 00003,<br />
and so on. If <strong>HandNet</strong> finds that a number is already used, if will skip that<br />
number and use the next available number. For example, if you enter 1000<br />
as the starting number and 1000 through 1020 are all used, <strong>HandNet</strong> will<br />
automatically skip these numbers and start at 1021. When the program<br />
adds the numbers at the end of the process, it lets you know if it had to<br />
skip any existing ID numbers.<br />
However, do not begin an ID with zero (0) if you are going to enroll<br />
the user with the command menus on the reader. <strong>HandNet</strong> lets you<br />
enroll a user by either picking Enroll from the Reader menu, or by using<br />
the Command menus on the reader. If you are going to use the Command<br />
menus on the reader, the ID number should not begin with zero (0). While<br />
<strong>HandNet</strong> distinguishes between 5 and 0005, the process of adding a user<br />
from the reader command menu does not. This means that if you create<br />
a user with an ID of 0005 in <strong>HandNet</strong> and try to enroll that user with the<br />
command menus on the reader, when you type 0005, the reader thinks you<br />
are enrolling User Five, and this will not correspond with 0005 in <strong>HandNet</strong>.<br />
If you are going to use Enroll on the Reader menu, you can begin an ID<br />
with zero (if you are never going to begin an ID with zero, this might be a<br />
good choice <strong>for</strong> a duress code if you use one; see page 47 <strong>for</strong> more about<br />
duress codes).<br />
82
<strong>HandNet</strong> <strong>for</strong> <strong>Windows</strong><br />
<strong>Security</strong> Options<br />
This screen controls what this user has access to and when.<br />
After you click Next on this screen, <strong>HandNet</strong> adds the new users.<br />
Select an access profile to control which readers the user can use at what<br />
times: Click this entry <strong>for</strong> a list of available access profiles. If these users<br />
can use all readers at all times, choose Always. If you do not want these<br />
users to be able to use any readers at this point, choose Never. For other<br />
access, select the appropriate profile. You must set access profiles up be<strong>for</strong>e<br />
they are available here; see page 67 <strong>for</strong> more about setting up access profiles.<br />
Select an authority level to allow users to access reader commands: This<br />
determines what the users can do at the reader. For most users, None is the<br />
appropriate choice.<br />
Each higher level gives access to the lower levels as well. For example,<br />
users with an authority level of four can also use the Level 1, 2 and 3 menus.<br />
Except <strong>for</strong> recalibrating the reader (part of Level 1), and enrolling a user if<br />
you have not purchased the upgrade to the full feature set, <strong>HandNet</strong> can<br />
control every setting in the reader, so there is generally no need to control<br />
settings through the control menus in the reader.<br />
None: This lets the reader gain access through the reader, but not use the<br />
command menus in the reader to change the reader’s settings. This<br />
choice is appropriate <strong>for</strong> most users.<br />
(1) Service: This lets you recalibrate the reader and change the reader’s<br />
status display.<br />
(2) Setup: This lets you control reader setup issues including how the<br />
reader is connected to your computer network, what language the<br />
reader displays in, the date/time, etc.<br />
(3) Management: This lets you list users.<br />
(4) Enrollment: This lets you add or remove users.<br />
(5) <strong>Security</strong>: This lets you control the passwords <strong>for</strong> the reader menus,<br />
change time zones, enroll users who do not need hand access, etc.<br />
See the HandKey manual <strong>for</strong> more on directly changing settings through the<br />
reader.<br />
83
Adding and Maintaining Users<br />
Limited Access<br />
Enable limited access: This gives a user access <strong>for</strong> a specific date range. For<br />
example, suppose a contractor or temporary employee was going to be<br />
working in your building <strong>for</strong> a month. Or suppose an employee gave notice<br />
that s/he was leaving <strong>for</strong> a new job in two weeks. Once this period was<br />
over, you would not want these users to have access. Rather than having<br />
to remember to disable the user on the appropriate date, this option lets<br />
you set a start and end date/time so the user is automatically enabled and<br />
disabled at the appropriate points.<br />
To set up start and end date/times, check the box by this button and then<br />
click the Edit Access button (this button only works if you have checked the<br />
box). This takes you to the Edit Limited Access screen:<br />
To change either start or end date or time, click the corresponding entry<br />
and pick from the list that comes up.<br />
This option is disabled if you have not purchased the license upgrade to<br />
the full feature set of Version 2.0.<br />
This option is NOT <strong>for</strong> limiting access to specific readers or <strong>for</strong> specific<br />
times of the day; to control that, use the Access Profiles entry.<br />
Override the reader’s reject threshold (<strong>for</strong> users with special<br />
requirements): Never change this option when adding multiple users at<br />
once. For users with a physical condition like arthritis that prevents them<br />
from placing their hands on the reader in exactly the same way each<br />
time, this option lets you control how exact the hand match must be <strong>for</strong><br />
the reader to grant access. Only change this <strong>for</strong> individual users who are<br />
having trouble gaining access, never <strong>for</strong> a whole group of users at once.<br />
If you later discover that a user is having trouble getting access<br />
consistently, go to the <strong>Security</strong> tab in the User Properties and change this<br />
entry there; see page 92. You would check this box and then slide the pointer<br />
further to the right (the Less Sensitive side). If a user has a really severe<br />
hand condition, it is possible to give access without hand recognition, but<br />
because this offers reduced security, that should only be a last resort; see<br />
Adding a User Who Has Access Without Hand Recognition on page 74 <strong>for</strong><br />
84
<strong>HandNet</strong> <strong>for</strong> <strong>Windows</strong><br />
Progress Bar<br />
This is the final screen in the process of adding new users. If you are adding a<br />
large number of users, it gives you an idea of how much longer the process will<br />
take.<br />
If <strong>HandNet</strong> tries to add ID numbers that are already used, you see messages<br />
about those numbers being skipped (this will not changed the number of new<br />
users that are added).<br />
What to Do Next<br />
After you click Finish to leave the screen above, you need to enroll the users<br />
be<strong>for</strong>e they have access; see page 87. You will typically also want to rename the<br />
users since this process uses the ID number <strong>for</strong> the name; page 90. And if you<br />
created custom user entries, you will want to go to the Custom tab in User<br />
Properties to fill these entries in <strong>for</strong> each user; see page 94.<br />
* * * * *<br />
85
Adding and Maintaining Users<br />
Teaching Users How to Place Their Hands on Readers<br />
Correct Hand<br />
Placement<br />
Because the reader is looking at the shape of the hand, it is important that you<br />
place your hand on the reader the same way every time. When you put your<br />
hand on the reader, do this:<br />
• If you are wearing a ring, make sure the stone is up in its normal position.<br />
• Slide your hand <strong>for</strong>ward onto the platen (moving <strong>for</strong>ward like a plane would<br />
land at the airport; not straight down like a helicopter would land). Place your<br />
hand gently and com<strong>for</strong>tably; there is no need to apply pressure.<br />
• Keep your hand flat. You should feel the platen with your palm and with the<br />
bottom of your fingers.<br />
• Once you hand is flat on the platen, gently close your fingers so they touch<br />
against the finger pins. Again, there is no need to apply pressure or press<br />
hard. Watch the lights on the hand diagram on the top of the reader; if a light<br />
stays on, that finger is not making proper contact with the pin.<br />
Left Hand<br />
Placement<br />
If you have been enrolled with your left hand, follow the instructions above, but<br />
put your left hand palm up on the reader. The back of your hand should be as<br />
flat as possible against the platen.<br />
* * * * *<br />
86
<strong>HandNet</strong> <strong>for</strong> <strong>Windows</strong><br />
Enrolling Users<br />
Be<strong>for</strong>e a user can have access, you must take the user to a reader and have the<br />
reader create an image or template of the user’s hand. If you have purchased<br />
the upgrade to the full feature set, you can start this process using Enroll on the<br />
Reader menu. If you have not purchased this upgrade, you must use the reader<br />
command menus to start the enrollment process.<br />
Using the Enroll<br />
Option on the<br />
Reader Menu<br />
Be<strong>for</strong>e you enroll a user, add the user in <strong>HandNet</strong>; see page 76. You should also<br />
teach the user about correct hand placement; see page 86.<br />
1. If the Network window is not open, press CTRL-N to open it.<br />
2. In the Network window, click the reader to enroll the user at.<br />
3. Click the Reader menu, and click<br />
Enroll. You see a screen like this:<br />
4. If the user to enroll is not shown, click<br />
the entry and pick the user’s name.<br />
Then click Enroll now.<br />
5. The reader asks the user to place and remove his/her hand three times (if it<br />
asks <strong>for</strong> the hand more than three times, the user is not placing his/her hand<br />
consistently; go over the instructions <strong>for</strong> correct hand placement).<br />
Unless you get a message indicating that there was a problem, the user is now<br />
enrolled.<br />
<strong>Manual</strong>ly<br />
Enrolling<br />
Users Using<br />
the Reader<br />
Command<br />
Menus<br />
Be<strong>for</strong>e you enroll a user, add the user in <strong>HandNet</strong>; see page 76. You should also<br />
teach the user about correct hand placement on page 86.<br />
1. Check the list of users to make sure you have an authority level of four or<br />
higher. If you have an authority level of none, one, two, or three, you cannot<br />
do this (to change your authority level, double-click your name on the list of<br />
users, click the <strong>Security</strong> tab, click the Authority Level entry, and select the<br />
appropriate level).<br />
2. Go to the reader to be recalibrated, and enter command mode on the<br />
reader:<br />
If you have a HandKey II or HandKey CR reader: Press CLEAR, and<br />
then press ENTER.<br />
If you have an ID3D HandKey reader: Press # AND * (you can press<br />
them at the same time, or one after the other).<br />
The display on the reader should look like this:<br />
READY<br />
* :<br />
87
Adding and Maintaining Users<br />
3. Type your user ID number (the same one you enter to get access through<br />
the reader), and press ENTER or #. The reader asks you to place your<br />
hand. Once it recognizes your hand, this display looks like this:<br />
ENTER PASSWORD<br />
4. Type 4 and press ENTER or # (this is the standard password <strong>for</strong> the<br />
Enrollment menu in the reader; if you have changed this on the Passwords<br />
screen in the Reader Properties, enter the password you have set up).<br />
If you have a HandKey II or HandKey CR reader: The display should<br />
now look like this:<br />
ADD USER<br />
* NO YES #<br />
If you have an ID3D HandKey reader: The display should now look like<br />
this:<br />
ENROLL USER<br />
* NO YES #<br />
If the reader shows the READY screen again instead of this screen, then<br />
either you placed your hand improperly or you do not have the rights to do<br />
this; carefully check step one again.<br />
5. Press the YES / # button. This display should now look like this:<br />
ID?<br />
:<br />
6. Type the ID number of the user to enroll and press ENTER or YES / #. The<br />
display should now look like this:<br />
** PLACE HAND **<br />
1/3<br />
7. Have the user place his/her hand on the reader. The reader will ask the user<br />
to remove the hand and place it again. The reader should ask the user to<br />
place his/her hand three times; if it asks <strong>for</strong> the hand more than three times,<br />
the user is not placing his/her hand consistently; go over the instructions <strong>for</strong><br />
correct hand placement.<br />
Once the user has correctly placed the hand three times, the reader asks<br />
<strong>for</strong> the time zone:<br />
ENTER TIME ZONE<br />
(0)?:<br />
88
<strong>HandNet</strong> <strong>for</strong> <strong>Windows</strong><br />
8. When the user has access to this and other readers is controlled by the<br />
access profile you have assigned in the user’s properties, so just press<br />
ENTER or YES / #.<br />
9. The reader briefly flashes the message User Enrolled and then returns<br />
you to the Add User or Enroll User display. Enroll another user if needed,<br />
or press the CLEAR button to leave the Enrollment menu and return to the<br />
reader to its normal display.<br />
* * * * *<br />
89
Adding and Maintaining Users<br />
Changing Users<br />
Overview<br />
Q<br />
U<br />
I<br />
C<br />
K<br />
S<br />
T<br />
E<br />
P<br />
S<br />
Changing Users<br />
1. If the user window is not shown, press CTRL-U or pick Users from the<br />
View menu.<br />
2. Double-click the user to change in<strong>for</strong>mation. This takes you to the<br />
General tab in the User Properties (you can also click the user once<br />
and then pick Properties from the User menu).<br />
3. Click the tab that has the in<strong>for</strong>mation you want to change:<br />
To change the user’s name or ID: this is on the General tab.<br />
To change the users access level, authority, limited access, or the<br />
reader’s sensitivity: Click the <strong>Security</strong> tab.<br />
To change Custom entries: Click the Custom tab.<br />
4. Change in<strong>for</strong>mation as needed ant then click OK.<br />
Renaming Users<br />
1. If the user window is not shown, press CTRL-U or pick Users from the View<br />
menu.<br />
2. Double-click the user to rename. This takes you to User Properties.<br />
3. Type the new name, and then press ENTER or click OK.<br />
Alternate<br />
Methods<br />
User Properties,<br />
General<br />
Right-click the user’s name and pick Rename from the menu that pops up; click<br />
the user once and pick Rename from the View menu; or click the user once,<br />
pause <strong>for</strong> long enough so the computer will not think you are double-clicking,<br />
and then click directly on the user’s name.<br />
The General tab in User Properties lets you change the user’s name or ID. It<br />
also shows when the user last accessed a reader.<br />
Name: Enter the user’s name.<br />
If you want to sort the list of users by last name: Enter the last name<br />
first. For example, if the user’s name is Sam Gamgee, you would enter<br />
Gamgee, Sam.<br />
90
<strong>HandNet</strong> <strong>for</strong> <strong>Windows</strong><br />
If you have two users with the same name: You must enter a unique name<br />
<strong>for</strong> each user. If two users have the same name, you might add a middle<br />
initial, or you might add a job description after each. For example, if<br />
you have two users named John Jones, you might enter something like<br />
Jones, John (engineer) and Jones, John (maintenance).<br />
ID Number: If you change a user’s ID, be sure to let the user know. The user will<br />
not be able to gain access through any reader without knowing the correct<br />
ID.<br />
Each number must be unique (if you could give the same number to two<br />
users, the reader would not know which was trying to gain access). Longer<br />
numbers are slightly more secure, but four or five digits are generally<br />
adequate in context where user’s must enter the number. You may enter up to<br />
ten digits if you do not use a duress code, or up to nine digits if you do use a<br />
duress code. If you use a duress code, make sure that you do not create an<br />
ID that begins with that digit; see page 47 <strong>for</strong> more about duress codes. If you<br />
have set up an ID length on the Settings tab in the Reader Properties, make<br />
sure that you do not create an ID that is longer than this; see page 47 <strong>for</strong> more<br />
about ID length.<br />
If you use Wiegand card readers: Enter the ID number stored on the card.<br />
Do not begin an ID with zero (0) if you are going to enroll the user with<br />
the command menus on the reader: <strong>HandNet</strong> lets you enroll a user by<br />
either picking Enroll from the Reader menu, or by using the command<br />
menus on the reader. If you are going to use the command menus on<br />
the reader, the ID number should not begin with zero (0). While <strong>HandNet</strong><br />
distinguishes between 5 and 0005, the process of adding a user from<br />
the reader does not. This means that if you create a user with an ID of<br />
0005 in <strong>HandNet</strong> and try to enroll that user with the command menus on<br />
the reader, when you type 0005, the reader thinks you are enrolling user<br />
5; this will not correspond with 0005 in <strong>HandNet</strong>. If you are going to use<br />
Enroll on the Reader menu, you can begin an ID with zero (if you are<br />
never going to begin an ID with zero, this might be a good choice <strong>for</strong> a<br />
duress code if you use one).<br />
91
Adding and Maintaining Users<br />
User Properties,<br />
<strong>Security</strong><br />
The <strong>Security</strong> tab controls what this user has access to and when.<br />
Select an access profile to control which readers the user can use<br />
at what times: Click this entry <strong>for</strong> a list of available access profiles. If<br />
this user can use all readers at all times, choose Always. If you do not<br />
want the user to be able to use any readers at this point, choose Never.<br />
For other access, select the appropriate profile. You must set access<br />
profiles up be<strong>for</strong>e they are available here.<br />
Select an authority level to allow users to access reader commands:<br />
This determines what the user can do at the reader. For most users,<br />
None is the appropriate choice.<br />
Each higher level gives access to the lower levels as well. For example,<br />
a user with an authority level of four can also use the Level one, two<br />
and three menus. Except <strong>for</strong> recalibrating the reader (part of level 1),<br />
and enrolling a user if you have not purchased the upgrade to the full<br />
feature set, <strong>HandNet</strong> can control every setting in the reader, so there is<br />
generally no need to control settings through the reader menus.<br />
None: This lets the reader gain access through the reader, but not use<br />
the command menus in the reader to change the reader’s settings.<br />
This choice is appropriate <strong>for</strong> most users.<br />
(1) Service: This lets you recalibrate the reader and change the<br />
reader’s status display.<br />
(2) Setup: This lets you control reader setup issues including how the<br />
reader is connected to your computer network, what language the<br />
reader displays in, the date/time, etc.<br />
(3) Management: This lets you list users.<br />
(4) Enrollment: This lets you add or remove users.<br />
(5) <strong>Security</strong>: This lets you control the passwords <strong>for</strong> the reader menus,<br />
change time zones, enroll users who do not need hand access, etc.<br />
See the HandKey manual <strong>for</strong> more on directly changing settings through the<br />
reader.<br />
92
<strong>HandNet</strong> <strong>for</strong> <strong>Windows</strong><br />
Limited Access<br />
Enable limited access: This gives a user access <strong>for</strong> a specific date range.<br />
For example, suppose a contractor or temporary employee is going to<br />
be working in your building <strong>for</strong> a month. Or suppose an employee gives<br />
notice that s/he is leaving <strong>for</strong> a new job in two weeks. Once this period is<br />
over, you would not want these users to have access. Rather than having<br />
to remember to disable the user on the appropriate date, this option lets<br />
you set a start and end date/time so the user is automatically enabled and<br />
disabled at the appropriate points.<br />
To set up start and end date/times, check the box by this button and then<br />
click the Edit Access button (this button only works if you have checked<br />
the box). This takes you to the Edit Limited Access screen:<br />
To change either start or end date or time, click the corresponding entry<br />
and pick from the list that comes up.<br />
This option is disabled if you have not purchased the license upgrade to<br />
the full feature set of Version 2.0.<br />
This option is NOT <strong>for</strong> limiting access to specific readers or <strong>for</strong> specific<br />
times of the day. To control that, use the Access Profiles entry.<br />
Override the reader’s reject threshold (<strong>for</strong> users with special<br />
requirements): For users with a physical condition like arthritis that<br />
prevents them from placing their hands on the reader in exactly the same<br />
way each time, this option lets you control how exact the hand match must<br />
be <strong>for</strong> the reader to grant access.<br />
If a user is having trouble getting access consistently, check this box and<br />
then slide the pointer further to the right (the Less Sensitive side). If a user<br />
has a really severe hand condition, it is possible to give access without<br />
hand recognition, but because this offers reduced security, that should<br />
only be a last resort.<br />
93
Adding and Maintaining Users<br />
User Properties,<br />
Custom<br />
You only see entries on the Custom tab if you have set up custom user entries<br />
(see page 97 <strong>for</strong> more on creating custom user entries). The entries on this<br />
screen vary depending on what you have set up; the entries on your screen will<br />
probably be completely different from the examples show below.<br />
To change a value, click the item in the Value column and then enter the correct<br />
value.<br />
When You Are<br />
Done<br />
When you are done changing User Properties, click the OK button at the bottom<br />
of the screen.<br />
* * * * *<br />
94
<strong>HandNet</strong> <strong>for</strong> <strong>Windows</strong><br />
Changing Access <strong>for</strong> Many Users at Once<br />
Import TZ Option<br />
Caution<br />
File Format<br />
Import TZ on the File menu lets you change the access profile to Always or<br />
Never <strong>for</strong> many users based on in<strong>for</strong>mation in a text file (this file would be<br />
created with some other program).<br />
If you use this option, be aware that there are security risks involved: if you<br />
mistype a number in the file, you could easily give full access to a different user<br />
than you intended. And unlike most other changes in <strong>HandNet</strong>, the fact that this<br />
option is used and the fact that a user’s access is changed is NOT reflected in<br />
the activity log, so you will not have any record of the change. In most contexts,<br />
it is more appropriate to change user access through the <strong>Security</strong> tab in User<br />
Properties; see page 92.<br />
Each line of the file would list a user ID number followed by a comma, and then<br />
either 0 (zero) to set that user’s access profile to Always, or sixty-one, to set that<br />
user’s profile to Never (currently, you cannot use the file to switch to any other<br />
profile). For example, suppose your text file looked like this:<br />
1001, 0<br />
1002, 0<br />
1003, 61<br />
21345, 0<br />
43567, 61<br />
If you import this file, <strong>HandNet</strong> would set the access profile to Always <strong>for</strong> users<br />
with the IDs of 1001, 1002, and 21345, and it would set the profile to Never <strong>for</strong><br />
users with IDs 1003 and 43567. It would not change the access profiles <strong>for</strong> any<br />
other users. If <strong>HandNet</strong> could not find a user with the corresponding ID number,<br />
or if you have something other than zero or sixty-one after the comma, <strong>HandNet</strong><br />
would skip that line. It would not give you any message or tell you the line was<br />
skipped. If you have any lines that did not match the <strong>for</strong>mat above (<strong>for</strong> example,<br />
if you do not have the comma between the ID and the zero or sixty-one),<br />
<strong>HandNet</strong> would give a message at the end of the process that tells you how<br />
many bad records are ignored. If other lines are in the correct <strong>for</strong>mat, <strong>HandNet</strong><br />
would still process them successfully.<br />
You do not see any message or progress bar during the import process. If you<br />
are importing many records, you could have some delay where it looks like<br />
nothing is happening. For example, on a 166MHz processor, importing 1,000<br />
records takes slightly over thirty seconds; you would not see any activity while<br />
this is happening.<br />
* * * * *<br />
95
Adding and Maintaining Users<br />
User Database Properties<br />
What<br />
In<strong>for</strong>mation Is<br />
Shown<br />
This screen shows general in<strong>for</strong>mation about the whole user database,<br />
including the date it is created, the Version number, the number of enrolled<br />
users and number of non-enrolled users, and the total number of users in the<br />
database. You do not typically need this in<strong>for</strong>mation during normal use of the<br />
program. However, if you want to add or change custom user entries, you would<br />
come to this screen and then click the Custom tab.<br />
You get to this screen by picking DB Properties from the User menu.<br />
* * * * *<br />
96
<strong>HandNet</strong> <strong>for</strong> <strong>Windows</strong><br />
Adding Custom User Entries<br />
To collect additional in<strong>for</strong>mation about users in <strong>HandNet</strong>, you can add additional<br />
custom entries. <strong>HandNet</strong> then asks <strong>for</strong> this in<strong>for</strong>mation on the Custom screen<br />
of New User Wizard (see page 80) and the Custom tab in the User Properties<br />
(page 94).<br />
What you might want to collect could vary widely depending on how you<br />
are using <strong>HandNet</strong>: emergency phone numbers, employment start dates,<br />
department, pager number. You can add as many entries as you need.<br />
The in<strong>for</strong>mation that you add in custom entries is only available on the screen,<br />
either in User Properties or on the list of users (available by picking Users from<br />
the View menu). Currently, <strong>HandNet</strong> does not include custom user in<strong>for</strong>mation<br />
on any reports.<br />
Getting to the<br />
List of Custom<br />
Entries<br />
1. Click the User menu and then click DB<br />
Properties.<br />
2. Click the Custom tab. You will see<br />
a screen like this, but with different<br />
entries.<br />
Adding a New Entry<br />
To add a new custom entry, click the Add button. You see this screen:<br />
Type the name of the field or entry to add and press<br />
ENTER or click OK. Make sure that you enter the<br />
name of the entry correctly; once you continue, you<br />
cannot change the name.<br />
Deleting a<br />
Custom Entry<br />
Changing the<br />
Order of the<br />
Entries<br />
Click the entry in the list and click Delete. Be sure<br />
that you are deleting the correct item; the program<br />
will not ask you to confirm the deletion, and once<br />
you delete a custom entry, all in<strong>for</strong>mation that you have entered <strong>for</strong> users in that<br />
entry is gone. For example, suppose you create an Emergency Phone Number<br />
entry and entered phone numbers <strong>for</strong> all of your users. If you delete emergency<br />
phone numbers here, all of the phone numbers that you enter would be gone<br />
and there would be no way to get them back unless you make a backup of your<br />
<strong>HandNet</strong> in<strong>for</strong>mation.<br />
On the Custom screen in the User Properties, the entries in the same order as<br />
they are listed here. To change the order of the entries, click the entry to move<br />
and then click the up or down arrows next to the words Move field.<br />
* * * * *<br />
97
Adding and Maintaining Users<br />
Converting Users from MS-DOS <strong>HandNet</strong> or <strong>HandNet</strong>+<br />
If you have been using one of our MS-DOS programs (either <strong>HandNet</strong> or<br />
<strong>HandNet</strong>+), Convert <strong>HandNet</strong>+... on the File menu lets you import your users so<br />
you do not have to enter and enroll them again. This option brings in each user’s<br />
name, ID number, authority level, and reject threshold.<br />
If you have been using an older Version of <strong>HandNet</strong> <strong>for</strong> <strong>Windows</strong>, you do not<br />
need to do anything to convert that in<strong>for</strong>mation.<br />
To Convert<br />
<strong>HandNet</strong> Plus<br />
Users<br />
1. If you have been using <strong>HandNet</strong> rather than <strong>HandNet</strong> Plus, follow the steps<br />
below to convert your user in<strong>for</strong>mation from <strong>HandNet</strong> to <strong>HandNet</strong> Plus<br />
<strong>for</strong>mat.<br />
2. Pick Convert <strong>HandNet</strong>+ from the File menu.<br />
3. If you have installed <strong>HandNet</strong>+ somewhere other than in C:\HNET, click the<br />
Browse button and go to the directory where <strong>HandNet</strong>+ is installed. Then<br />
click the Open button.<br />
4. Click the Convert button. The <strong>HandNet</strong>+ database is converted to <strong>HandNet</strong><br />
<strong>for</strong> <strong>Windows</strong> <strong>for</strong>mat.<br />
5. This con Version does not bring in the access profiles <strong>for</strong> the users, so when<br />
this is done you must assign an access profile to each user on the <strong>Security</strong><br />
tab in User Properties.<br />
To Convert<br />
MS-DOS<br />
<strong>HandNet</strong> Users<br />
If your DOS Version of <strong>HandNet</strong> is in the standard /HNETdirectory: Press<br />
F1 while in <strong>HandNet</strong> to pop up the help. In the index, type convert and open<br />
the topic on converting <strong>HandNet</strong>+ in<strong>for</strong>mation. In this topic there is a button<br />
that automatically does this process <strong>for</strong> you.<br />
If your DOS Version of <strong>HandNet</strong> is NOT in the standard /HNET directory:<br />
1. Copy the convert.exe file from the <strong>HandNet</strong> <strong>for</strong> <strong>Windows</strong> directory to<br />
the directory the MS-DOS Version of <strong>HandNet</strong> is located. The standard<br />
location <strong>for</strong> <strong>HandNet</strong> <strong>for</strong> <strong>Windows</strong> is C:\Program Files\Schlage Biometrics,<br />
Inc.\<strong>HandNet</strong> <strong>for</strong> <strong>Windows</strong>. For example, to copy the convert file from this<br />
directory to c:\hnet, you would type:<br />
copy c:\progra~1\recogn~1\handne~1\convert.exe c:\hnet\<br />
2. Switch to the directory the MS-DOS Version of <strong>HandNet</strong> is in. For<br />
example, to switch to the \hnet directory, you would type cd\hnet and<br />
press ENTER.<br />
3. Make a backup copy of the file that contains your user in<strong>for</strong>mation. This<br />
file is called id_dbase.dat. For example, you might type:<br />
copy id_dbase.dat id_dabase.bak<br />
98<br />
4. Type convert and press ENTER. This should convert the in<strong>for</strong>mation to<br />
<strong>HandNet</strong> Plus <strong>for</strong>mat. Once you have done this, you are ready to import<br />
the in<strong>for</strong>mation into <strong>HandNet</strong> <strong>for</strong> <strong>Windows</strong> using the steps described<br />
above.<br />
* * * * *
<strong>HandNet</strong> <strong>for</strong> <strong>Windows</strong><br />
Importing and Exporting Users<br />
Getting User<br />
In<strong>for</strong>mation from<br />
a Reader<br />
If you have already set up users in a reader that you are connecting to <strong>HandNet</strong>,<br />
you do not need to recreate those users. You can get user in<strong>for</strong>mation from the<br />
reader by doing this:<br />
1. Pick Network from the View menu (or type CTRL-N).<br />
2. On the list of readers in the right pane of the Network window, select the<br />
reader(s) to get user in<strong>for</strong>mation from.<br />
3. Click the Reader menu, click Upload, and click Users.<br />
4. The program asks you to confirm that you want to upload users from the<br />
reader; click Yes to continue.<br />
Importing<br />
Users from<br />
Another Copy of<br />
<strong>HandNet</strong><br />
Setting Up Import<br />
Settings First<br />
Importing Users<br />
From Another<br />
Computer<br />
You only need to import users if you have readers connected to several different<br />
computers (each with its own copy of <strong>HandNet</strong>) and if users added to one<br />
system need to be available on the others. If all of your readers are connected<br />
to a single copy of <strong>HandNet</strong>, you do not need this feature.<br />
The export feature is only available if you have purchased the upgrade to the full<br />
feature set of Version 2.0.<br />
Make sure that you select the correct choices <strong>for</strong> what to import on the User<br />
Import/Export tab in System Settings be<strong>for</strong>e you try to import; see page 28. When<br />
<strong>HandNet</strong> imports, it empties the Import file, discarding those user records that<br />
do not meet the conditions you have checked there.<br />
1. On the computer where you exported users, go to the <strong>HandNet</strong><br />
directory and copy the file export.mdb to a floppy disk (you could also<br />
copy this file to a network drive, attach it to an e-mail, etc.).<br />
2. Rename the file on the disk (or in the new location) to import.mdb.<br />
3. Put this import.mdb file into the <strong>HandNet</strong> directory on the computer<br />
where you want to import users.<br />
4. If you do not have that copy of <strong>HandNet</strong> set up to import automatically,<br />
pick Import Users from the File menu (if you have the Enable box under<br />
Auto Import checked on the User Import/Export tab in System Settings,<br />
<strong>HandNet</strong> starts importing as soon as it finds the import.mdb file in the<br />
directory; see page 28).<br />
The activity window lists each user that is added, deleted or changed.<br />
99
Adding and Maintaining Users<br />
Exporting Users<br />
to Another Copy<br />
of <strong>HandNet</strong><br />
You only need to export users if you have readers connected to several different<br />
computers (each with its own copy of <strong>HandNet</strong>) and if users added to one<br />
system need to be available on the others. If all of your readers are connected<br />
to a single copy of <strong>HandNet</strong>, you do not need this feature.<br />
The export feature is only available if you have purchased the upgrade to the full<br />
feature set of Version 2.0.<br />
Automatically<br />
Exporting Users<br />
<strong>Manual</strong>ly Exporting<br />
Users<br />
<strong>HandNet</strong> can automatically export users when you create, enroll, change or<br />
delete users. When <strong>HandNet</strong> exports users is controlled by the items in the<br />
Export column on the User Import/Export tab in System Settings; see page 28.<br />
1. Go to the Users window.<br />
2. Select the users to export. To select multiple users that are together on the<br />
list, click the first user, hold the SHIFT key down, and click the last user that<br />
you want to select. To select multiple users that are not together on the list,<br />
click the first user to select, hold the CTRL key down, and click each other<br />
user that you want to select.<br />
3. Right-click (this brings up a menu).<br />
4. On the menu, point to Export, and then pick Selected (or pick All to export<br />
every user in the list whether selected or not).<br />
You will see a message with a progress bar that indicates that the users are<br />
being exported (if you only selected a few users, this may vanish almost<br />
instantly). Once this box disappears, the export process is done.<br />
To import these users on the other computer, see the instructions <strong>for</strong> Importing<br />
Users from Another Copy of <strong>HandNet</strong> on page 99.<br />
* * * * *<br />
100
Monitoring Ongoing Activity<br />
Activity Window<br />
The Activity window lists everything that happens at any reader connected to<br />
<strong>HandNet</strong>, and any change made in the <strong>HandNet</strong> program. To open this window,<br />
pick Activity from the View menu, or press CTRL-A.<br />
Rearranging<br />
or Resizing<br />
Columns in the<br />
Activity Window<br />
Only the first two tabs at the bottom of this screen (Activity and Alarms) are<br />
always there. The others are merely examples of custom activity views that you<br />
can create as needed; see Creating Custom Activity Views on page 104.<br />
To move any column, click on the column heading and hold the mouse down.<br />
With the mouse held down, drag the column heading to the left or right.<br />
Getting More<br />
Detail about an<br />
Activity in the<br />
Activity Window<br />
When you double-click on an activity in the<br />
Activity window, you get a screen like this that<br />
tells more about that activity.<br />
Date/Time: This shows the date and time<br />
when the activity occurred. The date is<br />
listed in month/day/ year order, and the<br />
time lists hours/minutes/seconds.<br />
Site: If this activity happened at a reader, this<br />
shows the name of the site the reader is<br />
associated with.<br />
Reader: If this activity happened at a reader,<br />
this shows the reader’s name.<br />
Address: If this activity happened at a reader, this shows the reader’s address;<br />
this address should correspond with the name of the reader listed above.<br />
If this activity occurred in the <strong>HandNet</strong> program, this says 255.<br />
Message Explanation: This shows some additional explanation of the<br />
message. For more explanation, see the complete list of activity<br />
messages starting on Activity Messages on page 116.<br />
101
Monitoring Ongoing Activity<br />
Type: Each message falls into one of ten categories. When you are creating an<br />
activity filter or custom activity report, you can limit your report or activity<br />
view to specific types of messages; see Message Types on page 111 <strong>for</strong><br />
more detail.<br />
Message: This shows the same message that you saw on the list in the Activity<br />
window.<br />
User/Info: If this message is associated with a particular user, this shows the<br />
user’s name and ID number.<br />
Data: This shows technical detail about the message that is not relevant to your<br />
use of the program. This is occasionally useful to support in debugging a<br />
problem.<br />
Acknowledged [checkbox]: This shows whether this message has been<br />
acknowledged yet. You cannot uncheck this box once it is marked.<br />
You also can check the box directly; you must use one of the three<br />
Acknowledge... buttons below.<br />
Buttons on the<br />
Activity Details<br />
Screen<br />
Acknowledge This Message: This marks the message as<br />
acknowledged. After the message on the activity or alarm list,<br />
you will see :ACK followed by the name of the operator who<br />
acknowledged the message and the date/time when it was<br />
acknowledged. If this is an alarm, this also shuts the alarm off.<br />
Acknowledge & Show Next: This acknowledges the current message<br />
and shows the next message. By next, we mean more recent<br />
in time; that is, the message above the current message on the<br />
activity list.<br />
Acknowledge All Alarms: This button is disabled unless there is an alarm<br />
that has not been acknowledged yet. You might use this button if you see<br />
several related alarms on the list and you want to acknowledge them all<br />
at once.<br />
More Info: This brings up the online help.<br />
Next: This shows the message that occurred more recently in time, that is, the<br />
message directly be<strong>for</strong>e this on the activity list.<br />
Previous: This shows the message that occurred be<strong>for</strong>e this message in time,<br />
that is, the message directly after it on the activity list.<br />
* * * * *<br />
102
<strong>HandNet</strong> <strong>for</strong> <strong>Windows</strong><br />
Getting to and Acknowledging Alarms<br />
Getting to the<br />
Alarms List<br />
Acknowledging<br />
an Alarm<br />
Alarms are listed with the rest of the activity in the Activity window, but we have<br />
also provided a separate view with just the alarms. To see this view, click the<br />
Alarms tab at the bottom of the Activity window.<br />
If an alarm is triggered in <strong>HandNet</strong>, do this to acknowledge it and turn it off.<br />
1. If the Activity window is not shown, press CTRL-A or pick Activity from the<br />
View menu.<br />
2. Double-click the alarm message with the bell icon next to it (you can see it<br />
both in the regular activity view or by clicking the Alarm tab at the bottom of<br />
the window).<br />
3. Click one of the Acknowledge... buttons at the bottom left of the window<br />
(you cannot just click the checkbox by the word acknowledged; you must<br />
click one of the buttons). After the message on the Activity or Alarm list, you<br />
will now see :ACK followed by the name of the operator who acknowledged<br />
the message and the date/time it was acknowledged.<br />
4. Take whatever action is appropriate in response to the alarm.<br />
What Situations<br />
Cause Alarms<br />
Which situations trigger alarms depends on which items are checked on the<br />
Alarms tab in the System Settings; see page 25.<br />
* * * * *<br />
103
Monitoring Ongoing Activity<br />
Creating and Printing Custom Activity Views<br />
Creating a<br />
Custom Activity<br />
View<br />
The main Activity window lists all activity that occurs: every access from every<br />
reader, every failed access, every user addition and enrollment, every alarm,<br />
and so on. Sometimes its useful to see less than this. For example, if you<br />
wanted to identify users who were having access problems, you might want to<br />
see only the Identity Unknown and Access Denied messages (the messages<br />
that can occur when someone enters a valid ID but then does not get a match<br />
on the hand). Or if you want to identify who has come in the building, you<br />
might want to see only Identity Verified messages and only <strong>for</strong> the readers that<br />
controlled entrances to the building.<br />
You can create (and print reports on) custom views <strong>for</strong> these or any other<br />
subsets of activity, limiting the view to specific messages, dates, times, users,<br />
and/or readers. To create a custom activity view:<br />
1. Click the View menu, and click<br />
Activity Filter. You see a list of any<br />
custom activity views if you have<br />
created any yet. This list looks like<br />
this, but the filters listed will be<br />
different.<br />
2. Click the Add button to create<br />
a new filter (that is, a set of<br />
conditions that will filter out only<br />
the in<strong>for</strong>mation you want to see). This takes you to the first Activity Filter<br />
screen (to change a filter you have already created, click the filter and then<br />
click Edit).<br />
3. Give the filter a name, associate an icon if you wish, and then go to each<br />
tab where you want to include something less than all of the activity.<br />
Each tab is initially set up to include all in<strong>for</strong>mation; go to those where you<br />
want to limit or filter out particular in<strong>for</strong>mation. For example, if you only want<br />
activity at certain readers, you would go to the Readers tab. If you only want<br />
certain messages, go to the Messages tab. The options on these tabs are<br />
explained, starting on page 107.<br />
4. When you have entered all of the conditions needed, click the OK button at<br />
the bottom of the window.<br />
To start this process, you could also right click on the bar at the bottom of the<br />
Activity window, and then pick Add New Filter....<br />
Removing a<br />
Custom Activity<br />
View<br />
This does not remove any activity from <strong>HandNet</strong>; it only removes the custom<br />
view of the activity.<br />
1. Click the View menu, and click Activity Filter. You will see a list of any<br />
custom activity views you have created.<br />
2. Click the view or filter to remove and click Delete.<br />
104
<strong>HandNet</strong> <strong>for</strong> <strong>Windows</strong><br />
Printing an<br />
Activity Report<br />
Based on an<br />
Activity Window<br />
Creating a<br />
Custom Activity<br />
Report from the<br />
Reports Menu<br />
1. Right-click on the bottom bar of the Activity window (where the Activity and<br />
Alarms tabs are).<br />
2. Pick Generate Report.<br />
3. In the report window that comes up, click the printer icon in the header; see<br />
Printing or Viewing Reports on page 127 <strong>for</strong> more detail.<br />
If you have not already created a custom activity view, or if you need to run the<br />
report on archived activity, then follow these steps to design the report.<br />
1. From the Main Menu bar, click File,<br />
click Reports, and click Activity....<br />
You see a screen like this (if you<br />
created any custom reports they<br />
would be listed; your reports may<br />
be very different from the samples<br />
listed here).<br />
2. Click the Add button to create a<br />
report (that is, a set of conditions<br />
that will filter out only the<br />
in<strong>for</strong>mation you want to see). This takes you to the first Activity Report<br />
screen (to change a report you have already created, click the filter and<br />
then click Edit). The screens that you see are identical to those that you see<br />
when creating a custom activity view.<br />
3. Give the report a name, associate an icon if you wish, and then go to each<br />
tab where you want to include something less than all of the activity.<br />
Each tab is initially set up to include all in<strong>for</strong>mation; go to those where you<br />
want to limit or filter out particular in<strong>for</strong>mation. For example, if you only<br />
wanted activity at certain readers, you would go to the Readers tab. If you<br />
only want certain messages, go to the Messages tab. The options on these<br />
tabs are explained starting on page 107.<br />
4. When you have entered all of the conditions needed, click the OK button at<br />
the bottom of the window. This returns you to the list of reports.<br />
Printing an<br />
Activity Report<br />
from the<br />
Reports Menu<br />
1. From the main menu, click File,<br />
click Reports, and then click<br />
Activity Reports. You see a screen<br />
like this (if you have created any<br />
custom reports they would be<br />
listed; your reports may be very<br />
different from the samples listed<br />
here).<br />
2. If you have not already designed<br />
the report, see Creating a<br />
Custom Activity Report from the Reports Menu above <strong>for</strong> help designing it.<br />
3. Click the report in the list of reports at the top of the window.<br />
105
Monitoring Ongoing Activity<br />
4. At the bottom of the window, indicate which activity to generate the report<br />
from:<br />
The system activity log: This includes all the activity that has<br />
occurred since the last time you archived activity (and that meets<br />
your report conditions).<br />
An activity archive: This includes all activity that meets your report<br />
conditions that is in the archive file that you pick. Click the Radio<br />
button by this choice, click the Browse button, and pick the file.<br />
<strong>HandNet</strong> lists files that have an .hna extension. Pick the Archive file<br />
and click OK.<br />
If the activity that you want is in several archive files, you will have<br />
to run the report several times, once <strong>for</strong> each archive file. If you<br />
need the in<strong>for</strong>mation in a single report, you can export each report<br />
to a file and then use another program to combine the reports into<br />
a single file.<br />
5. Click the Generate Report button. <strong>HandNet</strong> generates the report and shows<br />
it in a new window on the screen.<br />
6. Click the Printer icon near the middle of the header to print the report, or<br />
click the icon with the envelope to export the content of the report to a file.<br />
You can export to a variety of <strong>for</strong>mats including Word, Excel, Lotus 1-2-3,<br />
.rtf, text, and others; see Printing or Viewing Reports on page 127 <strong>for</strong> more<br />
detail.<br />
If the printer icon is disabled and grayed-out, you do not have a printer set<br />
up yet on this computer (to set up a printer, go to the <strong>Windows</strong> Start menu,<br />
highlight Settings, pick Printers, and click Add Printer).<br />
7. To close the Report window when done, click the X in the upper-right corner<br />
of the window.<br />
* * * * *<br />
106
<strong>HandNet</strong> <strong>for</strong> <strong>Windows</strong><br />
Condition Screens <strong>for</strong> Creating Custom Activity Views/Reports<br />
When you create an activity filter (that is, a custom view of your activity; see<br />
page 104), or when you design a custom activity report (see page 105), you see the<br />
screen shown below.<br />
Each tab is initially set up to include all in<strong>for</strong>mation; you only need to go to those<br />
tabs where you want to limit or filter out particular in<strong>for</strong>mation. For example, if<br />
you only want activity at certain readers, you would go to the Readers tab. If you<br />
only want certain messages, you would go to the Messages tab.<br />
General<br />
This screen contains the name and icon associated with activity filter or report.<br />
Name: Enter a name that describes the conditions that determine what activity<br />
will be included.<br />
Icon: If you want an icon associated with the this activity view/report, click the<br />
this entry. You do not have to choose an icon if you do not want to. If you<br />
do not want an icon, do not pick an icon; once you pick one, you cannot go<br />
back to having no icon.<br />
Do not click OK until you have gone to the other tabs and set up those<br />
conditions that limit the activity.<br />
Date<br />
This screen lets you limit the activity you see to certain dates.<br />
On any date: This includes activity from any date that is in the activity file. This<br />
is always the initial choice when you create a new report or activity filter.<br />
Between: This includes any activity between the dates entered or on those<br />
dates. For example, if you chose Between 05/01/01 and 05/31/01, activity<br />
from both 05/01 and 05/31 would be included along with the activity in<br />
between.<br />
107
Monitoring Ongoing Activity<br />
After: This includes activity that is after the date that you enter, but not activity<br />
that is on or be<strong>for</strong>e that date. For example, if you enter 05/01/01, you would<br />
see activity from 05/02 on, but activity on 05/01 would not be included (if<br />
you want the activity from 05/01, you would have to enter After 04/30).<br />
Be<strong>for</strong>e: This includes activity that is be<strong>for</strong>e the date that you enter, but not<br />
activity that is on or after that date. For example, if you enter 04/30/01, you<br />
would see activity from 04/29 and be<strong>for</strong>e, but activity from 04/30 would not<br />
be included (if you want the activity from 04/30, you would have to enter<br />
Be<strong>for</strong>e 05/01).<br />
Time<br />
During the past: This is useful <strong>for</strong> creating a view that lists only the most recent<br />
activity. For example, you might create a view that only listed activity during<br />
the past week. If you want to be more precise, this same option is on the<br />
Time screen so that you could, <strong>for</strong> example, limit a view to the last twentyfour<br />
hours.<br />
This screen controls what times activity must occur to be included.<br />
On any time: This includes activity from any time. This is always the initial<br />
choice when you create a new report or activity filter.<br />
Between: This includes any activity between the times entered or exactly at<br />
those times. For example, if you chose Between 12:00 and 13:00, activity<br />
that happened at exactly 12:00 or 1:00, PM along with the activity in<br />
between would be included. This goes from the earliest time to the latest<br />
time, regardless of which you enter first. For example, if you enter Between<br />
17:00 and 8:00 (hoping to get activity that was not during normal business<br />
hours), you would get the same activity as if you had entered Between 8:00<br />
and 17:00 (that is, activity that occurred during normal business hours). If<br />
you really want activity that is after 5:00 PM and be<strong>for</strong>e 8:00 AM, you would<br />
have to create two filters: one looking <strong>for</strong> activity after 17:00 and the other<br />
looking <strong>for</strong> activity be<strong>for</strong>e 8:00.<br />
After: This includes activity that is after the time that you enter, but not activity<br />
that is exactly at that time. For example, if you enter 12:00, you would<br />
see activity from 12:00:01 (that is one second after 12) on, but activity at<br />
12:00:00 or be<strong>for</strong>e would not be included.<br />
Be<strong>for</strong>e: This includes activity that is be<strong>for</strong>e the time that you enter, but not<br />
activity that is exactly at that time. For example, if you enter 12:00, you<br />
would see activity from 11:59:59 (that is one second be<strong>for</strong>e 12:00) on, but<br />
activity at 12:00:00 or after would not be included.<br />
108
<strong>HandNet</strong> <strong>for</strong> <strong>Windows</strong><br />
During the past: This is useful <strong>for</strong> creating a view that lists only the most recent<br />
activity. For example, you might create a view that only listed activity during<br />
the past twenty-four or <strong>for</strong>ty-eight hours (<strong>for</strong> longer periods, this same<br />
option is on the Date screen so that you could, <strong>for</strong> example, limit a view to<br />
the past thirty days).<br />
Sites<br />
This screen lets you limit the activity to certain sites.<br />
Any site: Leave this selected to not limit the activity based on site.<br />
A site named: This option is permanently disabled. To get activity <strong>for</strong> a single<br />
site, use the following option and only click one site in the list.<br />
The sites selected below: To limit the report/view to specific sites, click this<br />
and then select the sites to include activity from.<br />
To select a single site: Click that site in the list.<br />
To select multiple sites that are together on the list: Click the first site<br />
in the group, hold the SHIFT key down, and with the SHIFT key down,<br />
click the last site that you want to select.<br />
To select multiple sites that are not together on the list: Click the first<br />
site to select, hold the CTRL key down, and click each other site that<br />
you want to select.<br />
If you select specific sites here, make sure you do not select readers from<br />
different sites on the Reader tab; if you select sites here and select readers from<br />
different sites, you will not see any activity with this filter. If you want to select<br />
specific readers, select Any site on this screen.<br />
109
Monitoring Ongoing Activity<br />
Readers<br />
This tab lets you limit to activity that occurred at certain readers. For example,<br />
you might want to limit activity only to the readers controlling the entrances<br />
to the building so you could see who has come in. Or you might want to limit<br />
activity to the readers controlling the most secure areas so you could monitor<br />
them more closely.<br />
Any reader: Leave this selected to not limit the activity based on site.<br />
A reader named: This option is permanently disabled. To get activity <strong>for</strong> a<br />
single reader, use the following option and select only that one reader in the<br />
list.<br />
The readers selected below: To limit the report/view to specific readers, click<br />
this and then select the readers to include activity from.<br />
To select a single reader: Click that reader in the list.<br />
To select multiple readers that are together on the list: Click the first<br />
reader in the group, hold the SHIFT key down, and click the last reader<br />
that you want to select.<br />
To select multiple readers that are not together on the list: Click the<br />
first reader to select, hold the CTRL key down, and click each other<br />
reader that you want to select.<br />
Users<br />
This screen lets you limit to activity that occurred <strong>for</strong> certain users.<br />
Any user: Leave this selected to not limit the activity to particular users.<br />
A user named: This option is permanently disabled. For a single user, use<br />
the following option and select only that one user in the list.<br />
110
<strong>HandNet</strong> <strong>for</strong> <strong>Windows</strong><br />
The readers selected below: To limit the report/view to specific users,<br />
click this and then select the users to include activity <strong>for</strong>.<br />
To select a single user: Click that user in the list.<br />
To select multiple users that are together on the list: Click the first<br />
user in the group, hold the SHIFT key down, and click the last<br />
user that you want to select.<br />
To select multiple users that are not together on the list: Click the first<br />
user to select, hold the CTRL key down, and click each other user that<br />
you want to select.<br />
Message Types<br />
This screen lets you limit the activity included to particular kinds of<br />
messages. If you need only specific messages within a category, use the<br />
Messages tab instead.<br />
Any message: This includes activity regardless of what type of message it<br />
generates.<br />
The messages types checked below: Click this and then check any<br />
message type to include. You can check more than one box to include<br />
multiple types of messages.<br />
Acknowledgement: This does not list anything.<br />
Alarm: This lists any message that generates an alarm. Which<br />
messages generate alarms is controlled by your choices on the<br />
Alarms tab in System Settings. If you change which messages<br />
generate alarms, messages that did not generate an alarm when<br />
they occurred will not be listed, even if they would generate an<br />
alarm now.<br />
Invalid Access Attempt: This lists any message where someone tries<br />
to get access and cannot. This includes the messages Identity<br />
Unknown, Access Denied, and Access Refused, Time Zone.<br />
Operator Logs: This lists when operators log in or log out of<br />
<strong>HandNet</strong>, and it lists invalid login attempts. It does not list the<br />
addition of new operators or changes to the operator settings;<br />
only when each operator uses the system.<br />
Setup Changed: This lists any setup changes made directly using<br />
command mode at the reader. For setup changes made through<br />
<strong>HandNet</strong>, use System Database.<br />
111
Monitoring Ongoing Activity<br />
Status: This lists any messages that tell whether auxiliary input and<br />
output is on or off.<br />
System Database: This lists all setting changes made through<br />
<strong>HandNet</strong>. This includes adding or changing sites and readers,<br />
changing system settings, changing time zones, holidays and<br />
access profiles.<br />
System Status: This lists messages related to when <strong>HandNet</strong><br />
was started and exited, messages related to enrolling users,<br />
messages related to communication problems with readers, and<br />
messages related to in<strong>for</strong>mation being downloaded/uploaded to/<br />
from readers.<br />
User Database: This lists messages related to users being added,<br />
deleted, or changed. It does not include messages related to<br />
users being enrolled or attempted unauthorized enrollments.<br />
Valid Access: This lists Identity Verified messages.<br />
Messages<br />
This screen lets you limit the report or activity view to specific messages.<br />
For example, if you were trying to track who came into the building, you<br />
might select the building entrances on the Readers tab, and then choose<br />
only the message Identity Verified here. Or if you were trying to track<br />
access problems, you might limit the output to the messages Access<br />
Denied or Identity Unknown. If you want all of the messages in a particular<br />
category, you may find it easier to use the Message Types tab instead.<br />
Any message: This includes activity regardless of what message it<br />
generated.<br />
The messages checked below: Check any message to include. See<br />
the list of activity messages starting on page 116 <strong>for</strong> an explanation<br />
of what causes each message. Not all of the messages include<br />
what you would expect. For example, the message Authority Level<br />
Changed does not include users whose authority level was changed<br />
on the <strong>Security</strong> screen in User Properties; it only includes users<br />
whose authority level was changed using the command menus on a<br />
reader, which is not how you would typically change a user if you use<br />
<strong>HandNet</strong>. Many of the messages are like this. If you want all of the<br />
messages in a particular category, you may find it easier to use the<br />
Message Types tab instead.<br />
* * * * *<br />
112
<strong>HandNet</strong> <strong>for</strong> <strong>Windows</strong><br />
Archiving Past Activity<br />
What Archiving Is<br />
Archiving is moving past activity from the Current Activity file to a separate file.<br />
This keeps the Activity file smaller (and faster) while still keeping the in<strong>for</strong>mation<br />
available <strong>for</strong> reports if needed. You can set <strong>HandNet</strong> to remind you to make<br />
archives using the Archives tab in the System Settings; see page 26.<br />
To generate an activity report on activity that is archived, you must indicate that<br />
you want to generate the report based on an activity archive (and then pick the<br />
appropriate archive).<br />
Effect of<br />
Archiving on<br />
Reports<br />
Making the<br />
Archive<br />
When you archive, <strong>HandNet</strong> removes activity from the current activity file and<br />
stores it in a different file. When you generate an activity report, you can use the<br />
current activity file OR one of your archive files, but you cannot include activity<br />
from more than one file in a single report. This means, <strong>for</strong> example, that if you<br />
make an archive once a month, you cannot generate a single report that looks<br />
at the previous year’s activity; you would have to generate twelve reports, one<br />
<strong>for</strong> each monthly archive file. If you want an entire year’s in<strong>for</strong>mation in a single<br />
report, do not archive until the year is done, so all activity <strong>for</strong> the year will be in a<br />
single file.<br />
To make an archive of past activity, click the File menu and then click Archive.<br />
You see a screen like this:<br />
Available activity: This shows the date of the earliest activity in the activity file<br />
and the date of the most recent activity (usually today’s date). One the<br />
right you will see the total number of events or activities currently in the<br />
file.<br />
Selected <strong>for</strong> archival: This lets you choose the date range to include in the<br />
archive. The From date is initially set to the date of the earliest activity<br />
in the file; you do not normally want to change this date. The To date<br />
is initially set to today’s date; you might sometimes want to make this<br />
earlier to keep more activity in the file. For example, suppose you make<br />
an archive on the fifth of each month <strong>for</strong> the previous month. You could<br />
change the To date to the last day of the previous month so that activity<br />
from the beginning of the current month would not be archived yet.<br />
Even if you leave the To date set to the current date, <strong>HandNet</strong> may not<br />
actually go up to that date: on the Archives tab in the System Settings<br />
there is an entry Do not archive the latest ___ events. The archive<br />
process keeps at least that many events in the current activity file, even<br />
if some of those events are be<strong>for</strong>e the date you enter here.<br />
Estimated size of archive file: This is the approximate size that the archive file<br />
will be.<br />
113
Monitoring Ongoing Activity<br />
Archive file: This lists the name and location of the file that will be created.<br />
<strong>HandNet</strong> uses the location that you have entered <strong>for</strong> the Default Archive<br />
Directory on the Archives tab in the System Settings; see page 27.<br />
<strong>HandNet</strong> names the file using year/month/day hour/minute/seconds.<br />
For example HN Activity Archive 20010406 094542.hna is the default<br />
name <strong>for</strong> a file made on April 6, 2001 at 9:45 (and 42 seconds) AM. If<br />
you sometimes need to generate reports on past activity, and you do<br />
not find this naming method very clear, you can change this name. For<br />
example, if the archive contained in<strong>for</strong>mation from the previous month,<br />
you might name it something like Archive March, 2001.hna. You must<br />
keep the .hna extension <strong>for</strong> <strong>HandNet</strong> to be able to find the file when you<br />
want to generate a report on it.<br />
Once all entries are correct, click the Archive button to make the archive.<br />
* * * * *<br />
114
Exporting Activity<br />
Why Export<br />
Activity<br />
<strong>HandNet</strong> <strong>for</strong> <strong>Windows</strong><br />
If you want to create custom activity reports using some external report tool,<br />
Export Activity on the File menu sends all of your current activity to an Access<br />
database file called expactvt.mdb. While the main <strong>HandNet</strong> database files are<br />
password protected <strong>for</strong> security reasons, this file is not, so you can open it (if<br />
you have Microsoft Access) and use any in<strong>for</strong>mation in it. If you are only going<br />
to generate reports with Activity Reports on the File menu, you do not need this<br />
option; using it would only create a file that you do not need.<br />
This option only exports current activity, not activity that you have archived, so if<br />
you plan to use this option you probably should check the Export Transactions<br />
box on the Archive tab in System Settings; see page 27. This causes activity to be<br />
automatically exported whenever you archive activity.<br />
You only have access to this option if you have purchased the upgrade to full<br />
feature set of Version 2.0.<br />
When you choose Export Activity, <strong>HandNet</strong> pops up a box that tells you how<br />
many activity records are going to be exported. Click OK to continue.<br />
Avoiding<br />
Exporting the<br />
Same In<strong>for</strong>mation<br />
Twice<br />
If you export activity and then export activity again without having<br />
archived the activity you exported last time, you will end up with duplicate<br />
records in that export file. That is, you will find the same activities listed<br />
more than once.<br />
To avoid duplicate activity in the export file you can do one of two things:<br />
• You can export activity and then immediately archive ALL activity. That way,<br />
the next time you export activity, the activity that was exported last time will<br />
not be in the current activity file, so it will not be exported again.<br />
• If you do not want to archive activity after exporting (you might want to keep<br />
more activity in the current activity file so that you could see it in custom<br />
activity views or create reports that included a longer range of activity),<br />
delete or rename the last activity export file (expactvt.mdb) be<strong>for</strong>e exporting<br />
again. If you delete or rename this file, <strong>HandNet</strong> creates a new expactvt.<br />
mdb file when you export, and this new file will only contain the in<strong>for</strong>mation<br />
from this export and not what you exported last time.<br />
* * * * *<br />
115
Monitoring Ongoing Activity<br />
Activity Messages<br />
You see activity messages in the Activity window. You can limit the activity in<br />
a custom activity view or in an activity report by checking the corresponding<br />
messages on the Messages tab in the filter/report design (see page 112). And you<br />
can control which messages cause alarms using the Alarms tab in the system<br />
settings (see page 25).<br />
We have explained the messages in more detail here.<br />
Command<br />
Menus in the<br />
Reader<br />
Activity<br />
Messages<br />
Readers have built-in menus that let you change the settings in the reader.<br />
Some of the messages below can only occur if you make changes through<br />
these menus on the actual readers; you should not typically see these<br />
messages. Except <strong>for</strong> initially setting up the reader to communicate with<br />
<strong>HandNet</strong>, <strong>for</strong> recalibrating the reader, and <strong>for</strong> enrolling a user from the reader,<br />
you should NOT make changes to the reader through the reader command<br />
menus; you should control all other reader settings from within <strong>HandNet</strong>. See<br />
the HandKey manual <strong>for</strong> more about the reader menus.<br />
Access Denied: Someone repeatedly entered a valid ID at a reader, and each<br />
time the reader did NOT recognize the user’s hand (at the reader, the user<br />
will see the message ID Refused). The number of times that a user can<br />
try be<strong>for</strong>e getting this message depends on the Number of Tries entry on<br />
the Settings tab in the Reader Properties; see page 47. If access is denied<br />
<strong>for</strong> a user, the reader will not accept that ID again until another user has<br />
successfully gained access at that reader.<br />
Access Profiles Changed: Someone has changed one or more access<br />
profiles. During initial setup, this is a normal message. If you were not<br />
expecting access profiles to change, this could be an indication that<br />
someone was trying to give inappropriate access.<br />
Access Refused, Time Zone: A valid ID was entered at a reader, but the user<br />
is not authorized to have access during the hours or days of the week<br />
based on the time zone associated with the reader in the access profile.<br />
Activated Limited Access User: A user was set up with access <strong>for</strong> a limited<br />
date/time range. The computer’s date and time matched the date/time the<br />
user was scheduled to start having access, so <strong>HandNet</strong> made the user<br />
active and sent the user’s in<strong>for</strong>mation to each appropriate reader so the<br />
user could can access; see page 93 <strong>for</strong> more about limited access.<br />
Activity Archived: The operator used the Archive option on the File menu; (see<br />
page 113 <strong>for</strong> more on archiving past activity).<br />
Alarm Acknowledged: An alarm occurred, and an operator went to the Alarm<br />
Properties screen and clicked one of the acknowledge buttons (following<br />
the message on the activity or alarm list, you will see :ACK followed by<br />
the name of the operator who acknowledged the alarm and when it was<br />
acknowledged); see page 103 <strong>for</strong> more on acknowledging alarms.<br />
Amnesty Punch Granted: You should not see this message.<br />
Authority Level Changed: A user’s authority level was changed from the<br />
reader’s command menu (typically you would change a user’s authority<br />
116
<strong>HandNet</strong> <strong>for</strong> <strong>Windows</strong><br />
level from the <strong>Security</strong> tab in the User Properties; if you change the<br />
authority level there, you just see the message User Record Changed).<br />
Auto Import Started: An import.mdb file (which contains users to import) was<br />
found, and <strong>HandNet</strong> was set up to automatically import users, so <strong>HandNet</strong><br />
started importing them. Whether <strong>HandNet</strong> automatically imports users is<br />
controlled by the Enable box under Auto Import on the User Import/Export<br />
tab in System Settings; see page 28.<br />
Aux Output OFF: The auxiliary output has been turned off.<br />
Aux Unlock Via Wiegand Keypad: The auxiliary output has been turned on by<br />
a valid ID number at a remote keypad.<br />
Auxiliary Input ON: The auxiliary input on the reader has been activated.<br />
Auxiliary Output ON: The reader has turned on an auxiliary device (like an<br />
alarm) that is connected to the reader.<br />
Auxiliary Output Setup Changed: The timing and clearing of an auxiliary<br />
output activation has been changed.<br />
Baud Rate Changed: The communications baud rate has been changed using<br />
the command menus at the reader.<br />
Command Mode Entered: Someone entered the command mode at a reader.<br />
Readers have built in menus that let you change the reader settings. These<br />
command menus are mainly needed when someone is using the readers<br />
without the <strong>HandNet</strong> program; <strong>HandNet</strong> controls most settings in the reader<br />
<strong>for</strong> you. The only tasks you should need to do through the reader command<br />
menus are setting up the reader’s address and communication settings<br />
during initial setup, recalibrating the reader, and enrolling users at the<br />
reader if you are not using the Enroll option on the Reader menu.<br />
Data Base Restored: You should not see this message.<br />
Data Base Saved: You should not see this message.<br />
Data Downloaded to Reader: Someone used one of the Download options<br />
on the Reader menu to send in<strong>for</strong>mation to the reader; see page 60. Unless<br />
there was some problem with the reader that is being corrected, this is not<br />
usually necessary; <strong>HandNet</strong> usually automatically sends all in<strong>for</strong>mation to<br />
the reader that the reader needs.<br />
Data Log Buffer Empty: You should not see this message.<br />
Deactivating Limited Access User: A user was set up with access <strong>for</strong> a<br />
limited date/time range. The computer’s date and time matched the date/<br />
time the user’s access was supposed to end, so <strong>HandNet</strong> made the user<br />
inactive and sent the appropriate in<strong>for</strong>mation to readers so the user could<br />
no longer gain access, see page 93 <strong>for</strong> more about limited access.<br />
Door Forced Open: A door was <strong>for</strong>ced open without a valid ID and hand<br />
recognition at a reader.<br />
Door Open Too Long: A door was kept open <strong>for</strong> longer than was allowed<br />
117
Monitoring Ongoing Activity<br />
based on the time entered in the Door Switch Shunt Time on the<br />
Configuration tab in the Reader Properties; see page 48.<br />
Duress Alarm: A user entered the duress code, a code that indicates that<br />
the user is in trouble or that someone is <strong>for</strong>cing the user to give him/her<br />
access; see page 47 <strong>for</strong> more about duress codes.<br />
Exit Granted: The user is permitted to exit.<br />
Extended Datalog: Someone entered command mode on the reader and<br />
changed settings that do not have specific messages associated with<br />
them (<strong>for</strong> example, you get this message if you change the language of the<br />
reader’s display or the <strong>for</strong>mat of the date on the reader).<br />
<strong>HandNet</strong> Exited: Someone picked Exit from the File menu to shut <strong>HandNet</strong><br />
down. Under normal circumstances, <strong>HandNet</strong> is left running continually<br />
so it can monitor activity and immediately process any alarm messages.<br />
If someone exited <strong>HandNet</strong> to install a new Version of the program or<br />
to per<strong>for</strong>m maintenance on the computer it is on, there is probably no<br />
problem; if someone exited the program at some other point, this could be<br />
an indication of an attempt to get around security.<br />
<strong>HandNet</strong> Started: Someone started the <strong>HandNet</strong> program. Under normal<br />
circumstances, <strong>HandNet</strong> is usually left running continually so it can monitor<br />
activity and immediately process any alarm messages. If someone exited<br />
<strong>HandNet</strong> to install a new Version of the program or to per<strong>for</strong>m maintenance<br />
on the computer it is on and then restarted, then there is probably no<br />
problem. If you see the message <strong>HandNet</strong> Started but you do not see<br />
the message <strong>HandNet</strong> Exited earlier in the list, then someone exited the<br />
program and restored an older Version of the activity files; this could be an<br />
indication that someone is trying to hide activity.<br />
<strong>HandNet</strong>+ File Converted: Someone used Convert <strong>HandNet</strong>+ on the<br />
File menu to convert users from <strong>HandNet</strong>+ into <strong>HandNet</strong> <strong>for</strong> <strong>Windows</strong><br />
(<strong>HandNet</strong>+ was an MS-DOS predecessor to <strong>HandNet</strong> <strong>for</strong> <strong>Windows</strong>); see<br />
page 98 <strong>for</strong> more on converting users from MS-DOS Versions of <strong>HandNet</strong>.<br />
Holiday Table Changed: Someone has added, changed, or deleted a holiday<br />
with the Holidays option; see page 65 <strong>for</strong> more about setting up holidays.<br />
Identity Unknown: Someone entered a valid ID at a reader, but the reader did<br />
not recognize the user’s hand.<br />
Identity Verified: At a reader, a user entered a valid ID and the reader<br />
recognized the user’s hand and gave access.<br />
Invalid Operator Login Attempt: Someone tried to log into <strong>HandNet</strong> but<br />
entered an invalid user name or password. This could occur if someone<br />
just typed the name or password incorrectly, or it could mean that an<br />
unauthorized person was trying to get into the program.<br />
118<br />
Leave Command Mode: Someone exited or left command mode at a reader.<br />
Readers have built-in menus that let you change the reader settings. These<br />
command menus are mainly needed when someone is using the readers<br />
without the <strong>HandNet</strong> program; <strong>HandNet</strong> controls most settings in the reader<br />
<strong>for</strong> you. The only tasks you should need to do through the reader command
<strong>HandNet</strong> <strong>for</strong> <strong>Windows</strong><br />
menus are setting up the reader’s address and communication settings<br />
during initial setup, recalibrating the reader, and enrolling users at the<br />
reader if you are not using the Enroll option on the Reader menu.<br />
Lock Output OFF: Someone chose Relock from the Reader menu to relock an<br />
unlocked door; see page 128 <strong>for</strong> more about locking and unlocking doors.<br />
Lock Output ON: Someone chose to unlock a door using one of the Unlock<br />
options on the Reader menu; see page 128 <strong>for</strong> more about locking and<br />
unlocking doors.<br />
Lock Setup Changed: Using the command menus in the reader, someone<br />
changed the number of seconds the lock should be unlocked <strong>for</strong> or<br />
the number of seconds the door is allowed to be open (normally this is<br />
changed in <strong>HandNet</strong> on the Configuration tab in Reader Properties; if it is<br />
changed there, you just see the message Reader Properties Changed).<br />
<strong>Manual</strong> Import Started: The operator selected Import Users to import users<br />
from the import.mdb file; see page 99 <strong>for</strong> more about importing users<br />
(when you must import users manually or whether <strong>HandNet</strong> imports them<br />
automatically is controlled by the Enable box under Auto Import on the<br />
User Import/Export tab in System Settings; see page 28).<br />
Maximum ID Length Changed: Someone changed the maximum length <strong>for</strong><br />
a user ID using the command menus in the reader (if you changed the ID<br />
length on the Settings tab in the Reader Properties, you would just see the<br />
message Reader Properties Changed).<br />
Memory Cleared: Someone used the Clear Memory option from the Command<br />
menus in the reader. This erases all the users from the reader (typically<br />
you would do this if you were changing the use of the reader and wanted<br />
to make sure that those who previously had access through this reader no<br />
longer had access through it).<br />
Messages Read: You should not see this message.<br />
No Hand Read For Card: You should not see this message.<br />
Operating Mode Changed: The operating mode of the reader has been<br />
changed using the command menus in the reader.<br />
Operator Added: A new operator (someone authorized to use <strong>HandNet</strong>) was<br />
added on the Operators tab in System Settings; see page 24 <strong>for</strong> more<br />
about adding operators.<br />
Operator Deleted: An operator (someone authorized to use <strong>HandNet</strong>) was<br />
removed from the Operators tab in System Settings; see page 24 <strong>for</strong> more<br />
about deleting operators.<br />
Operator Login: An operator logged into <strong>HandNet</strong>.<br />
Operator Logout: An operator logged out of <strong>HandNet</strong>.<br />
Operator Properties Changed: Someone changed the tasks that an operator<br />
is allowed to do on the Operators tab in System Settings; see page 24 <strong>for</strong><br />
more about controlling which options an operator can use.<br />
119
Monitoring Ongoing Activity<br />
Output Mode Changed: The output mode of lock output or card reader<br />
emulation has been changed using the Command menus in the reader.<br />
Passwords Changed: Someone changed the passwords <strong>for</strong> the reader<br />
Command menus, using the command menus in the reader. Generally<br />
this setting is controlled from <strong>HandNet</strong> on the Passwords tab in Reader<br />
Properties rather than from the reader (if you change this or other settings<br />
<strong>for</strong> the reader in <strong>HandNet</strong>, you just see the message Reader Properties<br />
Changed).<br />
Printer Setup Changed: If a serial printer is attached to the reader, the printer<br />
settings have been changed using the command menus in the reader.<br />
Reader Action Failed: <strong>HandNet</strong> was unable to complete a communication<br />
attempt with the reader. This could be an indication that the connection to<br />
the reader is not set up correctly; see the Troubleshooting resolving this<br />
error.<br />
Reader Added: A reader was added to <strong>HandNet</strong>.<br />
Reader Connection Failed: <strong>HandNet</strong> was not able to establish<br />
communications with the reader. This could be an indication that the<br />
connection to the reader is not set up correctly; see Troubleshooting<br />
resolving this error.<br />
Reader Connection Timeout: <strong>HandNet</strong> lost its connection with the reader.<br />
This could be an indication that the connection to the reader is not set up<br />
correctly; see the troubleshooting <strong>for</strong> help resolving this error.<br />
Reader Data Uploaded to <strong>HandNet</strong>: Someone used Upload Users on the<br />
Reader menu to get user in<strong>for</strong>mation from the reader; see Getting User<br />
In<strong>for</strong>mation from a Reader on page 99.<br />
Reader Deleted: A reader was deleted from <strong>HandNet</strong>.<br />
Reader Properties Changed: Someone went to the Reader Properties and<br />
changed the settings on one of the tabs there. <strong>HandNet</strong> does not keep<br />
track of which settings were changed. For more about Reader Properties,<br />
see page 45.<br />
Record Imported <strong>for</strong> Creation: An new user was added to <strong>HandNet</strong> by the<br />
import process.<br />
Record Imported <strong>for</strong> Deletion: A user that was already in <strong>HandNet</strong> was<br />
deleted based on in<strong>for</strong>mation in the Import file.<br />
Record Imported <strong>for</strong> Modification: A user that was already in <strong>HandNet</strong> was<br />
changed to match a user with the same ID in the Import file.<br />
120<br />
Record Imported, Empty Template Overwrote Local Enrollment: A user that<br />
was not enrolled was imported. This replaced an enrolled user, so the user<br />
is not longer enrolled in <strong>HandNet</strong>. You can prevent enrolled users by being<br />
replace by either preventing the exporting computer from exporting users<br />
that are not enrolled yet, or by changing the import settings so non-enrolled<br />
users cannot replace enrolled ones; see the explanation <strong>for</strong> the Import/<br />
Export settings on page 28.
<strong>HandNet</strong> <strong>for</strong> <strong>Windows</strong><br />
Reject Override Changed: Someone changed the reject threshold <strong>for</strong> an<br />
individual user using the command menus in the reader. Generally this<br />
setting is controlled in <strong>HandNet</strong> with the Override setting on the <strong>Security</strong><br />
screen in User Properties; <strong>HandNet</strong> users would not typically change this<br />
at the reader (if you change this or other user settings in <strong>HandNet</strong>, you just<br />
see the message User Properties Changed).<br />
Reject Threshold Set: Someone changed the reject threshold using the<br />
command menus in the reader. Generally this setting is controlled from<br />
<strong>HandNet</strong> using Reject Threshold on the Configuration tab in Reader<br />
Properties rather than from the reader (if you change this or other settings<br />
<strong>for</strong> the reader in <strong>HandNet</strong>, you just see the message Reader Properties<br />
Changed).<br />
Remote Enrollment Started: A user was enrolled with the Enroll option on the<br />
Reader menu (<strong>for</strong> users enrolled from the Command menu on the reader,<br />
you see the message User Enrolled); see page 87 <strong>for</strong> more about enrolling<br />
users.<br />
Report Engine Unavailable: You should never see this message.<br />
Request to Exit Activated: A user has pressed the Request to Exit button in<br />
order to get out of the secure area.<br />
Score Is: You should never see this message.<br />
Site Added: A site was added to <strong>HandNet</strong>.<br />
Site Code Changed: The site code was changed using the Command menus<br />
in the reader.<br />
Site Connected: <strong>HandNet</strong> is set up to connect with the site by modem, and<br />
<strong>HandNet</strong> connected to the site.<br />
Site Deleted: A site was deleted in <strong>HandNet</strong>.<br />
Site Disconnected: <strong>HandNet</strong> is set up to connect with the site by modem, and<br />
<strong>HandNet</strong> disconnected from the site when it was done communicating with<br />
the site.<br />
Site Properties Changed: In <strong>HandNet</strong>, one or more changes were made to the<br />
Site Properties; <strong>for</strong> more about Site Properties, see page 34.<br />
Special Enrollment: The Command menus in the reader was used to enroll a<br />
user who does not require hand recognition to gain access.<br />
Supervisor Override: You should not see this message.<br />
System Re-calibrated: Someone recalibrated the reader; see page 124.<br />
System Settings Changed: Someone changed one or more entries on one of<br />
the System Settings tabs that you get to with settings on the View menu;<br />
<strong>for</strong> more about system settings, see page 22.<br />
Tamper Activated: Someone has shaken the reader roughly or has opened the<br />
reader. Unless someone was servicing the reader, this message generally<br />
121
Monitoring Ongoing Activity<br />
warrants further investigation.<br />
Time and Date Set: Someone changed the time and date in the reader using<br />
the command menus in the reader (generally, rather than changing date<br />
and time in the reader, you would just make sure that the date and time<br />
were correct in the computer and then send the date and time to the reader<br />
using Download Time on the Reader menu).<br />
Time Restrictions Turned On/Off For All Users: You should not see this<br />
message.<br />
Time Zone Data Changed: Someone changed a time zone using the<br />
Command menus in the reader. Generally this setting is controlled with<br />
the Time Zone settings in <strong>HandNet</strong> and not changed at the reader (if<br />
you change time zones in <strong>HandNet</strong>, you see the message Time Zones<br />
Changed).<br />
Time Zones Changed: In <strong>HandNet</strong>, someone changed Time Zones; see page 61<br />
<strong>for</strong> more on setting up Time Zones.<br />
Two Man Timeout: Two people were required to verify at the reader, and they<br />
have not done so within the permitted time period.<br />
Unable to Close Communications Port: <strong>HandNet</strong> was unable to close the<br />
Serial Communications port.<br />
Unable to Install Communications Port or Unable to Open<br />
Communications Port: You get this message if <strong>HandNet</strong> tries to establish<br />
communication with a reader through a serial port and it cannot. Generally<br />
this only happens if you are running another program that is already<br />
controlling that serial port. You cannot have two different devices connected<br />
to the same port, so if a reader really is connected to that port, nothing<br />
else should be. Either you have selected the wrong port on the Connection<br />
tab in the Site Properties, or the other program that you are running has<br />
the wrong port selected. If you were previously running another program<br />
(especially one trying to connect to a modem, fax, or printer), it is possible<br />
that the other program tried to use the port and did not close it properly.<br />
Make sure that other programs that might try to control the port are closed.<br />
If the problem still exists, trying shutting everything down and restarting the<br />
computer.<br />
Unable to Retrieve Datalog: An attempt to get in<strong>for</strong>mation from the reader<br />
failed.<br />
Unauthorized Enrollment Attempted: Someone tried to enroll a user at a<br />
reader and the user had not been added to <strong>HandNet</strong> yet. Your settings do<br />
not allow this (to change your settings so this is allowed, check the box<br />
by Do not delete unauthorized enrollments on the <strong>Security</strong> tab in System<br />
Settings; see page 23).<br />
Unit Address Changed: Someone changed the address of the reader using<br />
the command menus in the reader.<br />
User Added From Card: You should not see this message.<br />
122<br />
User Database Field Added: Someone went to the Custom tab in the User
<strong>HandNet</strong> <strong>for</strong> <strong>Windows</strong><br />
Database properties and added a new custom entry; see page 97.<br />
User Database Field Deleted: Someone went to the Custom tab in the User<br />
Database properties and removed a custom entry.<br />
User Database Import Finished: The process of importing users (from the<br />
import.mdb file) is done.<br />
User Enrolled: A user was enrolled using the command menu on the reader<br />
(<strong>for</strong> users enrolled with the Enroll option on the Reader menu, you see the<br />
message Remote Enrollment Started); see page 87 <strong>for</strong> more about enrolling<br />
users.<br />
User Record Added: A user was added in <strong>HandNet</strong>.<br />
User Record Changed: User Properties were changed <strong>for</strong> a user in <strong>HandNet</strong>.<br />
The change could be on any of the three tabs of user in<strong>for</strong>mation; see page<br />
90 <strong>for</strong> more on user properties.<br />
User Record Deleted: A user was deleted in <strong>HandNet</strong>.<br />
User Removed: A user was removed using the command menus in the reader.<br />
A user who was removed in this way is only removed from that one reader;<br />
the user is not removed from <strong>HandNet</strong> or from any other reader. If you ever<br />
download users to a reader, the user will be added to the reader again if<br />
the user is still in <strong>HandNet</strong> (to remove a user from <strong>HandNet</strong>, click the user<br />
on the list of users and press the DEL key. Removing a user from <strong>HandNet</strong><br />
generates the message User Record Deleted).<br />
Users Listed: Someone listed users using the command menus in the reader<br />
(if you want a list of users, its generally much easier to just look at the list of<br />
users in <strong>HandNet</strong> or to print the Users report; see page 13).<br />
Users Time Zone Changed: When a user can access the reader was changed<br />
from the command menus in the reader (typically, this is not changed at the<br />
reader; you would instead change the user’s access profile on the <strong>Security</strong><br />
tab in User Properties to change when the user has access to particular<br />
readers. If you did this, you would see the message User Properties<br />
Changed).<br />
* * * * *<br />
123
Other Ongoing Activities<br />
Reader Maintenance<br />
Cleaning<br />
Readers<br />
You should periodically clean hand readers; if you do not, users may get<br />
rejected more often.<br />
Spray any ordinary, non-abrasive cleaner on a clean cloth, and then use the<br />
cloth to wipe the platen, the mirror and reflector on the sides of reader, and the<br />
window above the platen. When wiping the platen, start from the back corners<br />
and wipe <strong>for</strong>ward.<br />
Never spray cleaning fluid directly onto the reader! Always spray a cloth and<br />
then wipe the reader with the cloth.<br />
Recalibrating<br />
Readers<br />
Never use an abrasive or gritty cleaner! An abrasive cleaner could scratch<br />
the reader; this would damage it.<br />
If users are often being rejected at a particular reader, try recalibrating it. To do<br />
this:<br />
1. Check the list of users to make sure you have an authority level of one or<br />
higher. If you have an authority level of None, you cannot do this (to change<br />
your authority level, double-click your name on the list of users, click the<br />
<strong>Security</strong> tab, click the Authority Level entry, and select the appropriate level).<br />
2. Go to the reader to be recalibrated, and enter command mode on the<br />
reader:<br />
If you have a HandKey II or HandKey CR reader: Press CLEAR, and<br />
then press ENTER.<br />
If you have an ID3D HandKey reader: Press # AND * (you can press<br />
them at the same time, or one after the other).<br />
The display on the reader should look like this:<br />
READY<br />
* :<br />
3. Type your User ID number (the same one you enter to get access through<br />
the reader), and press ENTER or #. The reader asks you to place your<br />
ENTER PASSWORD<br />
124
<strong>HandNet</strong> <strong>for</strong> <strong>Windows</strong><br />
hand. Once it recognizes your hand, this display looks like this:<br />
4. Type 1 and press ENTER or # (this is the standard password <strong>for</strong> the Service<br />
menu in the reader; if you have changed this on the Passwords screen in<br />
the Reader Properties, enter the password you have set up). The display<br />
should now look like this:<br />
CALIBRATE<br />
* NO YES #<br />
If the reader shows the READY screen again instead of this screen, either<br />
you placed your hand improperly or you do not have the rights to do this;<br />
carefully check step one again.<br />
5. Press the YES/# button. This display should now look something like this:<br />
r0 c0 e100 s<br />
RECAL (Y#/N*)?:<br />
(The actual numbers on the first line may be different).<br />
6. Press the YES/# button again. After telling you to please wait, you will see<br />
the Calibrate No/Yes display again. At this point, the reader should be<br />
recalibrated.<br />
7. Press the CLEAR button to leave the Service menu and return to the reader<br />
to its normal display.<br />
* * * * *<br />
125
Other Ongoing Activities<br />
Making Backups<br />
Why Make<br />
Backups<br />
Occasionally computer hard drives fail, losing the in<strong>for</strong>mation on them.<br />
Occasionally computer files get damaged, making the in<strong>for</strong>mation in them<br />
unusable. And occasionally computer users make mistakes and delete<br />
in<strong>for</strong>mation they should not. A backup is an extra copy of the in<strong>for</strong>mation on<br />
your computer, so that if the in<strong>for</strong>mation gets damaged or lost, you have another<br />
copy to protect you.<br />
The in<strong>for</strong>mation in <strong>HandNet</strong>—in<strong>for</strong>mation about readers, access profiles,<br />
and users—represents many hours of work. The record of activity (including<br />
archived historical activity) is often an important security record. So you should<br />
protect your many hours of work by periodically making a backup copy of this<br />
in<strong>for</strong>mation.<br />
Making Backups<br />
a Scheduled<br />
Event<br />
How to Make<br />
a Backup of<br />
Your <strong>HandNet</strong><br />
In<strong>for</strong>mation<br />
In practice, many computer users understand that backups are important, but<br />
they still go months or even years without actually making one. Then, when a<br />
problem occurs, the backup they have is so old that it does not save them all<br />
that much work. The way to avoid this is to make backing up your in<strong>for</strong>mation<br />
a scheduled part of your routine. How often you need to make them depends<br />
on how many changes to the in<strong>for</strong>mation you make. If you are continually<br />
adding and removing users, a weekly backup might be appropriate. If you make<br />
fewer changes and losing a month’s changes would not be that hard to redo,<br />
a monthly backup might be enough. Regardless, decide how often to make a<br />
backup, and then put it on your calendar; do it every Friday morning, or every<br />
month be<strong>for</strong>e you print your activity reports. If you do not schedule backups,<br />
they probably will not happen. And if you do not make them, sooner or later<br />
most computer users regret it.<br />
You should periodically be making backups of all the in<strong>for</strong>mation on your<br />
computer. How to best do that is beyond the scope of these instructions. Here,<br />
we will just tell you how to make a backup of your <strong>HandNet</strong> in<strong>for</strong>mation.<br />
1. Use <strong>Windows</strong> Explorer to go to the folder <strong>HandNet</strong> is in (if you installed<br />
<strong>HandNet</strong> in the standard location, it is in C:\Program Files\Schlage<br />
Biometrics, Inc\<strong>HandNet</strong> <strong>for</strong> <strong>Windows</strong>).<br />
2. Make a copy of all of the Microsoft Access Database files (*.MDB) and all<br />
of the <strong>HandNet</strong> Activity Archive files (*.HNA) in this directory. You can copy<br />
these files to a floppy disk or to a network drive. If the files are large, WinZip<br />
is a helpful and inexpensive utility that lets you both compress a number of<br />
files into a single archive and spread the archive over a number of disks if<br />
needed (to get WinZip, go to www.winzip.com. For help making an archive<br />
span several floppy disks, look up “spanning” in the index of WinZip’s help).<br />
The best protection is to store the backup disks in a different place than the<br />
computer. That way, if the computer is damaged by fire or water, or if the<br />
computer equipment is stolen, there is no chance of the backup disks being<br />
damaged or taken.<br />
* * * * *<br />
126
Reporting and Exporting In<strong>for</strong>mation<br />
Printing or<br />
Viewing Reports<br />
<strong>HandNet</strong> <strong>for</strong> <strong>Windows</strong><br />
Whenever you generate a report, <strong>HandNet</strong> shows the report in a new window.<br />
The header of that window lets you move from page to page, print the report, or<br />
export the report to a file. The header looks like this:<br />
To print the report: Click the printer icon near the middle of the header to print<br />
the report.<br />
If the printer icon is disabled and grayed out, you do not have a printer set<br />
up yet on this computer (to set up a printer, go to the <strong>Windows</strong> Start menu,<br />
highlight Settings, pick Printers, and click Add Printer).<br />
To export the report to a file: Click the icon with the envelope. You can export<br />
to a variety of <strong>for</strong>mats including Word, Excel, Lotus 1-2-3, .....rtf, text, and<br />
others.<br />
To close the report window when done: Click the X in the upper-right corner<br />
of the window.<br />
Getting<br />
In<strong>for</strong>mation<br />
from <strong>HandNet</strong><br />
Database Files<br />
Exporting activity<br />
to an access<br />
database file<br />
Exporting the<br />
content of any<br />
report to various<br />
<strong>for</strong>mats<br />
<strong>HandNet</strong> <strong>for</strong> <strong>Windows</strong> stores in<strong>for</strong>mation in access database files (actions.<br />
mdb, activity.mdb, and <strong>HandNet</strong>.mdb). These files are password-protected <strong>for</strong><br />
security; we do NOT ever give these passwords out <strong>for</strong> any reason. If we did, it<br />
would put the integrity of your security at risk.<br />
However, <strong>HandNet</strong> can export activity to an access database file that is not<br />
password protected so you can open it and access any in<strong>for</strong>mation in it at will.<br />
If you want to create custom activity reports using some external report tool,<br />
Export Activity on the File menu sends all of your current activity to an access<br />
database file called expactvt.mdb.<br />
To save <strong>HandNet</strong> in<strong>for</strong>mation to a file, you can also generate any<br />
Activity Report or other report on the Reports menu and, when you<br />
see the report on the screen, click the Export button.<br />
You will then be able to save the content of the report in a number of different<br />
<strong>for</strong>mats so you can import it into other programs. These <strong>for</strong>mats include:<br />
character-separated values, comma-separated values, Crystal Reports, Data<br />
Interchange Format (DIF), Excel (Versions 5.0, 7.0, or 8.0; either extended or<br />
not), Lotus 1-2-3 (WK1, WK3, or WKS), Access 97 database, paginated text,<br />
record style (columns of values(report definition, Rich Text Format (RTF), tabseparated,<br />
text, or Word <strong>for</strong> <strong>Windows</strong>)).<br />
* * * * *<br />
127
Other Ongoing Activities<br />
Locking and Unlocking Doors<br />
Automatically<br />
Unlocking<br />
a Door on a<br />
Scheduled Basis<br />
If you regularly want a door unlocked during certain hours:<br />
1. If you have not already done so, set up a time zone that corresponds to the<br />
days and times you want the door unlocked.<br />
2. Select the reader(s) in the list of readers.<br />
3. Pick Reader from the main menu, and then pick Properties from the Reader<br />
menu.<br />
4. Go to the Configuration tab.<br />
5. In the Auto Unlock Time Zone, choose the time zone when the door should<br />
be automatically unlocked. <strong>HandNet</strong> automatically unlocks the door at the<br />
beginning of the time zone, and locks it again at the end of the time zone.<br />
Unlocking a<br />
Door on a Non-<br />
Scheduled Basis<br />
Unlock on the Reader menu lets you unlock a door without setting it up to be<br />
regularly unlocked.<br />
1. Select the reader(s) in the list of readers.<br />
2. Pick Reader from the main menu, and highlight Unlock on the Reader<br />
menu. You will see another menu with two choices: Indefinite and Timed.<br />
To unlock a door so that it stays unlocked until you lock it again:<br />
Choose Indefinite. This leaves the door unlocked until you lock it again<br />
with Relock on the Reader menu.<br />
To unlock the door momentarily: Choose Timed. This unlocks the door<br />
connected to that reader only <strong>for</strong> the number of seconds specified in<br />
Lock Open For on the Configuration tab in the Reader Properties (that<br />
is, it unlocks the door <strong>for</strong> the same number of seconds that the door<br />
would be unlocked if it were opened by a reader).<br />
Locking a Door<br />
so it cannot be<br />
Opened from the<br />
Reader<br />
Locking an<br />
Unlocked Door<br />
Lockup on the Reader menu disables the lock on the door <strong>for</strong> the selected<br />
reader. The reader will still let users enter their ID numbers and still verify hands,<br />
but the door will stay locked and will not open even <strong>for</strong> valid users. No one will<br />
be able to open the door from the reader until you choose Unlock or Relock<br />
from the Reader menu.<br />
If you have unlocked a door with Unlock, Indefinite on the Reader menu, Relock<br />
locks it again (if you unlocked the door using Unlock, Timed on the Reader<br />
menu, the door automatically relocks after the number of seconds specified<br />
in Lock Open For on the Configuration tab in the Reader Properties just as it<br />
would if the door were unlocked by the reader, so you do not have to anything<br />
special to relock it).<br />
If you have disabled access through a door with Lockup on the Reader menu,<br />
Relock releases so the reader can open it again.<br />
* * * * *<br />
128
<strong>HandNet</strong> <strong>for</strong> <strong>Windows</strong><br />
Turning an Auxiliary Device On or Off<br />
<strong>HandNet</strong> can be set up to automatically turn on external auxiliary devices when<br />
certain conditions occur. For example, it might trigger an alarm, turn on lights or<br />
a security camera, and so on.<br />
<strong>HandNet</strong> can turn an auxiliary device on automatically when certain conditions<br />
occur. When this can happen is controlled by the Auxiliary (AUX) Settings tab;<br />
see page 48 (the HandKey II and HandKey CR support up to three auxiliary<br />
devices; this option only controls the first of these, the same one controlled by<br />
the Auxiliary Settings tab in Reader Properties. The other two are only controlled<br />
by the Extended Settings tab in Reader Properties).<br />
<strong>Manual</strong>ly<br />
Turning an<br />
Auxiliary Device<br />
On<br />
Auxiliary Output on the Reader menu lets you turn manually turn an auxiliary<br />
device on or off without anything happening at the reader. For example,<br />
suppose a reader, in addition to being connected to a door, is also connected<br />
to an auxiliary light. You could use this option to turn the light on without doing<br />
anything at the reader.<br />
To turn on an auxiliary device that is connected to a reader:<br />
1. Click a reader in the right pane of the Network window (if the Network<br />
window is not shown, press CTRL-N to open it).<br />
2. Click Reader from the main menu bar at the top of the screen.<br />
3. Click Auxiliary Output on the Reader menu, and then click On.<br />
<strong>Manual</strong>ly<br />
Turning an<br />
Auxiliary Device<br />
Off<br />
If you have manually turned an auxiliary device on, or if an alarm condition<br />
has turned it on, you can also turn the device off from <strong>HandNet</strong>. For example,<br />
suppose an auxiliary alarm is connected to the reader, and suppose the alarm<br />
is set to sound <strong>for</strong> fifteen minutes after the condition occurs. You could use this<br />
option to turn the alarm off be<strong>for</strong>e the fifteen minutes was done.<br />
To turn off an auxiliary device that is connected to a reader:<br />
1. Click a reader in the right pane of the Network window (if the Network<br />
window is not shown, press CTRL-N to open it).<br />
2. Click Reader from the main menu bar at the top of the screen.<br />
3. Click Auxiliary Output on the Reader menu, and then click Off.<br />
* * * * *<br />
129
Troubleshooting<br />
Answers to Common Questions<br />
Enroll Option<br />
Disabled<br />
If the Enroll option on the Reader menu is disabled or grayed out, there are<br />
several possible reasons. Check each of the following:<br />
1. Make sure you are logged in. If you are not logged in, you cannot change<br />
anything.<br />
2. Make sure that you have selected a reader on the list of readers. Since<br />
enrollment has to be done at a reader, you must pick the reader to enroll at<br />
be<strong>for</strong>e the enroll option will work (to see the list of readers, type CTRL-N or<br />
pick Network from the View menu).<br />
3. Pick About <strong>HandNet</strong> <strong>for</strong> <strong>Windows</strong>... from the Help menu. Check the bottom<br />
of the box that pops up. To be able to use the enroll feature, the last line<br />
must say You may use all features of this software. If this line says Your<br />
current license does not let you use the enroll..., you must contact your<br />
dealer and upgrade your license be<strong>for</strong>e you can use this feature (once you<br />
upgrade, we will send you an access code that makes the feature available).<br />
If you do not upgrade to the full feature set, you must start the enrollment<br />
process using the command menus in the reader; see page 87.<br />
4. Check with your supervisor to see if you are authorized to enroll users<br />
(<strong>for</strong> you to be authorized to enroll users, Reader Data Download must be<br />
checked in the Access Rights <strong>for</strong> the operator in System Settings).<br />
No Current<br />
Record Message<br />
Problems<br />
Connecting to a<br />
Site by Modem<br />
You get the message No Current Record when you start <strong>HandNet</strong> if you have<br />
not added any users yet. This message stops occurring once you add a user;<br />
see page 74 and following <strong>for</strong> help adding users.<br />
If you are having trouble getting <strong>HandNet</strong> to connect to a site by modem, check<br />
each of the following:<br />
1. Click the site in the left pane of the Network window, pick Properties from<br />
the Site menu, and click the Connection tab.<br />
2. Make sure you have picked the serial port that the modem is connected to; if<br />
this is set to None, <strong>HandNet</strong> will not connect.<br />
3. Make sure the Baud Rate in Site Properties in <strong>HandNet</strong> matches the baud<br />
rate the reader is set up <strong>for</strong>. We recommend 9,600 <strong>for</strong> a HandKey II or<br />
HandKey CR and 2400 <strong>for</strong> a HandKey reader.<br />
4. Make sure the phone number is entered correctly. If you have to dial some<br />
digit to get an outside line, enter this digit followed by a comma be<strong>for</strong>e the<br />
phone number. If the number is a long distance number, make sure you<br />
have entered the 1 and the area code as appropriate. For example, if you<br />
130
<strong>HandNet</strong> <strong>for</strong> <strong>Windows</strong><br />
have to dial 9 <strong>for</strong> an outside line, and the number was a long distance call<br />
that required by 1 and an area code, you would enter the number like this:<br />
9, 18025551212<br />
5. Make sure the modem is hooked up to a phone line.<br />
6. Make sure the phone line is plugged into the right jack on the modem<br />
connected to your computer (most modems have two jacks: one labeled<br />
Line and one labeled Phone. The phone wire from the phone jack on the<br />
wall must connect to the jack on the modem labeled Line.<br />
7. Make sure the phone line has a dial tone (hook up a regular phone to the<br />
modem jack labeled Phone to see if you hear a dial tone; if you do not, there<br />
is a problem with the jack or phone line).<br />
8. Make sure no other phone, fax machine, or modem is trying to use the<br />
same phone line.<br />
9. Make sure call waiting is not on <strong>for</strong> this line.<br />
10. On the Schedule tab in Site Properties, make sure you have set up a time<br />
<strong>for</strong> this site to connect. Make sure this connection time is enabled (checked).<br />
Program<br />
Claims to be a<br />
Demonstration<br />
Version<br />
When <strong>HandNet</strong> <strong>for</strong> <strong>Windows</strong> is installed, it is in demonstration mode: it gives<br />
you full functionality <strong>for</strong> fourteen days, and after that it limits the use of certain<br />
features.<br />
If you purchase a previous Version of <strong>HandNet</strong> <strong>for</strong> <strong>Windows</strong>, you are<br />
also authorized to use this Version, but you must register it first, even if<br />
you registered your previous Version. Once you send us your registration<br />
in<strong>for</strong>mation, we will give you an authorization code that makes the program<br />
permanently functional.<br />
To register this copy of <strong>HandNet</strong>, please pick Registration from the File menu<br />
and follow the instructions on that screen (we would just repeat the instructions<br />
here, but you need the unique ID number that is shown on that screen and you<br />
also need to print the registration <strong>for</strong>m).<br />
If you really do have a demonstration Version, please contact us to find out how<br />
to purchase a full Version.<br />
Software<br />
Expired<br />
After the first time you use this Version of <strong>HandNet</strong>, you have fourteen days<br />
to register it. You must register even if you registered your previous Version of<br />
<strong>HandNet</strong>. If you do not register within fourteen days, you will not be able to log<br />
in. When you try to log in, you see this message:<br />
If you get this message, exit <strong>HandNet</strong> and then restart. This brings up the<br />
registration screen. Send us the in<strong>for</strong>mation requested on that screen. Once<br />
we get your in<strong>for</strong>mation, we will send you an activation code to enter on the<br />
registration screen. This will make <strong>HandNet</strong> permanently functional.<br />
131
Troubleshooting<br />
Unable to<br />
Acknowledge an<br />
Alarm<br />
If you have opened the detail box <strong>for</strong> an alarm and the Acknowledge buttons are<br />
disabled or grayed out, check the following:<br />
1. Make sure you are logged in. If you are not logged in, you cannot change<br />
anything.<br />
2. Make sure that you are clicking one of the Acknowledge buttons at the<br />
bottom left of the window; you cannot just click the checkbox by the word<br />
acknowledged; you must click one of the buttons.<br />
3. Check with your supervisor to see if you are authorized to acknowledge<br />
alarms (<strong>for</strong> you to be authorized to acknowledge alarms, the Alarm<br />
Acknowledgement box must be checked in the Access Rights <strong>for</strong> the<br />
operator in System Settings; see page 24 <strong>for</strong> more on adding or changing<br />
operator settings).<br />
User Often<br />
Rejected<br />
Creating a new<br />
profile of the<br />
user’s hand<br />
If the user has<br />
a disability that<br />
prevents consistent<br />
hand placement<br />
If a user is often rejected at readers, you may need to teach the user the correct<br />
way to place the hand on the platen; see Teaching Users How to Place Their<br />
Hands on Readers on page 86.<br />
If the user held his/her hand improperly while being enrolled, or if the user<br />
has lost or gained a lot of weight, the hand profile may be different enough to<br />
prevent recognition. Delete the user (this eliminates the old hand profile), and<br />
then add the user again. When you re-enroll the user, this creates a new profile<br />
of the hand. Make sure the user correctly places his/her hand. You can usually<br />
avoid this situation by allowing <strong>HandNet</strong> to update the user’s hand profile each<br />
time the user gains access; see page 23.<br />
You may need to increase the tolerance <strong>for</strong> the user. To do this:<br />
1. Double-click the user on the list of users (you could also click once to select<br />
the user and then pick Properties from the User menu).<br />
2. Click the <strong>Security</strong> tab.<br />
3. Check the Override Reader’s Threshold box if it is not already checked.<br />
4. Drag the pointer to the right (the Less Sensitive side).<br />
If many users<br />
are rejected at a<br />
particular reader<br />
If many users are being rejected at a particular reader, you may need to clean<br />
the reader or you may need to recalibrate it; see page 124.<br />
* * * * *<br />
132
Index<br />
A<br />
Access<br />
Multiple Users<br />
Changing ..............................95<br />
Access Denied ........................116<br />
Access Profile ...........................83<br />
Access Profiles Changed ........116<br />
Access Refused, Time Zone ...116<br />
Activated Limited Access User..116<br />
Activity<br />
Exporting ..............................115<br />
Avoid Exporting Twice ........115<br />
To Access Database File ....127<br />
Messages<br />
Access Denied ...................116<br />
Access Profiles Changed.....116<br />
Access Refused, Time Zone.116<br />
Activated Limited Access User .<br />
........................................116<br />
Activity Archived .................116<br />
Alarm Acknowledged .........116<br />
Amnesty Punch Granted ....116<br />
Authority Level Changed ....117<br />
Auto Import Started ............117<br />
Auxiliary Input ON ..............117<br />
Auxiliary Output ON ...........117<br />
Auxiliary Output Setup .Changed<br />
........................................117<br />
Aux Output OFF .................117<br />
Aux Unlock Via Wiegand Keypad<br />
........................................117<br />
Baud Rate Changed ..........117<br />
Command Mode Entered ...117<br />
Data Base Restored ...........117<br />
Data Base Saved ...............117<br />
Data Downloaded to Reader .<br />
........................................117<br />
Data Log Buffer Empty .......117<br />
Deactivating Limited Access<br />
User ..............................117<br />
Door Forced Open .............117<br />
Door Open Too Long ..........118<br />
Duress Alarm .....................118<br />
Exit Granted .......................118<br />
Extended Datalog ..............118<br />
<strong>HandNet</strong> Exited ..................118<br />
<strong>HandNet</strong>+ File Converted ..118<br />
<strong>HandNet</strong> Started ................118<br />
Holiday Table Changed ......118<br />
Identity Unknown ................118<br />
Identity Verified ...................118<br />
Invalid Operator Login Attempt .<br />
........................................118<br />
Leave Command Mode ......118<br />
Lock Output OFF ................119<br />
Lock Output ON .................119<br />
Lock Setup Changed ..........119<br />
<strong>Manual</strong> Import Started .......119<br />
Maximum ID Length Changed<br />
........................................119<br />
Memory Cleared ................119<br />
Messages Read .................119<br />
No Hand Read For Card ....119<br />
Operating Mode Changed ..119<br />
Operator Added ..................119<br />
Operator Deleted ................119<br />
Operator Login ...................119<br />
Operator Logout .................119<br />
Operator Properties Changed .<br />
........................................119<br />
Output Mode Changed .......120<br />
Passwords Changed ..........120<br />
Printer Setup Changed ......120<br />
Reader Action Failed ..........120<br />
Reader Added ....................120<br />
Reader Connection Failed .120<br />
Reader Connection Timeout .<br />
........................................120<br />
Reader Data Uploaded to<br />
<strong>HandNet</strong> ........................120<br />
Reader Deleted ..................120<br />
Reader Properties Changed .<br />
........................................120<br />
Record Imported, Empty<br />
Template Overwrote Local<br />
Enrollment .....................120<br />
Record Imported <strong>for</strong> Creation .<br />
........................................120<br />
Record Imported <strong>for</strong> Deletion .<br />
........................................120<br />
Record Imported <strong>for</strong> Modification<br />
........................................120<br />
Reject Override Changed ...121<br />
Reject Threshold Set ..........121<br />
Remote Enrollment Started .121<br />
Report Engine Unavailable .121<br />
Request to Exit Activated ...121<br />
Score Is ..............................121<br />
Site Added .........................121<br />
Site Code Changed ............121<br />
Site Connected ..................121<br />
Site Deleted .......................121<br />
Site Disconnected ..............121<br />
Site Properties Changed ....121<br />
Special Enrollment .............121<br />
Supervisor Override ...........121<br />
System Re-calibrated .........121<br />
System Settings Changed .121<br />
Tamper Activated ...............122<br />
Time and Date Set .............122<br />
Time Restrictions Turned On/Off<br />
For All Users .................122<br />
Time Zone Data Changed ..122<br />
Time Zones Changed ........122<br />
Two Man Timeout ...............122<br />
Unable to Close<br />
Communications Port ....122<br />
Unable to Install<br />
Communications Port<br />
or Unable to Open<br />
Communications Port ....122<br />
Unable to Retrieve Datalog .122<br />
Unauthorized Enrollment<br />
Attempted ......................122<br />
Unit Address Changed .......122<br />
User Added From Card ......122<br />
User Database Field Added 123<br />
User Database Field Deleted .<br />
........................................123<br />
User Database Import Finished<br />
........................................123<br />
User Enrolled .....................123<br />
User Record Added ...........123<br />
User Record Changed .......123<br />
User Record Deleted .........123<br />
User Removed ...................123<br />
Users Listed .......................123<br />
Users Time Zone Changed .123<br />
Past Archiving .......................113<br />
Reports<br />
Screens, Condition .............107<br />
General ............................107<br />
Screen<br />
Buttons ...............................102<br />
Next 1.................................02<br />
Previous ...........................102<br />
Views<br />
Screens, Condition .............107<br />
General ............................107<br />
Views, Custom<br />
Creating .............................104<br />
Printing ...............................104<br />
133
Troubleshooting<br />
Removing ...........................104<br />
Window<br />
Data ...................................102<br />
Getting more detail .............101<br />
Message ............................102<br />
Message Explanation .........101<br />
Rearranging .......................101<br />
Report<br />
Creating ...........................105<br />
Printing ............................105<br />
Resizing .............................101<br />
Type ...................................102<br />
User/Info .............................102<br />
Activity Archive ........................106<br />
Activity Archived ......................116<br />
Activity Log ..............................106<br />
Alarm Acknowledged ..............116<br />
Alarm(s)<br />
Acknowledging<br />
Unable to ............................132<br />
Alarms<br />
Acknowledging ......................103<br />
Getting to ..............................103<br />
List<br />
Getting to ...........................103<br />
Amnesty Punch Granted .........116<br />
Archive<br />
Creating ................................113<br />
Archive file ..........................114<br />
Available activity .................113<br />
File Size .............................113<br />
Selected <strong>for</strong> archival ...........113<br />
Archiving<br />
Activity, Past .........................113<br />
Definition ................................113<br />
Authority Level .....................83, 92<br />
Management ...........................92<br />
None .......................................92<br />
<strong>Security</strong> ...................................92<br />
Authority Level Changed .........117<br />
Auto Import Started .................117<br />
Auxiliary Device<br />
<strong>Manual</strong>ly<br />
Turning Off .........................129<br />
Turning On .........................129<br />
Turning On or Off ..................129<br />
Auxiliary Input ON ...................117<br />
Auxiliary Output ON ................117<br />
Auxiliary Output Setup Changed .<br />
........................................117<br />
Aux Output OFF ......................117<br />
Aux Unlock Via Wiegand Keypad .<br />
........................................117<br />
134<br />
B<br />
Backup<br />
How to ..................................126<br />
Backups<br />
Creating ................................126<br />
Events<br />
Scheduled ..........................126<br />
Reasons <strong>for</strong> ..........................126<br />
Scheduled<br />
Events ................................126<br />
Baud Rate Changed ................117<br />
C<br />
Command Mode Entered ........117<br />
Custom Entries<br />
Screen ....................................80<br />
D<br />
Data Base Restored ................117<br />
Data Base Saved ....................117<br />
Data Downloaded to Reader ...117<br />
Data Log Buffer Empty ............117<br />
Date<br />
End .........................................93<br />
Start ........................................93<br />
Start/End ................................79<br />
Deactivating Limited Access User .<br />
........................................117<br />
Door<br />
Locking<br />
So cannot be opened from<br />
reader ............................128<br />
Unlocking<br />
On a Non-Scheduled Basis .128<br />
Unlocking Automatically<br />
On a Scheduled Basis .......128<br />
Door Forced Open ..................117<br />
Door Open Too Long ...............118<br />
Doors<br />
Locking .................................128<br />
Unlocking ..............................128<br />
Duress Alarm ..........................118<br />
E<br />
Enroll<br />
Option<br />
Disabled .............................130<br />
Events<br />
Scheduled<br />
Backups .............................126<br />
Exit Granted ............................118<br />
Extended Datalog ....................118<br />
F<br />
Frequently Asked Questions ...130<br />
H<br />
Handnet<br />
Database Files<br />
Getting In<strong>for</strong>mation from ....127<br />
<strong>HandNet</strong>+<br />
Converting From .....................98<br />
<strong>HandNet</strong> Exited .......................118<br />
<strong>HandNet</strong>+ File Converted .......118<br />
<strong>HandNet</strong> Started .....................118<br />
Hand Placement ........................86<br />
Correct ....................................86<br />
Left Handed ............................86<br />
Holiday Table Changed ...........118<br />
I<br />
Icon ........................................107<br />
ID<br />
Screen ....................................77<br />
Starting ...................................82<br />
Identity Unknown .....................118<br />
Identity Verified ........................118<br />
ID number .................................81<br />
ID Number .................................91<br />
In<strong>for</strong>mation<br />
Exporting ..............................127<br />
Getting from <strong>HandNet</strong> Database<br />
Files ..............................127<br />
Reporting ..............................127<br />
Invalid Operator Login Attempt..118<br />
L<br />
Leave Command Mode ...........118<br />
Limited Access ..............79, 84, 93<br />
Enabling ......................79, 84, 93<br />
Reject Threshold ...............79, 84<br />
Override ...............................93<br />
Lock Output OFF .....................119<br />
Lock Output ON ......................119<br />
Lock Setup Changed ...............119<br />
M<br />
Management .............................92<br />
<strong>Manual</strong> Import Started ............119<br />
Maximum ID Length Changed..119<br />
Memory Cleared .....................119<br />
Menu<br />
Reader<br />
Enroll Option ........................87<br />
Menus<br />
Command<br />
in Reader ...........................116
<strong>HandNet</strong> <strong>for</strong> <strong>Windows</strong><br />
Message<br />
Record<br />
No Current .........................130<br />
Messages ................................112<br />
Activity ..................................116<br />
Access Denied ...................116<br />
Access Profiles Changed ...116<br />
Access Refused, Time Zone .<br />
........................................116<br />
Activated Limited Access User .<br />
........................................116<br />
Activity Archived .................116<br />
Alarm Acknowledged .........116<br />
Amnesty Punch Granted ....116<br />
Authority Level Changed ....117<br />
Auto Import Started ............117<br />
Auxiliary Input ON ..............117<br />
Auxiliary Output ON ...........117<br />
Auxiliary Output Setup Changed<br />
........................................117<br />
Aux Output OFF .................117<br />
Aux Unlock Via Wiegand Keypad<br />
........................................117<br />
Baud Rate Changed ..........117<br />
Command Mode Entered ...117<br />
Data Base Restored ...........117<br />
Data Base Saved ...............117<br />
Data Downloaded to Reader .<br />
........................................117<br />
Data Log Buffer Empty .......117<br />
Deactivating Limited Access<br />
User ..............................117<br />
Door Forced Open .............117<br />
Door Open Too Long ..........118<br />
Duress Alarm .....................118<br />
Exit Granted .......................118<br />
Extended Datalog ..............118<br />
<strong>HandNet</strong> Exited ..................118<br />
<strong>HandNet</strong>+ File Converted ..118<br />
<strong>HandNet</strong> Started ................118<br />
Holiday Table Changed ......118<br />
Identity Unknown ................118<br />
Identity Verified ...................118<br />
Invalid Operator Login Attempt .<br />
........................................118<br />
Leave Command Mode ......118<br />
Lock Output OFF ................119<br />
Lock Output ON .................119<br />
Lock Setup Changed ..........119<br />
<strong>Manual</strong> Import Started .......119<br />
Maximum ID Length Changed .<br />
........................................119<br />
Memory Cleared ................119<br />
Messages Read .................119<br />
No Hand Read For Card ....119<br />
Operating Mode Changed ..119<br />
Operator Added ..................119<br />
Operator Deleted ................119<br />
Operator Login ...................119<br />
Operator Logout .................119<br />
Operator Properties Changed .<br />
........................................119<br />
Output Mode Changed .......120<br />
Passwords Changed ..........120<br />
Printer Setup Changed ......120<br />
Reader Action Failed ..........120<br />
Reader Added ....................120<br />
Reader Connection Failed .120<br />
Reader Connection Timeout .<br />
........................................120<br />
Reader Data Uploaded to<br />
<strong>HandNet</strong> ........................120<br />
Reader Deleted ..................120<br />
Reader Properties Changed .<br />
........................................120<br />
Record Imported, Empty<br />
Template Overwrote Local<br />
Enrollment .....................120<br />
Record Imported <strong>for</strong> Creation .<br />
........................................120<br />
Record Imported <strong>for</strong> Deletion .<br />
........................................120<br />
Record Imported <strong>for</strong> Modification<br />
........................................120<br />
Reject Override Changed ...121<br />
Reject Threshold Set ..........121<br />
Remote Enrollment Started .121<br />
Report Engine Unavailable 121<br />
Request to Exit Activated ...121<br />
Score Is ..............................121<br />
Site Added .........................121<br />
Site Code Changed ............121<br />
Site Connected ..................121<br />
Site Deleted .......................121<br />
Site Disconnected ..............121<br />
Site Properties Changed ....121<br />
Special Enrollment .............121<br />
Supervisor Override ...........121<br />
System Re-calibrated .........121<br />
System Settings Changed .121<br />
Tamper Activated ...............122<br />
Time and Date Set .............122<br />
Time Restrictions Turned On/Off<br />
For All Users .................122<br />
Time Zone Data Changed ..122<br />
Time Zones Changed ........122<br />
Two Man Timeout ...............122<br />
Unable to Close<br />
Communications Port ....122<br />
Unable to Install<br />
Communications Port<br />
or Unable to Open<br />
Communications Port ....122<br />
Unable to Retrieve Datalog .122<br />
Unauthorized Enrollment<br />
Attempted ......................122<br />
Unit Address Changed .......122<br />
User Added From Card ......122<br />
User Database Field Added.123<br />
User Database Field Deleted .<br />
........................................123<br />
User Database Import Finished<br />
........................................123<br />
User Enrolled .....................123<br />
User Record Added ...........123<br />
User Record Changed .......123<br />
User Record Deleted .........123<br />
User Removed ...................123<br />
Users Listed .......................123<br />
Users Time Zone Changed .123<br />
The messages checked below .<br />
........................................112<br />
Messages Read ......................119<br />
Message Types<br />
Alarm ....................................111<br />
Invalid Access Attempt .........111<br />
Operator Logs .......................111<br />
Setup Changed .....................111<br />
Status ...................................112<br />
System Database .................112<br />
System Status ......................112<br />
The Message Types Checked<br />
Below ............................111<br />
User Database ......................112<br />
Valid Access .........................112<br />
Modems<br />
Connection<br />
Problems ............................130<br />
Monitoring Ongoing Activity ....101<br />
MS-DOS <strong>HandNet</strong><br />
Converting From .....................98<br />
N<br />
Name .......................................107<br />
Screen ....................................77<br />
No Hand Read For Card .........119<br />
O<br />
Operating Mode Changed .......119<br />
Operator Added .......................119<br />
Operator Deleted .....................119<br />
Operator Login ........................119<br />
Operator Logout ......................119<br />
Operator Properties Changed .119<br />
Option<br />
Enroll<br />
Disabled .............................130<br />
TZ<br />
135
Troubleshooting<br />
Importing ..............................95<br />
Options<br />
<strong>Security</strong> ...................................83<br />
Access Profile ......................83<br />
Authority Level ......................83<br />
Other Ongoing Activities .........124<br />
Output Mode Changed ............120<br />
Overview<br />
Users<br />
Changing ..............................90<br />
P<br />
Passwords Changed ...............120<br />
Printer Setup Changed ...........120<br />
Program<br />
Demonstration Version ..........131<br />
Properties<br />
User<br />
Authority Level ......................92<br />
Custom .................................94<br />
General ................................90<br />
User Database ........................96<br />
Users<br />
<strong>Security</strong> ................................92<br />
R<br />
Reader Action Failed ...............120<br />
Reader Added .........................120<br />
Reader Connection Failed ......120<br />
Reader Connection Timeout ...120<br />
Reader Data Uploaded to <strong>HandNet</strong><br />
........................................120<br />
Reader Deleted .......................120<br />
Reader Properties Changed ...120<br />
Reader(s)<br />
Cleaning ...............................124<br />
Command Menu<br />
Enrolling, <strong>Manual</strong>ly ...............87<br />
Maintenence .........................124<br />
Menu<br />
Enroll Option ........................87<br />
Menus, Command ................116<br />
Recalibrating .........................124<br />
User<br />
Getting In<strong>for</strong>mation from ......99<br />
Record Imported, Empty Template<br />
Overwrote Local Enrollment<br />
........................................120<br />
Record Imported <strong>for</strong> Creation .120<br />
Record Imported <strong>for</strong> Deletion ..120<br />
Record Imported <strong>for</strong> Modification .<br />
........................................120<br />
Reject Override Changed ........121<br />
Reject Threshold ...........79, 84, 93<br />
Override ............................79, 93<br />
Reject Threshold Set ...............121<br />
136<br />
Relock .....................................128<br />
Remote Enrollment Started .....121<br />
Report<br />
Activity<br />
Printing ...............................105<br />
Activity, Window<br />
Creating .............................105<br />
Printing ...............................105<br />
Report Engine Unavailable .....121<br />
Report(s)<br />
Exporting to Various Formats .127<br />
Reports<br />
Activity<br />
Screens, Condition .............107<br />
General ............................107<br />
Archiving<br />
Effect ..................................113<br />
Printing .................................127<br />
Viewing .................................127<br />
Request to Exit Activated ........121<br />
S<br />
Score Is ...................................121<br />
Screen<br />
Date ......................................107<br />
General .................................107<br />
Message Types .....................111<br />
Name/ID .................................77<br />
Readers ................................110<br />
Sites ......................................109<br />
Time ......................................108<br />
Users ....................................110<br />
<strong>Security</strong><br />
Access Profile .........................83<br />
Authority Level ........................83<br />
Options ...................................83<br />
Properties<br />
User .....................................92<br />
Screen ....................................78<br />
User<br />
Properties .............................92<br />
Site Added ...............................121<br />
Site Code Changed .................121<br />
Site Connected ........................121<br />
Site Deleted .............................121<br />
Site Disconnected ...................121<br />
Site Properties Changed .........121<br />
Software<br />
Expired .................................131<br />
Special Enrollment ..................121<br />
Supervisor Override ................121<br />
System Re-calibrated ..............121<br />
System Settings Changed .......121<br />
T<br />
Tamper Activated ....................122<br />
Time<br />
End .........................................93<br />
Start ........................................93<br />
Start/End ................................79<br />
Time and Date Set ..................122<br />
Time Restrictions Turned On/Off For<br />
All Users ........................122<br />
Time Zone ...............................116<br />
Time Zone Data Changed .......122<br />
Time Zones Changed ..............122<br />
Troubleshooting .......................130<br />
Two Man Timeout ....................122<br />
TZ<br />
Import Option ..........................95<br />
U<br />
Unable to Close Communications<br />
Port ...............................122<br />
Unable to Install Communications<br />
Port or Unable to Open<br />
Communications Port ....122<br />
Unable to Retrieve Datalog .....122<br />
Unauthorized Enrollment Attempted<br />
........................................122<br />
Unit Address Changed ............122<br />
Unlock, Indefinite .....................128<br />
User Added From Card ...........122<br />
User Database Field Added ....123<br />
User Database Field Deleted ..123<br />
User Database Import Finished .<br />
........................................123<br />
User Enrolled ..........................123<br />
User Record Added .................123<br />
User Record Changed ............123<br />
User Record Deleted ...............123<br />
User Removed ........................123<br />
User(s)<br />
Changing ................................90<br />
Overview ..............................90<br />
Converting<br />
From MS-DOS or <strong>HandNet</strong>+..98<br />
Enrolling ..................................87<br />
Entries<br />
Adding Custom ....................97<br />
Entries, Custom<br />
Adding New ..........................97<br />
Changing Order ...................97<br />
Deleting ................................97<br />
Getting .................................97<br />
Exporting ................................99<br />
To another <strong>HandNet</strong> copy ..100<br />
Group<br />
Adding ..................................81<br />
<strong>HandNet</strong>+<br />
Converting ............................98<br />
ID
<strong>HandNet</strong> <strong>for</strong> <strong>Windows</strong><br />
Starting .................................82<br />
Importing ................................99<br />
From another <strong>HandNet</strong> copy..99<br />
MS-DOS <strong>HandNet</strong><br />
Converting ............................98<br />
Multiple<br />
Adding ..................................81<br />
New<br />
Number of ............................82<br />
<strong>Security</strong> Screen ....................78<br />
Number of ...............................82<br />
Properties<br />
Authority Level ......................92<br />
Custom .................................94<br />
Database ..............................96<br />
General ................................90<br />
<strong>Security</strong> ................................92<br />
Reader<br />
Getting In<strong>for</strong>mation from ......99<br />
Rejected ...............................132<br />
Renaming ...............................90<br />
Screen, <strong>Security</strong><br />
Access Profiles ........78, 83, 92<br />
Authority Level ......................78<br />
Management ......................78<br />
None ..................................78<br />
Starting ID ..............................82<br />
Users Listed ............................123<br />
Users Time Zone Changed .....123<br />
V<br />
View<br />
Activity, Custom<br />
Removing ...........................104<br />
Views<br />
Activity<br />
Screens, Condition .............107<br />
General ............................107<br />
Activity, Custom<br />
Creating .............................104<br />
Printing ...............................104<br />
W<br />
Window<br />
Activity ..................................101<br />
Data ...................................102<br />
Getting more detail .............101<br />
Message ............................102<br />
Message Explanation .........101<br />
Rearranging .......................101<br />
Report<br />
Creating ...........................105<br />
Printing ............................105<br />
Resizing .............................101<br />
Type ...................................102<br />
User/Info .............................102<br />
137
Ingersoll Rand’s <strong>Security</strong> <strong>Technologies</strong> Sector is a leading global provider of products and services that<br />
make environments safe, secure, and productive. The Sector’s market-leading products include electronic<br />
and biometric access control systems; time and attendance and personnel scheduling systems; mechanical<br />
locks and portable security, door closures and exit devices, steel doors and frames, architectural hardware<br />
and technologies and services <strong>for</strong> global security markets.<br />
408.341.4110 www.schlage.com www.ingersollrand.com<br />
Schlage<br />
Biometric Solutions<br />
Ingersoll Rand <strong>Security</strong> <strong>Technologies</strong><br />
1520 Dell Avenue<br />
Campbell, CA 95008<br />
Office: 866-861-2480/512-712-1413 (international)<br />
Fax: 866-303-1794/408-341-4111<br />
E-mail: sbssupport@irco.com<br />
©2009 Ingersoll-Rand Company Limited P/N HN-MAN Rev. 3.0 10/09