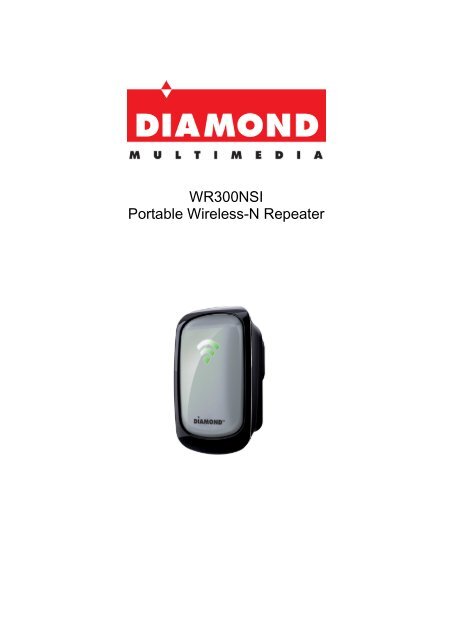
WR300NSI Portable Wireless-N Repeater
WR300NSI Portable Wireless-N Repeater
WR300NSI Portable Wireless-N Repeater
You also want an ePaper? Increase the reach of your titles
YUMPU automatically turns print PDFs into web optimized ePapers that Google loves.
<strong>WR300NSI</strong><br />
<strong>Portable</strong> <strong>Wireless</strong>-N <strong>Repeater</strong>
Quick Start Guide<br />
Minimum System Requirements<br />
To configure your <strong>WR300NSI</strong> repeater your computer must meet the following minimum requirements.<br />
Any operating system can be used<br />
Web Browser<br />
233MHz processor<br />
Ethernet network adapter<br />
Package Contents<br />
Package contents are listed below.<br />
<strong>WR300NSI</strong><br />
Ethernet cable<br />
Easy Start Guide<br />
Resource CD (documentation only, contains no applications and all configurations are performed from<br />
the <strong>WR300NSI</strong>’s built in web based configuration page)
Device Overview<br />
Front Panel<br />
LABEL STATE DESCRIPTION<br />
LED RRSI<br />
3 BARS Connected 95% and above RSSI (Excellent)<br />
2 BARS Connected 55-94% RSSI (Recommended)<br />
1 BAR Connected 10-54% RSSI (Weak)
Device Overview bottom panel<br />
Device Overview top panel
LABEL<br />
DESCRIPTION<br />
WPS BUTTON<br />
Connect <strong>WR300NSI</strong> to any WPS capable devices<br />
Configuring the <strong>Repeater</strong><br />
Setting up the device is easy. Follow the steps below to configure the device for your current wireless<br />
router/AP. Ensure to disable the wireless connection on the PC or laptop used for configuring the<br />
<strong>WR300NSI</strong>. Please note the <strong>WR300NSI</strong> will automatically detect your existing wireless channel<br />
encryption and security type do not change this<br />
To configure your device via the Web GUI:<br />
1. Connect the <strong>WR300NSI</strong> to a power outlet.
2. Connect an Ethernet cable from your PC’s Ethernet port to the Ethernet port at the base of the<br />
<strong>WR300NSI</strong>.<br />
3. Once a connection to the <strong>WR300NSI</strong> is established, your PC/laptop will receive an IP address<br />
automatically and you will be able to access the configuration page using the web graphical user<br />
interface.<br />
4. To access the web GUI, Launch your web browser and input 10.0.10.254 on the address bar.
5. You will now see the following screen below, click on “Quick Connect”<br />
NOTE: If you are connecting to a hidden wireless network, you need to go through the Manual Setup<br />
and key-in the information from your existing wireless router/AP manually Or Un check the broadcast<br />
SSID option so that your wireless network will remain hidden.<br />
6. Click the Connect button located on the right side of the wireless network you want to connect to.<br />
Click Refresh if you don't see your wireless SSID on the list. NOTE: You want to connect to your own<br />
existing <strong>Wireless</strong> Network.<br />
7. Input the current wireless network key/passphrase. Click the Apply button to commit the changes.<br />
Note this is the same password you use to connect to your existing wireless router.
Note: The LED status will turn orange and then Green when completed and the above message box will<br />
auto close<br />
8. Close the web browser and power down the <strong>WR300NSI</strong> by unplugging the device from the wall plug.<br />
Now, Plug the <strong>WR300NSI</strong> back to a power outlet at the identified location. Note: it is always best to<br />
place the repeater half way between your dead spot and your original wireless router.<br />
9. You may now use your wireless devices such as laptops, smart phones, etc. with the <strong>Repeater</strong>.
10. For Access Point (AP) and <strong>Wireless</strong> to Ethernet Bridge configuration see complete user guide<br />
available on the included resource CD.<br />
Trouble Shooting:<br />
If you cannot open up the <strong>WR300NSI</strong> web configuration page after inputting 10.0.10.254 in your web<br />
browsers address check the following:<br />
1. Make sure your computer received an IP address in the same range as the repeater. For windows 7<br />
you can check your IP address by clicking on “Start” open the “Control Panel”<br />
Click on “Network and Internet” as shown below:
Click on “View network status and tasks” as shown below:<br />
Click on “Change adapter settings” as shown below:
Double click on the Ethernet network name of your wired Ethernet port. See example below:<br />
Click on the “Details” tab as shown below:
Notice the IPv4 Address is 10.0.10.1, this is correct. The IP address you receice may vary. Example you<br />
may get 10.0.10.2, 10.0.10.3, but notice the first three digits are always the same. If you have an IP<br />
address that is not in this range you must manually change it in order to configure the repeater.<br />
To change it click on the properties tab on the bottom left hand corner. You will see the image below:<br />
Double click on the “Internet Protocol Version 4 (TCP/IPv4” tab.<br />
You will now see the following:
Make sure you select “Use the following IP address” option and enter<br />
10.0.10.1 for the IP address.<br />
Enter 255.255.255.0 for the Subnet mask.<br />
Enter 10.0.10.254 for the Default gateway.<br />
When you are finished it should look like the image below:
Once completed proceed back to step 4 of this guide to complete the <strong>WR300NSI</strong> configuration.<br />
Note: after you have finished setting up the repeater using manual TCP/IP settings you must go back to<br />
the TCP/IP settings and revert back to obtain IP automatically. See image below:
Technical Support<br />
Diamond Technical Support staff is here to help resolve any issues that you may be<br />
experiencing. Prior to contacting technical support please make sure you have the<br />
following information available.<br />
1. Model #: (Printed on the bar code, located on the box)<br />
2. Installation CD Version: (printed on the CD label)<br />
3. The version of Windows that your system is running.<br />
4. The manufacturer and model # of your computer.<br />
5. CPU type and speed (example: Intel Pentium4 2.4GHZ)<br />
6. A complete description of the problem that you are experiencing including any<br />
steps that you have taken to try to resolve the issue.<br />
Technical Support Options<br />
Free Telephone Support<br />
818-357-5165<br />
(long distance rates may apply)<br />
Mon - Fri, 8 - 4:30 PST<br />
http://www.diamondmm.com


