Project Report Guidelines - WPI Stinger Labs
Project Report Guidelines - WPI Stinger Labs
Project Report Guidelines - WPI Stinger Labs
You also want an ePaper? Increase the reach of your titles
YUMPU automatically turns print PDFs into web optimized ePapers that Google loves.
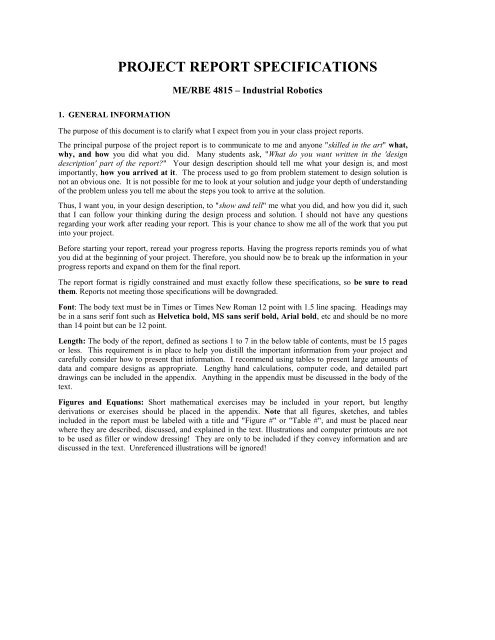
PROJECT REPORT SPECIFICATIONS<br />
ME/RBE 4815 – Industrial Robotics<br />
1. GENERAL INFORMATION<br />
The purpose of this document is to clarify what I expect from you in your class project reports.<br />
The principal purpose of the project report is to communicate to me and anyone "skilled in the art" what,<br />
why, and how you did what you did. Many students ask, "What do you want written in the 'design<br />
description' part of the report?" Your design description should tell me what your design is, and most<br />
importantly, how you arrived at it. The process used to go from problem statement to design solution is<br />
not an obvious one. It is not possible for me to look at your solution and judge your depth of understanding<br />
of the problem unless you tell me about the steps you took to arrive at the solution.<br />
Thus, I want you, in your design description, to "show and tell" me what you did, and how you did it, such<br />
that I can follow your thinking during the design process and solution. I should not have any questions<br />
regarding your work after reading your report. This is your chance to show me all of the work that you put<br />
into your project.<br />
Before starting your report, reread your progress reports. Having the progress reports reminds you of what<br />
you did at the beginning of your project. Therefore, you should now be to break up the information in your<br />
progress reports and expand on them for the final report.<br />
The report format is rigidly constrained and must exactly follow these specifications, so be sure to read<br />
them. <strong>Report</strong>s not meeting those specifications will be downgraded.<br />
Font: The body text must be in Times or Times New Roman 12 point with 1.5 line spacing. Headings may<br />
be in a sans serif font such as Helvetica bold, MS sans serif bold, Arial bold, etc and should be no more<br />
than 14 point but can be 12 point.<br />
Length: The body of the report, defined as sections 1 to 7 in the below table of contents, must be 15 pages<br />
or less. This requirement is in place to help you distill the important information from your project and<br />
carefully consider how to present that information. I recommend using tables to present large amounts of<br />
data and compare designs as appropriate. Lengthy hand calculations, computer code, and detailed part<br />
drawings can be included in the appendix. Anything in the appendix must be discussed in the body of the<br />
text.<br />
Figures and Equations: Short mathematical exercises may be included in your report, but lengthy<br />
derivations or exercises should be placed in the appendix. Note that all figures, sketches, and tables<br />
included in the report must be labeled with a title and "Figure #" or "Table #", and must be placed near<br />
where they are described, discussed, and explained in the text. Illustrations and computer printouts are not<br />
to be used as filler or window dressing! They are only to be included if they convey information and are<br />
discussed in the text. Unreferenced illustrations will be ignored!
2<br />
2. ORDER OF CONTENTS IN THE REPORT<br />
The contents must be as follows, in the order listed.<br />
A. Title Page: There must be a title page, as the first page, containing the title of project, your<br />
name(s) listed alphabetically, group number, and the date submitted. The title block information<br />
may not exceed 4" wide by 2" high centered in the upper third of the title page. The rest of the<br />
page must be blank.<br />
B. Executive Summary: (See below for description)<br />
C. Table of Contents:<br />
1. Introduction .......................................................................................................... #<br />
2. Goal Statement ..................................................................................................... #<br />
3. Task Specifications .............................................................................................. #<br />
4. Workspace Setup.................................................................................................. #<br />
5. Gripper Design ..................................................................................................... #<br />
6. Programming ........................................................................................................ #<br />
7. Results and Discussion ......................................................................................... #<br />
8. Conclusions .......................................................................................................... #<br />
9. Bibliography......................................................................................................... #<br />
10. Appendices ........................................................................................................... #<br />
11. CD/DVD .................................................................................... inside front cover<br />
D. Introduction: This serves to define the original problem statement as given and sets the scene for<br />
what follows.<br />
E. Goal Statement: This is a clear, concise restatement describing what you set out to do in your<br />
project.<br />
F. Task Specifications: This is a clearly stated list of performance specifications, which, in your<br />
judgment, are both necessary and possible in order to achieve the stated goal.<br />
G. Workspace Setup: This section should describe the workspace of your workcell. Subsections<br />
should include a discussion on design, fabrication, and assembly of your fixtures, and your<br />
workspace layout including where you placed your fixtures and why. What parts do you have?<br />
H. Gripper Design: This section should describe your gripper and include discussion on the design,<br />
fabrication, and use. Were their multiple iterations in your design? Did you perform any necessary<br />
calculations? How does your gripper interact with the parts/fixtures in the workspace?<br />
I. Programming: This section should describe the programming aspect of your project. Did you use<br />
on-line programming, off-line programming, or both and why? Provide a flow chart of your<br />
program layout.<br />
J. Results and Discussion: This section clearly describes your final results, design, or other<br />
accomplishments.<br />
K. Conclusions: This section is important from an academic standpoint, though it probably would<br />
not appear in a professional report in industry. Here you describe what you learned in this project,<br />
what pitfalls you encountered, and what gains or insights you made. This is a valuable aid to us in
3<br />
planning future projects to improve the educational experience. Tell us if this exercise was of<br />
value to you or not, and how it could be improved. This is required!<br />
L. Bibliography: contains all references used in report listed by author, title, and publisher.<br />
M. Appendices: An appendix means an "add-on". This is the repository for all data or information<br />
that are useful but would otherwise interrupt the flow of the report if included in its body.<br />
Examples of items belonging in the appendix are: computer programs or extensive printouts,<br />
catalog information, mathematical proofs or derivations, extensive test data, etc. Do not put<br />
individual illustrations that are germane to the design discussion in the appendix! They<br />
should be in the body of the report and be discussed there. Reference must also be made in the<br />
report to all material that is in the appendices. If it is not referenced or discussed, it should not be<br />
there! It is then just filler!<br />
N. CD/DVD/USB Flash Memory: If required, must be securely protected in an appropriate case,<br />
jacket, or sleeve, which is attached to the inside front cover.<br />
O. Executive Summary: Though this appears first in the report, it must actually be written last,<br />
because an executive summary is intended to summarize the results of the project. It must<br />
clearly and concisely (in 1/2 to 1 page maximum) describe what you set out to do and what you<br />
did. It is not just a restatement of the problem. It is a summary of your results and<br />
accomplishments. Thus, it cannot be written until the report is finished.<br />
3. REPORT COVER<br />
The report cover must contain mechanical fasteners through punched holes. It may not be a 3-ring binder,<br />
or pinch binder of either metal or plastic. If transparent, the title page should be visible through it. If not<br />
transparent, it must have a stick-on label with your name, project title, date, and course number. This type<br />
of project report cover is available in the <strong>WPI</strong> Bookstore at low cost. Any color is acceptable.<br />
4. PAPER<br />
Paper used in the report must meet the following specifications:<br />
A. All hand written formulae, mathematical derivations, etc. must be on unlined white paper 8-1/2" x<br />
11"<br />
B. Hand drawn diagrams, plots, and sketches can be on heavyweight quadrille pad lined paper or on<br />
“green” graph paper, 8-1/2" x 11" (available at <strong>WPI</strong> Bookstore).<br />
C. All mechanical drawings must be on white bond paper or plotter paper of either 8-1/2" x 11" or<br />
11" x 17" size Z-folded to 8-1/2" x 11" [see Z-folding]. (available at <strong>WPI</strong> bookstore).<br />
D. All computer printouts may be on standard line-printer paper or on "thesis" computer paper, and<br />
pages must be 8-1/2" x 11" (see Z-folding).<br />
5. ARRANGING OF SHEETS IN REPORT<br />
A. All pages must be inserted to be read from either the bottom of the report or the right side!<br />
Illustrations reading from the left side will be ignored.<br />
B. All sheets must be provided with a blank left margin of sufficient width to prevent any written<br />
information from being captured (hidden) in the binding.<br />
C. No sheet may protrude beyond the report cover, and all sheets must be trimmed or Z-folded to 8-<br />
1/2" x 11" and be uniformly bound.<br />
D. "Z-folding": All sheets larger than 8-1/2 x 11" must be Z-folded to allow easy unfolding. See a<br />
sample report for an example of a proper Z-fold. A proper Z-fold will expose the right 11" edge of
4<br />
the paper to allow its legend or title block to be seen. Thus, the identification of that sheet must be<br />
in the lower right quarter of the sheet.<br />
6. GENERAL COMMENTS<br />
A properly executed engineering report should be neat, orderly, logically arranged, and aesthetic. It should<br />
be a professional document that you would be proud to show anyone - recruiter, boss, pawnshop broker,<br />
or even some professor! It takes effort and time to put the report together properly, so do not leave that<br />
task until it is too late. The write-up and assembly of this type of report can easily take two (2) days of<br />
work.


