User Manual
User Manual
User Manual
Create successful ePaper yourself
Turn your PDF publications into a flip-book with our unique Google optimized e-Paper software.
1<br />
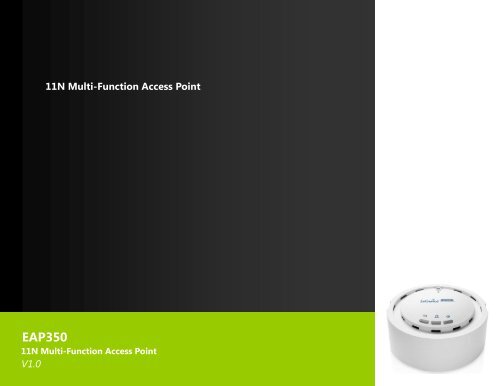
11N Multi-Function Access Point<br />
EAP350<br />
11N Multi-Function Access Point<br />
V1.0
1<br />
Table of Contents<br />
1 Introduction ......................................................................................................................................................................... 4<br />
1.1 Features and Benefits .......................................................................................................................................................................... 4<br />
1.2 Package Contents ................................................................................................................................................................................. 5<br />
1.3 System Requirements .......................................................................................................................................................................... 6<br />
1.4 Applications ........................................................................................................................................................................................... 6<br />
2 Before you Begin ................................................................................................................................................................. 8<br />
2.1 Considerations for Wireless Installation ......................................................................................................................................... 8<br />
2.2 Computer Settings (Windows XP/Windows 7) ............................................................................................................................. 9<br />
2.3 Apple Mac X OS .................................................................................................................................................................................. 12<br />
2.4 Hardware Installation ......................................................................................................................................................................... 13<br />
3 Configuring Your Access Point ........................................................................................................................................ 15<br />
3.1 Default Settings ................................................................................................................................................................................... 15<br />
3.2 Web Configuration ............................................................................................................................................................................. 16<br />
4 Status ................................................................................................................................................................................... 18<br />
4.1 Save/Reload ......................................................................................................................................................................................... 18<br />
4.2 Main ....................................................................................................................................................................................................... 19<br />
4.3 Wireless Client List .............................................................................................................................................................................. 21<br />
4.4 System Log ........................................................................................................................................................................................... 22<br />
5 System ................................................................................................................................................................................. 23<br />
5.1 Operation Mode ................................................................................................................................................................................. 23<br />
5.2 IP Settings ............................................................................................................................................................................................. 24<br />
5.3 Spanning Tree Setting ....................................................................................................................................................................... 25<br />
6 Wireless ............................................................................................................................................................................... 27
2<br />
6.1 Wireless Network ................................................................................................................................................................................ 27<br />
6.2 Wireless Security ................................................................................................................................................................................. 30<br />
6.3 Wireless MAC Filter ............................................................................................................................................................................ 34<br />
6.4 Wireless Advanced ............................................................................................................................................................................. 35<br />
6.5 WPS (Wi-Fi Protected Setup) ........................................................................................................................................................... 37<br />
6.6 WDS Link Settings .............................................................................................................................................................................. 39<br />
7 Management ...................................................................................................................................................................... 41<br />
7.1 Administration ..................................................................................................................................................................................... 41<br />
7.2 Management VLAN ............................................................................................................................................................................ 42<br />
7.3 SNMP ..................................................................................................................................................................................................... 43<br />
7.4 Backup/Restore ................................................................................................................................................................................... 45<br />
7.5 Firmware Upgrade .............................................................................................................................................................................. 46<br />
7.6 Time Setting ......................................................................................................................................................................................... 47<br />
7.7 Log .......................................................................................................................................................................................................... 48<br />
7.8 Diagnosis .............................................................................................................................................................................................. 49<br />
7.9 LED Control .......................................................................................................................................................................................... 50<br />
7.10 Logout ................................................................................................................................................................................................... 51<br />
7.11 Reset ...................................................................................................................................................................................................... 52<br />
8 Building a Wireless Network ........................................................................................................................................... 53<br />
8.1 Access Point Mode ............................................................................................................................................................................. 53<br />
8.2 Access Point Mode with WDS Function (WDS AP mode) ........................................................................................................ 54<br />
8.3 WDS Bridge Mode .............................................................................................................................................................................. 55<br />
Appendix A – FCC Interference Statement ............................................................................................................................ 56
3<br />
Revision History<br />
Version Date Notes<br />
1.0 2011/07/28 First Release
4<br />
1 Introduction<br />
EAP350 is a multi-functioned 11n product with 3 major multi-functions, is designed to operate in every working<br />
environment for enterprises.<br />
EAP350 is a Wireless Network device that delivers up to 6x faster speeds and 7x extended coverage than 802.11b/g<br />
devices. EAP350 supports home network with superior throughput, performance and unparalleled wireless range.<br />
To protect data during wireless transmissions, EAP350 encrypts all wireless transmissions through WEP data encryption<br />
and supports WPA/WPA2. Its MAC address filter allows users to select stations with access to connect network. In<br />
addition, the function of user isolation protects private network between client users. EAP350 thus is the best product to<br />
ensure network safety for enterprises.<br />
1.1 Features and Benefits<br />
Features<br />
Benefits<br />
High Speed Data Rate Up to 300Mbps Capable of handling heavy data payloads such as MPEG video<br />
streaming.<br />
10/100/1000 Fast Ethernet Support up to 1Gbps networking speed.<br />
IEEE 802.11n draft Compliant and backward<br />
compatible with 802.11b/g<br />
Fully compatible with IEEE 802.11b/g/n devices.<br />
Multi-Function, 3 functions<br />
Point-to-point, Point-to-multipoint Wireless<br />
Connectivity<br />
Allowing users to select AP, WDS AP or WDS Bridge mode in various<br />
applications.<br />
Allowing to transfer data from buildings to buildings.
5<br />
Support Multi-SSID function (4 SSID) in AP<br />
mode<br />
WPA2/WPA/ IEEE 802.1x support<br />
MAC address filtering in AP mode<br />
<strong>User</strong> isolation support (AP mode)<br />
Power-over-Ethernet (IEEE802.3af)<br />
Keep personal setting<br />
SNMP Remote Configuration Management<br />
QoS (WMM) support<br />
Allowing clients to access different networks through a single access<br />
point and to assign different policies and functions for each SSID by<br />
manager.<br />
Powerful data security.<br />
Ensuring secure network connection.<br />
Protecting the private network between client users.<br />
Flexible Access Point locations and saving cost.<br />
Keeping the latest setting when firmware upgrade.<br />
Helping administrators to remotely configure or manage the Access<br />
Point easily.<br />
Enhancing user performance and density.<br />
1.2 Package Contents<br />
The package contains the following items. In case of return, please keep the original box set, and the complete box set<br />
must be included for full refund.<br />
• EAP350<br />
• 12V/1A 100V~240V Power Adapter<br />
• RJ-45 Ethernet LAN Cable<br />
• CD-ROM with <strong>User</strong>'s <strong>Manual</strong><br />
• Quick Guide
6<br />
1.3 System Requirements<br />
The following are the minimum system requirements in order configure the device.<br />
• Computer with an Ethernet interface or Wireless Network function.<br />
• Windows, Mac OS or Linux based operating systems<br />
• Internet Explorer or Firefox or Safari Web-Browser Software<br />
1.4 Applications<br />
The wireless LAN products are easy to install and highly efficient. The following list describes some of the many<br />
applications made possible through the power and flexibility of wireless LANs:<br />
a) Difficult-to-wire environments<br />
There are many situations where wires cannot be laid easily. Historic buildings, older buildings, open areas<br />
and across busy streets make the installation of LANs either impossible or very expensive.<br />
b) Temporary workgroups<br />
Consider situations in parks, athletic arenas, exhibition centers, disaster-recovery, temporary offices and<br />
construction sites where one wants a temporary WLAN established and removed.<br />
c) The ability to access real-time information<br />
Doctors/nurses, point-of-sale employees, and warehouse workers can access real-time information while<br />
dealing with patients, serving customers and processing information.<br />
d) Frequently changed environments<br />
Show rooms, meeting rooms, retail stores, and manufacturing sites where frequently rearrange the<br />
workplace.
7<br />
e) Small Office and Home Office (SOHO) networks<br />
SOHO users need a cost-effective, easy and quick installation of a small network.<br />
f) Wireless extensions to Ethernet networks<br />
Network managers in dynamic environments can minimize the overhead caused by moves, extensions to<br />
networks, and other changes with wireless LANs.<br />
g) Wired LAN backup<br />
Network managers implement wireless LANs to provide backup for mission-critical applications running on<br />
wired networks.<br />
h) Training/Educational facilities<br />
Training sites at corporations and students at universities use wireless connectivity to ease access to<br />
information, information exchanges, and learning.
8<br />
2 Before you Begin<br />
This section will guide you through the installation process. Placement of the ENGENIUS EAP350 is very important to<br />
avoid poor signal reception and performance. Avoid placing the device in enclosed spaces such as a closet, cabinet or<br />
wardrobe.<br />
2.1 Considerations for Wireless Installation<br />
The operating distance of all wireless devices cannot be pre-determined due to a number of unknown obstacles in the<br />
environment that the device is deployed. These could be the number, thickness and location of walls, ceilings or other<br />
objects that the wireless signals must pass through. Here are some key guidelines to ensure that you have the optimal<br />
wireless range.<br />
• Keep the number of walls and ceilings between the EnGenius access point and other network devices to a minimum.<br />
Each wall or ceiling can reduce the signal strength; the degradation depends on the building’s material.<br />
• Building materials makes a difference. A solid metal door or aluminum stubs may have a significant negative effect on<br />
range. Locate your wireless devices carefully so the signal can pass through a drywall or open doorways. Materials such<br />
as glass, steel, metal, concrete, water (fish tanks), mirrors, file cabinets and brick will also degrade your wireless signal.<br />
• Interferences can also come from your other electrical devices or appliances that generate RF noise. The most usual<br />
types are microwaves, or cordless phones.
9<br />
2.2 Computer Settings (Windows XP/Windows 7)<br />
This device can be configured as an Access Point, WDS AP or WDS Bridge. The default IP address of the device is<br />
192.168.1.1 (In Access Point Mode as default). In order to log into this device, you must first configure the TCP/IP<br />
settings of your PC/Notebook.<br />
• Click Start button and open Control Panel.<br />
Windows XP Windows 7
10<br />
• Windows XP, click [Network Connection]<br />
• Windows 7, click [View Network Status and Tasks] then [Change adapter settings]<br />
• Right click on [Local Area Connection] and select [Properties].
11<br />
• Select “Internet Protocol (TCP/IP)” and click [Properties]<br />
• Select “Use the following IP address” and enter IP address and subnet<br />
mask then click [OK].<br />
Note: Ensure that the IP address and subnet mask are on the same subnet as<br />
the device.<br />
For example: Device IP address: 192.168.1.1<br />
PC IP address: 192.168.1.10<br />
PC subnet mask: 255.255.255.0
12<br />
2.3 Apple Mac X OS<br />
• Go to System Preferences > Network<br />
• Under Network setting, select “<strong>Manual</strong>ly” and enter<br />
IP address and subnet mask.<br />
• Click Apply when done.
13<br />
2.4 Hardware Installation<br />
1. Place the unit in an appropriate location after conducting a site survey.<br />
2. Plug one end of the Ethernet cable into the Ethernet port of the device and another end into your PC/Notebook.<br />
3. Insert the DC-inlet of the power adapter into the port labeled “DC-IN” and the other end into the power socket on<br />
the wall.<br />
This diagram depicts the hardware configuration.
14<br />
Front Panel<br />
Rear Panel<br />
Front Panel<br />
Reset Button<br />
LED Lights<br />
Rear Panel<br />
DC IN<br />
Ethernet Port<br />
One click for reset the device. Press over 10 seconds for reset to factory default.<br />
LED lights for Wireless, Ethernet port and Power.<br />
DC IN for Power.<br />
Ethernet port for RJ-45 cable.
15<br />
3 Configuring Your Access Point<br />
This section will show you how to configure the device using the web-based configuration interface.<br />
3.1 Default Settings<br />
Please use your Ethernet port or wireless network adapter to connect the Access Point.<br />
Default Settings<br />
IP Address 192.168.1.1<br />
<strong>User</strong>name / Password admin / admin<br />
Operation Mode<br />
Access Point<br />
Wireless SSID<br />
EnGeniusxxxxxx<br />
Wireless Security<br />
None<br />
Note: xxxxxx represented in the wireless SSID above is the last 6 characters of your device MAC Address. This can be found on the device body<br />
label and is unique for each device.
16<br />
3.2 Web Configuration<br />
• Open a web browser (Internet Explorer/Firefox/Safari) and enter the IP Address http://192.168.1.1<br />
Note: If you have changed the default LAN IP Address of the Access Point, ensure you enter the correct IP Address.<br />
• The default username and password are admin. Once you have entered the correct username and password, click the<br />
Login button to open the web-base configuration page.
17<br />
• You will see the following webpage if login successfully.
18<br />
4 Status<br />
The Status section contains the following options: Main, Wireless Client List and System Log.<br />
The following sections describe these options.<br />
4.1 Save/Reload<br />
This page lets you save and apply the settings shown under Unsaved changes list, or cancel the unsaved changes and<br />
revert to the previous settings that were in effect.
19<br />
4.2 Main<br />
Clicking the Main link under the Status menu or clicking Home at the top-right of the Web Configurator shows status<br />
information about the current operating mode.<br />
- The System Information section shows general system information such as device name, MAC address, current time,<br />
firmware version and management VLAN ID.<br />
- The LAN Settings section shows Local Area Network setting such as the LAN IP address, subnet mask, and DNS<br />
address.
20<br />
- The Current Wireless Settings section shows wireless information such as operating mode, frequency and channel.<br />
Since the EAP350 supports multiple-SSIDs, information about each SSID, such as its ESSID and security settings, are<br />
displayed.
21<br />
4.3 Wireless Client List<br />
Clicking the Wireless Client List link under the Status menu displays the list of clients associated to the EAP350, along<br />
with the MAC addresses and signal strength for each client. Clicking the [Refresh] button updates (refreshes) the client<br />
list.<br />
Note: Only in Access Point and WDS AP mode.
22<br />
4.4 System Log<br />
The EAP350 automatically logs (records) events of possible interest in its internal memory. To view the logged<br />
information, click the System Log link under the Status menu. If there is not enough internal memory to log all events,<br />
older events are deleted from the log. When powered down or rebooted, the log will be cleared.<br />
System Log<br />
Refresh<br />
Clear<br />
Update the log.<br />
Clear the log.
23<br />
5 System<br />
5.1 Operation Mode<br />
The EAP350 supports three operating modes: Access Point, WDS Access Point and WDS Bridge.<br />
System Properties<br />
Device Name<br />
Country/Region<br />
Operation Mode<br />
Accept / Cancel<br />
Enter a name for the device. The name you type appears in SNMP management. This name is<br />
not the SSID and is not broadcast to other devices.<br />
Select a Country/Region to conform to local regulations.<br />
Use the radio button to select an operating mode.<br />
Click [Accept] to confirm the changes or [Cancel] to cancel and return previous settings.
24<br />
5.2 IP Settings<br />
This page allows you to modify the device's IP settings.<br />
IP Settings<br />
IP Network Setting<br />
IP Address<br />
IP Subnet Mask<br />
Default Gateway<br />
Primary / Secondary<br />
DNS<br />
Select whether the device IP address will use the static IP address specified in the IP Address<br />
field or be obtained automatically when the device connects to a DHCP server.<br />
The IP Address of this device.<br />
The IP Subnet Mask of this device.<br />
The Default Gateway of this device. Leave it blank if you are unsure of this setting.<br />
The primary / secondary DNS address for this device.
25<br />
5.3 Spanning Tree Setting<br />
This page allows you to modify the Spanning Tree settings. Enabling Spanning Tree protocol will prevent network loops<br />
in your LAN network.<br />
Spanning Tree<br />
Spanning Tree Status<br />
Bridge Hello Time<br />
Bridge Max Age<br />
Bridge Forward Delay<br />
Enable or disable the Spanning Tree function.<br />
Specify Bridge Hello Time, in seconds. This value determines how often the device sends hello<br />
packets to communicate information about the topology throughout the entire Bridged Local<br />
Area Network.<br />
Specify Bridge Max Age, in seconds. If another bridge in the spanning tree does not send a<br />
hello packet for a long period of time, it is assumed to be dead.<br />
Specify Bridge Forward Delay, in seconds. Forwarding delay time is the time spent in each of<br />
the Listening and Learning states before the Forwarding state is entered. This delay is provided<br />
so that when a new bridge comes onto a busy network, it looks at some traffic before<br />
participating.
26<br />
Priority<br />
Accept / Cancel<br />
Specify the Priority number. Smaller number has greater priority.<br />
Click [Accept] to confirm the changes or [Cancel] to cancel and return previous settings.
27<br />
6 Wireless<br />
6.1 Wireless Network<br />
This page shows the current status of the device's Wireless settings.
28<br />
Wireless Network<br />
Wireless Mode<br />
Channel HT Mode<br />
Extension Channel<br />
Channel / Frequency<br />
Auto<br />
AP Detection<br />
Current Profile<br />
Profile Isolation<br />
Accept / Cancel<br />
Wireless mode supports 802.11b/g/n mixed mode.<br />
The default channel bandwidth is 20/40MHz. The larger the channel, the better the transmission<br />
quality and speed.<br />
Select upper or lower channel. Your selection may affect the Auto channel function.<br />
Select the channel and frequency appropriate for your country’s regulation.<br />
Check this option to enable auto-channel selection.<br />
AP Detection can select the best channel to use by scanning nearby areas for Access Points.<br />
Configure up to four different SSIDs. If many client devices will be accessing the network, you<br />
can arrange the devices into SSID groups. Click [Edit] to configure the profile and check<br />
whether you want to enable extra SSID.<br />
Restricted client to communicate with different VID by selecting the radio button.<br />
Click [Accept] to confirm the changes or [Cancel] to cancel and return previous settings.
29<br />
SSID Profile<br />
SSID Profile<br />
SSID<br />
VLAN ID<br />
Suppressed SSID<br />
Station Separation<br />
Wireless Security<br />
Save / Cancel<br />
Specify the SSID for the current profile.<br />
Specify the VLAN tag for the current profile.<br />
Check this option to hide the SSID from clients. If checked, the SSID will not appear in the site<br />
survey.<br />
Click the appropriate radio button to allow or prevent communication between client devices.<br />
See the Wireless Security section.<br />
Click [Save] to accept the changes or [Cancel] to cancel and return previous settings.
30<br />
6.2 Wireless Security<br />
The Wireless Security section lets you configure the EAP350's security modes: WEP, WPA-PSK, WPA2-PSK, WPA-PSK<br />
Mixed, WPA, WPA2, and WPA Mixed. We strongly recommend you use WPA2-PSK.<br />
Note: Only in Access Point and WDS AP mode.<br />
WEP Encryption:<br />
WEP Encryption<br />
Auth Type<br />
Input type<br />
Key Length<br />
Select Open System or Shared Key.<br />
ASCII: regular text (recommended)<br />
HEX: for advanced users<br />
Select the desired option, and ensure the wireless clients use the same setting.<br />
Choices are 64, 128, 152-bit password lengths.
31<br />
Default Key<br />
Encryption Key #<br />
Select the key you wish to be the default. Transmitted data is ALWAYS encrypted using the<br />
Default Key; the other Keys are for decryption only.<br />
You must enter a Key Value for the Default Key.<br />
Enter the key value or values you wish to use. Only the Key selected as Default is required. The<br />
others are optional.
32<br />
WPA-PSK (WPA Pre-Shared Key) Encryption:<br />
WPA-PSK (WPA Pre-Shared Key) Encryption<br />
Encryption<br />
Passphrase<br />
Group Key Update Interval<br />
Select the WPA encryption you would like.<br />
Please ensure that your wireless clients use the same settings.<br />
Wireless clients must use the same key to associate the device.<br />
If using passphrase format, the Key must be from 8 to 63 characters in length.<br />
Specify how often, in seconds, the group key changes.
33<br />
WPA Encryption:<br />
WPA Encryption<br />
Encryption<br />
Radius Server<br />
Radius Port<br />
Radius Secret<br />
Group Key Update Interval<br />
Select the WPA encryption you would like.<br />
Please ensure that your wireless clients use the same settings.<br />
Enter the IP address of the Radius Server<br />
Enter the port number used for connections to the Radius server.<br />
Enter the secret required to connect to the Radius server.<br />
Specify how often, in seconds, the group key changes.<br />
Note: 802.11n does not allow WEP/WPA-PSK TKIP/WPA2-PSK TKIP security mode. The connection mode will change from 802.11n to<br />
802.11g.
34<br />
6.3 Wireless MAC Filter<br />
Wireless MAC Filters are used to allow or deny network access to wireless clients according to their MAC addresses.<br />
You can manually add a MAC address to restrict the permission to access EAP350. The default setting is Disable<br />
Wireless MAC Filter.<br />
Note: Only in Access Point and WDS AP mode.<br />
Wireless Filter (Access Point / WDS AP mode)<br />
ACL Mode<br />
MAC Address<br />
Add<br />
Delete<br />
Apply<br />
Determines whether network access is granted or denied to clients whose MAC addresses<br />
appear in the MAC Address table on this page. Choices are Disable, Deny MAC in the list, or<br />
Allow MAC in the list.<br />
Enter the MAC address of the wireless client.<br />
Click Add to add the MAC address to the MAC Address table.<br />
Delete the selected entries.<br />
Click Apply to apply the changes.
35<br />
6.4 Wireless Advanced<br />
This page allows you to configure wireless advance settings. It is recommended the default settings are used unless the<br />
user has experience with these functions.
36<br />
Wireless Advanced<br />
Data Rate<br />
Transmit Power<br />
RTS/CTS Threshold<br />
Distance<br />
Short GI<br />
Aggregation<br />
Wireless Traffic<br />
Shaping<br />
Incoming Traffic Limit<br />
Select a data rate from the drop-down list. The data rate affects throughput. If you select a low<br />
data rate value, for example, the throughput is reduced but the transmission distance increases.<br />
Set the power output of the wireless signal.<br />
Specify the threshold package size for RTC/CTS. A small number causes RTS/CTS packets to be<br />
sent more often and consumes more bandwidth.<br />
Specify the distance between Access Points and clients. Longer distances may drop high-speed<br />
connections.<br />
Sets the time that the receiver waits for RF reflections to settle out before sampling data. Using a<br />
short (400ns) guard interval can increase throughput, but can also increase error rate in some<br />
installations due to increased sensitivity to radio-frequency reflections. Select the option that<br />
works best for your installation.<br />
Merges data packets into one packet. This option reduces the number of packets, but increases<br />
packet sizes.<br />
Check this option to enable wireless traffic shaping. Traffic shaping regulates the flow of packets<br />
leaving an interface to deliver improved Quality of Service.<br />
Specify the wireless transmission speed used for downloading.<br />
Outgoing Traffic Limit Specify the wireless transmission speed used for uploading.<br />
Accept / Cancel<br />
Click [Accept] to confirm the changes or [Cancel] to cancel and return previous settings.
37<br />
6.5 WPS (Wi-Fi Protected Setup)<br />
WPS feature is following the Wi-Fi Alliance WPS standard and it eases the set up of security-enabled Wi-Fi networks in<br />
the home and small office environment.<br />
It reduces the user steps required to configure a network and supports two methods that are familiar to most<br />
consumers to configure a network and enable security.<br />
Note: Only in Access Point and WDS AP mode.
38<br />
Wi-Fi Protected Setup (WPS)<br />
WPS<br />
WPS Current Status<br />
Select Enable or Disable the WPS feature.<br />
Shows whether the WPS function is Configured or unConfigured.<br />
Configured means that WPS has been used to authorize connection between the device and<br />
wireless clients.<br />
Self Pin Code<br />
SSID<br />
Authentication Mode<br />
Passphrase Key<br />
WPS Via Push Button<br />
WPS Via PIN<br />
The PIN code of this device.<br />
The SSID (wireless network name) used when connecting using WPS.<br />
Shows the encryption method used by the WPS process.<br />
This is the passphrase key that is randomly generated during the WPS process. It is required if<br />
wireless clients that do not support WPS attempts to connect to the wireless network.<br />
Click this button to initialize WPS feature using the push button method.<br />
Enter the PIN code of the wireless device and click this button to initialize WPS feature using the<br />
PIN method.
39<br />
6.6 WDS Link Settings<br />
Using WDS (Wireless Distribution System) to connect Access Point wirelessly, and in doing so extend a wired<br />
infrastructure to locations where cabling is not possible or inefficient to implement.<br />
Note that compatibility between different brands and models is not guaranteed. It is recommended that the WDS<br />
network be created using the same models for maximum compatibility.<br />
Also note that all Access Points in the WDS network needs to use the same Channel and Security settings.<br />
To create a WDS network, please enter the MAC addresses of the Access Points that you want included in the WDS. There<br />
can be a maximum of four access points.<br />
Note: Only in WDS AP and WDS Bridge mode.
40<br />
WDS Link Settings<br />
MAC Address<br />
Mode<br />
Accept / Cancel<br />
Enter the Access Point’s MAC address to which you want to extend the wireless area.<br />
Select Disable or Enable from the drop-down list.<br />
Click [Accept] to confirm the changes or [Cancel] to cancel and return previous settings.
41<br />
7 Management<br />
7.1 Administration<br />
This page allows you to change the system password<br />
and to configure remote management. By default, the<br />
user name is admin and the password is: admin.<br />
Password can contain 0 to 12 alphanumeric characters<br />
and are case sensitive.<br />
Change Password<br />
Name<br />
Password<br />
Confirm Password<br />
Save/Apply / Cancel<br />
Enter a new username for logging in to the Web Configurator.<br />
Enter a new password for logging in to the Web Configurator.<br />
Re-enter the new password for confirmation.<br />
Click Save/Apply to apply the changes or Cancel to return previous settings.
42<br />
7.2 Management VLAN<br />
This page allows you to assign a VLAN tag to the packets. A VLAN is a group of computers on a network whose<br />
software has been configured so that they behave as if they were on a separate Local Area Network (LAN). Computers<br />
on VLAN do not have to be physically located next to one another on the LAN.<br />
Management VLAN<br />
Management VLAN ID<br />
Accept / Cancel<br />
If your network includes VLANs and if tagged packets need to pass through the Access Point,<br />
enter the VLAN ID. Otherwise, click No VLAN tag.<br />
Click Accept to confirm the changes or Cancel to cancel and return previous settings.<br />
Note:<br />
1. If you reconfigure the Management VLAN ID, you may lose your connection to the EAP350. Verify that the DHCP server supports the<br />
reconfigured VLAN ID and then reconnect to the EAP350 using the new IP address.<br />
2. Clicking Accept does not apply the changes. To apply them, use Status > Save/Load (see section 4.1).
43<br />
7.3 SNMP<br />
This page allows you to assign the contact details, location, community name and trap settings for SNMP. This is a<br />
networking management protocol used to monitor network-attached devices. SNMP allows messages (called protocol<br />
data units) to be sent to various parts of a network. Upon receiving these messages, SNMP-compatible devices (called<br />
agents) return data stored in their Management Information Bases.<br />
SNMP<br />
SNMP Enable/Disable<br />
Contact<br />
Location<br />
Community Name (Read<br />
Only)<br />
Enable or disable SNMP feature.<br />
Specify the contact details of the device<br />
Specify the location of the device.<br />
Specify the password for access the SNMP community for read only access.
44<br />
Community Name<br />
(Read/Write)<br />
Specify the password for access to the SNMP community with read/write access.<br />
Trap<br />
Trap Destination Address<br />
Trap Destination<br />
Community Name<br />
Specify the IP address of the computer that will receive the SNMP traps.<br />
Specify the password for the SNMP trap community.
45<br />
7.4 Backup/Restore<br />
This page allows you to save the current device configurations. When you save the configurations, you also can re-load<br />
the saved configurations into the device through the [Restore Saved Settings from A File]. If extreme problems occur<br />
you can use the [Revert to Factory Default Settings] to set all configurations to its original default settings.<br />
Backup/Restore<br />
Save A Copy of Current<br />
Settings<br />
Restore Saved Settings<br />
from A File<br />
Revert to Factory Default<br />
Settings<br />
Click [Backup] to save the current configured settings.<br />
To restore settings that have been previously backed up, click [Browse], select<br />
the file, and click [Restore].<br />
Click [Factory Default] button to restore the EAP350 to its factory default<br />
settings.
46<br />
7.5 Firmware Upgrade<br />
This page allows you to upgrade the device's firmware.<br />
To perform the Firmware Upgrade:<br />
1. Click the [Browse] button and navigate to the location of the upgrade file.<br />
2. Select the upgrade file. Its name will appear in the Upgrade File field.<br />
3. Click the [Upload] button to commence the firmware upgrade.<br />
Note: The device is unavailable during the upgrade process, and must restart when the upgrade is completed. Any connections to or through the<br />
device will be lost.
47<br />
7.6 Time Setting<br />
This page allows you to set the system time.<br />
Time<br />
<strong>Manual</strong>ly Set Date and Time<br />
Automatically Get Date and<br />
Time<br />
<strong>Manual</strong>ly specify the date and time.<br />
Select a time zone from the drop-down list and check whether you want to<br />
enter the IP address of an NTP server or use the default NTP server.
48<br />
7.7 Log<br />
This page allows you to setup Syslog and local log functions.<br />
Log<br />
Syslog<br />
Log Server IP Address<br />
Local Log<br />
Save/Apply / Cancel<br />
Enable or disable the syslog function.<br />
Enter the IP address of the log server.<br />
Enable or disable the local log service.<br />
Click Save/Apply to apply the changes or Cancel to return previous settings.
49<br />
7.8 Diagnosis<br />
This page allows you to ascertain connection quality and trace the routing table to the target.<br />
Diagnosis<br />
Target IP<br />
Ping Packet Size<br />
Number of Pings<br />
Start Ping<br />
Traceroute Target<br />
Start Traceroute<br />
Enter the IP address you would like to search.<br />
Enter the packet size of each ping.<br />
Enter the number of times you want to ping.<br />
Click [Start Ping] to begin pinging.<br />
Enter an IP address or domain name you want to trace.<br />
Click [Start Traceroute] to begin the trace route operation.
50<br />
7.9 LED Control<br />
This page allows you to control LED on/off for Power, LAN interface and WLAN interface.
51<br />
7.10 Logout<br />
Click [Logout] in Management menu to logout.
52<br />
7.11 Reset<br />
In some circumstances it may be required to force the device to reboot. Click on [Reboot the Device] to reboot.
53<br />
8 Building a Wireless Network<br />
With its ability to operate in various operating modes, your EAP350 is the ideal device around which you can build your<br />
WLAN. This appendix describes how to build a WLAN around your EAP350 using he device’s operating modes.<br />
8.1 Access Point Mode<br />
In Access Point Mode, EAP350 behaves likes a central connection for stations or clients that support IEEE 802.11b/g/n<br />
networks. Stations and client must be configured to use the same SSID and security password to associate with the<br />
EAP350. The EAP350 supports four SSIDs at the same time for secure guest access.
54<br />
8.2 Access Point Mode with WDS Function (WDS AP mode)<br />
The EAP350 also supports WDS AP mode. This operating mode allows wireless connections to the EAP350 using WDS<br />
technology. In this mode, configure the MAC addresses in both Access Points to enlarge the wireless area by enabling<br />
WDS Link settings. WDS supports four AP MAC addresses.
55<br />
8.3 WDS Bridge Mode<br />
In WDS Bridge Mode, the EAP350 can wirelessly connect different LANs by configuring the MAC address and security<br />
settings of each EAP350 device. Use this mode when two wired LANs located a small distance apart want to<br />
communicate with each other. The best solution is to use the EAP350 to wirelessly connect two wired LANs, as shown<br />
in the following figure.<br />
WDS Bridge Mode can establish four WDS links, creating a star-like network.<br />
Note: WDS Bridge Mode is unlike Access Point. Access Points linked by WDS are using the same frequency channel, more Access Points<br />
connected together may lower throughput. Please be aware to avoid loop in your wireless connection, otherwise enable Spanning Tree<br />
Function.
56<br />
Appendix A – FCC Interference Statement<br />
Federal Communication Commission Interference Statement<br />
This equipment has been tested and found to comply with the limits for a Class B digital device, pursuant to Part 15 of the FCC Rules. These limits are<br />
designed to provide reasonable protection against harmful interference in a residential installation. This equipment generates uses and can radiate radio<br />
frequency energy and, if not installed and used in accordance with the instructions, may cause harmful interference to radio communications. However, there<br />
is no guarantee that interference will not occur in a particular installation. If this equipment does cause harmful interference to radio or television reception,<br />
which can be determined by turning the equipment off and on, the user is encouraged to try to correct the interference by one of the following measures:<br />
• Reorient or relocate the receiving antenna.<br />
• Increase the separation between the equipment and receiver.<br />
• Connect the equipment into an outlet on a circuit different from that to which the receiver is connected.<br />
• Consult the dealer or an experienced radio/TV technician for help.<br />
FCC Caution: Any changes or modifications not expressly approved by the party responsible for compliance could void the user's authority to operate this<br />
equipment.<br />
This device complies with Part 15 of the FCC Rules. Operation is subject to the following two conditions: (1) This device may not cause harmful interference,<br />
and (2) this device must accept any interference received, including interference that may cause undesired operation.<br />
IMPORTANT NOTE:<br />
FCC Radiation Exposure Statement:<br />
This equipment complies with FCC radiation exposure limits set forth for an uncontrolled environment.<br />
This device complies with FCC RF Exposure limits set forth for an uncontrolled environment, under 47 CFR 2.1093 paragraph (d)(2).<br />
This transmitter must not be co-located or operating in conjunction with any other antenna or transmitter.


