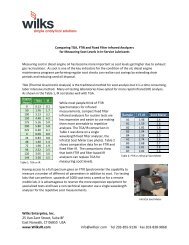
Manuals & Procedures - Wilks Enterprise, Inc.
Manuals & Procedures - Wilks Enterprise, Inc.
Manuals & Procedures - Wilks Enterprise, Inc.

You also want an ePaper? Increase the reach of your titles
YUMPU automatically turns print PDFs into web optimized ePapers that Google loves.
InfraRan ® Specific Vapor<br />
Analyzer<br />
User’s Guide<br />
InfraRan is a registered trademark of <strong>Wilks</strong> <strong>Enterprise</strong>, <strong>Inc</strong>.<br />
Copyright 2010 <strong>Wilks</strong> <strong>Enterprise</strong>, <strong>Inc</strong>., Norwalk, CT
1. InfraRan Specific Vapor Analyzer Overview ........................................................................................................ 4<br />
1.1. Introduction .................................................................................................................................................. 4<br />
1.2. Basic Measurement Concept ........................................................................................................................ 4<br />
1.3. Analyzer Description ................................................................................................................................... 5<br />
1.4. Analyzer Port Inlet/Outlet Fittings ............................................................................................................... 6<br />
1.4.1. Reducing Pump Outlet Noise................................................................................................................... 6<br />
1.4.2. Instrument Shoulder Strap ....................................................................................................................... 6<br />
2. Getting Started ....................................................................................................................................................... 7<br />
2.1. Analyzer Check ............................................................................................................................................ 7<br />
2.2. Charging the Battery .................................................................................................................................... 7<br />
2.3. Cleaning the Instrument ............................................................................................................................... 8<br />
2.4. Instrument Warm-up .................................................................................................................................... 8<br />
2.5. Power Source ............................................................................................................................................... 8<br />
2.6. Quick Start Instructions ................................................................................................................................ 8<br />
3. Keypad Operations ................................................................................................................................................ 8<br />
3.1. Data Entry Keypad ....................................................................................................................................... 9<br />
3.2. Keypad Menu Operations Map .................................................................................................................... 9<br />
3.2.1. Top Menu ................................................................................................................................................ 9<br />
3.2.2. Analyze Menu ........................................................................................................................................ 10<br />
3.2.3. Run Menu .............................................................................................................................................. 10<br />
3.2.4. Control Menu ......................................................................................................................................... 11<br />
3.2.5. Files Menu ............................................................................................................................................. 12<br />
3.2.6. Setup Menu ............................................................................................................................................ 13<br />
3.2.7. Diag Menu ............................................................................................................................................. 13<br />
3.2.8. Clock Menu ........................................................................................................................................... 14<br />
3.2.9. Analysis Menu ....................................................................................................................................... 14<br />
3.2.10. Log Menu .......................................................................................................................................... 15<br />
3.2.11. Calibrate Menu .................................................................................................................................. 15<br />
3.2.12. Download Menu ................................................................................................................................ 16<br />
3.2.13. Control Menu .................................................................................................................................... 16<br />
3.3. Analysis Modes .......................................................................................................................................... 17<br />
3.3.1. Normal (Analysis) Mode ....................................................................................................................... 17<br />
3.3.2. Fast (Survey) Mode ............................................................................................................................... 17<br />
3.4. Display Operations ..................................................................................................................................... 17<br />
3.4.1. System Indicator .................................................................................................................................... 17<br />
3.4.2. Display Modes ....................................................................................................................................... 17<br />
4. Communications Interface ................................................................................................................................... 18<br />
4.1. USB Port Operation Test ........................................................................................................................... 19<br />
4.2. Downloading Data with RS-232/USB ....................................................................................................... 19<br />
2
4.2.1. Using Windows Hyperterminal Program ............................................................................................... 19<br />
4.2.2. Using the Excel Spreadsheet Download ................................................................................................ 20<br />
4.3. Serial Data Output ...................................................................................................................................... 21<br />
5. Input/Output and Power Connectors .................................................................................................................... 23<br />
6. Battery Removal .................................................................................................................................................. 23<br />
7. Optional Accessory-Analog Output: ................................................................................................................... 24<br />
8. Specifications....................................................................................................................................................... 25<br />
8.1. Operating and Storage Conditions ............................................................................................................. 25<br />
9. Troubleshooting ................................................................................................................................................... 26<br />
10. Service and Customer Support ....................................................................................................................... 27<br />
Figure 1 InfraRan Optical System with 16cm cell .................................................................................................. 4<br />
Figure 2 InfraRan Optical System with 6m cell ................................................................................................... 5<br />
Figure 3 InfraRan Controls and Connections ......................................................................................................... 5<br />
Figure 4 InfraRan Gas Port Fittings ........................................................................................................................ 6<br />
Figure 5 InfraRan Shoulder Straps ......................................................................................................................... 7<br />
Figure 6 InfraRan Keypad and Display .................................................................................................................. 9<br />
Figure 7 Excel Spreadsheet download screen ........................................................................................................ 20<br />
Figure 8 Excel Spreadsheet download COM Port Setting .................................................................................... 21<br />
Figure 9 Analyzer Connections ............................................................................................................................... 23<br />
3
_________________________________________________________________________________________<br />
1. InfraRan Specific Vapor Analyzer Overview<br />
1.1. Introduction<br />
The InfraRan Specific Vapor Analyzer is an analyzer that measures a particular gas or vapor in air at the<br />
parts per million (ppm) level by infrared absorption. The gas or vapor absorbs infrared energy at specific<br />
wavelengths and the amount of energy absorbed is proportional to the gas concentration. The analyzer is<br />
calibrated to read out directly in the desired units.<br />
The analyzer has a rechargeable internal battery pack with a 7 – 8 hr run time. It may also be run from<br />
100 – 250 VAC 50/60 Hz using the charger/power supply.<br />
1.2. Basic Measurement Concept<br />
The InfraRan Specific Vapor Analyzer is an infrared fixed filter analyzer. A broad-band, pulsed infrared<br />
source. The source illuminates the entrance window of a tubular, single pass transmission cell or a folded<br />
path, multipass cell. A portion of the energy is absorbed by the sample. The infrared beam then passes<br />
through an exit window and is focused on an optical filter(s) mounted on a detector that selects the<br />
wavelength required for the analysis. The detector converts the infrared energy to an electrical signal<br />
proportional to the intensity. The signal is processed by a microcomputer and is converted to a real-time<br />
display of the gas concentration in parts per million (ppm). In addition to the display both the original<br />
detector signal(s) and the calculated concentrations are transmitted as an ASCII string through an RS-232<br />
serial or USB port. Figures 1 & 2 below illustrate the theory of operation.<br />
Figure 1 InfraRan Optical System with 16cm cell<br />
4
Figure 2<br />
InfraRan Optical System with 6m cell<br />
1.3. Analyzer Description<br />
The following diagrams show the basic components of the InfraRan<br />
Figure 3 InfraRan Controls and Connections<br />
5
1.4. Analyzer Port Inlet/Outlet Fittings<br />
The inlet fitting will accept the sample wand fitting and the fitting on the zero filter holder. The outlet<br />
fitting is to reduce noise exiting the gas port block and it can be used to attach an exhaust tube to the<br />
analyzer if the user wishes to purge the gas from the test area. All fittings to the gas analyzer are standard<br />
1/4 NPT ports.<br />
Note: If an analyzer is to be attached to long lengths of tubing for the inlet and outlet, it is advised that an<br />
external pump be used. It is not recommended that an external pump be attached to the internal pump as<br />
this may cause pressure or a vacuum differential that could affect the readings or cause a seal to fail.<br />
Contact <strong>Wilks</strong> <strong>Enterprise</strong> if an external pump is needed, in that case an analyzer without an internal<br />
pump can be supplied.<br />
1.4.1. Reducing Pump Outlet Noise<br />
Additional quieting of the pump output may be required for applications in hospitals or locations where<br />
the noise of the outlet pump port may be a problem. A particulate filter, such as the type found on the<br />
sample wand can be attached to the outlet with a short length of tubing.<br />
Figure 4 InfraRan Gas Port Fittings<br />
1.4.2. Instrument Shoulder Strap<br />
The shoulder strap supplied with the instrument is rated for greater weight capacity than the total weight<br />
of the InfraRan gas analyzer and should provide safe carrying of the InfraRan for the lifetime of the<br />
instrument. Care should be taken to ensure that the strap is in good condition and properly used.<br />
Occasionally check the strap hooks for cracks, tears, loose stitching and that the metal safety clip is intact<br />
and operating properly. If there is any doubt about the condition of the strap, it should be replaced.<br />
The strap hook is latched to<br />
the safety clips slot and may<br />
release upon lifting the analyzer.<br />
The clip loop is correctly<br />
engaged by the strap clip and<br />
the safety clip is in its slot.<br />
6
Figure 5 InfraRan Shoulder Straps<br />
_________________________________________________________________________________________<br />
2. Getting Started<br />
Customers who have already set up the InfraRan may want to go to section 2.6 below for the Quick<br />
Start instructions. The following instructions are for the initial start up of the InfraRan.<br />
2.1. Analyzer Check<br />
When the instrument is received examine the container for damage. The following should be included in<br />
the contents:<br />
InfraRan Analyzer<br />
Charger - AC Adapter – InfraRan Interconnect Cable<br />
Sampling Hose & Particulate Filer<br />
Zero Filter Assembly<br />
Package of 2 zero filters<br />
Set of Inlet/Outlet Fittings<br />
Power Cord<br />
USB Cable<br />
Instruction Manual<br />
Driver/Utilities CD<br />
Wand Clip<br />
2.2. Charging the Battery<br />
After unpacking, the InfraRan Analyzer should be placed on the charger overnight. Connect charger to<br />
charger port on instrument and allow to charge at least 12 hours. The battery charger is a “smart charger”<br />
that will not overcharge the battery. Please see the charger for an explanation of indicator lights.<br />
Note: The battery should be substantially discharged before recharging to avoid developing memory in<br />
the battery that will reduce its capacity.<br />
7
2.3. Cleaning the Instrument<br />
Use damp soapy rag. Do not use solvent. Do not attempt to clean the gas cell. If the cell has become<br />
fouled it will need to be returned to <strong>Wilks</strong> <strong>Enterprise</strong> for replacement.<br />
2.4. Instrument Warm-up<br />
The InfraRan should be run with the pump on for a minimum of 30 minutes for the most stable zero prior<br />
to making measurements. Even though the detector voltage continues to vary significantly for about 4<br />
more hours, the InfraRan compensates for this change using the temperature measured by a thermistor<br />
attached to the detector housing. Each time the analyzer zero is determined, a new temperature origin is<br />
recorded and the compensation applied from that point on. During this initial 4 hour period, it is wise to<br />
rezero the InfraRan at least every hour.<br />
2.5. Power Source<br />
When changing the power source from battery to mains power or the reverse, the instrument zero should<br />
always be re-determined.<br />
2.6. Quick Start Instructions<br />
Turn on power. (30 minute warmup)<br />
Select CNTRL then select BATTERY to check battery status<br />
ESCAPE then select ESCAPE<br />
ANALYZE then select REZERO (Prompt for filter)<br />
ZERO (30 second cell flush, 30 second Zero operation)<br />
RUN then select RUN again (requires 2 key presses to avoid unintended start, 30 second<br />
countdown before first reading)<br />
YOU ARE READY TO SAMPLE!<br />
_________________________________________________________________________________________<br />
3. Keypad Operations<br />
A majority of operations will only require the use of the Top Menu described in 3.2.1. For more detailed<br />
operations, each function for each layer of operation is described in this section.<br />
8
3.1. Data Entry Keypad<br />
Figure 6 InfraRan Keypad and Display<br />
ENTER<br />
Accepts the current selection and advances to the next item or if there are no more items, exits to<br />
the next higher menu level<br />
CLEAR<br />
Erases data entered in user fields<br />
The down arrow returns to the previous menu item.<br />
The up arrow forwards to the next menu item.<br />
The right arrow enters a text space.<br />
This button toggles between SURVEY (fast) or ANALYZE (normal) modes. Survey<br />
mode has a faster response but higher noise and is useful for detecting areas of high<br />
concentration e.g. near a leak.<br />
3.2. Keypad Menu Operations Map<br />
3.2.1. Top Menu<br />
The top menu display is shown below.<br />
9
3.2.2. Analyze Menu<br />
When the ANALYZE key is selected from the top menu display the following Analyzer Menu is displayed<br />
REZERO<br />
Prompts user "INSTALL ZERO FILTER"<br />
The label ZERO will appear after the REZERO key is pressed<br />
Press ZERO key<br />
Timer countdown 30 seconds to introduce fresh air<br />
Timer countdown 30 seconds to zero instrument<br />
Display zero voltage of detector<br />
RUN<br />
Prompts user " INSTALL PARTICULATE FILTER "<br />
Press the RUN key<br />
Timer countdown 30 seconds to introduce sample air then analyzer continues into run mode<br />
LOCATION<br />
Input site location names for the log report with the data entry keypad<br />
Multiple locations can be entered by pressing the up or down arrow keys<br />
Pressing ENTER at any of the location numbers exits the location entry menu<br />
ESCAPE<br />
Returns to prior menu<br />
Note: Defined locations cannot be changed unless the current file is empty. See section 3.2.5 for erase<br />
functions.<br />
3.2.3. Run Menu<br />
When the RUN key is selected from the Analyze Menu display the following Run Menu is displayed<br />
10
LOG ON<br />
Toggles logging operations, LOG ON indicates that the logging operation is currently off.<br />
Pressing LOG ON will change the softkey to LOG OFF and display a LOG ON indication on the<br />
top left of the display.<br />
Pressing the LOG OFF softkey toggles the logging functions off and turns off the LOG OFF<br />
indicator on the display. See section 3.2.10 for additional logging functions.<br />
CONTROL<br />
Toggles pump and alarm on/off or displays battery charge condition.<br />
Note: the pump and alarm functions are toggled on/off for the current run. Starting a new run resets these<br />
functions to their normal defaults as set in section 3.2.10 ).<br />
3.2.4. Control Menu<br />
When the CONTROL key is selected from the Run Menu display the following Control Menu is displayed<br />
WILKS INFRARAN<br />
18NOV07<br />
14:30:55<br />
PUMP ON<br />
PUMP OFF<br />
ESCAPE<br />
PUMP<br />
Pump can be turned ON or OFF<br />
WILKS INFRARAN<br />
18NOV07<br />
14:30:55<br />
ALARM ON<br />
ALARM OFF<br />
ESCAPE<br />
ALARM<br />
Alarm can be turned ON or OFF<br />
11
WILKS INFRARAN<br />
BATTERY = 100%<br />
18NOV07<br />
14:30:55<br />
ESCAPE<br />
BATTERY<br />
Shows percent of battery power left<br />
WILKS INFRARAN<br />
18NOV07<br />
14:30:55<br />
25% 50% 75% 100%<br />
ESCAPE<br />
BRIGHTNESS<br />
Allows for screen brightness adjustment<br />
ESCAPE<br />
Returns to prior menu<br />
3.2.5. Files Menu<br />
When the FILE key is selected from the top menu display the following Files Menu is displayed<br />
NEW<br />
Enter file name with the alpha numeric keypad.<br />
Press CLEAR to delete current file name.<br />
Press ENTER to accept changes.<br />
ERASE<br />
Prompts user to delete file, press ENTER key to erase data in current file.<br />
ESCAPE<br />
Cancels erase operation and return to prior menu.<br />
12
3.2.6. Setup Menu<br />
When the SETUP key is selected from the top menu display the following Setup Menu is displayed<br />
DIAG<br />
Opens up the diagnostic menu which allows the user to check current calibration by injecting a<br />
calibrated gas standard.<br />
Displays system energy and gain number.<br />
CLOCK<br />
Set system time and date.<br />
ANALYSIS<br />
Global settings for the log functions and audible alarm high/low toggles on or off.<br />
Sets system display.<br />
CALIBRATE<br />
Settings containing information on current calibrated gas(s).<br />
ESCAPE<br />
Returns to prior menu.<br />
3.2.7. Diag Menu<br />
When the DIAG key is selected from the Setup Menu display the following Diag Menu is displayed<br />
VERIFY<br />
Prompts calibration standard concentration.<br />
Press ENTER to start verification.<br />
Prompts user to inject standard gas, press RUN to continue.<br />
Press ESCAPE at any time to cancel.<br />
13
ENERGY<br />
Prompts user to install zero filter.<br />
Press BEGIN key to continue.<br />
ESCAPE<br />
Returns to prior menu<br />
3.2.8. Clock Menu<br />
When the CLOCK key is selected from the Setup Menu display the following Clock Menu is displayed<br />
DATE<br />
TIME<br />
Set Year - Month - Date with keys on keypad.<br />
Set Hour - Minute - Second with keys on keypad.<br />
ESCAPE<br />
Returns to prior menu.<br />
3.2.9. Analysis Menu<br />
When the ANALYSIS key is selected from the Setup Menu display the following Analysis Menu is<br />
displayed<br />
LOG<br />
Settings for logging functions on/off status, mode and interval.<br />
DISPLAY<br />
Display selection for concentration, %T, and ABS.<br />
ESCAPE<br />
Returns to prior menu.<br />
14
3.2.10. Log Menu<br />
STATUS<br />
Global selection to turn logging function on/off.<br />
Selectable log interval, 1 second to 1 minute using the up/down arrows on keypad.<br />
MODE<br />
Select CONTINIOUS or SINGLE logging mode.<br />
INTERVAL<br />
Selectable by up/down arrows on keypad from 1 second to 1 minute.<br />
ESCAPE<br />
Returns to prior menu.<br />
Note: The InfraRan records the maximum, minimum and average concentrations for each logged interval.<br />
3.2.11. Calibrate Menu<br />
When the CALIBRATE key is selected from the Setup Menu display the following Calibration Menu is<br />
displayed<br />
EDIT<br />
Step thru calibration values with the ENTER key on the keypad.<br />
To change values, press CLEAR to erase current value and enter new values thru the alpha<br />
numeric keypad.<br />
Press ENTER to accept the new values.<br />
Calibration Values<br />
Name<br />
y0 #<br />
alpha1 #<br />
k1 #<br />
alpha2 #<br />
k2 #<br />
Factory Set<br />
Factory Set<br />
Factory Set<br />
Factory Set<br />
Factory Set<br />
Factory Set<br />
15
Scale Fact # Factory Set<br />
Range # Factory Set<br />
Temp Slope # Factory Set<br />
Precision # User Select<br />
High Alarm # User Select<br />
Low Alarm # User Select<br />
ID Number # User Select<br />
When all the calibration values have been entered or after the last item has been selected with the ENTER<br />
key, the menu will proceed to the prior menu and SAVING CHANGES should visible on the display.<br />
SEL GAS<br />
Using the up/down arrows on keypad step thru gases available and press ENTER to select gas for<br />
measurement. (This menu item is available on multi gas analyzers only).<br />
ESCAPE<br />
Returns to prior menu.<br />
3.2.12. Download Menu<br />
When the DWNLD key is selected from the top menu display the following Download Menu is displayed<br />
FILE<br />
Selecting FILE allows the user to download the current log file to the host computer.<br />
Press ENTER to download file<br />
ESCAPE<br />
Cancels operation and returns to prior menu.<br />
3.2.13. Control Menu<br />
When the CNTL key is selected from the top menu display the following Control Menu is displayed<br />
16
PUMP<br />
Toggles analyzer pump on or off.<br />
ALARM<br />
Toggles alarms on or off.<br />
BATTERY<br />
Displays percent of charge on analyzer battery.<br />
BRIGHT<br />
Selectable display brightness from 25% to 100% (set to 25% for best battery life)<br />
ESCAPE<br />
Returns to prior menu.<br />
Note : Setting the pump or alarms either on or off, effects their operation at all times. If the pump or<br />
alarms are turned off, they will not operate until they are turned on in RUN mode using the CONTROL<br />
softkey.<br />
3.3. Analysis Modes<br />
3.3.1. Normal (Analysis) Mode<br />
In normal analysis mode, reported data are the result of a rolling average of 16 measured values over a<br />
period of about 24 seconds. The display is updated at each data point. The value will lag the sample<br />
concentration by a few seconds but noise will be reduced.<br />
3.3.2. Fast (Survey) Mode<br />
Fast mode is entered and exited by pressing the light bulb button on the lower right corner of the keypad.<br />
The display shows “Fast Response” when this mode is enabled. The fast mode is intended for detecting<br />
leaks or “hot” spots. The measurements are not signal averaged. In this mode the display is considerably<br />
noisier than in the normal mode but response is faster.<br />
3.4. Display Operations<br />
3.4.1. System Indicator<br />
LOW BAT<br />
This warning appears in the indicator area when the battery is low and will soon require a charge<br />
3.4.2. Display Modes<br />
The concentration display changes depending on the relationship between the measured concentration and<br />
the control parameters.<br />
Concentration in normal range<br />
Concentration above alarm level<br />
Concentration above Calibrated Range<br />
Concentration above Mathematical Range<br />
Normal Display<br />
Flashing Display<br />
Inverted Display<br />
Asterisks replace digits<br />
17
_________________________________________________________________________________________<br />
4. Communications Interface<br />
The InfraRan has both USB and RS-232 serial interfaces. In the Run mode the current readings are<br />
transmitted as comma delimited strings every second. See Section 4.3 for the data format. Data recorded<br />
internally using the logging functions, Sections 3.2.3 and 3.2.10, are downloaded using the same interface<br />
and communications protocol. See Section 4.2.<br />
Note: For XP or earlier versions.<br />
1. Plug in the USB cable from the host computer to the InfraRan USB mini B port.<br />
2. The host computer will come up with a dialog box, noting that it has found new hardware and asking<br />
where to find the driver.<br />
3. Place the driver/utilities CD into the host computer CDROM drive and continue with the driver<br />
installation by directing the Windows driver dialog box to the driver directory on the CDROM<br />
4. After the installation of the driver, confirm that a new COM port has been added to the host computer.<br />
In the Control Panel on your computer, select the SYSTEM icon.<br />
Click on the Hardware Tab and then click on the Device Manager Button.<br />
Confirm that an additional COM port has been added the host computer. It will be identified as a "USB<br />
Serial Port".<br />
18
4.1. USB Port Operation Test<br />
To confirm the proper operation of the USB COM port, start the Windows Hyperterminal program in the<br />
Start - Programs - Accessories - Communications menu. Configure Hyperterminal to communicate with<br />
the COM port allocated to the USB serial port.<br />
The port configuration is as follows:<br />
9600 Baud<br />
1 Stop bit<br />
No Parity<br />
No Flow Control<br />
With the InfraRan USB cable plugged in and the analyzer on, press ANALYZE then RUN. After the<br />
analyzer has started the RUN cycle, a continuous stream of data should be now displayed on<br />
hyperterminal. This will confirm the proper operation of the USB port.<br />
4.2. Downloading Data with RS-232/USB<br />
Download Data Report After recording data using the SETUP - ANALYSIS - LOG - STATUS selection<br />
you can download the data file to a host computer in one of two ways.<br />
4.2.1. Using Windows Hyperterminal Program<br />
Start the Hyperterminal program on your computer, by clicking on Start – Programs – Accessories and<br />
Communications.<br />
1. Configure 9600 Baud Rate, 8 Bits, No Parity, 1 Stop Bit<br />
2. Select Transfer (computer)<br />
3. Select Capture Test, name file then hit start<br />
4. Select DWNLD on the InfraRan keypad, select FILE then hit ENTER for the download. Observe<br />
the data transfer on your computer<br />
5. Select transfer on your computer<br />
6. Select Capture Test then hit stop<br />
7. Escape to hyperterminal File List, select File Saved from the name chosen in #3, and notepad will<br />
be opened<br />
19
4.2.2. Using the Excel Spreadsheet Download<br />
Note: Before using the spreadsheet program, the cheapcomm program (available on the CD provided<br />
with the InfraRan) must be loaded first.<br />
Open the spreadsheet data log report by starting EXCEL and then using File - Open from the<br />
EXCEL menus. Or the data logger can be started by double clicking on the<br />
InfraRan_log_report_xxx.xls file on the CDROM.<br />
Always use “Save As” to save completed log files, so as not to over write the master<br />
InfraRan_log_report_xxx.xls file.<br />
Once the data logger has loaded, click the Enable Macros button.<br />
COM Port<br />
Download Button<br />
Figure 7 Excel Spreadsheet download screen<br />
Change the COM port number to the correct port that the InfraRan USB port is assigned.<br />
Click on the current COM port assignment in the "Enter Serial Port" box.<br />
Change the COM number in the fx formula bar and press ENTER.<br />
20
Change COM port number here<br />
COM3<br />
Click here<br />
Figure 8 Excel Spreadsheet download COM Port Setting<br />
Start the download process clicking on the Download Report button.<br />
Click OK on the next dialog box, Excel will now wait for the InfraRan to start the download.<br />
To start download, Click OK then on the InfraRan DWNLD >Files >ENTER.<br />
OK<br />
Cancel<br />
Start the data transfer, by pressing the Download then Files key on the InfraRan followed by<br />
ENTER on the keypad.<br />
The Excel program should now display Transfer In Progress in the Download report button.<br />
After the transfer is complete, the InfraRan can be disconnected from the host PC.<br />
The data is now in the host PC and will be formatted in Excel.<br />
Note : Large log files will take a few moments to transfer to the host PC. Very large log files could take<br />
quite a long time for Excel to format. The process time will depend on the speed of the host PC used.<br />
4.3. Serial Data Output<br />
The InfraRan analyzer outputs a constant asci stream on the rs232 and USB ports when the RUN is<br />
initiated via the ANALYZE Menu. The stream can be used to input specialized or custom applications<br />
on a host PC to perform analysis functions external to the InfraRan analyzer. Or to perform<br />
external logging functions.<br />
21
The data stream:<br />
13MAR09, 12:29:11, 2.7553, 0, 0.0077, 2.7535, 20.67, 123<br />
Field 1 2 3 4 5 6 7 8<br />
1. Date, DDMMMYY.<br />
2. Time, HH:MM:SS.<br />
3. Buffered voltage value from detector.<br />
4. Value displayed on InfraRan VFD display.<br />
5. Absorbance value.<br />
6. Unbuffered voltage value from detector.<br />
7. Temperature value from internal thermistor (Celsius).<br />
8. Analyzer I.D. (this field is only enabled when a value is entered via the SETUP - CALIBRATE<br />
Menu on the InfraRan)<br />
22
_________________________________________________________________________________________<br />
5. Input/Output and Power Connectors<br />
Figure 9 Analyzer Connections<br />
_________________________________________________________________________________________<br />
6. Battery Removal<br />
1. Place the analyzer on its side,<br />
remove the 4 retaining screws and<br />
the battery door.<br />
2. Loosen the two thumb screws on<br />
the battery cover.<br />
Swing the cover out and lift out<br />
the cover from its retaining slot.<br />
3. Press in on the bottom or top of<br />
the battery and lift out of the battery<br />
compartment.<br />
Figure 10 Battery Removal<br />
23
_________________________________________________________________________________________<br />
7. Optional Accessory-Analog Output:<br />
The InfraRan Specific Vapor Analyzer can be equipped with an optional analog output that is available<br />
through a BNC connector on the end of the analyzer below the standard terminal block. The analog<br />
signal range is 0 – 5 Vdc. This signal is proportional to the digital concentration value that is displayed<br />
on the vacuum fluorescent display and reported in the serial data string. It is generated by an eight bit<br />
digital-to-analog converter (DAC). The correspondence between the analog signal and the digital value is<br />
determined by the Range setting found in the Setup->Calibrate->Edit menu. Some typical values are<br />
shown below.<br />
Selected Range Concentration @ 5V Concentration Step Size<br />
2 ppm 2 ppm 0.0078 ppm<br />
5 ppm 5 ppm 0.0196 ppm<br />
10 ppm 10 ppm 0.0392 ppm<br />
50 ppm 50 ppm 0.196 ppm<br />
100 ppm 100 ppm 0.392 ppm<br />
500 ppm 500 ppm 1.96 ppm<br />
It is the responsibility of the user to keep track of the correspondence between the analog signal level and<br />
the concentration.<br />
Analog Output<br />
Connector center conductor<br />
(+) Pos.<br />
0 - 5<br />
V D C<br />
Shell of connector<br />
( - ) Gnd<br />
24
_________________________________________________________________________________________<br />
8. Specifications<br />
ITEM<br />
Instrument Type<br />
Power Requirements(Battery Charger-external operating supply)<br />
Battery Pack Rechargeable, Nickel Metal Hydride<br />
Dimensions<br />
Weight<br />
Enclosure<br />
Instrument Type<br />
Optics:<br />
Cell<br />
Photometer<br />
SPECIFICATION<br />
Single Beam Infrared Spectrometer<br />
100-250V AC 50/60 Hz<br />
12V, 9 A mp-hr capacity<br />
15 x 7.3 x 7.5 inches, 38 x 18.5 x 19 cm<br />
18 lbs, 8.2 kg<br />
High Impact Polymer<br />
Single Beam Infrared Spectrometer<br />
Polished aluminum tube or gold mirror<br />
multiple pass<br />
Fixed band pass<br />
Filter<br />
Pyroelectric detector<br />
Cell Pathlength<br />
16 cm or 6.0 meters (dependent on gas<br />
and concentration range being measured<br />
Sample Cell Volume 18.1cm3(16 cm)or .45 liters (6.5 m)<br />
Sample Flow<br />
3L/min Typical (16 cm cell)<br />
10L/min Typical (6.0 m cell)<br />
Gas Purge<br />
5 cell volumes for 99% gas exchange<br />
Measurement Cycle<br />
Source<br />
Communications<br />
Communications protocol<br />
Concentration Alarm<br />
Key Pad<br />
Display updated every 1.5 seconds<br />
Pulsed thin-film element<br />
RS-232, DB 9 connector<br />
USB, Mini B connector<br />
9600 baud, 8,N,1<br />
Two level settable audible alarm and<br />
visual display alarms<br />
20 Key tactile keypad<br />
8.1. Operating and Storage Conditions<br />
OPTIMUM NORMAL STORAGE<br />
Temperature 23±2 o C (73±4 o F) 5 - 40 o C (40-120 o F) -20 - +60 o C (5 - 140 o F)<br />
Relative Humidity 50±10% 2 – 95% non-condensing 0-100% non-condensing<br />
25
_________________________________________________________________________________________<br />
9. Troubleshooting<br />
1. Number Displayed at the End of a Zero Cycle<br />
At the end of a zero cycle (initiated with Analyze->Rezero->Zero), the number displayed following<br />
ZERO = is the voltage from the first detector. This value should be between 1 and 4.5 V.<br />
If it is:<br />
Between 0.5 and 1 V and the sample is known to be anesthetic-free air then cell contamination, probably<br />
due to dust or lint, is likely. Useful measurements should still be possible for a short time but instrument<br />
noise can be expected to increase. The analyzer should be returned to <strong>Wilks</strong> <strong>Enterprise</strong> for service and<br />
recalibration as soon as possible.<br />
Between 0.1 and 0.5 V and the sample is known to be anesthetic-free air then either the cell has suffered<br />
severe contamination or some optical components have moved due to a severe mechanical shock.<br />
Instrument noise will be high and measurements will be of questionable value. The analyzer must be<br />
returned to <strong>Wilks</strong> <strong>Enterprise</strong> for repair and recalibration.<br />
Between 0 and 0.1 V and the sample is known to be anesthetic-free air then either some optical<br />
components have been dislodged by a severe mechanical shock, optical components (source, detector, gas<br />
cell) or electronic components have failed. Useful measurements will not be possible. The analyzer must<br />
be returned to <strong>Wilks</strong> <strong>Enterprise</strong> for repair and recalibration.<br />
2. Negative Readings for an Anesthetic are Displayed<br />
Negative readings for an anesthetic indicate that a zero was performed with a sample that contained an<br />
anesthetic or another material that absorbs the infrared wavelengths used for the analysis. The most likely<br />
reasons for this are that either a zero gas filter was not used or the filter that was used is saturated with<br />
anesthetic. Replace the filter with one from a new package and repeat the zero cycle.<br />
For nitrous oxide analysis, the zero gas filter is not effective. In this case a zero sample must be collected<br />
in an area that is free of nitrous oxide. A suitable location is often a hallway outside the operating suite<br />
and well away from the recovery room. If nitrous oxide analysis continues to give trouble, it is a good<br />
idea to establish the analyzer zero in an area far removed from the operating suite, recovery room and any<br />
rooms occupied by post surgery patients and then to measure the nitrous oxide levels in the hallways<br />
closer to the operating suite in order to identify well ventilated areas that can reliably be expected to be<br />
free of nitrous oxide.<br />
3. The InfraRan is Unresponsive to Anesthetics<br />
Remove the sample wand and filters. Cover first the inlet and then the outlet fitting with a finger. Verify<br />
that you can feel a slight vacuum at the inlet and a slight positive pressure at the outlet. If there is no<br />
indication of either pressure or vacuum, check that the InfraRan is in Run mode. Press Control->Pump.<br />
If Pump Off is highlighted press the key under Pump On to turn the pump on. You should be able to<br />
hear the pump and feel vacuum at the inlet and pressure at the outlet.<br />
26
If the pump fails to operate or if there is either no vacuum at the inlet or pressure at the outlet, the<br />
InfraRan must be returned to <strong>Wilks</strong> <strong>Enterprise</strong> for repair.<br />
4. Display is Blank or Garbled<br />
If the display is not functioning properly the InfraRan must be returned to <strong>Wilks</strong> <strong>Enterprise</strong> for repair.<br />
5. Some or All Keypad Keys Do Not Function<br />
The InfraRan must be returned to <strong>Wilks</strong> <strong>Enterprise</strong> for repair.<br />
_________________________________________________________________________________________<br />
10. Service and Customer Support<br />
Your InfraRan ® Specific Vapor Analyzer may have been purchased either directly from <strong>Wilks</strong><br />
<strong>Enterprise</strong> or from a local dealer or representative. For help with any difficulties or problems associated<br />
with operation you are recommended to contact your local representative or dealer first. If the analyzer<br />
was purchased direct, or if there are problems that are unanswered by the local representative, or you have<br />
a technical question about the operation of the instrument or to the analysis, please contact <strong>Wilks</strong><br />
<strong>Enterprise</strong> at the contact address provided below:<br />
Customer Services Department<br />
<strong>Wilks</strong> <strong>Enterprise</strong>, <strong>Inc</strong>.<br />
25 Van Zant Street, Suite 8F<br />
Norwalk, CT 06855<br />
USA<br />
Telephone : (203) 855 - 9136<br />
FAX : (203) 838 - 9868<br />
E-mail : tech@wilksir.com<br />
<strong>Wilks</strong> <strong>Enterprise</strong>, <strong>Inc</strong>. . 25 Van Zant Street, Suite 8F . East Norwalk, CT 06855 . www.<strong>Wilks</strong>IR.com<br />
Tel: 203-855-9136 . Fax: 203-838-9868 . info@wilksir.com . tech@wilksir.com<br />
27