Surgical Technique Guide - OsteoMed
Surgical Technique Guide - OsteoMed
Surgical Technique Guide - OsteoMed

Create successful ePaper yourself
Turn your PDF publications into a flip-book with our unique Google optimized e-Paper software.
InterPhlex<br />
Flexible Stabilization Rods<br />
<strong>Surgical</strong> <strong>Technique</strong> <strong>Guide</strong>
DANGER indicates an imminently hazardous situation<br />
which, if not avoided, will result in death or serious injury.<br />
WARNING indicates a potentially hazardous situation which, if<br />
not avoided, could result in death or serious injury.<br />
CAUTION indicates a potentially hazardous situation which, if<br />
not avoided, could result in minor or moderate injury.<br />
CAUTION used without the safety alert symbol indicates a<br />
potentially hazardous situation which, if not avoided, may result<br />
in property damage.
Instructions for Use<br />
Osteomed INTERPHALANGEAL Flexible Stabilization Rods<br />
1. A straight longitudinal or short curvilinear skin incision is made over<br />
the dorsum of the interphalangeal joint.<br />
2. Retract the skin bilaterally and deepen the wound to the extensor<br />
expansion.<br />
3. The extensor tendon is incised and reflected. Dorsal veins should be<br />
carefully retracted.<br />
4. A longitudinal capsulotomy is performed, exposing the interphalangeal<br />
joint.<br />
5. The interphalangeal joint is excised.<br />
To ensure proper implant fit, only the drill included in the sterile<br />
surgical set should be used to implant the device.<br />
Do not use drill or sizers if sterile package is damaged.<br />
6. The drill included in the sterile surgical pack is used to prepare the<br />
medullary canals for implant placement.<br />
Note: Laser marking on drill flutes is in 5mm increments.<br />
7. The sizers are used to determine the correct size and final fit of each<br />
implant. The size of the implant depends on amount of bone resected<br />
and size of the patient. The implant can be further modified by<br />
trimming the stems if necessary.<br />
8. Thoroughly irrigate the wound for final implant placement.<br />
Do not use implant if sterile package is damaged.<br />
9. Place the implant.<br />
10. Flush the implant site with copious irrigation.<br />
11. Reattach the capsule of the interphalangeal joint, suture the extensor<br />
tendon, close the subcutaneous tissue, and close the skin.<br />
Recommendations for implant handling:<br />
1. Contact with gowns, drapes, gloves, sponges, or any other<br />
possible source of foreign body contaminants should be avoided.<br />
2. Excessive handing of the implant should be avoided.<br />
3. The implant should be handled with a blunt instrument.<br />
4. The implant should be kept immersed in sterile antibiotic solution<br />
after the introduction to the operative field.<br />
5. After trimming, rinse the implant thoroughly to remove any free<br />
particles.<br />
1
Instructions for Use<br />
Osteomed METATARSOPHALANGEAL Flexible Stabilization Rods<br />
1. A straight longitudinal or short curvilinear skin incision is made over<br />
the dorsum of the metatarsophalangeal joint.<br />
2. Retract the skin bilaterally and deepen the wound to the extensor<br />
expansion.<br />
3. Dorsal veins and extensor tendon should be carefully retracted.<br />
4. A longitudinal capsulotomy is performed, exposing the<br />
metatarsophalangeal joint.<br />
5. The metatarsophalangeal joint is excised.<br />
To ensure proper implant fit, only the drill included in the sterile surgical<br />
set should be used to implant the device.<br />
Do not use drill or sizers if sterile package is damaged.<br />
6. The drill included in the sterile surgical pack is used to prepare the<br />
medullary canals for implant placement.<br />
Note: Laser marking on drill flutes is in 10mm increments.<br />
7. The sizers are used to determine the correct size and final fit of each<br />
implant. The size of the implant depends on amount of bone resected<br />
and size of the patient. The implant can be further modified by<br />
trimming the stems if necessary.<br />
8. Thoroughly irrigate the wound for final implant placement.<br />
Do not use implant if sterile package is damaged.<br />
9. Place the implant.<br />
10. Flush the implant site with copious irrigation.<br />
11. Reattach the capsule of the metatarsophalangeal joint, close the<br />
subcutaneous tissue, and close the skin.<br />
Recommendations for implant handling:<br />
1. Contact with gowns, drapes, gloves, sponges, or any other possible source of<br />
foreign body contaminants should be avoided.<br />
2. Excessive handing of the implant should be avoided.<br />
3. The implant should be handled with a blunt instrument.<br />
4. The implant should be kept immersed in sterile antibiotic solution after the<br />
introduction to the operative field.<br />
5. After trimming, rinse the implant thoroughly to remove any free particles.<br />
2
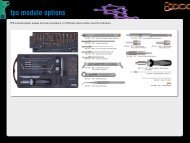
System Components<br />
360-2200<br />
Inter-Phlanageal Sterile <strong>Surgical</strong> Kit<br />
(Drills and Trials)<br />
360-2800<br />
Metatarsal Phlanageal Sterile <strong>Surgical</strong> Kit<br />
(Drills and Trials)<br />
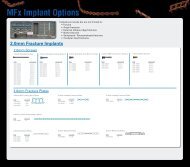
360-2240 Inter-Phalangeal Flexible Stabilization Rod, 4.0mm<br />
360-2245 Inter-Phalangeal Flexible Stabilization Rod, 4.5mm<br />
360-2808 Metatarsal Phalangeal Flexible Stabilization Rod, 8mm<br />
360-2810 Metatarsal Phalangeal Flexible Stabilization Rod, 10mm<br />
3
Osteomed L.P.<br />
www.osteomed.com<br />
Customer Service: 800.456.7779 Tel: 972.677.4600 Fax: 972.677.4601 3885 Arapaho Road, Addison, Texas 75001<br />
P/N 030-1302 Rev. D