Microscopes and Crystals - National High Magnetic Field Laboratory
Microscopes and Crystals - National High Magnetic Field Laboratory
Microscopes and Crystals - National High Magnetic Field Laboratory

Create successful ePaper yourself
Turn your PDF publications into a flip-book with our unique Google optimized e-Paper software.
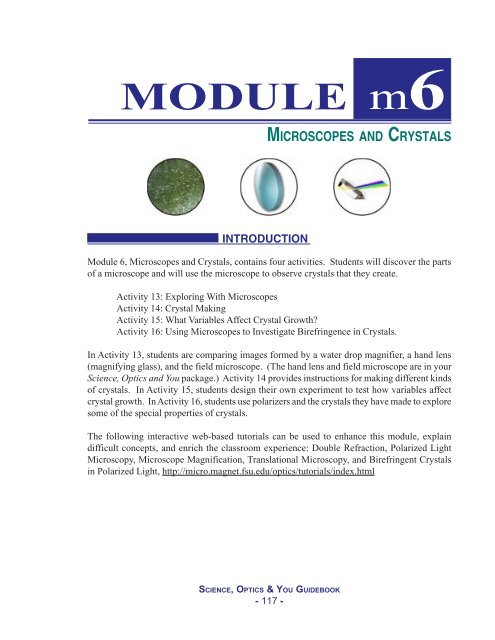
MODULE m6<br />
MICROSCOPES AND CRYSTALS<br />
INTRODUCTION<br />
Module 6, <strong>Microscopes</strong> <strong>and</strong> <strong>Crystals</strong>, contains four activities. Students will discover the parts<br />
of a microscope <strong>and</strong> will use the microscope to observe crystals that they create.<br />
Activity 13: Exploring With <strong>Microscopes</strong><br />
Activity 14: Crystal Making<br />
Activity 15: What Variables Affect Crystal Growth?<br />
Activity 16: Using <strong>Microscopes</strong> to Investigate Birefringence in <strong>Crystals</strong>.<br />
In Activity 13, students are comparing images formed by a water drop magnifier, a h<strong>and</strong> lens<br />
(magnifying glass), <strong>and</strong> the field microscope. (The h<strong>and</strong> lens <strong>and</strong> field microscope are in your<br />
Science, Optics <strong>and</strong> You package.) Activity 14 provides instructions for making different kinds<br />
of crystals. In Activity 15, students design their own experiment to test how variables affect<br />
crystal growth. In Activity 16, students use polarizers <strong>and</strong> the crystals they have made to explore<br />
some of the special properties of crystals.<br />
The following interactive web-based tutorials can be used to enhance this module, explain<br />
difficult concepts, <strong>and</strong> enrich the classroom experience: Double Refraction, Polarized Light<br />
Microscopy, Microscope Magnification, Translational Microscopy, <strong>and</strong> Birefringent <strong>Crystals</strong><br />
in Polarized Light, http://micro.magnet.fsu.edu/optics/tutorials/index.html<br />
SCIENCE, OPTICS & YOU GUIDEBOOK<br />
- 117 -
SCIENCE, OPTICS & YOU GUIDEBOOK<br />
- 118 -
ACTIVITY 13: EXPLORING MICROSCOPES<br />
m6: <strong>Microscopes</strong> <strong>and</strong> <strong>Crystals</strong><br />
A CT<br />
CTIVITY<br />
Exploring With <strong>Microscopes</strong><br />
T he compound microscope was invented in about 1595 by Zacharias Janssen. Robert<br />
Hooke (1635-1703) made compound microscopes containing two or sometimes three lenses,<br />
which he began using in the 1660’s.<br />
In 1665 Robert Hooke published a remarkable book<br />
called Micrographia, which contained detailed<br />
drawings <strong>and</strong> descriptions of small objects from<br />
flies to fleas. With the help of a recent invention,<br />
the microscope, Hooke showed things that once<br />
had been invisible. Two types of microscopes were<br />
in use, the “simple” microscope that had just one<br />
lens, <strong>and</strong> the “compound” microscope which had<br />
two or more lenses. Hooke used a compound<br />
microscope, while Anton van Leeuwenhoek, another<br />
pioneer of microscopy, used simple microscopes made<br />
with very good lenses. His great care in grinding these lenses produced excellent results. Van<br />
Leeuwenhoek made detailed studies of many tiny “animalcules,” <strong>and</strong> was the first person to<br />
ever see bacteria. The magnifying power of his simple microscopes ranged from about 70 times<br />
(70X) to more than 250 times (250X). A wonderful source for the history of microscopes can<br />
be found at http://micro.magnet.fsu.edu<br />
At its simplest, a compound microscope needs just two lenses, a small but powerful objective<br />
lens, <strong>and</strong> a larger eyepiece lens. [The field microscope found in your Science, Optics <strong>and</strong> You<br />
package is a simple microscope until you use the eyepiece attachment which makes it a compound<br />
microscope.] Light from the specimen is focused by the objective lens so that it forms a magnified<br />
image. The eyepiece lens then enlarges this just like a magnifying glass, so that the observer’s<br />
eye traces the light back to see a much bigger image. A compound (two-lens) microscope<br />
produces an image that is inverted, or back-to-front.<br />
In Exploring with <strong>Microscopes</strong>, students should see the relationship between magnifying lenses<br />
<strong>and</strong> microscopes <strong>and</strong> realize that the same principle used in finding the focal point of a lens is<br />
used in focusing a microscope. In the following activities the students will be exploring some<br />
simple microscopes <strong>and</strong> the field microscope which can be found in the Science Optics <strong>and</strong> You<br />
package.<br />
SCIENCE, OPTICS & YOU GUIDEBOOK<br />
- 119 -
ACTIVITY 13: EXPLORING MICROSCOPES<br />
m6: <strong>Microscopes</strong> <strong>and</strong> <strong>Crystals</strong><br />
MATERIALS:<br />
! Slide<br />
! Grease marking pencil<br />
! Dropper<br />
! Small container of Water<br />
! H<strong>and</strong> lens<br />
! <strong>Field</strong> Microscope<br />
! Source of light, flashlight or good room light<br />
! Newsprint, <strong>and</strong> comics from the newspaper<br />
! Science Notebook<br />
WHAT WILL THE STUDENTS DO?<br />
In this activity students will be doing comparative observations of objects using a simple water<br />
drop magnifier, a h<strong>and</strong>s lens <strong>and</strong> a field microscope which is an example of a basic compound<br />
microscope. Students can work individually or in pairs, depending on the number of students in<br />
the class. This can be a teacher-guided activity or students can work independently using the<br />
student page as a guide. There will be three different explorations in this activity.<br />
Part 1<br />
1. Part 1 involves the construction of a water drop magnifier, a type of simple microscope. The<br />
students will use a plastic slide, their Science Notebook, a grease pencil, an eyedropper, a<br />
small container of water <strong>and</strong> some newsprint, both black <strong>and</strong> white, <strong>and</strong> colored print from<br />
the comics section of the newspaper.<br />
2. Students will take the plastic slide <strong>and</strong> draw a circle in the center of the slide with the grease<br />
pencil. The circle should be a little smaller than the diameter of a dime.<br />
3. Using a newspaper, magazine, or book students find a lower case “e” to observe with their<br />
water drop magnifier.<br />
4. Students will add one drop of water to the circle, observe the “e,” add a second drop of<br />
water, observe again, <strong>and</strong> a third drop of water to the circle <strong>and</strong> observe <strong>and</strong> record differences<br />
in their Science Notebooks.<br />
5. Students take a piece of the comics or a comic book (this also works with pictures in<br />
magazines) <strong>and</strong> observe the dots that form the images. There are three colors of dots to<br />
form all of these images.<br />
6. Students will observe differences in the dots using a 1-drop magnifier, a 2-drop magnifier<br />
<strong>and</strong> a 3-drop magnifier.<br />
SCIENCE, OPTICS & YOU GUIDEBOOK<br />
- 120 -
ACTIVITY 13: EXPLORING MICROSCOPES<br />
m6: <strong>Microscopes</strong> <strong>and</strong> <strong>Crystals</strong><br />
Students have actually formed a plano-convex<br />
lens. The more water that is added to the circle,<br />
the thicker the “lens” is going to be;<br />
consequently, the focal point <strong>and</strong> the<br />
magnification will change. As students first<br />
begin to move the “lens” further away from<br />
the newsprint, the image grows larger. If they<br />
continue to move the lens away from the page<br />
it will become fuzzy <strong>and</strong> when it comes back<br />
WHAT’S GOING ON HERE?<br />
into focus the image will appear upside down.<br />
This is because of the way the lens bends the<br />
light traveling from the page to your eye. When<br />
the lens is close to the page, you see what is<br />
known as a virtual image. This is an upright<br />
image that is larger than the image on the page.<br />
As you move the h<strong>and</strong> lens closer to your eye<br />
<strong>and</strong> away from the page, you see what is called<br />
a real image, which is upside down.<br />
Part 2<br />
1. Students look at the letter “e” through the h<strong>and</strong> lens provided in the package.<br />
2. Recording their observations, students will compare what they see through the h<strong>and</strong> lens<br />
with what they saw using the water drop magnifier.<br />
3. Students will look at the colored paper from the comics (like they did with the water drop<br />
magnifier). Students should notice <strong>and</strong> record any similarities <strong>and</strong> differences they may see<br />
in these images in their Science Notebooks. They might comment on the focal length, the<br />
clarity of the image or colors they are able to see.<br />
Part 3<br />
1. Students will be using the field microscope included in the package for the last part of this<br />
activity. They will be looking at the newsprint <strong>and</strong> the colored paper from the comics using<br />
this microscope.<br />
2. If the paper is too thick for light to pass through the paper from the mirror, then another<br />
student can shine the flashlight on the slide so that a good image will be seen. It is suggested<br />
that students be made aware of the functions of the parts of these field microscopes, how to<br />
focus, <strong>and</strong> how to place the specimens on the stage of the microscope.<br />
*The field microscope magnifies 50 times (50X) <strong>and</strong> when using the compound eyepiece it<br />
increases the magnification of the microscope 2-4 times. Most of the time students will be<br />
using the microscopes without the compound eyepiece.<br />
SCIENCE, OPTICS & YOU GUIDEBOOK<br />
- 121 -
ACTIVITY 13: EXPLORING MICROSCOPES<br />
m6: <strong>Microscopes</strong> <strong>and</strong> <strong>Crystals</strong><br />
BASIC OPERATION OF THE FIELD MICROSCOPE<br />
1. Place the field microscope on a level surface.<br />
2. Insert the specimen slide under the stage clips.<br />
3. Rotate the mirror, using gentle pressure on one or both of the mirror hubs<br />
until the maximum amount of light is reflected from the mirror into the<br />
eyepiece. This is called the field of view.<br />
4. Focus slowly by turning the focus wheel with your thumb.<br />
TIPS FOR SUCCESSFUL VIEWING<br />
" To get a good image, light must pass through transparent or translucent specimens, or bounce<br />
off the top of an opaque specimen.<br />
" The higher the power of magnification, the greater the intensity of light needed. A lamp or<br />
brightly-lit window should be sufficient.<br />
" Light from fluorescent bulbs generally yields better images than inc<strong>and</strong>escent bulbs.<br />
" If the students are working as partners, one of them could shine the flashlight down on the<br />
specimen so that enough light would be produced to see an image.<br />
EXTENSIONS:<br />
Expository writing.<br />
<strong>Microscopes</strong> <strong>and</strong> telescopes both use lenses.<br />
Before you begin writing, think about the similarities <strong>and</strong> differences in how microscopes<br />
<strong>and</strong> telescopes work.<br />
Now write how you could make a telescope from materials in the classroom that would<br />
allow you to see things at a distance.<br />
Narrative writing.<br />
<strong>Microscopes</strong> are often used to study small plants <strong>and</strong> animals in ponds.<br />
Pretend that you are investigating a neighboring pond, which suddenly changed color<br />
from a light brown to a bright green.<br />
Now write a short story about how you would investigate this problem using a microscope.<br />
SCIENCE, OPTICS & YOU GUIDEBOOK<br />
- 122 -
ACTIVITY 13: EXPLORING MICROSCOPES<br />
m6: <strong>Microscopes</strong> <strong>and</strong> <strong>Crystals</strong><br />
Reading. Read aloud (or have available) A Drop of Water by Walter Wick (ISBN 0-590-22197-3).<br />
This book uses illustrations <strong>and</strong> some text to describe the properties of a drop of water. This<br />
relates directly to the first Exploration in Activity 13, making a water drop magnifier.<br />
Reading. The book, Looking for Atlantis by Colin Thompson (ISBN 0-679-85648-X) is rich<br />
with images that challenge the reader to identify the thous<strong>and</strong>s of objects “hidden” in the pictures.<br />
Beneath each illustration is another illustration of an imaginary world. Have students use their<br />
powers of observation to identify as many items as they can <strong>and</strong> then compare with classmates<br />
to develop a complete list.<br />
HISTORICAL VIGNETTE: ZACHARIAS JANSSEN<br />
The origin of the optical microscope is a matter of debate. However, most scholars agree that<br />
the invention of the compound microscope can be credited to Zacharias Janssen in the late<br />
sixteenth century. At that time eyeglasses were beginning to enjoy widespread use <strong>and</strong> this<br />
focused a great deal of attention on optics <strong>and</strong> lenses. This first microscope was made in the<br />
year 1595 probably with the help of his father Hans Janssen. Part of the confusion about who<br />
actually invented the first compound microscope is due to the fact that no early Janssen<br />
microscope has survived. A microscope that can be found in a Middleburg, Holl<strong>and</strong>, museum<br />
is reported to be an early Janssen-made microscope.<br />
Luckily, there was one true Janssen microscope that survived long enough to be studied. As<br />
was customary at the time, the Janssens made several examples of their microscope to give to<br />
royalty. One of those was sent to Prince Maurice of Orange, <strong>and</strong> one was given to Archduke<br />
Albert of Austria. Neither of these microscopes survived to modern times, but in the early<br />
1600’s a childhood friend of Zacharias Janssen examined it <strong>and</strong> recorded his observations. He<br />
described the royal instrument as being made of three sliding tubes, measuring 18 inches long<br />
when fully extended, <strong>and</strong> two inches in diameter. It was very ornate, with 3 brass dolphins at<br />
the end forming the feet of a tripod. This early microscope was different from modern<br />
microscopes in that it only contained 2 lenses, <strong>and</strong> magnified objects nine times.<br />
After the invention of this microscope, many other scientists began to experiment with ways of<br />
improving this early microscope. Most of them made improvements by grinding the lenses<br />
more carefully, <strong>and</strong> by having more than two lenses to magnify objects.<br />
Activity. Robert Hooke was the first scientist to use the term cell for the individual units of<br />
living things. Encourage students to research how Hooke decided on this name, <strong>and</strong> to draw<br />
what he first saw.<br />
Writing. The only way that we know that Zacharias Janssen invented an improved microscope<br />
was because someone else documented his invention. Discuss with students the importance of<br />
keeping accurate <strong>and</strong> detailed records in both words <strong>and</strong> drawings. Use the field microscope<br />
from your package <strong>and</strong> have students draw the instrument <strong>and</strong> write a description of how it<br />
SCIENCE, OPTICS & YOU GUIDEBOOK<br />
- 123 -
ACTIVITY 13: EXPLORING MICROSCOPES<br />
m6: <strong>Microscopes</strong> <strong>and</strong> <strong>Crystals</strong><br />
works as if no model of the microscope existed.<br />
ARTIST VIGNETTE: GEORGES SEURAT (1859-1891)<br />
During his short life, Georges-Pierre Seurat was an innovator in the field of<br />
art. This French painter was a leader in a movement called neoimpressionism<br />
in the late 19 th century. While searching for a way to represent<br />
nature, he developed a technique called pointillism. Pointillism is the term<br />
given to creating an illusion of depth <strong>and</strong> light <strong>and</strong> dark values by grouping<br />
dots of ink. By changing the space between the dots, one can achieve an<br />
illusion of varying hues. Dots of ink placed close together will create a dark<br />
value. The further apart the dots are placed, the lighter the value will appear.<br />
A gradient from light to dark can be created by gradually varying the space<br />
between the dots.<br />
Seurat was an art scientist in that he spent much of his life searching for how different colors<br />
<strong>and</strong> lines would change the look or texture of a canvas. His experiments with color led him to<br />
paint in small dots of color that were arranged in such a combination that they seem to vibrate.<br />
Individual colors tended to interact with those around them <strong>and</strong> fuse in the eye of the viewer.<br />
This concept is similar to the dots or pixels in a computer image. If you magnify any computer<br />
image enough, you will see individual colors that when set together produce an image. Seurat<br />
was interested in the way that colors worked together to create a particular tone. This technique<br />
of pointillism took much longer to produce a work of art, however during his life he produced<br />
over 500 pieces of artwork.<br />
Activity. Students can produce a drawing using pointillism by following these directions. Students<br />
will create a light pencil sketch of their object. This will act as a reference <strong>and</strong> will be erased<br />
once the drawing is complete. They will create the darkest values first by placing dots very<br />
close together. Next they will create the illusion of a lighter value by extending the distance<br />
between the dots. Then they will gradually extend the distance between the dots as they capture<br />
the natural shading of the object. Once they have completed this, have them step back <strong>and</strong> take<br />
a look at the drawing. They will then make any changes needed. This is a time-consuming<br />
project but can be a fun way for students to try this art form.<br />
SCIENCE, OPTICS & YOU GUIDEBOOK<br />
- 124 -
ACTIVITY 13: EXPLORING MICROSCOPES<br />
m6: <strong>Microscopes</strong> <strong>and</strong> <strong>Crystals</strong><br />
A CT<br />
CTIVITY<br />
Exploring With <strong>Microscopes</strong><br />
The compound microscope was invented in<br />
Janssen Microscope<br />
about 1595 by Zacharias Janssen <strong>and</strong> his<br />
father Hans Janssen. Their early microscope<br />
only had two lenses that only allowed them to see<br />
objects about nine times larger than normal. Their invention<br />
however allowed other scientists to make changes in their initial<br />
design until some microscopes even as early as 1665 were able to<br />
magnify up to 250 times.<br />
In this activity you are going to make a simple microscope by making a water<br />
drop magnifier, <strong>and</strong> then compare the images produced by this magnifier to images<br />
produced by using a h<strong>and</strong> lens <strong>and</strong> the field microscope.<br />
MATERIALS:<br />
! Slide<br />
! Grease pencil<br />
! Dropper<br />
! Small container of water<br />
! H<strong>and</strong> lens<br />
! <strong>Field</strong> microscope<br />
! Source of light, flashlight or good room light.<br />
! Newsprint <strong>and</strong> comics from the newspaper<br />
! Science Notebook<br />
SCIENCE, OPTICS & YOU GUIDEBOOK<br />
- 125 -
ACTIVITY 13: EXPLORING MICROSCOPES<br />
m6: <strong>Microscopes</strong> <strong>and</strong> <strong>Crystals</strong><br />
Using the materials above <strong>and</strong> the procedure below, you are going to make a<br />
water drop magnifier. For each trial, draw a circle in your Science Notebook to<br />
represent your field of view (the area you can see through your magnifier or<br />
microscope) <strong>and</strong> then draw the images you see. Describe what you see next to<br />
your drawings.<br />
1. Draw a circle in the center of the slide with the grease pencil. It should be a<br />
little smaller than the diameter of a dime.<br />
2. Add one drop of water to the circle <strong>and</strong> observe a lower case “e” in a piece of<br />
newspaper by looking through the drop. In your Science Notebook, draw <strong>and</strong><br />
describe what you see.<br />
3. Add two drops of water to the circle <strong>and</strong> observe the “e” again. In your<br />
Science Notebook, draw <strong>and</strong> describe what you see.<br />
4. Add three drops of water to the circle <strong>and</strong> observe the “e” again. In your<br />
Science Notebook, draw <strong>and</strong> describe what you see.<br />
5. Now start over with a water drop magnifier using one drop of water <strong>and</strong> observe<br />
a piece of colored paper from the comics. In your Science Notebook, draw<br />
<strong>and</strong> describe what you see.<br />
6. Observe the same piece of paper using a two-drop <strong>and</strong> a three-drop magnifier.<br />
In your Science Notebook, draw <strong>and</strong> describe what you see.<br />
7. Look at the newspaper “e” <strong>and</strong> the colored picture from the comics with the<br />
h<strong>and</strong> lens provided in the package.<br />
8. Now use the field microscope to view the newsprint <strong>and</strong> the<br />
colored paper from the comics.<br />
9. In your Science Notebook, compare how the objects looked<br />
under the different magnifying tools.<br />
SCIENCE, OPTICS & YOU GUIDEBOOK<br />
- 126 -
ACTIVITY 14: MAKING CRYSTALS<br />
m6: <strong>Microscopes</strong> <strong>and</strong> <strong>Crystals</strong><br />
A CT<br />
CTIVITY<br />
Making <strong>Crystals</strong><br />
W<br />
hat is a crystal? <strong>Crystals</strong> are solids that form when there is a regular repeated pattern of<br />
molecules. In some solids, the arrangements of the atoms <strong>and</strong> molecules can be r<strong>and</strong>om<br />
throughout the material. In crystals, however, a collection of atoms is repeated in exactly the<br />
same arrangement over <strong>and</strong> over throughout the entire material.<br />
Because of their repetitive nature, crystals can take on strange <strong>and</strong><br />
interesting shapes naturally. When we grow crystals, in the laboratory<br />
or in the classroom, the atoms <strong>and</strong> molecules are separated into an<br />
individual collection of atoms, <strong>and</strong> as the water evaporates, they fall<br />
naturally into their appropriate place in the repetitive structure.<br />
When making crystals in the classroom, you first need to create a<br />
saturated solution. When you reach the point that no more solute (the<br />
substance that you are trying to dissolve) will dissolve (regardless of what<br />
you do to the solution), then you have made a saturated solution. For example,<br />
when adding sugar to water you can increase the amount of solute (sugar) the water (solvent)<br />
will hold by stirring <strong>and</strong> heating the solution.<br />
Below are some tips for making crystals <strong>and</strong> diagnosing some problems that students may<br />
experience when doing the activity for the first time.<br />
CRYSTAL MAKING TIPS<br />
1. Measure according to the directions. More of a chemical does not always<br />
make better crystals.<br />
2. When heating your saturated solution, use saucepans that are glass or enamel.<br />
Metal containers may react with your chemicals.<br />
3. It is preferable to use distilled or filtered water, but tap water works very well.<br />
To determine whether tap water will affect the crystals you are making, perform the “ice<br />
cube test.” (If ice cubes appear cloudy, tap water will probably produce cloudy crystals so<br />
use distilled or filtered water. If ice cubes are clear, use tap water.)<br />
SCIENCE, OPTICS & YOU GUIDEBOOK<br />
- 127 -
ACTIVITY 14: MAKING CRYSTALS<br />
m6: <strong>Microscopes</strong> <strong>and</strong> <strong>Crystals</strong><br />
4. Try to keep the crystal growing experiment in an area with constant humidity <strong>and</strong> temperature,<br />
as much as possible.<br />
5. Once you prepare solutions, place them where they will not be disturbed.<br />
WHERE TO FIND COMMON MATERIALS FOR CRYSTAL MAKING.<br />
Alum: A common ingredient for making pickles, alum can be found in the spice <strong>and</strong> herb<br />
section of the grocery store, or purchased at some drug stores.<br />
Copper sulfate: Found at hardware stores or nurseries <strong>and</strong> sold as a product that kills tree roots<br />
in septic or sewer lines, copper sulfate (CuSO 4<br />
) can also be ordered through most science catalogs.<br />
Borax: A laundry product that can be found at the grocery store, borax will make-easy-to<br />
observe crystals.<br />
Epsom salts: A product that can be easily found in drug stores or in grocery stores, epsom salts<br />
is commonly used in many households.<br />
Granulated sugar <strong>and</strong> table salt also create interesting crystals crystals.<br />
TROUBLE-SHOOTING:<br />
If crystals do not form:<br />
You may be using too much water, not enough of the chemical, or the temperature or<br />
humidity may be unfavorable.<br />
If crystals form but are tiny:<br />
You may have too much of the chemical in proportion to the water, or evaporation is<br />
happening too quickly.<br />
If crystals grow but then disappear:<br />
If your crystals get smaller or disappear over time, then add more chemicals to the<br />
solution <strong>and</strong> begin again.<br />
If crystals are cloudy:<br />
You may have impurities in the water or in the chemical. Distilled water is recommended.<br />
SCIENCE, OPTICS & YOU GUIDEBOOK<br />
- 128 -
ACTIVITY 14: MAKING CRYSTALS<br />
m6: <strong>Microscopes</strong> <strong>and</strong> <strong>Crystals</strong><br />
MATERIALS:<br />
! Tap water or distilled or filtered water<br />
! Slides<br />
! Baby food jars, clear film canisters, or other clear container<br />
! Copper sulfate (CuSO 4<br />
), Epsom salts, table salt, sugar or borax<br />
! Droppers or straws to dispense <strong>and</strong>/or stir solutions<br />
! Teaspoon (a teaspoon holds 5 ml of liquid)<br />
! <strong>Field</strong> <strong>Microscopes</strong><br />
! Science Notebooks<br />
WHAT WILL THE STUDENTS DO?<br />
The purpose of this activity is to provide students with the opportunity to make crystals using<br />
materials <strong>and</strong> instructions provided. This is a structured activity, <strong>and</strong> is intended to introduce<br />
students to crystal making. In Activity 15, students will extend this experience by investigating<br />
variables that affect crystal growth.<br />
Procedure:<br />
Students will make crystals using one or all of the solutes listed in the materials section.<br />
For example, if students are making a copper sulfate solution, they will follow these instructions.<br />
1. Place 10 ml (2 tsp.) of warm water in a jar, or other container.<br />
2. Add 7 g (1 tsp.) of copper sulfate to the water.<br />
3. Shake or stir until the copper sulfate is dissolved.<br />
4. Take a dropper, or a straw, <strong>and</strong> put one or two drops of the liquid in the center of a slide.<br />
5. Place the slide where it will not be disturbed.<br />
6. Students will examine the slide the next day. <strong>and</strong> record observations in their Science<br />
Notebooks. These may be in the form of written observations <strong>and</strong> drawings.<br />
EXTENSIONS:<br />
Art. Before photography was widely used, geologists, astronomers, naturalists <strong>and</strong><br />
other scientists used words <strong>and</strong> drawings to inform each other about their discoveries.<br />
Have students pretend they are geologists <strong>and</strong> have them draw pictures of crystals as carefully<br />
as they can, including all details. Then, encourage students to color the drawings. The more<br />
detail they have included, the more colors they can incorporate. Students can compare these<br />
drawings to the actual drawings of birefringent crystals in Activity 16.<br />
SCIENCE, OPTICS & YOU GUIDEBOOK<br />
- 129 -
ACTIVITY 14: MAKING CRYSTALS<br />
m6: <strong>Microscopes</strong> <strong>and</strong> <strong>Crystals</strong><br />
Writing. Have students imagine that they are spelunkers (cave explorers). What kinds of patterns,<br />
shapes, or formations would they see? Students can include stories about stalactites <strong>and</strong><br />
stalagmites. If any students have visited caves (such as the Marianna Caverns, Luray Caverns,<br />
or Carlsbad Caverns), encourage them to share what they have seen to help others envision<br />
what caves are like. Have students illustrate their stories.<br />
Reading. Either have students read or read aloud to them Gary Paulsen’s The Legend of Red<br />
Horse Cavern (ISBN 0440410231). An adventure story about young people lost in a cavern<br />
could be a jumping off point to encourage students to do further research on caverns or to write<br />
their own stories.<br />
Guest Speaker. Invite a gemologist to speak to the class, display some precious crystals <strong>and</strong><br />
discuss how the crystals are cut to make them marketable. Try contacting a local jewelry store,<br />
geology club, or college or university department.<br />
HISTORICAL VIGNETTE:<br />
THE LEGEND BEHIND THE HOPE DIAMOND<br />
The famous blue Hope Diamond weighs 44.52 carats <strong>and</strong> is said to be unlucky for its owner. It<br />
is probably the most famous gemstone in history. Many of the people that owned the diamond<br />
were unlucky <strong>and</strong> it is believed that the stone was the cause<br />
of their misfortune.<br />
The 112 carat Hope Diamond was mined in India <strong>and</strong><br />
originally brought to France in 1668 by Jean Baptiste<br />
Tavernier. It was said to be cursed because a thief stole the<br />
diamond from the eye of a statue of the Hindu goddess Sita,<br />
wife of Rama. According to the curse, misfortune,<br />
unhappiness, <strong>and</strong> even death would come to anyone who stole<br />
the stone or took possession of it. Tavernier sold it to Louis XIV,<br />
who had it cut into a 67 carat heart-shaped stone <strong>and</strong> named it the<br />
“Blue Diamond of the Crown.” Tavernier was reportedly killed by wild dogs on his next trip to<br />
India.<br />
Louis XVI <strong>and</strong> Marie Antoinette inherited the “French Blue,” as it was popularly known. In<br />
1792 about the time of their executions, the French Blue <strong>and</strong> all of the other French crown<br />
jewels were stolen. Many of the jewels were recovered, but not the Blue Diamond of the Crown.<br />
There are reports that the French Blue was re-cut to its present size by Wilhelm Fals, a Dutch<br />
diamond cutter. It is believed that he died after his son Hendrick stole the diamond from him.<br />
Hendrick later committed suicide.<br />
In 1830 a 44.5-carat deep blue oval-cut diamond appeared in London. It was believed to have<br />
been the French Blue that had been re-cut to conceal its identity. Henry Hope bought it <strong>and</strong><br />
since then it has been called the Hope diamond.<br />
SCIENCE, OPTICS & YOU GUIDEBOOK<br />
- 130 -
ACTIVITY 14: MAKING CRYSTALS<br />
m6: <strong>Microscopes</strong> <strong>and</strong> <strong>Crystals</strong><br />
Many Europeans owned the diamond, <strong>and</strong> many had similar tales of bad luck. It was sold to<br />
Evalyn Walsh McLean, a wealthy American, in 1911 <strong>and</strong> many members of her family also<br />
experienced bad luck. After she bought the Hope diamond, her son was killed in an automobile<br />
accident, her husb<strong>and</strong> died in a mental hospital, <strong>and</strong> her daughter died in 1946 from an overdose<br />
of sleeping pills. After her death in 1947, Harry Winston, a well known jeweler, purchased all<br />
of her jewels including the Hope diamond. He gave the gem to the Smithsonian Institution in<br />
Washington, DC, in 1958, where it has remained on permanent display ever since.<br />
Narrative writing.<br />
Diamonds are a type of crystal. The Hope Diamond is a very famous example of a<br />
crystal.<br />
Think about what happened to people who have owned the Hope Diamond. Pretend<br />
that you are now the owner of this diamond.<br />
Write a short story about what has happened in your life since buying this diamond.<br />
Does the bad luck continue or are you the one to “break the curse?”<br />
ARTIST VIGNETTE: GEORGES BRAQUE 1882-1963<br />
Georges Braque was a French painter known<br />
for his influence on the cubist style of art. Braque was born in<br />
1882 near Paris, France, <strong>and</strong> like his father <strong>and</strong> gr<strong>and</strong>father,<br />
apprenticed himself as a house painter. However, by 1902 he<br />
decided to pursue the study of painting as a fine art. He<br />
emulated the style of other painters who used brilliant colors<br />
<strong>and</strong> a loose structure of forms to express themselves. Braque<br />
also studied Paul Cézanne’s work <strong>and</strong> his influence led him<br />
to paint in the manner that came to be called cubist. Braque<br />
frequently painted architectural structures in a geometric form<br />
resembling a cube or a rectangular prism. <strong>Crystals</strong> also inspired<br />
the cubist painters. They saw in them the shape of a village<br />
on a hillside, <strong>and</strong> in the skin <strong>and</strong> features of a face.<br />
Picasso, with whom Braque began to work closely in 1909, had been developing a similar<br />
approach to painting. Both artists produced paintings of neutralized color <strong>and</strong> complex patterns<br />
of faceted form, now called analytic cubism. Both artists also began to experiment with collage,<br />
a technique of constructing an image from the materials of everyday life, for example, newspapers,<br />
labels or pieces of fabric. The work with Picasso continued until Braque enlisted in the French<br />
army in 1914. He was severely wounded in World War I <strong>and</strong> resumed his artistic career alone in<br />
1917.<br />
SCIENCE, OPTICS & YOU GUIDEBOOK<br />
- 131 -
ACTIVITY 14: MAKING CRYSTALS<br />
m6: <strong>Microscopes</strong> <strong>and</strong> <strong>Crystals</strong><br />
After the war Braque developed a more personal style with brilliant colors <strong>and</strong> textured surfaces.<br />
He continued to work throughout his life <strong>and</strong> produced many paintings, graphics <strong>and</strong> sculptures.<br />
Braque died in 1963 in Paris.<br />
Activity:<br />
Have students create a collage using different materials, selecting a theme <strong>and</strong> using the materials<br />
to create different shapes within the collage. Students may wish to use crystals, as some Cubists<br />
did, as the basis for their artwork using a medium other than collage.<br />
SCIENCE, OPTICS & YOU GUIDEBOOK<br />
- 132 -
ACTIVITY 14: MAKING CRYSTALS<br />
m6: <strong>Microscopes</strong> <strong>and</strong> <strong>Crystals</strong><br />
A CT<br />
Making <strong>Crystals</strong><br />
CTIVITY<br />
What is a crystal? <strong>Crystals</strong> are solids that form in special ways. There is a regular<br />
repeated pattern that occurs each <strong>and</strong> every time new crystals form. Because of<br />
this arrangement, crystals can take on strange <strong>and</strong> interesting shapes naturally.<br />
When we grow crystals, the atoms <strong>and</strong> molecules are separated, <strong>and</strong> as the water<br />
evaporates, they fall naturally into their place in the repeated pattern. In this<br />
activity you will be learning how to make crystals.<br />
Materials:<br />
! Water (tap, distilled or filtered)<br />
! Slides<br />
! Baby food jars, clear film canisters, or other container<br />
! Copper sulfate (CuSO 4<br />
), Epsom salts, table salt, sugar or borax<br />
! Droppers or straws<br />
! Teaspoon (a teaspoon holds 5 ml of liquid)<br />
! <strong>Field</strong> <strong>Microscopes</strong><br />
! Science Notebooks<br />
SCIENCE, OPTICS & YOU GUIDEBOOK<br />
- 133 -
ACTIVITY 14: MAKING CRYSTALS<br />
m6: <strong>Microscopes</strong> <strong>and</strong> <strong>Crystals</strong><br />
Procedure:<br />
If you are making a copper sulfate solution, you will:<br />
1. Place 10 ml (2 tsp) of warm water in a jar, or pill bottle.<br />
2. Add 7g (1 tsp) of copper sulfate to the water.<br />
3. Shake or stir until the copper sulfate is dissolved.<br />
4. Take a dropper, or a straw, <strong>and</strong> put one or two drops of the liquid in the center<br />
of a slide.<br />
5. Place the slide where it will not be disturbed.<br />
6. You will examine the slide tomorrow.<br />
Use the same steps to make crystals using Epsom salt, table salt, sugar, or borax.<br />
What to do the next day?<br />
Use your h<strong>and</strong> lens <strong>and</strong> field microscope to look at the crystals you made yesterday.<br />
Record your observations <strong>and</strong> answers to questions in your Science Notebook.<br />
1. What is the difference between what your slide looked like yesterday <strong>and</strong> what<br />
your slide looks like today? Describe what you think happened.<br />
2. Draw what you see while looking at each of the crystals you made with your<br />
field microscope. Be sure to label your drawings.<br />
3. Look at another student’s crystals. Do their crystals look like the crystals you<br />
made? How are they alike? How are they different?<br />
SCIENCE, OPTICS & YOU GUIDEBOOK<br />
- 134 -
ACTIVITY 15: WHAT VARIABLES AFFECT CRYSTAL GROWTH?<br />
m6: <strong>Microscopes</strong> <strong>and</strong> <strong>Crystals</strong><br />
A CT<br />
A<br />
CTIVITY<br />
What Variables Affect Crystal Growth?<br />
lmost every solid that occurs in nature is made up of<br />
crystals. The minerals found on earth have differently shaped<br />
crystals. Salt looks like rough s<strong>and</strong> to the unaided eye, however<br />
when viewed through a magnifying glass or a microscope, it<br />
is actually made up of small cube-shaped crystals. Many<br />
crystals are transparent; others are colored. Some crystals,<br />
like salt are very small, while others are large enough to be<br />
seen without a h<strong>and</strong> lens or a microscope.<br />
Some crystals are formed when molten rock cools <strong>and</strong> hardens.<br />
Others are formed when water containing dissolved minerals evaporates. In both cases, the<br />
atoms of the minerals form solids by coming together in regular repeating patterns. (See Activity<br />
14) These repeating patterns make crystals both strong <strong>and</strong> hard. <strong>Crystals</strong> of the same mineral<br />
always follow the same growth pattern.<br />
In this activity, students will design investigations about crystals. If they are trying to find out<br />
how different variables affect crystal growth, they need to first identify the variables they will<br />
be studying. There are two types of variables, manipulated <strong>and</strong> responding variables. If a<br />
variable is deliberately changed it is called a manipulated variable. The variable that may<br />
change as a result of changing the manipulated variable is called the responding variable. Students<br />
in this activity are going to investigate how variables affect crystal growth.<br />
MATERIALS:<br />
! Baby food jars, clear film canisters, or other containers<br />
! Water (some warm, <strong>and</strong> some at room temperature)<br />
! Measuring spoon (1 tsp = 5 ml)<br />
! Copper Sulfate (CuSO 4<br />
), Epsom salt, table salt, sugar, borax or other crystal-forming<br />
substance<br />
! Slides<br />
! Droppers or straws<br />
! <strong>Field</strong> microscope<br />
! Science Notebooks<br />
! H<strong>and</strong> lens<br />
SCIENCE, OPTICS & YOU GUIDEBOOK<br />
- 135 -
ACTIVITY 15: WHAT VARIABLES AFFECT CRYSTAL GROWTH?<br />
m6: <strong>Microscopes</strong> <strong>and</strong> <strong>Crystals</strong><br />
WHAT WILL STUDENTS DO?<br />
In this activity, students will be investigating variables that may influence the quality of crystals<br />
they will be making. In Activity 14, students were given instructions on how to make crystals<br />
<strong>and</strong> in this activity, students are going to determine what variables affect the size of the crystals.<br />
You may wish to refer to student answers to question #1 on the student page.<br />
There are two options for implementing this activity. Activity 15A is open-ended where students<br />
decide what variables affect crystal growth <strong>and</strong> then decide on the manipulating variables they<br />
would like to study. Activity 15B is prescriptive <strong>and</strong> explains to students how to test three<br />
variables in making crystals. Following are teacher instructions for both Activity 15A <strong>and</strong><br />
Activity 15B. Each activity has a student page.<br />
1. Once you have discussed the concept of<br />
variables, encourage students to first<br />
discuss <strong>and</strong> list in their Science Notebooks<br />
things to consider when making crystals.<br />
Some variables that students may suggest<br />
are: temperature of the mixture,<br />
temperature in the room, type of container<br />
used, amount of water, amount of solid,<br />
placement of slides, how the mixture is<br />
heated, or atmospheric conditions.<br />
2. Students will need to choose what they<br />
would like to change, when making their<br />
crystals. This one thing is the manipulating<br />
variable.<br />
3. Encourage students to design a way to find<br />
out how each variable affects the size,<br />
number, or formation of crystals.<br />
4. Students will write down in their Science<br />
Notebooks all of the steps involved in<br />
testing each variable.<br />
5. Students from another group should read<br />
the instructions to see if they are easy to<br />
underst<strong>and</strong>.<br />
6. Students predict the affect each variable has<br />
on the formation of the crystals they have<br />
chosen to make, then perform their<br />
experiment, <strong>and</strong> record all data in their<br />
Science Notebooks.<br />
Activity 15A<br />
7. Have students examine their crystals using<br />
h<strong>and</strong> lenses <strong>and</strong> field microscopes <strong>and</strong><br />
compare their results with the predictions<br />
they made prior to making the crystals.<br />
8. Students will test each of their indentified<br />
variables.<br />
9. Students will present their findings to the<br />
class.<br />
Note: The crystals need to sit undisturbed for<br />
24 hours.<br />
SCIENCE, OPTICS & YOU GUIDEBOOK<br />
- 136 -
ACTIVITY 15: WHAT VARIABLES AFFECT CRYSTAL GROWTH?<br />
m6: <strong>Microscopes</strong> <strong>and</strong> <strong>Crystals</strong><br />
Activity 15B<br />
In this activity, students will investigate three variables that may influence the quality of the<br />
crystals:<br />
Variable 1: Temperature<br />
Variable 2: Method of mixing the solution<br />
Variable 3: Amount of solid<br />
By manipulating these variables, students will answer the following questions:<br />
1. Does the temperature of the water in a solution affect crystal growth?<br />
2. Does stirring or shaking a solution affect crystal growth?<br />
3. Does the amount of solid added to water in a solution affect crystal growth?<br />
Variable 1:<br />
Students will manipulate the temperature of the liquid used to make their crystals.<br />
1. Provide 2 containers (baby food jars, clear film canisters or other containers).<br />
2. Students label their containers with their names <strong>and</strong> an H (heated) or a C (not heated). The<br />
same amount of water <strong>and</strong> copper sulfate or other chemical for each container will be used.<br />
The only difference is the temperature of the water (the variable) used to make each solution.<br />
3. Provide room temperature water for one container <strong>and</strong> heated water (not boiling) for the<br />
other.<br />
4. Students add 7 g (1 tsp.) of the chemical to 10 ml (2 tsp.) of water in each container. Stir<br />
gently until the chemical dissolves.<br />
5. Students will place two drops of the warm solution on a slide, <strong>and</strong> two drops of the room<br />
temperature solution on another slide. These should be labeled <strong>and</strong> then placed where they<br />
will not be disturbed.<br />
6. Students will examine the crystals the next day with h<strong>and</strong> lenses <strong>and</strong> with the field<br />
microscopes <strong>and</strong> record results in their science notebooks.<br />
SCIENCE, OPTICS & YOU GUIDEBOOK<br />
- 137 -
ACTIVITY 15: WHAT VARIABLES AFFECT CRYSTAL GROWTH?<br />
m6: <strong>Microscopes</strong> <strong>and</strong> <strong>Crystals</strong><br />
Variable 2:<br />
Students will investigate the effect of stirring or shaking crystal-making solution on crystal<br />
growth.<br />
1. Provide 2 different containers for students. Have them label their containers with their<br />
name <strong>and</strong> an S (stirred) or an NS (not stirred). Students will use the same amount of warm<br />
water <strong>and</strong> the same amount of copper sulfate (CuSO 4<br />
) or other chemical in each container.<br />
Everything but the variable should remain constant.<br />
2. Have students add 10 ml (2 tsp.) of heated water <strong>and</strong> approximately 7 grams (1 tsp.) of the<br />
chemical to each container.<br />
3. Stir the chemical <strong>and</strong> warm water in container S <strong>and</strong> do not stir the warm water <strong>and</strong> chemical<br />
in container NS.<br />
4. After 5 minutes, take 2 drops of the liquid from container S <strong>and</strong> place it on a slide, <strong>and</strong> 2<br />
drops of the liquid from container NS on another slide. Have students label these <strong>and</strong> place<br />
them where they will not be disturbed.<br />
5. Students will examine the slides the next day with h<strong>and</strong> lenses <strong>and</strong> with the field microscopes<br />
<strong>and</strong> record results in their science notebooks.<br />
6. Have students repeat the process, shaking the mixture.<br />
Variable 3:<br />
Students will investigate how crystal growth is affected by adding different amounts of chemical<br />
to water.<br />
1. Provide 2 containers for students. Have students label containers with their names <strong>and</strong> one<br />
with a (3.5g) <strong>and</strong> the other container with a (7g).<br />
2. Students will make solutions of two different concentrations. In the (3.5g) container they<br />
will add approximately 3.5 grams (½ tsp.) of copper sulfate (CuSO 4<br />
) or some other chemical<br />
to10 ml (2 tsp.) of warm water. In the container marked (7g) they will add approximately 7<br />
grams (1 tsp.) of the chemical to 10 ml (2 tsp.) of warm water.<br />
3. Students should either stir or shake both containers until the chemical is dissolved. They<br />
will base this decision on results from investigating variable 2.<br />
4. Students take 2 drops of liquid from the (3.5g) container <strong>and</strong> place them on a slide. They<br />
should also take 2 drops of liquid from the (7g) container <strong>and</strong> place them on a different<br />
slide. Both slides should be labeled <strong>and</strong> set aside where they will not be disturbed.<br />
5. Students will observe the slides the next day with h<strong>and</strong> lenses <strong>and</strong> field microscopes <strong>and</strong><br />
record observations in their Science Notebooks.<br />
SCIENCE, OPTICS & YOU GUIDEBOOK<br />
- 138 -
ACTIVITY 15: WHAT VARIABLES AFFECT CRYSTAL GROWTH?<br />
m6: <strong>Microscopes</strong> <strong>and</strong> <strong>Crystals</strong><br />
EXTENSIONS:<br />
Research <strong>and</strong> Art. There are six crystal systems: cubic, tetragonal, hexagonal, orthorhombic,<br />
monoclinic, <strong>and</strong> triclinic. Research the different crystal shapes <strong>and</strong> design a model of one of<br />
them to be shared with the class. Find the names of minerals that represents each system.<br />
Research <strong>and</strong> Writing. Stalactites <strong>and</strong> stalagmites are structures often found in caves. Students<br />
pretend that they are tour guides explaining how these structures form to people on a tour.<br />
Write a script explaining this process. Encourage students to use models or visual aids that<br />
explain these <strong>and</strong> other stone features created by groundwater deposits.<br />
HISTORICAL VIGNETTE:<br />
DOROTHY CROWFOOT HODGKIN (1910-1994)<br />
Dorothy Hodgkin, a Nobel Prize winning chemist made important<br />
contributions to biology, chemistry <strong>and</strong> physics during her lifetime.<br />
She was born in Cairo, Egypt but lived most of her life in Engl<strong>and</strong>.<br />
At an early age, she developed an interest in chemistry <strong>and</strong> crystals,<br />
<strong>and</strong> on her sixteenth birthday received a book about using x-rays to<br />
study crystals from William Henry Bragg, a Nobel Prize winner in<br />
physics. This gift increased her interest in crystals, <strong>and</strong> started her<br />
on a career path toward using x-rays to study the shape <strong>and</strong> structure<br />
of crystals found in living things.<br />
Although she was sick with rheumatoid arthritis from the time she<br />
was 24 years old, Hodgkin became one of the most skilled<br />
crystallographers of her time. She always chose projects to work on that others thought were<br />
impossible or too difficult. Hodgkin’s hard work <strong>and</strong> knowledge of math, chemistry, physics<br />
<strong>and</strong> biology enabled her to determine the structure of penicillin, vitamin B-12, <strong>and</strong> insulin. The<br />
work she did using x-rays to discover the structure of these crystals helped other scientists learn<br />
how to determine the molecular structure of almost any crystalline material. Hodgkin was only<br />
the third woman to receive a Nobel Prize in Chemistry. This prize was awarded for her discovery<br />
of the structure of Vitamin B-12 <strong>and</strong> for other discoveries she made that changed the way<br />
scientists study chemistry.<br />
SCIENCE, OPTICS & YOU GUIDEBOOK<br />
- 139 -
ARTIST VIGNETTE: JUAN GRIS (1887-1927)<br />
Juan Gris was a Spanish painter who was important in developing the<br />
style of painting known as Cubism. Two other important painters who<br />
used this style of painting were Picasso <strong>and</strong> Georges Braque. The<br />
Cubist style of painting usesflat, two-dimensional surfaces. Cubist<br />
painters used sharp lines <strong>and</strong> geometric shapes rather than painting<br />
objects using actual form <strong>and</strong> color.<br />
The use of stronger colors <strong>and</strong> larger <strong>and</strong> more decorative shapes<br />
distinguished the work of Juan Gris from that of Picasso or Braque.<br />
Gris portrayed the synthetic cubism form that used decorative shapes,<br />
stenciling, collage <strong>and</strong> brighter colors. Many of the Cubists also<br />
combined smooth <strong>and</strong> rough surfaces, <strong>and</strong> frequently used foreign<br />
materials such as newspapers that were pasted on the canvas in<br />
combination with the painted areas. This collage technique became another popular way of<br />
creating art. It was Gris who helped to popularized the Cubist style by systemizing the ideas of<br />
Picasso <strong>and</strong> Braque.<br />
Activity:<br />
The structure of ice crystals that produce a snowflake has been a source of fascination for young<br />
<strong>and</strong> old alike. It is said that no two snowflakes are the same, is that true? Encourage students to<br />
devise a way to find out using a variety of print <strong>and</strong> electronic media. Have students draw or<br />
make a model of a snowflake <strong>and</strong> present findings to the class.<br />
SCIENCE, OPTICS & YOU GUIDEBOOK<br />
- 140 -
ACTIVITY 15: WHAT VARIABLES AFFECT CRYSTAL GROWTH?<br />
m6: <strong>Microscopes</strong> <strong>and</strong> <strong>Crystals</strong><br />
A CT<br />
CTIVITY<br />
What Variables Affect Crystal Growth?<br />
Activity 15A<br />
Almost every solid that occurs in nature is made up<br />
of crystals. The minerals found on earth have<br />
differently shaped crystals. Salt looks like rough s<strong>and</strong><br />
to the unaided eye. However, when looked at using a<br />
h<strong>and</strong> lens or a microscope, it is actually made up of<br />
small cube-shaped crystals. Many crystals are<br />
transparent, others are colored. Some crystals, like<br />
salt, are very small, while others are large enough to be<br />
seen without a h<strong>and</strong> lens or a microscope. What causes crystals to be so different<br />
from one another?<br />
In this activity you <strong>and</strong> your group are going to investigate variables that affect<br />
crystal growth. Before beginning this activity, think about how you made crystals<br />
in Activity 14. Using the materials below, you <strong>and</strong> your group members are<br />
going to design an experiment to test your ideas about crystal growth.<br />
MATERIALS:<br />
! Baby food jars, clear film canisters, or other containers<br />
! Water<br />
! Measuring spoon (1 teaspoon = 5 ml)<br />
! Copper Sulfate (CuSO 4<br />
), Epsom salt, table salt, sugar, borax or other<br />
substance<br />
! Slides<br />
! Droppers or straws<br />
! <strong>Field</strong> microscope<br />
! H<strong>and</strong> Lens<br />
! Science Notebooks<br />
SCIENCE, OPTICS & YOU GUIDEBOOK<br />
- 141 -
ACTIVITY 15: WHAT VARIABLES AFFECT CRYSTAL GROWTH?<br />
m6: <strong>Microscopes</strong> <strong>and</strong> <strong>Crystals</strong><br />
1. Think about how you made crystals in Activity 14. With your group, write<br />
down a list the things necessary for crystals to form in your Science Notebook.<br />
Then, choose one or more things to change (your variables) when you make<br />
a new batch of crystals.<br />
2. Design a way to test how each variable affects crystal growth <strong>and</strong> how you<br />
are going to record your data. Record your plan in your Science Notebook.<br />
3. Exchange Science Notebooks with another group. Can they underst<strong>and</strong> which<br />
variable you are testing? Do they know what materials are needed? Are your<br />
instructions clear enough so that they could copy your experiment?<br />
4. List each variable that you wish to test <strong>and</strong> predeict what you think will happen.<br />
When you are done with your experiment, you can look back <strong>and</strong> see how<br />
accurate your predictions were. Now conduct your experiment, let the crystals<br />
sit undisturbed for at least 24 hours <strong>and</strong> record the results.<br />
5. Draw the crystals in your science notebook.<br />
6. Share your results with the class.<br />
7. Answer the following questions in your Science Notebook:<br />
! Did other groups choose the same variable? Were their results the same?<br />
! What other questions do you have about crystal making?<br />
SCIENCE, OPTICS & YOU GUIDEBOOK<br />
- 142 -
ACTIVITY 15: WHAT VARIABLES AFFECT CRYSTAL GROWTH?<br />
m6: <strong>Microscopes</strong> <strong>and</strong> <strong>Crystals</strong><br />
A CT<br />
CTIVITY<br />
What Variables Affect Crystal Growth?<br />
Activity 15B<br />
Almost every solid that occurs in nature is made up<br />
of crystals. The minerals found on earth have<br />
differently shaped crystals. Salt looks like rough s<strong>and</strong><br />
to the unaided eye, however when looked at using a<br />
h<strong>and</strong> lens or a microscope, it is actually made up of<br />
small cube-shaped crystals. Many crystals are<br />
transparent, others are colored. Some crystals, like salt,<br />
are very small, while others are large enough to be seen<br />
without a h<strong>and</strong> lens or a microscope. What causes crystals to be so different from<br />
one another?<br />
In this activity you <strong>and</strong> your group are going to investigate variables that affect<br />
crystal growth. Before beginning this activity, think about how you made crystals<br />
in Activity 14.<br />
You will be making crystals three different ways. Each time you will be changing<br />
one thing (this is called a variable) when you make your crystals. The three<br />
different variables you will be testing are: temperature, method of mixing the<br />
solution, <strong>and</strong> amount of solid. In doing this, you will try to anwer the following<br />
questions:<br />
1. Does the temperature of the water in a solution affect crystal growth?<br />
2. Does stirring or shaking a solution affect crystal growth?<br />
3. Does the amount of chemical added to the water affect crystal growth?<br />
SCIENCE, OPTICS & YOU GUIDEBOOK<br />
- 143 -
ACTIVITY 15: WHAT VARIABLES AFFECT CRYSTAL GROWTH?<br />
m6: <strong>Microscopes</strong> <strong>and</strong> <strong>Crystals</strong><br />
VARIABLE 1: TEMPERATURE<br />
MATERIALS:<br />
! 2 containers (for example, baby food jars, or clear film canisters. One<br />
container will be labeled with an (H), <strong>and</strong> one of the containers will be<br />
labeled with a (C). Make sure that your name is on both containers.<br />
! Cup containing warm water <strong>and</strong> a cup containing cool water<br />
! Measuring spoon (1 tsp. = 5 ml)<br />
! 2 teaspoons of copper sulfate (CuSO 4<br />
) or some other chemical<br />
! 2 slides<br />
! A dropper or straw to put liquid on the slide<br />
! <strong>Field</strong> microscope<br />
! H<strong>and</strong> lens<br />
! Science Notebooks<br />
Day 1:<br />
1. Put 10 ml (2 tsp.) of warm water in the container marked (H).<br />
2. Put 10 ml (2 tsp.) of cool water in the container marked (C).<br />
3. Add about 7 grams (1 tsp.) of copper sulfate or the chemical you are using to<br />
each container.<br />
4. Shake or stir each container until all of the chemical is dissolved.<br />
5. Label two microscope slides (H) <strong>and</strong> (C).<br />
6. Using a dropper or straw put 2 drops of liquid from container (H) on to slide<br />
(H). Put 2 drops of liquid from container (C) on to slide (C).<br />
7. Put the two slides where they will not be disturbed. You will observe them<br />
tomorrow.<br />
8. Answer the following questions in your Science Notebook:<br />
! Based on the crystals your grew in Activity 14, what do you think your<br />
new crystals will look like?<br />
! What do you think the results of your experiment will be? How do you<br />
think the temperature will affect the crystals?<br />
SCIENCE, OPTICS & YOU GUIDEBOOK<br />
- 144 -
Day 2<br />
1. First use your h<strong>and</strong> lens to observe both slides <strong>and</strong> record what you see in<br />
your Science Notebook. Then use your microscope <strong>and</strong> do the same thing.<br />
Record observations by writing <strong>and</strong> drawing what you see.<br />
2. In your Science Notebook write about the difference between the crystals grown<br />
using warm water, <strong>and</strong> the crystals grown using cool water.<br />
3. Can you answer the question, Does the temperature of water in a solution<br />
affect crystal growth? Be prepared to share your results with the rest of the<br />
class.<br />
SCIENCE, OPTICS & YOU GUIDEBOOK<br />
- 145 -
ACTIVITY 15: WHAT VARIABLES AFFECT CRYSTAL GROWTH?<br />
m6: <strong>Microscopes</strong> <strong>and</strong> <strong>Crystals</strong><br />
VARIABLE 2: METHOD OF MIXING THE SOLUTION<br />
MATERIALS:<br />
! 2 containers (for example, baby food jars, or clear film canisters. One<br />
container will be labeled with an (H), <strong>and</strong> one of the containers will be<br />
labeled with a (C). Make sure that your name is on both containers.<br />
! Warm water<br />
! Measuring spoon (1 tsp. = 5 ml)<br />
! 2 teaspoons of copper sulfate (CuSO 4<br />
) or some other chemical<br />
! 2 slides<br />
! A dropper or straw to put liquid on the slide<br />
! <strong>Field</strong> microscope<br />
! H<strong>and</strong> lens<br />
! Science Notebooks<br />
Day 1<br />
1. Put 10 ml (2 tsp.) of warm water in the container marked (S).<br />
2. Put 10 ml (2 tsp. of warm water in the container marked (NS).<br />
3. Add about 7 grams (1 tsp.) of copper sulfate or some other chemical to each<br />
container.<br />
4. Shake or stir container (S) until all of the chemical is dissolved. Do not shake<br />
or stir the copper sulfate in the container marked (NS) Allow this to sit for<br />
about 5 minutes.<br />
5. Label 2 microscope slides (S) <strong>and</strong> (NS).<br />
6. Using a dropper or straw put 2 drops of liquid from container (S) onto slide<br />
(S). Put 2 drops of liquid from container (NS) onto slide (NS.)<br />
7. Put the two slides where they will not be disturbed. You will observe them<br />
tomorrow.<br />
8. Answer the following questions in your Science Notebook:<br />
! Based on the crystals your grew in Activity 14, what do you think your<br />
new crystals will look like?<br />
! What do you think the results of your experiment will be? How do you<br />
think the method of mixing the solution will affect the crystals?<br />
SCIENCE, OPTICS & YOU GUIDEBOOK<br />
- 146 -
Day 2<br />
1. First use your h<strong>and</strong> lens to observe both slides <strong>and</strong> record what you see in<br />
your Science Notebook. Then use your microscope <strong>and</strong> do the same thing.<br />
Record observations by writing <strong>and</strong> drawing what you see.<br />
2. In your Science Notebook write about the difference between crystals grown<br />
using a solution that was stirred or shaken <strong>and</strong> thcrystals grown using a solution<br />
that was not stirred or shaken.<br />
3. Can you answer the question, Does the method of mixing the solution affect<br />
crystal growth? Be prepared to share your results with the rest of the class.<br />
SCIENCE, OPTICS & YOU GUIDEBOOK<br />
- 147 -
ACTIVITY 15: WHAT VARIABLES AFFECT CRYSTAL GROWTH?<br />
m6: <strong>Microscopes</strong> <strong>and</strong> <strong>Crystals</strong><br />
VARIABLE 3: AMOUNT OF CHEMICAL<br />
MATERIALS:<br />
! 2 containers (for example, baby food jars, or clear film canisters. One<br />
container will be labeled with an (1/2), <strong>and</strong> one of the containers will be<br />
labeled with a (1). Make sure that your name is on both containers.<br />
! Warm water<br />
! Measuring spoon (1 tsp. = 5 ml)<br />
! 1 1/2 teaspoons of copper sulfate (CuSO 4<br />
) or some other chemical<br />
! 2 slides<br />
! A dropper or straw to put liquid on the slide<br />
! <strong>Field</strong> microscope<br />
! H<strong>and</strong> lens<br />
! Science Notebooks<br />
Day 1<br />
1. Put 10 ml (2 tsp.) of warm water in the container marked (1/2).<br />
2. Put 10 ml (2 tsp.) of warm water in the container marked (1).<br />
3. Add about 3.5 g (1/2 tsp.) of chemical to the container marked (1/2).<br />
4. Add approximately 7 g (1 tsp.) of chemical to the container marked (1).<br />
5. Shake or stir both containers until the chemical is dissolved.<br />
6. Label two microscope slides. One slide should be marked (1/2) <strong>and</strong> one slide<br />
should be marked (1).<br />
7. Using a dropper or straw put 2 drops of liquid from container (1/2) on to slide<br />
(1/2).<br />
8. Put two drops of liquid from container (1) on to slide (1).<br />
9. Put the two slides where they will not be disturbed. You will observe them<br />
tomorrow.<br />
10.Answer the following questions in your Science Notebook:<br />
! Based on the crystals your grew in Activity 14, what do you think your<br />
new crystals will look like?<br />
! What do you think the results of your experiment will be? How do you<br />
think the amount of chemical will affect the crystals?<br />
SCIENCE, OPTICS & YOU GUIDEBOOK<br />
- 148 -
Day 2<br />
1. First use your h<strong>and</strong> lens to observe both slides <strong>and</strong> record what you see in<br />
your Science Notebook. Then use your microscope <strong>and</strong> do the same thing.<br />
Record observations by writing <strong>and</strong> drawing what you see.<br />
2. In your Science Notebook write about the difference between crystals grown<br />
using different amounts of chemical.<br />
3. Can you answer the question, Does the amount of chemical affect crystal<br />
growth? Be prepared to share your results with the rest of the class.<br />
SCIENCE, OPTICS & YOU GUIDEBOOK<br />
- 149 -
SCIENCE, OPTICS & YOU GUIDEBOOK<br />
- 150 -
ACTIVITY 16: USING MICROSCOPES TO INVESTIGATE BIREFRINGENCE<br />
m6: <strong>Microscopes</strong> <strong>and</strong> <strong>Crystals</strong><br />
A CT<br />
Isotropic<br />
CTIVITY<br />
Using <strong>Microscopes</strong> to Investigate<br />
Birefringence in <strong>Crystals</strong><br />
O ne way to explore light <strong>and</strong> color using a microscope is to view crystals. The use of<br />
crystals with your students will capture their imaginations <strong>and</strong> it is an activity that can be done<br />
safely, quickly, <strong>and</strong> easily. Substances that have crystalline structures have atoms <strong>and</strong> molecules<br />
that are arranged in an orderly pattern that is repeated over <strong>and</strong> over again. The simplest crystal<br />
structure is cubic, which means that the atoms are uniformly spaced along three mutually<br />
perpendicular axes. Crystal structure is said to be isotropic if the spacing of the atoms is the<br />
same along each axis. If the spacing or arrangement of atoms along one axis is different from<br />
that of another axis, then the crystal is said to be anisotropic. If the atoms or molecules of a<br />
solid are not arranged in a regular periodic structure, then the solid is said to be amorphous.<br />
Anisotropic<br />
Amorphous<br />
Glass <strong>and</strong> plastic are examples of amorphous solids; table salt is an example of an isotropic<br />
crystal; <strong>and</strong> snowflakes or calcite are examples of anisotropic crystals. This pattern is predictable<br />
<strong>and</strong> can be manipulated by scientists using, for example, high magnetic fields. <strong>Crystals</strong> are easy<br />
to make <strong>and</strong> observe with the naked eye, a h<strong>and</strong> lens, or a microscope. Each of these tools<br />
reveals a different level of complexity in the crystal. This activity introduces students to crystal<br />
structures <strong>and</strong> a new way of looking at things. If your students are proficient at using microscopes,<br />
then they can now investigate some special properties of crystals.<br />
A birefringent material refracts light twice, so when you look at a birefringent material (like the<br />
crystals) using the field microscope, you can do special things to manipulate the image. (Calcite<br />
or calcium carbonate is the most common birefringent mineral found in nature.) The property of<br />
birefringence allows us to use polarizers (the kind of lenses that are used in most sunglasses) to<br />
manipulate the colors that appear when we observe crystals through the lens of a microscope.<br />
SCIENCE, OPTICS & YOU GUIDEBOOK<br />
- 151 -
ACTIVITY 16: USING MICROSCOPES TO INVESTIGATE BIREFRINGENCE<br />
m6: <strong>Microscopes</strong> <strong>and</strong> <strong>Crystals</strong><br />
Photomicrography is a technique that involves using polarized lenses <strong>and</strong> cameras to observe<br />
birefringence in crystals. This technique is used at the <strong>National</strong> <strong>High</strong> <strong>Magnetic</strong> <strong>Field</strong> <strong>Laboratory</strong><br />
(NHMFL) by Mike Davidson whose images are used on ties, scarves, exercise wear, book<br />
covers, folders, <strong>and</strong> many other items. The beautiful images that have been created using this<br />
technique can be accessed at the following web site: http://micro.magnet.fsu.edu/.<br />
There is a scientific application as well as an artistic application. The process has been used for<br />
a long while by biologists <strong>and</strong> in the medical sciences. Interest in semiconductors, which directly<br />
relates to the work at the NHMFL, has required new tools to explore the surface features of new<br />
materials. In general, photomicroscopy is used as a tool to examine the surface of crystallized<br />
samples.<br />
In this Activity, you <strong>and</strong> your students will be making crystals <strong>and</strong> examining them using the<br />
naked eye <strong>and</strong> the compound light microscope. You will also be looking at the crystals using<br />
polarized light film that will allow you to view the many colors in birefringent crystals, like<br />
Epsom salt crystals or copper sulfate crystals.<br />
MATERIALS:<br />
$ <strong>Field</strong> microscopes or other compound light microscopes<br />
$ Glass slides<br />
$ Epsom salt, copper sulfate, or vitamin C powder<br />
$ Warm water<br />
$ Polarizers<br />
$ Science Notebook<br />
WHAT WILL THE STUDENTS DO?<br />
1. Students will make crystals (see Activity 14, this Module) using Epsom salts, copper sulfate,<br />
or vitamin C powder.<br />
*Encourage students to try using different types of solvents other than water. Rubbing<br />
alcohol <strong>and</strong> acetone (fingernail polish remover) may be used <strong>and</strong> students might get better<br />
quality crystals.<br />
2. Students will be observing crystals with their eyes <strong>and</strong> using their field microscopes. Each<br />
observation is structured <strong>and</strong> each sample is represented with a drawing in students’ Science<br />
Notebooks (see student page).<br />
3. Students will be investigating the various crystals using the polarizers <strong>and</strong> the field<br />
microscopes.<br />
SCIENCE, OPTICS & YOU GUIDEBOOK<br />
- 152 -
ACTIVITY 16: USING MICROSCOPES TO INVESTIGATE BIREFRINGENCE<br />
m6: <strong>Microscopes</strong> <strong>and</strong> <strong>Crystals</strong><br />
How To Use the Polarizers:<br />
1. Place one polarizer beneath the slide<br />
2. Place the slide containing the crystal sample <strong>and</strong> the polarizer on the stage of the microscope.<br />
3. Place the other polarizer on top of the eyepiece of the field microscope.<br />
4. While looking at the different crystals, rotate the lens on top of the eyepiece. Notice <strong>and</strong><br />
record which crystals are birefringent.<br />
5. <strong>Crystals</strong> that are birefringent will produce beautiful colors as the eyepiece polarizer is rotated.<br />
Remember, not all of the crystals that the students made will be birefringent. Those that are not<br />
birefringent will appear to be clear when viewed through the polarizers rather than exhibiting<br />
many colors.<br />
DEMONSTRATION:<br />
Take a clear plastic cup <strong>and</strong> place it on an overhead projector. Put about an inch of Karo syrup<br />
in the bottom of the cup. Turn the projector on <strong>and</strong> students will see colors projected on the<br />
screen. This is because plastic is birefringent. Karo syrup is the medium used to display this<br />
property. Encourage students to try other media <strong>and</strong> record their observations.<br />
EXTENSIONS:<br />
Narrative Writing.<br />
Each of us has seen the beauty of crystals after they are polished <strong>and</strong> cut <strong>and</strong> made into<br />
jewelry.<br />
Before you begin writing, think about a time that you saw a lovely piece of jewelry that<br />
was special to someone.<br />
Now write a story about that special piece of jewelry <strong>and</strong> why it was special.<br />
Reading. Read aloud poems from Once Upon Ice <strong>and</strong> Other Frozen Poems by Jane Yolen<br />
(ISBN 1-56397-408-8) <strong>and</strong> have students compare the crystals they made with ice crystals.<br />
Then have students write poems about the crystal shapes they observed.<br />
Research. Students can research birthstones <strong>and</strong> other gemstones. Encourage students to research<br />
myths <strong>and</strong> legends that have been written <strong>and</strong>/or passed down from generation to generation<br />
regarding gemstones. Have them identify their birthstones <strong>and</strong> share with the class.<br />
SCIENCE, OPTICS & YOU GUIDEBOOK<br />
- 153 -
ACTIVITY 16: USING MICROSCOPES TO INVESTIGATE BIREFRINGENCE<br />
m6: <strong>Microscopes</strong> <strong>and</strong> <strong>Crystals</strong><br />
Biography. Wilson Bentley (b. 1865) was a photographer who concentrated on capturing the<br />
unique beauty of snow crystals. Snowflake Bentley by Jacqueline Briggs Martin (ISBN 0-395-<br />
86162-4) is an introduction to the biography genre for younger students <strong>and</strong> can be a starting<br />
point for older students to research Bentley’s life <strong>and</strong> work. Bentley’s work was as a developer<br />
of the process of microphotography, which began in his Vermont childhood. Bentley’s career<br />
choice was based on childhood curiosity about snowflakes. He took his first pictures of<br />
snowflakes when he was only 19.<br />
Art. Students can create a coloring book of patterns they observed when examining the crystals<br />
they made. Students can do a color-by-number page for younger students to color. You may<br />
wish to have them research photomicrographs of crystals whose special properties have been<br />
used to create color images.<br />
HISTORICAL VIGNETTE: ANTONY VAN LEEUWENHOEK<br />
Antony van Leeuwenhoek was a Dutch zoologist born in 1632 (d. 1723). He is best remembered<br />
for his depiction of red blood corpuscles. Van Leeuwenhoek was able to draw these tiny structures<br />
only after he experimented with different simple microscope designs. The simple microscope<br />
van Leeuwenhoek used was metal with a single lens. It had such a short focal length that the<br />
instrument had to be held very close to his eye so that the object he was looking at would be in<br />
focus. Some of his designs magnified objects up to 250 times.<br />
Leeuwenhoek is often given credit for inventing the<br />
microscope. However, compound microscopes<br />
(microscopes using more than one lens) had been built<br />
<strong>and</strong> used as early as 1595, well before Leeuwenhoek was born.<br />
What he did was to make improvements to the lenses that were<br />
used in microscopes, using his talents as a lens grinder to develop lenses that<br />
magnified over 200 times. He also recognized that one needed to take great pains to properly<br />
adjust the lighting that was used with microscopes to maintain clarity. His detailed drawings<br />
<strong>and</strong> descriptions distinguished Leeuwenhoek from his contemporaries. Interestingly, <strong>and</strong> of<br />
some interest to young students, Leeuwenhoek was not very good at illustrating his own<br />
descriptions, so he hired an artist to complete the artwork.<br />
Until his death in 1723, Leeuwenhoek met with artists, scientists, <strong>and</strong> other interested people<br />
(for example, Tsar Peter the Great from Russia) who were fascinated by the odd things he was<br />
able to see. This included the “animacules, a-swimming” in his mouth <strong>and</strong> all manner of animal<br />
<strong>and</strong> plant tissue.<br />
Activity. Working in pairs, one student will observe an object using the microscope <strong>and</strong> describe<br />
it in words to his or her partner. The partner will attempt to draw the object based on that<br />
description. Encourage students to communicate with one another as the drawings progress.<br />
Then, check the drawing against the image seen through the microscope.<br />
SCIENCE, OPTICS & YOU GUIDEBOOK<br />
- 154 -
ACTIVITY 16: USING MICROSCOPES TO INVESTIGATE BIREFRINGENCE<br />
m6: <strong>Microscopes</strong> <strong>and</strong> <strong>Crystals</strong><br />
Writing <strong>and</strong> History. Van Leeuwenhoek stated the following:<br />
. . . my work, which I’ve done for a long time, was not pursued in order<br />
gain the praise I now enjoy, but chiefly from a craving after knowledge,<br />
which I notice resides in me more than most other men. And therewithal,<br />
whenever I found out anything remarkable, I have thought it my duty to<br />
put down my discovery on paper, so that all ingenious people might be<br />
informed thereof. (Letter written in June 12, 1716)<br />
Have students discuss why it is important to record their observations, discoveries, questions,<br />
<strong>and</strong> possible answers. Many scientists are famous for their diaries <strong>and</strong> journals (for example,<br />
Leonardo da Vinci <strong>and</strong> Galileo Galilei). Students pretend they are writing (or describing) to a<br />
friend who knows nothing about microscopes how the instrument works <strong>and</strong> what they saw<br />
using the microscope.<br />
ARTIST VIGNETTE: PABLO PICASSO<br />
Pablo Picasso (1881-1973) was a prolific artist whose work expressed many different artistic<br />
movements. Picasso, the son of an art teacher, was born in Barcelona, Spain. One of the many<br />
<strong>and</strong> varied techniques that Picasso experimented with was Cubism. This technique incorporates<br />
flattened images that appear fragmented. It is a blending of shapes used to express the artist’s<br />
emotion. Although Picasso was schooled in the great masters of the past, he is known as a<br />
modern painter.<br />
Most Americans knew little of the Cubist movement until 1913 <strong>and</strong> the famous Armory Show<br />
in New York. This was the first time that new radical European art was featured in a major art<br />
show. Even though most of the show (two-thirds) was devoted to realist mainstream American<br />
art <strong>and</strong> featured American contemporary artists, it is best remembered for introducing modern<br />
art to Americans.<br />
Activity. Encourage students to use the crystal shapes they observed to create art. Whether they<br />
use the shapes to create recognizable figures or as the basis for abstract art, students should be<br />
able to explain their work to others. It may represent an emotion, a scene, a person, people,<br />
animals, or an event. Making art could take other forms such as sculpture or collages.<br />
SCIENCE, OPTICS & YOU GUIDEBOOK<br />
- 155 -
SCIENCE, OPTICS & YOU GUIDEBOOK<br />
- 156 -
ACTIVITY 16: USING MICROSCOPES TO INVESTIGATE BIREFRINGENCE<br />
m6: <strong>Microscopes</strong> <strong>and</strong> <strong>Crystals</strong><br />
A CT<br />
CTIVITY<br />
Using <strong>Microscopes</strong> to Investigate<br />
Birefringence in <strong>Crystals</strong><br />
In this activity you will be making crystals, observing some special properties of<br />
crystals, <strong>and</strong> using microscopes with polarizers to observe birefringence in certain<br />
crystals. Birefringence is another word for double refraction. When light passes<br />
through a crystal that is birefringent, the light rays are bent or refracted twice.<br />
In some materials a double image is produced. Double<br />
refraction can be seen by comparing two materials, glass<br />
<strong>and</strong> calcite. If a pencil mark is drawn on a piece of paper<br />
<strong>and</strong> then covered with a piece of glass only one pencil<br />
mark will be seen. However, if this same pencil mark is<br />
covered with a piece of calcite crystal, <strong>and</strong> the crystal is<br />
turned a certain way, then two pencil marks will be seen<br />
rather than one.<br />
Scientists use many tools to look at things like crystals. One of those tools is a<br />
microscope. Although crystals are large compared to other things that<br />
scientists look at using a microscope, there are many things we can learn by<br />
observing crystals in different ways. You will look at the crystals that you<br />
make using your eyes, your field microscope, <strong>and</strong> polarizers. Each time you<br />
observe the crystals draw what you see.<br />
MATERIALS:<br />
! <strong>Field</strong> microscopes or other compound light microscopes<br />
! Glass slides<br />
! Epsom salt, copper sulfate, or vitamin C powder<br />
! Warm water<br />
! 2 Polarizers<br />
! 1 Piece of calcite crystal<br />
! Science Notebook<br />
SCIENCE, OPTICS & YOU GUIDEBOOK<br />
- 157 -
ACTIVITY 16: USING MICROSCOPES TO INVESTIGATE BIREFRINGENCE<br />
m6: <strong>Microscopes</strong> <strong>and</strong> <strong>Crystals</strong><br />
1. Make crystals (Epsom salt, vitamin C, <strong>and</strong> copper sulfate) or use the crystals<br />
you made in Activity 14. In your Science Notebook, write down the procedure<br />
you used in making the three types of crystals. Be sure to include solvents<br />
other than water that you used. Also include any questions that you have<br />
about crystals or crystal making.<br />
2. Look at the crystals made by other students. Are they all the same shape <strong>and</strong><br />
size? Describe similarities <strong>and</strong> differences in your Science Notebook.<br />
3. If you made these same crystals again, what would you do to make sure that<br />
your crystals were the largest they could be?<br />
4. In your Science Notebook, draw <strong>and</strong> label each crystal sample.<br />
5. Discuss with other students in your class the similarities <strong>and</strong> differences among<br />
the drawings. Also discuss your answers to the questions you wrote in your<br />
Science Notebook.<br />
6. Now, look at your crystal samples using 2 polarizers <strong>and</strong> the field microscope.<br />
How to use the polarizers:<br />
" Place one polarizer under the slide containing the crystal sample.<br />
" Place the slide <strong>and</strong> the polarizer on the stage of the microscope.<br />
" Place the other polarizer on top of the eyepiece of the field microscope.<br />
" While looking at the different crystals, rotate the lens on top of the eye<br />
piece. Notice <strong>and</strong> record which crystals are birefringent. (<strong>Crystals</strong> that<br />
are birefringent will produce beautiful colors as the top polarizer is<br />
turned.)<br />
7. In your Science Notebook, create a chart or some other way of recording data.<br />
Write down the name of the crystal, draw what the crystal looks like, <strong>and</strong> tell<br />
whether or not the crystal is birefringent.<br />
Using calcite to observe birefringence:<br />
Calcite is a natural birefringent material. Place a glass<br />
slide over some text <strong>and</strong> observe the writing. Now place<br />
a calcite crystal over the same writing <strong>and</strong> observe what<br />
you see. How is this different from what you saw when<br />
you looked at the writing through the plain glass slide?<br />
SCIENCE, OPTICS & YOU GUIDEBOOK<br />
- 158 -
m6: <strong>Microscopes</strong> <strong>and</strong> <strong>Crystals</strong><br />
STUDENT SELF-CHECK<br />
MODULE 6: MICROSCOPES AND CRYSTALS<br />
Now that you have completed Module 6, follow the directions below as a selfcheck<br />
to see if you need more practice.<br />
1. Describe or draw how the letter “e” looks when you look at it through the<br />
water droplet magnifier.<br />
2. How is the field microscope different from other magnifiers?<br />
3. What advice would you give to a classmate who was going to make crystals?<br />
4. Some crystals have special properties that you can see using polarizers. Draw<br />
or describe in words what you saw when you looked at copper sulfate with the<br />
field microscope.<br />
SCIENCE, OPTICS & YOU GUIDEBOOK<br />
- 159 -
SCIENCE, OPTICS & YOU GUIDEBOOK<br />
- 160 -