Flute Sectionals
Flute Sectionals
Flute Sectionals

You also want an ePaper? Increase the reach of your titles
YUMPU automatically turns print PDFs into web optimized ePapers that Google loves.
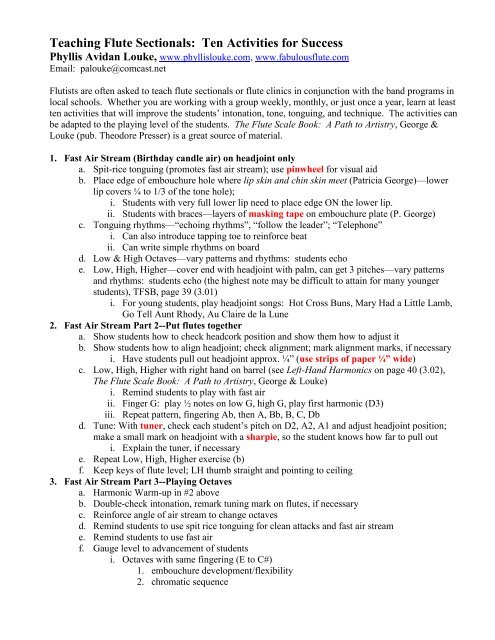
Teaching <strong>Flute</strong> <strong>Sectionals</strong>: Ten Activities for Success<br />
Phyllis Avidan Louke, www.phyllislouke.com, www.fabulousflute.com<br />
Email: palouke@comcast.net<br />
Flutists are often asked to teach flute sectionals or flute clinics in conjunction with the band programs in<br />
local schools. Whether you are working with a group weekly, monthly, or just once a year, learn at least<br />
ten activities that will improve the students’ intonation, tone, tonguing, and technique. The activities can<br />
be adapted to the playing level of the students. The <strong>Flute</strong> Scale Book: A Path to Artistry, George &<br />
Louke (pub. Theodore Presser) is a great source of material.<br />
1. Fast Air Stream (Birthday candle air) on headjoint only<br />
a. Spit-rice tonguing (promotes fast air stream); use pinwheel for visual aid<br />
b. Place edge of embouchure hole where lip skin and chin skin meet (Patricia George)—lower<br />
lip covers ¼ to 1/3 of the tone hole);<br />
i. Students with very full lower lip need to place edge ON the lower lip.<br />
ii. Students with braces—layers of masking tape on embouchure plate (P. George)<br />
c. Tonguing rhythms—“echoing rhythms”, “follow the leader”; “Telephone”<br />
i. Can also introduce tapping toe to reinforce beat<br />
ii. Can write simple rhythms on board<br />
d. Low & High Octaves—vary patterns and rhythms: students echo<br />
e. Low, High, Higher—cover end with headjoint with palm, can get 3 pitches—vary patterns<br />
and rhythms: students echo (the highest note may be difficult to attain for many younger<br />
students), TFSB, page 39 (3.01)<br />
i. For young students, play headjoint songs: Hot Cross Buns, Mary Had a Little Lamb,<br />
Go Tell Aunt Rhody, Au Claire de la Lune<br />
2. Fast Air Stream Part 2--Put flutes together<br />
a. Show students how to check headcork position and show them how to adjust it<br />
b. Show students how to align headjoint; check alignment; mark alignment marks, if necessary<br />
i. Have students pull out headjoint approx. ¼” (use strips of paper ¼” wide)<br />
c. Low, High, Higher with right hand on barrel (see Left-Hand Harmonics on page 40 (3.02),<br />
The <strong>Flute</strong> Scale Book: A Path to Artistry, George & Louke)<br />
i. Remind students to play with fast air<br />
ii. Finger G: play ½ notes on low G, high G, play first harmonic (D3)<br />
iii. Repeat pattern, fingering Ab, then A, Bb, B, C, Db<br />
d. Tune: With tuner, check each student’s pitch on D2, A2, A1 and adjust headjoint position;<br />
make a small mark on headjoint with a sharpie, so the student knows how far to pull out<br />
i. Explain the tuner, if necessary<br />
e. Repeat Low, High, Higher exercise (b)<br />
f. Keep keys of flute level; LH thumb straight and pointing to ceiling<br />
3. Fast Air Stream Part 3--Playing Octaves<br />
a. Harmonic Warm-up in #2 above<br />
b. Double-check intonation, remark tuning mark on flutes, if necessary<br />
c. Reinforce angle of air stream to change octaves<br />
d. Remind students to use spit rice tonguing for clean attacks and fast air stream<br />
e. Remind students to use fast air<br />
f. Gauge level to advancement of students<br />
i. Octaves with same fingering (E to C#)<br />
1. embouchure development/flexibility<br />
2. chromatic sequence
ii. Same as (i) plus D1-2; Eb1-2 (talk about LH index finger as an “octave key” to<br />
reinforce keeping LH1 up when playing D2 & Eb2 (see p. 45 (3.07), TFSB)<br />
iii. Same as (ii) plus continuing chromatically through F3 or G3<br />
iv. For more advanced students, use full range to C4 or D4; vary articulation<br />
v. Eb Major Scale in Octaves: Eb1-2, F1-2, etc… to Eb2-3<br />
vi. F Major Scale in Octaves; also G, Ab, Bb, depending on level.<br />
g. Activities<br />
i. Low-High tongued, slurred<br />
ii. Use various tonguing and rhythmic patterns, including<br />
1. Snake Charmer ( : LHH x 4 or HLL x 4<br />
2. Donkey ( : LH x 4 or HL x 4)<br />
3. Slurred<br />
4. Fluttertongued<br />
5. Various rhythmic patterns or double-tonguing<br />
6. “Echoing Rhythms”, “Follow the Leader”, “Telephone”<br />
iii. Left-Hand Scales- G Major & Ab Major (TFSB p. 42 (3.04) – Left-Hand Scales)<br />
4. Balancing the <strong>Flute</strong> (Patricia George)/Hand Position<br />
a. Always keep keys level<br />
b. Support point: LH index finger above knuckle on the “flute shelf” (not on bone)<br />
c. Support point: embouchure plate in chin (Patricia George)<br />
d. Support point: RH thumb on back of tube with fingers in their natural arched position (pads of<br />
fingers on the keys, not fingertips); “pulling book off shelf” (Michel Debost)<br />
e. RH thumb is a counterbalance to LH index finger, stabilizing flute so it won’t roll toward the<br />
player when lifting the LH thumb for notes such as C (Patricia George)<br />
f. “Pizza Slice” (Patricia George): end of flute should be in front of your nose<br />
g. Activity: Play B to C; and other notes to C<br />
i. Keep LH still—watch for movement in the elbow and hand<br />
ii. Move fingers from the knuckles and keep elbows quiet (Patricia George)<br />
iii. Eventually use the “I am going home” rhythm (P. George)<br />
h. Aurally (not written): Use note pairs in page 44 Balancing the <strong>Flute</strong> and Trills for Balance<br />
from The <strong>Flute</strong> Scale Book<br />
5. Body Alignment and Music Stands<br />
a. Body is aligned with shoulders above hips—no twisting at waist<br />
b. Stand or sit at 45% angle (1/4 turn to the right) to music stand<br />
c. Standing: feet shoulder width apart with left foot at 12:00, and right at approx. 3:00<br />
d. Shoulders should be down, arms & elbows should hang from shoulders in a natural position—<br />
no tension<br />
e. Head should be balanced on neck with chin “level” (looking straight ahead, not looking down<br />
or up)—exercise to find this balanced spot.<br />
6. Vibrato—with Headjoint only (Patricia George), TFSB, p. 13 (1.01)<br />
a. Using HAH and HAH slurred in chunks<br />
b. 2:1 pattern HAH HAH HAH x 4, then slurred HAHs (vibrato) x 4<br />
c. 3:1 pattern<br />
d. 4:1 pattern<br />
e. Put flute together and apply these patterns to various scales<br />
7. Double-tonguing—with headjoint only<br />
a. 2:1 pattern<br />
b. 4:1 pattern
c. Triple tonguing: 3:1 pattern<br />
d. Put flute together and apply these patterns to various scales<br />
8. Third Octave Fingerings<br />
a. Play octaves starting with D2-D3, to reinforce 3 rd octave fingerings (see chart on page 45 of<br />
TFSB); reinforce correct fingerings with which fingers change in the higher octave<br />
b. Play scales in octaves (Eb Major, F, G, Ab, Bb, etc.)<br />
c. Check pitch on E3, F3, F#3, Ab3 and teach useful alternate fingerings to lower pitch, if notes<br />
are sharp<br />
i. E3: no right pinky<br />
ii. F3: add right ring finger<br />
iii. F#3: use middle right finger, instead of ring finger (this is the preferred fingering for<br />
many “new scale” flutes)<br />
iv. Ab3: add right middle and ring fingers (this also helps reduce the note’s resistance,<br />
and should be used as the primary fingering for those students playing piccolo)<br />
d. Wiggles (I am going home) adjacent notes of the higher octave scales (Patricia George)<br />
i. Also do this with trill fingerings—Free fingering charts<br />
1. http://www.portsmouthmusic.org/PDF/Fingering%20charts/<strong>Flute</strong>TrillChart.pdf<br />
2. http://www.wfg.woodwind.org/flute/fl_tr2_3.html<br />
e. Aurally: Third Octave Wiggles (page 46 of The <strong>Flute</strong> Scale Book)<br />
f. Aurally: Short Scales (page 46 of The <strong>Flute</strong> Scale Book)—for more advanced students<br />
9. Dynamics (Kazuo Tokito)<br />
a. Maintain fast air speed; change angle of air to change dynamics and keep pitch stable<br />
b. Soft: lower lip forward, upper lip back, “pooh” position; p = pooh<br />
c. Loud upper lip forward, lower lip back<br />
d. Activities: soft, loud, crescendo, diminuendo, hairpins on individual notes<br />
i. Scale, practice diminuendo at the end of a phrase, dynamics in simple melodies<br />
10. More on intonation<br />
a. Tune carefully to D2, A2, A1; keep keys level; use fast consistent airstream<br />
b. Air speed: slow = flatter; fast = sharper<br />
c. Embouchure hole should be covered ¼ to 1/3<br />
i. How to check how much is covered<br />
ii. Covered too much = flat and muffled tone; covered too little = sharp and strident tone<br />
d. Airstream angle: lower angle = flatter; higher angle = sharper<br />
e. Posture (chin level): chin lower = flatter; chin higher = sharper<br />
11. Rhythm exercises—working on division of the beat, TFSB, p. 14 (1.02), simple and compound<br />
meter<br />
a. Put each of the rhythms on a large flashcard (tag board or cardboard)<br />
i. Can mix and match putting them on the pen tray of a classroom white board or tape to<br />
a wall with masking tape<br />
b. Practice counting and/or clapping rhythms, work on accuracy of subdivisions<br />
c. Scale practice with rhythm #1, 2, etc., or can alternate two rhythms<br />
12. Articulations and more advanced rhythm patterns<br />
a. Practice scales using ideas in TFSB, p. 141-144 (Appendices)