Xda Orbit - O2
Xda Orbit - O2
Xda Orbit - O2

You also want an ePaper? Increase the reach of your titles
YUMPU automatically turns print PDFs into web optimized ePapers that Google loves.
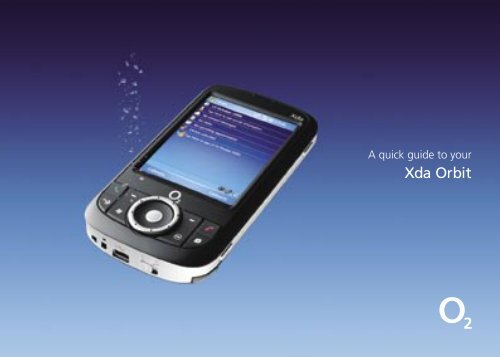
A quick guide to your<br />
<strong>Xda</strong> <strong>Orbit</strong>
Contents<br />
Section 1<br />
Getting started 2<br />
Install the memory card<br />
and SIM card 2<br />
Insert the memory<br />
and SIM cards 3<br />
Install and charge the battery 4<br />
Turn on and set up<br />
for the first time 6<br />
Check the battery power 7<br />
Enter your PIN 7<br />
Synchronise with your<br />
PC or laptop 8<br />
Section 2<br />
Using your <strong>Xda</strong> <strong>Orbit</strong> 12<br />
Mobile phone 12<br />
A world of connections 12<br />
Internet and messaging 13<br />
Video, pictures and audio 13<br />
Setting up ISP<br />
email accounts 14<br />
Set up a POP3/IMAP4<br />
email account 14<br />
Microsoft Direct Push Email 15<br />
In the Box 16<br />
A tour of your <strong>Xda</strong> <strong>Orbit</strong> 20<br />
Status indicators 28<br />
Section 3<br />
Help and troubleshooting 32<br />
General questions 34
Getting started<br />
1. Install the memory<br />
card and SIM card<br />
Firstly, make sure your <strong>Xda</strong> <strong>Orbit</strong><br />
is turned off before you install any<br />
cards. Then remove the battery<br />
by sliding the battery cover latch.<br />
You’ll find this at the bottom of<br />
your <strong>Xda</strong> <strong>Orbit</strong>. If the battery is<br />
inside, simply remove it with your<br />
finger by lifting the upper right<br />
side of the battery slot.<br />
Slide the SIM card holder<br />
downward to unlock it, then<br />
lightly flip it open. Then open<br />
the memory card holder.<br />
2. Insert the memory *<br />
and SIM cards<br />
Now gently slide both the memory<br />
SD card and the SIM card into<br />
their holders, with their gold<br />
contacts facing down.<br />
(The cut-off corner of the SIM<br />
card should mirror the corner<br />
in the SIM card slot).<br />
Press down the memory card<br />
holder to close and lock it in<br />
place. Then close the SIM card<br />
holder and slide it upwards to<br />
lock it in place.<br />
Finally replace both the battery<br />
(see instructions in the next<br />
section) and the battery cover.<br />
* There is no memory card contained in the standard box.<br />
2 3
3. Install and charge<br />
the battery<br />
You will receive the new<br />
batteries partially charged. But<br />
before you start using your <strong>Xda</strong><br />
<strong>Orbit</strong>, you will need to install and<br />
fully charge the battery.<br />
To install the battery, remove the<br />
battery cover first and insert the<br />
battery. The gold connectors on<br />
the battery should meet with the<br />
row of connectors on the left<br />
side of the battery slot. Insert the<br />
left side of the battery first, then<br />
gently push it down into place<br />
(there will be a small click as it is<br />
locked into position) and replace<br />
the battery cover.<br />
Lights on the LED indicator on<br />
your <strong>Xda</strong> <strong>Orbit</strong> will show the<br />
battery status:<br />
When your <strong>Xda</strong> <strong>Orbit</strong> is off a<br />
solid amber light shows when<br />
it is charging<br />
When your <strong>Xda</strong> <strong>Orbit</strong> is on, a<br />
solid amber light and a charging<br />
icon on the Today screen will<br />
show when it is charging<br />
After the battery has been fully<br />
charged, a green light and full<br />
battery icon appears on the<br />
Today screen.<br />
Top Tip: Some batteries<br />
perform best after several<br />
full charge and discharge<br />
cycles. There’s two ways to<br />
charge the battery:<br />
– you can connect your<br />
<strong>Xda</strong> <strong>Orbit</strong> directly to an<br />
electrical outlet using<br />
the AC adapter<br />
– you can plug the sync<br />
cable to the USB port<br />
on your PC and to the<br />
sync connector on your<br />
<strong>Xda</strong> <strong>Orbit</strong>.<br />
4 5
4. Turn on and set up<br />
for the first time<br />
Turn on your <strong>Xda</strong> <strong>Orbit</strong> by<br />
pressing the power button on<br />
the right-hand edge.<br />
A welcome screen will appear.<br />
It will prompt you to Tap<br />
the screen to set up your<br />
<strong>Xda</strong> <strong>Orbit</strong>. You can do this<br />
by following the on-screen<br />
instructions.<br />
Your <strong>Xda</strong> <strong>Orbit</strong> will start to set<br />
itself up and add applications<br />
supplied by <strong>O2</strong>. After about<br />
two minutes, you’ll see a<br />
customisation screen which lets<br />
you tailor some options on your<br />
<strong>Xda</strong> <strong>Orbit</strong>. These are:<br />
Basic: configures your<br />
connection settings and adds extra<br />
touches so that your <strong>Xda</strong> is even<br />
easier to use. We recommend you<br />
to use this setting as standard.<br />
Corporate: a tailored solution<br />
from <strong>O2</strong>. No settings or <strong>O2</strong><br />
enhancements are installed –<br />
this option is only available if<br />
your <strong>Xda</strong> <strong>Orbit</strong> is supplied by<br />
your IT manager.<br />
Now choose your country and<br />
connection settings.<br />
Tap OK to complete your set<br />
up. Your <strong>Xda</strong> <strong>Orbit</strong> will then<br />
restart itself.<br />
5. Check the battery power<br />
Tap the battery level icon<br />
on the Today screen. The power<br />
settings screen will open and<br />
display the current battery<br />
power level.<br />
A warning message will show<br />
if the battery power is very<br />
low. If you see this, you should<br />
immediately save your data by<br />
synchronising with your PC, or<br />
back-up data on a secondary<br />
storage card, and then turn off<br />
your <strong>Xda</strong> <strong>Orbit</strong>. Do not restart<br />
it until you have connected it<br />
to the power adapter.<br />
Press power again to turn off<br />
your <strong>Xda</strong> <strong>Orbit</strong>.<br />
6. Enter your PIN<br />
When your <strong>Xda</strong> <strong>Orbit</strong> restarts,<br />
it may ask you to enter the PIN<br />
for your SIM.<br />
Tap in your PIN and select Enter.<br />
If you’re an <strong>O2</strong> Ireland customer,<br />
please enter the PUK code<br />
supplied with your SIM or call<br />
Customer Service on 1909<br />
6 7
Top tip: you’ll block your SIM<br />
card if you enter the wrong<br />
PIN three times. This means<br />
you won’t be able to make<br />
or receive any calls, texts or<br />
picture messages.<br />
Don’t worry – you can easily<br />
sort this out by contacting<br />
your service provider. They’ll<br />
unblock it for you right away.<br />
7. Synchronise with your<br />
PC or laptop<br />
Microsoft ® ActiveSync ® lets you<br />
synchronise information on your<br />
<strong>Xda</strong> <strong>Orbit</strong> with your PC such as<br />
Inbox, Calendar, contacts and<br />
tasks within Microsoft Outlook ® .<br />
The software is already installed<br />
on your <strong>Xda</strong> <strong>Orbit</strong> but you will<br />
need to install it on your PC if<br />
you haven’t already.<br />
To do this, insert the Getting<br />
Started CD included in your<br />
<strong>Xda</strong> <strong>Orbit</strong> box into the CD drive<br />
of your PC and follow the simple<br />
on-screen wizard.<br />
When it’s installed just connect<br />
the USB cable to your PC and<br />
start synchronising.<br />
Now that you’re set up,<br />
let’s get going!<br />
8 9
Section 2
Using your <strong>Xda</strong> <strong>Orbit</strong><br />
Mobile phone<br />
Use your <strong>Xda</strong> <strong>Orbit</strong> just like a<br />
mobile phone to keep in contact,<br />
get in touch with the office or<br />
send text and picture messages.<br />
A world of connections<br />
<strong>Xda</strong> <strong>Orbit</strong> supports GPRS and<br />
Wireless LAN so there’s a choice<br />
of connecting to the Internet at a<br />
range of speeds. Just choose the<br />
network that works best wherever<br />
you are. Bluetooth means you’re<br />
wire free and can use your <strong>Xda</strong><br />
with car kits and headsets.<br />
Your <strong>Xda</strong> <strong>Orbit</strong> comes with GPS<br />
(Global Positioning System)<br />
built in. That means that you<br />
can enjoy a wide variety of GPS<br />
services, the most widely known<br />
are Satellite Navigation, Friend<br />
Finder and Find My Nearest.<br />
If you have purchased the<br />
Satellite Navigation solution<br />
with your <strong>Xda</strong> <strong>Orbit</strong>, refer to<br />
the instruction manual in the<br />
additional pack. If you would<br />
like to purchase the Satellite<br />
Navigation pack for your <strong>Xda</strong><br />
<strong>Orbit</strong>, please speak to <strong>O2</strong>.<br />
Internet and messaging<br />
Use Outlook Mobile to send and<br />
receive emails with attachments,<br />
keep track of meetings and<br />
events and keep in sync with<br />
Outlook on your PC.<br />
You can also get real time access*<br />
to email using Microsoft Direct<br />
Push Email if your company has<br />
Microsoft Exchange 2003 or<br />
above. This means you can get up<br />
to the minute access to your Inbox,<br />
Contacts and Calendar.<br />
You can download, view and<br />
edit email attachments using<br />
mobile versions of Microsoft<br />
Office applications such as<br />
Word, Excel and Powerpoint.**<br />
And create and send picture<br />
messages or text your contacts<br />
for a fast response.<br />
The Internet Explorer Mobile<br />
gives you fast connection to the<br />
Internet. Do your banking, check<br />
stock prices or catch up with the<br />
day’s news.<br />
Video, pictures and audio<br />
Take detailed pictures or shoot<br />
video with sound. The <strong>Xda</strong> <strong>Orbit</strong><br />
has a high-resolution camera<br />
built-in with flash, and a clear,<br />
high-quality colour screen.<br />
Your <strong>Xda</strong> <strong>Orbit</strong> also comes with<br />
FM Radio on board. Plug your<br />
headphones in (they act as an<br />
antenna) and simply select Start<br />
> FM Radio to start listening.<br />
* Subject to coverage and your company’s IT infrastructure, permissions and policies.<br />
** Applies to read only for Powerpoint.<br />
12 13
Setting up ISP<br />
email accounts<br />
The email Setup Wizard<br />
makes it easy and simple to<br />
set up your Outlook email<br />
and POP3/IMAP4 accounts.<br />
Set up ISP email accounts<br />
using email Setup Wizard<br />
1. Tap Start > Messaging.<br />
2. Tap Menu > Tools ><br />
New Account to access<br />
the email Setup Wizard.<br />
3. The email Setup Wizard<br />
guides you step-by-step<br />
through the setup process<br />
Set up a POP3/IMAP4<br />
email account<br />
You can set up a POP3 or IMAP4<br />
email account if you have an<br />
email account with an Internet<br />
service provider (ISP) or an<br />
account that you access using a<br />
VPN server connection (typically<br />
a work account).<br />
1. Tap Start > Messaging.<br />
2. Tap Menu > Tools ><br />
New Account.<br />
3. On the first email Setup<br />
screen, select Other (POP3/<br />
IMAP) from the Your email<br />
provider list, then tap Next.<br />
4. On the next screen, enter your<br />
email address, and tap Next.<br />
Auto configuration will help<br />
you download necessary email<br />
server settings.<br />
5. Once Auto configuration<br />
has finished, tap Next.<br />
6. Enter your name (the<br />
name you want displayed<br />
when you send email) and<br />
your password.<br />
Top Tip: Select the Save<br />
password check box if you<br />
want to save your password.<br />
Microsoft Direct Push Email<br />
<strong>Xda</strong> <strong>Orbit</strong> is powered by Windows<br />
Mobile, a pocket-sized version<br />
of Microsoft Windows. It has<br />
all the features of a top of the<br />
range PDA and mobile phone,<br />
and also gives you real-time<br />
access to your Inbox, Calendar,<br />
Contacts synchronised on your<br />
device automatically over the air<br />
with your email account.*<br />
To receive real-time access to<br />
your Outlook files, your company<br />
needs to be running Microsoft<br />
Exchange Server 2003 Service<br />
Pack 2 with your <strong>Xda</strong> <strong>Orbit</strong><br />
which has the latest Windows<br />
Mobile 5.0 software.<br />
Your IT department will need to<br />
enable wireless services on the<br />
Exchange Server and also set up<br />
relevant IT security policies and<br />
permissions such as password<br />
requirements.<br />
To find out how to use Microsoft<br />
Direct Push Email with your <strong>O2</strong><br />
<strong>Xda</strong> <strong>Orbit</strong> go to our website:<br />
www.o2.co.uk/xda<br />
*Subject to your company’s IT infrastructure, permissions and policies.<br />
14 15
In the Box<br />
<strong>Xda</strong> <strong>Orbit</strong><br />
your all in one phone<br />
and GPS PDA<br />
<strong>Xda</strong> <strong>Orbit</strong> battery<br />
to power your <strong>Xda</strong><br />
AC Adapter<br />
for recharging your <strong>Xda</strong> battery.<br />
Connection cable<br />
to connect your <strong>Xda</strong> to a<br />
PC for synchronising data<br />
and charging.<br />
Hands-free stereo headset<br />
make sure you connect this<br />
headset when you use the<br />
FM Radio as it uses the headset<br />
as an antenna.<br />
16 17
Quick Start Guide<br />
this booklet<br />
Microsoft Windows Mobile<br />
5.0 user guide<br />
Warranty card for Europe<br />
Microsoft Windows Mobile<br />
Getting Started CD<br />
including Microsoft Outlook<br />
2002 and Microsoft Active Sync<br />
v4.2 applications<br />
Applications CD<br />
including GPRS monitor,<br />
Clearview PDF Viewer<br />
and Wireless USB Modem<br />
drivers applications<br />
<strong>O2</strong> may change the contents of the <strong>Xda</strong> <strong>Orbit</strong> box in the future.<br />
The images here are purely to illustrate what’s in the box, the actual contents may look slightly different.<br />
18 19
A tour of your <strong>Xda</strong> <strong>Orbit</strong><br />
1 2<br />
1. Notification lights<br />
on left<br />
This LED light indicates<br />
the following:<br />
3<br />
4<br />
5<br />
9<br />
10<br />
• a blinking blue light will show<br />
when Bluetooth is poweredup<br />
and ready to transmit<br />
radio frequency signal<br />
• a blinking green light for<br />
Wi-Fi status<br />
• alternate blinking lights<br />
display when both Bluetooth<br />
and Wi-Fi are enabled<br />
• an amber light indicates the<br />
GPS status<br />
2. Notification light<br />
on right<br />
This bi-colour LED shows green<br />
and amber lights for GSM/GPRS<br />
standby, message, and network<br />
status. It will also let you know<br />
the status of the battery.<br />
3. Left and right soft keys<br />
Press to execute the command<br />
shown in the label above<br />
the button.<br />
4. Talk button<br />
Press to answer an incoming<br />
call or dial a number.<br />
5. GPS button<br />
Press to access messages or launch<br />
the GPS software if installed.<br />
6. Start button<br />
Press to open the Start menu.<br />
7. Trackball<br />
Roll up, down, left, or right<br />
to move through menus<br />
and programme instructions.<br />
Press the trackball to carry<br />
out the selection.<br />
Use the trackball as a shutter<br />
release when using the camera.<br />
Use the trackball to move<br />
around a GPS map when<br />
using the GPS software.<br />
8. OK button<br />
Press to confirm your data entries<br />
or to exit the existing programme.<br />
9. End button<br />
Press to end a call or return<br />
to the Today screen.<br />
10. Internet Explorer button<br />
Press to launch Internet<br />
Explorer Mobile.<br />
6 7 8<br />
20 21
11. Touch screen<br />
Tap the screen with the stylus<br />
to write, draw or select.<br />
12. Track wheel<br />
You can turn this clockwise<br />
or counterclockwise to move<br />
through items on the screen<br />
or in a menu.<br />
Use it for zooming when you use<br />
the camera or the GPS software.<br />
13. Status Indicators<br />
The Today screen displays<br />
important information, such as<br />
upcoming appointments and<br />
status indicators. Some of the<br />
status icons that you may see<br />
on your <strong>Xda</strong> <strong>Orbit</strong> are listed<br />
on pages 28–29<br />
11<br />
13<br />
14<br />
14. Battery cover<br />
Slide it out to access the<br />
battery compartment.<br />
15. Stylus<br />
You can use the stylus to write,<br />
draw or select items on the<br />
touch screen.<br />
12<br />
15<br />
22 23
16<br />
17<br />
18<br />
16. Voice command button<br />
Press to start Voice Speed Dial;<br />
press and hold to record a<br />
voice note.<br />
17. Volume slider<br />
Slide it up or down to adjust the<br />
speaker volume.<br />
Slide it up or down to adjust the<br />
earpiece volume during a call.<br />
18. Reset button<br />
Press the Reset button with the<br />
stylus to soft-reset your <strong>Xda</strong> <strong>Orbit</strong>.<br />
19. Power button<br />
Press power to turn off the display<br />
temporarily. This will switch it to<br />
Sleep mode. You can still receive<br />
calls and messages when your<br />
<strong>Xda</strong> <strong>Orbit</strong> is in Sleep mode.<br />
Press and hold for about five<br />
seconds to turn off the power<br />
completely. This makes all<br />
the functions, including the<br />
phone, unavailable.<br />
20. Camera button<br />
Press to launch the camera and<br />
press again to take a photo or<br />
video clip, depending on the<br />
specified capture mode.<br />
19<br />
20<br />
24 25
21. Car antenna connector<br />
You can connect your <strong>Xda</strong> <strong>Orbit</strong><br />
to the car antenna to boost your<br />
reception while in the car.<br />
22. GPS antenna connector<br />
You can connect an external<br />
GPS antenna to get a better<br />
GPS signal.<br />
23. Camera<br />
Use the camera to take still<br />
photos and record video clips.<br />
21 22<br />
23<br />
24. Strap holder<br />
This lets you attach a strap for<br />
carrying your <strong>Xda</strong> <strong>Orbit</strong>.<br />
25. Sync connector/<br />
earphone jack<br />
Use this connector to synchronise<br />
data by connecting the provided<br />
USB Sync cable or to recharge<br />
the battery via the provided<br />
AC adapter. You can also use the<br />
USB stereo headset for handsfree<br />
conversation or to listen to<br />
FM radio and audio media. The<br />
stereo headset acts as an antenna.<br />
26. Battery cover latch<br />
Slide this latch to release the<br />
battery cover.<br />
24 25 26<br />
26 27
Status indicators<br />
Status icon<br />
Meaning<br />
Status icon<br />
Meaning<br />
Status icon<br />
Meaning<br />
Status icon<br />
Meaning<br />
New email or text messages;<br />
SMS notification of voicemail<br />
New multimedia (MMS) message<br />
New MSN message<br />
There are more notifications.<br />
Tap the icon to view all.<br />
No signal<br />
Phone is turned off<br />
No phone service<br />
Searching for phone service<br />
GPRS available<br />
ActiveSync notification<br />
Wi-Fi function enabled, but the <strong>Xda</strong> <strong>Orbit</strong> is<br />
not yet connected to a wireless network<br />
Wireless network(s) detected<br />
Connecting to wireless network<br />
(arrows moving);<br />
No SIM card inserted<br />
Battery is fully charged<br />
Battery power is very low<br />
Battery charging<br />
Device is locked<br />
Speakerphone on<br />
GPRS connecting<br />
Connected to wireless network<br />
Device is unlocked<br />
Dialing while no SIM card is inserted<br />
GPRS in use<br />
Synchronising via Wi-Fi<br />
Bluetooth headset detected<br />
Voice call in progress<br />
Roaming<br />
Vibration mode<br />
QuickGPS update notification<br />
Calls are forwarded<br />
Connection is active<br />
Sound on<br />
GPRS Monitor currently active<br />
Call on hold<br />
Connection is not active<br />
Sound off<br />
Serial USB connection active<br />
Missed call<br />
Synchronisation in progress<br />
Alarm<br />
The USB to PC icon*<br />
Maximum signal strength<br />
Synchronisation error<br />
*The USB to PC icon appears on the Today screen when you are connected to your computer with a serial USB connection.<br />
For more information about USB to PC, refer to the user manual.<br />
28 29
Section 3
Help and troubleshooting<br />
Help online<br />
Need technical help with your<br />
<strong>Xda</strong> <strong>Orbit</strong>? Send an email to<br />
our support team:<br />
(UK) o2datasupport@o2.com<br />
(EIRE) support@o2.ie<br />
We will try to get back to you<br />
within 24 hours or on the next<br />
business day.<br />
Talk to us<br />
Your service provider will be<br />
able to help if you have any<br />
general questions about your<br />
<strong>Xda</strong> <strong>Orbit</strong>, questions about<br />
charges on your account or<br />
activation of <strong>O2</strong> services.<br />
You’ll find their contact details<br />
printed on your monthly bill.<br />
If you’re a corporate customer,<br />
we recommend you contact your<br />
internal help desk.<br />
32 33
General questions<br />
Can I use software<br />
designed for the previous<br />
<strong>Xda</strong> series or Windows<br />
Mobile ® 2003 with my<br />
<strong>Xda</strong> <strong>Orbit</strong>?<br />
<strong>Xda</strong> <strong>Orbit</strong> uses Microsoft<br />
Windows Mobile 5.0 as the<br />
core system. Applications<br />
written for the <strong>Xda</strong> II family<br />
(such as IIs or IIi) may not work<br />
correctly. You should contact the<br />
software vendor to check if the<br />
application will work correctly<br />
with Windows Mobile 5.0.<br />
Can I receive phone calls or<br />
text messages while using<br />
the internet or synchronising<br />
email on my <strong>Xda</strong> <strong>Orbit</strong>?<br />
You can make and receive phone<br />
calls when using Wireless LAN.<br />
If you’re actively using your<br />
connection in GPRS mode, your<br />
phone calls will be forwarded<br />
based on your settings – the<br />
default is to divert to voicemail<br />
(if it’s set up) or another number.<br />
However, you can make and<br />
receive calls if your GPRS is idle.<br />
What are the maximum<br />
speeds of GPRS?<br />
In GPRS mode, <strong>Xda</strong> <strong>Orbit</strong><br />
supports a maximum download<br />
speed of up to 53kbps and an<br />
upload speed of up to 26kbps.<br />
How do I turn the phone<br />
off and go into PDA mode?<br />
Tap the antenna icon at the top<br />
of the screen and select Turn on<br />
flight mode.<br />
Why when I press the<br />
GPS button does it take<br />
me to messages?<br />
If the GPS Satellite Navigation<br />
software has not been installed this<br />
button will default to messages.<br />
To install the software, follow<br />
the installation instructions in<br />
the GPS pack.<br />
When I’m overseas, why<br />
do I see a white triangle<br />
at the top of the screen?<br />
The triangle means you’re<br />
roaming on a foreign network<br />
and roaming charges apply.<br />
34 35
Can I close applications<br />
using one of the buttons?<br />
Press the End call key, or tap<br />
the X in the top right corner<br />
of the application.<br />
How can I display my<br />
own number?<br />
Choose Start > Programs ><br />
SIM Manager > Tools > List of<br />
Own Numbers. Tap number 1<br />
in the list. Tap in your name and<br />
mobile number. Tap Change.<br />
Tap OK to exit. If you choose<br />
Phone > Menu > Options,<br />
you’ll see your number.<br />
How can I delete email<br />
from my ISP mail server?<br />
By default, your <strong>Xda</strong> will only<br />
download a copy of the email<br />
from your mailbox. To delete<br />
them from your mailbox, select<br />
Start > Messaging > Inbox<br />
> Menu > Tools > Options ><br />
Storage. Change the Empty<br />
deleted items dropdown box<br />
to Immediately.<br />
The next time you synchronise<br />
with your mailbox, the emails<br />
should be deleted. However, your<br />
Internet Service Provider (ISP) may<br />
not support this service.<br />
TOP TIP: To find out<br />
more you can check out<br />
the latest “Frequently<br />
Asked Questions” at<br />
www.o2.co.uk/xda<br />
36
o2.co.uk<br />
<strong>O2</strong> (UK) Limited, 260 Bath Road, Slough, Berks, SL1 4DX.<br />
Registered in England No.1743099. Registered office as above.<br />
© <strong>O2</strong> (UK) Limited 2001-2006. Correct at time of going to press (10/06)<br />
The Bluetooth ® word and logos are owned by the Bluetooth SIG, Inc.<br />
Windows Mobile is a trade mark or registered trade mark of Microsoft Corporation<br />
in the United States and/or other countries.<br />
<strong>O2</strong>BU032N LN 1006.