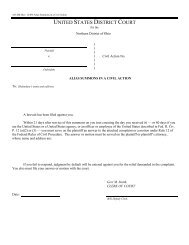
United States District Court Northern District of Ohio CM/ECF Tips ...
United States District Court Northern District of Ohio CM/ECF Tips ...
United States District Court Northern District of Ohio CM/ECF Tips ...

Create successful ePaper yourself
Turn your PDF publications into a flip-book with our unique Google optimized e-Paper software.
<strong>United</strong> <strong>States</strong> <strong>District</strong> <strong>Court</strong><br />
<strong>Northern</strong> <strong>District</strong> <strong>of</strong> <strong>Ohio</strong><br />
<strong>CM</strong>/<strong>ECF</strong> <strong>Tips</strong>:<br />
Obtaining Written Opinions for Free<br />
Obtaining a List <strong>of</strong> Cases by Category<br />
Obtaining a List <strong>of</strong> Documents Filed by Date Range and/or Case Category<br />
Turning <strong>CM</strong>/<strong>ECF</strong> Document Headers Off/On<br />
Setting up E-Mail Notification<br />
Adding Attachments with Full Descriptions
<strong>United</strong> <strong>States</strong> <strong>District</strong> <strong>Court</strong><br />
<strong>Northern</strong> <strong>District</strong> <strong>of</strong> <strong>Ohio</strong><br />
Obtaining Written Opinions<br />
You can easily obtain a listing <strong>of</strong> written opinions issued by the <strong>Court</strong> after April 16, 2005, as<br />
well as copies <strong>of</strong> the documents themselves, for free. Here’s how.<br />
1. Log into the <strong>Court</strong>’s <strong>CM</strong>/<strong>ECF</strong> system using either your <strong>CM</strong>/<strong>ECF</strong> or PACER account.<br />
2. Click on Reports<br />
3. If you have logged in using your <strong>CM</strong>/<strong>ECF</strong> account, you may be asked for your PACER<br />
information here. Enter it.<br />
4. Click on Written Opinions under Civil and Criminal Reports<br />
5. The Written Opinions Report screen will provide you with a variety <strong>of</strong> selection criteria<br />
to help you fine tune your search including: Case Number, Name, Office, Nature <strong>of</strong> Suit,<br />
Case Type, Cause, Case Flags, etc. A screen shot is on the next page. Keep the default<br />
values for most <strong>of</strong> the items as they are. Change only those values that will help you meet<br />
your needs.<br />
In the following example, we will search for all Written Opinions entered from 5/13/2005<br />
to 5/19/2005<br />
a. Select an appropriate filing data range. Enter a Filed date <strong>of</strong> “5/9/2000” and a to<br />
date <strong>of</strong> “5/13/05”.<br />
b. Click Run Report.<br />
6. The system will provide you with a list Written Opinions that meet the selection criteria.<br />
Notes:<br />
Written Opinions are defined by the Judicial Conference as as “any document issued by a judge<br />
<strong>of</strong> the court sitting in that capacity that sets forth a reasoned explanation for a court’s decision.”<br />
The responsibility for determining which documents meet this definition rests with the authoring<br />
judge<br />
The Nature <strong>of</strong> Suit codes are taken from the Civil Cover Sheet. You can select more than one<br />
Nature <strong>of</strong> Suit by holding down the control (ctrl) key when you click on your selections.<br />
The Filed / to dates can be set for any range, but the system only identifies Written Opinions<br />
issued April 16, 2005 and later.<br />
While access to Written Opinions is now free, PACER fees still apply for other documents.
<strong>United</strong> <strong>States</strong> <strong>District</strong> <strong>Court</strong><br />
<strong>Northern</strong> <strong>District</strong> <strong>of</strong> <strong>Ohio</strong><br />
Cases by Case Category<br />
Did you know that you can obtain a list <strong>of</strong> civil cases filed in this <strong>Court</strong> by case category? It’s<br />
easy.Here’s how you do it.<br />
Suppose you wanted to obtain a list <strong>of</strong> all pending Insurance cases.<br />
1. Log into the <strong>Court</strong>’s <strong>CM</strong>/<strong>ECF</strong> system using either your <strong>CM</strong>/<strong>ECF</strong> or PACER account.<br />
2. Click on Reports<br />
3. If you have logged in using your <strong>CM</strong>/<strong>ECF</strong> account, you may be asked for your PACER<br />
information here. Enter it.<br />
4. Click on Civil Cases under Civil Reports<br />
5. The Civil Cases Report screen will provide you with a variety <strong>of</strong> selection criteria<br />
(Office, Case Type, Nature <strong>of</strong> Suit, Case Flags, Cause, etc.). A screen shot is on the next<br />
page. Keep the default values for most <strong>of</strong> the items as they are. Change the following to<br />
meet your needs:<br />
a. Select the desired Nature <strong>of</strong> Suit. In this example, scroll down the Nature <strong>of</strong> Suit<br />
list and highlight 110 (Insurance).<br />
b. Make sure the Open Cases check box is checked.<br />
c. Select an appropriate filing data range. For this example I will enter a Filed date<br />
<strong>of</strong> “1/1/2000” and a to date <strong>of</strong> “5/19/05”.<br />
d. Click Run Report.<br />
6. The system will provide you with a list <strong>of</strong> the pending Insurance cases.<br />
Notes:<br />
The Nature <strong>of</strong> Suit codes are taken from the Civil Cover Sheet. You can select more than one<br />
Nature <strong>of</strong> Suit by holding down the control (ctrl) key when you click on your selections.<br />
The Filed / to dates can be set for any range. The system has most cases going back to the early<br />
1990s.<br />
The system permits you to select Open Cases and/or Closed Cases by checking the appropriate<br />
check box.<br />
The amount <strong>of</strong> time it takes to run the report is dependent upon a number <strong>of</strong> factors including<br />
your selection criteria and the number <strong>of</strong> users using the system.<br />
Give it a try.
<strong>United</strong> <strong>States</strong> <strong>District</strong> <strong>Court</strong><br />
<strong>Northern</strong> <strong>District</strong> <strong>of</strong> <strong>Ohio</strong><br />
Obtaining a List <strong>of</strong> Documents Filed by Date Range and/or Case Category<br />
using the<br />
Docket Activity Report<br />
The Docket Activity Report can help you obtain a list <strong>of</strong> documents filed with the <strong>Court</strong> for any<br />
day, or during any date range, with convenient links to the documents themselves. You can even<br />
narrow your search to documents filed in a specific case or category <strong>of</strong> cases, such as Patent<br />
cases. Here’s how to do it. (Note that applicable PACER charges apply.)<br />
Suppose you want to obtain a list <strong>of</strong> the documents filed from May 23rd to May 24th <strong>of</strong> 2005:<br />
1. Log into the <strong>Court</strong>’s <strong>CM</strong>/<strong>ECF</strong> system using either your <strong>CM</strong>/<strong>ECF</strong> or PACER account.<br />
2. Click on Reports<br />
3. If you have logged in using your EM/<strong>ECF</strong> account, you may be asked for your PACER<br />
information here. Enter it.<br />
4. Click on Docket Activity<br />
5. The Docket Activity Report screen will provide you with a variety <strong>of</strong> selection criteria<br />
(Case number, Office, Case Type, Event Category, Case Flags, etc.). A screen shot<br />
attached. Keep the default values for most <strong>of</strong> the items as they are. Change only the items<br />
necessary to narrow the focus to the cases you want. In this example, only the date range<br />
needs to be altered.<br />
a. To obtain the cases filed on May 23-24, 2005 change the dates to read:<br />
“Entered between 5/23/2005 and 5/24/2005”<br />
b. Click Run Report.<br />
6. The system will provide you with a list <strong>of</strong> the documents entered into the system on those<br />
dates.<br />
Notes: You can focus your search on a single case (just enter the case number) or a particular<br />
case category (select the appropriate Case Category flag). You can select more than one Case<br />
Category by holding down the control (ctrl) key when you click on your selections. The Case<br />
Category flag codes are:<br />
CAT01 Admiralty CAT08 Personal Injury<br />
CAT02 Antitrust CAT09 Administrative (Social Security)<br />
CAT03 Civil Rights CAT10 Tax<br />
CAT04 Contract CAT11 Copyright / Trademark<br />
CAT05 Habeas Corpus CAT12 General Civil<br />
CAT06 Labor Relations CAT13 Death Penalty<br />
CAT07<br />
Patent
The time it takes to run the report is dependent upon your selection criteria and the number <strong>of</strong><br />
users on the system. Experiment with whichever search criteria meet your needs.
<strong>United</strong> <strong>States</strong> <strong>District</strong> <strong>Court</strong><br />
<strong>Northern</strong> <strong>District</strong> <strong>of</strong> <strong>Ohio</strong><br />
Turning the <strong>CM</strong>/<strong>ECF</strong> Document Headers Off/On<br />
The <strong>CM</strong>/<strong>ECF</strong> s<strong>of</strong>tware allows case number, document number, date filed and page number to be<br />
displayed in a header on PDF document pages. The original PDF documents filed with the <strong>Court</strong><br />
will not be altered in any way; instead, the case information will be generated at the time the<br />
document is accessed for viewing and/or printing, and affixed to the top <strong>of</strong> the document pages.<br />
You can easily turn the PDF Document header feature <strong>of</strong>f if you do not want headers to be<br />
displayed on documents you view or print. Here is how.<br />
1. Log into the <strong>Court</strong>’s <strong>CM</strong>/<strong>ECF</strong> system using your <strong>CM</strong>/<strong>ECF</strong> account.<br />
2. Click on Utilities<br />
3. Click on Maintain Your Account<br />
4. Deselect the Add Headers to PDF Documents check box.<br />
5. Click Submit button.<br />
6. Click Submit button.<br />
If you wish to turn the PDF document header feature back on, simply follow steps one through<br />
three above, reselect the Add Headers to PDF Documents check box and follow steps five and<br />
six.
<strong>United</strong> <strong>States</strong> <strong>District</strong> <strong>Court</strong><br />
<strong>Northern</strong> <strong>District</strong> <strong>of</strong> <strong>Ohio</strong><br />
Setting Up E-Mail Notification in <strong>CM</strong>/<strong>ECF</strong><br />
Users can receive e-mail notification <strong>of</strong> all electronic filings in cases they are<br />
interested in by setting the automatic e-mail notification in their user accounts.<br />
• Access the “Live” System. Note that the “Live” electronic filing system and the “Training Area” are<br />
different systems. Setting your e-mail notification in one system does not set it in the other.)<br />
• Click on “Utilities”<br />
• Click on “Maintain Your Account”<br />
At the “maintain your account screen”, by removing the checkmark by “Add Headers to PDF Documents”<br />
you can remove the option <strong>of</strong> document headers appearing on electronically filed documents.<br />
Example Document Header:<br />
.<br />
• Click on “Email Information”<br />
• To add a primary and/or secondary e-mail address, click on the appropriate “add new e-mail<br />
address” link. Enter your e-mail address in the “configuration options” box.
• Upon entering an e-mail address in the “configuration options” box, the following screen will<br />
appear. Answer the following questions:<br />
• To receive notification <strong>of</strong> activity for other cases, enter the case number in the following format<br />
YY-#### (ex. 09-51) in the “add additional cases for noticing” box and click on “find the case”.<br />
You do not have to be a party in the cases entered in this field.<br />
• Select the type <strong>of</strong> notice you would like to receive. There are two options:<br />
1) Send notice per filing which is the default method. This selection sends notices to you<br />
immediately upon filing.<br />
2) Send notice as a summary report which is an alternate method. This selection will send a<br />
summary <strong>of</strong> notices at the end <strong>of</strong> the day (usually at midnight). If you seek electronic<br />
notice in a large number <strong>of</strong> cases, this selection is the preferred method.<br />
• Click on “Return to Person Information Screen”<br />
• From the Person Information Screen, select “Submit” You will receive a confirmation screen listing<br />
the cases and e-mail options you have selected.<br />
Note: Failure to select “Submit” will result in no changes being made. Changes have<br />
been made only if you receive confirmation <strong>of</strong> same.
<strong>United</strong> <strong>States</strong> <strong>District</strong> <strong>Court</strong><br />
<strong>Northern</strong> <strong>District</strong> <strong>of</strong> <strong>Ohio</strong><br />
Secondary E-mail Addresses in <strong>CM</strong>/<strong>ECF</strong><br />
Users can receive e-mail notification <strong>of</strong> all electronic filings in cases they are interested in by<br />
setting the automatic e-mail notification in their user accounts. Users can receive e-mail notification at a<br />
secondary e-mail address as well.<br />
Adding A Secondary E-mail Address in <strong>CM</strong>/<strong>ECF</strong><br />
• Access the “Live” System. Note that the “Live” electronic filing system and the “Training Area” are different systems.<br />
Setting your e-mail notification in one system does not set it in the other.<br />
• Click on “Utilities”<br />
• Click on “Maintain Your Account”<br />
.<br />
• Click on “Email Information”<br />
To add a secondary e-mail address, click on the “add new e-mail address”link found under “Secondary e-<br />
mail addresses”. Enter your e-mail address in the “configuration options” box.
• Upon entering an e-mail address in the “configuration options” box, the following screen will<br />
appear. Answer the following questions:<br />
• To receive notification <strong>of</strong> activity for other cases, enter the case number in the following format<br />
YY-#### (ex. 09-51) in the “add additional cases for noticing” box and click on “find the case”.<br />
You do not have to be a party in the cases entered in this field.<br />
• Select the type <strong>of</strong> notice you would like to receive. There are two options:<br />
1) Send notice per filing which is the default method. This selection sends notices to you<br />
immediately upon filing.<br />
2) Send notice as a summary report which is an alternate method. This selection will send a<br />
summary <strong>of</strong> notices at the end <strong>of</strong> the day (usually at midnight). If you seek electronic<br />
notice in a large number <strong>of</strong> cases, this selection is the preferred method.<br />
• Click on “Return to Person Information Screen” once the secondary address has been added.<br />
• From the Person Information Screen, select “Submit” You will receive a confirmation screen listing<br />
the cases and e-mail options you have selected.<br />
Note: Failure to select “Submit” will result in no changes being made. Changes have<br />
been made only if you receive confirmation <strong>of</strong> same.
Removing A Secondary E-mail Address in <strong>CM</strong>/<strong>ECF</strong><br />
To remove a secondary e-mail address, click on the e-mail address link that you want to delete found<br />
under “Secondary e-mail addresses”. Once you click on the e-mail link, the “configuration options” box<br />
appears containing the e-mail address. Delete the e-mail address from the “configuration options” box.<br />
• Click on “Return to Person Information Screen” once the secondary address has been deleted.<br />
• From the Person Information Screen, select “Submit” You will receive a confirmation screen listing<br />
the cases and e-mail options you have selected.<br />
Note: Failure to select “Submit” will result in no changes being made. Changes have<br />
been made only if you receive confirmation <strong>of</strong> same.
<strong>United</strong> <strong>States</strong> <strong>District</strong> <strong>Court</strong><br />
<strong>Northern</strong> <strong>District</strong> <strong>of</strong> <strong>Ohio</strong><br />
Adding Attachments to Documents<br />
with Thorough Description<br />
After browsing and uploading a main document, users can add attachments. The<br />
adding <strong>of</strong> attachments during docketing is streamlined to only require one screen.<br />
When the user clicks on the browse button to add the first attachment, and selects a<br />
category or enters a description (or both) a new row will automatically appear so the<br />
user can add a second attachment and so on.<br />
Click on the Category box and select a word that is applicable to your attachment. If<br />
none apply, do not select a word. Leave the Category box blank and add descriptive<br />
text in the Description box. This box is free text.<br />
Incorrect:<br />
It is not necessary to repeat the word you selected in the Category pick<br />
list again in the Description box.<br />
Correct:
• Once all attachments are added and identified, click “next” and continue.<br />
Sample docket text<br />
Motion to Expand the Record filed by Test Defendant. Related document(s) 157, 156.<br />
(Attachments: # 1 Exhibit 3 - Deposition <strong>of</strong> Sgt. John Doe; # 2 Exhibit 8 - Declaration <strong>of</strong><br />
trial counsel Jane Doe; # 3 Exhibit 9 - Declaration <strong>of</strong> trial counsel Mary Smith; # 4<br />
Exhibit 10 - Declaration <strong>of</strong> Test Plaintiff; # 5 Exhibit 11 - Declaration <strong>of</strong> John Smith; # 6<br />
Exhibit 12 - Declaration <strong>of</strong> Mayor City; # 7 Exhibit 13 - Declaration <strong>of</strong> Peter Smith; # 8<br />
Exhibit 14 - Declaration <strong>of</strong> Joe Williams; # 9 Exhibit 15 - State v. Smith trial testimony <strong>of</strong><br />
John Doe; # 10 Exhibit 17 - State v. Smith trial testimony <strong>of</strong> John Smith. (Test, Atty)
<strong>United</strong> <strong>States</strong> <strong>District</strong> <strong>Court</strong><br />
<strong>Northern</strong> <strong>District</strong> <strong>of</strong> <strong>Ohio</strong><br />
Joint Filings<br />
Documents filed on behalf <strong>of</strong> multiple parties are called joint filings. Examples include<br />
stipulations, joint motions, and the report <strong>of</strong> the parties planning meeting.<br />
To submit a joint filing select your event (stipulation, motions, etc.) as usual. Enter the<br />
case number and click “next”.<br />
Using your mouse, control + left click and select each party for whom you are filing and<br />
click “next”.<br />
IMPORTANT: Uncheck the box if you do not represent the party listed. If you do<br />
represent the listed party do not remove the check.