
You also want an ePaper? Increase the reach of your titles
YUMPU automatically turns print PDFs into web optimized ePapers that Google loves.
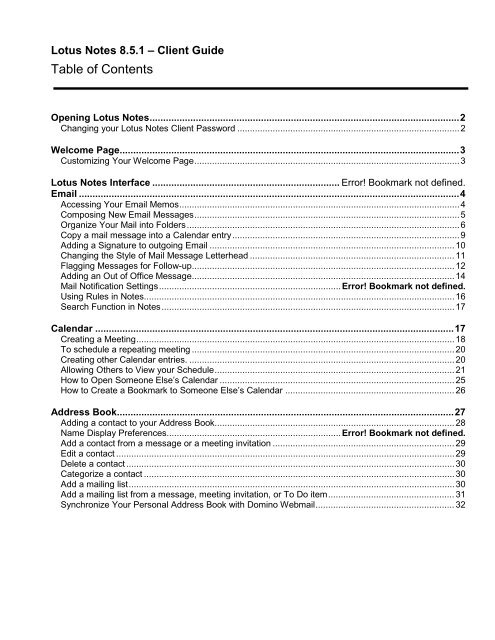
<strong>Lotus</strong> <strong>Notes</strong> 8.5.1 – <strong>Client</strong> <strong>Guide</strong><br />
Table of Contents<br />
Opening <strong>Lotus</strong> <strong>Notes</strong> .................................................................................................................. 2<br />
Changing your <strong>Lotus</strong> <strong>Notes</strong> <strong>Client</strong> Password ........................................................................................ 2<br />
Welcome Page ............................................................................................................................. 3<br />
Customizing Your Welcome Page ......................................................................................................... 3<br />
<strong>Lotus</strong> <strong>Notes</strong> Interface ..................................................................... Error! Bookmark not defined.<br />
Email ............................................................................................................................................ 4<br />
Accessing Your Email Memos ............................................................................................................... 4<br />
Composing New Email Messages ......................................................................................................... 5<br />
Organize Your Mail into Folders ............................................................................................................ 6<br />
Copy a mail message into a Calendar entry .......................................................................................... 9<br />
Adding a Signature to outgoing Email ................................................................................................. 10<br />
Changing the Style of Mail Message Letterhead ................................................................................. 11<br />
Flagging Messages for Follow-up ........................................................................................................ 12<br />
Adding an Out of Office Message ........................................................................................................ 14<br />
Mail Notification Settings ........................................................................ Error! Bookmark not defined.<br />
Using Rules in <strong>Notes</strong> ........................................................................................................................... 16<br />
Search Function in <strong>Notes</strong> .................................................................................................................... 17<br />
Calendar .................................................................................................................................... 17<br />
Creating a Meeting .............................................................................................................................. 18<br />
To schedule a repeating meeting ........................................................................................................ 20<br />
Creating other Calendar entries. ......................................................................................................... 20<br />
Allowing Others to View your Schedule ............................................................................................... 21<br />
How to Open Someone Else’s Calendar ............................................................................................. 25<br />
How to Create a Bookmark to Someone Else’s Calendar ................................................................... 26<br />
Address Book ............................................................................................................................ 27<br />
Adding a contact to your Address Book............................................................................................... 28<br />
Name Display Preferences..................................................................... Error! Bookmark not defined.<br />
Add a contact from a message or a meeting invitation ........................................................................ 29<br />
Edit a contact ...................................................................................................................................... 29<br />
Delete a contact .................................................................................................................................. 30<br />
Categorize a contact ........................................................................................................................... 30<br />
Add a mailing list ................................................................................................................................. 30<br />
Add a mailing list from a message, meeting invitation, or To Do item .................................................. 31<br />
Synchronize Your Personal Address Book with Domino Webmail ....................................................... 32
Opening <strong>Lotus</strong> <strong>Notes</strong><br />
1. Double-click on the <strong>Notes</strong> icon located on your desktop<br />
2. <strong>Notes</strong> will display the Enter Password dialog box.<br />
3. If you know your password, type it in and click OK.<br />
(Fig. 1)<br />
Changing your <strong>Lotus</strong> <strong>Notes</strong> <strong>Client</strong> Password<br />
1. From the main menu, click on File Security User Security.<br />
2. Enter your current password in the text box. Click OK.<br />
3. Click the Change Password button to set or change your password.<br />
4. Enter your current password in the text box. Click OK.<br />
5. Enter your new password in the first text fields. Confirm your password by typing it again into<br />
the second text field, exactly as you did the first time. Click OK.<br />
Fig.1<br />
Contd.<br />
2 Osgoode ITS
Welcome Page<br />
Customizing Your Welcome Page<br />
This is how the welcome page will look<br />
like:<br />
Choose ‘Use the<br />
default’. You can<br />
always modify this<br />
layout by clicking on<br />
‘Create my own’<br />
1. You’ll see the following change in home page view:<br />
3 Osgoode ITS
Click the dropdown<br />
arrow to<br />
select the<br />
Welcome page<br />
style you prefer.<br />
Email<br />
Accessing Your Email Memos<br />
1. To access your email memos/Inbox, click on the Mail icon within either the OPEN<br />
menu<br />
or on the home page.<br />
2. To check for new email memos, select the Refresh button in the navigation toolbar or<br />
press the F9 key.<br />
4 Osgoode ITS
3. To open included attachments, double click on the attachment icon in the body of the email<br />
message.<br />
Composing New Email Messages<br />
1. Access your emails in you inbox by clicking the icon.<br />
Clicking this link<br />
will display the<br />
address book.<br />
This is the<br />
Attachment icon.<br />
Clicking this will<br />
enable you to<br />
choose the file to be<br />
attached from a<br />
Click here to save a message that you were<br />
composing without sending it<br />
Address book Selector<br />
5 Osgoode ITS
Select the address<br />
book from the drop<br />
down list.<br />
A list of names is<br />
displayed in the<br />
display filed after<br />
selecting the<br />
address book.<br />
NOTE: When adding multiple names into any of the Address fields, separate them with<br />
commas.<br />
Organize Your Mail into Folders<br />
You can create folders and move your mail messages into them for better organization.<br />
4. Click here<br />
To create a new folder:<br />
5. Type a name for the folder<br />
6 Osgoode ITS
The folders will be displayed here<br />
when you click Folders in the<br />
navigation pane<br />
6. Click OK<br />
To move a message into a folder:<br />
1. Select the message in your Inbox (or any other view) (see accessing your email memos<br />
section)<br />
2. Click Folder > Move to Folder<br />
7 Osgoode ITS
A list of folders<br />
will be<br />
displayed here.<br />
Click on any to<br />
select and then<br />
click on move<br />
NOTE: You can also do this from the Sent or All Documents view; however, you will not have<br />
the Move option. Instead, you will only have the Add option. The message will stay in the<br />
Sent or All Documents view and will also be added to the new folder.<br />
Remove a message from a folder:<br />
1. Select the message<br />
2. Click Folder > Remove from Folder<br />
Remove a folder:<br />
1. Click on the folder icon and select Discover Folders Option<br />
8 Osgoode ITS
Select a folder<br />
from the list here<br />
Rename a folder:<br />
1. Right click the folder (left hand column of mail page) and choose Rename Folder<br />
2. Type the new name<br />
3. Click OK<br />
NOTE:<br />
Messages can be clicked and<br />
dragged into the folders on the left<br />
hand column.<br />
Copy a mail message into a Calendar entry<br />
1. Open a mail message. (see accessing your email memos section)<br />
2. Choose Actions Copy into New Calendar Entry.<br />
3. Enter the Location of the event, the Entry Type and the Begins and Ends time field(s) of the<br />
copied message.<br />
4. Click on Save and Close to save and close your Calendar entry.<br />
9 Osgoode ITS
Click here to save & send or save draft<br />
Enter the data in the<br />
fields<br />
Adding a Signature to outgoing Email<br />
1. Click Files and then Preferences. In the Preferences window, under the Mail tab, select<br />
the Signature tab.<br />
10 Osgoode ITS
1<br />
2<br />
3<br />
4<br />
In the Signature box provided,<br />
type your text signature, or select<br />
'HTML file or Image File' if you<br />
plan to use a non-text signature.<br />
2. Click on 'Automatically append a signature to the bottom of my outgoing mail memos'<br />
box, and then click ok.<br />
5<br />
Changing the Style of Mail Message Letterhead<br />
Letterhead is the graphic which is located to the left of the address fields in the New Memo form.<br />
To choose a letterhead do the following:<br />
1. Open your Inbox (see accessing your email memos section)<br />
2. Click File > Preferences (refer to figure in previous section)<br />
3. Click the Letterhead tab<br />
11 Osgoode ITS
2<br />
1<br />
3<br />
4<br />
4. Click a letterhead to preview it<br />
5. Click OK to select it<br />
Flagging Messages for Follow-up<br />
12 Osgoode ITS
6. Select the message in your Inbox (see accessing your email memos section)<br />
7. Click Follow-up > Quick Flag<br />
8. A green "flag" will be placed next to the message in the Inbox<br />
9. Click the Follow-up view to display all of the messages that are flagged for follow-up<br />
10. After you follow-up, select the message and click Follow-up > Remove Flag<br />
11. To set an alarm reminder or to select additional Follow-up actions, click Follow-up > Add or<br />
Edit Flag<br />
13 Osgoode ITS
Adding an Out of Office Message<br />
12. To set an Out-of-Office notification for your incoming mail, from the Action Bar select More<br />
> Out of Office, specify the duration of your absence, and a memo you would like others to<br />
receive.<br />
14 Osgoode ITS
13. When you are done configuring this memo, click ‘Enable’ to activate the notification.<br />
14. NOTE: When you return to the office, be sure to disable your Out of Office notification.<br />
15. You can exclude people or groups from receiving your Out of Office notification on the<br />
Exclusions tab.<br />
15 Osgoode ITS
Using Rules in <strong>Notes</strong><br />
1. <strong>Lotus</strong> uses Rules to filter and sort your mail to mailboxes, folders, and even the trash.<br />
2. To create a Rule, click on Actions>More>Mail rules<br />
3. . With the Mail Rules Window tab selected open, click New Rule.<br />
16 Osgoode ITS
Search Function in <strong>Notes</strong><br />
To search for a specific memo”<br />
1. Open your inbox (look at Accessing your Email Memos section)<br />
2. Locate the Search All Mail search filed on the top right corner of your window.<br />
3. Once located type in the key words to filter out the inbox to display results.<br />
Calendar<br />
1. To access your calendar, click the Open icon.<br />
17 Osgoode ITS
2. Select Calendar .<br />
3. NOTE: You can also access your calendar through the home tab.<br />
4. To change the view of your calendar to a daily, weekly, or monthly format, click on the<br />
corresponding tab in the Action Bar on the left hand side of the window.<br />
Creating a Meeting<br />
1. To schedule a meeting, click on New and then Meeting on the Calendar screen<br />
18 Osgoode ITS
2. Add a Subject to the Invitation and specify the date and time of your meeting.<br />
3. Invitees to your meeting can be designated as Required (to) or Optional (cc)<br />
participants. The FYI (bcc) field keeps non-attending staff or managers informed of<br />
meeting times and topics.<br />
4. Each Required and Optional invitee will receive an invitation email memo with the details<br />
of your proposed meeting and will be able to respond regarding their attendance. FYI<br />
recipients will be notified of the meeting, but it will not appear in their personal calendar.<br />
19 Osgoode ITS
5. Specify location and resource details about the meeting in the Where section.<br />
To schedule a repeating meeting<br />
1. To repeat a meeting, open calendar entry (Shown above)<br />
2. Click on the Repeat link and a Repeat Options Menu opens up<br />
3. Select your settings and click OK<br />
1<br />
2<br />
3<br />
Creating other Calendar entries.<br />
1. <strong>Lotus</strong> offers additional types of Calendar entries (Appointments, Anniversaries, Reminders,<br />
and All Day Events).<br />
20 Osgoode ITS
2. To schedule one of these event types, click New in the Action bar button and select your<br />
Calendar Entry choice.<br />
3. These event types are different than meetings in that they do not schedule invitees, rooms or<br />
resources.<br />
Allowing Others to View your Schedule<br />
1. To allow co-workers to view your schedule go to the Calendar Action bar, click File and<br />
select Preferences from the menu. In the Preferences window select the Access &<br />
Delegation tab, then Access to Your Schedule tab.<br />
For Access to Your Mail & Calendar<br />
21 Osgoode ITS
2<br />
3<br />
1<br />
4<br />
9<br />
22 Osgoode ITS
5<br />
8<br />
6<br />
2. Select the person from Osgoode’s Address Book<br />
3. Click OK<br />
7<br />
For Access To Your Schedule<br />
1. In the section titled, "Who is allowed to see your schedule information (when you are<br />
busy or available)," specify what level of visibility you prefer. Using the settings in this<br />
section, you may specify campus-wide visibility to view your busy time, you may block all<br />
users from viewing your busy time, or you may allow only certain people to view your busy<br />
time.<br />
23 Osgoode ITS
2. If you need to grant detailed access to your information, use the "What schedule<br />
information they may see" section to customize the level of visibility you would like to allow.<br />
5<br />
6<br />
9<br />
7<br />
8<br />
3. Select the person from Osgoode’s Address Book<br />
4. Click OK<br />
24 Osgoode ITS
How to Open Someone Else’s Calendar<br />
1. Open your Calendar<br />
2. Click Tools/Open Calendar For….<br />
1<br />
2<br />
3. The Open Calendar dialog box opens:<br />
3<br />
4<br />
4. Select the person from Osgoode’s Address Book<br />
5. Click OK<br />
6. You will be in this person’s Calendar.<br />
7. If the person has not delegated you access to their Calendar you will receive a message<br />
saying that access is denied.<br />
25 Osgoode ITS
How to Create a Bookmark to Someone Else’s<br />
Calendar<br />
If this is a Calendar that you access on a regular basis, you should create a bookmark to it so<br />
that you can access it easily in the future:<br />
1. Drag and drop the window tab directly on the Open Icon<br />
Drag and Drop<br />
Now when you click on the Open icon you will see your entry book marked.<br />
26 Osgoode ITS
2. or right click on the calendar entry’s tab on the top and click on add to book mark.<br />
3. As a result you will now see the entry in the Open menu when clicked)<br />
Address Book<br />
1. Access your Address Book by clicking on the Open tab<br />
2. Add a new contact by clicking New, and selecting Contact from the menu.<br />
3. Create a list of contacts by clicking New, and selecting Group from the menu.<br />
27 Osgoode ITS
4. To extract contact information from a memo, meeting invitation, or To Do item, click Tools<br />
from the Action Bar and select 'Add Sender to Address Book'.<br />
Adding a contact to your Address Book<br />
1. Open your Address Book and click on the Add Contact button in the top left corner of the<br />
screen.<br />
2. This should open the following form.<br />
3. Fill out the fields and click Save and close.<br />
The contact is now in your Address Book.<br />
28 Osgoode ITS
Add a contact from a message or a meeting<br />
invitation<br />
1. Select the message, invitation, or item.<br />
2. Click Actions Tools Add Sender to Address Book.<br />
3. Check the information <strong>Notes</strong> displays about the person and click on OK.<br />
Edit a contact<br />
1. Open your Address Book and open the contact.<br />
2. Make your changes and click on Save and Close.<br />
29 Osgoode ITS
Delete a contact<br />
1. Open your Address Book and select the contact.<br />
2. Click on the Delete button at the top of the screen.<br />
Categorize a contact<br />
1. Type one or more names separated by commas in the Categories field, under the Advanced<br />
tab.<br />
2. Click on Save and Close.<br />
3. To display contacts by category, switch to the Contacts by Category view of your Address<br />
Book.<br />
Add a mailing list<br />
1. Open your Address Book and switch to the Groups view.<br />
2. Click on Add Mailing List button at the top of the page.<br />
30 Osgoode ITS
4<br />
Click on Save and Close. 1<br />
Enter a name into the<br />
Group name field.<br />
2<br />
Type a brief description in<br />
the Description field.<br />
Type the names of the people in the<br />
Members field. After each name,<br />
press ENTER or type a comma. To<br />
select names from an Address Book,<br />
click the button to the right of the<br />
field.<br />
3<br />
3. You have added a mailing list which will be displayed under the Groups view.<br />
Add a mailing list from a message, meeting<br />
invitation, or To Do item<br />
1. Open the message, invitation, or item.<br />
31 Osgoode ITS
Type a name<br />
Type a brief description<br />
in the Description field<br />
.<br />
(Optional) To leave someone off<br />
the mailing list, click the person's<br />
name in the Members field.<br />
Click on OK.<br />
Synchronize Your Personal Address Book with<br />
Domino Webmail (Replication)<br />
The New <strong>Lotus</strong> <strong>Notes</strong> <strong>Client</strong> Automatically synchronized your address book with domino<br />
webmail.<br />
32 Osgoode ITS