LED Replacement Bulb Instructions - Paramount Pools
LED Replacement Bulb Instructions - Paramount Pools
LED Replacement Bulb Instructions - Paramount Pools

You also want an ePaper? Increase the reach of your titles
YUMPU automatically turns print PDFs into web optimized ePapers that Google loves.
ROhS REACH<br />
® International patent<br />
Warning<br />
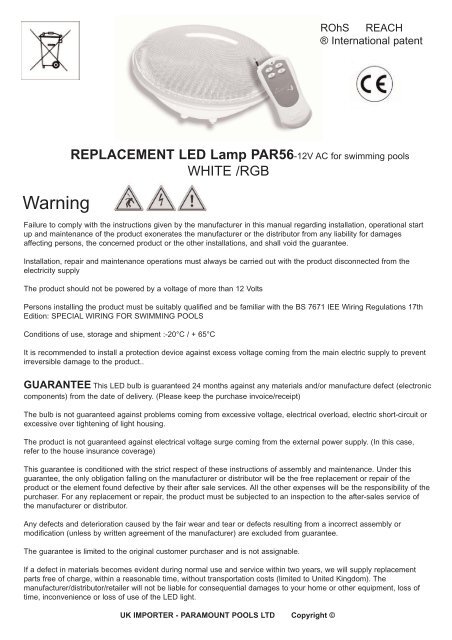
REPLACEMENT <strong>LED</strong> Lamp PAR56-12V AC for swimming pools<br />
WHITE /RGB<br />
Failure to comply with the instructions given by the manufacturer in this manual regarding installation, operational start<br />
up and maintenance of the product exonerates the manufacturer or the distributor from any liability for damages<br />
affecting persons, the concerned product or the other installations, and shall void the guarantee.<br />
Installation, repair and maintenance operations must always be carried out with the product disconnected from the<br />
electricity supply<br />
The product should not be powered by a voltage of more than 12 Volts<br />
Persons installing the product must be suitably qualified and be familiar with the BS 7671 IEE Wiring Regulations 17th<br />
Edition: SPECIAL WIRING FOR SWIMMING POOLS<br />
Conditions of use, storage and shipment :-20°C / + 65°C<br />
It is recommended to install a protection device against excess voltage coming from the main electric supply to prevent<br />
irreversible damage to the product..<br />
GUARANTEE This <strong>LED</strong> bulb is guaranteed 24 months against any materials and/or manufacture defect (electronic<br />
components) from the date of delivery. (Please keep the purchase invoice/receipt)<br />
The bulb is not guaranteed against problems coming from excessive voltage, electrical overload, electric short-circuit or<br />
excessive over tightening of light housing.<br />
The product is not guaranteed against electrical voltage surge coming from the external power supply. (In this case,<br />
refer to the house insurance coverage)<br />
This guarantee is conditioned with the strict respect of these instructions of assembly and maintenance. Under this<br />
guarantee, the only obligation falling on the manufacturer or distributor will be the free replacement or repair of the<br />
product or the element found defective by their after sale services. All the other expenses will be the responsibility of the<br />
purchaser. For any replacement or repair, the product must be subjected to an inspection to the after-sales service of<br />
the manufacturer or distributor.<br />
Any defects and deterioration caused by the fair wear and tear or defects resulting from a incorrect assembly or<br />
modification (unless by written agreement of the manufacturer) are excluded from guarantee.<br />
The guarantee is limited to the original customer purchaser and is not assignable.<br />
If a defect in materials becomes evident during normal use and service within two years, we will supply replacement<br />
parts free of charge, within a reasonable time, without transportation costs (limited to United Kingdom). The<br />
manufacturer/distributor/retailer will not be liable for consequential damages to your home or other equipment, loss of<br />
time, inconvenience or loss of use of the <strong>LED</strong> light.<br />
UK IMPORTER - PARAMOUNT POOLS LTD Copyright ©
REPLACEMENT<br />
INSTRUCTION - WHITE /RGB<br />
Seamaid <strong>LED</strong> PAR56 lamps 12 Volts AC can replace the<br />
traditional PAR56 lamp on a new or existing swimming pool.<br />
They are not suitable for the Seamaid Flat Universal one-piece<br />
modular light system.<br />
<strong>Bulb</strong>s are available in WHITE or RGB with a Remote Control<br />
Unit.<br />
Installation Guide<br />
Change the existing o'ring gasket when replacing a bulb on an<br />
old light system. Do not install a replacement bulb if original<br />
housing has been distorted due to overheating.<br />
Ensure the bulb(s) are connected to a transformer of a power<br />
at least equivalent to the total of all the bulbs. The use of electronic or electromagnetic transformers are prohibited. To<br />
synchronise RGB bulbs they must be connected to the same transformer. Handle the lamps with care on a clean towel.<br />
1. Before any installation/replacement; turn off power supply to bulb.<br />
2. EXISTING POOLS (Non Seamaid ) Remove existing light from housing as per the manufacturers<br />
instruction (providing enough cable (3) has been provided) and place onto pool surround. If no excess cable<br />
has been left, lower pool water to gain access from within the pool.<br />
3. Access light housing to remove existing bulb as per manufacturers instruction.<br />
4. Remove the spade connectors (2) from the back of bulb terminal (1).<br />
5. Remove any visible scale deposit from wire electrical spade connectors (2) using an abrasive paper<br />
(wet 'n' dry) and check connections are secure.<br />
6. Check and change if necessary the o'ring seal. Use a silicone sealant for added precaution.<br />
7. If bulb housing is distorted, do not install bulb. A replacement bulb housing will need to be purchased.<br />
8. Re-insert the light system back into light housing.<br />
9. Turn on power supply. Light is now ready to use. See operation notes below.<br />
1<br />
2<br />
3<br />
Operation<br />
WHITE <strong>LED</strong> bulb- turn on/off manually via isolation switch.<br />
RGB <strong>LED</strong> bulb with remote control: This version has a manual program with<br />
11 static colours and 5 coloured environments controlled by the provided radio<br />
remote controller. The use of the remote controller requires that you must<br />
position yourself facing the lamp at a maximum distance of 10 meters (remote<br />
control antenna must be fully extended). Any metallic elements that are sited<br />
near the <strong>LED</strong> bulb may interfere with the radio reception and reduce operation<br />
down to 1 or 2 meters. You may use the main ON/OFF switch to change the<br />
programs of the light. Switching the ON/OFF button within 2 seconds will<br />
change the program. Leaving the light OFF for over 10 seconds and then<br />
switching back ON again, restarts the last lighting program (sequence). A<br />
special remote switch (attached to main transformer) is required for multiple<br />
light systems - contact your dealer for details.<br />
Remote Control pairing process:<br />
* Install the battery in the remote controller<br />
* Switch OFF/ON/OFF/ON the power supply of the lamp(s)<br />
* Press the buttons O & S together during 1 second<br />
* Each lamp connected flash once on white colour to valid the pairing<br />
Press several times the button C (manual selection) or P (five automatic<br />
lighting sequences).<br />
RGB - Remote Control<br />
O - On/off<br />
S - Synchronising Function<br />
C - Colours 1-11<br />
P - Programme 1-5<br />
* Supplied with MN23 type 12v alkaline<br />
batteries