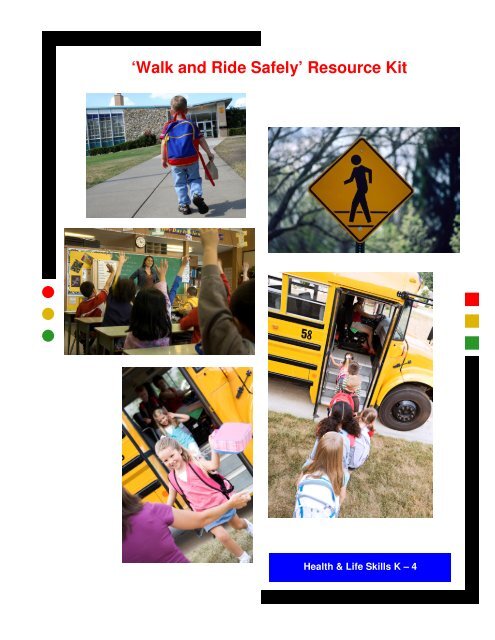
'Walk and Ride Safely' Resource Kit - Capital Health
'Walk and Ride Safely' Resource Kit - Capital Health
'Walk and Ride Safely' Resource Kit - Capital Health

Create successful ePaper yourself
Turn your PDF publications into a flip-book with our unique Google optimized e-Paper software.
‘Walk <strong>and</strong> <strong>Ride</strong> Safely’ <strong>Resource</strong> <strong>Kit</strong><br />
<strong>Health</strong> & Life Skills K – 4
Table of Contents<br />
Introduction .............................................................................................................. 3<br />
Content Checklist .................................................................................................... 4<br />
Learner Outcomes ................................................................................................... 5<br />
Modules ................................................................................................................... 6<br />
1. Pedestrian Safety ............................................................................................ 7<br />
Lesson I: Get Me To The Other Side…Safely .......................................... 8<br />
2. School Bus Safety .......................................................................................... 14<br />
Lesson I: Get Me On The Bus <strong>and</strong> Off Again Safely ............................... 15<br />
Quizzes ................................................................................................................... 23<br />
Student Information ................................................................................................. 28<br />
‘Student Pedestrian Safety Journal’ ................................................................... 29<br />
‘Kidsafe Connection Child Pedestrian Safety’ fact sheet ................................... 31<br />
‘Safe Kids Canada Pedestrian Safety Tips’ info sheet ....................................... 33<br />
‘Pedestrian Safety’ certificate ............................................................................. 34<br />
‘School Bus’ picture ........................................................................................... 35<br />
‘Danger Zone’ .................................................................................................... 36<br />
‘Practising the Letter S’ activity .......................................................................... 37<br />
‘Bus Safety Rules’ brochure ............................................................................... 38<br />
‘About School Bus Safety’ bookmark ................................................................. 40<br />
‘School Bus Safety’ certificate ............................................................................ 42<br />
Information Sources ............................................................................................... 43<br />
2
Welcome to the ‘Walk <strong>and</strong> <strong>Ride</strong> Safely <strong>Resource</strong> <strong>Kit</strong>’<br />
We are pleased to provide this resource kit free of charge to schools <strong>and</strong> community<br />
agencies.<br />
This kit was created to provide educators with the information <strong>and</strong> resources to<br />
teach children ‘how to safely cross the street’ <strong>and</strong> ‘how to get on <strong>and</strong> off the bus<br />
safely’. Included in this kit is a manual containing lesson plans, quizzes, <strong>and</strong> student<br />
information sheets.<br />
The ‘Walk <strong>and</strong> <strong>Ride</strong> Safely <strong>Resource</strong> <strong>Kit</strong>’ complements Alberta Education's Program<br />
of Studies for <strong>Health</strong> <strong>and</strong> Life Skills for Kindergarten through Grade 4.<br />
There are no time restrictions on the lessons, which provides the educator with the<br />
opportunity to adapt all or portions of the lesson he/she feels best suits his/her<br />
groups’ needs.<br />
3
RESOURCE KIT<br />
CHECKLIST<br />
Educators: When borrowing the kit, please complete the ‘Educator Verification’ column.<br />
<strong>Kit</strong> Managers: When kit is returned, please complete the ‘<strong>Kit</strong> Manager Verification’ column.<br />
Educator: How did you hear about the kit? _________________________________<br />
Date of kit loan: _________________________________<br />
CONTENTS<br />
Replacement<br />
Cost<br />
‘Walk <strong>and</strong> <strong>Ride</strong> Safely’ Manual $15.00<br />
Educator<br />
Verification<br />
<strong>Kit</strong> Manager<br />
Verification<br />
‘Point, Pause, Proceed Video $15.00<br />
Signs x 5 (Stop, Yield, Pedestrian $10.00 each<br />
Crossing, Playground, Walk/Don’t<br />
Walk)<br />
Pylons x 4 <strong>and</strong> pole $20.00<br />
Crosswalk mat $20.00<br />
Plastic container for signs <strong>and</strong> lesson<br />
plans<br />
$10.00<br />
‘Pooh’s Great Bus Adventure’ $50.00<br />
Educator:<br />
KIT MANAGER ONLY<br />
<strong>Kit</strong> Manager:<br />
Infection Control Complete:<br />
(signature)<br />
Date:<br />
4
Linking ‘Walk <strong>and</strong> <strong>Ride</strong> Safely’ to the<br />
Alberta Elementary Curriculum<br />
The aim of the <strong>Health</strong> <strong>and</strong> Life Skills Program of Studies is to enable students to<br />
make well-informed, healthy choices <strong>and</strong> to develop behaviours that contribute to<br />
the well-being of self <strong>and</strong> others.<br />
The “Walk <strong>and</strong> <strong>Ride</strong> Safely” <strong>Resource</strong> <strong>Kit</strong> was developed to complement Alberta<br />
Education’s Program of Studies for <strong>Health</strong> <strong>and</strong> Life Skills, Kindergarten to Grade 4.<br />
Following is a list of general <strong>and</strong> specific outcomes the resource kit was designed to<br />
support.<br />
Learner Outcomes:<br />
WELLNESS CHOICES – General Outcome<br />
Students will make responsible <strong>and</strong> informed choices to maintain health <strong>and</strong> to<br />
promote safety for self <strong>and</strong> others.<br />
Safety <strong>and</strong> Responsibility:<br />
W - K.7<br />
W - K.8<br />
W - K.9<br />
identify unsafe situations, <strong>and</strong> identify safety rules for protection<br />
identify safety symbols<br />
describe <strong>and</strong> observe safety rules in the home <strong>and</strong> the school<br />
W - K.10 describe <strong>and</strong> demonstrate ways to be safe at home <strong>and</strong> away from home<br />
W - 1.8<br />
W - 1.9<br />
determine reasons for <strong>and</strong> apply safety rules at home <strong>and</strong> at school<br />
describe <strong>and</strong> apply appropriate street safety behaviours in the community<br />
W - 1.10 recognize community helpers <strong>and</strong> identify how to seek their help<br />
W - 2.7<br />
identify <strong>and</strong> develop plans to use when dealing with pressure to engage in<br />
behaviour that is uncomfortable or inappropriate<br />
W - 2.10 identify members of personal safety support networks <strong>and</strong> how to access<br />
assistance<br />
W - 3.7<br />
W - 3.8<br />
W - 3.9<br />
W - 4.8<br />
identify strategies to avoid being bullied in different case scenarios<br />
employ practices that provide safety for self <strong>and</strong> others<br />
describe, apply <strong>and</strong> analyze appropriate safety behaviours in the local<br />
community<br />
exp<strong>and</strong> practices that provide safety for self <strong>and</strong> others<br />
W - 4.10 describe <strong>and</strong> demonstrate ways to assist with the safety of others<br />
5
Modules<br />
6
Pedestrian Safety<br />
Module 1<br />
Lesson 1: Get Me To The Other Side … Safely!<br />
7
Module 1<br />
Lesson 1: ‘GET ME TO THE OTHER SIDE…SAFELY!’<br />
Objectives:<br />
Upon completion of Lesson 1, ‘Get Me To The Other Side…Safely’, the student<br />
will:<br />
Identify <strong>and</strong> describe the five different road signs contained in the kit: Stop,<br />
Yield, Pedestrian Crossing, Playground, Walk/Don’t Walk.<br />
• Underst<strong>and</strong> why children under the age of nine should always be<br />
accompanied by adults or older children whenever they cross the street.<br />
• Demonstrate how to safely cross the street while being accompanied by an<br />
adult or older child.<br />
Educator Background:<br />
In Canada, children five to nine years old remain at high risk for pedestrian<br />
injuries; in fact, it is the leading cause of injury <strong>and</strong> death for this age group. At<br />
this age, their judgment <strong>and</strong> perceptual skills are still immature, yet they often<br />
eagerly try to cross streets on their own in order to demonstrate some<br />
independence.<br />
Why do children lack good judgment about traffic?<br />
Young children can’t see out of the corner of their eyes as well as adults<br />
can.<br />
• It is often difficult for children to determine the direction that sounds are<br />
coming from.<br />
• Children lack a sense of vulnerability.<br />
Children have trouble judging how fast a vehicle is coming towards them<br />
or how far away it is.<br />
• Children can be easily distracted <strong>and</strong> impulsive.<br />
• Children think that if they can see the driver, the driver can see them.<br />
Children’s small stature means that they may not see hazards <strong>and</strong> drivers<br />
may not see them.<br />
What can be done?<br />
Children under nine years of age should be accompanied by a responsible<br />
adult or child over 9 years of age whenever they cross the street.<br />
8
Crossing the street safely:<br />
Cross only at pedestrian crosswalks or at corners.<br />
• Stop before stepping onto the street.<br />
• POINT – in the direction in which you are crossing to show drivers you want<br />
to cross.<br />
PAUSE – Look left, right, <strong>and</strong> left again.<br />
• Listen for traffic.<br />
• Wait until there are no oncoming vehicles or vehicles are stopped in all<br />
directions.<br />
Make eye contact with drivers so you know that they see you <strong>and</strong> they know<br />
that you see them.<br />
• PROCEED – Carefully cross the street with arm extended (walk quickly but<br />
do not run), still looking left <strong>and</strong> right.<br />
Additional information:<br />
Pedestrians must stop at driveways, alleys, <strong>and</strong> areas without curbs.<br />
• Remind children to never run out on to the street (chasing a ball, a pet, etc.)<br />
• Teach children about the dangers of crossing the street between parked cars<br />
(decreased visibility).<br />
Pedestrians should walk on the sidewalk. In areas without sidewalks,<br />
pedestrians should walk facing traffic.<br />
• Pedestrians should wear bright colours <strong>and</strong>/or reflective clothing to ensure<br />
drivers see them well.<br />
Applicable resources:<br />
‘Child Pedestrian Safety’ fact sheet (Kidsafe Connection)<br />
• ‘Pedestrian Safety - Safety Tips’ info sheet (Safe Kids Canada)<br />
• ‘Student Pedestrian Safety Journal’ activity sheet<br />
‘Point, Pause, Proceed’ video (Alberta Transportation)<br />
Notes to Educator:<br />
Assemble the pedestrian crossing in an open space in the classroom.<br />
• Place the signs you will be using in the pylon holders: Playground (child running<br />
with a ball), Pedestrian (white with parent <strong>and</strong> child carrying books), Stop, Yield,<br />
<strong>and</strong>/or Walk/Don’t Walk.<br />
• After completion of the lesson, distribute the ‘Student Pedestrian Safety Journal’<br />
(two pages) for a take home activity to be completed with parents.<br />
9
Distribute ‘Child Pedestrian Safety’ fact sheet <strong>and</strong> ‘Pedestrian Safety – Safety<br />
Tips’ info sheet to supplement the ‘Student Pedestrian Safety Journal’.<br />
• After completion of the lesson, distribute signed ‘Pedestrian Safety’ certificate.<br />
Get Ready:<br />
Discuss why children, under nine years of age, should not cross the street alone <strong>and</strong><br />
how to cross the street properly by working through the Step-by-Step Lesson Plan.<br />
Encourage brainstorming <strong>and</strong> discussion whenever possible. (Educator may wish to<br />
select a student(s) to document class responses on the board, overhead, or chart<br />
paper for future reference).<br />
Explore <strong>and</strong> Apply:<br />
Work through activities in the Step by Step Lesson Plan – ‘Get Me To The Other<br />
Side…Safely!’<br />
Step-by-Step Lesson Plan – ‘Get Me To The Other Side…Safely!’.<br />
Educator asks: “Has anyone in this class ever crossed a street before?”<br />
Class response:<br />
I have, I have.<br />
Educator asks: “Did anybody cross the street with you?”<br />
Class response:<br />
No, I always do it by myself.<br />
Yes, my Mom or Dad.<br />
Yes, my brother or sister.<br />
Yes, my friend(s).<br />
Educator asks: “How many of you think it is safe for you to cross the street alone?”<br />
Educator may count the show of h<strong>and</strong>s.<br />
Educator asks: “Well class, I have to tell you that to safely cross the street you<br />
should be nine years old. Does anyone know why?”<br />
Class response:<br />
Because we are too little<br />
Not tall enough<br />
Don’t know how<br />
Educator asks: Those are all good answers, but the real reason is because your<br />
brain isn’t fully grown yet <strong>and</strong> it doesn’t underst<strong>and</strong> how to cross a street safely.<br />
Let me give you some examples:<br />
You can’t see out of the corner of your eye as well as adults can.<br />
It is still difficult at your age to know what direction that sounds are coming<br />
from (e.g. a siren) <strong>and</strong> you may turn the wrong way searching for that sound.<br />
You can’t judge how fast a vehicle is coming towards you or how far away a<br />
vehicle is.<br />
You may not have the patience to wait for a stoplight to change or for cars to<br />
stop at crosswalks, before you step out onto the road.<br />
10
Educator asks: “So class, if it is not safe for you to cross the street alone, until you<br />
are at least nine years of age, how can we solve this problem?”<br />
Class response:<br />
We could cross the street with our Mom, Dad, brother, sister, older friend,<br />
gr<strong>and</strong>ma, gr<strong>and</strong>pa, school patrol, or teacher.<br />
Educator reminds class: “So class, you never cross the street alone <strong>and</strong> if you<br />
need to cross the street, you need to ask your Mom or Dad or another adult or a<br />
child older than 9 years old to help you get safely across the street.”<br />
Educator asks: “Now that we know we need help from an adult or older child, do<br />
you think there are any rules we should follow before we cross the street <strong>and</strong> while<br />
we are crossing the street?”<br />
Class response:<br />
We look both ways <strong>and</strong> run fast!<br />
We always use Point, Pause, <strong>and</strong> Proceed!<br />
Educator shows 4 different signs to the class. Point to each sign <strong>and</strong> explain that<br />
these signs indicate a good place to cross.<br />
Stop<br />
• Pedestrian<br />
• Yield<br />
Walk/Don’t Walk<br />
Please note: Explain to children that if the WALK light changes to a flashing DON’T WALK while they<br />
are crossing, they must continue to cross the street. Show the children what a DON’T WALK light<br />
looks like <strong>and</strong> explain that when it is flashing they need to quickly finish crossing. Teach the children<br />
not to enter a crosswalk when a DON’T WALK light is on (either flashing or solid).<br />
Class Demonstrations:<br />
Educator asks for a volunteer to demonstrate how to cross the street safely.<br />
Educator reminds class that they must have a responsible adult or child over 9<br />
years old crossing the street with them. Educator should actively participate in this<br />
activity as the responsible adult or child over 9 years old.<br />
St<strong>and</strong> at the corner (stop sign or yield sign) or at the crosswalk.<br />
• Stop before stepping onto the street.<br />
• POINT – in the direction in which you are crossing to show drivers you<br />
want to cross.<br />
PAUSE – Look left, right, <strong>and</strong> left again.<br />
• Listen for traffic.<br />
• Wait until there are no oncoming vehicles or all vehicles are stopped in<br />
both directions.<br />
Make eye contact with drivers so you know that they see you <strong>and</strong> they<br />
know that you see them.<br />
11
• PROCEED – Carefully cross the street with arm extended (walk quickly<br />
but do not run), still looking left <strong>and</strong> right.<br />
Please note: If you have access to a remote control car, it can be used to help children learn to wait<br />
for cars to pass before crossing.<br />
Class Activities:<br />
Educator may show the video – Point, Pause, Proceed.<br />
• Educator may divide the class into small groups to practise crossing the<br />
street safely. Those sitting at their desk will create posters for the hall<br />
showing how to cross the street safely; one group at a time will go with the<br />
educator to practise how to safely cross the street.<br />
• Once the class has practised crossing the street, distribute the Student<br />
Pedestrian Safety Journal (two pages) <strong>and</strong> the two pedestrian safety<br />
information sheets <strong>and</strong> ask the children to document each time they have<br />
crossed the street safely with an adult or child over 9 years of age. Have<br />
the students bring in their journal weekly for a minimum of 3 months.<br />
Once the children have shown that they know how to cross the street<br />
safely distribute the ‘Pedestrian Safety’ certificates.<br />
Additional Activities:<br />
Role Play - Create scenarios in which the students role-play one or more<br />
of the following situations (or they may choose to create one of their own).<br />
Scenario #1 – You are playing soccer at the playground with your<br />
friend <strong>and</strong> the ball gets kicked onto the street. What do you do?<br />
Scenario #2 – You begin crossing the street at an assigned crosswalk<br />
<strong>and</strong> the crosswalk signal changes to DON’T WALK. What do you do?<br />
Scenario #3 – You are going for a walk <strong>and</strong> are about to cross a<br />
driveway. What should you do?<br />
Scenario #4 – You are ready to cross the street with your parent. What 5<br />
things should you do before crossing the street?<br />
Scenario #5 - There are several buses <strong>and</strong> cars parked along the street<br />
<strong>and</strong> you need to cross. What should you do?<br />
• Design a PowerPoint Presentation that supports the scenarios presented in<br />
class or with photos of students in the class observing different kinds of<br />
pedestrian safety rules.<br />
12
• Have the students write a small script in which they act out/present their<br />
scenario(s) to the class.<br />
Design a poster/comic strip that goes with one of the scenarios presented in<br />
class; post it in the classroom or in the school or community newspaper.<br />
• Educator <strong>and</strong> students may play a game called ‘Red Light/Green Light’.<br />
Everyone lines up on a straight line <strong>and</strong> faces the leader (who is across the<br />
room). When the leader shows the ‘WALK’ symbol, all of the children<br />
advance (walk) until the leader shows the ‘DON’T WALK’ symbol, then all of<br />
the children need to stop. If a student is caught walking during the ‘DON’T<br />
WALK’ symbol, they need to take 3 steps backwards. The first student to<br />
reach the leader becomes the next leader.<br />
• Educator may order, free of charge, student workbooks entitled ‘Walk the<br />
Talk’ from Alberta Transportation (www.saferoads.com).<br />
Please note:<br />
Some of the resources contained in this pedestrian resource kit may not be suitable<br />
for all age groups. Please adapt accordingly.<br />
Information provided by Kidsafe Connection – www.capitalhealth.ca/kidsafe,<br />
Safe Kids Canada – www.safekidscanada.ca, <strong>and</strong> Alberta Transportation –<br />
www.saferoads.com.<br />
13
School Bus Safety<br />
Module 2<br />
Lesson 1: Get Me On The Bus And Off Again … Safely!<br />
14
Module 2<br />
Lesson 1: ‘GET ME ON THE BUS AND OFF AGAIN … SAFELY!’<br />
Objectives:<br />
Upon completion of Lesson 1, ‘Get Me On The School Bus And Off Again …<br />
Safely’, the student will:<br />
Underst<strong>and</strong> what the phrase ‘danger zone’ means when discussing school<br />
buses.<br />
• Identify <strong>and</strong> describe what to do while you are waiting for the school bus, how<br />
to board the school bus, <strong>and</strong> how to get off the school bus.<br />
• Describe the type of behavior that should be used while riding a school bus.<br />
Educator Background:<br />
Travel by school bus is one of the safest modes of transportation. Some people<br />
are concerned about the lack of seat belts, but the interior of school buses are<br />
designed to protect the occupants in a collision without seat belts. Adding seat<br />
belts may not improve the safety of these vehicles.<br />
Despite the safety precautions taken in the design of the bus, injuries from<br />
school bus incidents do occur. Some injuries are the result of school bus<br />
collisions, but children are also injured as pedestrians. This occurs when they<br />
are struck by the school bus or other vehicle while crossing the road to get on to<br />
the bus, or after getting off of the school bus.<br />
Key Facts<br />
Approximately three Canadian children are killed <strong>and</strong> 31 are injured each<br />
year as pedestrians hit by a school bus.<br />
• An average of 250 children age 14 or under are hospitalized every year in<br />
Canada due to injuries suffered when riding in a school bus. Although the<br />
number of incidents varies considerably from year to year, an average of 1<br />
child dies as a school bus passenger every two - three years.<br />
• One percent (1%) of all road collisions involves buses, including school<br />
buses.<br />
School buses are designed to protect passengers with a system called<br />
compartmentalization, meaning that children will be confined within a<br />
padded compartment in the bus in the event of a crash. The compartment<br />
includes several key safety features: the seats are positioned close<br />
together to form the confined area, the seats have high backs that are<br />
designed to bend <strong>and</strong> absorb energy during a crash, <strong>and</strong> the seats are<br />
anchored strongly into the vehicle.<br />
15
Did you know?<br />
Twice a day school buses in Alberta are responsible for the safe<br />
transportation of young Albertans.<br />
• School buses in Alberta travel hundreds of thous<strong>and</strong>s of kilometers<br />
everyday.<br />
• Transport Canada says travel by school bus in Alberta is one of the safest<br />
means of transporting children to <strong>and</strong> from school.<br />
School buses are driven by conscientious, dedicated drivers.<br />
• The greatest time of danger to students <strong>and</strong> for others on the roadways is<br />
during the loading <strong>and</strong> unloading of a school bus.<br />
• Most school bus collisions involve a bus being struck by another vehicle<br />
from behind or children being struck while exiting or approaching a school<br />
bus.<br />
Students can reduce the risk of school bus injury by following some safety<br />
guidelines.<br />
What can be done?<br />
Children need to be taught <strong>and</strong> reminded to stay away from the ‘Danger Zone’ –<br />
the front, back, <strong>and</strong> sides of the bus – by at least three metres (ten feet) – five<br />
giant steps.<br />
When the school bus approaches the bus stop, children should line up with the<br />
smaller children at the front <strong>and</strong> stay away from the bus until it stops.<br />
After the bus has stopped, children should get on the bus one at a time. They<br />
should hold on to the h<strong>and</strong>rail while climbing the steps, then go directly to their<br />
seat.<br />
The people at the front of the bus should leave first. When it is their turn to get<br />
off, children should carry all of their things in front of them, to the door. They<br />
should hold on to the h<strong>and</strong>rail when stepping off the bus.<br />
Children should walk away from the bus so the driver can see them. Once they<br />
are off the bus, they should stay away from it. If they drop something or have<br />
forgotten something, they should get the driver’s attention immediately before<br />
going to get it.<br />
16
The ‘DANGER ZONE’<br />
The ‘Danger Zone’ is the area on<br />
all sides of the bus where children<br />
are in the most danger of being hit.<br />
Children should stay at least three<br />
metres (ten feet) away from the bus<br />
<strong>and</strong> never go behind it. They should<br />
take five giant steps in front of the<br />
bus before crossing, so they can be<br />
seen by the driver.<br />
Checklist for Getting on the bus <strong>and</strong> off again ... safely:<br />
St<strong>and</strong> in a group while waiting for the bus. No pushing or shoving.<br />
• Stay out of the ‘Danger Zone’ until the bus driver lets you know it’s safe to get<br />
on. If you can touch the bus, you’re too close.<br />
• Once the bus arrives, line up with the smaller children at the front. Get on the<br />
bus one at a time.<br />
Use the h<strong>and</strong>rail when getting on or off the bus.<br />
• Sit down right away <strong>and</strong> stay seated until you leave the bus.<br />
• Face forward <strong>and</strong> don’t throw things inside the bus or out the bus window.<br />
Talk quietly <strong>and</strong> keep your head <strong>and</strong> arms inside the bus. Keep your feet out<br />
of the aisle.<br />
• Wait until the bus stops before st<strong>and</strong>ing. Move away from the bus <strong>and</strong> out of<br />
the ‘Danger Zone’ right away when you get off the bus<br />
• You always look all four ways before crossing the road – left, right, ahead,<br />
<strong>and</strong> behind.<br />
Always listen to school bus drivers – they’re in charge.<br />
17
Additional information:<br />
While riding the bus, children should follow these safety rules:<br />
Be properly dressed for the weather.<br />
• Never take rides from strangers even if you miss the bus.<br />
• Be at your bus stop at least five minutes before the bus is scheduled to<br />
arrive.<br />
Applicable resources:<br />
‘Bus Safety Rules’ brochure (Alberta Transportation)<br />
• ‘About School Bus Safety’ bookmark (Alberta Transportation)<br />
• ‘Pooh’s Great Bus Adventure’ DVD (Alberta Transportation)<br />
Notes to Educator:<br />
Set up chairs in the classroom similar to the inside of a school bus. You will<br />
need seven chairs – six for your passengers <strong>and</strong> one for the driver (the driver<br />
may be a student or yourself). Have ready the information from the ‘About<br />
School Bus Safety’ bookmark.<br />
• After completion of the lesson, distribute the ‘Practising the Letter ‘S’ assignment<br />
as a take home activity to be completed by the student with their parents.<br />
• After completion of the lesson, distribute ‘About School Bus Safety Rules’<br />
bookmark <strong>and</strong> ‘Bus Safety Rules’ brochure to take home <strong>and</strong> share with parents.<br />
After completion of the lesson, distribute signed ‘School Bus Safety’ certificate.<br />
Get Ready:<br />
Discuss the dangers that exist when getting on <strong>and</strong> off a school bus. Discuss how to<br />
get safely on <strong>and</strong> off a school bus by working through the Step-by-Step Lesson Plan.<br />
Encourage brainstorming <strong>and</strong> discussion whenever possible. (Educator may wish to<br />
select a student(s) to document class responses on the board, overhead, or chart<br />
paper for future reference).<br />
Explore <strong>and</strong> Apply:<br />
Work through activities in the Step by Step Lesson Plan – ‘Get Me On The Bus And<br />
Off Again Safely’.<br />
Step-by-Step Lesson Plan – ‘Get Me On The Bus And Off Again…Safely!’<br />
Educator holds up the photo of a school bus (in student information section of this<br />
manual) or points to one outside the window <strong>and</strong> asks: “Has anyone in this class<br />
ever ridden in a school bus before?”<br />
Class response:<br />
I have, I haven’t.<br />
18
Educator asks: “We have learned that there are safe ways of doing things <strong>and</strong><br />
unsafe ways of doing things. Just like when we learned about crossing the road<br />
safely. Do you think there is a safe way of getting on a school bus?”<br />
Class response:<br />
Yes<br />
Educator asks: “How many of you have ever heard the words ‘Danger Zone’ when<br />
we talk about school buses?” Educator may count the show of h<strong>and</strong>s.<br />
Educator asks: “Does anyone know what the ‘Danger Zone’ is?”<br />
Class response:<br />
Underneath the bus<br />
On top of the bus<br />
Touching the bus<br />
Educator asks: Those are all good answers, <strong>and</strong> you are real close. If you can<br />
touch the bus – you are way too close to the bus <strong>and</strong> in the ‘Danger Zone’.<br />
Educator discusses the ‘Danger Zone’ by drawing a bus on the board, overhead,<br />
or chart paper or by holding up the picture of the ‘Danger Zone’ located in the<br />
Student Information section of this manual.<br />
Educator asks: “Now class do you think there are any rules we should follow while<br />
we are waiting for the bus?<br />
Class response:<br />
St<strong>and</strong> in a group while waiting for the bus. No pushing or shoving.<br />
Stay out of the ‘Danger Zone’ until the bus driver lets you know it’s safe to get<br />
on. If you can touch the bus, you’re too close.<br />
Educator asks: “Now class do you think there are any rules we should follow when<br />
the bus arrives <strong>and</strong> we board the bus?<br />
Once the bus arrives, line up with the smaller children at the front. Get on the<br />
bus one at a time.<br />
Use the h<strong>and</strong>rail when getting on or off the bus.<br />
Educator asks: “How about when we are on the bus?<br />
Sit down right away <strong>and</strong> stay seated until you leave the bus.<br />
Face forward <strong>and</strong> don’t throw things inside the bus or out the bus window.<br />
Talk quietly <strong>and</strong> keep your head <strong>and</strong> arms inside the bus. Keep your feet out<br />
of the aisle.<br />
Educator asks: “What do we do when we get to where we are going?”<br />
Wait until the bus stops before st<strong>and</strong>ing. Move away from the bus <strong>and</strong> out of<br />
the ‘Danger Zone’ right away when you get off the bus<br />
You always look all four ways before crossing the road – left, right, ahead,<br />
<strong>and</strong> behind.<br />
Educator reminds class to always listen to school bus drivers – they’re in<br />
charge.<br />
Students might ask: “Why don’t school buses have seat belts?”<br />
Educator may say: “Some people are concerned about the lack of seat belts,<br />
but the interior of school buses are designed to protect the occupants in a<br />
collision without seat belts. This is called compartmentalization.”<br />
19
Educator reminds students: “You must always wear your seat belt or use a<br />
booster seat while riding in a motor vehicle.”<br />
Class Demonstrations:<br />
Educator asks for a volunteer to demonstrate how to safely get on <strong>and</strong> off the bus<br />
using the chairs set up in the classroom.<br />
Educator reminds class about the ‘Danger Zone’ <strong>and</strong> uses the ‘About School Bus<br />
Safety’ bookmark (student information section of this manual).<br />
Educator may actively participate in this activity as either a student boarding the<br />
bus or the school bus driver.<br />
Class Activities:<br />
Educator may show the DVD – ‘Pooh’s Great Bus Adventure’.<br />
• Educator may divide the class into small groups to practise getting on the<br />
school bus <strong>and</strong> off again safely. Those sitting at their desk can build an<br />
egg carton bus or create posters showing a bus safety rule from the<br />
‘About School Safety’ bookmark. One group at a time will go with the<br />
educator to practise how to safety get on the bus <strong>and</strong> off again.<br />
• Once the class has practised getting on the bus <strong>and</strong> off again safely,<br />
distribute the ‘Practising the Letter S’ assignment, the ‘About School Bus<br />
Safety’ bookmark, <strong>and</strong> the ‘Bus Safety Rules’ brochure to take home to<br />
parents.<br />
Once the children have shown that they know how to get on the bus <strong>and</strong><br />
off again safely distribute the ‘School Bus Safety’ certificates.<br />
Additional Activities:<br />
Role Play - Create scenarios in which the students role-play one or more<br />
of the following situations (or they may choose to create one of their own).<br />
Scenario #1 – You are st<strong>and</strong>ing in a group with your friends, waiting for<br />
the bus. One of your friends starts running for the bus as soon as s/he<br />
sees it come around the corner. What would you do/say? Would you<br />
follow?<br />
Scenario #2 – You are boarding the bus <strong>and</strong> your best friend doesn’t<br />
use the h<strong>and</strong>rail to get on the bus. What would you do/say?<br />
Scenario #3 – You are riding on the bus <strong>and</strong> several of your friends keep<br />
sitting up on their knees to look out the window. What would you do?<br />
Would you do the same?<br />
• Design a PowerPoint Presentation that supports the scenarios presented in<br />
class or with photos of students in the class observing different kinds of<br />
school bus safety rules.<br />
20
• Educator <strong>and</strong> students may sing ‘The Wheels on the Bus’ creating their<br />
own version using topics they have learned or by using the words below.<br />
The wheels on the bus go round <strong>and</strong> round<br />
Round <strong>and</strong> round, round <strong>and</strong> round<br />
The wheels on the bus go round <strong>and</strong> round<br />
All through the town.<br />
The wipers on the bus go “Swish, swish, swish,<br />
Swish, swish, swish, swish, swish, swish”,<br />
The wipers on the bus go “Swish, Swish, Swish”<br />
All through the town.<br />
While waiting for the bus, I stay out of the DANGER ZONE, the<br />
DANGER ZONE, the DANGER ZONE<br />
While waiting for the bus, I stay out of the DANGER ZONE<br />
All through the town.<br />
When I get on the bus I hold the h<strong>and</strong> railing, the h<strong>and</strong> railing, the h<strong>and</strong><br />
railing.<br />
When I get on the bus I hold the h<strong>and</strong> railing<br />
All through the town.<br />
When I get on the bus I sit quietly, quietly, quietly,<br />
When I get on the bus sit quietly,<br />
All through the town.<br />
I wait for the bus to stop before I st<strong>and</strong> up, I st<strong>and</strong> up, I st<strong>and</strong> up<br />
I wait for the bus to stop before I st<strong>and</strong> up<br />
All through the town.<br />
I move away from the DANGER ZONE after leaving the bus, leaving<br />
the bus, leaving the bus.<br />
I move away from the DANGER ZONE after leaving the bus,<br />
All through the town.<br />
I listen to school bus drivers because, they’re in charge, they’re in<br />
charge,<br />
I listen to school bus drivers because, they’re in charge<br />
All through the town.<br />
Have the students write a small script in which they act out/present their<br />
scenario(s) to the class.<br />
• Create a School Bus using an egg carton.<br />
21
Materials: top of an egg carton, yellow paint, black marker, 2 plastic lids from<br />
juice or milk containers, magazines<br />
Create your own School Bus: Cut the lid off the egg carton <strong>and</strong> paint it<br />
yellow. Have the children cut people’s faces from magazines for gluing onto<br />
the egg carton lid (optional: they may draw these on their own). When the<br />
paint is dry, glue on the plastic lids (wheels), <strong>and</strong> the magazine cut outs.<br />
Photo courtesy www.dltk-kids.com<br />
• Design a poster/comic strip that goes with one of the scenarios presented in class;<br />
post it in the classroom or in the school or community newspaper.<br />
When booking a field trip, inquire into the possibility of booking the bus for an<br />
additional half hour before <strong>and</strong> after the field trip <strong>and</strong> discuss the ‘Danger<br />
Zone’ as well as the ‘About School Bus Safety’ bookmark for getting on the<br />
bus <strong>and</strong> off again safely.<br />
• Educator may order, free of charge, student workbooks entitled ‘Walk the<br />
Talk’ from Alberta Transportation (www.saferoads.com).<br />
Please note:<br />
Some of the resources contained in this ‘Walk <strong>and</strong> <strong>Ride</strong> Safely’ resource kit may not<br />
be suitable for all age groups. Please adapt accordingly.<br />
22
QUIZZES<br />
23
Get Me To The Other Side Safely<br />
Grade K & Grade 1 Quiz (oral quiz)<br />
1. Who should help you cross the street safely until you are at least nine years of<br />
age?<br />
______________________________________________________________<br />
______________________________________________________________<br />
2. You can begin crossing the street safely by yourself when you are ______ years<br />
of age or older.<br />
3. What should you do before you cross the street?<br />
______________________________________________________________<br />
______________________________________________________________<br />
______________________________________________________________<br />
______________________________________________________________<br />
______________________________________________________________<br />
Teacher’s Key:<br />
1. mom, dad, school patrol, older child, teacher, etc.<br />
2. 9 (nine)<br />
3. Answers should include:<br />
Have a responsible adult or child over 9 with me.<br />
St<strong>and</strong> at the corner (stop sign or yield sign) or at the crosswalk.<br />
Stop before stepping onto the street.<br />
POINT – in the direction in which you are crossing to show drivers you want to<br />
cross.<br />
PAUSE – Look left, right, <strong>and</strong> left again.<br />
Listen for traffic.<br />
Wait until there are no oncoming vehicles or all vehicles are stopped in either<br />
direction.<br />
Make eye contact with drivers so you know that they see you <strong>and</strong> they know that<br />
you see them.<br />
PROCEED – Carefully cross the street with arm extended (walk quickly but do<br />
not run), still looking left <strong>and</strong> right.<br />
24
Get Me To The Other Side Safely<br />
Grade 2 - 4 Quiz (may be oral quiz)<br />
1. Why is it unsafe for you to cross the road by yourself until you are at least<br />
nine years of age?<br />
______________________________________________________________<br />
______________________________________________________________<br />
______________________________________________________________<br />
2. List the 4 signs learned in this lesson that show a good place to cross the street.<br />
_____________________________________________________________<br />
_____________________________________________________________<br />
3. You can begin crossing the street safely by yourself when you are ______<br />
years of age or older.<br />
4. What should you do before you cross the street?<br />
_____________________________________________________________<br />
_____________________________________________________________<br />
_____________________________________________________________<br />
_____________________________________________________________<br />
Teacher’s Key:<br />
1. Answers may include:<br />
You can’t see out of the corner of your eye as well as adults can.<br />
It is still difficult at your age to know what direction that sounds are coming from (e.g. a<br />
siren) <strong>and</strong> you may turn the wrong way searching for that sound.<br />
You can’t judge how fast a vehicle is coming towards you or how far away a vehicle is.<br />
You may not have the patience to wait for a stoplight to change or for cars to stop at<br />
crosswalks, before you step out onto the road.<br />
2. Signs include: Stop, Pedestrian Crossing, Yield, Walk/Don’t<br />
3. 9 (nine)<br />
4. Answers should include:<br />
St<strong>and</strong> at the corner (stop sign or yield sign) or at the crosswalk.<br />
Stop before stepping onto the street.<br />
POINT – in the direction in which you are crossing to show drivers you want to cross.<br />
PAUSE – Look left, right, <strong>and</strong> left again.<br />
Listen for traffic.<br />
Wait until there are no oncoming vehicles or all vehicles are stopped in either direction.<br />
Make eye contact with drivers so you know that they see you <strong>and</strong> they know that you<br />
see them.<br />
PROCEED – Carefully cross the street with arm extended (walk quickly but do not run),<br />
still looking left <strong>and</strong> right.<br />
25
Get Me On The Bus And Off Again Safely<br />
Grade K & Grade 1 Quiz (oral quiz)<br />
1. How many giant steps should you take so that you are outside of the ‘Danger<br />
Zone’?<br />
______________________________________________________________<br />
______________________________________________________________<br />
2. What should you hold onto when you are climbing onto the bus?<br />
______________________________________________________________<br />
3. What rules should you follow when you are riding the bus?<br />
______________________________________________________________<br />
______________________________________________________________<br />
______________________________________________________________<br />
______________________________________________________________<br />
______________________________________________________________<br />
Teacher’s Key:<br />
1. 5 (five)<br />
2. H<strong>and</strong>rail<br />
3. Answers may include:<br />
Take your seat right away <strong>and</strong> stay seated until you leave the bus.<br />
Face forward <strong>and</strong> don’t throw things inside the bus or out the bus window.<br />
Talk quietly <strong>and</strong> keep your head <strong>and</strong> arms inside the bus.<br />
26
Get Me On The Bus And Off Again Safely<br />
Grade 2 - 4 Quiz (may be oral quiz)<br />
1. Where is the ‘Danger Zone’?<br />
______________________________________________________________<br />
______________________________________________________________<br />
______________________________________________________________<br />
2. How big is the ‘Danger Zone’?<br />
_____________________________________________________________<br />
_____________________________________________________________<br />
3. How many giant steps should you take in front of the bus before crossing the<br />
road? ________________________________________________________<br />
4. What should you do while you are riding the bus?<br />
_____________________________________________________________<br />
_____________________________________________________________<br />
_____________________________________________________________<br />
_____________________________________________________________<br />
Teacher’s Key:<br />
1. The ‘Danger Zone’ is the area on all sides of the bus where I am in the most danger of<br />
being hit.<br />
2. At least 3 m (10 feet) all around the bus.<br />
3. They should take five giant steps in front of the bus before crossing, so they can be<br />
seen by the driver.<br />
4. Answers should include:<br />
Face forward <strong>and</strong> don’t throw things inside the bus or out the bus window.<br />
Talk quietly <strong>and</strong> keep your head <strong>and</strong> arms inside the bus.<br />
Wait until the bus stops before st<strong>and</strong>ing.<br />
27
STUDENT INFORMATION<br />
28
Date<br />
Student Pedestrian Safety Journal<br />
Did we cross at Did we follow<br />
Who helped<br />
a crosswalk or the safety tips<br />
me cross the<br />
pedestrian on the back of<br />
street today?<br />
crossing? this sheet?<br />
What do I still need<br />
to work on?<br />
Remember to:<br />
POINT, PAUSE, & PROCEED!<br />
29
Student Pedestrian Safety Journal - Notes to Parent(s)/Guardian(s)<br />
Did you know…in Canada, children five to nine years old remain at high risk for<br />
pedestrian injuries; in fact, it is the leading cause of injury <strong>and</strong> death for this age<br />
group. At this age, their judgment <strong>and</strong> perceptual skills are still immature, yet<br />
they often eagerly try to cross streets on their own in order to demonstrate some<br />
independence.<br />
What can be done?<br />
Children under nine years of age should be accompanied by a responsible adult<br />
or child over 9 years of age whenever they cross the street.<br />
…information provided by Safe Kids Canada - www.safekidscanada.ca<br />
Safety Tips to help you ‘get them to the other side … safely.’<br />
Cross only at pedestrian crosswalks or at corners.<br />
• Stop before stepping onto the street.<br />
• POINT – in the direction in which you are crossing to show drivers you<br />
want to cross.<br />
PAUSE – Look left, right, <strong>and</strong> left again.<br />
• Listen for traffic.<br />
• Wait until there are no oncoming vehicles or all vehicles are stopped in<br />
either direction.<br />
Make eye contact with drivers so you know that they see you <strong>and</strong> they<br />
know that you see them.<br />
• PROCEED – Carefully cross the street with arm extended (walk quickly<br />
but do not run), still looking left <strong>and</strong> right.<br />
Other important stuff…<br />
Pedestrians must stop at driveways, alleys, <strong>and</strong> areas without curbs.<br />
• Remind children to never run out on to the street (chasing a ball, a pet,<br />
etc.)<br />
• Teach children about the dangers of crossing the street between parked<br />
cars (decreased visibility).<br />
Pedestrians should walk on the sidewalk. In areas without sidewalks,<br />
pedestrians should walk facing traffic.<br />
• Pedestrians should wear bright colours <strong>and</strong>/or reflective clothing to ensure<br />
drivers see them well.<br />
30
‘Kidsafe Connection Child Pedestrian Safety’ fact sheet (front)<br />
To download this document, visit www.capitalhealth.ca/kidsafe under ‘fact sheets’.<br />
31
‘Kidsafe Connection Child Pedestrian Safety’ fact sheet (back)<br />
To download this document, visit www.capitalhealth.ca/kidsafe under ‘fact sheets’.<br />
32
‘Safe Kids Canada Pedestrian Safety – Safety Tips’ info sheet<br />
To download this document, visit www.safekidscanada.ca under ‘pedestrian’.<br />
33
‘Pedestrian Safety’ certificate<br />
Today I learned how to cross the road … safely.<br />
Dear Parent(s)/Guardian(s),<br />
Did you know … if I am less than 9 years of age I should<br />
be crossing the street with an adult or responsible older<br />
child?<br />
Thanks for keeping me safe.<br />
Student<br />
Teacher<br />
34
School Bus Picture<br />
35
The ‘Danger Zone’<br />
The ‘Danger Zone’ is the area on all sides of the bus where children<br />
are in the most danger of being hit.<br />
Children should stay at least three metres (ten feet) away from the bus<br />
<strong>and</strong> never go behind it. They should take five giant steps in front of the<br />
bus before crossing, so they can be seen by the driver.<br />
Information provided by The National Highway Traffic Safety Administration<br />
36
‘Practicing the Letter ‘S’<br />
School Bus<br />
s------------------------------------------------------------------------------<br />
S<br />
-------------------------------------------------------------------------------<br />
Did you know … young children are most likely to be hit by a school bus because they:<br />
• hurry to get on or off the bus,<br />
• act before they think <strong>and</strong> have little experience with traffic,<br />
• assume motorists will see them <strong>and</strong> will wait for them to cross,<br />
• don't always stay within the bus driver's sight, or<br />
• drop something as they get off the bus <strong>and</strong> run into the path of the bus to pick it up?<br />
www.nhtsa.dot.gov<br />
Parent/Guardian Signature<br />
37
‘Bus Safety Rules’ brochure (outside view)<br />
To order copies of this brochure, visit www.saferoads.com – Contact Us<br />
38
‘Bus Safety Rules’ brochure (inside view)<br />
To order copies of this brochure, visit www.saferoads.com – Contact Us<br />
39
‘About School Bus<br />
Safety’ bookmark<br />
(front)<br />
To order copies of this bookmark,<br />
visit www.saferoads.com – Contact Us<br />
40
‘About School Bus<br />
Safety’ bookmark<br />
(back)<br />
To order copies of this bookmark,<br />
visit www.saferoads.com – Contact Us<br />
41
‘School Bus Safety’ certificate<br />
Today I learned how to get on the school bus<br />
<strong>and</strong> off again … safely.<br />
Dear Parent(s)/Guardian(s),<br />
Did you know … the greatest danger related to school<br />
buses is when children are outside, not inside, the bus?<br />
Thanks for keeping me safe.<br />
Student<br />
Teacher<br />
42
Information Sources<br />
Some of the information in this manual originated with or was adapted from the<br />
following organizations:<br />
Alberta <strong>Health</strong> Services<br />
Alberta Transportation<br />
National Highway Traffic Safety Administration<br />
Safe Kids Canada<br />
For more information visit<br />
www.capitalhealth.ca/kidsafe or<br />
e-mail kidsafe@capitalhealth.ca<br />
Printed December 2008<br />
43