RTiPanel Setup Guide - Pilote Films
RTiPanel Setup Guide - Pilote Films
RTiPanel Setup Guide - Pilote Films

Create successful ePaper yourself
Turn your PDF publications into a flip-book with our unique Google optimized e-Paper software.
v. 20110815<br />
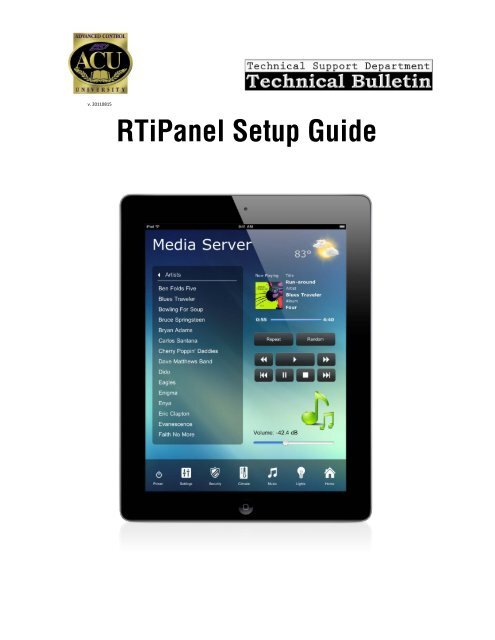
<strong>RTiPanel</strong> <strong>Setup</strong> <strong>Guide</strong>
Table of Contents<br />
<strong>RTiPanel</strong> Overview and Requirements .......................................................................................................................... 3<br />
Software Requirements: ........................................................................................................................................... 3<br />
Hardware Requirements: .......................................................................................................................................... 3<br />
Network Requirements: ............................................................................................................................................ 3<br />
Licensing Requirements: ........................................................................................................................................... 3<br />
Basic Integration Designer Programming ...................................................................................................................... 4<br />
Adding an <strong>RTiPanel</strong> Device to System ....................................................................................................................... 4<br />
Adding <strong>RTiPanel</strong> Licenses to System ......................................................................................................................... 4<br />
Configuring ® iPad ® , iPhone ® or iPod touch ® Device ........................................................................................................ 5<br />
Re-Configuring Device ............................................................................................................................................... 6<br />
Advanced Integration Designer Programming .............................................................................................................. 6<br />
Gauge Drawing Tool .................................................................................................................. 6<br />
Slider Drawing Tool ................................................................................................................ 6<br />
Toggle Button Drawing Tool ................................................................................................... 6<br />
One-Way List Drawing Tool ................................................................................................... 7<br />
Two-Way List Drawing Tool .................................................................................................... 7<br />
<strong>RTiPanel</strong> Password .................................................................................................................................................... 8<br />
Locking Orientation ................................................................................................................................................... 8<br />
Changing Orientation View ....................................................................................................................................... 8<br />
Hiding Buttons for an Orientation ............................................................................................................................. 9<br />
Remote Access <strong>Setup</strong> .................................................................................................................................................... 9<br />
Dynamic Name Service .............................................................................................................................................. 9<br />
Setting up DynDns Account .................................................................................................................................. 9<br />
Setting up DnyDns on Router ................................................................................................................................ 9<br />
Network Router <strong>Setup</strong> (Port Forwarding) ................................................................................................................. 9<br />
Integration Designer <strong>Setup</strong> ....................................................................................................................................... 9<br />
Setting External Hostname ................................................................................................................................. 10<br />
Setting External Gateway .................................................................................................................................... 10
<strong>RTiPanel</strong> Overview and Requirements<br />
<strong>RTiPanel</strong> is an iOS application that is designed to run on iPad and iPhone devices. This application communicates<br />
with RTI’s XP series control processors to provide full control of your RTI system right from your iPad or iPhone.<br />
The <strong>RTiPanel</strong> application is designed to run on LAN and WAN networks giving full control and two-way feedback<br />
from anywhere in the world. A license is required for every Apple device in order to communicate. Licenses may<br />
be purchased from the RTI online store, or by contacting your local distributor.<br />
Software Requirements:<br />
• Integration Designer programming software version 8.2 or higher<br />
• Any version of XP-3 processor firmware.<br />
• Firmware 1.1 or higher for the XP-6 control processor<br />
• Firmware 3.0 or higher for the XP-8 control processor<br />
Hardware Requirements:<br />
• The <strong>RTiPanel</strong> for Apple ® devices is programmed on a PC based computer running Windows XP or<br />
higher<br />
• Apple ® iPad ® , iPhone ® and iPod touch ® device<br />
• RTI XP3, XP6, or XP8 control processor<br />
• When using an XP8 processor, you must install an SD card into the front on the XP8. The SD card<br />
provides additional file space needed to store <strong>RTiPanel</strong> data files.<br />
Network Requirements:<br />
• Local Apple ® devices must be connected to the same Ethernet network as the XP series control processor.<br />
• Apple ® devices requiring remote access must have an Internet connection.<br />
• Use of the <strong>RTiPanel</strong> from a remote location requires Internet access for the XP series processor with a<br />
static IP address from the Internet Service Provider (ISP). If a static IP address is not possible, then a<br />
dynamic DNS service will need to be used. (See the Remote Access section for details.)<br />
Licensing Requirements:<br />
• A license is required for each ® iPad ® , iPhone ® or iPod touch ® device.<br />
-In the event that a customer replaces an Apple® device, rebooting the XP processor will “free”<br />
up the license being used by the old device. When <strong>RTiPanel</strong> is installed and connected to the XP<br />
processor, the license will have been transferred to the new Apple® product.<br />
Note: Systems in which communication with multiple XP processors is required<br />
(on the same network), a single <strong>RTiPanel</strong> license communicating with a “main”<br />
XP processor is all that is required. When programming in ID, go to the Device<br />
Properties of the Apple® device and select “Output” verify that the Default<br />
System is set to the XP processor containing the <strong>RTiPanel</strong> license. Click OK. As<br />
with native RTI control devices, alternate processor communication can be<br />
selected for individual buttons (Button Properties, Output tab). The “main” XP<br />
processor will receive commands and will transfer communications via<br />
Ethernet to other XP processors on the network as required. In the event that<br />
communication with multiple XP processors on a single button press is<br />
required, use of the “System Macro Triggers” Driver Utility can initiate a serial<br />
command to be sent from the main processor to a secondary XP processor to<br />
initiate a System Macro.<br />
• Licenses may be purchased online at http://www.rticorp.com/dealers/rtipanel_dealer.html, or by<br />
contacting your local RTI distributor.
Basic Integration Designer Programming<br />
Creating a system that includes an <strong>RTiPanel</strong> device starts with a system file containing an XP series processor.<br />
From there, you simply add the Apple device like you would any other RTI device. Next, add an <strong>RTiPanel</strong> license<br />
and your ready to connect.<br />
Adding an <strong>RTiPanel</strong> Device to System<br />
From the ‘Device’ menu select ‘Add New’. In the ‘Add New’ dialog box, find the ‘Virtual Controls’ section. Choose<br />
the Apple device you wish to add to the file.<br />
Adding <strong>RTiPanel</strong> Licenses to System<br />
From the ‘File’ menu select ‘System Properties’. Go to the ‘iOS/Virtual Panel’ tab. Find the ‘Licenses’ section.<br />
Press the ‘Add’ button to add your license file.
Configuring ® iPad ® , iPhone ® or iPod touch ® Device<br />
Configuring your Apple device is quick and easy. Start by downloading the <strong>RTiPanel</strong> app from the iTunes app store.<br />
When you start the application you will see a screen with two buttons. Choose the ‘Get Started’ button.<br />
The next screen will show a list of RTI XP processors that are on the LAN and are<br />
available to connect to. If you are configuring remotely, you can add the DNS<br />
hostname directly by selecting the ‘+’ button in the upper-right corner of the<br />
screen.<br />
Once a server has been selected, it will provide a list of devices compatible with<br />
the hardware running the <strong>RTiPanel</strong> app. If the <strong>RTiPanel</strong> is running on an iPhone4<br />
device, the list will show both iPhone and iPhone4 devices.<br />
Finally, select the desired device. The configuration<br />
will be downloaded to the device and the device will<br />
be “configured”. The <strong>RTiPanel</strong> app will check-in with<br />
the server after each connection is made to determine<br />
if a new configuration is available. If a new<br />
configuration is available, it will be downloaded<br />
automatically by the <strong>RTiPanel</strong> app.
Reconfiguring Device<br />
In the event that the <strong>RTiPanel</strong> needs to connect to a different server, the<br />
configuration can be reset. Resetting the configuration will cause the <strong>RTiPanel</strong> to<br />
return to the “Welcome” screen, allowing you to go through the configuration<br />
steps again. The “Reconfigure” option automatically resets itself to “Off” when<br />
you go back to the <strong>RTiPanel</strong> app. A customer who has XP processors in multiple<br />
homes and wishes to switch the system being controlled would use the<br />
reconfigure setting to change the XP processor being communicated with.<br />
Advanced Integration Designer Programming<br />
There are several features that are unique to Apple® device programming. These programming tools will appear in<br />
the bottom left tool pallet within the Integration Designer programming software only when programming an<br />
Apple® device.<br />
Gauge Drawing Tool<br />
To add a gauge object to a page, select the gauge drawing tool in the lower-left corner of the Integration Designer<br />
window. Now select the ‘Draw Button’ tool. Draw the gauge on the page to the desired size. The orientation of<br />
the gauge will change depending on the size of the button. To make the gauge orientation bottom-to-top, simply<br />
draw the button tall and skinny. Gauge objects are for feedback only. You cannot place a command onto the<br />
gauge object.<br />
Slider Drawing Tool<br />
To add a slider object to a page, select the slider drawing tool in the lower-left corner of the Integration Designer<br />
window. Now select the ‘Draw Button’ tool. Draw the slider on the page to the desired size. The orientation of<br />
the slider will change depending on the size of the button. To make the slider orientation bottom-to-top, simply<br />
draw the button tall and skinny. Once the slider has been created, driver commands and feedback variables can be<br />
assigned.<br />
Toggle Button Drawing Tool<br />
To add a Toggle Button object to a page, select the switch object drawing tool in the lower-left corner of the<br />
Integration Designer window. Now select the ‘Draw Button’ tool. Note that while the actual button can be drawn<br />
to the desired size, the toggle button graphic itself is a fixed size. Once the toggle button has been created, driver<br />
commands and feedback variables can be assigned.
One-Way List Drawing Tool<br />
To add a One-Way List object to a page, select the static list object drawing tool in the lower-left corner of the<br />
Integration Designer window. Now select the ‘Draw Button’ tool. Draw the one-way list object on the page to the<br />
desired size. A one-way list can then be populated by right clicking on the scrolling list object and selecting “Edit<br />
Scrolling List”. A programming menu similar to the illustration below will appear and allow for the creation of<br />
macro commands to be executed when an item from the list is selected. Button Text and bitmap fields are also<br />
available for customization of the scrolling list. One-way scrolling lists can be an ideal interface for control<br />
requirements that would otherwise require many fixed buttons (ex: favorite music or tv stations, surround modes<br />
from an A/V receiver).<br />
Two-Way List Drawing Tool<br />
To add a Two Way List object to a page, select the static list object drawing tool in the lower-left corner of the<br />
Integration Designer window. Now select the ‘Scrolling List Object’ tool. Draw the two-way list object on the page<br />
to the desired size. Once created, driver commands and item list feedback variables can be assigned to the list for<br />
two-way communication with compatible desired equipment. Additionally, the button text properties (text size,<br />
font, alignment) can be adjusted by right clicking on the two-way list button, and selecting “Edit Properties”.<br />
Note: Two-way lists are programmed differently on iOS devices<br />
compared to native RTI controllers. This is due to the fact that<br />
<strong>RTiPanel</strong> is exposing some of the native capabilities of the iOS<br />
scrolling lists. There is no need to account for a progress bar, or<br />
Scroll/Page up or down commands on iOS devices. The progress<br />
indicator is built into the iOS list, and swiping allows for quick,<br />
intuitive navigation through the contents of the list.
<strong>RTiPanel</strong> Password<br />
<strong>RTiPanel</strong> can provide secure access via the “Security” tab of the Device<br />
Properties for each Apple® device. When <strong>RTiPanel</strong> application is open<br />
and the password option has been enabled, a prompt will ask for the<br />
password entry before the user interface is presented. Note that the<br />
password prompt will only be initiated upon starting of the <strong>RTiPanel</strong><br />
application. If the <strong>RTiPanel</strong> has been opened and is running in the<br />
background of iOS, a “new” prompt will not be required when the user<br />
chooses to use the <strong>RTiPanel</strong> application. In the event that secure<br />
access to the control interface is important, the user should completely<br />
close <strong>RTiPanel</strong> in iOS after each use (i.e. <strong>RTiPanel</strong> should not be still<br />
running in the background).<br />
Locking Orientation<br />
<strong>RTiPanel</strong> supports unique GUI layout for both Portrait and Landscape<br />
mode on Apple® devices. Both Portrait and Landscape mode are enabled<br />
by default on each Apple® device. The GUI for each orientations must be<br />
programmed when both modes are enabled, which in general will require<br />
additional programming time. If a fixed graphics orientation is preferred,<br />
right click on the Apple® device in the System Workspace of Integration<br />
Designer, and select “Edit Properties”. From the General tab, select the<br />
preferred orientation. Once selected, only the desired orientation needs<br />
to be customized in Integration Designer.<br />
Changing View of Orientation<br />
When using both orientations (landscape and portrait) on an Apple®<br />
device, the programmer can alternate easily between both views, either by<br />
selecting from the Device Menu in the upper left corner of Integration<br />
Designer, or by using the shortcut “Ctrl + Q”.
Hiding Buttons for an Orientation<br />
When auto-rotation is enabled for the Apple® device, each button will be<br />
visible in both Portrait and Landscape mode by default. If a button should<br />
only be visible in one orientation, right click on the button, and select “Edit<br />
Properties”. From the General tab, uncheck the view in which the button<br />
should NOT appear.<br />
Video/ Dynamic Images<br />
<strong>RTiPanel</strong> version 1.0 supports streaming MJPEG images as well as Dynamic Images (ex: Cover Art) while on LAN<br />
connection. WAN or 3G video/image tunneling is not currently supported.<br />
Remote Access <strong>Setup</strong><br />
Dynamic Name Service<br />
The first step when setting up remote access is to create a Dynamic Name Service (DNS) account with a DNS server<br />
like DynDns.com. When setting up your DNS account you will receive a DNS hostname. This hostname is what you<br />
will use when setting up the <strong>RTiPanel</strong> in Integration Designer.<br />
Setting up DynDns Account<br />
Go to the DynDns website (http://dyn.com) . Navigate to the account setup page and create a new account. Enter<br />
the IP address found on your router. This IP address is the external address given to the router by the ISP. This IP<br />
address will be updated automatically by your router.<br />
Setting up DnyDns on Router<br />
Once you have setup a DynDns account, you must provide your router with the new account information. In your<br />
router setup, navigate to the DNS setup page. You may see a list of supported DNS services. Choose ‘DynDns’.<br />
Then enter the username and password information. The router will log into your DynDns account whenever the<br />
IP address changes.<br />
Network Router <strong>Setup</strong> (Port Forwarding)<br />
The next step is to setup the port forwarding entry in your router. Logon to your router using a web browser and<br />
look for the ‘port forwarding’ setup. The router must be configured to forward packets from port 4110 to the<br />
gateway XP processor. A typical port forward configuration entry would look like this:<br />
Application: <strong>RTiPanel</strong><br />
Port: 4110<br />
Destination: 192.168.1.200 (IP address of gateway XP processor)<br />
Integration Designer <strong>Setup</strong><br />
The last step is to enter the DNS hostname into your Integration Designer system file.
Setting External Hostname<br />
Under the ‘File’ menu choose ‘System Properties’. On the iOS/Virtual Panel tab, find the ‘Remote Access’ section.<br />
Enter the hostname provided by your DNS account. You can also enter the IP address directly but we do not<br />
recommend that.<br />
Setting External Gateway<br />
If you have more than one XP series processor in your file, you can<br />
designate which processor will act as the gateway for iOS<br />
communications. Remember that the <strong>RTiPanel</strong> licenses are tied to a<br />
particular processor and changing this setting will require new licenses.