Installation Instructions - Rampage Products
Installation Instructions - Rampage Products
Installation Instructions - Rampage Products

You also want an ePaper? Increase the reach of your titles
YUMPU automatically turns print PDFs into web optimized ePapers that Google loves.
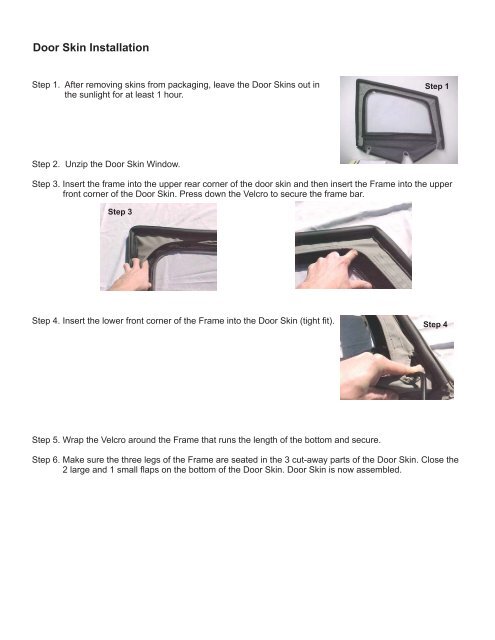
Door Skin <strong>Installation</strong><br />
Step 1. After removing skins from packaging, leave the Door Skins out in<br />
the sunlight for at least 1 hour.<br />
Step 1<br />
Step 2. Unzip the Door Skin Window.<br />
Step 3. Insert the frame into the upper rear corner of the door skin and then insert the Frame into the upper<br />
front corner of the Door Skin. Press down the Velcro to secure the frame bar.<br />
Step 3<br />
Step 4. Insert the lower front corner of the Frame into the Door Skin (tight fit).<br />
Step 4<br />
Step 5. Wrap the Velcro around the Frame that runs the length of the bottom and secure.<br />
Step 6. Make sure the three legs of the Frame are seated in the 3 cut-away parts of the Door Skin. Close the<br />
2 large and 1 small flaps on the bottom of the Door Skin. Door Skin is now assembled.