Issue 4, Spring 2012 - Riverland Community College
Issue 4, Spring 2012 - Riverland Community College
Issue 4, Spring 2012 - Riverland Community College

Create successful ePaper yourself
Turn your PDF publications into a flip-book with our unique Google optimized e-Paper software.
Fabricating a Master Key<br />
We decided to remove a door lock, take it home, take it apart, and fashion a master key. So, following the<br />
instruction sheet from the box, we removed a door lock. We didn't think it would be that noticeable since some<br />
doors still needed locks installed. Anyway, we would bring the lock back as soon as we were finished with it.<br />
We took the lock to a basement workshop in one participant’s home. We were careful in setting up the workbench<br />
because we knew the pins in the lock had to be maintained in their original order if the lock were to be usable after we<br />
were finished. It was also important that the key we were making would work in the other locks at the college. We used<br />
a small notebook to record the order of the pin holes and pin lengths as each was extracted. Loops of masking tape,<br />
adhesive side up, kept the pins in order, one strip for each pin hole.<br />
We removed the lock cylinder from the external knob and carefully moved a metal slide covering the pin holes just<br />
enough to reveal the first hole. The spring was now visible and was removed. The pins had to be retrieved in their correct<br />
order, so we tipped the cylinder sideways just enough so that the top-most pin came out. We measured the pin with a<br />
micrometer, recorded its length in the notebook, and then added it to the strip of masking tape. By recording the pin's<br />
length, we could still put the lock back together correctly even if we accidentally dropped several. We continued in that<br />
fashion until all pins were removed.<br />
While removing the pins from the sixth hole, we encountered something unexpected. After the first couple of pins, three<br />
tiny ball bearings fell out. We didn't know what they were for and set them aside for the time being. All we knew was<br />
they had to go back in the same pin hole they came out of and in the same order. At this point in time, we didn't fully<br />
understand all the features of the lock which I will explain later.<br />
Each pin hole had a spring on top, one or more ordinary pins in the middle, and a key pin with a conically shaped nose<br />
on the bottom that fell into the key slots. We knew that a master key meant some or all of the slots had multiple pins,<br />
which also meant there was more than one break line for the pins: an individual key break line and a master key break<br />
line. By “break line,” I mean a separation between pins in each hole that aligns with the interface between the inner and<br />
outer cylinder such that no pin prevents the inner cylinder, called the “plug,” from turning.<br />
We had purchased key blanks for that make and model from the Sterling Benjamin Franklin. We inserted a blank key<br />
into the inner cylinder, inserted a small punch into the pin hole, and tapped it lightly with a small hammer. This made a<br />
small indentation on the key blank indicating where the key slots were centered. The key was removed and the first slot<br />
filed until the top of the key pin was level with the top of the plug. We added another pin and continued to file the slot<br />
until the master key break was even with the top of the plug.<br />
We proceeded in this fashion until the first four key slots were complete. There were additional pins (plus ball bearings)<br />
in the fifth and sixth pin holes. That meant there were additional break lines for those holes, which meant there were<br />
several possible configurations for the master key.<br />
We proceeded to make one of the master key configurations by filing the fifth and sixth key slot. After each filing, we<br />
went back to the college to test it. There was no way we could determine the correct configuration from the single lock<br />
we had. We didn't need to go inside. Any outside door would work for the test. The first attempt failed. However, the<br />
second succeeded! We put the lock back together, went back to the college, and used our new master key to get in<br />
through an external door. We re-installed the lock on the door from which we had removed it and left. Participant 2, who<br />
was mechanically inclined and had access to metal working tools, fashioned a tool that opened the utility tunnel doors<br />
from the classroom side.<br />
So now we had a master key which could open any door to the building. What to do with it? Best to do nothing at all<br />
until an unusual situation presents itself. Participant 2 had graduated from Austin State Junior <strong>College</strong> the prior spring<br />
and was off to the University of Minnesota in the fall.<br />
Fall quarter began, the first in the brand new building. It was a wonderful facility after the years on third floor of the high<br />
school.<br />
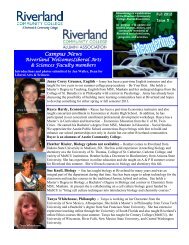
Chemistry instructor Rex Sala recalls . . .<br />
“When I joined the faculty in September of 1965, Austin Junior <strong>College</strong> was a very nice, two-year liberal arts<br />
college whose students, for the most part, transferred to other four-year colleges and universities. Our students<br />
generally increased their grade-point averages upon transfer due to the rigor of our curriculum. The college<br />
offered a secretarial program that was the only vocational program we had at that time. We also provided the<br />
college courses needed by the Albert Lea three-year Registered Nursing program. A few business courses were<br />
offered in connection with a DECA program, but no specific two-year degree. The vast majority of the<br />
curriculum was standard liberal arts courses. The college was in the throes of being taken over (purchased) by<br />
the state of Minnesota. (The state had made a commitment that there should be an institution of higher<br />
education within thirty-five miles (commuting distance) of every student in the state.<br />
“Prank” continued on Page 7<br />
Page 6