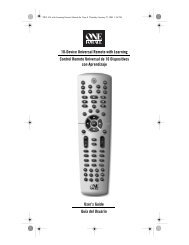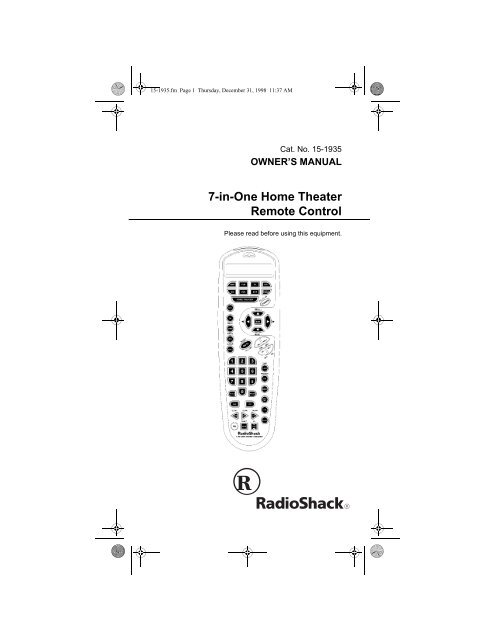
7-in-One Home Theater Remote Control - Radio Shack
7-in-One Home Theater Remote Control - Radio Shack
7-in-One Home Theater Remote Control - Radio Shack

Create successful ePaper yourself
Turn your PDF publications into a flip-book with our unique Google optimized e-Paper software.
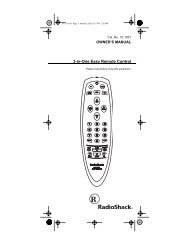
15-1935.fm Page 1 Thursday, December 31, 1998 11:37 AM<br />
Cat. No. 15-1935<br />
OWNER’S MANUAL<br />
7-<strong>in</strong>-<strong>One</strong> <strong>Home</strong> <strong>Theater</strong><br />
<strong>Remote</strong> <strong>Control</strong><br />
Please read before us<strong>in</strong>g this equipment.
15-1935.fm Page 2 Thursday, December 31, 1998 11:37 AM<br />
INTRODUCTION<br />
Your <strong>Radio</strong><strong>Shack</strong> 7-<strong>in</strong>-<strong>One</strong> <strong>Home</strong> <strong>Theater</strong> <strong>Remote</strong><br />
<strong>Control</strong> can replace up to seven <strong>in</strong>frared remote controls.<br />
You can use it to control your TV, VCR, cable converter,<br />
satellite receiver, CD player, tuner, phonograph,<br />
video accessory, digital audio tape, cassette, or laser<br />
disc player.<br />
Unlike some universal remote controls, this remote control<br />
is preprogrammed with the most commonly used<br />
commands and does not have to learn its commands<br />
from the orig<strong>in</strong>al remote controls. All you have to do is<br />
tell it which device’s remote controls you want to replace<br />
(by enter<strong>in</strong>g 3-digit codes).<br />
This manual <strong>in</strong>cludes a list of many manufacturers’ 3-<br />
digit codes for your devices. Or, you can call the toll-free<br />
number at the bottom of every page for assistance.<br />
The 7-<strong>in</strong>-<strong>One</strong> transmits both <strong>in</strong>frared (IR) and radio frequency<br />
(RF) signals, so you don’t need to be with<strong>in</strong><br />
“l<strong>in</strong>e-of-sight” to control devices. With the supplied IR/<br />
RF Command Center, you can use the remote to control<br />
devices <strong>in</strong> any room of your home.<br />
© 1998 Tandy Corporation.<br />
All Rights Reserved.<br />
<strong>Radio</strong><strong>Shack</strong> and Plug ’n Power are registered trademarks<br />
used by Tandy Corporation.<br />
X-10 is a registered trademark of X-10 (USA) Inc.<br />
2<br />
Need help? Call 1-800-763-9232
15-1935.fm Page 3 Thursday, December 31, 1998 11:37 AM<br />
CONTENTS<br />
Preparation ........................................................................ 4<br />
Install<strong>in</strong>g Batteries ........................................................ 4<br />
Sett<strong>in</strong>g the Clock .......................................................... 5<br />
Quick Setup ....................................................................... 6<br />
A Look at Your <strong>Remote</strong> .................................................... 8<br />
Sett<strong>in</strong>g Up the <strong>Remote</strong> ................................................... 12<br />
To Operate Your TV .................................................... 12<br />
To Operate Your VCR or TV/VCR Comb<strong>in</strong>ation ......... 16<br />
To Operate Your Cable Converter .............................. 21<br />
To Operate Your Satellite Receiver ............................. 24<br />
To Operate Your CD Player ........................................ 26<br />
To Operate Your Tuner/Receiver ................................ 29<br />
To Operate Your Amplifier ........................................... 31<br />
To Operate Other Devices .......................................... 33<br />
Special Features ............................................................. 37<br />
Search<strong>in</strong>g for a Code .................................................. 37<br />
Us<strong>in</strong>g the Sleep Function ........................................... 38<br />
Convert<strong>in</strong>g Device Keys ............................................. 39<br />
Volume Lock ............................................................... 40<br />
Us<strong>in</strong>g the Macro Keys ................................................ 41<br />
Sett<strong>in</strong>g Up Timed Sequences ..................................... 42<br />
Sett<strong>in</strong>g Up the <strong>Home</strong> <strong>Theater</strong> Key .............................. 44<br />
Clear All ...................................................................... 45<br />
Us<strong>in</strong>g the IR/RF Command Center ............................. 46<br />
Troubleshoot<strong>in</strong>g .............................................................. 49<br />
Need help? Call 1-800-763-9232<br />
3
15-1935.fm Page 4 Thursday, December 31, 1998 11:37 AM<br />
PREPARATION<br />
INSTALLING BATTERIES<br />
Your 7-<strong>in</strong>-<strong>One</strong> requires four AAA alkal<strong>in</strong>e batteries (not<br />
supplied), available at your local <strong>Radio</strong><strong>Shack</strong> store.<br />
Cautions:<br />
• Use only fresh batteries of the required size and<br />
recommended type.<br />
• Do not mix old and new batteries, different types of<br />
batteries (standard, alkal<strong>in</strong>e, or rechargeable), or<br />
rechargeable batteries of different capacities.<br />
To <strong>in</strong>stall the batteries:<br />
1. Press down on the battery compartment cover and<br />
slide the cover off.<br />
2. Place the batteries <strong>in</strong> the compartment, match<strong>in</strong>g<br />
the polarity marks (+ and –) <strong>in</strong>side.<br />
3. Replace the cover.<br />
If the batteries are <strong>in</strong>stalled correctly and the red <strong>in</strong>dicator<br />
does not light when you press POWER, replace the<br />
batteries.<br />
Cautions:<br />
• Dispose of old batteries promptly and properly. Do<br />
not burn or bury them.<br />
• Always remove old or weak batteries. Batteries can<br />
leak chemicals that can destroy electronic parts.<br />
Notes:<br />
• After you <strong>in</strong>stall batteries, the remote performs a<br />
test of the display for 10 seconds or until you press<br />
a key.<br />
4<br />
Need help? Call 1-800-763-9232
15-1935.fm Page 5 Thursday, December 31, 1998 11:37 AM<br />
• To extend battery life, the display turns off after 10<br />
seconds of keypad <strong>in</strong>activity and turns on aga<strong>in</strong><br />
when you press any key.<br />
• Device codes you have programmed <strong>in</strong>to the 7-<strong>in</strong>-<br />
<strong>One</strong> rema<strong>in</strong> stored <strong>in</strong> memory while you replace<br />
the batteries. However, you must reset the clock.<br />
SETTING THE CLOCK<br />
Follow these steps to set the clock on the 7-<strong>in</strong>-<strong>One</strong>’s display.<br />
1. Hold down SETUP until TIMED SEQ. appears.<br />
2. Press MENU twice. CONFIGURE appears.<br />
3. Press SELECT. THEATR SEL appears.<br />
4. Press MENU aga<strong>in</strong>.<br />
5. Press SELECT. TIME appears and the first digit <strong>in</strong><br />
the time flashes. Enter the time <strong>in</strong> 12-hour format.<br />
AM/PM flashes.<br />
6. If necessary, press MENU to toggle between AM<br />
and PM, then press SELECT. The day of the week<br />
display appears.<br />
7. Use MENU and to toggle through the days of<br />
the week until the current day appears, then press<br />
SELECT. The currently selected device and the correct<br />
time appear.<br />
Need help? Call 1-800-763-9232<br />
5
15-1935.fm Page 6 Thursday, December 31, 1998 11:37 AM<br />
QUICK SETUP<br />
The steps <strong>in</strong> this section tell you how to quickly set up<br />
the 7-<strong>in</strong>-<strong>One</strong> to operate all of your devices.<br />
To set up devices <strong>in</strong>dividually, or add a device after you<br />
have set up the 7-<strong>in</strong>-<strong>One</strong>, see the appropriate section<br />
under “Sett<strong>in</strong>g Up the <strong>Remote</strong>.”<br />
Note: For the best operation, you should be with<strong>in</strong> 15<br />
feet of the device you want to control.<br />
Follow these steps for quick setup.<br />
1. Turn on all of the devices you are sett<strong>in</strong>g up.<br />
2. Press TV.<br />
3. Hold down SETUP until TIMED SEQ appears.<br />
4. Press MENU . CODE SETUP appears.<br />
5. Press SELECT. DEV SET UP appears.<br />
6. Press SELECT aga<strong>in</strong>. TV appears.<br />
7. Enter the first three-digit TV code listed for your<br />
TV’s brand <strong>in</strong> “Setup Codes for TVs” on Page 12,<br />
then press SELECT.<br />
8. Po<strong>in</strong>t the remote at your TV and press POWER.<br />
Your TV should turn off. If it does not, enter the next<br />
code from the list and press SELECT then POWER<br />
aga<strong>in</strong>. When your TV turns off, press VCR. VCR<br />
appears.<br />
9. Enter the first three-digit VCR code listed for your<br />
VCR’s brand <strong>in</strong> “Setup Codes for VCRs” on<br />
Page 16 or “Setup Codes for TV/VCR Combos” on<br />
Page 19, then press SELECT.<br />
6<br />
Need help? Call 1-800-763-9232
15-1935.fm Page 7 Thursday, December 31, 1998 11:37 AM<br />
10. Po<strong>in</strong>t the remote at your VCR and press POWER.<br />
Your VCR should turn off. If it does not, enter the<br />
next code from the list and press SELECT then<br />
POWER aga<strong>in</strong>. When your VCR turns off, press<br />
CBL. CABLE appears.<br />
11. Cont<strong>in</strong>ue sett<strong>in</strong>g up devices by press<strong>in</strong>g the appropriate<br />
device key, enter<strong>in</strong>g your device’s code and<br />
press<strong>in</strong>g SELECT. Refer to the code list for the type<br />
of device you want to set up:<br />
Setup Codes for Page<br />
Amplifiers 32<br />
Cable Converters 22<br />
Cassette Players 34<br />
CD Players 26<br />
DAT Players 34<br />
Satellite Receivers 24<br />
DVD Players 34<br />
<strong>Home</strong> Automation 35<br />
Laser Disc Players 35<br />
Miscellaneous Audio 35<br />
Phonographs 36<br />
Tuners/Receivers 29<br />
12. Once the 7-<strong>in</strong>-<strong>One</strong> is operat<strong>in</strong>g all of your devices,<br />
press ESC to stop programm<strong>in</strong>g.<br />
Need help? Call 1-800-763-9232<br />
7
15-1935.fm Page 8 Thursday, December 31, 1998 11:37 AM<br />
A LOOK AT YOUR REMOTE<br />
AMP, TUN, TV, CBL, CD, VCR, SAT, and PLUG ’N POWER<br />
— let you select the device you want to control.<br />
HOME THEATER — lets you control all the functions of a<br />
home theater system.<br />
POWER — turns the remote on and off, and controls ALL<br />
LTS ON <strong>in</strong> the PLUG ’N POWER mode.<br />
MENU — works like the Menu or OSD (on-screen display)<br />
key on your orig<strong>in</strong>al remote. Use , , , and<br />
(Menu Up, Down, Right and Left) to navigate your onscreen<br />
menus. If your orig<strong>in</strong>al remote had a Select key<br />
to select menu options, use SELECT <strong>in</strong> its place. Use<br />
CLEAR (SHIFT + SELECT) to exit/clear menus. See your<br />
device’s orig<strong>in</strong>al owner’s manual for more detailed <strong>in</strong>structions<br />
on us<strong>in</strong>g menus.<br />
Notes:<br />
• , , , and also control the Rear Level +/–<br />
and Balance Right/Left functions <strong>in</strong> AMP or TUN<br />
mode, and Disc +/– and Track +/– <strong>in</strong> CD mode.<br />
• SELECT also controls TAPE MON <strong>in</strong> AMP or TUN<br />
mode, Disc Select <strong>in</strong> CD mode, and the Fetch function<br />
<strong>in</strong> the on-screen menu of an RCA satellite system.<br />
PROG (SHIFT + MENU) — operates your satellite system’s<br />
and cable converter’s Guide function, as well as<br />
any device’s secondary menus.<br />
SUR (Surround) — operates the Surround mode. It also<br />
operates the favorite channel function <strong>in</strong> SAT and CBL<br />
modes, 10+ (to access tracks numbered higher than 10)<br />
<strong>in</strong> CD mode, and the DISC function of a laser disc player.<br />
8<br />
Need help? Call 1-800-763-9232
15-1935.fm Page 9 Thursday, December 31, 1998 11:37 AM<br />
SHIFT — besides those functions described elsewhere<br />
<strong>in</strong> this manual, works with these keys to control advanced<br />
features:<br />
Mode Key Function<br />
VCR PLAY SLOW<br />
REW REW SLOW (SLOW–)<br />
FF FF SLOW (SLOW+)<br />
STOP EJECT<br />
PAUSE X2<br />
Satellite Receiver MENU+ AUDIO+<br />
MENU– AUDIO–<br />
Receiver/Tuner/Amplifier MENU+ CENTER LEVEL +<br />
MENU– CENTER LEVEL –<br />
MENU DELAY+<br />
MENU DELAY–<br />
Laser Disc/Cassette/DVD PLAY REVERSE PLAY<br />
REW REW SLOW<br />
FF FF SLOW<br />
STOP EJECT<br />
PAUSE X2<br />
CD STOP EJECT<br />
ESC (Escape) — lets you exit the remote’s displayed<br />
menu.<br />
CENTER and REAR (SHIFT + CENTER) — work like the<br />
Add and Delete keys on your orig<strong>in</strong>al TV remote, the<br />
DISC A and B keys on your laser disc remote, or the<br />
SAT and AUDIO keys of a satellite system remote.<br />
VOL+ (Volume Up), VOL– (Volume Down) and MUTE —<br />
control the volume like the Volume Up and Down and<br />
Mute keys on your orig<strong>in</strong>al remote. In Plug n’ Power<br />
mode, VOL+/VOL– operates Bright and Dim and MUTE<br />
operates ALL OFF.<br />
Need help? Call 1-800-763-9232<br />
9
15-1935.fm Page 10 Thursday, December 31, 1998 11:37 AM<br />
SLEEP (SHIFT + MUTE) — controls the Sleep Timer <strong>in</strong><br />
TV, CABLE, SAT, and AMP or TUN modes for devices<br />
which have this feature. If your device does not have a<br />
Sleep Timer, SLEEP activates the remote’s built-<strong>in</strong> sleep<br />
timer.<br />
CH+ (Channel Up) and CH– (Channel Down) — work<br />
like the Channel Up and Down keys on your orig<strong>in</strong>al remote.<br />
CH+ and CH– also control Preset Up/Preset<br />
Down <strong>in</strong> AMP or TUN mode and ON/OFF <strong>in</strong> Plug n’<br />
Power mode.<br />
Digit Keys (0–9) — work like the digit keys on your orig<strong>in</strong>al<br />
remote. They also control Input Selections <strong>in</strong> AMP<br />
or TUN mode.<br />
ENTER — works like the Enter key on your orig<strong>in</strong>al remote<br />
(for example, to change channels).<br />
TV/VCR — works like the TV/SAT key on your orig<strong>in</strong>al<br />
satellite remote. TV/VCR also controls TV/Video <strong>in</strong> TV<br />
mode, TV/VCR <strong>in</strong> VCR mode, A/B <strong>in</strong> cable and CD<br />
modes, and Input Select <strong>in</strong> AMP or TUN mode.<br />
LAST (Last Channel) — works like the Previous Channel<br />
or Recall key on your orig<strong>in</strong>al remote. It also operates<br />
the RANDOM functions <strong>in</strong> the CD and AMP or TUN<br />
modes.<br />
AUDIO and VIDEO (Macro Keys) — memorize up to 15<br />
keystrokes, so you can repeat them <strong>in</strong> sequence <strong>in</strong> any<br />
mode at the press of a s<strong>in</strong>gle key.<br />
REW (Rew<strong>in</strong>d), PL (Play), FF (Fast Forward), REC<br />
(Record), STOP, and PAUSE — work like the transport<br />
keys on your orig<strong>in</strong>al VCR or Laser Disc player remotes.<br />
To guard aga<strong>in</strong>st accidentally record<strong>in</strong>g over a videotape,<br />
you must press REC twice before record<strong>in</strong>g.<br />
10<br />
Need help? Call 1-800-763-9232
15-1935.fm Page 11 Thursday, December 31, 1998 11:37 AM<br />
LAST — works like the Previous Channel or Recall key<br />
on your orig<strong>in</strong>al TV remote.<br />
DISPLAY (SHIFT + LAST) — controls the Display function<br />
of your devices. If you are operat<strong>in</strong>g an RCA satellite<br />
system, DISPLAY controls the Select function <strong>in</strong> your<br />
On-Screen Guide and Display when you are view<strong>in</strong>g a<br />
program. If you are operat<strong>in</strong>g a CD player, it controls the<br />
Time function.<br />
PIP — controls your TV or VCR’s Picture-<strong>in</strong>-Picture feature.<br />
Works like the VIEW key on your satellite receiver’s<br />
remote.<br />
FREEZE (SHIFT + PIP) — freezes your Picture-<strong>in</strong>-Picture<br />
w<strong>in</strong>dow.<br />
SWAP — swaps the Picture-<strong>in</strong>-Picture w<strong>in</strong>dow and the<br />
ma<strong>in</strong> picture.<br />
MOVE PIP — moves the Picture-<strong>in</strong>-Picture w<strong>in</strong>dow<br />
around the screen. Works like the Next key on your satellite<br />
receiver’s remote.<br />
LITE — lets you turn the remote’s backlight and display<br />
on and off. When you press LITE to turn on the backlight,<br />
the backlight stays lit for 5 seconds then lights<br />
aga<strong>in</strong> anytime you press a key. To turn off the backlight,<br />
press LITE aga<strong>in</strong>.<br />
SETUP — lets you use the remote’s displayed menu<br />
menu to program your 7-<strong>in</strong>-<strong>One</strong>.<br />
Need help? Call 1-800-763-9232<br />
11
15-1935.fm Page 12 Thursday, December 31, 1998 11:37 AM<br />
SETTING UP THE REMOTE<br />
Note: For the best operation, you should be with<strong>in</strong> 15<br />
feet of the device you want to control.<br />
TO OPERATE YOUR TV<br />
Locate the codes for your TV <strong>in</strong> “Setup Codes for TVs”<br />
and write them <strong>in</strong> the space below. The brands are listed<br />
<strong>in</strong> alphabetical order, with the most popular codes<br />
listed first.<br />
Codes: _____________________________________<br />
Then follow these steps to program the 7-<strong>in</strong>-<strong>One</strong> to operate<br />
your TV.<br />
1. Turn on your TV.<br />
2. Press TV then hold down SETUP until TIMED SEQ<br />
appears.<br />
3. Press MENU . CODE SETUP appears.<br />
4. Repeatedly press SELECT until TV appears.<br />
5. Enter the first three-digit code listed for your TV’s<br />
brand, then press SELECT.<br />
6. Po<strong>in</strong>t the 7-<strong>in</strong>-<strong>One</strong> at your TV and press POWER.<br />
Your TV should turn off. If it does not, enter the next<br />
code from the list and press SELECT then POWER<br />
aga<strong>in</strong>. When your TV turns off, press ESC to stop<br />
programm<strong>in</strong>g.<br />
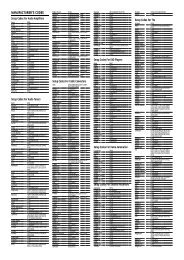
Setup Codes for TVs<br />
Brand Codes<br />
Abex 032<br />
Admiral 093<br />
Adventura 046<br />
Aiko 092<br />
Brand<br />
Codes<br />
Akai 030<br />
Alaron 179, 183<br />
A-Mark 003<br />
Ambassador 177<br />
Anam 055<br />
National<br />
12<br />
Need help? Call 1-800-763-9232
15-1935.fm Page 13 Thursday, December 31, 1998 11:37 AM<br />
Brand<br />
Codes<br />
Anam 180<br />
AOC 019, 030, 003,<br />
052, 185<br />
Archer 003<br />
Audiovox 092, 451, 180,<br />
003<br />
Baysonic 180<br />
Belcor 019<br />
Bell & Howell 154, 016<br />
Bradford 180<br />
Brockwood 019<br />
Broksonic 236, 463, 003<br />
Candle 030, 056, 046,<br />
186<br />
Carnivale 030<br />
Carver 054<br />
CCE 217<br />
Celebrity 000<br />
C<strong>in</strong>eral 092, 451<br />
Citizen 060, 030, 056,<br />
092, 186, 280,<br />
046, 039<br />
Clairtone 185<br />
Concerto 056<br />
Contec 180, 157, 158,<br />
185<br />
Craig 180<br />
Crosley 054<br />
Crown 180, 039<br />
Curtis Mathes 047, 054, 060,<br />
030, 056, 451,<br />
154, 051, 016,<br />
039, 093, 145<br />
CXC 180<br />
Daewoo 451, 092, 019,<br />
091, 039<br />
Daytron 019<br />
Denon 145<br />
Brand<br />
Codes<br />
Dumont 017, 019<br />
Electroband 000, 185<br />
Electrohome 381, 389, 409<br />
Emerson 236, 463, 019,<br />
180, 280, 179,<br />
154, 177, 178,<br />
181, 182, 183,<br />
185, 270, 282,<br />
038, 158, 039<br />
Envision 030<br />
Fisher 154, 159<br />
Fujitsu 179<br />
Funai 171, 180, 179<br />
Futuretech 180<br />
GE 047, 051, 055,<br />
451, 021, 178,<br />
027, 029, 135,<br />
279, 282, 174,<br />
093<br />
Gibralter 017, 019, 030<br />
Goldstar 019, 030, 056,<br />
178, 001, 002,<br />
032, 106, 409<br />
Gradiente 053, 056<br />
Grunpy 180, 179<br />
Hallmark 178<br />
Harley 179<br />
Davidson<br />
Harvard 180<br />
Hitachi 145, 151, 056,<br />
032, 038, 279,<br />
409, 413<br />
Inf<strong>in</strong>ity 054<br />
Inteq 017<br />
Janeil 046<br />
JBL 054<br />
JCB 000<br />
JVC 053, 036, 069,<br />
160, 169, 182<br />
Kawasho 158<br />
Need help? Call 1-800-763-9232<br />
13
15-1935.fm Page 14 Thursday, December 31, 1998 11:37 AM<br />
Brand<br />
Codes<br />
Kaypani 052<br />
KEC 180<br />
Kenwood 019, 030<br />
Kloss 024, 046<br />
KMC 106<br />
KTV 180, 280, 030,<br />
183, 185, 039,<br />
217<br />
LG 056<br />
Logik 016<br />
Luxman 056<br />
LXI 047, 054, 156,<br />
154, 178, 148<br />
Magnavox 054, 096, 186,<br />
187, 179, 030,<br />
020, 024, 028,<br />
036, 386<br />
Majestic 016<br />
Marantz 054, 030<br />
Matsushita 250<br />
Megatron 145, 178, 003<br />
MEI 185<br />
Memorex 150, 154, 016,<br />
056, 178, 106,<br />
250<br />
MGA 150, 019, 030,<br />
178, 155<br />
Midland 047, 017, 039,<br />
051, 032, 135<br />
M<strong>in</strong>utz 021<br />
Mitsubishi 150, 019, 093,<br />
178, 155<br />
Motorola 093, 055<br />
MTC 019, 060, 030,<br />
056, 091, 185<br />
Multitech 180, 217<br />
NAD 156, 178, 166<br />
NEC 030, 019, 056,<br />
036<br />
Brand<br />
Codes<br />
Nikko 092, 030, 178<br />
Noblex 430<br />
Noshi 018<br />
NTC 092<br />
Onwa 180<br />
Optimus 154, 250, 166<br />
Optonica 093, 165<br />
Orion 236, 463, 179<br />
Panasonic 250, 051, 055<br />
JC Penney 047, 156, 019,<br />
060, 051, 030,<br />
056, 178, 002,<br />
003, 018, 021,<br />
027, 135, 032,<br />
149, 039<br />
Philco 054, 096, 019,<br />
145, 030, 020,<br />
028, 463<br />
Philips 054<br />
Pilot 030, 019, 039<br />
Pioneer 038, 166<br />
Portland 092, 019, 039<br />
Prism 051<br />
Proscan 047<br />
Proton 178, 003, 052<br />
Pulsar 017, 019<br />
Quasar 250, 051, 055,<br />
165<br />
<strong>Radio</strong><strong>Shack</strong> 047, 019, 180,<br />
154, 030, 056,<br />
178, 165, 409,<br />
032, 039<br />
RCA 047, 018, 019,<br />
051, 029, 038,<br />
090, 278, 135,<br />
174, 093<br />
Realistic 019, 180, 165,<br />
154, 030, 056,<br />
178, 032, 039<br />
Rhapsody 185, 183<br />
14<br />
Need help? Call 1-800-763-9232
15-1935.fm Page 15 Thursday, December 31, 1998 11:37 AM<br />
Brand<br />
Codes<br />
Runco 017, 030<br />
Sampo 030, 032, 052,<br />
039<br />
Samsung 060, 019, 030,<br />
056, 178, 032,<br />
427, 482<br />
Samsux 039<br />
Sansei 451<br />
Sansui 463<br />
Sanyo 154, 159, 146<br />
Scimitsu 019<br />
Scotch 178<br />
Scott 236, 019, 180,<br />
179, 178<br />
Sears 047, 054, 156,<br />
179, 154, 056,<br />
171, 178, 146,<br />
148, 149, 159<br />
Semivox 180<br />
Semp 156<br />
Sharp 093, 165, 153,<br />
157, 386, 039<br />
Shogun 019<br />
Signature 016<br />
Simpson 186, 187<br />
Sony 000, 080<br />
Soundesign 180, 179, 178,<br />
186<br />
Spectricon 003<br />
Squareview 171<br />
SSS 019, 180<br />
Starlite 180<br />
Supre-Macy 046<br />
Supreme 000<br />
Sylvania 054, 096, 030,<br />
020, 028, 381<br />
Symphonic 171<br />
Tandy 093<br />
Brand<br />
Codes<br />
Tatung 055, 003<br />
Technics 250, 051<br />
Technol Ace 179<br />
Techwood 051, 056, 003<br />
Teknika 054, 150, 019,<br />
060, 180, 179,<br />
016, 056, 092,<br />
186, 312, 039<br />
Telefunken 056<br />
TMK 177, 056, 178<br />
Toshiba 156, 060, 154,<br />
036, 149<br />
Tosonic 185<br />
Totevision 039<br />
Trical 157<br />
Universal 027<br />
Vector 030<br />
Research<br />
Victor 053<br />
Vidikron 054, 242<br />
Vidtech 019, 178, 036<br />
Vik<strong>in</strong>g 046, 312<br />
Wards 054, 019, 165,<br />
179, 021, 016,<br />
030, 056, 178,<br />
020, 027, 028,<br />
029, 080, 096,<br />
174<br />
Yamaha 019, 030<br />
Zenith 017, 092, 016<br />
Zonda 003<br />
Need help? Call 1-800-763-9232<br />
15
15-1935.fm Page 16 Thursday, December 31, 1998 11:37 AM<br />
TO OPERATE YOUR VCR OR<br />
TV/VCR COMBINATION<br />
Locate the codes for your VCR or TV/VCR comb<strong>in</strong>ation<br />
<strong>in</strong> “Setup Codes for VCRs” on Page 16 or “Setup Codes<br />
for TV/VCR Combos” on Page 19 and write the codes <strong>in</strong><br />
the space below. The brands are listed <strong>in</strong> alphabetical<br />
order, with the most popular codes listed first.<br />
Codes: _____________________________________<br />
Then follow these steps to program your 7-<strong>in</strong>-<strong>One</strong> to operate<br />
your VCR or TV/VCR comb<strong>in</strong>ation.<br />
1. Turn on your VCR or TV/VCR comb<strong>in</strong>ation and<br />
<strong>in</strong>sert a tape.<br />
2. Press VCR.<br />
3. Hold down SETUP until TIMED SEQ appears.<br />
4. Press MENU . CODE SETUP appears.<br />
5. Repeatedly press SELECT until VCR appears.<br />
6. Enter the first three-digit VCR code listed for your<br />
VCR’s brand, then press SELECT.<br />
7. Po<strong>in</strong>t the 7-<strong>in</strong>-<strong>One</strong> at the VCR and press POWER or<br />
PL (Play). Your VCR should turn off or start to play.<br />
If it does not, enter the next code from the code list<br />
then SELECT and POWER or PL aga<strong>in</strong>. When your<br />
VCR turns off or plays, press ESC to stop programm<strong>in</strong>g.<br />
Setup Codes for VCRs<br />
Brand Codes<br />
Admiral 048<br />
Adventura 000<br />
Aiko 278<br />
Brand<br />
Codes<br />
Aiwa 037, 000<br />
Akai 041, 049, 053,<br />
061, 106<br />
American 035<br />
High<br />
16<br />
Need help? Call 1-800-763-9232
15-1935.fm Page 17 Thursday, December 31, 1998 11:37 AM<br />
Brand<br />
Codes<br />
Asha 240<br />
Audiovox 037<br />
Beaumark 240<br />
Bell & Howell 104<br />
Broksonic 209, 184, 479,<br />
002, 121, 211,<br />
295, 361<br />
Calix 037<br />
Canon 035<br />
Capehart 020<br />
Carver 081<br />
CCE 072, 278<br />
C<strong>in</strong>eral 278<br />
Citizen 037, 278<br />
Colt 072<br />
Craig 240, 037, 047,<br />
072, 271<br />
Curtis Mathes 060, 035, 041,<br />
162<br />
Cybernex 240, 051<br />
Daewoo 045, 278, 020<br />
Daytron 020<br />
Denon 042<br />
Dynatech 000<br />
Electrohome 037<br />
Electrophonic 037<br />
Emerex 032<br />
Emerson 184, 209, 479,<br />
037, 002, 043,<br />
000, 121, 278,<br />
036, 061, 068,<br />
208, 211, 212,<br />
294, 295, 361<br />
Fisher 104, 047, 066,<br />
054<br />
Fuji 035, 033<br />
Funai 000<br />
Garrard 000<br />
Brand<br />
Codes<br />
GE 060, 202, 035,<br />
240, 048, 065<br />
Go Video 232, 279, 432<br />
Goldstar 037, 038<br />
Gradiente 008, 000<br />
Harley 000<br />
Davidson<br />
Harman/ 038, 075<br />
Kardon<br />
Harwood 072, 068<br />
Headquarter 046<br />
HI-Q 047<br />
Hitachi 042, 105, 041,<br />
000, 065, 166,<br />
396<br />
Jensen 041<br />
JVC 041, 008, 067,<br />
206<br />
KEC 037, 278<br />
Kenwood 041, 067, 038<br />
KLH 072<br />
Kodak 035, 037<br />
Lloyd’s 000, 208<br />
Logik 072<br />
LXI 037<br />
Magnasonic 278<br />
Magnavox 035, 081, 039,<br />
000, 110, 149<br />
Magn<strong>in</strong> 240<br />
Marantz 035, 081<br />
Marta 037<br />
Matsushita 162, 035, 454<br />
MEI 035<br />
Memorex 035, 162, 037,<br />
039, 047, 000,<br />
240, 048, 104,<br />
046<br />
MGA 043, 240, 061<br />
Need help? Call 1-800-763-9232<br />
17
15-1935.fm Page 18 Thursday, December 31, 1998 11:37 AM<br />
Brand<br />
Codes<br />
MGN<br />
240<br />
Technology<br />
M<strong>in</strong>olta 042, 105<br />
Mitsubishi 043, 067, 048,<br />
061, 075, 173<br />
Motorola 035, 048<br />
MTC 000, 240<br />
Multitech 000, 072<br />
NEC 038, 041, 067,<br />
104, 040<br />
Nikko 037<br />
Nikon 034<br />
Noblex 240<br />
Olympus 035<br />
Optimus 037, 048, 104,<br />
162, 454, 432<br />
Optonica 062<br />
Orion 184, 479, 002,<br />
295<br />
Panasonic 162, 035, 254,<br />
378, 454<br />
JC Penney 035, 037, 042,<br />
240, 038, 040,<br />
054<br />
Pentax 042, 065, 105<br />
Philco 035, 209, 479<br />
Philips 081, 035, 110,<br />
062<br />
Pilot 037<br />
Pioneer 067, 162<br />
Portland 020<br />
Profitronic 240<br />
Proscan 060, 202<br />
Protec 072<br />
Pulsar 039, 051<br />
Quarter 046<br />
Quartz 046<br />
Quasar 035, 162, 454<br />
Brand<br />
Codes<br />
<strong>Radio</strong><strong>Shack</strong> 037, 000<br />
Radix 037<br />
Randex 037<br />
RCA 060, 202, 035,<br />
042, 240, 048,<br />
065, 105, 106,<br />
149<br />
Realistic 035, 037, 047,<br />
000, 048, 104,<br />
066, 062, 046<br />
Ricoh 034, 253<br />
Runco 039<br />
Salora 075<br />
Samsung 240, 045, 051,<br />
053<br />
Sanky 048, 039<br />
Sansui 000, 041, 067,<br />
082, 271, 479<br />
Sanyo 104, 047, 240,<br />
046<br />
Scott 043, 045, 184,<br />
121, 210, 211,<br />
212<br />
Sears 035, 104, 037,<br />
047, 042, 000,<br />
066, 046, 054,<br />
105<br />
Semp 045<br />
Sharp 048, 062<br />
Sh<strong>in</strong>tom 072<br />
Shogun 240, 051<br />
S<strong>in</strong>ger 072<br />
Sony 032, 033, 034,<br />
000, 035, 253<br />
STS 042<br />
Sunpak 253<br />
Sylvania 081, 035, 043,<br />
000, 110<br />
Symphonic 000<br />
Tatung 041<br />
18<br />
Need help? Call 1-800-763-9232
15-1935.fm Page 19 Thursday, December 31, 1998 11:37 AM<br />
Brand Codes<br />
TEAC 041, 000<br />
Technics 162, 035<br />
Teknika 035, 037, 000<br />
Thomas 000<br />
TMK 240, 036, 208<br />
Toshiba 045, 043, 066,<br />
210, 212, 366<br />
Totevision 037, 240<br />
Unitech 240<br />
Universum 325<br />
Vector 038, 040<br />
Research<br />
Vector 045<br />
Video 045, 040, 061<br />
Concepts<br />
Videosonic 240<br />
Wards 060, 035, 047,<br />
042, 000, 240,<br />
048, 081, 072,<br />
062, 149, 212<br />
White 278<br />
West<strong>in</strong>ghouse<br />
XR-1000 035, 000, 072<br />
Yamaha 038<br />
Zenith 039, 000, 034,<br />
033<br />
Setup Codes for<br />
TV/VCR Combos<br />
Brand Codes<br />
American 035*<br />
High<br />
Broksonic 002, 479<br />
Colt 072<br />
Curtis Mathes 035*<br />
Daewoo 278<br />
Emerson 002, 294, 479<br />
Funai 000<br />
GE 035*, 060*,<br />
048*, 240<br />
Hitachi 000<br />
Lloyds 000<br />
MGA 240<br />
Magnavox 000, 035*,<br />
081*<br />
Magn<strong>in</strong> 240<br />
Memorex 037, 162*<br />
Mitsubishi 048*<br />
Optimus 1162*<br />
Orion 002, 479<br />
Panasonic 035*, 162*,<br />
1162*<br />
JC Penney 035*, 240<br />
Quasar 035*, 162*<br />
RCA 035*, 060*,<br />
048*<br />
Samsung 240*<br />
Sansui 000, 479<br />
Sanyo 240<br />
Sears 000, 037<br />
Sony 032*<br />
Symphonic 000<br />
Zenith 000<br />
Need help? Call 1-800-763-9232<br />
19
15-1935.fm Page 20 Thursday, December 31, 1998 11:37 AM<br />
Note: If your TV/VCR works us<strong>in</strong>g a code (from the table)<br />
highlighted with an asterisk (*), you might need to<br />
program a separate TV code to control the volume.<br />
Check the list below and follow the <strong>in</strong>structions <strong>in</strong> “To<br />
Operate Your TV” on Page 12 to program the supplied<br />
TV code.<br />
Code for TV<br />
VCR Code Volume<br />
<strong>Control</strong><br />
032 000<br />
035 051<br />
048 093<br />
060 047<br />
081 054<br />
162 250<br />
240 060<br />
20<br />
Need help? Call 1-800-763-9232
15-1935.fm Page 21 Thursday, December 31, 1998 11:37 AM<br />
TO OPERATE YOUR CABLE<br />
CONVERTER<br />
Locate the codes for your cable converter <strong>in</strong> “Setup<br />
Codes for Cable Converters” on Page 22 and write<br />
them <strong>in</strong> the space below. The brands are listed <strong>in</strong> alphabetical<br />
order, with the most popular codes listed first.<br />
Codes: _____________________________________<br />
Follow these steps to program the 7-<strong>in</strong>-<strong>One</strong> to operate<br />
your cable converter.<br />
1. Turn on your cable converter.<br />
2. Press CBL.<br />
3. Hold down SETUP until TIMED SEQ appears.<br />
4. Press MENU . CODE SETUP appears.<br />
5. Repeatedly press SELECT until CABLE appears.<br />
6. Enter the first three-digit code listed for your converter’s<br />
brand, then press SELECT.<br />
7. Po<strong>in</strong>t the 7-<strong>in</strong>-<strong>One</strong> at the cable converter and press<br />
POWER. Your cable converter should turn off. If it<br />
does not, enter the next code <strong>in</strong> the code list and<br />
press SELECT then POWER aga<strong>in</strong>. When your<br />
cable converter turns off, press ESC to stop programm<strong>in</strong>g.<br />
Note: If your orig<strong>in</strong>al cable converter remote does not<br />
have an ON key, press CH+ on the 7-<strong>in</strong>-<strong>One</strong> to turn on<br />
your cable converter.<br />
Need help? Call 1-800-763-9232<br />
21
15-1935.fm Page 22 Thursday, December 31, 1998 11:37 AM<br />
Setup Codes for Cable<br />
Converters<br />
Brand Codes<br />
ABC 003, 008, 014,<br />
007, 017, 013,<br />
011, 001<br />
Allegro 153, 315<br />
Antronix 022, 207<br />
Archer 797, 153, 022,<br />
207<br />
Cabletenna 022<br />
Cableview 022<br />
Century 153<br />
Citizen 153, 315<br />
Colour Voice 025, 031<br />
Comband 232, 233<br />
Comtronics 040, 060<br />
Contec 019<br />
Digi 637<br />
Eastern 002<br />
Electricord 078<br />
Emerson 797<br />
Everquest 015, 040<br />
Focus 400<br />
Garrard 153<br />
GC<br />
207<br />
Electronics<br />
GE 232, 233<br />
Gem<strong>in</strong>i 015, 057, 242<br />
General<br />
Instrument<br />
276, 003, 011,<br />
476<br />
GMI 057<br />
Goldstar 144, 040<br />
Goodm<strong>in</strong>d 797<br />
Haml<strong>in</strong> 020, 009, 259,<br />
034, 273<br />
Hitachi 011<br />
Brand<br />
Hytex 007<br />
Jasco 153, 315<br />
Jerrold 003, 276, 014,<br />
476, 012, 011,<br />
015, 024<br />
Macom 033<br />
Magnavox 027, 334<br />
Memorex 000<br />
Movie Time 063, 156<br />
Novaplex 618<br />
NSC 063, 156<br />
Oak 007, 019<br />
Optimus 021<br />
Panasonic 107, 000, 021<br />
Panther 637<br />
Paragon 000<br />
Philips 153, 025, 027,<br />
031, 242, 290,<br />
334<br />
Pioneer 144, 533, 023,<br />
260<br />
Popular 400<br />
Mechanics<br />
Pulsar 000<br />
<strong>Radio</strong><strong>Shack</strong> 883, 015, 315<br />
RCA 021<br />
Realistic 207<br />
Recoton 400<br />
Regal 020, 259, 273,<br />
279<br />
Regency 002<br />
Rembrandt 011<br />
Runco 000<br />
Samsung 144, 040<br />
Scientific<br />
Atlanta<br />
Codes<br />
008, 477, 017,<br />
006<br />
Signal 015, 040<br />
Signature 011<br />
22<br />
Need help? Call 1-800-763-9232
15-1935.fm Page 23 Thursday, December 31, 1998 11:37 AM<br />
Brand<br />
Codes<br />
SL Marx 040<br />
Sprucer 021, 307<br />
Starcom 003, 015<br />
Stargate 015, 040, 797<br />
Starquest 015<br />
Sylvania 001<br />
Tandy 258<br />
TeleCaption 221<br />
Teleview 040<br />
Texscan 001<br />
Timeless 418<br />
Tocom 012, 013<br />
Toshiba 000<br />
Tusa 015<br />
TV86 063<br />
Unika 022, 153, 207<br />
United 007<br />
Artists<br />
United Cable 003<br />
Universal 191, 077, 022,<br />
153, 207<br />
Videoway 250<br />
Viewstar 063, 027, 060,<br />
211, 258<br />
Zenith 000, 525<br />
Zentek 400<br />
Need help? Call 1-800-763-9232<br />
23
15-1935.fm Page 24 Thursday, December 31, 1998 11:37 AM<br />
TO OPERATE YOUR SATELLITE<br />
RECEIVER<br />
Locate the codes for your satellite receiver <strong>in</strong> “Setup<br />
Codes for Satellite Receivers” on Page 24 and write<br />
them <strong>in</strong> the space below. The brands are listed <strong>in</strong> alphabetical<br />
order, with the most popular codes listed first.<br />
Codes: _____________________________________<br />
Then follow these steps to program the 7-<strong>in</strong>-<strong>One</strong> to operate<br />
your satellite receiver.<br />
1. Turn on your satellite receiver.<br />
2. Press SAT.<br />
3. Hold down SETUP until TIMED SEQ appears.<br />
4. Press MENU . CODE SETUP appears.<br />
5. Repeatedly press SELECT until SAT appears.<br />
6. Enter the first code listed for your receiver’s brand<br />
then press SELECT.<br />
7. Po<strong>in</strong>t the 7-<strong>in</strong>-<strong>One</strong> at the satellite receiver and<br />
press POWER. Your satellite receiver should turn<br />
off. If it does not, enter the next code <strong>in</strong> the code list<br />
and press SELECT then POWER aga<strong>in</strong>. When your<br />
satellite receiver turns off, press ESC to stop programm<strong>in</strong>g.<br />
Setup Codes for<br />
Satellite Receivers<br />
Brand Codes<br />
AlphaStar 772<br />
Amplica 072<br />
Amway 043, 075<br />
Brand<br />
Astro 095<br />
Industries<br />
BSR 095<br />
Cable 554<br />
Innovations<br />
Capetronic 095<br />
Century 538<br />
Codes<br />
24<br />
Need help? Call 1-800-763-9232
15-1935.fm Page 25 Thursday, December 31, 1998 11:37 AM<br />
Brand<br />
Channel 018, 212<br />
Master<br />
Chaparral 053, 209, 216<br />
Citoh 164<br />
Conifer 004<br />
Curtis Mathes 061, 072<br />
DX Antenna 041<br />
Drake 018, 064, 149,<br />
245<br />
Echostar 148, 159, 218,<br />
269, 280, 775<br />
Expressvu 775<br />
General<br />
Instrument<br />
HTS 775<br />
Hitachi 819<br />
<strong>Home</strong>cable 238<br />
Hughes 749<br />
Network<br />
Systems<br />
Codes<br />
050, 361, 547,<br />
554, 869<br />
Hytek 095<br />
IQ 210<br />
IQ Prism 210<br />
Intersat 043<br />
JVC 775<br />
Janeil 152<br />
Jerrold 361, 627<br />
Legend 269<br />
Macom 018, 050, 061<br />
Magnavox 724<br />
Memorex 269, 724<br />
Norsat 004<br />
Panasonic 152, 701<br />
Pansat 647<br />
Philips 200, 724<br />
Pico 075<br />
Primestar 361, 627<br />
Brand<br />
Codes<br />
Prosat 158<br />
RCA 566<br />
<strong>Radio</strong><strong>Shack</strong> 554<br />
Ramsey 075<br />
Realistic 051, 052<br />
STS 041, 210<br />
Sony 639<br />
Star Choice 869<br />
Star Trak 180, 421, 547<br />
Strong 421<br />
Toshiba 061, 082, 790<br />
Town & 547<br />
Country<br />
Uniden 052, 074, 076,<br />
238, 296, 370,<br />
554, 724<br />
Zenith 061, 064<br />
Need help? Call 1-800-763-9232<br />
25
15-1935.fm Page 26 Thursday, December 31, 1998 11:37 AM<br />
TO OPERATE YOUR CD PLAYER<br />
Locate the codes for your CD player <strong>in</strong> “Setup Codes for<br />
CD Players” and write them <strong>in</strong> the space below. The<br />
brands are listed <strong>in</strong> alphabetical order, with the most<br />
popular codes listed first.<br />
Codes: _____________________________<br />
Follow these steps to program the 7-<strong>in</strong>-<strong>One</strong> to operate<br />
your CD Player.<br />
1. Turn on your CD player and <strong>in</strong>sert a disc.<br />
2. Press CD.<br />
3. Hold down SETUP until TIMED SEQ appears.<br />
4. Press MENU . CODE SETUP appears.<br />
5. Repeatedly press SELECT until CD appears.<br />
6. Enter the first code listed for your CD player’s<br />
brand then press SELECT.<br />
7. Po<strong>in</strong>t the 7-<strong>in</strong>-<strong>One</strong> at the CD player and press PL.<br />
Your CD player should play. If it does not, enter the<br />
next code <strong>in</strong> the code list and press SELECT then<br />
PL aga<strong>in</strong>. When the CD player plays, press ESC to<br />
stop programm<strong>in</strong>g.<br />
Setup Codes for CD<br />
Players<br />
Brand Codes<br />
ADC 018, 033<br />
Acoustic 123<br />
Research<br />
Adcom 155, 234<br />
Aiwa 012, 124, 157<br />
Akai 156<br />
Brand<br />
Codes<br />
Audio 194<br />
Alchemy<br />
Audio- 170<br />
Technica<br />
BSR 194, 245<br />
Bang & 212<br />
Olufsen<br />
Burmester 420<br />
California 029<br />
Audio Lab<br />
26<br />
Need help? Call 1-800-763-9232
15-1935.fm Page 27 Thursday, December 31, 1998 11:37 AM<br />
Brand<br />
Codes<br />
Capetronic 237, 690<br />
Carrera 194<br />
Carver 157, 179, 299,<br />
437<br />
Crown 122<br />
DAK 245<br />
DKK 000<br />
Denon 003<br />
Emerson 155, 164, 305,<br />
469<br />
Fisher 048, 088, 174,<br />
179, 342<br />
GE 009<br />
Garrard 245, 280, 393,<br />
420, 425<br />
Genexxa 032, 164, 305<br />
GoldStar 030, 417<br />
Harman/ 108, 426<br />
Kardon<br />
Hitachi 032, 139, 155<br />
Inkel 065<br />
JVC 072, 655, 658<br />
Kenwood 028, 037, 048<br />
Kodak 287<br />
Krell 157<br />
Kyocera 018<br />
LXI 305<br />
L<strong>in</strong>n 157<br />
Luxman 093, 149, 327<br />
MCS 029, 043<br />
MTC 420<br />
Magnavox 038, 129, 157,<br />
305<br />
Marantz 005, 029, 038,<br />
157, 180<br />
McIntosh 287<br />
Mission 157<br />
Mitsubishi 098<br />
Brand<br />
Codes<br />
NAD 019, 299<br />
NEC 043, 130, 234<br />
Nakamichi 147<br />
Nikko 164, 169, 170,<br />
174<br />
Onkyo 101, 102, 138<br />
Optimus 000, 032, 037,<br />
048, 087, 145,<br />
175, 179, 194,<br />
196, 280, 305,<br />
342, 420, 426,<br />
437, 468, 536,<br />
671, 690, 775<br />
Panasonic 029, 303, 367,<br />
752<br />
Parasound 194, 420<br />
Philips 157, 274, 287<br />
Pioneer 032, 244, 305,<br />
468<br />
Proton 152, 157<br />
QED 157<br />
Quasar 029<br />
RCA 009, 053, 155,<br />
179, 305, 764<br />
Realistic 155, 164, 175,<br />
179, 180, 237,<br />
420<br />
Rotel 157, 420<br />
SAE 157<br />
STS 018<br />
Sansui 157, 202, 216,<br />
305<br />
Sanyo 087, 179<br />
Scott 155, 164, 305<br />
Sears 305<br />
Sharp 037, 180, 262,<br />
265<br />
Sherwood 065, 180, 196,<br />
426<br />
Shure 043<br />
Need help? Call 1-800-763-9232<br />
27
15-1935.fm Page 28 Thursday, December 31, 1998 11:37 AM<br />
Brand<br />
Codes<br />
Signature 108<br />
Sony 000, 185, 490,<br />
604, 605<br />
Soundesign 145, 425<br />
Symphonic 183<br />
Tascam 420<br />
Teac 016, 045, 153,<br />
174, 180, 183,<br />
378, 393, 420<br />
Technics 029, 207, 303<br />
Toshiba 019, 299<br />
Vector 033, 194, 417<br />
Research<br />
Victor 072<br />
Wards 053, 108, 157<br />
Yamaha 036, 170, 187<br />
Yorx 461<br />
28<br />
Need help? Call 1-800-763-9232
15-1935.fm Page 29 Thursday, December 31, 1998 11:37 AM<br />
TO OPERATE YOUR TUNER/<br />
RECEIVER<br />
Locate the codes for your tuner/receiver <strong>in</strong> “Setup<br />
Codes for Tuners/Receivers” on Page 29 and write<br />
them <strong>in</strong> the space below. The brands are listed <strong>in</strong> alphabetical<br />
order, with the most popular codes listed first.<br />
Codes: _____________________________________<br />
Then follow these steps to program the 7-<strong>in</strong>-<strong>One</strong> to operate<br />
your tuner/receiver.<br />
1. Turn on your tuner/receiver.<br />
2. Press TUN.<br />
3. Hold down SETUP until TIMED SEQ appears.<br />
4. Press MENU . CODE SETUP appears.<br />
5. Repeatedly press SELECT until TUNER appears.<br />
6. Enter the first code listed for your device’s brand<br />
then press SELECT.<br />
7. Po<strong>in</strong>t the 7-<strong>in</strong>-<strong>One</strong> at the tuner/receiver and press<br />
POWER. Your tuner/receiver should turn off. If it<br />
does not, enter the next code <strong>in</strong> the code list and<br />
press SELECT then POWER aga<strong>in</strong>. When the<br />
tuner/receiver turns off, press ESC to stop programm<strong>in</strong>g.<br />
Setup Codes for<br />
Tuners/Receivers<br />
Brand Codes<br />
ADC 531<br />
Adcom 616<br />
Admiral 182<br />
Brand<br />
Codes<br />
Aiwa 121, 125, 158,<br />
189, 405<br />
Akai 076, 224<br />
Bose 639<br />
Capetronic 531<br />
Carver 008, 042, 189,<br />
360, 412<br />
Need help? Call 1-800-763-9232<br />
29
15-1935.fm Page 30 Thursday, December 31, 1998 11:37 AM<br />
Brand<br />
Codes<br />
Casio 195, 201<br />
Clar<strong>in</strong>ette 195<br />
Curtis Mathes 080, 201<br />
Denon 004, 273, 771<br />
Emerson 424<br />
Fisher 042, 219, 360<br />
Garrard 281, 286, 424,<br />
440, 463, 744<br />
Harman/ 110<br />
Kardon<br />
Inkel 062<br />
JVC 074, 464<br />
Jensen 754<br />
Kenwood 027, 077, 186,<br />
313, 314<br />
Koss 424, 744<br />
LXI 181, 744<br />
L<strong>in</strong>n 189<br />
Lloyd’s 195<br />
Luxman 166<br />
MCS 039, 201, 346<br />
Magnavox 128, 189, 195,<br />
531<br />
Marantz 006, 039, 128,<br />
189, 412<br />
Modulaire 195<br />
NAD 320<br />
NEC 235<br />
NTDE 744<br />
Geniesom<br />
Nakamichi 347<br />
Onkyo 100, 119, 135,<br />
380<br />
Optimus 042, 080, 177,<br />
181, 186, 219,<br />
286, 440, 531,<br />
622, 670, 738,<br />
744, 754, 801<br />
Orient Power 744<br />
Brand<br />
Codes<br />
Panasonic 039, 309<br />
JC Penney 195, 201<br />
Philips 189, 412<br />
Pioneer 014, 080, 150,<br />
289, 531, 630<br />
Quasar 039<br />
RCA 054, 346, 360,<br />
530, 531<br />
<strong>Radio</strong><strong>Shack</strong> 744<br />
Realistic 163, 181, 182,<br />
195<br />
Sansui 189, 346<br />
Sanyo 219, 801<br />
Scott 105, 163, 390<br />
Sears 201<br />
Sharp 186<br />
Sherwood 062, 491, 502<br />
Sonic 281<br />
Sony 158, 415, 238<br />
Soundesign 670<br />
Symphonic 182<br />
Teac 163, 298, 387,<br />
463<br />
Technics 039, 208, 309<br />
Techwood 281<br />
Victor 074<br />
Wards 014, 042, 054,<br />
080, 158, 189<br />
Yamaha 082, 176, 186<br />
Yorx 195<br />
Zenith 281, 622, 744<br />
30<br />
Need help? Call 1-800-763-9232
15-1935.fm Page 31 Thursday, December 31, 1998 11:37 AM<br />
TO OPERATE YOUR AMPLIFIER<br />
Locate the codes for your amplifiers <strong>in</strong> “Setup Codes for<br />
Amplifiers” on Page 32 and write them <strong>in</strong> the space below.<br />
The brands are listed <strong>in</strong> alphabetical order, with the<br />
most popular codes listed first.<br />
Codes: _____________________________________<br />
Then follow these steps to program the 7-<strong>in</strong>-<strong>One</strong> to operate<br />
your amplifier.<br />
1. Turn on your amplifier.<br />
2. Press AMP.<br />
3. Hold down SETUP until TIMED SEQ appears.<br />
4. Press MENU . CODE SETUP appears.<br />
5. Repeatedly press SELECT until AMP appears.<br />
6. Enter the first code listed for your amplifier’s brand<br />
then press SELECT.<br />
7. Po<strong>in</strong>t the 7-<strong>in</strong>-<strong>One</strong> at the amplifier and press<br />
POWER. Your amplifier should turn off. If it does<br />
not, enter the next code <strong>in</strong> the code list and press<br />
SELECT then POWER aga<strong>in</strong>. When the amplifier<br />
turns off, press ESC to stop programm<strong>in</strong>g.<br />
Need help? Call 1-800-763-9232<br />
31
15-1935.fm Page 32 Thursday, December 31, 1998 11:37 AM<br />
Setup Codes for<br />
Amplifiers<br />
Brand Codes<br />
Acurus 765<br />
AudioSource 011<br />
Carver 269<br />
Curtis Mathes 300<br />
Denon 160<br />
Elan 647<br />
Forte 606<br />
GE 078<br />
GoldStar 031<br />
Harman/ 106<br />
Kardon<br />
Kenwood 356<br />
L<strong>in</strong>n 269<br />
Luxman 165<br />
Magnavox 269<br />
Marantz 269, 321<br />
McIntosh 251<br />
NEC 264<br />
Nakamichi 321<br />
Optimus 013, 300, 395<br />
Panasonic 308<br />
Philips 269<br />
Pioneer 013, 300<br />
Realistic 395<br />
Sansui 321<br />
Shure 264<br />
Sony 220<br />
Soundesign 078, 211<br />
Technics 308<br />
Wards 013, 078, 211<br />
Yamaha 133, 143, 354,<br />
504<br />
32<br />
Need help? Call 1-800-763-9232
15-1935.fm Page 33 Thursday, December 31, 1998 11:37 AM<br />
TO OPERATE OTHER DEVICES<br />
In addition to the labeled devices (AMP, TUN, TV, CD,<br />
CBL, VCR, or SAT), the 7-<strong>in</strong>-<strong>One</strong> can also operate laser<br />
disc players (LDP), cassette decks, digital audio tape<br />
(DAT) players, video accessories, and miscellaneous<br />
audio devices (graphic equalizers and digital audio service<br />
term<strong>in</strong>als, for example).<br />
To access device codes for:<br />
Digital Video Disc Players, Laser Disc Players,<br />
Cassette Decks, Digital Audio Tape Players<br />
Phonographs<br />
Video Accessories<br />
Miscellaneous Audio<br />
<strong>Home</strong> Automation<br />
Use:<br />
VCR<br />
CD<br />
CBL<br />
AMP<br />
PLUG ’N POWER<br />
For example, to set up a laser disc player:<br />
1. Turn on your laser disc player and <strong>in</strong>sert a disc.<br />
2. Press VCR.<br />
3. Hold down SETUP until TIMED SEQ appears.<br />
4. Press MENU . CODE SETUP appears.<br />
5. Repeatedly press SELECT until VCR appears.<br />
6. Press MENU or to toggle between VCR, LDP,<br />
TAPE, and DAT.<br />
7. When LDP appears, enter the first code listed for<br />
your laser disc player’s brand <strong>in</strong> “Setup Codes for<br />
Laser Disc Players” on Page 35, then press<br />
SELECT.<br />
8. Po<strong>in</strong>t the 7-<strong>in</strong>-<strong>One</strong> at the laser disc player and<br />
press PL. Your laser disc player should play. If it<br />
does not, enter the next code <strong>in</strong> the code list and<br />
press SELECT then PL aga<strong>in</strong>. When the laser disc<br />
player plays, press ESC to stop programm<strong>in</strong>g.<br />
Need help? Call 1-800-763-9232<br />
33
15-1935.fm Page 34 Thursday, December 31, 1998 11:37 AM<br />
Setup Codes for<br />
Cassette Players<br />
Brand Codes<br />
ADC 171<br />
Aiwa 029, 197, 200<br />
Akai 283<br />
Carver 029, 261<br />
Denon 076<br />
Fisher 074, 261<br />
Garrard 300, 308, 309,<br />
439<br />
JVC 244, 273, 274,<br />
303<br />
Kenwood 070, 071, 092,<br />
233, 234<br />
Kyocera 171<br />
MGA 313<br />
Magnavox 029<br />
Marantz 029<br />
Mitsubishi 283, 313<br />
Nakamichi 147, 151, 218,<br />
247, 248<br />
Onkyo 136, 282<br />
Optimus 027, 220, 300,<br />
337, 439<br />
Panasonic 229<br />
Philips 029<br />
Pioneer 027, 099, 220<br />
RCA 261<br />
Sansui 029<br />
Sanyo 261<br />
Sharp 231<br />
Sherwood 337<br />
Sony 170, 243, 291<br />
Teac 280, 289, 308,<br />
309<br />
Technics 229<br />
Brand<br />
Codes<br />
Victor 273, 274<br />
Wards 027<br />
Yamaha 094, 097<br />
Setup Codes for<br />
Digital Audio Tape<br />
(DAT) Players<br />
Brand Code<br />
Carver 158<br />
Marantz 158<br />
Philips 158<br />
Setup Codes For DVD<br />
Players<br />
Brand Codes<br />
JVC 558<br />
Kenwood 534<br />
Magnavox 503<br />
Mitsubishi 521<br />
Onkyo 503<br />
Panasonic 490<br />
Philips 503, 539<br />
Pioneer 525<br />
Proscan 522<br />
RCA 522<br />
Sony 533<br />
Technics 490<br />
Toshiba 503<br />
Zenith 503<br />
34<br />
Need help? Call 1-800-763-9232
15-1935.fm Page 35 Thursday, December 31, 1998 11:37 AM<br />
Setup Codes for <strong>Home</strong><br />
Automation<br />
Brand Codes<br />
Audio Access 154<br />
GE 240<br />
LiteTouch 084<br />
Lutron 318<br />
<strong>One</strong> For All 167<br />
<strong>Radio</strong><strong>Shack</strong> 240<br />
Sanyo 336<br />
Security 167<br />
System<br />
Universal X10 167<br />
Setup Codes for Laser<br />
Disc Players<br />
Brand Codes<br />
Aiwa 203<br />
Carver 064, 194, 323<br />
Denon 059, 172, 241<br />
Disco Vision 023<br />
Funai 203<br />
Hitachi 023<br />
JVC 558<br />
Kenwood 534<br />
Magnavox 194, 217, 241,<br />
503<br />
Marantz 064, 194<br />
Mitsubishi 059, 521<br />
NAD 059<br />
NEC 286<br />
Onkyo 503<br />
Panasonic 204, 490<br />
Philips 064, 194, 503,<br />
539<br />
Brand Codes<br />
Pioneer 023, 059, 525<br />
Proscan 522<br />
Quasar 204<br />
RCA 128, 522<br />
Realistic 203<br />
Samsung 323<br />
Sega 023<br />
Sony 193, 201, 270,<br />
533<br />
Technics 204, 490<br />
Theta Digital 194<br />
Toshiba 503<br />
Yamaha 217<br />
Zenith 503<br />
Setup Codes for<br />
Miscellaneous Audio<br />
Brand Codes<br />
Aiwa 203<br />
Carver 064, 194, 323<br />
Denon 059, 172, 241<br />
Disco Vision 023<br />
Funai 203<br />
Hitachi 023<br />
JVC 558<br />
Kenwood 534<br />
Magnavox 194, 217,<br />
241, 503<br />
Marantz 064, 194<br />
Mitsubishi 059, 521<br />
NAD 059<br />
NEC 286<br />
Onkyo 503<br />
Panasonic 204, 490<br />
Need help? Call 1-800-763-9232<br />
35
15-1935.fm Page 36 Thursday, December 31, 1998 11:37 AM<br />
Brand Codes<br />
Philips 064, 194,<br />
503, 539<br />
Pioneer 023, 059, 525<br />
Proscan 522<br />
Quasar 204<br />
RCA 128, 522<br />
Realistic 203<br />
Samsung 323<br />
Sega 023<br />
Sony 193, 201,<br />
270, 533<br />
Technics 204, 490<br />
Theta Digital 194<br />
Toshiba 503<br />
Yamaha 217<br />
Zenith 503<br />
Setup Codes for<br />
Phonographs<br />
Brand Codes<br />
Aiwa 188<br />
Carver 188<br />
Magnavox 188<br />
Marantz 188<br />
Philips 188<br />
36<br />
Need help? Call 1-800-763-9232
15-1935.fm Page 37 Thursday, December 31, 1998 11:37 AM<br />
SPECIAL FEATURES<br />
SEARCHING FOR A CODE<br />
Before Setup<br />
If you have tried all the codes from the list and your device<br />
still will not respond to the 7-<strong>in</strong>-<strong>One</strong> (or if your brand<br />
is not listed), try search<strong>in</strong>g for your code.<br />
For example, to f<strong>in</strong>d the code for a TV:<br />
1. Turn on your TV, then press TV.<br />
2. Hold down SETUP until TIMED SEQ appears.<br />
3. Press MENU . CODE SETUP appears.<br />
4. Press SELECT. DEV SET UP appears.<br />
5. Press MENU . DEV SEARCH appears.<br />
6. Press SELECT. TV and the last entered three-digit<br />
code appear.<br />
7. Press POWER. If your TV does not turn off, press<br />
MENU . The next most recently entered code<br />
appears. Cont<strong>in</strong>ue press<strong>in</strong>g POWER then MENU<br />
until your TV turns off. Then press SELECT to lock<br />
<strong>in</strong> the code and stop programm<strong>in</strong>g.<br />
Repeat these steps, us<strong>in</strong>g the appropriate device control<br />
button <strong>in</strong> Step 1 for each device you need to search.<br />
Note: If you are search<strong>in</strong>g for a VCR, laser disc player,<br />
or DVD player code, you might need to use PL (Play) <strong>in</strong>stead<br />
of POWER.<br />
Need help? Call 1-800-763-9232<br />
37
15-1935.fm Page 38 Thursday, December 31, 1998 11:37 AM<br />
After Setup<br />
After you have set up your devices, you might need to<br />
f<strong>in</strong>d out which code is operat<strong>in</strong>g one of them. For example,<br />
to f<strong>in</strong>d out what three-digit code is operat<strong>in</strong>g your<br />
TV:<br />
1. Press TV.<br />
2. Hold down SETUP until TIMED SEQ appears.<br />
3. Press MENU . CODE SETUP appears.<br />
4. Press SELECT. DEV SET UP appears.<br />
5. Press MENU twice. DEV NUMBER appears.<br />
6. Press SELECT. TV and the code for that device<br />
appear.<br />
Note: To view the three-digit code for another<br />
device, press the key for the device you want to<br />
view <strong>in</strong> Step 1.<br />
7. Write down the three-digit code then press ESC to<br />
stop programm<strong>in</strong>g.<br />
USING THE SLEEP FUNCTION<br />
To use the sleep timer built <strong>in</strong>to your TV, cable converter,<br />
satellite system, or audio device, press SLEEP<br />
(SHIFT then MUTE). Most sleep timers advance <strong>in</strong> <strong>in</strong>crements<br />
of 10 or 15 m<strong>in</strong>utes. For specific <strong>in</strong>structions on<br />
sett<strong>in</strong>g your device’s sleep timer, refer to the device’s<br />
owner’s manual.<br />
Or, if your device does not have a sleep timer, follow<br />
these steps to enable Sleep Lock on the 7-<strong>in</strong>-<strong>One</strong>. Then<br />
you can use the 7-<strong>in</strong>-<strong>One</strong>’s built-<strong>in</strong> sleep timer with all<br />
devices.<br />
1. Hold down SETUP until TIMED SEQ appears.<br />
38<br />
Need help? Call 1-800-763-9232
15-1935.fm Page 39 Thursday, December 31, 1998 11:37 AM<br />
2. Press MENU twice. CONFIGURE appears.<br />
3. Press SELECT. THEATER SEL appears.<br />
4. Press MENU twice. SLEEP LOCK appears<br />
5. Press SELECT. DISABLE appears.<br />
6. Press MENU . ENABLE appears.<br />
7. Press SELECT to stop programm<strong>in</strong>g.<br />
Whenever you press SLEEP (SHIFT then MUTE), SLEEP<br />
15 appears. To add time to the sleep timer, press MENU<br />
. Each press of MENU adds 15 m<strong>in</strong>utes to the sleep<br />
timer, up to a total of 60 m<strong>in</strong>utes. When the desired<br />
sleep time appears, press SELECT. SLEEP appears.<br />
When Sleep Lock is enabled, the 7-<strong>in</strong>-<strong>One</strong> activates its<br />
own Sleep Timer. To use another device’s sleep timer,<br />
or to simply disable Sleep Lock, repeat the above steps,<br />
press<strong>in</strong>g MENU to select DISABLE <strong>in</strong> Step 6.<br />
CONVERTING DEVICE KEYS<br />
You can use the 7-<strong>in</strong>-<strong>One</strong> to operate a second TV or<br />
VCR, or any comb<strong>in</strong>ation of up to six devices. To do<br />
this, you must first convert an unused device key (AMP,<br />
TUN, TV, CD, CBL, VCR, or SAT) to operate the second<br />
device.<br />
For example, to convert CBL to operate a second TV:<br />
1. Hold down SETUP until TIMED SEQ appears.<br />
2. Press MENU twice. CONFIGURE appears.<br />
3. Press SELECT. THEATR SEL appears.<br />
4. Press MENU three times. MODE MAP appears.<br />
5. Press SELECT. SOURCE appears.<br />
6. Press TV. COPY TO appears.<br />
Need help? Call 1-800-763-9232<br />
39
15-1935.fm Page 40 Thursday, December 31, 1998 11:37 AM<br />
7. Press CBL. TV2 appears.<br />
8. Program the converted device key (CBL) with the<br />
code for the second TV. (See “To Operate Your TV”<br />
on Page 12.)<br />
Repeat these steps for each key you want to convert.<br />
VOLUME LOCK<br />
The 7-<strong>in</strong>-<strong>One</strong> lets you choose one device to control the<br />
sound volume for all the devices the 7-<strong>in</strong>-<strong>One</strong> operates.<br />
When you first set up the 7-<strong>in</strong>-<strong>One</strong>, each device with a<br />
volume control operates its own volume. You can<br />
change this so that one device controls the volume no<br />
matter which device the 7-<strong>in</strong>-<strong>One</strong> is operat<strong>in</strong>g.<br />
For example, to set-up the 7-<strong>in</strong>-<strong>One</strong> so your receiver always<br />
controls the volume:<br />
1. Hold down SETUP until TIMED SEQ appears.<br />
2. Press MENU twice. CONFIGURE appears.<br />
3. Press SELECT. THEATR SEL appears.<br />
4. Press MENU twice. VOL LOCK appears.<br />
5. Press SELECT. UNLOCK appears.<br />
6. Press MENU . LOCK appears.<br />
7. Press SELECT then the key for the device that you<br />
want to control the sound volume (AMP, TUN, TV,<br />
CD, CBL, VCR, or SAT), then press SELECT.<br />
For example, to control the volume through your<br />
receiver, press TUN then SELECT. When you press<br />
the volume keys on your 7-<strong>in</strong>-<strong>One</strong>, your receiver<br />
controls the volume.<br />
8. Press ESC to exit.<br />
40<br />
Need help? Call 1-800-763-9232
15-1935.fm Page 41 Thursday, December 31, 1998 11:37 AM<br />
Note: You might need to use the MENU or VOL keys to<br />
control volume, depend<strong>in</strong>g on which device you selected<br />
dur<strong>in</strong>g these steps.<br />
Resett<strong>in</strong>g Volume Lock<br />
To restore volume control to each <strong>in</strong>dividual device:<br />
1. Hold down SETUP until TIMED SEQ appears.<br />
2. Press MENU twice. CONFIGURE appears.<br />
3. Press SELECT. THEATR SEL appears.<br />
4. Press MENU twice. VOL LOCK appears.<br />
5. Press SELECT. LOCK appears.<br />
6. Press MENU . UNLOCK appears.<br />
7. Press SELECT. Each device now controls its own<br />
volume when you use the volume keys on your 7-<br />
<strong>in</strong>-<strong>One</strong>.<br />
USING THE MACRO KEYS<br />
The 7-<strong>in</strong>-<strong>One</strong> has two macro keys, AUD and VID. Each<br />
key lets you play back a series of up to 15 keystrokes at<br />
any time with the press of a s<strong>in</strong>gle key, <strong>in</strong> any mode.<br />
You can set up a maximum of 36 macros, 15 timed sequences<br />
(see “Sett<strong>in</strong>g Up Timed Sequences” on<br />
Page 42), or a comb<strong>in</strong>ation of both.<br />
For example, follow these steps to set up a macro on<br />
VID that turns on your TV, VCR, and satellite system so<br />
you can record a program.<br />
Note: If you make a mistake, press ESC and start over<br />
at Step 1.<br />
1. Hold down SETUP. TIMED SEQ appears.<br />
Need help? Call 1-800-763-9232<br />
41
15-1935.fm Page 42 Thursday, December 31, 1998 11:37 AM<br />
2. Press MENU twice. CONFIGURE appears.<br />
3. Press SELECT. THEATR SEL appears.<br />
4. Press MENU four times. KEY MACRO appears.<br />
5. Press SELECT. SEL MACKEY appears.<br />
6. Press VID. SELECT SEQ appears.<br />
7. Enter the sequence of up to 15 keystrokes that you<br />
want the 7-<strong>in</strong>-<strong>One</strong> to memorize, then press ESC.<br />
For example: TV POWER 0 4 TV VCR SAT POWER<br />
In our example, whenever you press VID, the TV<br />
turns on, tunes to channel 4, and changes its <strong>in</strong>put<br />
to VIDEO 1, then the satellite turns on.<br />
Note: When sett<strong>in</strong>g up a macro, you must <strong>in</strong>clude<br />
all keystrokes that you would enter dur<strong>in</strong>g regular<br />
usage, such as press<strong>in</strong>g ENTER after a channel<br />
number when chang<strong>in</strong>g channels (if your TV<br />
requires it).<br />
Repeat these steps to set up a macro on the other macro<br />
key.<br />
SETTING UP TIMED SEQUENCES<br />
The 7-<strong>in</strong>-<strong>One</strong> lets you set up a sequence of keystrokes<br />
that can be played back at a time you specify, up to seven<br />
days <strong>in</strong> advance. You can set up a maximum of 15<br />
timed sequences, 36 macros (see “Us<strong>in</strong>g the Macro<br />
Keys” on Page 41), or a comb<strong>in</strong>ation of both.<br />
For example, follow these steps to set your VCR to<br />
record a program from your satellite system.<br />
Note: If you make a mistake, press ESC and start over<br />
at Step 1.<br />
1. Hold down SETUP until TIMED SEQ appears.<br />
42<br />
Need help? Call 1-800-763-9232
15-1935.fm Page 43 Thursday, December 31, 1998 11:37 AM<br />
2. Repeatedly press SELECT until START and the<br />
time appear, with the first digit bl<strong>in</strong>k<strong>in</strong>g. Enter the<br />
time <strong>in</strong> 12-hour format. AM/PM flashes.<br />
3. If necessary, press MENU to toggle between AM<br />
and PM, then press SELECT. ONCE appears.<br />
4. Press MENU or to toggle between ONCE,<br />
DAILY, and WEEKLY. When the desired frequency<br />
appears, press SELECT. The day of the week display<br />
appears.<br />
5. Use MENU and to toggle through the days of<br />
the week until the day when you want the<br />
sequence to start runn<strong>in</strong>g appears.<br />
6. Press SELECT. ENTER SEQ appears.<br />
7. Enter the sequence of keystrokes you want the 7-<br />
<strong>in</strong>-<strong>One</strong> to play at the selected time, then press<br />
ESC.<br />
For example, to set up a sequence that turns on<br />
the satellite, tunes to channel 275, turns on the<br />
VCR, and starts record<strong>in</strong>g, enter:<br />
SAT POWER SAT 2 7 5 VCR POWER VCR RECORD<br />
When your sequence is set up, the clock icon<br />
appears.<br />
Delet<strong>in</strong>g a Timed Sequence<br />
1. Hold down SETUP until TIMED SEQ appears.<br />
2. Press SELECT. ADD MACRO appears.<br />
3. Press MENU or . DEL MACRO appears.<br />
4. Press SELECT. DEL and the first set day and time<br />
appear.<br />
5. If necessary, use MENU or to scroll through<br />
the saved timed sequences. When you see the<br />
one you want to delete, press SELECT. DELETED<br />
Need help? Call 1-800-763-9232<br />
43
15-1935.fm Page 44 Thursday, December 31, 1998 11:37 AM<br />
appears. If there are more timed sequences, the<br />
next one appears.<br />
SETTING UP THE HOME THEATER<br />
KEY<br />
The 7-In-<strong>One</strong> lets you operate all of the most commonly<br />
used home theater functions <strong>in</strong> one mode. When sett<strong>in</strong>g<br />
up the <strong>Home</strong> <strong>Theater</strong> mode, you choose which devices<br />
will control volume, channel chang<strong>in</strong>g, playback, picture-<strong>in</strong>-picture,<br />
and menu functions.<br />
1. Press HOME THEATER.<br />
2. Hold down SETUP until TIMED SEQ appears.<br />
3. Press MENU twice. CONFIGURE appears.<br />
4. Press SELECT twice. AUDIO appears.<br />
5. Press SELECT then the appropriate device key (TV,<br />
CBL, SAT, VCR, or AUX) to select the device that<br />
you want to control audio features <strong>in</strong> <strong>Home</strong> <strong>Theater</strong><br />
mode, then press SELECT. CHANNEL appears.<br />
6. Press SELECT, then the appropriate device key to<br />
select the device that you want to change channels<br />
<strong>in</strong> <strong>Home</strong> <strong>Theater</strong> mode. Then press SELECT aga<strong>in</strong>.<br />
PLAYBACK appears.<br />
7. Press SELECT, then CD or VCR to select the device<br />
that you want to control the transport keys (PLAY,<br />
REW, FF, PAUSE, STOP and REC) <strong>in</strong> <strong>Home</strong> <strong>Theater</strong><br />
mode. Then press SELECT aga<strong>in</strong>. PIP (Picture-<strong>in</strong>-<br />
Picture) appears.<br />
8. Press SELECT then TV, CBL, or VCR to select the<br />
device that you want to control Picture-<strong>in</strong>-Picture<br />
features <strong>in</strong> <strong>Home</strong> <strong>Theater</strong> mode. Then press<br />
SELECT aga<strong>in</strong>. MENU appears.<br />
44<br />
Need help? Call 1-800-763-9232
15-1935.fm Page 45 Thursday, December 31, 1998 11:37 AM<br />
9. Press SELECT then the appropriate key to select<br />
the device you want to control the menu features <strong>in</strong><br />
<strong>Home</strong> <strong>Theater</strong> mode. Then press SELECT aga<strong>in</strong> to<br />
stop programm<strong>in</strong>g.<br />
Sett<strong>in</strong>g Up a Power Key Macro<br />
After you set up the HOME THEATER mode, you can create<br />
a macro sequence that lets you use POWER to turn<br />
on and off all of your <strong>Home</strong> <strong>Theater</strong> devices.<br />
1. Press HOME THEATER, then hold down SETUP until<br />
TIMED SEQ appears.<br />
2. Press MENU twice. CONFIGURE appears.<br />
3. Press SELECT. THEATR SEL appears.<br />
4. Repeatedly press MENU– until KEY MACRO<br />
appears.<br />
5. Press SELECT. SEL MACKEY appears.<br />
6. Press POWER then the key for each device <strong>in</strong> your<br />
home theater system.<br />
Note: You cannot use AUD or VID <strong>in</strong> your <strong>Home</strong><br />
<strong>Theater</strong> Power key macro.<br />
7. Press POWER then ESC to stop programm<strong>in</strong>g.<br />
To activate the <strong>Home</strong> <strong>Theater</strong> Power macro, press<br />
HOME THEATER so THEATER appears, then press<br />
POWER to turn all of your home theater devices on or<br />
off.<br />
CLEAR ALL<br />
Use the Clear All feature to reset all advanced functions<br />
of the 7-<strong>in</strong>-<strong>One</strong>. Clear All erases macro sequences,<br />
timed macro sequences, and Volume Lock from the 7-<br />
Need help? Call 1-800-763-9232<br />
45
15-1935.fm Page 46 Thursday, December 31, 1998 11:37 AM<br />
<strong>in</strong>-<strong>One</strong>’s memory. It does not erase the setup codes you<br />
programmed.<br />
To reset the 7-<strong>in</strong>-<strong>One</strong> us<strong>in</strong>g the Clear All feature:<br />
1. Hold down SETUP. TIMED SEQ appears.<br />
2. Press MENU twice. CONFIGURE appears.<br />
3. Press SELECT. THEATER SEL appears.<br />
4. Press MENU . CLR ALL appears.<br />
5. Press SELECT. CLR ALL appears.<br />
6. Press SELECT aga<strong>in</strong>. CONFIRM appears.<br />
7. Press SELECT once more. Your 7-<strong>in</strong>-<strong>One</strong> is reset.<br />
USING THE IR/RF COMMAND<br />
CENTER<br />
The 7-<strong>in</strong>-<strong>One</strong> comes with an IR/RF Command Center<br />
which receives radio frequency (RF) signals from the 7-<br />
<strong>in</strong>-<strong>One</strong> and converts them <strong>in</strong>to <strong>in</strong>frared (IR) signals to<br />
control your components.<br />
Note: The 7-<strong>in</strong>-<strong>One</strong>’s actual range depends on the construction<br />
of the build<strong>in</strong>g where it is used, as well as other<br />
factors, such as radio frequency <strong>in</strong>terference. For the<br />
best operation:<br />
• Aim the 7-<strong>in</strong>-<strong>One</strong> toward the room where the Command<br />
Center is located.<br />
• Do not position the Command Center near metal<br />
objects (such as heat<strong>in</strong>g ducts) that can absorb RF<br />
signals.<br />
• Keep fresh batteries <strong>in</strong> the 7-<strong>in</strong>-<strong>One</strong>. Weak batteries<br />
reduce the 7-<strong>in</strong>-<strong>One</strong>’s range.<br />
46<br />
Need help? Call 1-800-763-9232
15-1935.fm Page 47 Thursday, December 31, 1998 11:37 AM<br />
After you have set up the 7-<strong>in</strong>-<strong>One</strong> to control your devices<br />
(see “Quick Setup” on Page 6 or “Sett<strong>in</strong>g Up the <strong>Remote</strong>”<br />
on Page 12), follow these steps to set up the<br />
Command Center:<br />
1. Choose a location about 8 feet <strong>in</strong> front of the components<br />
you want to control. The location should<br />
be near an easily accessible standard AC outlet,<br />
with l<strong>in</strong>e-of-sight access to your components.<br />
2. Plug the Command Center’s power cord <strong>in</strong>to the<br />
AC outlet and raise its telescop<strong>in</strong>g antenna.<br />
3. Position the Command Center so its black IR lens<br />
is fac<strong>in</strong>g your components.<br />
4. Be sure the remote is not po<strong>in</strong>t<strong>in</strong>g toward your<br />
equipment, then test the Command Center by<br />
press<strong>in</strong>g POWER. You should be able to control<br />
components from any room.<br />
Us<strong>in</strong>g the IR Signal Extension Cord<br />
You can use the supplied IR signal extension cord to<br />
control a device that is with<strong>in</strong> 4 feet of the Command<br />
Center but out of its direct l<strong>in</strong>e of sight.<br />
1. Plug the IR signal extension cord <strong>in</strong>to the jack<br />
(shown here) on the back of the Command Center.<br />
2. Route the IR signal extension cord to the device.<br />
Need help? Call 1-800-763-9232<br />
47
15-1935.fm Page 48 Thursday, December 31, 1998 11:37 AM<br />
3. Use the supplied double-sided tape to attach the IR<br />
signal extension cord to the device, with its LED on<br />
or next to the device’s IR sensor.<br />
4. Be sure the remote is not po<strong>in</strong>t<strong>in</strong>g toward your<br />
equipment, then test the Command Center by<br />
press<strong>in</strong>g POWER. The Command Center converts<br />
the 7-<strong>in</strong>-<strong>One</strong>’s RF signal <strong>in</strong>to an IR signal, and<br />
transmits that signal to the device through the cord.<br />
48<br />
Need help? Call 1-800-763-9232
15-1935.fm Page 49 Thursday, December 31, 1998 11:37 AM<br />
TROUBLESHOOTING<br />
Problem<br />
Display beg<strong>in</strong>s to fade,<br />
does not appear, or the<br />
red light bl<strong>in</strong>ks five times<br />
when you press a key.<br />
The 7-<strong>in</strong>-<strong>One</strong> does not<br />
operate your device.<br />
The 7-<strong>in</strong>-<strong>One</strong> is not perform<strong>in</strong>g<br />
commands properly.<br />
You make a mistake<br />
when sett<strong>in</strong>g up your 7-<strong>in</strong>-<br />
<strong>One</strong>.<br />
VCR not record<strong>in</strong>g.<br />
CH+/– (Channel Up/<br />
Down) and LAST not<br />
work<strong>in</strong>g for your RCA TV.<br />
Solution<br />
Replace the batteries with four<br />
fresh AAA alkal<strong>in</strong>e batteries.<br />
Try all of the codes listed for<br />
your brand of device <strong>in</strong> the<br />
“Setup Codes” section. If this<br />
does not work, try search<strong>in</strong>g for<br />
your code (see “Search<strong>in</strong>g for a<br />
Code” on Page 37).<br />
Make sure the device you are<br />
sett<strong>in</strong>g up can be operated with<br />
an <strong>in</strong>frared remote.<br />
Try all of the codes listed for<br />
your brand of device <strong>in</strong> the<br />
“Setup Codes” section. Many<br />
set-up codes may allow some<br />
degree of operation. However,<br />
only one set-up code will work<br />
correctly with your device.<br />
Dur<strong>in</strong>g any set up procedure,<br />
except for timed sequences, the<br />
ESC key will return you to the<br />
DEVICE and the TIME screen<br />
without sav<strong>in</strong>g any of the<br />
entered <strong>in</strong>formation. If you make<br />
a mistake when sett<strong>in</strong>g up a<br />
timed sequence, return to the<br />
timed sequence menu and<br />
delete the <strong>in</strong>correct sequence.<br />
As a safety feature on the 7-<strong>in</strong>-<br />
<strong>One</strong>, you must press the REC<br />
key twice to beg<strong>in</strong> record<strong>in</strong>g.<br />
Due to RCA design (1983-<br />
1987), only the orig<strong>in</strong>al remote<br />
will operate these functions.<br />
Need help? Call 1-800-763-9232<br />
49
15-1935.fm Page 50 Thursday, December 31, 1998 11:37 AM<br />
Problem<br />
Problems chang<strong>in</strong>g channels.<br />
The red light bl<strong>in</strong>ks when<br />
you press a key but you<br />
receive no response from<br />
your device.<br />
You can turn your audio<br />
component on and off<br />
and control its volume,<br />
but you cannot change<br />
preset channels.<br />
Your satellite receiver<br />
does not respond to the<br />
codes listed <strong>in</strong> the manual.<br />
The 7-<strong>in</strong>-<strong>One</strong> does not<br />
operate Bang & Olufsen<br />
audio equipment.<br />
Solution<br />
If your orig<strong>in</strong>al remote required<br />
an ENTER keystroke when<br />
chang<strong>in</strong>g channels, press the<br />
ENTER key on the 7-<strong>in</strong>-<strong>One</strong><br />
after you enter the channel number.<br />
Press the appropriate device<br />
key (MAN, TUN, TV, CBL, CD,<br />
VCR, SAT, PLUG ’N POWER)<br />
for the device you are try<strong>in</strong>g to<br />
operate.<br />
Make sure you aim your 7-<strong>in</strong>-<br />
<strong>One</strong> at your device and that you<br />
are with<strong>in</strong> 15 feet of the device<br />
before us<strong>in</strong>g your remote.<br />
Some audio components might<br />
need both a Tuner/Receiver<br />
code (see Page 29) and an<br />
Audio Amplifier code (see Page<br />
32) to control all the features of<br />
your audio component.<br />
The codes listed <strong>in</strong> this manual<br />
are set up to operate your satellite<br />
receiver on the 1st or 2nd<br />
addresses only. Make sure the<br />
satellite receiver you are sett<strong>in</strong>g<br />
up can be operated with an<br />
<strong>in</strong>frared remote.<br />
Some Bang & Olufsen and other<br />
manufacturers’ equipment operates<br />
at frequencies higher than<br />
100 kHz. The 7-<strong>in</strong>-<strong>One</strong> will not<br />
operate such devices.<br />
50<br />
Need help? Call 1-800-763-9232
15-1935.fm Page 51 Thursday, December 31, 1998 11:37 AM<br />
NOTES<br />
Need help? Call 1-800-763-9232<br />
51
15-1935.fm Page 52 Thursday, December 31, 1998 11:37 AM<br />
Limited N<strong>in</strong>ety-Day Warranty<br />
This product is warranted by <strong>Radio</strong><strong>Shack</strong> aga<strong>in</strong>st manufactur<strong>in</strong>g defects <strong>in</strong><br />
material and workmanship under normal use for n<strong>in</strong>ety (90) days from the<br />
date of purchase from <strong>Radio</strong><strong>Shack</strong> company-owned stores and authorized<br />
<strong>Radio</strong><strong>Shack</strong> franchisees and dealers. EXCEPT AS PROVIDED HEREIN,<br />
<strong>Radio</strong><strong>Shack</strong> MAKES NO EXPRESS WARRANTIES AND ANY IMPLIED<br />
WARRANTIES, INCLUDING THOSE OF MERCHANTABILITY AND FIT-<br />
NESS FOR A PARTICULAR PURPOSE, ARE LIMITED IN DURATION TO<br />
THE DURATION OF THE WRITTEN LIMITED WARRANTIES CONTAINED<br />
HEREIN. EXCEPT AS PROVIDED HEREIN, <strong>Radio</strong><strong>Shack</strong> SHALL HAVE NO<br />
LIABILITY OR RESPONSIBILITY TO CUSTOMER OR ANY OTHER PER-<br />
SON OR ENTITY WITH RESPECT TO ANY LIABILITY, LOSS OR DAMAGE<br />
CAUSED DIRECTLY OR INDIRECTLY BY USE OR PERFORMANCE OF<br />
THE PRODUCT OR ARISING OUT OF ANY BREACH OF THIS WAR-<br />
RANTY, INCLUDING, BUT NOT LIMITED TO, ANY DAMAGES RESULTING<br />
FROM INCONVENIENCE, LOSS OF TIME, DATA, PROPERTY, REVENUE,<br />
OR PROFIT OR ANY INDIRECT, SPECIAL, INCIDENTAL, OR CONSE-<br />
QUENTIAL DAMAGES, EVEN IF <strong>Radio</strong><strong>Shack</strong> HAS BEEN ADVISED OF THE<br />
POSSIBILITY OF SUCH DAMAGES.<br />
Some states do not allow the limitations on how long an implied warranty lasts<br />
or the exclusion of <strong>in</strong>cidental or consequential damages, so the above limitations<br />
or exclusions may not apply to you.<br />
In the event of a product defect dur<strong>in</strong>g the warranty period, take the product<br />
and the <strong>Radio</strong><strong>Shack</strong> sales receipt as proof of purchase date to any<br />
<strong>Radio</strong><strong>Shack</strong> store. <strong>Radio</strong><strong>Shack</strong> will, at its option, unless otherwise provided<br />
by law: (a) correct the defect by product repair without charge for parts and labor;<br />
(b) replace the product with one of the same or similar design; or (c) refund<br />
the purchase price. All replaced parts and products, and products on<br />
which a refund is made, become the property of <strong>Radio</strong><strong>Shack</strong>. New or reconditioned<br />
parts and products may be used <strong>in</strong> the performance of warranty service.<br />
Repaired or replaced parts and products are warranted for the<br />
rema<strong>in</strong>der of the orig<strong>in</strong>al warranty period. You will be charged for repair or replacement<br />
of the product made after the expiration of the warranty period.<br />
This warranty does not cover: (a) damage or failure caused by or attributable<br />
to acts of God, abuse, accident, misuse, improper or abnormal usage, failure<br />
to follow <strong>in</strong>structions, improper <strong>in</strong>stallation or ma<strong>in</strong>tenance, alteration, lightn<strong>in</strong>g<br />
or other <strong>in</strong>cidence of excess voltage or current; (b) any repairs other than<br />
those provided by a <strong>Radio</strong><strong>Shack</strong> Authorized Service Facility; (c) consumables<br />
such as fuses or batteries; (d) cosmetic damage; (e) transportation, shipp<strong>in</strong>g<br />
or <strong>in</strong>surance costs; or (f) costs of product removal, <strong>in</strong>stallation, set-up service<br />
adjustment or re<strong>in</strong>stallation.<br />
This warranty gives you specific legal rights, and you may also have other<br />
rights which vary from state to state.<br />
<strong>Radio</strong><strong>Shack</strong> Customer Relations, Dept. W, 100 Throckmorton St., Suite 600,<br />
Fort Worth, TX 76102<br />
We Service What We Sell 3/97<br />
11A98N<br />
Pr<strong>in</strong>ted <strong>in</strong> Hong Kong