RD-600 Sequencing (PDF) - Roland UK
RD-600 Sequencing (PDF) - Roland UK
RD-600 Sequencing (PDF) - Roland UK

You also want an ePaper? Increase the reach of your titles
YUMPU automatically turns print PDFs into web optimized ePapers that Google loves.
®<br />
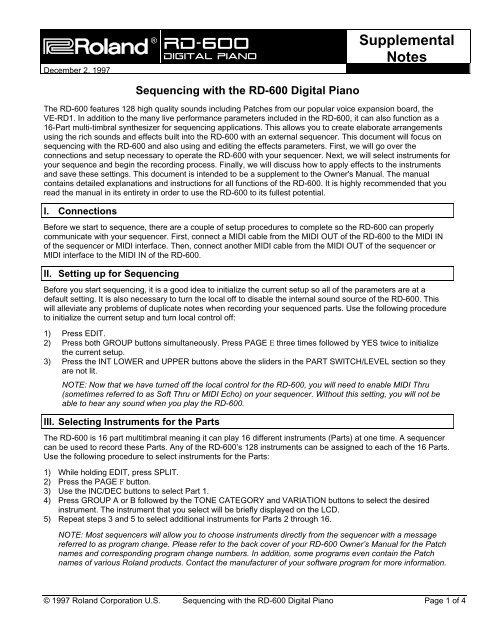
®ÂØÒňΠ<strong>RD</strong>-<strong>600</strong><br />
Digital Piano<br />
December 2, 1997<br />
Supplemental<br />
Notes<br />
<strong>Sequencing</strong> with the <strong>RD</strong>-<strong>600</strong> Digital Piano<br />
The <strong>RD</strong>-<strong>600</strong> features 128 high quality sounds including Patches from our popular voice expansion board, the<br />
VE-<strong>RD</strong>1. In addition to the many live performance parameters included in the <strong>RD</strong>-<strong>600</strong>, it can also function as a<br />
16-Part multi-timbral synthesizer for sequencing applications. This allows you to create elaborate arrangements<br />
using the rich sounds and effects built into the <strong>RD</strong>-<strong>600</strong> with an external sequencer. This document will focus on<br />
sequencing with the <strong>RD</strong>-<strong>600</strong> and also using and editing the effects parameters. First, we will go over the<br />
connections and setup necessary to operate the <strong>RD</strong>-<strong>600</strong> with your sequencer. Next, we will select instruments for<br />
your sequence and begin the recording process. Finally, we will discuss how to apply effects to the instruments<br />
and save these settings. This document is intended to be a supplement to the Owner's Manual. The manual<br />
contains detailed explanations and instructions for all functions of the <strong>RD</strong>-<strong>600</strong>. It is highly recommended that you<br />
read the manual in its entirety in order to use the <strong>RD</strong>-<strong>600</strong> to its fullest potential.<br />
I. Connections<br />
Before we start to sequence, there are a couple of setup procedures to complete so the <strong>RD</strong>-<strong>600</strong> can properly<br />
communicate with your sequencer. First, connect a MIDI cable from the MIDI OUT of the <strong>RD</strong>-<strong>600</strong> to the MIDI IN<br />
of the sequencer or MIDI interface. Then, connect another MIDI cable from the MIDI OUT of the sequencer or<br />
MIDI interface to the MIDI IN of the <strong>RD</strong>-<strong>600</strong>.<br />
II. Setting up for <strong>Sequencing</strong><br />
Before you start sequencing, it is a good idea to initialize the current setup so all of the parameters are at a<br />
default setting. It is also necessary to turn the local off to disable the internal sound source of the <strong>RD</strong>-<strong>600</strong>. This<br />
will alleviate any problems of duplicate notes when recording your sequenced parts. Use the following procedure<br />
to initialize the current setup and turn local control off:<br />
1) Press EDIT.<br />
2) Press both GROUP buttons simultaneously. Press PAGE E three times followed by YES twice to initialize<br />
the current setup.<br />
3) Press the INT LOWER and UPPER buttons above the sliders in the PART SWITCH/LEVEL section so they<br />
are not lit.<br />
NOTE: Now that we have turned off the local control for the <strong>RD</strong>-<strong>600</strong>, you will need to enable MIDI Thru<br />
(sometimes referred to as Soft Thru or MIDI Echo) on your sequencer. Without this setting, you will not be<br />
able to hear any sound when you play the <strong>RD</strong>-<strong>600</strong>.<br />
III. Selecting Instruments for the Parts<br />
The <strong>RD</strong>-<strong>600</strong> is 16 part multitimbral meaning it can play 16 different instruments (Parts) at one time. A sequencer<br />
can be used to record these Parts. Any of the <strong>RD</strong>-<strong>600</strong>’s 128 instruments can be assigned to each of the 16 Parts.<br />
Use the following procedure to select instruments for the Parts:<br />
1) While holding EDIT, press SPLIT.<br />
2) Press the PAGE F button.<br />
3) Use the INC/DEC buttons to select Part 1.<br />
4) Press GROUP A or B followed by the TONE CATEGORY and VARIATION buttons to select the desired<br />
instrument. The instrument that you select will be briefly displayed on the LCD.<br />
5) Repeat steps 3 and 5 to select additional instruments for Parts 2 through 16.<br />
NOTE: Most sequencers will allow you to choose instruments directly from the sequencer with a message<br />
referred to as program change. Please refer to the back cover of your <strong>RD</strong>-<strong>600</strong> Owner’s Manual for the Patch<br />
names and corresponding program change numbers. In addition, some programs even contain the Patch<br />
names of various <strong>Roland</strong> products. Contact the manufacturer of your software program for more information.<br />
© 1997 <strong>Roland</strong> Corporation U.S. <strong>Sequencing</strong> with the <strong>RD</strong>-<strong>600</strong> Digital Piano Page 1 of 4
®ÂØÒňÎ<br />
<strong>RD</strong>-<strong>600</strong> Supplemental Notes<br />
IV. Setting up for <strong>Sequencing</strong><br />
By default, the <strong>RD</strong>-<strong>600</strong> is setup for MIDI channels 1-16 for Parts 1-16. If desired, you can change these channels<br />
or turn them off. Use the following procedure:<br />
1) While holding EDIT, push the Modulation Lever forward.<br />
2) Press the PAGE E button twice.<br />
3) Use the INC/DEC buttons to select the Part number.<br />
4) Use the PAGE E button to move the cursor to channel.<br />
5) Use the INC/DEC buttons to select the MIDI channel.<br />
6) If desired, press both INC/YES and DEC/NO simultaneously to disable or turn off a selected part.<br />
V. Recording Your Performance<br />
Now that we have setup the desired instruments and MIDI channels, were ready to record. Use the following<br />
procedure:<br />
1) While holding EDIT, press SPLIT.<br />
2) Press the PAGE F button.<br />
3) Press the TX UPPER button under PART SELECT.<br />
4) Use the INC/DEC buttons to select the desired MIDI channel to match the Part you would like to record.<br />
5) Start your sequencer recording and play your performance for that Part.<br />
6) Repeat steps 4 and 5 to record additional Parts.<br />
NOTE: There are many sequencers that have the ability to select the desired MIDI channel on each track for<br />
recording. This function is sometimes referred to as Keyboard Thru or Auto Channelize. If your sequencer<br />
has<br />
this function, it will not be necessary to perform step 4. Instead, select the MIDI channel for each track on<br />
your sequencer.<br />
VI. Using the EFX Processor<br />
The <strong>RD</strong>-<strong>600</strong> contains four effects processors including EFX, Reverb, Chorus and a three band EQ. There are 40<br />
stereo EFX algorithms including rotary speaker, distortion and triple-tap-delay that can be applied to Parts in your<br />
sequence. The RATE/SENS and the DEPTH/LEVEL knobs have different assigned parameters depending on the<br />
chosen effect. When a Patch is selected, the <strong>RD</strong>-<strong>600</strong> will automatically select an EFX for that instrument (i.e. the<br />
Organ Patches have a Rotary Speaker effect applied to them). The EFX algorithm can also be changed manually.<br />
For example, let’s apply the Auto-Wah effect to the E. Organ Patch and then change the Rate and Depth of the<br />
effect. Use the following procedure to change the effect:<br />
1) Using section III above, select the E. Organ Patch. Notice that the Rotary Speaker effect is automatically<br />
selected.<br />
2) While holding EDIT, press EFX UPPER.<br />
3) Press the DEC/NO button once to select the Auto-Wah effect.<br />
Use the following procedure to modify the effect:<br />
1) Rotate the RATE/SENS knob to change the rate of the Auto-Wah.<br />
2) Rotate the DEPTH/LEVEL knob to change the depth.<br />
Now that you have defined the overall EFX settings for this setup, use the following procedure to assign this<br />
processor to the UPPER or LOWER Part:<br />
1) While holding EDIT, press EFX UPPER again. Notice that the screen now shows the EFX level for the<br />
UPPER Part.<br />
2) Use the INC/DEC buttons to decrease or increase the amount of the effect applied to the UPPER Part.<br />
If you want to apply this effect to both UPPER and LOWER Parts, hold down the EFX UPPER button while<br />
simultaneously pressing the EFX LOWER button.<br />
© 1997 <strong>Roland</strong> Corporation U.S. <strong>Sequencing</strong> with the <strong>RD</strong>-<strong>600</strong> Page 2 of 4
®ÂØÒňÎ<br />
<strong>RD</strong>-<strong>600</strong> Supplemental Notes<br />
VII. Applying Reverb and Chorus<br />
Adding reverb to a part will create an ambiance to a sound. It can give you the feeling of playing in a concert hall.<br />
Chorus can broaden the sound, adding depth and luster to a Part. The following chart lists the parameters<br />
available for editing:<br />
REVERB<br />
CHORUS<br />
Type Room1, Room2, Stage1, Stage2, Hall1, Hall2 Level The level of the chorus effect.<br />
Delay and Pan-Delay<br />
Level The level of the reverb effect. Rate The speed of the chorus effect.<br />
Time Sets the length of time the reverb will continue. Depth Sets the depth that the chorus will<br />
modulate.<br />
HF Damp Sets the frequency that the high range will be cut. PreDelay Adjusts the amount of time before the<br />
chorus effect begins to sound.<br />
Delay<br />
Feedback<br />
Adjusts the amount of times the delay will repeat. Feedback Adjusts the amount of chorus sound that<br />
is returned or fed back into the chorus.<br />
Output Determines how the chorus and reverb<br />
will be connected before being sent to the<br />
output.<br />
Use the following procedure to change the Reverb settings:<br />
1) While holding EDIT, press the REVERB button repeatedly to step through the different parameter settings<br />
listed above.<br />
2) Use the INC/DEC buttons to change the values for these settings.<br />
Use the following procedure to change the Chorus settings:<br />
1) While holding EDIT, press the CHORUS button repeatedly to step through the different parameter settings<br />
listed above.<br />
2) Use the INC/DEC buttons to change the values for these settings.<br />
Now that you have defined the overall Reverb and Chorus settings for this setup, use the following procedure to<br />
define the Reverb and Chorus amount for each Part in your sequence:<br />
1) While holding EDIT, press SPLIT.<br />
2) Press the PAGEF button.<br />
3) Use the INC/DEC buttons to select the desired Part.<br />
4) While holding EDIT, press REVERB or CHORUS to display the Reverb or Chorus Amount parameter.<br />
5) Use the INC/DEC buttons to set the effect amount for the currently selected Part.<br />
VIII. Saving the Setup<br />
All of the changes thus far are only in temporary memory. This means that the changes will revert back to their<br />
original settings if the <strong>RD</strong>-<strong>600</strong> is turned off or if a new Setup is selected. We must write the settings to a Setup in<br />
order to retain them for future use. Use the following procedure to save your settings to an Internal Setup:<br />
1) Press EDIT so it is lit.<br />
2) Press both GROUP buttons simultaneously.<br />
3) Use the INTERNAL TONE CATEGORY and INTERNAL TONE VARIATION buttons to select the desired<br />
Setup destination.<br />
4) Press INC/YES.<br />
Use the following procedure to recall the saved Setup:<br />
1) Press both GROUP buttons simultaneously.<br />
2) Use the INTERNAL TONE CATEGORY and INTERNAL TONE VARIATION buttons to select a Setup.<br />
© 1997 <strong>Roland</strong> Corporation U.S. <strong>Sequencing</strong> with the <strong>RD</strong>-<strong>600</strong> Page 3 of 4
®ÂØÒňÎ<br />
<strong>RD</strong>-<strong>600</strong> Supplemental Notes<br />
IX. Customizing The Keyboard<br />
Here are some extra features available to help you in the operation of the <strong>RD</strong>-<strong>600</strong>:<br />
Use the following procedure to set the <strong>RD</strong>-<strong>600</strong> to power up with your current Setup:<br />
1) While holding EDIT, press SPLIT.<br />
2) Press the PAGE F button three times to select Powerup Mode.<br />
3) Press INC/YES to change DEFAULT to LAST.<br />
There is a Control Channel setting in the <strong>RD</strong>-<strong>600</strong> that will allow you to change Setups with a MIDI program<br />
change message. Use the following procedure to set the Control Channel:<br />
1) From the Powerup Mode page, press the PAGE F button three times to select Control Ch.<br />
2) Use the INC and DEC buttons to select a MIDI channel that will not be used in your sequence (i.e. Channel<br />
16). If you set the Control Channel to a channel that you are using, you may inadvertently change your Setup<br />
instead of the desired Patch.<br />
NOTE: Sending a program change from 1-64 to MIDI Channel 16 will now change entire Setups.<br />
3) To disable the Control Channel function press INC and DEC simultaneously.<br />
© 1997 <strong>Roland</strong> Corporation U.S. <strong>Sequencing</strong> with the <strong>RD</strong>-<strong>600</strong> Page 4 of 4