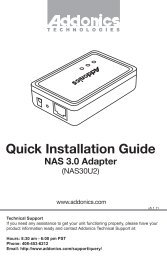
SATA to 44-Pin IDE Converter User Guide - Addonics
SATA to 44-Pin IDE Converter User Guide - Addonics
SATA to 44-Pin IDE Converter User Guide - Addonics

You also want an ePaper? Increase the reach of your titles
YUMPU automatically turns print PDFs into web optimized ePapers that Google loves.
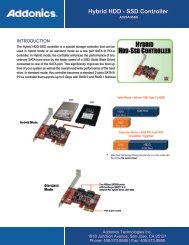
T E C H N O L O G I E S<br />
<strong>User</strong> <strong>Guide</strong><br />
<strong>SATA</strong> <strong>to</strong> <strong>44</strong>-<strong>Pin</strong><br />
<strong>IDE</strong> <strong>Converter</strong><br />
(ADSA<strong>IDE</strong><strong>44</strong>)<br />
www.addonics.com<br />
Technical Support<br />
If you need any assistance <strong>to</strong> get your unit functioning properly, please<br />
have your product information ready and contact <strong>Addonics</strong> Technical<br />
Support at:<br />
Hours: 8:30 am - 6:00 pm PST<br />
Phone: 408-453-6212<br />
Email: http://www.addonics.com/support/query/
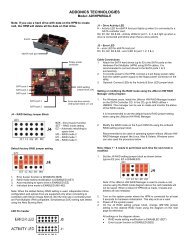
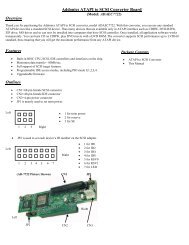
Overview<br />
Front View<br />
1<br />
1. <strong>44</strong>-pin <strong>IDE</strong> Connec<strong>to</strong>r<br />
2. <strong>SATA</strong> Power and Data Connec<strong>to</strong>r<br />
3. Master, Slave & Cable Select<br />
Jumpers<br />
4. <strong>Pin</strong> 1 Marker<br />
Back View<br />
2<br />
3<br />
4<br />
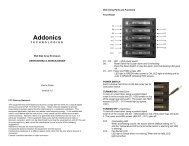
Jumper Settings<br />
Master Slave Cable Select<br />
NOTE: To set the <strong>SATA</strong> hard drive as a Master Device when connected <strong>to</strong> an <strong>IDE</strong> channel,<br />
do not install a jumper. As a Slave Device short the middle pins.<br />
www.addonics.com Technical Support (M-F 8:30am - 6:00pm PST) Phone: 408-453-6212 Email: www.addonics.com/support/query/
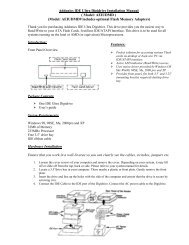
Installation<br />
1. 15-pin <strong>SATA</strong> Power & 7-pin Data<br />
Connec<strong>to</strong>r<br />
Step 1. Locate the <strong>SATA</strong> connec<strong>to</strong>r<br />
of your 2.5” <strong>SATA</strong> drive.<br />
1<br />
Step 2. Connect the converter<br />
board <strong>to</strong> the <strong>SATA</strong> connec<strong>to</strong>r of the<br />
hard drive.<br />
Step 3. (Optional) Connect the <strong>IDE</strong><br />
ribbon cable <strong>to</strong> the <strong>44</strong>-pin connec<strong>to</strong>r<br />
on the converter. The red edge of<br />
the ribbon cable needs <strong>to</strong> line up <strong>to</strong><br />
pin 1 marker of the <strong>44</strong>-pin connec<strong>to</strong>r.<br />
The other end of the ribbon<br />
cable will be connected <strong>to</strong> your<br />
motherboard’s <strong>44</strong>-pin <strong>IDE</strong> channel.<br />
www.addonics.com Technical Support (M-F 8:30am - 6:00pm PST) Phone: 408-453-6212 Email: www.addonics.com/support/query/
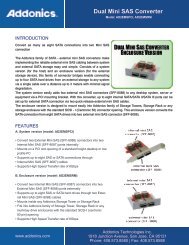
CONTACT US<br />
www.addonics.com<br />
Phone: 408-573-8580<br />
Fax: 408-573-8588<br />
Email: http://www.addonics.com/sales/query/