Three Prisms - Dick Blick - Dick Blick Art Materials
Three Prisms - Dick Blick - Dick Blick Art Materials
Three Prisms - Dick Blick - Dick Blick Art Materials

Create successful ePaper yourself
Turn your PDF publications into a flip-book with our unique Google optimized e-Paper software.
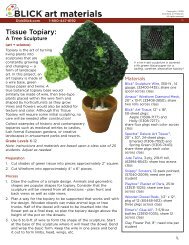
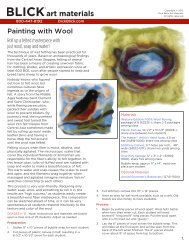
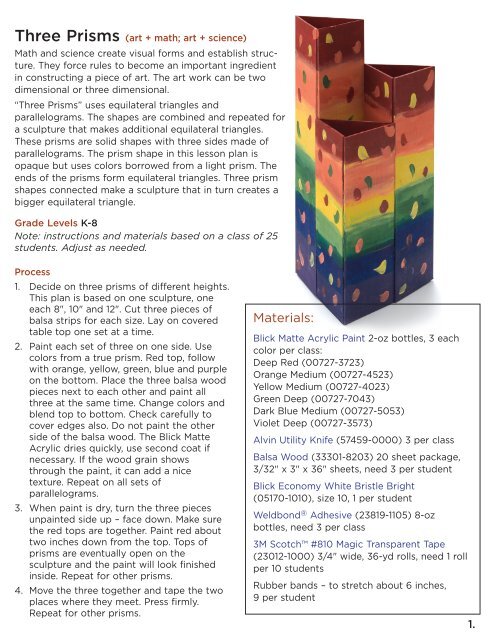
<strong>Three</strong> <strong>Prisms</strong> (art + math; art + science)<br />
Math and science create visual forms and establish structure.<br />
They force rules to become an important ingredient<br />
in constructing a piece of art. The art work can be two<br />
dimensional or three dimensional.<br />
“<strong>Three</strong> <strong>Prisms</strong>” uses equilateral triangles and<br />
parallelograms. The shapes are combined and repeated for<br />
a sculpture that makes additional equilateral triangles.<br />
These prisms are solid shapes with three sides made of<br />
parallelograms. The prism shape in this lesson plan is<br />
opaque but uses colors borrowed from a light prism. The<br />
ends of the prisms form equilateral triangles. <strong>Three</strong> prism<br />
shapes connected make a sculpture that in turn creates a<br />
bigger equilateral triangle.<br />
Grade Levels K-8<br />
Note: instructions and materials based on a class of 25<br />
students. Adjust as needed.<br />
Process<br />
1. Decide on three prisms of different heights.<br />
This plan is based on one sculpture, one<br />
each 8", 10" and 12". Cut three pieces of<br />
balsa strips for each size. Lay on covered<br />
table top one set at a time.<br />
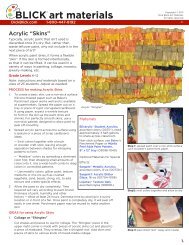
2. Paint each set of three on one side. Use<br />
colors from a true prism. Red top, follow<br />
with orange, yellow, green, blue and purple<br />
on the bottom. Place the three balsa wood<br />
pieces next to each other and paint all<br />
three at the same time. Change colors and<br />
blend top to bottom. Check carefully to<br />
cover edges also. Do not paint the other<br />
side of the balsa wood. The <strong>Blick</strong> Matte<br />
Acrylic dries quickly, use second coat if<br />
necessary. If the wood grain shows<br />
through the paint, it can add a nice<br />
texture. Repeat on all sets of<br />
parallelograms.<br />
3. When paint is dry, turn the three pieces<br />
unpainted side up – face down. Make sure<br />
the red tops are together. Paint red about<br />
two inches down from the top. Tops of<br />
prisms are eventually open on the<br />
sculpture and the paint will look finished<br />
inside. Repeat for other prisms.<br />
4. Move the three together and tape the two<br />
places where they meet. Press firmly.<br />
Repeat for other prisms.<br />
<strong>Materials</strong>:<br />
<strong>Blick</strong> Matte Acrylic Paint 2-oz bottles, 3 each<br />
color per class:<br />
Deep Red (00727-3723)<br />
Orange Medium (00727-4523)<br />
Yellow Medium (00727-4023)<br />
Green Deep (00727-7043)<br />
Dark Blue Medium (00727-5053)<br />
Violet Deep (00727-3573)<br />
Alvin Utility Knife (57459-0000) 3 per class<br />
Balsa Wood (33301-8203) 20 sheet package,<br />
3/32" x 3" x 36" sheets, need 3 per student<br />
<strong>Blick</strong> Economy White Bristle Bright<br />
(05170-1010), size 10, 1 per student<br />
Weldbond ® Adhesive (23819-1105) 8-oz<br />
bottles, need 3 per class<br />
3M Scotch #810 Magic Transparent Tape<br />
(23012-1000) 3/4" wide, 36-yd rolls, need 1 roll<br />
per 10 students<br />
Rubber bands – to stretch about 6 inches,<br />
9 per student<br />
1.
(A)<br />
Tape<br />
Tape<br />
Side 1<br />
Side 2 Side 3<br />
National Standards<br />
Content Standard #6 — Making connections between<br />
visual arts and other disciplines<br />
5-8<br />
Students describe ways in which the principles<br />
and subject matter of other disciplines taught in<br />
the school are interrelated with the visual arts<br />
9-12<br />
Students synthesize the creative and analytical<br />
Process, continued<br />
principles and techniques of the visual arts and<br />
selected other arts disciplines, the humanities, or<br />
Tape Tape<br />
the sciences<br />
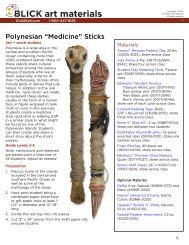
5. Lift side one and side three and put them 1<br />
together (see illustration A). Place a<br />
rubber band on each end to hold them in<br />
that position. Make sure they form an<br />
2 3<br />
equilateral triangle. Place a small line of glue<br />
on the two side edges that are not taped<br />
together. Place the glue at the corner on the<br />
outside. Use a toothpick or a piece of cardboard<br />
Side to apply 1 the glue. Side Make 2 sure the Side sides3<br />
are barely touching – just enough to glue.<br />
Adjust the shape if needed – the rubber<br />
bands will shift a little. Repeat for other prism<br />
shapes.<br />
6. When the glue dries, remove the rubber<br />
bands. Stand the three prisms red ends up.<br />
Move them together until the middle hole<br />
forms another equilateral triangle. Move one<br />
prism out slightly, add glue on the edge<br />
where they meet and put back in place.<br />
Repeat on other connecting edges. Get a<br />
helper to hold them together and add a<br />
rubber band at bottom and at top where the<br />
three meet. They will glue and hold firmly.<br />
1<br />
7. Remove the rubber bands. They should have<br />
created a bigger equilateral triangle<br />
together (see illustration B).<br />
2 3<br />
8. Students may add painted designs of<br />
their choices.<br />
(B)<br />
Copyright © 2007 <strong>Dick</strong> <strong>Blick</strong> <strong>Art</strong> <strong>Materials</strong>. All rights reserved. JG<br />
2.