Wire Weave - Dick Blick - Dick Blick Art Materials
Wire Weave - Dick Blick - Dick Blick Art Materials
Wire Weave - Dick Blick - Dick Blick Art Materials

You also want an ePaper? Increase the reach of your titles
YUMPU automatically turns print PDFs into web optimized ePapers that Google loves.
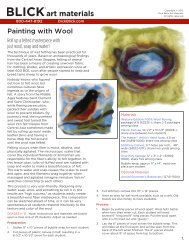
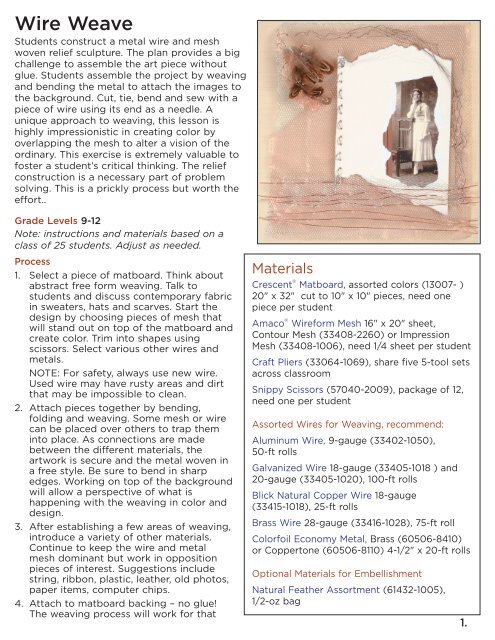
<strong>Wire</strong> <strong>Weave</strong><br />
Students construct a metal wire and mesh<br />
woven relief sculpture. The plan provides a big<br />
challenge to assemble the art piece without<br />
glue. Students assemble the project by weaving<br />
and bending the metal to attach the images to<br />
the background. Cut, tie, bend and sew with a<br />
piece of wire using its end as a needle. A<br />
unique approach to weaving, this lesson is<br />
highly impressionistic in creating color by<br />
overlapping the mesh to alter a vision of the<br />
ordinary. This exercise is extremely valuable to<br />
foster a student’s critical thinking. The relief<br />
construction is a necessary part of problem<br />
solving. This is a prickly process but worth the<br />
effort..<br />
Grade Levels 9-12<br />
Note: instructions and materials based on a<br />
class of 25 students. Adjust as needed.<br />
Process<br />
1. Select a piece of matboard. Think about<br />
abstract free form weaving. Talk to<br />
students and discuss contemporary fabric<br />
in sweaters, hats and scarves. Start the<br />
design by choosing pieces of mesh that<br />
will stand out on top of the matboard and<br />
create color. Trim into shapes using<br />
scissors. Select various other wires and<br />
metals.<br />
NOTE: For safety, always use new wire.<br />
Used wire may have rusty areas and dirt<br />
that may be impossible to clean.<br />
2. Attach pieces together by bending,<br />
folding and weaving. Some mesh or wire<br />
can be placed over others to trap them<br />
into place. As connections are made<br />
between the different materials, the<br />
artwork is secure and the metal woven in<br />
a free style. Be sure to bend in sharp<br />
edges. Working on top of the background<br />
will allow a perspective of what is<br />
happening with the weaving in color and<br />
design.<br />
3. After establishing a few areas of weaving,<br />
introduce a variety of other materials.<br />
Continue to keep the wire and metal<br />
mesh dominant but work in opposition<br />
pieces of interest. Suggestions include<br />
string, ribbon, plastic, leather, old photos,<br />
paper items, computer chips.<br />
4. Attach to matboard backing – no glue!<br />
The weaving process will work for that<br />
<strong>Materials</strong><br />
Crescent ® Matboard, assorted colors (13007- )<br />
20" x 32" cut to 10" x 10" pieces, need one<br />
piece per student<br />
Amaco ® <strong>Wire</strong>form Mesh 16" x 20" sheet,<br />
Contour Mesh (33408-2260) or Impression<br />
Mesh (33408-1006), need 1/4 sheet per student<br />
Craft Pliers (33064-1069), share five 5-tool sets<br />
across classroom<br />
Snippy Scissors (57040-2009), package of 12,<br />
need one per student<br />
Assorted <strong>Wire</strong>s for Weaving, recommend:<br />
Aluminum <strong>Wire</strong>, 9-gauge (33402-1050),<br />
50-ft rolls<br />
Galvanized <strong>Wire</strong> 18-gauge (33405-1018 ) and<br />
20-gauge (33405-1020), 100-ft rolls<br />
<strong>Blick</strong> Natural Copper <strong>Wire</strong> 18-gauge<br />
(33415-1018), 25-ft rolls<br />
Brass <strong>Wire</strong> 28-gauge (33416-1028), 75-ft roll<br />
Colorfoil Economy Metal, Brass (60506-8410)<br />
or Coppertone (60506-8110) 4-1/2" x 20-ft rolls<br />
Optional <strong>Materials</strong> for Embellishment<br />
Natural Feather Assortment (61432-1005),<br />
1/2-oz bag<br />
1.
Process, continued<br />
also. Use wire to sew through holes punched into<br />
the backing or fold foil over the sides and crimp<br />
to secure.<br />
Options<br />
• Combine fabric and wire for more texture.<br />
• Change shapes and work more 3D in<br />
construction.<br />
- The concepts in this lesson plan, symmetrical,<br />
asymmetrical, positive and negative shapes can<br />
be divided into other lesson plans rich in<br />
principles and elements of design.<br />
Copyright © 2003 <strong>Dick</strong> <strong>Blick</strong> <strong>Art</strong> <strong>Materials</strong>. All rights reserved.JG<br />
National Standards<br />
Content Standard #1 — Understanding and<br />
applying media, techniques and processes.<br />
9-12 Students conceive and create works<br />
of visual art that demonstrate an<br />
understanding of how the communication<br />
of their ideas relates to the media,<br />
techniques, and processes they use<br />
Content Standard #2 — Using knowledge of<br />
structures and functions<br />
9-12 Students create artworks that use<br />
organizational principles and functions to<br />
solve specific visual arts problems<br />
Content Standard #3 — Choosing and<br />
evaluating a range of subject matter,<br />
symbols, and ideas<br />
9-12 Students apply subjects, symbols,<br />
and ideas in their artworks and use the<br />
skills gained to solve problems in daily life<br />
2.