SERVICE MANUAL - Jordans Manuals
SERVICE MANUAL - Jordans Manuals
SERVICE MANUAL - Jordans Manuals

Create successful ePaper yourself
Turn your PDF publications into a flip-book with our unique Google optimized e-Paper software.
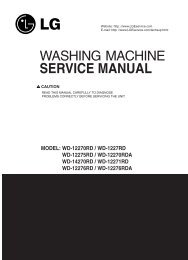
WASHING MACHINE<br />
<strong>SERVICE</strong> <strong>MANUAL</strong><br />
CAUTION<br />
READ THIS <strong>MANUAL</strong> CAREFULLY TO DIAGNOSE TROUBLES<br />
CORRECTLY BEFORE OFFERING <strong>SERVICE</strong>.<br />
MODEL : WD-1412RD<br />
WD-14120(5,6)RD<br />
WD-12120(5)RD<br />
WD-10120(5)RD<br />
100
MAY. 2002 PRINTED IN KOREA<br />
P/No.:3828ER3008T<br />
101
CONTENTS<br />
1. SPECIFICATION............................................................................................................................3<br />
2. FEATURES & TECHNICAL EXPLANATION ................................................................................ 4<br />
3. PARTS IDENTIFICATION ............................................................................................................ 6<br />
4. INSTALLATION............................................................................................................................. 7<br />
5. OPERATION ................................................................................................................................10<br />
6. WIRING DIAGRAM / PROGRAM CHART...................................................................................14<br />
7. TROUBLE SHOOTING................................................................................................................15<br />
7-1.BEFORE SVC CHECKING..................................................................................................15<br />
7-2.QC TEST MODE..................................................................................................................15<br />
7-3.HOW TO KNOW THE WATER LEVEL FREQUENCY.........................................................15<br />
7-4.ERROR DISPLAY ................................................................................................................16<br />
8. ERROR DIAGNOSIS AND CHECK LIST ....................................................................................18<br />
8-1. DIAGNOSIS AND ANSWER FOR ABNORMAL OPERATION ...........................................18<br />
8-2. FAULT DIAGNOSIS AND TROUBLE SHOOTING .............................................................21<br />
9. DISASSEMBLY INSTRUCTIONS ...............................................................................................31<br />
10. EXPLODED VIEW AND PARTS LIST .......................................................................................41<br />
10-1. THE EXPLODED VIEW OF CABINET ASSEMBLY .........................................................41<br />
10-2. THE EXPLODED VIEW OF CONTROL PANEL AND DISPENSER ASSEMBLY ............42<br />
10-3. THE EXPLODED VIEW OF DRUM AND TUB ASSEMBLY .............................................43<br />
10-4. THE EXPLODED VIEW OF DRYER ................................................................................44<br />
APPENDIX (Replacement parts list) ...........................................................................................45<br />
2
1. SPECIFICATION<br />
ITEM<br />
WD-1412RD / WD-14120(5)RD / WD-12120(5)RD / WD-10120(5)RD<br />
POWER SUPPLY<br />
220V-240V~, 50HZ<br />
PRODUCT WEIGHT<br />
71kg<br />
WASHING<br />
140W<br />
ELECTRICITY SPIN<br />
300W<br />
CONSUMPTION FAN MOTOR<br />
25W<br />
DRAIN MOTOR<br />
40W<br />
WASH HEATER<br />
2000W<br />
DRY HEATER<br />
2100W<br />
REVOLUTION<br />
WASH45rpm<br />
SPEED<br />
SPIN WD-1412RD/WD-14120(5,6)RD 400/800/1000/1400 rpm<br />
WD-12120(5)RD<br />
400/800/1000/1200 rpm<br />
WD-10120(5)RD<br />
400/600/800/1000 rpm<br />
OPERATION WATER PRESSURE<br />
0.3-10kgf/cm 2 (30-1000kPa)<br />
CONTROL TYPE<br />
Electronic<br />
WASH CAPACITY<br />
7.0kg (Cotton)<br />
DRY CAPACITY<br />
4.0kg (Cotton)<br />
DIMENSION<br />
600mm(W)600mm(D)850mm(H)<br />
WASH PROGRAM Cotton, Cotton-Eco, Synthetic, Delicate, Wool, Hand Wash, Quick 30<br />
RINSE<br />
Normal / Super / Rinse Hold<br />
DOOR SWITCH TYPE<br />
Manual<br />
WATER LEVEL<br />
8 steps (by sensor)<br />
RESERVATION<br />
From 3 hours to 19 hours<br />
SENSING OF THE LAUNDRY AMOUNT<br />
Adapted<br />
FUZZY LOGIC<br />
Adapted<br />
DISPLAY OF THE REMAINING TIME<br />
Adapted<br />
ERROR DIAGNOSIS<br />
10 items<br />
POWER AUTO OFF<br />
Adapted<br />
CHILD LOCK<br />
Adapted<br />
AUTO RESTART<br />
Adapted<br />
TIME SAVE<br />
Adapted<br />
3
2. FEATURES & TECHNICAL EXPLANATION<br />
2-1.FEATURES<br />
Automatic process from washing to drying.<br />
Automatic process from washing to drying can be<br />
selected easily.<br />
Washing capacity : 7 kg (Cotton)<br />
Drying capacity : 4 kg (Cotton)<br />
More economical by Intelligent Wash System<br />
Intelligent Wash System detects the amount of load and water<br />
temperature, and then determines the optimum water level and<br />
washing time to minimize energy and water consumption.<br />
Direct Drive system<br />
The advanced Brushless DC motor rotates the Drum directly<br />
without belt and pulley.<br />
Wash<br />
Rinse<br />
Child-Lock<br />
The Child-Lock system has been developed to prevent<br />
children from pressing any button to change the program<br />
during operation.<br />
Low noise speed control system<br />
By sensing the amount of load and balance, evenly distributes<br />
load to minimize the spinning noise level.<br />
Auto Restart<br />
Although the washing machine is turned off by a power failure, it<br />
restarts automatically in its stopped process when power is<br />
supplied again. And it will be the same when the machine<br />
unplugged in operation is plugged in again.<br />
4
2-2.DETERMINE WASHING TIME BY FUZZY LOGIC<br />
To get the best washing performance optimal time is determined by sensing of water temperature,<br />
selected washing temperature and laundry amount.<br />
water<br />
temperature<br />
washing time<br />
selected<br />
washing<br />
temperature<br />
FUZZY<br />
LOGIC<br />
rinsing time<br />
the best<br />
washing<br />
performance<br />
laundry<br />
amount<br />
spin rhythm, time<br />
SENSING PROCESSING DETERMINATION EFFECT<br />
2-3.WATER LEVEL CONTROL<br />
This model adopts a pressure sensor which can sense the water level in the tub.<br />
Water supply is stopped when the water level to the preset level, then washing program proceeds.<br />
Spinning does not proceed until the water in the tub reduces to a certain level.<br />
5
3. PARTS IDENTIFICATION<br />
Drawer<br />
(For detergent and<br />
fabric softener)<br />
Power plug<br />
If the supply cord is damaged,<br />
it must be replaced by the<br />
manufacturer or its service agents<br />
or a similarly qualified person in<br />
order to avoid a hazard.<br />
Control panel<br />
Drain hose<br />
Door<br />
Drum<br />
Drain pump filter<br />
Lower cover<br />
Adjustable feet<br />
Lower cover cap<br />
Drain plug<br />
ACCESSORIES<br />
Spanner<br />
6
4. INSTALLATION<br />
Before servicing ask troubles of customers<br />
Check the adjustment(power supply is 220-240V~, remove the transit bolts....)<br />
Check the troubles referring to the trouble shooting.<br />
Decide service steps referring to disassembly instructions.<br />
And then, service and repair.<br />
After servicing, operate the appliance whether it works O Kor NOT.<br />
STANDARD INSTALLATION<br />
The appliance should be installed as follows.<br />
REMOVE THE TRANSIT INSTALL THE APPLIANCE ADJUST THE<br />
BOLTS ON FLAT AND FIRM SURFACE HORIZONTAL<br />
Remove the transit bolts<br />
Turn the leveling feet to<br />
(3EA: )with supplied spanner. set the appliance horizontally.<br />
Keep the transit bolts and<br />
spanner for future use.<br />
Insert the 3 caps<br />
provided into the hole<br />
Low<br />
High<br />
1<br />
2<br />
The appliance goes up by<br />
rotating the feet clockwise.<br />
The appliance come down by<br />
rotating the feet counter<br />
clockwise.<br />
7
HOW TO CONNECT INLET HOSE<br />
Check that the rubber packing is inside of the<br />
valve connector.<br />
Connect the inlet hose firmly to prevent leak.<br />
CONNECT DRAIN HOSE<br />
Make sure that the hose is not twisted.<br />
Avoid submerging the end of the hose.<br />
The drain hose should be placed under 100cm from the floor.<br />
CONNECT POWER PLUG<br />
Connect the power plug to the wall outlet.<br />
Avoid connecting several electric devices,<br />
It may be the cause of the fire.<br />
8
TEST OPERATION<br />
Preparation for Press the POWER button. Press the Start/Pause<br />
washing.<br />
button.<br />
Connect the power plug to<br />
the outlet.<br />
Connect the inlet hose.<br />
Power<br />
Start/Pause<br />
In case of Coloreds program.<br />
Check the water heating. Check automatic reverse Check the water supply.<br />
turn.<br />
Press the Temp. button Check if the drum rotates Check if water is supplied<br />
and the present temperature will clockwise and counterclockwise. through the detergent dispenser.<br />
be displayed.<br />
Check drain and spin Power off and open the Water removal<br />
door<br />
Turn off Wash and Rinse after<br />
pressing the Start/Pause button<br />
and start the machine again.<br />
Check drain and spin.<br />
Power<br />
Power off and then power on.<br />
Check if the door can be<br />
opened after 3 minutes.<br />
If SVC is needed during<br />
check, remove<br />
the remaining water by pulling<br />
out the hose cap.<br />
9
5. OPERATION<br />
5-1) OPERATION-1<br />
10
5. OPERATION<br />
5-1) OPERATION-2<br />
12
6. WIRING DIAGRAM / PROGRAM CHART<br />
DISPLAY<br />
PWB<br />
MAIN PWB<br />
NA<br />
123456<br />
123456<br />
VL WH S / / K<br />
WH RD Y<br />
BK RD / /<br />
WH WH<br />
WH<br />
123<br />
123<br />
RD RD NA<br />
RD SKY BL WH<br />
RD WH<br />
123456<br />
1234<br />
56<br />
2 1 3<br />
2 1 3<br />
2314<br />
231<br />
4<br />
2 4 3 1<br />
2 4 3 1<br />
3 2 1<br />
3 2 1<br />
1<br />
1<br />
3 2 1<br />
3 2 1<br />
123<br />
123<br />
WH BK YL OR BL BN GY PK BL RD YL BL RD<br />
YL BK /<br />
WH<br />
BL /<br />
RD<br />
WH /<br />
BK<br />
GY /<br />
WH<br />
YL /<br />
BK<br />
BK YL BN / /<br />
BL<br />
RD YL<br />
BL YL RD<br />
BL<br />
BN<br />
GN /<br />
YL<br />
NA<br />
123<br />
123<br />
(S) (G) (S)<br />
PRESSURE<br />
SENSOR<br />
WH/RD<br />
WH<br />
/RD<br />
12<br />
WH 12 WH<br />
12<br />
12<br />
THERMISTOR THERMISTOR<br />
(Dry Duct Dry H/T) (Tub)<br />
FAN MOTOR<br />
WH<br />
123<br />
123<br />
U V W<br />
12345<br />
12345<br />
Ha<br />
Hb<br />
GND<br />
MOTOR<br />
INLET<br />
VALVE<br />
WH<br />
BK<br />
3<br />
M P D<br />
AIN R R<br />
E Y<br />
BK<br />
2<br />
1<br />
BK RD<br />
YL /<br />
RD<br />
BN /<br />
YL<br />
YL<br />
THER-<br />
MOSTAT<br />
2 1<br />
2 1 WH<br />
RD<br />
DRY<br />
HEATER<br />
GN /<br />
YL<br />
RD<br />
WASHING<br />
HEATER<br />
FUSE<br />
NA<br />
CP<br />
P<br />
WH<br />
C<br />
RD<br />
WH<br />
NOISE<br />
FILTER<br />
GN /<br />
YL<br />
BL BN<br />
C<br />
BK<br />
P<br />
BK<br />
n<br />
PIN CONNECTOR NUMBER<br />
TERMINAL+HOUSING (#250)<br />
EARTH TERMINAL<br />
VL 3 2 1<br />
6 5 4<br />
3 2 1 NA<br />
DRAIN<br />
MOTOR<br />
POWER<br />
CORD<br />
WIRE COLOR: BASE/LINE<br />
DOOR LOCK S/W<br />
PROGRAM CHART<br />
* Water Supply : WáS * Intermittent Spin : IáS * Disentangle : DáT<br />
C<br />
Wash<br />
Rinse<br />
A<br />
Y<br />
Spin<br />
Pre<br />
Main<br />
Normal (Hold)<br />
Extra (Hold)<br />
U<br />
C<br />
D E T<br />
Washing Staycooling 1<br />
2<br />
3<br />
L<br />
4<br />
R N O<br />
S W<br />
W<br />
Normal<br />
E á<br />
I<br />
Y<br />
á<br />
W<br />
W<br />
W<br />
W<br />
W<br />
D O<br />
S á S<br />
á<br />
I<br />
S<br />
á<br />
á<br />
I<br />
á á<br />
I<br />
Working<br />
C<br />
T<br />
á á<br />
I á<br />
á<br />
F<br />
O E<br />
S<br />
S S<br />
S S<br />
S S S<br />
S<br />
Time<br />
F<br />
U<br />
(Hour:Minute)<br />
P<br />
R<br />
1 2 3 4 5 6 7 8 9 10 11 12 13 14 15 16 17 18 19 20 21 22 23 24 25 26 27 28 29 20 20<br />
S Time<br />
E<br />
(SEC) 120 MIN 60 300 120 MIN 120 60 60 60 300 120 360 60 300 120 360 60 300 120 360 60 300 120 360 60 600 120 20 20<br />
Washing<br />
Drain<br />
Heat<br />
Wash<br />
Rinse<br />
Drain<br />
Drain<br />
Rinse<br />
Drain<br />
Cotton<br />
Cotton-Eco<br />
Synthetic<br />
8 60<br />
96<br />
8<br />
1<br />
40<br />
8 23<br />
59<br />
About 2:43(2:41)<br />
About 3:03<br />
About 1:30<br />
Quick 30<br />
12<br />
About 30<br />
Delicate<br />
1<br />
29<br />
About 1:01<br />
Wool<br />
1<br />
23<br />
About 1:01<br />
HandWash<br />
1<br />
29<br />
About 1:00<br />
Wash<br />
8<br />
60<br />
~<br />
96<br />
About 1:50<br />
Rinse<br />
Drain<br />
Rinse<br />
Drain<br />
Rinse<br />
Drain<br />
Spin<br />
DáT<br />
Rinse<br />
Rinse Hold<br />
Dry<br />
Spin<br />
Wash<br />
+ Rinse<br />
Wash<br />
+Spin<br />
Rinse<br />
+ Spin<br />
8<br />
8<br />
60<br />
~<br />
96<br />
60 ~<br />
96<br />
* Basic Cycle<br />
* Optional Cycle<br />
* Pre-Setting Time : Water Supply - 120 sec.<br />
Drain - 60 sec.<br />
* ~ Time for varies as the temperature or the amount of laundry.<br />
* Basic time is minute in washing chart<br />
* The actual program time can be varied with the load amount,<br />
water temperature or ambient temperature<br />
14<br />
About 39<br />
About 39<br />
About 2:21<br />
About 15<br />
About 2:29<br />
About 1:44<br />
About 39
7. TROUBLE SHOOTING<br />
7-1.BEFORE SVC CHECKING<br />
Be careful of electric shock or disconnecting the parts while trouble shooting.<br />
Voltage of each terminal in 220-240V~ and DC while applying an electric current.<br />
7-2.QC TEST MODE.<br />
Pressing Rinse, and Spin button simultaneously.<br />
Power supply ON with pressing upper two button.Then buzzer sound twice.<br />
Press the Start/Pause button as follows.<br />
Press the Start/Pause button more 4 times until stop spinning<br />
Pressing number of<br />
Start/Pause button<br />
None<br />
Checking Point<br />
All lamps turn on<br />
Display Status<br />
1 time Clockwise spin(right) Drum rpm(About 40~52)<br />
2 times Low speed Spin Drum rpm(About 70~90)<br />
3 times High speed Spin Drum rpm(About 90~110)<br />
4 times Inlet valve for pre-wash operation Water level frequency(25~65)<br />
5 times Inlet valve for main-wash operation Water level frequency(25~65)<br />
6 times Inlet valve for dry operation Water level frequency(25~65)<br />
7 times Counterclockwise spin(left) Drum rpm(About 40~52)<br />
8 times Heater is in operation for 3 sec. Water temperature<br />
9 times Draining pump operation Water level frequency<br />
10 times Dry operation for 6 minutes Auto off operation after 6 minutes<br />
7-3.HOW TO KNOW THE WATER LEVEL FREQUENCY<br />
Press the Rinse and Spin button simultaneously.<br />
The digits means water level frequency(10 -1 )<br />
ex) 241 : Water level frequency = 241 10 -1<br />
=24.1<br />
7-4.HOW TO KNOW TO TEMPERATURE OF EACH THERMISTOR<br />
AT OPERATING CONDITION.<br />
■ Thermistor in tub : Press the [WATER TEMP] button.<br />
■ Thermistor in dry duct : Press the [DRY] button.<br />
■ Thermistor in condensing duct : Press the [SPIN] and [DRY] button simultaneously.<br />
15
7-5.ERROR DISPLAY.<br />
If you press the Start/Pause button in error condition, any error except ‘ ’ will disappear and the<br />
machine will change into pause status.<br />
In case of<br />
if the error is not resolved within 20 sec., and in case of other errors,<br />
if the error is not resolved within 4 min., power will be turned off automatically and the error only will be<br />
blinked. But in case of , power will not be turned off.<br />
ERROR SYMPTOM CAUSE<br />
1<br />
WATER INLET<br />
ERROR<br />
• Not reached to the water level(2 level)within 4<br />
minutes after water supplied or not reached to<br />
the preset water level within 25 minutes.<br />
2<br />
3<br />
4<br />
5<br />
DRAIN ERROR<br />
OVERFLOW<br />
ERROR<br />
SENSOR PRESSURE<br />
S/W ERROR<br />
DOOR OPEN<br />
ERROR<br />
• Not fully drained within 5 minutes.<br />
• Water is over flowing(over 8 level).<br />
If is displayed, drain pump operates to<br />
drain water automatically.<br />
• The sensor pressure switch is out of order.<br />
• In case of operating the reservation function or<br />
the other function with door opened. Close the<br />
door, then the error display is resolved.<br />
• The door switch is out of order.<br />
6<br />
7<br />
IMBALANCE<br />
ERROR<br />
HEATING<br />
ERROR<br />
• The appliance is tilted.<br />
• Laundry is gatherd to one side.<br />
• The THERMISTOR is out of order.<br />
16
ERROR SYMPTOM CAUSE<br />
8<br />
CURRENT<br />
ERROR<br />
• MAIN PWB ASSEMBLY is out of order<br />
Replace the MAIN PWB ASSEMBLY<br />
• Winding in the STATOR ASSEMBLY is short-circuited.<br />
Replace the STATOR ASSEMBLY<br />
• “ ” is dispplayed during a high spin<br />
Replace the LEAD WIRE ASSEMBLY (MOTOR)<br />
9<br />
MOTOR<br />
ERROR<br />
• The connector in the LEAD WIRE ASSEMBLY is not connected to<br />
the connnector of STATOR ASSEMBLY<br />
Reconnect or repair the connector<br />
• The hall sensor is out of order/defective.<br />
Replace the STATOR ASSEMBLY<br />
10<br />
DRY<br />
HEATOR<br />
ERROR<br />
• The Dry Heater is out of order<br />
Replace the Dry Heater<br />
• The Connector of the Dry Heater is not connected properly to the<br />
connector in the Main PWB ASSEMBLY<br />
Reconnect or repair the connector<br />
• The Dry fan motor is out of order<br />
Replace the fan Motor.<br />
17
8. ERROR DIAGNOSIS AND CHECK LIST<br />
8-1.DIAGNOSIS AND ANSWER FOR ABNORMAL OPERATION<br />
SYMPTOM<br />
GUIDE FOR <strong>SERVICE</strong> CALL<br />
NO POWER<br />
Is the power plug connected firmly to<br />
220-240V~ outlet?<br />
YES<br />
Power failure? or Breaker opened?<br />
NO<br />
Visit to check<br />
Water inlet trouble<br />
Is "<br />
" displayed?<br />
YES<br />
No Inlet<br />
Is the tap opened?<br />
Is the tap frozen?<br />
YES<br />
NO<br />
Is the water supply shut-off?<br />
NO<br />
Is filter in the inlet valve clogged with<br />
foreign material?<br />
YES<br />
Clean the filter of<br />
inlet valve<br />
NO<br />
Visit to check<br />
18
SYMPTOM<br />
GUIDE FOR <strong>SERVICE</strong> CALL<br />
• Door does not open<br />
• Error displayed on<br />
the program<br />
Started with door opened?<br />
NO<br />
YES<br />
Close the door<br />
Visit to check<br />
Check if the door switch is O . K.<br />
• DRAIN TROUBLE<br />
Is "<br />
" displayed?<br />
YES<br />
Is the debris filter clogged with foreign<br />
material such as pin, coin and etc.?<br />
NO<br />
Is the drain hose frozen with water,<br />
kinked or crushed?<br />
NO<br />
YES<br />
Clean up<br />
the filter.<br />
Visit to check<br />
19
SYMPTOM<br />
Suds overflow from the<br />
appliance.<br />
(In this condition, wash and<br />
spin do not operate<br />
normally)<br />
GUIDE FOR <strong>SERVICE</strong> CALL<br />
Is low-sudsing detergent for the drum<br />
washing machine used?<br />
YES<br />
Is the proper amount of detergent used<br />
as recommended?<br />
YES<br />
Recommend to reduce the using amount<br />
of detergent.<br />
LOW-SUDSING<br />
This appliance has the automatic suds sensing function which<br />
operates under much suds condition for good rinse and<br />
preventing overflow.<br />
When much suds are sensed, suds removing function such as<br />
drain, water input and pause will operate without rotating the<br />
drum.<br />
No effect of softener<br />
Is softener put in the correct compartment of<br />
the drawer?<br />
YES<br />
Is the drawer closed during wash?<br />
YES<br />
Is the softener cap clogged?<br />
YES<br />
Explain how to use softener<br />
< Clean the compartment for softener ><br />
Compartment for<br />
softener<br />
Visit to check<br />
20
8-2.FAULT DIAGNOSIS AND TROUBLE SHOOTING<br />
CAUTION<br />
1. Be careful of electric shock or disconnecting the parts while trouble shooting.<br />
2. First of all, check the connection of each part terminal with wiring diagram.<br />
3. If you replace the MAIN PWB ASSEMBLY, Put in the connectors correctly.<br />
NO POWER<br />
When measuring the voltage of the outlet,<br />
is the voltage AC 220-240V~?<br />
NO<br />
Check the fuse?<br />
YES<br />
(1)<br />
Is the led(1) on?<br />
NO<br />
Replace MAIN PWB<br />
ASSEMBLY<br />
<br />
(2)<br />
YES<br />
Is connector(2) disconnected or<br />
disassembled?<br />
YES<br />
Reconnect the PWB<br />
ASSEMBLY<br />
<br />
NO<br />
Is wire of the PWB ASSEMBLY disconnected?<br />
YES<br />
Reconnect the PWB<br />
ASSEMBLY<br />
NO<br />
Replace PWB ASSEMBLY<br />
21
NO WATER SUPPLY<br />
Is water supply shut-off?<br />
NO<br />
Is the tap opened?<br />
NO<br />
Open the tap.<br />
YES<br />
When you press both Rinse button and Spin button<br />
simultaneously, is the water level frequency below<br />
240?<br />
NO<br />
YES<br />
Check the AIR CHAMBER<br />
and the tube clogged<br />
with impurity.<br />
Is the inlet valve filter clogged with impurity?<br />
YES<br />
Clean the filter.<br />
NO<br />
Option<br />
Is resistance between each terminal of INLET<br />
VALVE ASSEMBLY is 2~8 k ?<br />
NO<br />
Replace the INLET VALVE<br />
ASSEMBLY.<br />
YES<br />
Check the voltage of the inlet valve connector<br />
220-240V~.<br />
(Refer to 7-2 QC TEST MODE)<br />
NO<br />
Replace the MAIN PWB<br />
ASSEMBLY<br />
DETERGENT DOES NOT FLOW IN<br />
Option<br />
Is water supplied?<br />
YES<br />
NO<br />
Refer to<br />
NO WATER SUPPLY<br />
Wiring diagram<br />
Are replaceptacles correctly connected to the<br />
terminals of the INLET VALVE ASSEMBLY?<br />
NO<br />
Check the wiring on the<br />
dispenser.<br />
SOFTENER<br />
MAIN PRE -<br />
WASH WASH<br />
YES<br />
Is detergent put in the correct compartment of<br />
the drawer?<br />
NO<br />
Put the detergent in the<br />
correct position<br />
PRE+MAIN<br />
MAIN WASH<br />
YES<br />
: Detergent<br />
MAX<br />
Is the detergent hardened?<br />
YES<br />
Clean the drawer.<br />
22
max<br />
SOFTENER DOES NOT FLOW IN<br />
Option<br />
Is water supplied?<br />
YES<br />
NO<br />
Refer to<br />
NO WATER SUPPLY<br />
Wiring diagram<br />
Are receptacles correctly connected to the terminals<br />
of the INLET VALVE ASSEMBLY?<br />
NO<br />
Check the wiring on the<br />
dispenser.<br />
YES<br />
MAXMAX<br />
Is softener put in the correct compartment of the<br />
drawer?<br />
NO<br />
Put it in the correct<br />
compartment.<br />
YES<br />
Is the softener cap clogged?<br />
YES<br />
Clean the cap and<br />
drawer.<br />
ABNORMAL SOUND<br />
Is the motor bolt loosened?<br />
YES<br />
Fix the bolt tightly.<br />
NO<br />
Is there friction noise from the motor?<br />
YES<br />
Replace the STATOR<br />
ASSEMBLY or ROTOR<br />
ASSEMBLY.<br />
23
HEATING WITHOUT WATER<br />
Wash<br />
Rinse<br />
When pressing Wash and Rinse at the same time<br />
after draining, is the water level frequency 248 ~ 262<br />
or more?<br />
When pressing Rinse, Spin buttons at the same<br />
time while wash, is the water level frequency<br />
between 230 - 243?<br />
NO<br />
Replace the<br />
S.PRESSURE SWITCH<br />
ASSEMBLY<br />
YES<br />
Checking voltage between two pins as press the<br />
POWER button is the voltage 220-240V~?<br />
YES<br />
Replace the MAIN PWB<br />
ASSEMBLY<br />
AC 220V-240V<br />
DRAIN MALFUNCTIONING<br />
Is the drain hose twisted or frozen?<br />
YES<br />
Repair the DRAIN HOSE<br />
ASSEMBLY.<br />
NO<br />
Is the impeller of the drain pump clogged?<br />
YES<br />
Remove foreign material.<br />
NO<br />
Is the connector disconnected, disassembled?<br />
YES<br />
Reconnect or repair the<br />
connector<br />
NO<br />
(2)<br />
Is the coil of the drain pump cut-off?<br />
(resistance of coil is 80~150 )<br />
NO<br />
YES<br />
Repair the DRAIN PUMP<br />
ASSEMBLY.<br />
(1)<br />
PWB ASSY(Main)<br />
When checking voltage between connectors<br />
( , )on spinning, is the voltage 220-240V~<br />
as the figure?<br />
NO<br />
Repair the MAIN PWB<br />
ASSEMBLY.<br />
24
HEATING CONTINUOUSLY ABOVE<br />
THE SETTING WATER TEMPERATURE<br />
When checking THERMISTOR on the tub is the<br />
THERMISTOR loosened above 2mm from<br />
the rubber?<br />
Push the THERMISTOR<br />
tightly to the rubber.<br />
25
SPIN TROUBLE<br />
Wash<br />
Rinse<br />
Check on the spinning, is the frequency of the<br />
water level 248 or more. The frequency can be<br />
checked by pressing the Wash and Rinse buttons at<br />
the same time on the program.<br />
YES<br />
NO<br />
Check the S.PRESSURE SWITCH<br />
ASSEMBLY or HOSE (Pressure).<br />
If the problem is on the<br />
S.PRESSURE SWITCH<br />
ASSEMBLY or the HOSE,<br />
replace the S.PRESSURE<br />
SWITCH ASSEMBLY or the<br />
HOSE.<br />
Rinse<br />
Spin<br />
When pressing Rinse, Spin and POWER buttons at<br />
the same time after power off, press the Start/Pause<br />
button 1 times, is the drum low speed spin?<br />
YES<br />
Normal<br />
NO<br />
Is it disconnected, or disassembled?<br />
[Red:3pin(1), NA:4pin(2)]<br />
YES<br />
Correct the connector.<br />
(2)<br />
(1)<br />
NO<br />
Check the motor connector, is the resistance of<br />
the terminal same as the figure?<br />
MOTOR TERMINAL (1)<br />
NO<br />
Replace the STATOR<br />
ASSEMBLY<br />
(1)<br />
Resistance of terminal:<br />
About 5 15<br />
YES<br />
Replace the MAIN PWB ASSEMBLY<br />
DOOR DOES NOT OPEN<br />
Door Lock<br />
Is Door lock Display lamp on?<br />
NO<br />
YES<br />
After draining and<br />
Door lock lamp off,<br />
open the door.<br />
Is<br />
Displayed?<br />
26<br />
YES<br />
Check switch Assembly,<br />
Door lock connector and<br />
Main PWB<br />
ASSEMBLY(Blue, 3pin)
[dHE] ERROR DISPLAY<br />
Dry duct<br />
~<br />
NO<br />
Replace the thermistor.<br />
(6322FR2046B)<br />
Condensing<br />
duct<br />
Thermistor<br />
Condensing bellows<br />
YES<br />
CHECK FOR DRY HEATER TROUBLE<br />
CHECK FOR DRY FAN MOTOR TROUBLE<br />
Disassemble the cabinet cover and<br />
condensing bellows.<br />
Is there any foreign object in condensing<br />
bellows.<br />
NO<br />
YES<br />
Clean the bellows<br />
Disassemble the dry fan assy and dry duct<br />
upper, and clean foreign object in duct and<br />
fan.<br />
27
9. DISASSEMBLY INSTRUCTIONS<br />
Disassemble and repair the parts after pulling out power cord from the outlet.<br />
CONTROL PANEL<br />
PLATE ASSEMBLY(TOP)<br />
Unscrew the screws on the top plate.<br />
The plate assembly(Top) is pulled back and<br />
then upward to arrow direction.<br />
The cover(Inner) is disassembled.<br />
HOOK<br />
The PWB assembly(Display) connectors are<br />
disconnected.<br />
Pull out drawer, three screws are unscrewed.<br />
Push two upper hooks and pull the control<br />
panel forward.<br />
PANEL ASSEMBLY (CONTROL)<br />
PWB ASSEMBLY<br />
(DISPLAY)<br />
The PWB assembly(Display) is disconnected.<br />
When 8 screws are unscrewed on the PWB<br />
insulator and the PWB assembly(Display) is<br />
disassembled from the PWB insulator.<br />
31
PWB ASSEMBLY(POWER)<br />
The back cover is removed.<br />
Two screws are unscrewed.<br />
Disconnect connector from the wiring.<br />
Pull the PWB assembly (Main) to arrow<br />
direction.<br />
DISPENSER ASSEMBLY<br />
The plate assembly(Top)and the<br />
cover(lnner)are disassembled.<br />
Pull the drawer to arrow direction.<br />
Two screws are unscrewed.<br />
DRAWER<br />
The hose clamps and the hose are<br />
disassembled.<br />
The ventilation bellows are disassembled on<br />
the tub.<br />
DISPENSER ASSEMBLY<br />
32
INLET VALVE<br />
2<br />
1<br />
Disconnect the wiring connector.<br />
Remove the valve by two screws of the valve<br />
holder.<br />
When reconnecting the connector<br />
4<br />
3<br />
VALVE (DRY)<br />
VALVE (PRE-WASH)<br />
VALVE (NORMAL-WASH)<br />
VALVE ®È (NORMAL-WASH)<br />
VALVE (HOT)<br />
YL/BK - BK<br />
GY/WH - BK<br />
WH/BK - BK<br />
BL/RD - BK<br />
BL/RD - BK<br />
COVER LOWER<br />
Remove the lower cover to arrow direction<br />
after one screw is unscrewed.<br />
33
DOOR<br />
Open the door completely.<br />
Remove the two screws from the hinge.<br />
When removing the Door Assembly, it is<br />
necessary to hold the Bracket that is inner of<br />
the Cabinet Cover.<br />
Removing method of remained water<br />
Cap(Remaining Hose)<br />
Rotate the Cap(Remaining Hose) to arrow<br />
direction.<br />
Pull it out from hose.<br />
First, prepare a bucket to put in the remained<br />
water.<br />
34
GASKET ASSEMBLY<br />
The cabinet gasket clamp is released.<br />
Two screws are unscrewed from the cabinet<br />
cover.<br />
Cap<br />
(Remaining Hose)<br />
One screw is unscrewed from the lower cover.<br />
The lower cover is disassembled by pulling<br />
out.<br />
Three screws are unscrewed from the cabinet.<br />
The control panel is removed.<br />
Screw is unscrewed from the cabinet cover.<br />
35
Tub Gasket<br />
Clamp<br />
Remove tub gasket clamp by loosening the<br />
screw.<br />
Remove dry gasket clamp by loosening the<br />
screw.<br />
Dry<br />
Gasket<br />
Clamp<br />
When reassembling the gasket, put the drain<br />
hole of the gasket downward, then assemble.<br />
Drain Hole<br />
36
ROTOR ASSEMBLY, STATOR ASSEMBLY, FRICTION DAMPER<br />
Rotor<br />
Remove the back cover.<br />
After loosening the bolt, Rotor, pull out the<br />
rotor.<br />
Bolt<br />
<br />
Remove the 6 bolt from the stator.<br />
Disconnect the 2 connectors.<br />
HOW TO ASSEMBLE THE MOTOR<br />
Bolt<br />
Friction<br />
Damper<br />
<br />
Hinge<br />
(Damper)<br />
Remove the bolts at the Tub.<br />
The Hinge(Damper) at the base is pulled off<br />
pressing on the snaps at the sharp end.<br />
The hinge at the base is pulled off.<br />
(To arrow direction)<br />
<br />
37
PUMP<br />
Screw<br />
Cap<br />
(Remaining Hose)<br />
Pump Outlet Hose<br />
Tub Pump Bellows<br />
Remove pump outlet hose.<br />
Remove tub pump bellows.<br />
Remove cap(Remaining Hose).<br />
Disconnect the wiring.<br />
Three screws are unscrewed from the cabinet.<br />
Remove the pump to arrow direction.<br />
Washing<br />
Heater<br />
Ring Terminal<br />
Nut<br />
HEATER<br />
Loosen the nut.<br />
Remove washing heater by pulling out.<br />
<br />
When assembling the washing heater, insert<br />
the heater to heater clip on the bottom of tub.<br />
THERMISTOR<br />
Thermistor<br />
Bracket<br />
Pull it out by holding the thermistor bracket.<br />
If holding the wire and pulling out it, it may be<br />
broken.<br />
Thermistor bulb<br />
38
SWITCH ASSY, DOOR LOCK<br />
The cabinet cover clamp is removed and the<br />
gasket is released.<br />
Two screws are unscrewed.<br />
The door lock S/W is disconnected form the<br />
wiring connector and the strap.<br />
WHEN FOREIGN OBJECT STUCK BETWEEN DRUM AND TUB<br />
Hole<br />
Remove washing heater.<br />
Remove the foreign object(wire,coin,etc) by<br />
inserting long bar in the hole.<br />
Washing Heater<br />
39
Dry Duct Upper<br />
DRY DUCT<br />
Dry fan<br />
Assembly<br />
Remove 5 screws and dry fan assembly.<br />
Remove 6 screws and dry duct upper.<br />
Thermostat<br />
Dry Heater<br />
Remove 1 screw and dry heater.<br />
Remove thermostat.<br />
CONDENSING DUCT<br />
Remove 2 screws from cabinet.<br />
Remove clamp and condensing duct.<br />
Condensing Duct<br />
Clamp<br />
Condensing<br />
Bellows<br />
40
10. EXPLODED VIEW AND PART LIST<br />
10-1.THE PART LIST OF CABINET ASSEMBLY<br />
:Non-service part<br />
:Service part<br />
A110<br />
A150<br />
A120<br />
A102<br />
A101<br />
A104<br />
A141<br />
A103<br />
A131<br />
A130<br />
A100<br />
A485<br />
A440<br />
A430<br />
A450<br />
A133<br />
A303<br />
A310<br />
A300<br />
A410<br />
A200<br />
A277<br />
HOT(ORANGE)<br />
COLD(BLUE)<br />
A275<br />
A276<br />
A201<br />
A220<br />
A210<br />
41
10-2 THE EXPLODED VIEW OF CONTROL PANEL &<br />
DISPENSER ASSEMBLY<br />
:Non-service part<br />
:Service part<br />
F170<br />
F300<br />
F160<br />
F460<br />
F461<br />
F310<br />
K343<br />
F450<br />
F430<br />
F220<br />
F120<br />
F215<br />
F110<br />
F210<br />
F130<br />
42
10-3 THE EXPLODED VIEW OF DRUM & TUB ASSEMBLY<br />
:Non-service part<br />
:Service part<br />
K140 K141<br />
K110 K142 K411 K420 K123 K120<br />
K360<br />
K211<br />
K130<br />
K131<br />
K513<br />
K143<br />
K350<br />
F140<br />
K310<br />
K511<br />
K510<br />
K611<br />
K610<br />
K105<br />
K100<br />
K410<br />
K530<br />
K320<br />
K343<br />
K341<br />
K344<br />
K340<br />
K531<br />
K520<br />
43<br />
K540
10-4 THE EXPLODED VIEW OF DRYER<br />
:Non-service part<br />
:Service part<br />
M120<br />
M110<br />
M100<br />
M121<br />
M210<br />
M101<br />
M312<br />
M220<br />
M310<br />
M311<br />
M230<br />
10-4 THE EXPLODED VIEW OF DRYER<br />
44