Installation Instructions - Jeep
Installation Instructions - Jeep
Installation Instructions - Jeep
You also want an ePaper? Increase the reach of your titles
YUMPU automatically turns print PDFs into web optimized ePapers that Google loves.
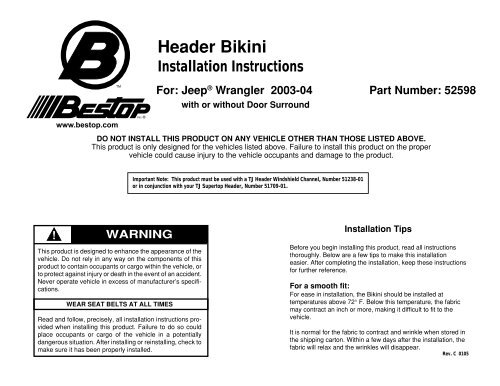
Header Bikini<br />
<strong>Installation</strong> <strong>Instructions</strong><br />
For: <strong>Jeep</strong> ® Wrangler 2003-04 Part Number: 52598<br />
with or without Door Surround<br />
www.bestop.com<br />
DO NOT INSTALL THIS PRODUCT ON ANY VEHICLE OTHER THAN THOSE LISTED ABOVE.<br />
This product is only designed for the vehicles listed above. Failure to install this product on the proper<br />
vehicle could cause injury to the vehicle occupants and damage to the product.<br />
Important Note: This product must be used with a TJ Header Windshield Channel, Number 51238-01<br />
or in conjunction with your TJ Supertop Header, Number 51709-01.<br />
WARNING<br />
This product is designed to enhance the appearance of the<br />
vehicle. Do not rely in any way on the components of this<br />
product to contain occupants or cargo within the vehicle, or<br />
to protect against injury or death in the event of an accident.<br />
Never operate vehicle in excess of manufacturer’s specifications.<br />
WEAR SEAT BELTS AT ALL TIMES<br />
<strong>Installation</strong> Tips<br />
Before you begin installing this product, read all instructions<br />
thoroughly. Below are a few tips to make this installation<br />
easier. After completing the installation, keep these instructions<br />
for further reference.<br />
For a smooth fit:<br />
For ease in installation, the Bikini should be installed at<br />
temperatures above 72° F. Below this temperature, the fabric<br />
may contract an inch or more, making it difficult to fit to the<br />
vehicle.<br />
Read and follow, precisely, all installation instructions provided<br />
when installing this product. Failure to do so could<br />
place occupants or cargo of the vehicle in a potentially<br />
It is normal for the fabric to contract and wrinkle when stored in<br />
dangerous situation. After installing or reinstalling, check to<br />
the shipping carton. Within a few days after the installation, the<br />
make sure it has been properly installed.<br />
fabric will relax and the wrinkles will disappear.<br />
52528 pg 1 Rev. C 0105
Parts List<br />
Bikini Qty - 1<br />
D-Ring Web Strap Qty - 2<br />
Tools Needed<br />
#30 Torx Driver<br />
Safety Glasses<br />
<strong>Installation</strong><br />
Caution<br />
Safety glasses should be worn at all<br />
times while installing this product.<br />
Step One<br />
INSTALL D-RING WEB STRAPS<br />
Locate the D-Ring Web Straps in the<br />
parts kit. Use the #30 Torx to remove<br />
the bolt at the rear of the speaker pod<br />
on each side of the vehicle. Thread a<br />
bolt through the hole in each D-Ring<br />
Web Strap and reinstall the bolts in the<br />
holes in the speaker pods. Do not<br />
tighten them at this time.<br />
Remove #30 Torx Bolt and<br />
reinstall with D-Ring Web Strap<br />
Step Two<br />
INSTALL BIKINI IN WINDSHIELD Header<br />
Orient the Bikini on the vehicle and<br />
drape it over the Sport Bar. Insert the<br />
plastic strip sewn along the front of the<br />
Bikini into the windshield header. Do<br />
not catch the fabric in the header.<br />
Center the Bikini on the vehicle so that<br />
it is an equal distance from the top of<br />
the windshield flange on both sides.<br />
Make sure space between top fabric and<br />
windshield flange is equal on both sides<br />
Make sure that only Plastic<br />
Strip is in retainer<br />
Plastic<br />
Strip<br />
Windshield<br />
Fabric<br />
Windshield<br />
Header<br />
Driver's Side<br />
View from front<br />
Note: For best possible installation, check to make sure that the bikini top is perfectly centered on the vehicle.<br />
52598 pg 2<br />
Rev. C 0105
Step Three<br />
FASTEN CENTER STRAP<br />
Wrap the long center strap at the rear of the Bikini around the sport bar, pull it forward into the vehicle to the<br />
windshield. Thread the strap through the footman loop on the windshield frame. Then pull the end of the strap<br />
back and thread it through the buckle. Tighten it securely.<br />
Buckles - Behind<br />
Sport Bar<br />
Center Strap - Thread through<br />
Footman Loop<br />
Buckle<br />
Strap<br />
Strap - In Front<br />
of Sport Bar<br />
Footman Loop<br />
Threading Strap<br />
through Buckle<br />
Step Four<br />
FASTEN REAR STRAPS<br />
Locate the two straps sewn at an angle to the<br />
rear of the Bikini on each side of the center<br />
strap. Thread the end of each strap through<br />
the D-Ring on the strap installed in Step 1.<br />
Thread the strap into the ring from underneath.<br />
Then pull the end of the strap back and<br />
thread it through the buckle sewn to the strap.<br />
When the alignment of the D-Ring Web Strap<br />
is established, use the #30 Torx to tighten the<br />
bolt. Tighten the web strap at the buckle.<br />
Buckle<br />
Thread the strap through the<br />
D-Ring from the bottom<br />
Threading Strap<br />
through Buckle<br />
Strap<br />
52598 pg 3<br />
Rev. C 0105
Step Five<br />
FASTEN REAR CORNER STRAPS<br />
Wrap the straps sewn to the rear<br />
corners around the sport bar and<br />
thread them through the buckles<br />
on the rear corners of the Bikini.<br />
Buckle<br />
Threading Strap<br />
through Buckle<br />
Strap<br />
Thread Strap<br />
through Buckle<br />
Step Six - without Door Surrounds<br />
FASTEN FLAPS ABOVE DOORS<br />
Locate the hook and loop strips sewn to the front corners of the Bikini.<br />
Fasten the strips to each other and tuck them up above the horizontal<br />
sport bar, out of the way.<br />
Locate the flap sewn inside the Bikini above the door opening. Wrap the<br />
inside and outside flaps around the horizontal sport bar and fasten the<br />
Hook and Loop Strips to each other.<br />
Step Six - with Door Surrounds<br />
SECURE BIKINI ABOVE DOORS<br />
Locate the hook and loop strips sewn to the front corners of the Bikini. Tuck the hook strip between the horizontal<br />
sport bar and the Door Surround.<br />
Locate the plastic strip sewn along the edge of the outer flap, above the door opening. Slip the plastic strip into the<br />
channel on the Door Surround.<br />
Fold the fabric insert from front to back, so that it lays flat on top of the horizontal sport bar and wrap the outer<br />
loop strip around the Door Surround and fasten it to the hook strip tucked inside of the rail to hold the fabric in<br />
place. Tuck the inside flap between the Door Surround and the Bikini fabric.<br />
Fold Fabric from front<br />
to back to Lay Flat<br />
Plastic Strips sewn inside fabric.<br />
Roll into channel in Door Surround<br />
Hook and Loop sewn inside fabric. Wrap Flaps<br />
around bar and fasten Hook and Loop to each<br />
other.<br />
Locate Hook Strip between Sport Bar and<br />
Door Surround and fasten to Loop<br />
Note: When removing the Bikini, it will be easiest to remove the plastic strips by starting at the front of the plastic<br />
and pulling down and out.<br />
52598 pg 4<br />
Rev. C 0105
Care and Maintenance of your Bestop Top<br />
Your top is made of the finest materials available. To keep it looking new and for the maximum possible wear, it will need<br />
periodic cleaning and maintenance.<br />
Washing: The top fabric should be washed often using soap, warm water and a soft bristle brush. Rinse with clear water to<br />
remove all traces of soap.<br />
Water: Seeping through at the seams may be stopped by applying 3-M Scotchgard® on the inside of the seams. Rips in the<br />
fabric may be repaired with Bondex® iron on patches. Iron the patches to the inside of the top, carefully following the Bondex®<br />
instructions.<br />
LIMITED WARRANTY<br />
We warrant our product to be free from defects in material and workmanship, for the terms specified below, provided there has<br />
been normal use and proper maintenance. This warranty applies to the original purchaser only. All remedies under this warranty<br />
are limited to the repair or replacement of any item or items found by the factory to be defective within the time period specified.<br />
If you have a warranty claim, first you must call our factory at the number below for instructions. You must retain proof of purchase<br />
and submit a copy with any items returned for warranty work. Upon completion of warranty work, if any, we will return<br />
the repaired or replaced item or items to you freight prepaid. Damage to our products caused by accidents, fire, vandalism,<br />
negligence, misinstallation, misuse, Acts of God, or by defective parts not manufactured by us, is not covered under this warranty.<br />
THE WARRANTY TIME PERIOD IS AS FOLLOWS: ALL “SOFT GOODS” MANUFACTURED BY OUR COMPANY (USING<br />
PRIMARILY VINYLS, PLASTICS, AND/OR FOAM): ONE YEAR FROM DATE OF PURCHASE.<br />
ANY IMPLIED WARRANTIES OF MERCHANTABILITY AND/OR FITNESS FOR A PARTICULAR PURPOSE CREATED<br />
HEREBY ARE LIMITED IN DURATION TO THE SAME DURATION AND SCOPE AS THE EXPRESS WRITTEN WARRANTY.<br />
OUR COMPANY SHALL NOT BE LIABLE FOR ANY INCIDENTAL OR CONSEQUENTIAL DAMAGE.<br />
Some states do not allow limitations on how long an implied warranty lasts, or the exclusion or limitation of incidental or<br />
consequential damages, so the above limitations or exclusions may not apply to you.<br />
This warranty gives you specific legal rights, and you may also have other rights which vary from state to state.<br />
For further information or request for warranty work, please contact:<br />
Bestop Inc.<br />
Customer Service<br />
(800)845-3567<br />
(303)465-1755<br />
52598 pg 58 5<br />
Rev. C 0105


