Maxtor OneTouch II Drive - Seagate
Maxtor OneTouch II Drive - Seagate
Maxtor OneTouch II Drive - Seagate

You also want an ePaper? Increase the reach of your titles
YUMPU automatically turns print PDFs into web optimized ePapers that Google loves.
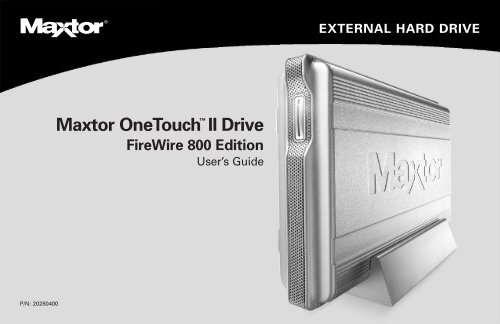
EXTERNAL HARD DRIVE<br />
<strong>Maxtor</strong> <strong>OneTouch</strong> <strong>II</strong> <strong>Drive</strong><br />
FireWire 800 Edition<br />
User’s Guide<br />
P/N: 20280400
Contents<br />
1 Introduction. . . . . . . . . . . . . . . . . . . . . . . . . . . . . . . . . . . . . . . . . . . . . . . . . . . . . . . . . . . . . . . . 1<br />
<strong>Drive</strong> Components . . . . . . . . . . . . . . . . . . . . . . . . . . . . . . . . . . . . . . . . . . . . . . . . . . . . . . 2<br />
System Requirements . . . . . . . . . . . . . . . . . . . . . . . . . . . . . . . . . . . . . . . . . . . . . . . . . . . 3<br />
Handling Precautions . . . . . . . . . . . . . . . . . . . . . . . . . . . . . . . . . . . . . . . . . . . . . . . . . . . . 4<br />
About this Guide . . . . . . . . . . . . . . . . . . . . . . . . . . . . . . . . . . . . . . . . . . . . . . . . . . . . . . . 5<br />
<strong>Maxtor</strong> Product Support. . . . . . . . . . . . . . . . . . . . . . . . . . . . . . . . . . . . . . . . . . . . . . . . . . 5<br />
2 Installing Your <strong>Drive</strong> . . . . . . . . . . . . . . . . . . . . . . . . . . . . . . . . . . . . . . . . . . . . . . . . 6<br />
Macintosh OS X . . . . . . . . . . . . . . . . . . . . . . . . . . . . . . . . . . . . . . . . . . . . . . . . . . . . . . . . 7<br />
Macintosh OS 9 . . . . . . . . . . . . . . . . . . . . . . . . . . . . . . . . . . . . . . . . . . . . . . . . . . . . . . . 13<br />
Windows XP and 2000. . . . . . . . . . . . . . . . . . . . . . . . . . . . . . . . . . . . . . . . . . . . . . . . . . 18<br />
Installing <strong>Drive</strong>rs Only . . . . . . . . . . . . . . . . . . . . . . . . . . . . . . . . . . . . . . . . . . . . . . . . . . 26<br />
3 Using Your <strong>Drive</strong> . . . . . . . . . . . . . . . . . . . . . . . . . . . . . . . . . . . . . . . . . . . . . . . . . . . 27<br />
Connecting and Disconnecting the <strong>Drive</strong>. . . . . . . . . . . . . . . . . . . . . . . . . . . . . . . . . . . . 27<br />
Using Retrospect ® Express - Macintosh. . . . . . . . . . . . . . . . . . . . . . . . . . . . . . . . . . . . . 29<br />
Using Retrospect ® Express HD - Windows . . . . . . . . . . . . . . . . . . . . . . . . . . . . . . . . . . 34<br />
Restoring Your Computer . . . . . . . . . . . . . . . . . . . . . . . . . . . . . . . . . . . . . . . . . . . . . . . 40<br />
Using the <strong>Maxtor</strong> <strong>OneTouch</strong> Settings . . . . . . . . . . . . . . . . . . . . . . . . . . . . . . . . . . . . . . 42<br />
Installing Applications on Your <strong>Drive</strong> . . . . . . . . . . . . . . . . . . . . . . . . . . . . . . . . . . . . . . . 50<br />
Moving Data Between Two Systems . . . . . . . . . . . . . . . . . . . . . . . . . . . . . . . . . . . . . . 50<br />
Playing Games . . . . . . . . . . . . . . . . . . . . . . . . . . . . . . . . . . . . . . . . . . . . . . . . . . . . . . . . 50<br />
Storing Audio . . . . . . . . . . . . . . . . . . . . . . . . . . . . . . . . . . . . . . . . . . . . . . . . . . . . . . . . . 50<br />
Using Security Lock . . . . . . . . . . . . . . . . . . . . . . . . . . . . . . . . . . . . . . . . . . . . . . . . . . . . 50<br />
Adding Rubber Feet to Your <strong>Drive</strong> . . . . . . . . . . . . . . . . . . . . . . . . . . . . . . . . . . . . . . . . . 51<br />
4 Glossary . . . . . . . . . . . . . . . . . . . . . . . . . . . . . . . . . . . . . . . . . . . . . . . . . . . . . . . . . . . . 52<br />
Index . . . . . . . . . . . . . . . . . . . . . . . . . . . . . . . . . . . . . . . . . . . . . . . . . . . . . . . . . . . . . . . 54
1<br />
Introduction<br />
1<br />
Thank you for selecting a <strong>Maxtor</strong> product.<br />
The new <strong>Maxtor</strong> <strong>OneTouch</strong> TM <strong>II</strong> FireWire 800 Edition, with triple<br />
interfaces (FireWire 800, FireWire 400 and USB 2.0), lets you<br />
access high-end graphics, photos and video files quickly, and<br />
connect easily with other computers.<br />
This user’s guide will help you setup your drive and includes helpful<br />
tips for performing backups and getting the most out of your new<br />
<strong>Maxtor</strong> <strong>OneTouch</strong> <strong>II</strong> drive, FireWire 800 Edition.<br />
The <strong>Maxtor</strong> <strong>OneTouch</strong> <strong>II</strong> drive, FireWire 800 Edition features:<br />
• Triple interfaces: FireWire 800, FireWire 400, and USB 2.0<br />
• <strong>Maxtor</strong> <strong>OneTouch</strong> button - the simple way to backup<br />
your files<br />
• EMC ® Dantz ® Retrospect ® Express software<br />
• <strong>Maxtor</strong> <strong>Drive</strong>Lock security feature password-protects the<br />
contents of the drive in case of loss or unauthorized use<br />
• Mac and PC compatible (pre-formatted for Mac)<br />
• Boot your Mac operating system directly from the drive<br />
• Simple <strong>Maxtor</strong> user interface for drive management,<br />
security and backup scheduling<br />
The <strong>Maxtor</strong> <strong>OneTouch</strong> Settings utility features:<br />
• Security settings to password-protect your critical data<br />
• Power management features to conserve energy when<br />
your drive isn’t being used<br />
• Diagnostic utilities to check the health of your drive<br />
• Customizing the <strong>OneTouch</strong> button which allows you to open<br />
a frequently-used program with the touch of a button<br />
• Using Retrospect Express to back up and restore your data<br />
• Performance settings to enhance your drive<br />
For more information about the <strong>OneTouch</strong> Settings, see “Restoring<br />
Your Complete System” on page 42.<br />
Introduction 1
WINDOWS MACINTOSH<br />
Includes:<br />
English English<br />
• EMC Dantz ® Retrospect ®<br />
Français Français<br />
Express HD (Win)<br />
Deutsch Deutsch<br />
Español<br />
• EMC Dantz Retrospect<br />
Italiano<br />
Express (Mac)<br />
• <strong>Maxtor</strong> <strong>OneTouch</strong> <strong>Drive</strong>rs<br />
• <strong>Maxtor</strong> <strong>OneTouch</strong> Utility<br />
www.maxtor.com<br />
Installation Software<br />
<br />
<strong>Maxtor</strong> <strong>OneTouch</strong> <strong>II</strong><br />
Logiciel d’installation • Installationssoftware<br />
Software di installazione • Software de instalación<br />
• Installatiesoftware<br />
Installationsprogram • Asennusohjelma<br />
Software de Instalação<br />
© 2005 <strong>Maxtor</strong> Corporation and its Licensors. <strong>Maxtor</strong> and the stylized <strong>Maxtor</strong> logo are registered trademarks, and <strong>Maxtor</strong> <strong>OneTouch</strong> is a<br />
and 5,966,730.Other patents pending. Other trademarks are the property of their respective holders. All rights reserved.5/05 PN: 20279900<br />
trademark, of <strong>Maxtor</strong> Corporation. Dantz and Retrospect are registered trademarks of EMC Corporation. U.S. patents 5,150,473<br />
1<br />
<strong>Drive</strong> Components<br />
Before installing your new drive, review the features shown<br />
in Figure 1.<br />
Refer to the capacity label on the front of the box of your<br />
<strong>Maxtor</strong> <strong>OneTouch</strong> <strong>II</strong> drive to determine which model you have.<br />
Included in this Kit<br />
The <strong>Maxtor</strong> <strong>OneTouch</strong> <strong>II</strong> FireWire 800 drive comes complete with<br />
the components shown in Figure 2. Familiarize yourself with each<br />
of these items prior to installation.<br />
Front<br />
Back<br />
<strong>Maxtor</strong> <strong>OneTouch</strong> <strong>II</strong><br />
FireWire 800 <strong>Drive</strong><br />
User’s Guide<br />
(Included on Install CD)<br />
<strong>Maxtor</strong><br />
<strong>OneTouch</strong><br />
Button<br />
Status Light<br />
(Flashing Blue<br />
Lights)<br />
Security<br />
Locking Slot<br />
USB<br />
Port<br />
FireWire 400<br />
Port<br />
Power<br />
Connector<br />
FireWire 800<br />
Ports<br />
Figure 1. <strong>Maxtor</strong> <strong>OneTouch</strong> <strong>II</strong> FireWire 800 <strong>Drive</strong> Features<br />
Power<br />
Switch<br />
Install CD<br />
Power Adapter<br />
FireWire 800<br />
(9-pin) Cable<br />
USB Cable<br />
FireWire 400<br />
(6-pin) Cable<br />
Rubber Feet<br />
Vertical Stand<br />
Figure 2. Included in this Kit<br />
2
FireWire 800<br />
9-pin to 9-pin FireWire 800<br />
(1394b) Cable<br />
FireWire 400<br />
6-pin to 6-pin FireWire 400<br />
(1394a) cable<br />
Many laptop computers, have a smaller 4-pin FireWire port requiring a special<br />
4-pin to 6-pin FireWire cable. This is not included, but can be purchased from<br />
your local computer store.<br />
USB<br />
‘A’ to ‘B’ USB cable<br />
The ‘A’ connector, typically, plugs into your computer<br />
and the ‘B’ connector plugs into your drive.<br />
If your computer has a different type of USB<br />
connection, you can purchase the correct type<br />
of cable from your local computer store.<br />
‘A’<br />
connector<br />
‘B’<br />
connector<br />
System Requirements<br />
Macintosh<br />
• FireWire 800 requires Mac OS X 10.2.8 or higher<br />
and FireWire 800 (9-pin) equipped computer<br />
• Apple G4 processor or greater<br />
• Mac OS 9.1 or later (FW 800 not supported);<br />
OS X (10.1.2-10.1.5; 10.2.4 or later)<br />
• OS 9: 64MB RAM or more as required by<br />
operating system<br />
• OS X: 128MB RAM or more as required by<br />
operating system<br />
• CD-ROM drive<br />
• Internet connection (for system updates)<br />
Mac OS 9 is compatible only with the FireWire 400 inferface.<br />
Retrospect Express does not work with the Server edition of<br />
the Mac OS.<br />
USB 1.1 is slower than USB 2 or FireWire.<br />
1<br />
Though this model has both USB and FireWire interfaces, it is only<br />
possible to use one interface at a time.<br />
Introduction 3
1<br />
System Requirements<br />
Windows<br />
• FireWire 800 requires Windows 2000 or XP operating<br />
system and FireWire 800 (9-pin) equipped computer<br />
• Pentium <strong>II</strong>I, 500 Mhz equivalent processor or higher<br />
• 2000 Professional, XP Professional, or XP Home Edition<br />
• 128MB RAM or more as required by operating system<br />
• CD-ROM drive<br />
• Internet connection (for system updates)<br />
All references to Windows 2000 actually refer specifically to Windows 2000<br />
Professional. Retrospect Express does not work with the Server editions of<br />
these operating systems.<br />
USB 1.1 is slower than USB 2 or FireWire.<br />
Interface Requirements<br />
• USB: Available USB 1.1 or 2.0 port<br />
• FireWire: Available FireWire 400 or FireWire 800 ports<br />
Handling Precautions<br />
Handle your drive with care! Follow the precautions listed here or<br />
you could damage your drive and void your warranty. Review the<br />
<strong>Maxtor</strong> Limited Warranty Card, included in the box, for more<br />
information.<br />
The following precautions can prevent loss of data:<br />
• Do not bump, jar, drop the drive or move while in operation.<br />
• Do not set the drive on its side without using the vertical<br />
stand as it could fall over and cause damage.<br />
• Do not remove any cables or power cords without properly<br />
disconnecting the drive through the operating system.<br />
• Do not set any liquids or drinks on the drive. Liquids will<br />
damage the internal electronics.<br />
• Do not attempt to open the drive’s case. This will void<br />
your warranty.<br />
4
About this Guide<br />
The following symbols and conventions are used in this guide:<br />
Bold<br />
Italics<br />
Used for menu, command, and keyboard<br />
selections you make and screens you will see.<br />
Used for emphasis and to identify new terms,<br />
which may also be defined in the Glossary.<br />
Helpful information about a particular topic.<br />
Important information to prevent problems and<br />
ensure that you are successful in using the drive.<br />
<strong>Maxtor</strong> Product Support<br />
<strong>Maxtor</strong> Corporation provides a comprehensive product support<br />
section on its web site, including the latest software drivers,<br />
product specifications, user’s guides, a complete troubleshooting<br />
section, and the <strong>Maxtor</strong> Knowledge Base – for answers to the<br />
most frequently asked questions.<br />
<strong>Maxtor</strong> USA Support<br />
Visit www.maxtorkb.com for the following information:<br />
• Search the Hard <strong>Drive</strong> Knowledge Base<br />
We store all resolved problems and FAQ’s in our knowledge<br />
base. Search by product, category, keywords, or phrases.<br />
• My Stuff<br />
Login to modify or view your FAQ update<br />
notifications or update your personal profile.<br />
• Most Popular Help Topics<br />
Top five most frequently asked questions.<br />
• Software Download<br />
Download installation and diagnostic programs<br />
for your hard drive or External Storage device.<br />
<strong>Maxtor</strong> Worldwide Support<br />
Visit www.maxtor.com and click worldwide support or<br />
contact us for product support outside of the USA.<br />
1<br />
Introduction 5
2<br />
2<br />
Installing Your <strong>Drive</strong><br />
In this chapter you will install your <strong>Maxtor</strong> <strong>OneTouch</strong> <strong>II</strong><br />
FireWire 800 drive, the EMC ® Dantz ® Retrospect ® Express backup<br />
software, and activate the <strong>Maxtor</strong> <strong>OneTouch</strong> button for simple<br />
backups of your valuable data anytime you need them. To ensure a<br />
successful installation, follow the steps outlined below.<br />
Please do not connect the drive to your computer until<br />
after you have installed the software.<br />
Follow these steps to install your drive<br />
Step 1. Install the software.<br />
Step 2. Connect the drive to your computer.<br />
Software Installation Options<br />
There are two options for the software installation:<br />
• Full Installation (Recommended)<br />
Installs the <strong>Maxtor</strong> software drivers necessary for the<br />
<strong>OneTouch</strong> <strong>II</strong> drive to operate, the <strong>OneTouch</strong> Utility program<br />
and the EMC Dantz Retrospect Express backup software that<br />
allows you to backup data at the touch of a button.<br />
• Install <strong>Drive</strong>rs<br />
Installs only the <strong>Maxtor</strong> drivers and the <strong>Maxtor</strong> <strong>OneTouch</strong><br />
Utility.<br />
Select your operating system<br />
The complete, step-by-step installation for popular Macintosh<br />
and Windows operating systems is described separately in the<br />
following sections. Simply find the section for your operating<br />
system and follow the steps to get your <strong>Maxtor</strong> <strong>OneTouch</strong> <strong>II</strong> drive<br />
up and running.<br />
• Macintosh OS X: See page 7.<br />
• Macintosh OS 9: See page 13.<br />
• Windows 2000 and XP: See page 18.<br />
6
Macintosh OS X<br />
Step 1. Install the Software<br />
Software installation: Do not press the <strong>Maxtor</strong> <strong>OneTouch</strong><br />
button until instructed by the User's Guide or installation<br />
software. Please quit all applications before starting the<br />
installation process. Do not remove the installation CD until<br />
after completing the <strong>Maxtor</strong> <strong>OneTouch</strong> setup.<br />
1. Turn on your computer.<br />
2. Insert the <strong>Maxtor</strong> Installation CD into your CD-ROM drive.<br />
After a few seconds, the Install CD should appear on your<br />
Macintosh’s desktop.<br />
3. Open the Install CD Icon.<br />
4. Find the folder appropriate for your language and open it.<br />
5. Open the folder named OS X.<br />
6. Double-click the Install Retrospect Express icon.<br />
The Authenticate window will open.<br />
7. Enter your Name (if necessary) and Password for your<br />
OS X system.<br />
(This is the Name and Password you set up when you originally<br />
installed OS X)<br />
Click OK.<br />
The Retrospect Express Installer will open.<br />
8. Click Continue.<br />
The license screen will appear.<br />
9. Review license agreement and Accept to continue.<br />
The Install Retrospect Express screen will appear.<br />
10. This screen allows you to specify what type of installation you<br />
want and where. It is automatically set up to do a Full Installation<br />
(recommended) into the Applications folder on your Macintosh.<br />
You can select the Custom Installation, using the Easy Install<br />
menu (recommended), as well as change the location of the<br />
installation using the Install Location menu at the bottom of<br />
the screen.<br />
When you are ready, Click Install.<br />
The installation will begin.<br />
11. When the installation is complete, the Installation was<br />
successful screen should appear, asking you to Restart.<br />
12. Click Restart.<br />
2<br />
Installing Your <strong>Drive</strong> 7
2<br />
13. After your Macintosh restarts, please remove the <strong>Maxtor</strong><br />
Install CD from your computer.<br />
14. Proceed to the next section: Connect the <strong>Drive</strong>.<br />
Step 2. Connect the <strong>Drive</strong><br />
The <strong>Maxtor</strong> <strong>OneTouch</strong> <strong>II</strong> drive connects to your computer using<br />
either a FireWire or USB interface. Make sure you know which<br />
interface is available on your drive and on your computer.<br />
Please install the software BEFORE you connect the drive.<br />
Connecting the Power<br />
1. Plug the round female connector from the power adapter into<br />
the drive’s power connector.<br />
2. Plug the two-pin female connector on the power cord<br />
into the power adapter.<br />
3. Plug the standard electrical plug from the power adapter into<br />
your power source.<br />
4. Turn on the <strong>Maxtor</strong> <strong>OneTouch</strong> <strong>II</strong> drive using the power switch<br />
on the back of the drive. The two blue lights on the front of the<br />
drive should illuminate.<br />
5. Determine whether you have USB or FireWire ports available<br />
on your system. If you are connecting your drive with FireWire,<br />
proceed to “To connect the FireWire cable” on page 9.<br />
Connecting with the USB Cable<br />
Do not plug a USB cable into the drive when a FireWire<br />
cable is already connected to the drive. The drive will only<br />
operate with one interface at a time.<br />
The <strong>Maxtor</strong> <strong>OneTouch</strong> button, Power management, and<br />
<strong>OneTouch</strong> Settings utility program are not supported for<br />
USB on the Macintosh. You may, however, use your drive<br />
as external storage and utilize the Retrospect software to<br />
maintain backup copies of your files and complete system.<br />
To connect the USB cable<br />
1. Plug the larger end of the USB cable into any available<br />
USB port on your computer. This USB logo <br />
may help you identify a USB port.<br />
Figure 1. Connecting the Power<br />
8
2. Plug the smaller end of the USB cable into the USB connection<br />
on the drive.<br />
Connecting with the FireWire Cable<br />
Do not plug a FireWire cable into the drive when a USB<br />
cable is already connected to the drive. This drive will only<br />
operate with one interface at a time.<br />
To connect the FireWire cable<br />
1. Plug one end of the FireWire cable into any available FireWire<br />
port on your computer or to any other FireWire device that is<br />
connected to your computer.<br />
2<br />
Figure 2. Connecting to a USB Port<br />
The installation is complete and your <strong>Maxtor</strong> <strong>OneTouch</strong> <strong>II</strong> drive is<br />
ready to use!<br />
If you did the Full Installation, including Retrospect Express, we<br />
encourage you to go to “Setting Up Bootable Backup with the<br />
<strong>OneTouch</strong> Button” on page 10 for easy, automated backup of<br />
your entire computer, anytime, with the touch of a button!<br />
If you did not install Retrospect Express, the installation is<br />
complete and your <strong>Maxtor</strong> <strong>OneTouch</strong> <strong>II</strong> <strong>Drive</strong> is ready to use.<br />
See “Using Your <strong>Drive</strong>” on page 27 in chapter 3, for<br />
information about using your drive for common applications.<br />
Figure 3. Connecting to a FireWire port<br />
A FireWire 800 adapter card is required for systems that do<br />
not have a FireWire 800 interface.<br />
Installing Your <strong>Drive</strong> 9
2<br />
2. Plug the other end of the FireWire cable into an available<br />
FireWire port on the back of the drive.<br />
The installation is complete and your <strong>Maxtor</strong> <strong>OneTouch</strong> <strong>II</strong> drive is<br />
ready to use!<br />
If you did the Full Installation, including Retrospect Express, we<br />
encourage you to go to the next section to setup the <strong>Maxtor</strong><br />
<strong>OneTouch</strong> button for easy, automated backup of your entire<br />
computer, anytime, at the touch of a button!<br />
Setting Up Bootable Backup with the<br />
<strong>OneTouch</strong> Button<br />
The following steps will provide you with a complete bootable<br />
backup of your Macintosh computer.<br />
Bootable backup works with FireWire only.<br />
When finished, you will have a backup of your entire computer, as<br />
well as the ability to start up your computer from your <strong>Maxtor</strong><br />
<strong>OneTouch</strong> <strong>II</strong> drive.<br />
Before you begin, make sure the <strong>Maxtor</strong> Install CD is NOT<br />
in your CD-ROM drive.<br />
The bootable backup option requires either using the entire<br />
<strong>OneTouch</strong> <strong>II</strong> drive for the backup copy or creating a dedicated<br />
disk partition for the backup copy. If you wish to store any<br />
files on the <strong>OneTouch</strong> <strong>II</strong> drive that are not included on the<br />
system drive you plan to copy, they must be stored in<br />
another partition on the <strong>OneTouch</strong> <strong>II</strong> drive.<br />
Prepare your <strong>Maxtor</strong> <strong>OneTouch</strong> <strong>II</strong> <strong>Drive</strong><br />
1. Select your system drive in the Finder and select Get Info from<br />
the File menu. Write down its capacity, it is listed here as<br />
“Capacity: xxx.xx GB”.<br />
2. Open Apple’s Disk Utility program (located in the Applications/<br />
Utilities folder)<br />
3. Select your <strong>Maxtor</strong> <strong>OneTouch</strong> <strong>II</strong> drive in the list and click on the<br />
Partition tab<br />
The following step will erase everything that currently<br />
exists on your <strong>Maxtor</strong> <strong>OneTouch</strong> <strong>II</strong> drive. Check your<br />
drive carefully to make sure there are no files on it you<br />
wish to keep.<br />
4. Click on the Volume Scheme pull-down menu and select<br />
two partitions.<br />
5. Select the first partition in this list and type in the capacity of<br />
your system drive (you checked in step #1 above) to the Size<br />
field. In the Name field, enter the name <strong>Maxtor</strong> Bootable<br />
Backup.<br />
10
6. The remaining space will be allocated to a second partition that<br />
can be used for general storage, enter the name <strong>Maxtor</strong> Extra<br />
Storage. When finished, click the OK button.<br />
7. A warning message will appear. Click the Partition button<br />
when you are ready.<br />
8. After the partitioning process is completed, Quit Apple’s Disk<br />
Utility. You should now see the two partitions as drive volumes<br />
on your Desktop.<br />
9. Go to the Apple menu and select System Preferences. Select<br />
Security, click on the Turn Off FileVaulting button, then Quit<br />
System Preferences.<br />
10. Select the “<strong>Maxtor</strong> Bootable Backup” drive. Then from the<br />
Finder, select File and Get Info.<br />
11. From the drive's Info Window, click on Ownership &<br />
Permissions and remove the check from Ignore ownership<br />
on this volume. Type in your password and close the info<br />
window.<br />
Set up Retrospect Express and back up your computer<br />
1. Push the button on the front of your drive.<br />
A window appears that says: ‘You need an administrator<br />
password to start Retrospect.’<br />
Enter the Name and Password for your OS X system.<br />
(This is the Name and Password you set up when you originally<br />
installed OS X)<br />
2. Click OK.<br />
The next screen will appear:<br />
‘Would you like to register Retrospect Express now?’<br />
3. Choose Register Now, Register Later or Already Registered.<br />
If you chose Register Now, go to the next step.<br />
If you chose Register Later or Already Registered,<br />
Retrospect Express will open. Go directly to Step 5.<br />
4. Enter the required information on the form.<br />
• Click Email to register via email<br />
• Click Print to register via mail<br />
• Click Register Later if you do not want to register now.<br />
2<br />
Installing Your <strong>Drive</strong> 11
2<br />
By registering 1 your new drive, you will have the option of<br />
receiving product updates, special offers, and important<br />
information about other data storage solutions from <strong>Maxtor</strong>.<br />
Once you’ve made your selection, Retrospect Express will<br />
open and the <strong>Maxtor</strong> <strong>OneTouch</strong> Setup screen will appear.<br />
5. Click Next.<br />
The Step 1 screen will appear.<br />
6. Select the hard drive where your operating system is installed<br />
and click Next.<br />
The Step 2 screen will appear.<br />
7. Choose All Files, bootable backup copy and click Next.<br />
The Step 3 screen is displayed.<br />
8. Select the <strong>Maxtor</strong> <strong>OneTouch</strong> <strong>II</strong> drive as the location to store an<br />
exact copy of all your computer’s files.<br />
1. Your registration information is collected and maintained according<br />
to the EMC and <strong>Maxtor</strong> privacy policies located on their respective<br />
web sites.<br />
If you choose to e-mail the information, make sure you are<br />
connected to the Internet.<br />
If you choose to print the information, you can fax the form to EMC<br />
Dantz Corporation at +1 925 253 9099.<br />
9. Click Next.<br />
You cannot select the same drive to be both the source<br />
and destination for your files. The source and destination<br />
drives must be different.<br />
The “Congratulations... now ready” screen appears.<br />
10. To complete the <strong>Maxtor</strong> <strong>OneTouch</strong> setup, click Finish.<br />
11. Go to the Retrospect Express menu and choose Quit<br />
Retrospect Express to exit Retrospect Express.<br />
12. If you are ready to back up your entire computer, push the<br />
button on the front of your drive.<br />
The <strong>OneTouch</strong> button may not function when Retrospect<br />
Express is already running. To correct the problem, quit<br />
Retrospect Express.<br />
Your complete system backup will start.<br />
The length of time for the backup process depends on the<br />
number of files on your computer.<br />
Only the current versions of your files are saved. Backup<br />
copies made with the <strong>Maxtor</strong> <strong>OneTouch</strong> feature do not<br />
include earlier versions of files you have deleted since the<br />
last time you pressed the <strong>Maxtor</strong> <strong>OneTouch</strong> button.<br />
Any files that are currently open are not saved.<br />
12
You may customize Retrospect Express to create backup copies of<br />
your files which will include revisions made on a daily basis.<br />
See the Retrospect Express User’s Guide for Macintosh, included<br />
on the install CD.<br />
Your hardware and software installation is now complete. See<br />
“Using Your <strong>Drive</strong>” on page 27 in chapter 3, for information on<br />
using your drive for common applications and on using Retrospect<br />
to make copies of your important files and restore backed up files.<br />
Macintosh OS 9<br />
Step 1. Install the Software<br />
1. Turn on your computer<br />
2. Insert the <strong>Maxtor</strong> Installation CD into your CD-ROM drive.<br />
After a few seconds, the <strong>Maxtor</strong> CD should appear on your<br />
Macintosh desktop.<br />
3. Open the Install CD icon.<br />
4. Find the folder appropriate for your language and open it.<br />
5. Double-click the Install Retrospect Express icon.<br />
The Retrospect Installer will open.<br />
6. Click Continue.<br />
The license screen will appear.<br />
7. Review the license agreement and click Accept.<br />
The Install Retrospect Express screen will appear.<br />
This screen allows you to specify what type of installation you<br />
want and where. It is automatically setup to do an Easy Install<br />
(full installation) which is recommended. It will install<br />
Retrospect Express into the Applications folder on<br />
your Macintosh.<br />
You can select a Custom Installation, using the Easy Install<br />
pop-up menu, as well as change the location of the installation<br />
using the Install Location menu at the bottom of the screen.<br />
8. When you are ready, click Install.<br />
The installation will begin.<br />
When the installation finishes, the Installation was successful<br />
window should appear, asking you to restart.<br />
9. Click Restart.<br />
10. After your Macintosh restarts, please eject the <strong>Maxtor</strong> Install<br />
CD from your computer.<br />
11. Proceed to the next section: Connect the <strong>Drive</strong>.<br />
2<br />
Installing Your <strong>Drive</strong> 13
2<br />
Step 2. Connect the <strong>Drive</strong><br />
The <strong>Maxtor</strong> <strong>OneTouch</strong> <strong>II</strong> drive connects to your computer using<br />
either a FireWire or USB interface. Make sure you know which<br />
interface is available on your drive and on your computer.<br />
Please install the software before you connect the drive.<br />
Connecting the Power<br />
1. Plug the round female connector from the power adapter into<br />
the drive’s power connector.<br />
2. Plug the two-pin female connector on the power cord<br />
into the power adapter.<br />
Figure 4. Connecting the Power<br />
3. Plug the standard electrical plug from the power adapter into<br />
your power source.<br />
4. Turn on the <strong>Maxtor</strong> <strong>OneTouch</strong> <strong>II</strong> drive using the power switch<br />
on the back of the drive. The two blue lights on the front of the<br />
drive should illuminate.<br />
5. Determine whether you have USB or FireWire ports available<br />
on your system. If you are connecting your drive with FireWire,<br />
proceed to “Connecting with the FireWire Cable” on page 15.<br />
Connecting with the USB Cable<br />
Do not plug a USB cable into the drive when a FireWire cable<br />
is already connected to the drive. The <strong>Maxtor</strong> <strong>OneTouch</strong> <strong>II</strong><br />
drive will only operate with one interface at a time.<br />
Before you connect<br />
Disable the File Exchange control panel:<br />
• From the Apple menu, select Control Panels<br />
The Control Panels folder will open.<br />
• Double-click the Extensions Manager icon.<br />
The Extensions Manager panel will open.<br />
• From the list that appears, uncheck the check box next to<br />
the File Exchange control panel by clicking on it.<br />
• Click Restart.<br />
After your Macintosh restarts, proceed to the next step.<br />
14
The <strong>Maxtor</strong> <strong>OneTouch</strong> button, Power management, and<br />
<strong>OneTouch</strong> Settings utility program are not supported for USB<br />
on the Macintosh. You may, however, use your drive as<br />
external storage and utilize the Retrospect Express software<br />
to maintain backup copies of your files and complete system.<br />
To connect the USB cable<br />
1. Plug the larger end of the USB cable into any available<br />
USB port on your computer. This USB logo <br />
may help you identify a USB port.<br />
2. Plug the smaller end of the USB cable into the USB<br />
connection on the drive.<br />
Depending on the size of your drive, it may take several<br />
seconds for your Macintosh to recognize the drive.<br />
The installation is complete and your drive is ready to use!<br />
Connecting with the FireWire Cable<br />
Do not plug a FireWire cable into the drive when a USB<br />
cable is already connected to the drive. This drive will only<br />
operate with one interface at a time.<br />
Before you connect<br />
Disable the File Exchange control panel:<br />
• From the Apple menu, select Control Panels<br />
• The Control Panels folder will open.<br />
• Double-click the Extensions Manager icon.<br />
The Extensions Manager panel will open.<br />
• From the list that appears, uncheck the check box next to the<br />
File Exchange control panel by clicking on it.<br />
• Click Restart.<br />
After your Macintosh restarts, proceed to the next step.<br />
2<br />
Figure 5. Connecting to a USB Port<br />
Installing Your <strong>Drive</strong> 15
2<br />
To connect the FireWire Cable<br />
1. Plug one end of the FireWire cable into any available FireWire<br />
port on your computer or any other FireWire device that is<br />
connected to your computer.<br />
2. Plug the other end of the FireWire cable into either of the<br />
available FireWire ports on the back of the drive.<br />
Figure 6. Connecting to a FireWire port<br />
Depending on the size of your drive, it may take several<br />
seconds for your Macintosh to recognize the drive.<br />
The installation is complete and your <strong>Maxtor</strong> <strong>OneTouch</strong> <strong>II</strong> drive is<br />
ready to use!<br />
If you did the Full Installation, we encourage you to proceed to the<br />
next section, “Backing Up Your Computer” on page 16, to setup<br />
Retrospect Express for easy, automated backup of your<br />
entire computer!<br />
If you’d like to learn how to set up <strong>OneTouch</strong> button for backing up<br />
your files at the touch of a button, see “Setting Up the <strong>Maxtor</strong><br />
<strong>OneTouch</strong> Feature” on page 32 in chapter 3.<br />
See “Using Your <strong>Drive</strong>” on page 27 in chapter 3, for information on<br />
using your drive for common applications and on using Retrospect<br />
Express to backup and restore your important files.<br />
Backing Up Your Computer<br />
To backup your entire Macintosh including the operating system,<br />
use the following steps:<br />
You cannot run Retrospect Express under OS 9 to create<br />
system backups of OS X. You must run Retrospect Express<br />
under OS X to back up an OS X system.<br />
1. Open Retrospect Express<br />
The Retrospect Express Directory window will open.<br />
2. Click the Automate tab.<br />
The Scripted Retrospect operations section<br />
will appear.<br />
16
3. Click EasyScript.<br />
The ‘Welcome to EasyScript’ window will appear.<br />
4. Click Next.<br />
The Backup media page will appear.<br />
5. Select File backup set (hard disk) and click Next.<br />
The Backup frequency page appears asking you:<br />
‘How often do you want to back up?’<br />
6. Choose either Every day or Once a week.<br />
If you chose the once a week backup option, choose the<br />
Day also.<br />
7. Click Next.<br />
The EasyScript backup strategy window appears.<br />
8. Choose a start time for your backups.<br />
9. Click Create.<br />
A window appears asking you: ‘What do you want to name<br />
your backup set?’<br />
10. Type in a memorable name, like System Backup, and click New.<br />
The Choose a Folder window will now appear.<br />
11. Select the drive you plan to back up to (your <strong>Maxtor</strong> <strong>OneTouch</strong><br />
<strong>II</strong> drive) and click Save.<br />
A window will appear: ‘EasyScript has created and scheduled a<br />
script.’<br />
At this point, you can click Open Script to view your script and<br />
make changes, or you can simply click Done to finish. You’ll<br />
learn how to make basic changes to your script later in this<br />
chapter.<br />
12. Click Done.<br />
You now have a finished a script that will automatically backup your<br />
entire computer at the time and date you specified. All you have to<br />
do is leave your computer and your <strong>Maxtor</strong> <strong>OneTouch</strong> <strong>II</strong> drive on.<br />
We highly recommend that you run your backup manually the first<br />
time to make sure that it backs up everything you need. You’ll learn<br />
how to do this in the following section.<br />
Doing Your First Backup<br />
1. Open Retrospect Express (if not already open).<br />
The Retrospect Express Directory window will open.<br />
2. Click the Run drop-down menu at the top of the screen and<br />
select EasyScript Backup.<br />
The EasyScript Backup window will appear.<br />
2<br />
Installing Your <strong>Drive</strong> 17
2<br />
3. Make sure Execute now is selected and click Execute.<br />
Retrospect will now start scanning your system, the<br />
Immediate Backup window will open and the backup process<br />
will begin.<br />
The first backup may take some time depending on the<br />
number of files in your computer. Each subsequent backup<br />
will take less time. This is because Retrospect compares the<br />
files in your actual system to the backup version and only<br />
copies new files or files that have been modified since the<br />
last backup. For more information on backup strategies, see<br />
the Retrospect Express User’s Guide.<br />
When the backup is complete, the message: ‘Execution<br />
completed successfully’ should appear.<br />
If your system backup was successful, you can quit Retrospect.<br />
For OS 9: Go to the File menu and select Quit.<br />
For OS X: Go to the Retrospect Express menu and select Quit<br />
Retrospect Express.<br />
When you quit Retrospect, a window will appear: ‘Script EasyScript<br />
Backup is next for automatic execution.’ This is a reminder to make<br />
sure that the drive you plan to use for the next backup (your <strong>Maxtor</strong><br />
<strong>OneTouch</strong> <strong>II</strong> drive) is connected to your computer and ready. If you<br />
are not sure, you can click the Check Media button to have<br />
Retrospect check for you.<br />
Windows 2000 and XP<br />
Step 1. Install the Software<br />
If you receive a message that you do not have sufficient<br />
privileges to complete the installation, you may not have the<br />
Administrative Privileges required to install the software.<br />
To determine if you have these rights:<br />
•Click the Windows Start button and choose Control Panel.<br />
•Double click the User Accounts icon.<br />
•If your account Logon is displayed at the bottom of this<br />
window with the description: Computer Administrator,<br />
you have the correct administrative privileges to install and<br />
run this software. If your system shows another type of<br />
account status, contact your IT/Systems Administrator for<br />
further assistance.<br />
1. Turn on your computer.<br />
2. Insert the <strong>Maxtor</strong> Installation CD into your CD-ROM drive. After<br />
a few seconds, the <strong>Maxtor</strong> Select Language screen will open.<br />
18
If, for some reason, the <strong>Maxtor</strong> screen does not appear:<br />
• Click the Windows Start button and then click Run.<br />
• Click Browse and find the drive named Install CD<br />
• Open Install CD, open Launch and click OK.<br />
The Select Language screen will appear.<br />
3. Select your language.<br />
The Main Menu will appear next.<br />
4. Select Install Software.<br />
The Install Software screen will appear.<br />
5. Select Full Installation or Install <strong>Drive</strong>rs.<br />
(Full Installation is recommended.)<br />
It may take a few seconds for the next screen to appear.<br />
If a message appears asking you to restart, follow the<br />
on-screen directions to restart your computer. (Please do<br />
not eject the Installer CD.)<br />
Once your computer restarts, you will see the next screen.<br />
The InstallShield welcome screen will open.<br />
6. Click Next.<br />
The License Agreement screen will appear.<br />
7. After reading the License Agreement, click Yes.<br />
The Customer Information screen will appear.<br />
8. Enter your User Name and Company Name.<br />
If there are multiple users that log in to your computer, you can<br />
choose whether you want them to be able to use your<br />
<strong>Maxtor</strong> <strong>OneTouch</strong> <strong>II</strong> drive. The all users option<br />
is recommended.<br />
Make your choice and click Next.<br />
The Choose Destination Location screen will appear.<br />
In the Destination Folder section of the screen, you can see<br />
where the <strong>Maxtor</strong> software will be installed. If you wish to<br />
change this, click Browse and choose a new location.<br />
9. When you are ready, click Next.<br />
The Select Program Folder screen will appear.<br />
You can see the name of the <strong>Maxtor</strong> program folder and where<br />
it will appear in the Windows Start menu. You can make<br />
changes to these settings, if you need to.<br />
10. When you are ready, click Next.<br />
The Setup Status window will appear briefly, then the<br />
InstallShield Wizard Complete window will appear.<br />
2<br />
Installing Your <strong>Drive</strong> 19
2<br />
11. Click Finish.<br />
The Retrospect Express HD Installshield Wizard will appear<br />
automatically.<br />
You may see a message asking you to Please Reboot your<br />
computer. If so, select: ‘Yes, I want to restart my computer<br />
now’ and click OK.<br />
If you have chosen not to install Retrospect, eject the Install<br />
CD and go directly to the “Connect the <strong>Drive</strong>” section on<br />
page 21.<br />
If you have chosen to install Retrospect, please do not<br />
eject the Install CD and go to the next step.<br />
12. Click Next.<br />
You may see a message that the Microsoft .NET software<br />
will be installed on your computer. If so, follow the onscreen<br />
instructions to complete the installation.<br />
The Retrospect Express HD welcome screen will appear.<br />
13. Click Next.<br />
The License Agreement screen will appear.<br />
14. After reading the agreement, select “I accept..” and click Next.<br />
The Customer Information screen will appear.<br />
15. Enter your User Name and Organization.<br />
Make your choice and click Next.<br />
16. Fill in your information and click Next.<br />
The Setup Type screen will appear.<br />
17. Choose the Recommended option to install all of the<br />
Retrospect Software (recommended). If you choose the<br />
Custom option, you will choose individual components and<br />
specify an install location before the installation begins.<br />
If you do not install Retrospect ExpressHD, you will not be<br />
able to use it with the <strong>OneTouch</strong> backup feature described<br />
later in this guide.<br />
Make your choice and click Next.<br />
The Ready to Install screen appears.<br />
18. If you’re ready to install the Retrospect software, click Install.<br />
After the software is installed on your computer, the message<br />
“InstallShield Wizard Completed” will appear.<br />
19. Click the Finish button.<br />
If a message appears asking you to restart, follow the<br />
on-screen directions to restart your computer.<br />
20
The Welcome to <strong>Maxtor</strong> <strong>OneTouch</strong> Setup screen will appear<br />
and a <strong>Maxtor</strong> <strong>OneTouch</strong> shortcut icon will appear on<br />
your desktop.<br />
20. Eject the <strong>Maxtor</strong> Install CD from your computer.<br />
21. Proceed to the next section: Connect the <strong>Drive</strong>.<br />
Step 2. Connect the <strong>Drive</strong><br />
The <strong>Maxtor</strong> <strong>OneTouch</strong> <strong>II</strong> drive connects to your computer using<br />
either a FireWire or USB interface. Make sure you know which<br />
interface is available on your drive and on your computer.<br />
Please Install the software before you connect the drive.<br />
Connecting the Power<br />
1. Plug the round female connector from the power adapter into<br />
the drive’s power connector.<br />
2. Plug the two-pin female connector on the power cord<br />
into the power adapter.<br />
Figure 3. Connecting the Power<br />
3. Plug the standard electrical plug from the power adapter into<br />
your power source.<br />
4. Turn on the drive using the power switch on the back of the<br />
drive. The two blue lights on the front should illuminate.<br />
5. Determine whether you have USB or FireWire ports available<br />
on your computer. If you are connecting your drive with<br />
FireWire, proceed to “Connecting with the FireWire Cable” on<br />
page 24.<br />
Connecting with the USB Cable<br />
Do not plug a USB cable into the drive when a FireWire cable<br />
is already connected to the drive. The drive only operates<br />
with one interface at a time.<br />
2<br />
Installing Your <strong>Drive</strong> 21
2<br />
To connect the USB cable<br />
1. Plug the flat end of the USB cable into any available USB port<br />
on your computer. This USB logo may help you<br />
identify a USB port.<br />
2. Plug the square end of the USB cable into the USB connection<br />
on the drive.<br />
Figure 4. Connecting a USB Port<br />
It may take up to 2 minutes for your computer to recognize<br />
the drive, after connecting it to your computer.<br />
A ‘Found New Hardware’ message will appear briefly at the<br />
bottom of the screen once your drive is recognized by your<br />
computer.<br />
3. If the Welcome to <strong>Maxtor</strong> <strong>OneTouch</strong> Setup screen is still<br />
visible, click Cancel to close it.<br />
Your computer may require a restart to complete the<br />
hardware installation.<br />
The <strong>Maxtor</strong> <strong>OneTouch</strong> <strong>II</strong> FireWire 800 drive is shipped with a<br />
Macintosh file system. The Windows XP and Windows 2000<br />
operating systems use an NTFS file structure. Your drive<br />
must be re-formatted for the NTFS file system in order to<br />
work properly with your Windows operating system.<br />
The Format <strong>Drive</strong> window will appear and you will have the<br />
opportunity to format your drive with the NTFS file system. This is<br />
necessary for Windows 2000 and XP users.<br />
4. Click Format.<br />
Your new drive will appear in the same way as your other<br />
drives, with a letter assigned to it by the operating system. The<br />
assigned letter will vary depending upon the number of other<br />
drives connected to your computer. Make a mental note of this<br />
drive letter.<br />
If you did the Full Installation, including Retrospect Express HD,<br />
go to the next step.<br />
If you did not install Retrospect Express HD, the installation is<br />
complete and your <strong>Maxtor</strong> <strong>OneTouch</strong> <strong>II</strong> drive is ready to use.<br />
See “Using Your <strong>Drive</strong>” on page 27 in chapter 3, for<br />
information about using your drive for common applications.<br />
5. Push the button on the front of your drive.<br />
The Retrospect registration screen will appear.<br />
22
6. To register immediately, enter your information in the<br />
registration form provided and click Register.<br />
If you do not wish to register now, click Register Later.<br />
If you have already registered, click Already Registered.<br />
In order to register, you must be connected to the internet.<br />
By registering 1 , you will have the option of receiving<br />
product updates, special offers, and important information<br />
about other data storage solutions from <strong>Maxtor</strong>.<br />
Once you’ve made your selection, the Retrospect welcome<br />
screen will appear.<br />
This screen displays the automatic backup settings for your<br />
computer. Retrospect Express HD will back up all the files on<br />
your computer to your <strong>Maxtor</strong> <strong>OneTouch</strong> <strong>II</strong> drive, every day at<br />
10 PM.<br />
7. If you would like to start your first backup immediately, click<br />
Back up now.<br />
To close Retrospect Express HD, click the ‘X’ located at the<br />
upper right corner of the window.<br />
You can back up manually, at any time, by pressing the button<br />
on the front of your drive.<br />
Your hardware and software installation is now complete. See<br />
“Using Your <strong>Drive</strong>” on page 27 in chapter 3, for information about<br />
using your drive and using Retrospect Express HD.<br />
2<br />
1. Your registration information is collected and maintained according<br />
to the EMC and <strong>Maxtor</strong> privacy policies located on their respective<br />
web sites.<br />
Installing Your <strong>Drive</strong> 23
2<br />
Connecting with the FireWire Cable<br />
Do not plug a FireWire cable into the drive when a USB<br />
cable is already connected to the drive. The drive only<br />
operates with one interface at a time.<br />
To connect the FireWire cable<br />
1. Plug one end of the FireWire cable into any available<br />
FireWire port on your computer.<br />
2. Plug the other end of the FireWire cable into an<br />
available FireWire port on the back of the drive.<br />
It may take up to 2 minutes for your computer to recognize<br />
the drive, after connecting it to your computer.<br />
A ‘Found New Hardware’ message will appear briefly at the bottom<br />
of the screen once your drive is recognized by your computer.<br />
3. If the Welcome to <strong>Maxtor</strong> <strong>OneTouch</strong> Setup screen is still<br />
visible, click Cancel to close it.<br />
Your computer may require a restart to complete the<br />
hardware installation process.<br />
The <strong>Maxtor</strong> <strong>OneTouch</strong> <strong>II</strong> FireWire 800 drive is shipped with a<br />
Macintosh file system. The Windows XP and Windows 2000<br />
operating systems use an NTFS file system. Your drive<br />
must be re-formatted for the NTFS file system in order to<br />
work properly with your Windows operating system.<br />
The Format <strong>Drive</strong> window will appear and you will have the<br />
opportunity to format your drive with the NTFS file system. This is<br />
necessary for Windows 2000 and XP users.<br />
4. Click Format.<br />
Figure 5. Connecting to a FireWire port<br />
A FireWire 800 adapter card is required for full<br />
FireWire 800 speed.<br />
24
Your new drive will appear in the same way as your other<br />
drives, with a letter assigned to it by the operating system. The<br />
assigned letter will vary depending upon the number of other<br />
drives connected to your computer. Make a mental note of<br />
this drive letter.<br />
If you did the Full Installation, including Retrospect Express HD,<br />
go to the next step.<br />
If you did not install Retrospect Express HD, the installation is<br />
complete and your <strong>Maxtor</strong> <strong>OneTouch</strong> <strong>II</strong> drive is ready to use.<br />
See “Using Your <strong>Drive</strong>” on page 27 in chapter 3, for<br />
information about using your drive for common applications.<br />
5. Push the button on the front of your drive.<br />
The Retrospect registration screen will appear.<br />
6. To register immediately, enter your information in the<br />
registration form provided and click Register.<br />
If you do not wish to register now, click Register Later.<br />
If you have already registered, click Already Registered.<br />
In order to register, you must be connected to the internet.<br />
By registering 1 , you will have the option of receiving<br />
product updates, special offers, and important information<br />
about other data storage solutions from <strong>Maxtor</strong>.<br />
Once you’ve made your selection, the Retrospect welcome<br />
screen will appear.<br />
This screen displays the automatic backup settings for your<br />
computer. Retrospect Express HD will back up all the files on<br />
your computer to your <strong>Maxtor</strong> <strong>OneTouch</strong> <strong>II</strong> drive, every day at<br />
10 PM.<br />
7. If you would like to start your first backup immediately, click<br />
Back up now.<br />
To close Retrospect Express HD, click the ‘X’ located at the<br />
upper right corner of the window.<br />
You can back up manually, at any time, by pressing the button on<br />
the front of your drive and clicking Back up now.<br />
Your hardware and software installation is now complete. See<br />
“Using Your <strong>Drive</strong>” on page 27 in chapter 3, for information about<br />
using your drive for common applications and using<br />
Retrospect Express HD.<br />
1. Your registration information is collected and maintained according<br />
to the EMC and <strong>Maxtor</strong> privacy policies located on their respective<br />
web sites.<br />
2<br />
Installing Your <strong>Drive</strong> 25
2<br />
Installing <strong>Drive</strong>rs Only<br />
This section describes how to install your new drive without<br />
installing Retrospect software.<br />
The <strong>Maxtor</strong> <strong>OneTouch</strong> button feature will not function if you<br />
choose to install under this option.<br />
Locate your operating system and the interface you plan to use in<br />
the following section and follow the corresponding installation<br />
procedure detailed.<br />
Macintosh<br />
No drivers are necessary. If you’re using OS 9, connect your<br />
<strong>Maxtor</strong> <strong>OneTouch</strong> <strong>II</strong> drive as described in “Step 2. Connect the<br />
<strong>Drive</strong>” on page 14. If you’re using OS X, connect your drive as<br />
described in “Step 2. Connect the <strong>Drive</strong>” on page 8.<br />
Windows<br />
Use the Custom Install feature on the <strong>Maxtor</strong> Install CD.<br />
1. Insert the Install CD in your CD-ROM drive.<br />
Wait for the <strong>Maxtor</strong> screen to appear.<br />
2. Select Install <strong>Drive</strong>rs and follow the steps to on-screen steps<br />
to complete the installation.<br />
Your drive is now ready to use.<br />
To Install Retrospect at a Later Time<br />
If you wish to install a complete copy of Retrospect software<br />
and the <strong>Maxtor</strong> <strong>OneTouch</strong> feature at a later time, you can do<br />
so by following the original installation instructions provided in<br />
“Installing Your <strong>Drive</strong>” on page 6 of this chapter.<br />
26
3<br />
Using Your <strong>Drive</strong><br />
Once installed, you can use your new <strong>Maxtor</strong> <strong>OneTouch</strong> <strong>II</strong><br />
FireWire 800 drive in the same way you use the other drives on<br />
your computer. Some of the basic ways you can use your new<br />
drive are:<br />
• Move or copy files or folders from your other drives,<br />
CD-ROMs, or other storage devices.<br />
• Within virtually any application, save files to and open files<br />
from the new drive.<br />
• Store video files, games, spreadsheets, and other commonly<br />
used files.<br />
• Store copies of important files from your desktop or laptop<br />
computer.<br />
For information on the <strong>Maxtor</strong> <strong>OneTouch</strong> Settings utility, including:<br />
• Performance and power management features<br />
• Security settings<br />
• Diagnostic utilities<br />
• Customizing the <strong>OneTouch</strong> button<br />
• Using Retrospect Express to back up and restore your data<br />
See “Restoring Your Complete System” on page 42, for<br />
more information.<br />
<strong>Maxtor</strong> <strong>OneTouch</strong> <strong>II</strong> drive lights and their messages<br />
The blue lights on the front of your drive provide useful information.<br />
Message<br />
Both lights on<br />
Lights blink alternating every second<br />
One light off and one blinking<br />
Status<br />
Power on/idle<br />
Active<br />
Standby mode<br />
Table 1: <strong>Maxtor</strong> <strong>OneTouch</strong> <strong>II</strong> drive lights<br />
Connecting and Disconnecting the <strong>Drive</strong><br />
The FireWire and USB interfaces allow you to hot swap your<br />
<strong>Maxtor</strong> <strong>OneTouch</strong> <strong>II</strong> drive; that is, connect and disconnect the drive<br />
while the computer and your drive are turned on.<br />
To connect the drive to a Macintosh computer<br />
1. Make sure the drive is turned on and that both blue<br />
lights are illuminated.<br />
Connecting your computer to a drive that is not powered on<br />
can cause your computer to behave erratically or freeze.<br />
2. Plug the FireWire or USB cable into the drive and your<br />
computer.<br />
3<br />
Using Your <strong>Drive</strong> 27
3<br />
After a moment, the computer will recognize that your<br />
drive is connected and the drive icon will appear on the<br />
desktop of your Macintosh.<br />
To disconnect the drive from a Macintosh computer<br />
1. From the desktop, drag the drive icon to the Trash.<br />
The drive will disappear from the desktop.<br />
Disconnect your drive from the computer.<br />
To connect the drive to a Windows computer<br />
1. Make sure the drive is turned on and that both blue<br />
lights are illuminated.<br />
2. Plug the FireWire or USB cable into the drive and your<br />
computer.<br />
After a moment, the computer will recognize that your<br />
drive is connected and the drive icon will appear in the<br />
My Computer window.<br />
To disconnect the drive from a Windows computer<br />
1. Double-click the Windows Unplug or Eject Hardware<br />
icon in your system icon tray located at the bottom right<br />
corner of your desktop.<br />
Unplug or Eject<br />
Hardware icon<br />
A list of device choices appears.<br />
2. Select the <strong>Maxtor</strong> drive and follow the on-screen<br />
directions to eject the drive.<br />
The system will display a message saying that you can<br />
safely remove the drive.<br />
3. Disconnect the drive from your computer.<br />
Your system may not allow you to disconnect the drive. In<br />
this case, you may need to close all open applications and<br />
documents or shut down your system completely to<br />
disconnect the drive safely. Removing the drive from your<br />
computer without disconnecting it properly through the<br />
operating system can result in lost or damaged files.<br />
Naming Your <strong>Maxtor</strong> <strong>OneTouch</strong> <strong>II</strong> <strong>Drive</strong><br />
Your new untitled drive appears in the same way as your other<br />
drives, with a new drive letter assigned by the operating system.<br />
The assigned letter will vary depending upon the number of other<br />
drives connected to your computer. Make a mental note of this<br />
drive letter. It∂s a good idea to name your new drive, so that is easy<br />
identify later when you use it for backing up your files.<br />
To name your drive on a Macintosh computer:<br />
1. On your desktop, click on the name of the new drive’s<br />
icon. The text will be to highlighted.<br />
2. Enter a name (for example “<strong>Maxtor</strong>”) for your drive and<br />
press Return.<br />
28
To name your drive on a Windows computer:<br />
1. Open your My Computer icon (where your other<br />
drives appear.)<br />
2. Right-click your new drive’s icon and select Properties.<br />
The properties window will open.<br />
3. In the Label section at the top of the window, enter a<br />
name for your drive. For example: ‘<strong>Maxtor</strong>.’<br />
Using Retrospect Express<br />
Macintosh<br />
Your <strong>Maxtor</strong> <strong>OneTouch</strong> <strong>II</strong> drive includes a full copy of the Dantz<br />
Retrospect Express software. It includes many powerful and<br />
convenient features. In addition to the <strong>Maxtor</strong> <strong>OneTouch</strong> feature,<br />
you can:<br />
• Automatically make copies of your most important files.<br />
• Make copies of your data onto other popular storage devices,<br />
including CD-R, DVD-R, and selected tape drives.<br />
• Recover lost work easily – restore a single file or the contents<br />
of an entire drive in one easy step.<br />
• Save time and minimize storage space needs.<br />
If you installed your drive with the <strong>Maxtor</strong> <strong>OneTouch</strong> feature, the<br />
Retrospect Express software is already installed.<br />
Here are some important guidelines:<br />
• Only the current versions of your files are copied. The<br />
<strong>Maxtor</strong> <strong>OneTouch</strong> <strong>II</strong> drive does not keep backup copies made<br />
in earlier sessions.<br />
• If you delete files from your source drive and then push the<br />
button, those same files will also be deleted from your<br />
<strong>Maxtor</strong> <strong>OneTouch</strong> <strong>II</strong> FireWire 800 drive.<br />
• Any files that are currently open will not be copied to the<br />
<strong>Maxtor</strong> <strong>OneTouch</strong> <strong>II</strong> drive. Close any files you want copied<br />
before pressing the button.<br />
Can I customize the <strong>Maxtor</strong> <strong>OneTouch</strong> Backup?<br />
Yes. Using Retrospect Express, you can customize <strong>OneTouch</strong><br />
backup in a variety of ways. The default type is a duplicate backup<br />
You can even customize how the duplicate replaces files on the<br />
destination drive.<br />
If you modify the destination location for the <strong>Maxtor</strong> <strong>OneTouch</strong><br />
script or another duplicate script in Retrospect Express, it will<br />
default to “replace the entire contents” of the selected drive or<br />
folder. This will erase all files on the destination drive’s backup<br />
folder and will only copy the selected files from the source<br />
drive’s folder.<br />
3<br />
Using Your <strong>Drive</strong> 29
3<br />
It is strongly recommended that you:<br />
• Select the option to “Replace Corresponding Files”<br />
• Define a folder on the destination drive dedicated to your<br />
duplicate backups.<br />
Archiving Files<br />
Figure 1. Replace Corresponding Files<br />
Archive is another type of backup you can do with Retrospect<br />
Express. Note that using this function will permanently remove<br />
files from the source drive and place them on the destination drive.<br />
If your destination drive is lost or damaged, you will have lost your<br />
only copy of these files.<br />
Can I do other types of backup?<br />
Yes. Using Retrospect Express, you can also create a script to back<br />
up multiple revisions of each file or to back up multiple drives or<br />
folders to a single backup set. This is the second type of backup<br />
you can create and customize. To access files contained in the<br />
backup set, use Retrospect Express.<br />
More Information<br />
To learn more about creating a backup script, go to:<br />
www.maxtorkb.com and enter “<strong>OneTouch</strong>” in the search function.<br />
Refer to the Express User’s Guide for detailed information about<br />
creating custom scripts and backup sets.<br />
Restoring Files<br />
It is easy to restore files that have been backed up using the<br />
<strong>Maxtor</strong> <strong>OneTouch</strong> feature.<br />
To restore files:<br />
1. Select the drive containing the copy of your files.<br />
2. Open the Retrospect Backup folder and then the folder<br />
that contains your backup copy.<br />
The folder is named ‘Backup copy of your_disk_name’<br />
(Only the first 9 characters of this name will be used).<br />
30
3. Drag the file or group of files you wish to restore to the<br />
desired folder as you would to move or copy any<br />
other file.<br />
If you are not sure where the files you want to restore are<br />
located, use your operating system’s Find command to search<br />
the drive containing the backup data.<br />
Changing Your <strong>Maxtor</strong> <strong>OneTouch</strong> Backup Settings<br />
1. Open Retrospect Express.<br />
The Retrospect Express Directory window will open.<br />
2. Click the Automate tab.<br />
The Scripted Retrospect operations window<br />
will appear.<br />
3. Click Scripts.<br />
The Scripts window will appear.<br />
4. Select the <strong>Maxtor</strong> <strong>OneTouch</strong> script.<br />
5. Press the Delete key on your keyboard.<br />
A window appears asking: ‘Really forget Script?’<br />
6. Click OK.<br />
7. Quit Retrospect Express by going to the File menu and<br />
selecting Quit.<br />
8. Push the button on the front of the drive.<br />
The <strong>Maxtor</strong> <strong>OneTouch</strong> setup wizard will start.<br />
9. Follow the steps, starting at step 2 in “Setting Up the<br />
<strong>Maxtor</strong> <strong>OneTouch</strong> Feature” on page 32.<br />
Adding <strong>Maxtor</strong> <strong>OneTouch</strong> Advanced Features<br />
You can further customize your <strong>Maxtor</strong> <strong>OneTouch</strong> script with<br />
advanced features from Retrospect Express. To learn more<br />
about these advanced features, use the Express User’s Guide<br />
in the Retrospect Express Folder on your Macintosh. If is not<br />
installed on your computer, you can access it on the <strong>Maxtor</strong><br />
installation CD.<br />
Retrospect User’s Guide<br />
Use the Express User’s Guide in the Retrospect Express<br />
folder on your Macintosh. If it is not installed on your computer,<br />
you can access it on the <strong>Maxtor</strong> installation CD.<br />
Retrospect Express User’s Guide on the CD:<br />
1. Insert the <strong>Maxtor</strong> Installation CD into your CD-ROM<br />
drive.<br />
The Install CD icon will appear on your desktop.<br />
2. Double-click the CD icon to open it.<br />
3. Open the folder appropriate for your language.<br />
3<br />
Using Your <strong>Drive</strong> 31
3<br />
4. Drag the Express User’s Guide onto your Macintosh’s<br />
hard drive.<br />
5. Double-click the Express User’s Guide to open it.<br />
You will need Adobe Acrobat Reader installed to open the<br />
guide. If you do not have it, you can download and install it<br />
for free from Adobe’s web site: www.adobe.com<br />
Macintosh OS 9<br />
Setting Up the <strong>Maxtor</strong> <strong>OneTouch</strong> Feature<br />
You can set up the <strong>Maxtor</strong> <strong>OneTouch</strong> feature to automatically make<br />
a backup copy of your selected files each time you press the<br />
<strong>OneTouch</strong> button.<br />
Before you begin, make sure the <strong>Maxtor</strong> Install CD is not<br />
in your CD-ROM drive.<br />
To set up the <strong>Maxtor</strong> <strong>OneTouch</strong> button feature<br />
1. Push the button on the front of your drive.<br />
If you have not already registered, a window will appear:<br />
‘Would you like to register Retrospect Express now?<br />
If you have already registered, skip to step 4.<br />
2. Choose either Register Now, Register Later or<br />
Already Registered.<br />
If you choose Register Now, go to the next step.<br />
If you chose Register Later or Already Registered,<br />
Retrospect Express will open. Go directly to Step 4 -<br />
<strong>Maxtor</strong> <strong>OneTouch</strong> Setup.<br />
3. Enter the required information on the form.<br />
• Click Email to register via email<br />
• Click Print to register via mail<br />
• Click Register Later if you do not want to register now.<br />
By registering 1 your new drive, you will have the option of<br />
receiving product updates, special offers, and important<br />
information about other data storage solutions from <strong>Maxtor</strong>.<br />
4. Retrospect Express will open and the <strong>Maxtor</strong> <strong>OneTouch</strong><br />
Setup screen will appear.<br />
1. Your registration information is collected and maintained according<br />
to the EMC and <strong>Maxtor</strong> privacy policies located on their respective<br />
web sites.<br />
If you choose to e-mail the information, make sure you are<br />
connected to the Internet.<br />
If you choose to print the information, you can fax the form to EMC<br />
Dantz Corporation at +1 925 253 9099.<br />
32
Click Next.<br />
The Step 1 Screen will appear.<br />
This selection does not copy your operating system files or<br />
Internet cache files.<br />
5. Select the drive to copy your files from and click Next.<br />
The Step 2 screen will appear.<br />
6. Choose the type of files to copy:<br />
Just Documents copies only documents you have created<br />
including your favorite files, bookmarks, and cookies. This<br />
selection is ideal for most users.<br />
Applications and Documents copies application files in<br />
addition to documents. This selection allows you to restore an<br />
application file if it has become damaged. Refer to the<br />
Retrospect User’s Guide for instructions on how to make<br />
a complete system backup copy.<br />
Make your choice and click Next.<br />
7. The Step 3 screen will appear. Select the <strong>Maxtor</strong> <strong>OneTouch</strong> <strong>II</strong><br />
drive or another drive on your computer as the location to store<br />
the copy of your files. Click Next.<br />
You cannot select the same drive to be both the source and<br />
destination for your files. The source and destination drives<br />
must be different.<br />
The “Congratulations...now ready” screen appears.<br />
8. To complete the <strong>Maxtor</strong> <strong>OneTouch</strong> setup, click Finish.<br />
9. Go to the File menu and choose Quit to exit<br />
Retrospect Express.<br />
You are now ready to use the <strong>Maxtor</strong> <strong>OneTouch</strong> feature!<br />
Each time you touch the button, Retrospect Express makes a copy<br />
of the folders and files on your source drive exactly as they exist at<br />
that time.<br />
The length of time for the backup process depends on the<br />
number of files on your computer.<br />
3<br />
Using Your <strong>Drive</strong> 33
3<br />
The <strong>OneTouch</strong> button may not function when Retrospect Express<br />
is already running. To correct the problem, go to the File menu in<br />
Retrospect, and choose Quit.<br />
Only the current versions of your files are saved. Backup<br />
copies made with the default <strong>Maxtor</strong> <strong>OneTouch</strong> feature do<br />
not include earlier versions of files you have deleted since<br />
the last time you pressed the <strong>Maxtor</strong> <strong>OneTouch</strong> button.<br />
Any files that are currently open are not saved, so close any<br />
files you wish to be copied.<br />
You may customize Retrospect Express to create backup<br />
copies of your files which will include revisions made on a<br />
daily basis. See the Express User’s Guide, included on the<br />
install CD.<br />
Using Retrospect Express HD<br />
Windows<br />
Understanding Restore Points<br />
The first step to backing your files is to create a restore point. A<br />
restore point is simply a snapshot of your files based on a specific<br />
date in time. It contains all the files and folders you select to back<br />
up, as they exist at the time that you back up.<br />
A restore point can be anything from a few files and folders to<br />
every file on your computer. Each time you back up, Retrospect<br />
Express HD adds a new restore point to your backup drive; thereby<br />
preserving copies of backed-up files and folders from multiple<br />
points in time. If there is not enough free disk space to add a new<br />
restore point, Retrospect Express HD automatically deletes older<br />
restore points to make room for new ones.<br />
You can restore individual files and folders from any restore point<br />
back to your computer. You can also restore your entire computer<br />
to its state at the time a restore point was created.<br />
Once you set up a backup, you can start it at any time by pressing<br />
the button on your <strong>Maxtor</strong> <strong>OneTouch</strong> <strong>II</strong> FireWire 800 drive. You can<br />
also schedule backups to take place automatically on specific days<br />
of the week.<br />
In the “Restoring your computer” section, later in this chapter, we<br />
will show you how to restore all the files on your computer in the<br />
event that your system is damaged or completely erased.<br />
34
Opening Retrospect Express HD<br />
You can open Retrospect Express HD from either the Start Menu:<br />
• Start >Programs >Dantz >Retrospect Express HD<br />
From the System Tray:<br />
• Right-click the red Retrospect Express HD icon:<br />
OR<br />
Press the <strong>OneTouch</strong> button<br />
Figure 12.<br />
Running an Immediate Backup<br />
Though comprehensive backups can be scheduled to run at predetermined<br />
times, you can launch them at any time by doing one<br />
of the following:<br />
• Press the <strong>OneTouch</strong> button - this will launch your backup<br />
immediately<br />
• Right-Click on the Retrospect icon located in the System<br />
Tray and select Back up now from the pop-up menu.<br />
• Open Retrospect Express HD and click Back up now.<br />
Revising Your Backup Settings<br />
1. Open Retrospect Express HD.<br />
2. The Welcome Screen will appear. It should identify<br />
when the next scheduled backup is to take place.<br />
Click Setup to make changes to your backup.<br />
3. Choose Comprehensive Backup and click Next.<br />
4. Click Next at the Save Restore Points window<br />
5. Change the days of the week or the starting time of your<br />
Backup and click Finish. You will then return to the main<br />
Retrospect Express window where your changes will be<br />
displayed and will go into effect at your next Backup.<br />
3<br />
Using Your <strong>Drive</strong> 35
3<br />
Restoring From Your Backup<br />
At times, your critical data may be corrupted. Fortunately, Retrospect<br />
Express HD provides you with the ability to restore your crucial files.<br />
If you need to restore your entire computer, see “Restoring<br />
Your Computer” on page 40.<br />
1. Open Retrospect Express HD<br />
The Welcome Screen will appear, with the next<br />
scheduled backup displayed.<br />
2. Click Restore.<br />
3. Select a restore point from which you wish to recover<br />
your data and click Next.<br />
Retrospect Express HD will now scan your computer.<br />
4. Place a check in each box containing data you wish<br />
to restore<br />
5. Use the search field to find specific files<br />
6. Click Next.<br />
You will now be asked where you wish to restore your<br />
files to. You have two options:<br />
• Their original location<br />
• The following location<br />
7. Make your choice and click Restore.<br />
Retrospect Express HD will then restore the files to your<br />
pre-selected location and provide you with the time that it<br />
will take to complete the restore. When finished, the<br />
Retrospect Express HD window will appear.<br />
Understanding the Restore Points Window<br />
The restore points window shows a calendar with the date in bold<br />
for the days that restore points were created. It will also list all the<br />
restore points in ascending order in a list box.<br />
When you select a date on the calendar, the list of restore points<br />
will automatically scroll to show all those that are associated with<br />
that specific date. The latest backup on that date will be<br />
highlighted. The drive for the restore point will also be shown.<br />
A green icon will appear before the date if the backup was<br />
successful, a yellow icon if the backup succeeded with some<br />
non-fatal errors, and a red icon if the backup failed.<br />
36
If you manually cancel a backup, it is considered to be a<br />
fatal error.<br />
If the restore point has a yellow or red icon, you can right-click the<br />
restore point to show the operation log, which will show you more<br />
information about the error.<br />
Locking Restore Points<br />
Retrospect Express HD's Grooming Technology manages your<br />
restore points by automatically adding the latest restore points and<br />
removing the oldest. However, there may be times that you do not<br />
want certain restore points removed from your system. In order to<br />
prevent restore points from being deleted, you must lock them.<br />
1. Open Retrospect Express.<br />
2. Click Restore.<br />
3. Highlight a restore point that you wish to use to lock<br />
your data and click Lock located in the upper right corner<br />
of the restore point screen.<br />
4. To unlock a restore point, simply repeat this procedure<br />
and the restore point will be unlocked when you click<br />
Lock again.<br />
Viewing Restore Point Logs<br />
There may be times that you want to see what may be causing<br />
problems with various restore points. You can accomplish this<br />
through viewing a restore point log.<br />
1. Open Retrospect Express HD.<br />
2. Click Restore.<br />
3. Highlight a restore point that you wish to use to view<br />
and click on the View Log button located in the upper<br />
right corner of the restore point screen.<br />
Deleting Restore Points<br />
Retrospect Express HD provides you with the ability to manually<br />
delete restore points. To manually delete a restore to point.<br />
1. Open Retrospect Express<br />
2. Click Restore.<br />
3. Highlight a restore point that you wish to remove and<br />
click on the delete button (the Red X) located in the<br />
upper right corner of the Restore.<br />
When a restore point is deleted, Retrospect Express HD will<br />
reclaim the disk space. This process can take a long time.<br />
Do not turn off your computer until the process is complete.<br />
3<br />
Using Your <strong>Drive</strong> 37
3<br />
Creating Retrospect Express HD Duplicates<br />
A duplicate saves the most recent version of files, in their original<br />
format, and overwrites the previous version. The following steps<br />
will show you how to create a duplicate.<br />
Please be aware of the following information when<br />
creating duplicates:<br />
•You cannot use Retrospect Express HD's comprehensive<br />
backup and duplicate features at the same time.<br />
•Duplicates are NOT automated nor can they be scheduled.<br />
•You can only run a duplicate "On Demand"; this means that<br />
the only time a duplicate is opened is when you manually<br />
open it.<br />
•A duplicate will always overwrite previous versions of files.<br />
1. Launch Retrospect Express<br />
2. Click Setup.<br />
The Select the type of Backup window will be displayed.<br />
3. Click Duplicate and click Next.<br />
From the file duplication window, you can:<br />
•Choose specific files and folders<br />
•Choose files by type<br />
4. Make your choice and click Next.<br />
You will then be prompted to select a disk where you<br />
wish to store your duplicate files.<br />
5. Check the appropriate box associated with your <strong>Maxtor</strong><br />
<strong>OneTouch</strong> <strong>II</strong> drive (or whichever drive you wish to back<br />
up to) and click Finish.<br />
The welcome screen will appear where your duplicate<br />
settings are displayed.<br />
6. Click Duplicate now to start the first duplicate backup.<br />
38
Restoring Files from a Duplicate<br />
Restoring files from a duplicate is as simple as drag and drop.<br />
2. Double-click on the Retrospect Duplicates folder<br />
1. Open My Computer and double-click on the drive letter<br />
associated with your <strong>Maxtor</strong> <strong>OneTouch</strong> <strong>II</strong> drive (or<br />
whichever drive you used to do your duplicate backup).<br />
3<br />
Figure 14. Duplicate Backup files<br />
3. Select the folder which contains your files and copy your<br />
files back to your PC.<br />
Figure 13. Retrospect Duplicates folder<br />
Using Your <strong>Drive</strong> 39
3<br />
Restoring Your Computer<br />
If disaster has struck and your system software is damaged or<br />
completely erased, this chapter provides you with step-by-step<br />
instructions on how to restore your system. 2<br />
These steps will be successful only if you have backed up your<br />
system using Retropsect.<br />
What’s contained in a full system restore?<br />
• Your current operating system<br />
• Your applications<br />
• Your personal files<br />
• Your computer’s settings - including the registry (on Windows)<br />
Before you begin. . .<br />
Because of factors like processor type, motherboard, video display<br />
card and other hardware that is specific to your brand and model of<br />
computer, we urge you to only do a full system restore to the<br />
same computer. Restoring your operating system, its applications<br />
and settings to another computer with different hardware is not<br />
supported and may cause significant problems with that computer.<br />
_________________________________________<br />
2 The <strong>Maxtor</strong> <strong>OneTouch</strong> <strong>II</strong> drive, in combination with the included Dantz Retrospect<br />
Express software, supports a complete system restore capability (Operating<br />
System, drivers, applications, settings and user files) back to the original computer<br />
system (running the same operating system) that the backup copy was made from,<br />
when performed according to the steps described in this chapter. If you need to<br />
restore data to a different computer and / or a different operating system, this<br />
product will only support the restoration of user files and does not support under<br />
those circumstances restoration of the Operating System, drivers, applications or<br />
settings.<br />
Basic Guidelines<br />
For your system restore to be successful, we recommend that<br />
you restore your system only:<br />
• To the same computer and same internal drive, or<br />
• To the same computer and new internal drive<br />
If you cannot restore to your original computer or an identical<br />
system, you can restore all of your personal files to a different<br />
computer. For more information, see www.maxtorkb.com.<br />
Restoring Your Complete System<br />
Macintosh OS 9<br />
Before you begin, you must format your system hard drive and<br />
install your operating system. If you had multiple partitions on your<br />
hard drive(s), you must create and format the same number of disk<br />
partitions. These partitions must be of equal or greater size to what<br />
they were on your original system. For information on how to<br />
partition and format your system drive, see the <strong>Maxtor</strong><br />
KnowledgeBase online at: www.maxtorkb.com.<br />
Restoring your OS X system<br />
For instructions on restoring your complete Macintosh OS X<br />
system, see the Quick Start poster included with your<br />
<strong>Maxtor</strong> <strong>OneTouch</strong> <strong>II</strong> drive.<br />
40
Most Macintosh computers are setup at the factory with<br />
only one partition per hard drive. If you did not have multiple<br />
partitions on any of your hard drives, all you have to do is<br />
reformat your hard disk(s) and re-install your Macintosh<br />
operating system. For more information, see your<br />
Macintosh manual.<br />
Do not partition or reformat the <strong>Maxtor</strong> <strong>OneTouch</strong> <strong>II</strong> drive<br />
that your system backup is stored on.<br />
Once you get your system running, reinstall Retrospect<br />
Express using the <strong>Maxtor</strong> Install CD. See “Installing Your<br />
<strong>Drive</strong>” on page 6 in chapter 2.<br />
To restore your system:<br />
1. Prepare your hard drive. Partition, if necessary, and<br />
format.<br />
2. Install your operating system.<br />
3. Reinstall <strong>Maxtor</strong> <strong>OneTouch</strong> software including<br />
Retrospect Express. (For more information see page 7<br />
in chapter 2.)<br />
4. Open Retrospect Express.<br />
The Retrospect Express Directory window will open.<br />
5. Click Restore.<br />
A window will appear asking you to ‘Select the restore<br />
type’<br />
6. Select Restore an entire disk and click OK.<br />
The ‘Accessing more backup sets’ window will appear<br />
asking you to open an existing catalog file or rebuild one.<br />
7. Click Open.<br />
Find and select the system backup set on your<br />
<strong>Maxtor</strong> <strong>OneTouch</strong> <strong>II</strong> drive.<br />
8. Click Open.<br />
Your system backup set should appear in the top part of<br />
the Restore from Backup:Source window. Make sure it<br />
is selected.<br />
9. Click OK.<br />
The Destination Selection window will now appear,<br />
asking you to choose a ‘Destination for restore.’<br />
Make sure Restore Entire Disk is selected. and select<br />
the drive that you want to restore your system to (your<br />
Macintosh hard drive where the system was originally<br />
installed).<br />
10. Click OK.<br />
A window will appear asking you if you really want to<br />
restore to the drive you selected, replacing it’s<br />
entire contents.<br />
3<br />
Using Your <strong>Drive</strong> 41
3<br />
11. Click Replace.<br />
Retrospect will scan your system (This may take a<br />
few minutes).<br />
The Restore from Backup window will appear, to confirm<br />
the source (your <strong>Maxtor</strong> <strong>OneTouch</strong> <strong>II</strong> drive) and the<br />
destination (your Macintosh hard drive) for the restore.<br />
12. Click Restore.<br />
A window will appear asking you: ‘Really Execute?’<br />
13. Click OK.<br />
(If the ‘Really Execute?’ window appears again, click OK.)<br />
Retrospect will begin to restore your system.<br />
This process may take several minutes.<br />
When Retrospect Express finishes, you should see the<br />
message: ‘Execution completed successfully.’<br />
You can view the Log to make sure that all of your files<br />
were restored by going to the Window menu and<br />
selecting Log.<br />
14. Quit Retrospect, by going to the File menu and<br />
selecting Quit.<br />
15. Restart your Macintosh.<br />
If the system restore was successful, you should find all of the files<br />
that you originally backed up.<br />
Restoring Your Complete System<br />
Windows<br />
To restore your system:<br />
1. Prepare your hard drive. Partition, if necessary, and format.<br />
2. Install your operating system.<br />
The following service packs need to be applied:<br />
Windows 2000: Service Pack 3 or later.<br />
Windows XP: Service Pack 1 or later.<br />
Microsoft Internet Explorer 5.01 or later is required for all<br />
windows operating systems.<br />
3. Reinstall the <strong>Maxtor</strong> <strong>OneTouch</strong> software including<br />
Retrospect. (For more information see chapter 2.)<br />
4. Open Retrospect Express HD.<br />
5. Click Restore<br />
The next window displays a calendar with a listing of all<br />
your restore points.<br />
42
6. Select the date that contains the restore point you wish<br />
to restore from.<br />
7. Click the restore point you wish to restore from.<br />
8. Click Next.<br />
You are now asked which files and folders you wish to<br />
restore.<br />
9. Place a check next to My Computer to select your entire<br />
computer for restore.<br />
10. Click Next.<br />
You will now select where you want to restore your files.<br />
11. Select To Their original location on: - to restore them<br />
to the exact location that they were initially copied from.<br />
All data will be lost on the current source location during<br />
this process.<br />
12. Click Restore.<br />
At this point, Retrospect Express HD will start restoring<br />
files to your system. A status bar will show the progress<br />
of the restoration. If needed, you can press Stop to end<br />
the restore process.<br />
If your system restore was successful, you can exit<br />
Retrospect.<br />
13. Click the red ‘X’ in the upper right corner of the window.<br />
14. Restart your computer.<br />
Your system may require more than one restart. Follow any<br />
additional on-screen instructions, if necessary, to complete<br />
your system restore.<br />
Using the <strong>Maxtor</strong> <strong>OneTouch</strong> Settings<br />
Your <strong>Maxtor</strong> <strong>OneTouch</strong> <strong>II</strong> FireWire 800 drive includes a utility that<br />
allows you to:<br />
• Find out more information about your drive<br />
• Customize your <strong>OneTouch</strong> button to open a different<br />
application or file<br />
• Control power management settings for your drive<br />
• Change performance settings<br />
• Enable password security to restrict access to your<br />
<strong>Maxtor</strong> <strong>OneTouch</strong> <strong>II</strong> drive<br />
• Run diagnostic tests to troubleshoot potential hardware<br />
problems with your <strong>OneTouch</strong> <strong>II</strong> drive<br />
3<br />
Using Your <strong>Drive</strong> 43
3<br />
Macintosh<br />
The <strong>OneTouch</strong> Settings utility does not work with USB<br />
using OS 9.<br />
Opening the <strong>OneTouch</strong> Settings utility<br />
Go to the Applications folder on your Macintosh and open the<br />
<strong>Maxtor</strong> <strong>OneTouch</strong> Settings.<br />
The <strong>Maxtor</strong> <strong>OneTouch</strong> Settings window will appear.<br />
The features are grouped into four sections:<br />
<strong>OneTouch</strong> Action: Where you can customize the<br />
<strong>OneTouch</strong> button.<br />
<strong>Drive</strong>Lock TM Data Security: Where you can control access to<br />
your <strong>Maxtor</strong> <strong>OneTouch</strong> <strong>II</strong> drive.<br />
Diagnostics: Where you can check the health of your drive.<br />
Tuning: Where you can adjust the performance of your drive.<br />
<strong>OneTouch</strong> Action<br />
You can set the button on your <strong>Maxtor</strong> <strong>OneTouch</strong> <strong>II</strong> drive<br />
to open an application or file of your choice.<br />
1. Select your <strong>Maxtor</strong> <strong>OneTouch</strong> <strong>II</strong> <strong>Drive</strong> in the window<br />
2. Click Select Action...,<br />
3. Select the application or file.<br />
4. Click Set Action.<br />
If you did the Full Installation, including Retrospect, the<br />
button on your <strong>Maxtor</strong> <strong>OneTouch</strong> <strong>II</strong> drive is automatically set<br />
to start your backup whenever you press it. If you customize<br />
it, it will disable your <strong>OneTouch</strong> button backup settings.<br />
However, you can reset the button at any time by clicking<br />
Revert Settings. If you also have a Personal Storage 5000<br />
drive, you can set its button to launch a different application.<br />
<strong>Drive</strong>Lock Data Security<br />
You can set a password for your <strong>Maxtor</strong> <strong>OneTouch</strong> <strong>II</strong> drive.<br />
Every time your drive is on and connected to your computer,<br />
including when you start or restart your computer, or when you<br />
turn off your drive and turn it back on, you will need to enter<br />
your password or the answer to your secret question, which<br />
you setup when you create your password, in order to use<br />
your drive.<br />
If you have forgotten your password, you can attempt to<br />
re-enter it or to recover it, by answering your secret question.<br />
You are allowed 5 attempts before you must turn off your drive<br />
and turn it back on, at which point you can try an additional<br />
5 times.<br />
If you are not able to recover your password, the only<br />
other way to unlock the drive is to erase all of<br />
its contents.<br />
44
Setting your Password<br />
1. Click <strong>Drive</strong>Lock Data Security<br />
2. Enter and re-enter a Password<br />
Your password must contain at least six characters and<br />
one digit.<br />
You may also choose a secret question (from the list<br />
provided) and type in the answer. If you do not want to<br />
choose a secret question and answer, go to step 5.<br />
3. Choose a Secret Question.<br />
4. Enter and re-enter an answer to the question.<br />
5. Click Set Password or Set Password and Q/A, if you<br />
chose a secret question and answer.<br />
Changing your Password<br />
1. Click <strong>Drive</strong>Lock Data Security.<br />
2. Enter your current Password.<br />
3. Enter and re-enter a new Password.<br />
You may also choose a secret question (from the list<br />
provided) and type in the answer. If you do not want to<br />
choose a secret question and answer, go to step 5.<br />
4. Choose a Secret Question.<br />
5. Enter and re-enter an answer to the question.<br />
6. Click Change Password.<br />
Disable Security<br />
If you decide you want to disable the password you created, follow<br />
these steps:<br />
1. Open the <strong>Maxtor</strong> <strong>OneTouch</strong> Settings utility and click<br />
<strong>Drive</strong>Lock Data Security or click Open Utility from the<br />
<strong>Maxtor</strong> screen that asks you for your password.<br />
2. Enter your Password.<br />
3. Click Disable Security.<br />
The Default setting for the Security setting is disabled.<br />
Erase <strong>Drive</strong><br />
If all attempts to recover your password fail and you need to erase<br />
your drive, follow these steps:<br />
1. Click <strong>Drive</strong>Lock Data Security.<br />
2. Click Password Unknown.<br />
3. Click Erase <strong>Drive</strong>.<br />
The Authenticate window will open<br />
4. Enter the Name and Password for your computer and<br />
click OK.<br />
A window will appear, asking you to confirm “...that you<br />
intend to destroy all data on this drive.”<br />
5. Type the 5-digit number that you see on the left in the<br />
box on the right and click Erase <strong>Drive</strong>.<br />
3<br />
Using Your <strong>Drive</strong> 45
3<br />
When the erase process is complete, a window will<br />
appear with the message that the disk has unreadable.<br />
6. For OS X: click Initialize...<br />
The Apple Disk Utility will open.<br />
To format your drive in OS X, see “Macintosh OS X” on<br />
page 22 in chapter 2.<br />
For OS 9: To format your drive in OS 9, see “Macintosh<br />
OS 9” on page 13 in chapter 2.<br />
Do not turn off your computer or your drive during the erase<br />
or formatting process.<br />
Diagnostics and Tuning<br />
Diagnostic Test<br />
You can check the health of your drive and adjust its<br />
performance.<br />
If you suspect there may be problems with your<br />
<strong>Maxtor</strong> <strong>OneTouch</strong> <strong>II</strong> drive, you can run the diagnostic test:<br />
Click Begin Test.<br />
If the test finds your drive to be defective, it will display a<br />
Return Material Authorization (RMA) diagnostic code you will<br />
use to return your drive for repairs under warranty.<br />
Tuning<br />
You can adjust the performance of your drive.<br />
Tune for Maximum Performance: provides improved data<br />
throughput when data access patterns are random in nature.<br />
Power Management Settings for OS X<br />
1. Under the Apple menu, select System Preferences.<br />
The System Preferences window will open.<br />
2. Click the Energy Saver icon (a light bulb).<br />
The Energy Saver panel will open, and the Sleep<br />
settings should be displayed.<br />
3. Make sure the checkbox for ‘Put the hard disk(s) to<br />
sleep when possible’ is checked.<br />
Power Management Settings for OS 9<br />
1. Under the Apple menu, select Control Panels.<br />
The Control Panels folder will open.<br />
2. Find and open the Energy Saver control panel.<br />
The Energy Saver window will open, and the Sleep<br />
Setup settings should be displayed.<br />
3. Make sure the checkbox for ‘Separate timing for hard disk<br />
sleep’ is checked.<br />
46
Windows<br />
The slider at the bottom of the screen controls the time<br />
period of inactivity before the all system hard drives will go<br />
to sleep. It is possible to choose as short as 10 minutes<br />
and as long as 60 minutes. You can also set it to never go<br />
to sleep.<br />
4. Select a time period using the slider in the bottom of the<br />
window.<br />
5. Close the Energy Saver control panel.<br />
Opening the <strong>OneTouch</strong> Settings utility<br />
Double-click the <strong>Maxtor</strong> <strong>OneTouch</strong> shortcut icon on<br />
your desktop.<br />
The <strong>Maxtor</strong> Main Menu will appear.<br />
The features are grouped into 3 functional areas:<br />
Setup & Restore: Where you set up and run your backups as<br />
well as restore files from a backup using Retrospect Express<br />
HD. For more information see “Using Retrospect Express HD”<br />
on page 34 earlier in this chapter.<br />
<strong>Drive</strong> Management: Where you can view information about<br />
your drive, adjust power settings, customize the <strong>OneTouch</strong><br />
button, run diagnostics, and adjust performance settings.<br />
Security Settings: Where you can control access to your<br />
<strong>Maxtor</strong> <strong>OneTouch</strong> <strong>II</strong> drive.<br />
<strong>Drive</strong> Management<br />
Click <strong>Drive</strong> Management<br />
The Manage My <strong>Maxtor</strong> <strong>OneTouch</strong> <strong>II</strong> drive screen will<br />
appear.<br />
View <strong>Drive</strong> Information<br />
This provides you with information about your drive including<br />
model number, serial number capacity, and more.<br />
Adjust Power Settings<br />
You can set your <strong>Maxtor</strong> <strong>OneTouch</strong> <strong>II</strong> drive to go to sleep (low<br />
power mode) after a period of inactivity. Simply select one of<br />
the time options from the drop-down menu and click Apply.<br />
Customize <strong>OneTouch</strong> Button<br />
You can set the button on your <strong>Maxtor</strong> <strong>OneTouch</strong> <strong>II</strong> drive to<br />
open an application or file of your choice. Click Browse,<br />
double-click the application or file, and click Apply.<br />
If you did the Full Installation, including Retrospect, the<br />
button on your <strong>Maxtor</strong> <strong>OneTouch</strong> <strong>II</strong> drive is automatically<br />
set to start a full system backup whenever you press it.<br />
If you customize it, it will disable your <strong>OneTouch</strong> button<br />
backup settings. However, you can reset the button at<br />
any time by clicking Default. If you also have a Personal<br />
Storage 5000 drive, you can set its button to launch a<br />
different application.<br />
3<br />
Using Your <strong>Drive</strong> 47
3<br />
Run Diagnostics<br />
You can check the health of your drive. If you suspect there<br />
may be problems with your <strong>Maxtor</strong> <strong>OneTouch</strong> <strong>II</strong> drive, click<br />
Test to run a diagnostic on your drive. If the test finds your<br />
drive to be defective, it will display an Return Material<br />
Authorization (RMA) code you will use to return your drive for<br />
repairs under warranty.<br />
Adjust Performance<br />
You can adjust the performance of your drive.<br />
Highest Performance: provides improved data throughput<br />
when data access patterns are random in nature.<br />
Security Settings<br />
Click Security Settings<br />
If you have not created a password, the Set Password screen<br />
will appear.<br />
If you set a password for your <strong>Maxtor</strong> <strong>OneTouch</strong> <strong>II</strong> drive, every<br />
time your drive is on and connected to your computer,<br />
including when you start or restart your computer, or when you<br />
turn off your drive and turn it back on, you will need to enter<br />
your password in order to use your drive.<br />
If you have forgotten your password, you can attempt to<br />
re-enter it or to recover it, by answering a question that you<br />
setup originally when you created your password. You are<br />
allowed 5 attempts before you must turn off your drive and<br />
turn it back on, to try again at which point you can try an<br />
additional 5 times.<br />
If you are not able to recover your password, the only<br />
other way to unlock the drive is to erase all of<br />
its contents.<br />
Setting your Password<br />
1. Click Security Settings<br />
2. Enter and re-enter a Password<br />
Your password must contain at least six characters and<br />
one digit.<br />
You may also choose a secret question (from the list<br />
provided) and type in the answer. If you do not want to<br />
choose a secret question and answer, go to step 5.<br />
3. Choose a Secret Question.<br />
4. Enter and re-enter an answer to the question.<br />
5. Click Apply.<br />
6. Click Confirm.<br />
7. Click Close.<br />
Changing your Password<br />
1. Click Security Settings.<br />
2. Click Change Password.<br />
3. Enter your current Password.<br />
4. Click Continue.<br />
5. Enter a new password following steps 2 - 6 in Setting<br />
your Password.<br />
48
Disable Security<br />
If you decide you want to disable the password you created,<br />
follow these steps:<br />
1. Click Security Settings.<br />
2. Click Disable Security.<br />
3. Enter your current Password.<br />
4. Click Apply.<br />
5. Click Close.<br />
The default setting for the security setting is disabled.<br />
Erase <strong>Drive</strong><br />
If all attempts to recover your password fail and you need to erase<br />
your drive, follow these steps:<br />
1. Click Security Settings.<br />
2. Click Erase <strong>Drive</strong>.<br />
3. Click Confirm.<br />
4. Click Yes.<br />
The erase process may take up to two hours or more,<br />
depending on your operating system.<br />
Do not turn off your computer or your drive during the erase<br />
or formatting process.<br />
5. After the erase process is complete, turn off your drive<br />
and turn it back on.<br />
The Format <strong>Drive</strong> window will appear.<br />
6. Click Format.<br />
The formatting process may take up to two hours or more,<br />
depending on your operating system.<br />
Retrospect Express User’s Guide<br />
For Macintosh: Use the Express User’s Guide in the Retrospect<br />
Express Folder on your Macintosh. If is not installed on your<br />
computer, you can access it on the <strong>Maxtor</strong> installation CD.<br />
For Windows: Use the built-in help system in Retrospect<br />
Express HD by clicking the question mark icon at the top of the<br />
screen in Retrospect.<br />
Macintosh version of the Retrospect User’s Guide on the CD:<br />
1. Insert the <strong>Maxtor</strong> Installation CD into your CD-ROM drive.<br />
The Install CD icon will appear on your desktop.<br />
2. Double-click the CD icon to open it.<br />
3. Open the folder appropriate for your language.<br />
4. Drag the Express User’s Guide onto your Macintosh’s<br />
hard drive.<br />
5. Double-click the Express User’s Guide to open it.<br />
3<br />
Using Your <strong>Drive</strong> 49
3<br />
Note: You will need Adobe Acrobat Reader installed to open<br />
the guide. If you do not have it, you can download and install<br />
it for free from Adobe’s web site: www.adobe.com<br />
Installing Applications on Your <strong>Drive</strong><br />
You may install and run applications from your drive like any other<br />
drive on your system. If you connect the drive to your system using<br />
a USB 1.1 interface, the data transfer rate is approximately 1 MB<br />
per second. Because of this, installing applications on a drive<br />
using the USB 1.1 interface is not recommended. However, you<br />
can store the data for many applications and then access the data<br />
over a USB 1.1 interface.<br />
Some Macintosh-based and most Windows-based<br />
applications installed on your drive will only run on the<br />
computer where the application was installed. If you move<br />
your drive to any other computer, the application may no<br />
longer function. Once the drive is reconnected to the<br />
computer where the application was originally installed,<br />
the application will function properly.<br />
Editing Video<br />
Using a computer to capture and edit video recorded with a<br />
digital camcorder is quickly becoming popular. Digital video files are<br />
typically very large, using about 13 GB per hour of video content.<br />
<strong>Maxtor</strong> recommends connecting your drive using the FireWire<br />
interface for best results when working with video.<br />
Moving Data Between Two Systems<br />
Your <strong>Maxtor</strong> <strong>OneTouch</strong> <strong>II</strong> drive provides a great tool for moving<br />
large amounts of data between two systems– whether they be<br />
Macintosh Computers, Windows PCs, or both. Certain considerations<br />
must be accounted for before proceeding. For more<br />
information, see the <strong>Maxtor</strong> online KnowledgeBase at:<br />
www.maxtorkb.com.<br />
Playing Games<br />
CD-ROM-based games typically run faster when they are on a<br />
hard drive rather than running them from the CD. You can use<br />
your <strong>Maxtor</strong> <strong>OneTouch</strong> <strong>II</strong> drive to store and play CD-ROM games.<br />
Storing Audio<br />
Using your computer as an audio jukebox is a very popular<br />
application. This allows you to store and play thousands of your<br />
favorite songs. You can also create and manage an audio library.<br />
Using Security Lock<br />
Your new drive includes a security locking slot on the back of the<br />
drive. The slot is compatible with most security locking cables.<br />
50
Adding Rubber Feet to Your<br />
<strong>Maxtor</strong> <strong>OneTouch</strong> <strong>II</strong> <strong>Drive</strong><br />
If you plan to use your drive on a desk surface, your kit includes<br />
four rubber feet to protect your drive and the surface of your desk.<br />
To apply the feet:<br />
1. Make sure your drive is disconnected properly from your<br />
computer. (“Connecting and Disconnecting the <strong>Drive</strong>”<br />
on page 27).<br />
2. Make sure your drive is turned off, by turning off the<br />
power switch on the back of the drive.<br />
3<br />
Rubber Feet<br />
Placement<br />
3. Turn your drive so that the ridges are facing up. This is<br />
the bottom of the drive.<br />
4. Place two rubber feet on each ridge on the bottom of<br />
your drive. One should be placed near the front and the<br />
other toward the back of each ridge.<br />
Bottom of <strong>Drive</strong><br />
Figure 15. Adding Rubber Feet to Your <strong>Drive</strong><br />
Using Your <strong>Drive</strong> 51
4<br />
Glossary<br />
4<br />
Backup – In Restropsect HD, a backup contains all the files and folders<br />
you selected to back up from a specific point in time. Previous backups are<br />
preserved, allowing you to store copies of your backup files from multiple<br />
points in time. See Restore Point.<br />
Byte – A unit of storage on a drive that holds a single character. A byte is<br />
equal to 8 bits.<br />
Capacity – The amount of information, measured in bytes, that can be<br />
stored on a drive. Also known as storage capacity.<br />
Daisy chain – A hardware configuration in which peripheral devices are<br />
connected to each other in a series. The FireWire interface, for example,<br />
supports a daisy chain of up to 62 drives.<br />
Data Transfer Rate – The speed at which data transfers to and from<br />
the drive.<br />
Defrag – (or defragment) A software utility that keeps the data for each<br />
file physically contiguous on the drive, which can enhance your drive’s<br />
performance.<br />
Device <strong>Drive</strong>r – A software program that enables a PC to communicate<br />
with peripheral devices such as hard drives and CD-ROM drives. Each type<br />
of device requires a different driver. Device driver programs are stored on a<br />
computer’s hard drive and are loaded into memory when the computer is<br />
started or when a device is plugged into the computer.<br />
Duplicate – In Retrospect Express HD, a duplicate saves the most<br />
recent version of files, in their original format, and overwrites the previous<br />
version.<br />
External Hard <strong>Drive</strong> – A external peripheral device containing a hard<br />
drive mechanism connected to a computer via a FireWire or USB interface.<br />
FireWire – The FireWire interface, also known as 1394 and i.LINK, is a<br />
high-performance, serial bus defined by the Institute of Electrical and<br />
Electronics Engineers (IEEE) as a standard for connecting digital devices<br />
together. It is ideal for connecting computers and hard drives to digital<br />
video and audio equipment.<br />
GB – (Gigabyte) Equal to 1,000,000,000 (billion) bytes.<br />
Hard <strong>Drive</strong> – An electromechanical device used for information storage<br />
and retrieval, incorporating one or more rotating disks on which data is<br />
recorded, stored, and read magnetically.<br />
Hot-Swap – This feature allows you to connect and disconnect external<br />
devices while the computer and the devices are running. External drives,<br />
such as the <strong>Maxtor</strong> <strong>OneTouch</strong> <strong>II</strong> drive can be hot-swapped.<br />
KB – (Kilobyte) Equal to 1,000 (thousand) bytes.<br />
MB – (Megabyte) Equal to 1,000,000 (million) bytes.<br />
52
Mb – (Megabit) When used to describe data storage, equal to one million<br />
bits.<br />
Mbps – (Megabits per second) When used to described data transfer<br />
rates, it refers to one million bits per second.<br />
NTFS – The primary file system for Windows 2000 and XP operating<br />
system that organizes files on your computer. Supports large capacity hard<br />
drives up to 2 TB.<br />
Operating System – Software that allows the user and programs<br />
installed on your system to communicate with computer hardware such as<br />
a hard drive and processor.<br />
Partition – A way to logically divide a hard drive so that an operating<br />
system treats each partition as if it were a separate hard drive. Each partition<br />
is assigned a unique drive letter in Windows or icon in the Mac OS.<br />
Port – A connection or socket on the motherboard, controller card, case,<br />
or chassis for connecting peripheral devices, such as a USB socket or<br />
FireWire socket.<br />
Restore Point – A snapshot of your files based on a specific date in<br />
time. It contains all the files and folders you select to backup, as they exist<br />
at the time that you back up.<br />
Script – A saved backup procedure for Retrospect that you can schedule<br />
to run at some future date and time or on a repeating schedule, such as<br />
daily. You may create as many scripts as you wish.<br />
Spin Down – Refers to the actual spinning of the disk mechanism.<br />
When a disk spins down, it stops spinning, thus conserving power.<br />
TB – (Terabyte) Equal to 1,000,000,000,000 (trillion) bytes.<br />
USB – Universal Serial Bus, a standard for connecting external devices to<br />
your computer.<br />
Volume – A fixed amount of storage on a hard drive. The term volume is<br />
often used as a synonym for the drive itself, but it is possible for a single<br />
drive to contain more than one volume or for a volume to span more than<br />
one drive.<br />
4<br />
Glossary 53
Index<br />
A<br />
About this Guide 5<br />
Adding Rubber Feet to 51<br />
Your <strong>OneTouch</strong> <strong>II</strong> <strong>Drive</strong><br />
Archiving files 39<br />
B<br />
Backing up your computer 27<br />
C<br />
Changing Your <strong>Maxtor</strong> 40<br />
<strong>OneTouch</strong> Backup Settings<br />
Connecting and Disconnecting 27<br />
the <strong>Drive</strong><br />
D<br />
Disconnect the drive 28<br />
from a Macintosh<br />
Disconnect the drive from a 28<br />
Windows system<br />
<strong>Drive</strong> components 2<br />
H<br />
Handling Precautions 4<br />
I<br />
Installing<br />
push-button feature 6<br />
the software 6<br />
Installing Applications on Your <strong>Drive</strong> 50<br />
M<br />
Mac OS X<br />
Installing the Software 7<br />
Mac OS 9<br />
Installing the Software 13<br />
Macintosh <strong>OneTouch</strong> Settings 42<br />
Changing your Password 48<br />
Diagnostics and Tuning 46<br />
Disable Security 49<br />
<strong>Drive</strong>Lock Data Security 44<br />
Erase <strong>Drive</strong> 49<br />
<strong>OneTouch</strong> Action 44<br />
Setting your Password 45<br />
Moving Data Between Two Systems 50<br />
O<br />
<strong>Maxtor</strong> <strong>OneTouch</strong> <strong>II</strong> <strong>Drive</strong> Components 2<br />
<strong>OneTouch</strong> lights 27<br />
P<br />
Playing Games 50<br />
Power Management OS 9 46<br />
Power Management OS X 46<br />
R<br />
Restoring your Computer 40<br />
Retrospect,<br />
Installing the software 6<br />
Retrospect User Guide 40, 47<br />
S<br />
Setting Up 10<br />
Setting Up the <strong>Maxtor</strong> 32<br />
<strong>OneTouch</strong> Feature Mac OS 9<br />
Software<br />
Installing 6<br />
Storing Audio 50<br />
System Requirements 3<br />
Support<br />
<strong>Maxtor</strong> 5<br />
U<br />
Using Retrospect Express HD 34<br />
Using Retrospect Express Mac 40<br />
Using the <strong>Maxtor</strong> 42<br />
<strong>OneTouch</strong> Settings<br />
Using Security Lock 50<br />
Using Your <strong>Drive</strong> 27<br />
W<br />
Windows <strong>OneTouch</strong> Settings 42<br />
Adjust Performance 48<br />
Adjust Power Settings 47<br />
Changing Your Password 48<br />
Customize <strong>OneTouch</strong> Button 47<br />
Disable Security 49<br />
<strong>Drive</strong> Management 47<br />
Erase <strong>Drive</strong> 49<br />
Highest Performance 48<br />
Security Settings 48<br />
Setting your Password 45<br />
Silent Mode 56<br />
View <strong>Drive</strong> Information 47<br />
Windows 2000 and XP<br />
Installing the Software 18<br />
Installing Your <strong>Drive</strong> 6<br />
Installing <strong>Drive</strong>rs Only 26<br />
54
©2005 <strong>Maxtor</strong> Corporation. All rights reserved. Changes are periodically made to the information herein which will be incorporated in revised editions of this publication.<br />
<strong>Maxtor</strong> may make changes or improvements to the product(s) described in this publication at any time and without notice. For purposes of storage capacity, a gigabyte<br />
(GB) equals 1,000,000,000 bytes. Total accessible capacity varies depending on operating environment. <strong>Maxtor</strong>, and the <strong>Maxtor</strong> stylized logo are registered trademarks<br />
and <strong>Maxtor</strong> <strong>OneTouch</strong> is a trademark of <strong>Maxtor</strong> Corporation. All other brands or products are trademarks or registered trademarks of their respective holders.<br />
<strong>Maxtor</strong> Corporation, 500 McCarthy Blvd., Milpitas, California, 95035.<br />
P/N: 20280400