Making microscope slide mounts using Cargille Meltmount mounting ...
Making microscope slide mounts using Cargille Meltmount mounting ...
Making microscope slide mounts using Cargille Meltmount mounting ...

Create successful ePaper yourself
Turn your PDF publications into a flip-book with our unique Google optimized e-Paper software.
Technical Bulletin<br />
MOM-T-1262<br />
Page 1 of 3<br />
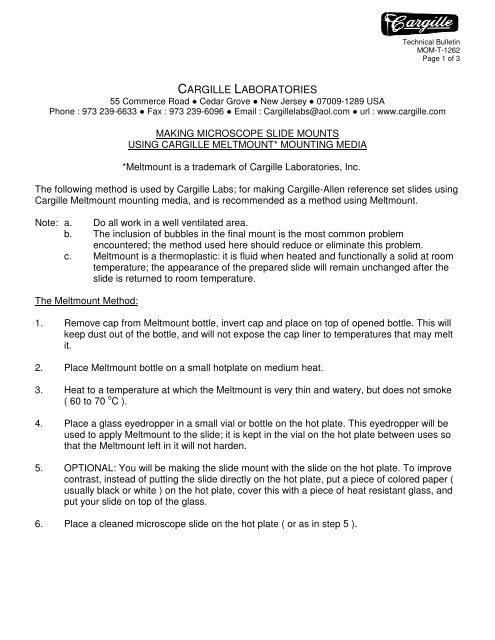
CARGILLE LABORATORIES<br />
55 Commerce Road ● Cedar Grove ● New Jersey ● 07009-1289 USA<br />
Phone : 973 239-6633 ● Fax : 973 239-6096 ● Email : <strong>Cargille</strong>labs@aol.com ● url : www.cargille.com<br />
MAKING MICROSCOPE SLIDE MOUNTS<br />
USING CARGILLE MELTMOUNT* MOUNTING MEDIA<br />
*<strong>Meltmount</strong> is a trademark of <strong>Cargille</strong> Laboratories, Inc.<br />
The following method is used by <strong>Cargille</strong> Labs; for making <strong>Cargille</strong>-Allen reference set <strong>slide</strong>s <strong>using</strong><br />
<strong>Cargille</strong> <strong>Meltmount</strong> <strong>mounting</strong> media, and is recommended as a method <strong>using</strong> <strong>Meltmount</strong>.<br />
Note: a. Do all work in a well ventilated area.<br />
b. The inclusion of bubbles in the final mount is the most common problem<br />
encountered; the method used here should reduce or eliminate this problem.<br />
c. <strong>Meltmount</strong> is a thermoplastic: it is fluid when heated and functionally a solid at room<br />
temperature; the appearance of the prepared <strong>slide</strong> will remain unchanged after the<br />
<strong>slide</strong> is returned to room temperature.<br />
The <strong>Meltmount</strong> Method:<br />
1. Remove cap from <strong>Meltmount</strong> bottle, invert cap and place on top of opened bottle. This will<br />
keep dust out of the bottle, and will not expose the cap liner to temperatures that may melt<br />
it.<br />
2. Place <strong>Meltmount</strong> bottle on a small hotplate on medium heat.<br />
3. Heat to a temperature at which the <strong>Meltmount</strong> is very thin and watery, but does not smoke<br />
( 60 to 70 o C ).<br />
4. Place a glass eyedropper in a small vial or bottle on the hot plate. This eyedropper will be<br />
used to apply <strong>Meltmount</strong> to the <strong>slide</strong>; it is kept in the vial on the hot plate between uses so<br />
that the <strong>Meltmount</strong> left in it will not harden.<br />
5. OPTIONAL: You will be making the <strong>slide</strong> mount with the <strong>slide</strong> on the hot plate. To improve<br />
contrast, instead of putting the <strong>slide</strong> directly on the hot plate, put a piece of colored paper (<br />
usually black or white ) on the hot plate, cover this with a piece of heat resistant glass, and<br />
put your <strong>slide</strong> on top of the glass.<br />
6. Place a cleaned <strong>microscope</strong> <strong>slide</strong> on the hot plate ( or as in step 5 ).
Technical Bulletin<br />
MOM-T-1262<br />
Page 2 of 3<br />
7. Place specimen on <strong>slide</strong> ( Note: some heat sensitive specimens can not be mounted <strong>using</strong><br />
heated <strong>Meltmount</strong>, heat sensitive specimens can be mounted at room temperature <strong>using</strong><br />
the Pressure Method described later in these instructions or by <strong>using</strong> <strong>Meltmount</strong> that has<br />
been thinned by the user with a solvent such as Toluene, which is then evaporated ).<br />
8. Place a cover glass on top of specimen.<br />
9. Using a pencil eraser, rock the cover glass back and forth to help level the cover glass.<br />
10. With the eyedropper, apply 2 or 3 drops of <strong>Meltmount</strong> on the <strong>slide</strong> at 2 corners of the cover<br />
glass. The <strong>Meltmount</strong> will then flow under the cover glass and surround the specimen.<br />
11. Using the pencil eraser again, rock the cover glass back and forth to help level it and<br />
spread the <strong>Meltmount</strong> . Then use the eraser to position the cover glass as desired.<br />
12. If the <strong>Meltmount</strong> does not completely fill the space under the cover glass, apply more with<br />
the eyedropper as in step 10.<br />
13. If bubbles appear in the <strong>Meltmount</strong> under the cover glass and the bubbles are not coming<br />
from the specimen, you should reduce the temperature of the hot plate or work more<br />
quickly in order to finish the <strong>slide</strong> before the <strong>Meltmount</strong> boils.<br />
14. When the <strong>slide</strong> is prepared to your satisfaction, remove from hot plate and allow to cool to<br />
room temperature.<br />
15. Removing excess <strong>Meltmount</strong> from <strong>slide</strong><br />
a. Slide must be cool.<br />
b. Scrape off excess <strong>using</strong> a razor blade.<br />
c. Remove the remainder <strong>using</strong> a tissue and a solvent such as xylene, or toluene. Wear<br />
polyethylene gloves to avoid getting the solvent and <strong>Meltmount</strong> on your hands,<br />
polyethylene provides greater protection from solvent penetration. For greater<br />
manual dexterity, a surgical type glove may be worn over the polyethylene gloves.<br />
16. Turn off hot plate and allow the <strong>Meltmount</strong> to return to room temperature before screwing<br />
on the cap.<br />
17. For additional information concerning technique, contact the <strong>Cargille</strong> Technical staff.
Technical Bulletin<br />
MOM-T-1262<br />
Page 3 of 3<br />
The Pressure Method<br />
Note:<br />
This method is useful for making permanent <strong>slide</strong>s in the field, or for making permanent <strong>slide</strong>s of<br />
heat sensitive specimens.<br />
1. The <strong>Meltmount</strong> is melted to a workable liquid as in the previous method.<br />
2. A clean <strong>slide</strong> is placed on the hot plate.<br />
3. <strong>Meltmount</strong> is applied with the eye dropper in a thin layer, filling in the area on the <strong>slide</strong> that<br />
will be covered by the cover glass. It is best to have a flat layer of <strong>Meltmount</strong>.<br />
4. The <strong>slide</strong> is allowed to cool to room temperature before <strong>using</strong>.<br />
5. Store <strong>slide</strong>s with <strong>Meltmount</strong> layer in a <strong>slide</strong> box until needed. Prepared <strong>slide</strong>s should always<br />
be stored flat.<br />
6. Applying the specimen can be done in many ways such as:<br />
a. transfer specimen to sticky tape then transfer from tape to <strong>Meltmount</strong> layer on the<br />
<strong>slide</strong> by running your fingernail over back of tape placed sticky side toward the<br />
<strong>Meltmount</strong> layer.<br />
b. place <strong>Meltmount</strong> layer and <strong>slide</strong> directly on specimen.<br />
c. drop specimen on <strong>Meltmount</strong> layer.<br />
7. Cover slip is then placed over specimen and <strong>Meltmount</strong> layer and is pressed between<br />
thumb and forefinger, taking care to avoid cracking cover slip.<br />
8. If desired, the finished <strong>slide</strong> can be improved by:<br />
a. more pressure with thumb and forefinger.<br />
b. heating briefly on hot plate.<br />
c. placing wax paper-covered weight, such as a book, on the attached cover glass<br />
overnight.