Setup Black Book - Petit RC
Setup Black Book - Petit RC
Setup Black Book - Petit RC
Create successful ePaper yourself
Turn your PDF publications into a flip-book with our unique Google optimized e-Paper software.
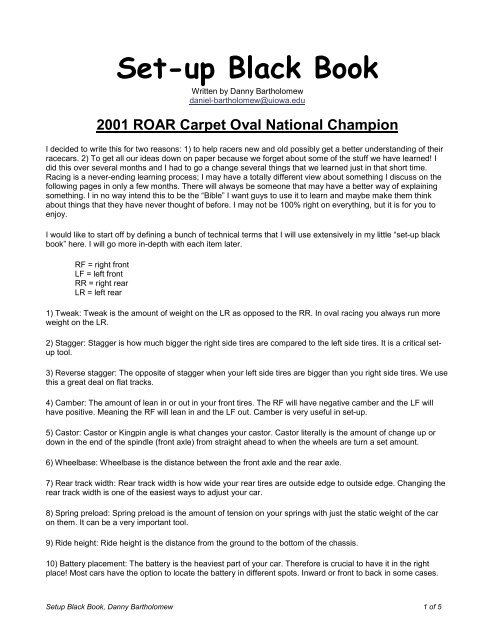
Set-up <strong>Black</strong> <strong>Book</strong><br />
Written by Danny Bartholomew<br />
daniel-bartholomew@uiowa.edu<br />
2001 ROAR Carpet Oval National Champion<br />
I decided to write this for two reasons: 1) to help racers new and old possibly get a better understanding of their<br />
racecars. 2) To get all our ideas down on paper because we forget about some of the stuff we have learned! I<br />
did this over several months and I had to go a change several things that we learned just in that short time.<br />
Racing is a never-ending learning process; I may have a totally different view about something I discuss on the<br />
following pages in only a few months. There will always be someone that may have a better way of explaining<br />
something. I in no way intend this to be the “Bible” I want guys to use it to learn and maybe make them think<br />
about things that they have never thought of before. I may not be 100% right on everything, but it is for you to<br />
enjoy.<br />
I would like to start off by defining a bunch of technical terms that I will use extensively in my little “set-up black<br />
book” here. I will go more in-depth with each item later.<br />
RF = right front<br />
LF = left front<br />
RR = right rear<br />
LR = left rear<br />
1) Tweak: Tweak is the amount of weight on the LR as opposed to the RR. In oval racing you always run more<br />
weight on the LR.<br />
2) Stagger: Stagger is how much bigger the right side tires are compared to the left side tires. It is a critical setup<br />
tool.<br />
3) Reverse stagger: The opposite of stagger when your left side tires are bigger than you right side tires. We use<br />
this a great deal on flat tracks.<br />
4) Camber: The amount of lean in or out in your front tires. The RF will have negative camber and the LF will<br />
have positive. Meaning the RF will lean in and the LF out. Camber is very useful in set-up.<br />
5) Castor: Castor or Kingpin angle is what changes your castor. Castor literally is the amount of change up or<br />
down in the end of the spindle (front axle) from straight ahead to when the wheels are turn a set amount.<br />
6) Wheelbase: Wheelbase is the distance between the front axle and the rear axle.<br />
7) Rear track width: Rear track width is how wide your rear tires are outside edge to outside edge. Changing the<br />
rear track width is one of the easiest ways to adjust your car.<br />
8) Spring preload: Spring preload is the amount of tension on your springs with just the static weight of the car<br />
on them. It can be a very important tool.<br />
9) Ride height: Ride height is the distance from the ground to the bottom of the chassis.<br />
10) Battery placement: The battery is the heaviest part of your car. Therefore is crucial to have it in the right<br />
place! Most cars have the option to locate the battery in different spots. Inward or front to back in some cases.<br />
<strong>Setup</strong> <strong>Black</strong> <strong>Book</strong>, Danny Bartholomew 1 of 5
11) Center shock length: This suspension part sees the most movement on your car. When compressed the<br />
shock must have adequate down-travel. It also most have up-travel which is critical for the cars traction. Will be<br />
discussed later.<br />
12) Toe-in/toe-out: This involves the front tires. Toe-in happens when the front width of the front tires is narrower<br />
than the back width of the front tires. Toe-out is the opposite. In a perfect world you want the toe-in/toe-out to be<br />
zero.<br />
13) Foam rubber: Foam rubber involves the molecular structure of the tire. Foam rubber has less bite and more<br />
wear than other tires. The foam rubber compounds are Blue, Green, Orange and yellow.<br />
14) Natural Rubber: Natural rubber is denser than foam; it provides higher traction and less wear. Compounds<br />
are <strong>Black</strong>, White, Gray, Aqua and Magenta<br />
15) Exotic rubber: Exotic rubber is high traction with ultra low wear. Compounds are Red, Purple and Pink.<br />
16) Car package: Every car is different even if they are the same model. Where you place your electronics, your<br />
wheelbase, and body position all affect your car package.<br />
17) Progressive and Constant Rate: Progressive springs get stiffer the more you collapse the spring. They<br />
generally make the front suspension feel smoother. Constant rate or standard springs have the same rate<br />
throughout their travel.<br />
18) Push: Your car has a pushing condition when it won’t stay on the bottom of the corner. A pushing car scrubs<br />
off all its speed in the corners.<br />
19) Loose: Your car is loose when it wants to spin out or slide sideways in the corner. “Loose is fast but on the<br />
edge you are out of control” Harry Hogge<br />
I think that covers terminology for now. If I write something you don’t understand ask me what the heck I’m takin’<br />
‘bout!<br />
Now I am going to go in-depth with everything you need to know on how to go fast! Read carefully. If you don’t<br />
understand something talk to me and I will try and explain better. Some things although they don’t seem logical<br />
you just have to accept them!<br />
Tweak is almost as important as charging the battery. Too much or not enough can slow the car down. First off,<br />
a ton of guys at the track have digital scale setups for setting tweak. Someone will let you use theirs, but<br />
remember there can be a great difference between scales. It is best to use the same ones all day. As a base<br />
start for everyone, I would run 12.5 ounces on the LR or 350 grams. When setting the tweak use equal<br />
movements on both shocks (or tweak screws). You want fairly equal preload on you springs. Depending on<br />
conditions, car package and class you may need a little more or less but this should get you close to start.<br />
Since you set the tweak while the car is a rest (obviously), it is the basis for the weight transfer in the corners.<br />
When you go through the corner weight transfers from the left to the right. The more weight you start with on the<br />
left the more that will remain on the left through cornering. Too much tweak will make the car push and lose<br />
speed. Not enough and the car will feel loose and won’t come off the corner with any speed if it doesn’t spin out.<br />
Tweak is not a great chassis-tuning device. I basically leave the tweak about the same everywhere I go. (Within<br />
a 1 oz.) The only thing I use it for is if the car is too tight or pushy going into the corner, then I may reduce it<br />
slightly, but too much and the car will lose forward bite coming off the corner. Which is extremely bad because<br />
getting off the corner fast is where the real speed is.<br />
For 4-cell set the tweak with about 10.5 oz or 300 grams on the LR.<br />
<strong>Setup</strong> <strong>Black</strong> <strong>Book</strong>, Danny Bartholomew 2 of 5
Stagger is a biggie. Think of an axle with one big wheel and one small wheel. When the axle rolls it will pull in<br />
the direction of whatever side the smaller wheel is on. That is why running stagger in the car helps the car turn.<br />
On a real racecar they run stagger in the inches. But remember these are 1/10 scale cars! We run stagger in the<br />
thousands of an inch! Running stagger is not a necessity, especially on flat tracks. Most of the time I run a little<br />
bigger LR or reverse stagger.<br />
Stagger in the front tires is also very important. Running a bigger RF will pick up weight on the LR making the<br />
car have more push. A Bigger LF than RF will loosen the car.<br />
To start, I would run the car with no stagger. Depending on the cars handling add or take away stagger. If you<br />
have to run more than .050 stagger or reverse stagger you need to change other things. Generally I end up with<br />
.010-.030 reverse stagger on the final set-up. WATCH! As your tires wear you will lose your stagger settings!<br />
Camber! As a general rule most guys will tell you to set the camber so the tires wear flat. This is a good rule of<br />
thumb. But Camber can do a ton for your cars handling.<br />
On the RF I run -2 to -2 1/2 degrees of camber. Measured with a RPM Camber Gauge (a necessary pit tool!). On<br />
the LF start with +1 degree. If the car needs more steering in the corners increase the camber even if the tire<br />
doesn’t wear flat. Reduce it to take away steering. Moving 1/2 degree can make a huge difference!<br />
Castor is important but not something that is of great help to beginners. First off, when looking at the kingpin<br />
from the side the upper part should always be leaning toward the back of the car. Secondly, the LF should<br />
always have less castor than the RF.<br />
Some of the affects of castor are this. Running lots of castor will make the car stable on the straight-aways, but<br />
this will add a ton of scrub to the car, slowing it down. It is best to run as little castor as possible. That equals the<br />
least amount of scrub. Adding castor will make the car turn into the corner better and make it push more coming<br />
off the corner. Running less castor will make the car tighter entering the corner and loosen it coming off.<br />
Run what Associated calls 0 castor in the LF and 2 in the RF. This will work at most every track. Like I said this<br />
is a very fine tune adjustment.<br />
Wheelbase is a hot topic of debate. It is my belief that short wheelbase cars are faster but they can be more<br />
difficult to set-up. I would always run short wheelbase and focus on working out your problems; you will be<br />
quicker for your troubles.<br />
When you shorten the wheelbase, you have to move the body back with it. This moves your rear down force<br />
point (spoiler/wing/both) back further, giving you more rear traction. In turn this will make the car push, then you<br />
can take steps to loosen your car back up. The end result is a car with the necessary traction and a looser<br />
overall set-up, which equals faster lap times! By looser overall set-up I mean harder tires (less rolling resistance),<br />
softer springs, etc.<br />
Rear track width, another biggie. Basically the wider the rear track the looser the car will be and a narrower rear<br />
track will tend to be tighter.<br />
The rear axle of your car is like a lever. If you move just the RR out, it will have more leverage and the car will<br />
turn better. And in reverse if you move the LR out the car will drive toward the outside more, tightening the car.<br />
For flat tracks I like to keep the rear track width as narrow as possible, Preferably close to the same as the front<br />
track width. A good starting point, using a straight edge line up the RR with the RF, Line LR up about an 1/8 inch<br />
outside the LF.<br />
I will start the spring preload section, discussing the front springs. How do you know how much pre-load? As a<br />
general rule with all the proper shims in place, you want to compress the spring a 1/16 of an inch so you can<br />
install the final e-clip. I’ll spill the secret on how to properly build a front end later.<br />
<strong>Setup</strong> <strong>Black</strong> <strong>Book</strong>, Danny Bartholomew 3 of 5
If you increase the preload on the spring, the spring will act stiffer. Increasing the preload on the RF will make<br />
the car push a little more, doing so on the LF will loosen the car slightly. This usually comes into play when the<br />
car needs a minor adjustment and not a whole spring rate change.<br />
Setting you side spring preload is simple. With the shock fully extended, turn the adjuster until it just takes up all<br />
the play in the spring. Do the same for the other shock and set your tweak. Remember to move shock adjusters<br />
equally so not to end up with one spring preloaded way more than the other.<br />
Your initial center spring preload should be to establish the proper ride height. Then to increase steering in your<br />
car you can add preload, even if it makes your ride height a little off. To take steering or looseness away reduce<br />
the preload.<br />
Chassis ride height is critical. Too low and the car will drag and too high the car will tend to tip over in the corner<br />
rather than be smooth. You want to keep the distance from the chassis to the ground between a 1/4” and 5/16 of<br />
an inch. This will keep the car safely from hitting the track or looking like a Mack truck riding around out there.<br />
Personally I always run the battery all the way to the left and all the way back if your car has that option. With the<br />
battery all the way left the car will want to continue in a left circle, this is good in most cases, because you want<br />
the car to turn freely through the corner. I only move the battery inward as a last resort.<br />
Moving the battery weight forward and back is a complicated deal and hard to explain on paper. The best way I<br />
can explain it is like so, your car transfers weight from the back to the front entering the corner. The more weight<br />
you have in the back to start with, the more can be transferred to the front while cornering. Therefore, with the<br />
battery all the way back will in reality loosen your car!<br />
Center shock length is sooo important. This part does the most moving when you are racing. You need to have<br />
the proper down-travel and up-travel. The down-travel or compression of your shock should allow the chassis to<br />
bottom out before the shock runs out of travel. Up-travel is necessary for traction. If the shock is too short the<br />
shock will be topped out or fully extended when you smash on the throttle. When the shock tops out you will<br />
loose traction. A good way to tell if your length is ok is to look at how far the rear pod hangs when the car is off<br />
the ground. The back of the pod should be at about a 5-10 degree angle when compared to the chassis. There<br />
is no magic number but it does affect the way your car handles.<br />
Choosing between constant rate or progressive springs is not that critical. I run progressive springs on flat tracks<br />
and constant rate on banked tracks. There isn’t a great difference in performance on the track, but to me<br />
progressive springs just feel better in the car. The one draw back is they tend to collapse or wear out faster than<br />
constant rate springs. This means you have to replace them more often. Front springs wear out fast, watch how<br />
much the spring sags when at ride height, this will tell you when the springs are getting soft as the car will sag<br />
more and more. You can compensate by adding pre-load shims or replacing the spring.<br />
Every type of racing comes down to who makes the right tire choice. R/C is no different, the right tires wins you<br />
the race. I can’t tell you that there are certain tires that are perfect at every track. What I can tell you from<br />
experience is a Purple RF Green LF and two white rears are a safe start at most any flat track. There are<br />
exceptions like places with “funny” carpet but that set-up should get you around the track.<br />
Shocks are so important it isn’t even funny. One of the biggest problems with guys cars are there isn’t any oil in<br />
the oil filled shock we use! We spend all this money on batteries, speed controls etc and it is the $7.00 shock<br />
that holds you back. These shocks leak badly, I rebuild mine every week before I race! No matter what.<br />
Roll center and camber gain are two things that can be complicated, but they are a major part of oval racing.<br />
Camber gain is rather simple. When the spring is compressed the top of the tire leans in on the RF and the LF.<br />
On the RF this is ok a little camber gain makes it so you don’t have to run as much camber in the RF giving you<br />
more contact with the track on the straight-away which provides more stability. In the LF you don’t want to loose<br />
and camber in the corner. The more parallel the upper and lower a-arms the less camber gain you will have. You<br />
will see quite of few guys that will put an aftermarket castor block on the LF which allows you to have the LF a-<br />
arm perfectly flat, but they will leave a little angle on the RF to still have some camber gain there. I personally run<br />
<strong>Setup</strong> <strong>Black</strong> <strong>Book</strong>, Danny Bartholomew 4 of 5
the stock parts on flats tracks mainly because there isn’t a whole lot of spring travel on the LF on a flat track. On<br />
a banked track I take all the camber gain out of the LF.<br />
The more parallel the upper and lower a-arms are the lower the roll center for your car will be. The roll center in<br />
its simplest form is how much the front end will roll in the corner. The lower the roll center the higher the center<br />
of gravity and vice versa. A good analogy is to think of a flagpole, if you were to grab a flagpole at the bottom<br />
(low roll center) the pole would sway back and forth easily. If you were to grab the pole in the center (high roll<br />
center) the pole would not sway as easily. The roll center is one of those things that is not a chassis adjustment<br />
but more of a building thing. You want the car with a low roll center; this will help the car turn in the corner. More<br />
roll equals more weight transfer therefore giving the car more steering. Once you get the car planted in the rear<br />
you will need this to make the car turn freely.<br />
Building a good front end is one of the most critical things on your car. Assembly the front end according to the<br />
Associated instructions with the exception of the upper a-arm eyelet. On the upper eyelet put the square corner<br />
up and the rounded corner down. I believe the instructions tell you to do the opposite but I have found that this<br />
works better especially with Pro-long kingpins. Make sure all of the pivot balls are free and don’t bind. If they are<br />
tight try taking them out and putting them back in a few times that usually frees them up. If all else fails use a<br />
different pivot ball. I recommend you use the Wolfe Pro-long kingpins as a replacement for the stock ones. This<br />
gives you a better spring selection and you can do a little more with the roll center stuff. Throw both kingpins in a<br />
dremel or drill and polish them to a high luster with MOTHER’S MAG POLISH or SEMICHROME. Repeat this<br />
process every few weeks. (Also polish you t-plate pivot balls too!!)<br />
Install your polished Kingpins per instructions. Don’t put the on spring yet. With everything installed move the<br />
whole assembly up and down; you will most likely find that it will bind. There are two main areas that the front<br />
end will bind. First, the inside edge of the steering block and the bottom of the upper a-arm, the remedy is to<br />
grind the inside edge of the steering block so it doesn’t touch the upper a-arm on up travel. You will find that the<br />
top of the kingpin will bind on the outer edge of the upper eyelet. Solution: remove the upper pivot ball and<br />
remove Small amounts of material from the upper eyelet with your x-acto knife. You may have to do this several<br />
times to get it right, reassemble it make sure the whole assembly moves up and down freely with little or no<br />
resistance.<br />
Install your springs, provided you are using Wolfe springs: for progressive springs, use one spring retainer on the<br />
large end and put that end to the top. Remember that the spring should be compressed about a 1/16” for a<br />
starting pre-load; the small end will rest on the e-clip. For standard springs use a spring retainer on both ends<br />
(standard springs are shorter than progressive) same pre-load. Always use a little lube on your kingpins, this<br />
provides smoothness and a little dampening. Don’t use anything that has a sticky feel to it, I personally use Losi<br />
Hydra fluid (clear).<br />
The main thing to remember when someone tells you what springs to run, think if their front end is bound up or<br />
not. A green spring in a bound up front end is way stiffer than a green spring in a free front end.<br />
<strong>Setup</strong> <strong>Black</strong> <strong>Book</strong>, Danny Bartholomew 5 of 5


