BLOCK SEAL HEAD GASKET REPAIR - Bar's Leaks & Rislone
BLOCK SEAL HEAD GASKET REPAIR - Bar's Leaks & Rislone
BLOCK SEAL HEAD GASKET REPAIR - Bar's Leaks & Rislone

You also want an ePaper? Increase the reach of your titles
YUMPU automatically turns print PDFs into web optimized ePapers that Google loves.
BAR’S LEAKS TECHNICAL BULLETIN<br />
Tech Bulletin #: TB-1100-2 Page 1 of 2<br />
Date 1 st Issued: May 25, 2006 Date Revised: July 22, 2013<br />
ISO 9001 CERTIFIED Bar’s <strong>Leaks</strong> Head Gasket Repair Part #: 1100<br />
<strong>BLOCK</strong> <strong>SEAL</strong> <strong>HEAD</strong> <strong>GASKET</strong> <strong>REPAIR</strong><br />
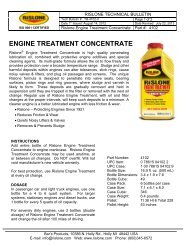
Bar’s <strong>Leaks</strong> Block Seal Head Gasket Repair is scientifically formulated<br />
to permanently seal coolant leaks that are the cause of most<br />
overheating problems. For most vehicles, this is the last chance before<br />
going to a junk yard or paying an expensive repair bill. This repair<br />
contains a blend of aramid and refractory fibers giving the strength of a<br />
bullet-proof vest and the heat resistance of fire-proof clothing. As these<br />
particles penetrate a crack or the blown head gasket area, they lock<br />
together and bond forming a hard permanent ceramic type seal. Your<br />
vehicle is a good candidate for this product if it can idle for 20 minutes<br />
without overheating or having to add coolant. Works effectively on cast<br />
iron or aluminum blocks & heads. Detailed English / Spanish<br />
instructions on back booklet label take you through each step of using<br />
the product. Overheating can be caused by a blown head gasket,<br />
cracked head or leaking block. Bar’s <strong>Leaks</strong> Block Seal Head Gasket<br />
Repair eliminates this problem. In addition, overheating can be caused<br />
by a stuck thermostat, bad water pump or defective radiator cap. Make<br />
sure these cooling system parts are in good working order before using<br />
Bar’s <strong>Leaks</strong> Block Seal Head Gasket Repair. When one of these parts<br />
fails, it can cause the head gasket to fail.<br />
WARNING:<br />
Head Gasket Repair is NOT COMPATIBILE<br />
with antifreeze and must only be added to<br />
cooling system and radiator after ALL<br />
ANTIFREEZE has been removed. Do not add<br />
to engine oil.<br />
NOTE: PROTECT FROM FREEZING<br />
TWICE THE PERFORMANCE<br />
Part One – LIQUID CERAMIC<br />
Liquid penetrates large and small leaks<br />
to form a seal actually harder than<br />
the original head gasket.<br />
Part Two – REINFORCED FIBERS<br />
Fiber additives lock together with liquid<br />
to increase strength and promote a<br />
permanent seal.<br />
Part Number: 1100<br />
UPC Item: 0 46087 01100 3<br />
UPC Case: 1 00 46087 01100 0<br />
Bottle Size: Net. Wt. 20 oz. (567g)<br />
Bottle Dimensions: 3.4 x 1.8 x 8.3<br />
Bottle Cube: 51<br />
Case Pack: 4 bottles per case<br />
Case Size: 7.2 x 3.6 x 8.8<br />
Case Cube: 228<br />
Case Weight: 5.8 pounds<br />
Pallet: TI 60 HI 5 Total 300<br />
Pallet Height: 48 inches<br />
DOSAGE:<br />
1 to 1.9 gallon cooling capacity use ½ bottle.<br />
2 gallon to 6 gallon cooling capacity use 1 bottle.<br />
Larger systems use 1 bottle for every 5 gallons of<br />
coolant capacity.<br />
Bar’s Products, 10386 N. Holly Rd., Holly MI 48442 USA<br />
E-mail: info@barsproducts.com Web: www.barsleaks.com Phone: (800)345-6572
B l o c k S e a l H e a d G a s k e t R e p a i r C o n t i n u e d P a g e | 2<br />
MOST COMMON MAJOR COOLING<br />
PROBLEMS<br />
THE SOLUTION,<br />
BAR’S LEAKS <strong>HEAD</strong> <strong>GASKET</strong> <strong>REPAIR</strong><br />
Block <strong>Leaks</strong> Stops Block <strong>Leaks</strong><br />
Cracked Cylinder Heads Seals Cracked Cylinder Heads<br />
Blown Head Gasket Repairs Blown Head Gaskets<br />
DIRECTIONS:<br />
1. Allow engine to cool. Make sure engine is cool enough so radiator cap can be safely<br />
removed. (This could take 30 minutes or longer). Drain and completely flush antifreeze<br />
from cooling system and overflow tank. Using a flush “T” with garden hose works best. If<br />
cooling system is dirty, use a good quality flush following manufacturer’s instructions. ALL<br />
antifreeze must be removed or clogging may occur.<br />
DISPOSAL: Observe local laws & regulations. Where permitted, dispose of in sanitary<br />
sewer system. Never pour on the ground or in a storm sewer system.<br />
2. For hard to stop internal leaks where coolant is leaking into a cylinder or the cylinder<br />
pressure is pushing coolant out, locate the cylinder causing the problem and remove the<br />
spark plug for best results.<br />
TIP: An indication of a cylinder causing the problem can be found by removing the spark<br />
plugs and looking for one that either cleaner than the others, or has a tint of antifreeze<br />
color on the tip or porcelain.<br />
3. Shake well, Mix Head Gasket Repair in bucket or container with approximately 3 quarts of<br />
warm water. Pour this mixture directly into the radiator. If using a small cooling system,<br />
like 4 cylinders with no A/C, mix ½ bottle of the Head Gasket Repair with the warm water.<br />
TIP: If you do not have access to your radiator, remove top hose where it connects to the<br />
top of radiator and install product in hose. Reattach and tighten clamp.<br />
4. Fill cooling system with water and reinstall radiator cap.<br />
5. Start engine.<br />
6. Turn heater on hot and fan on high.<br />
7. Run engine for 5 minutes or until thermostat opens.<br />
8. Turn vehicle off and allow engine to cool.<br />
9. Top off cooling system with water and reinstall radiator cap. If you removed a spark plug<br />
in step 2 reinstall now.<br />
10. Run engine at idle until normal operating temperature is reached. Continue running<br />
engine at idle for 15 minutes.<br />
11. Turn vehicle off and allow engine to cool.<br />
12. Top off cooling system with water as needed and reinstall radiator cap.<br />
13. Run engine at idle until normal operating temperature is reached. Continue running<br />
engine, but at high idle. (1500 RPM’s) for 20 minutes.<br />
TIP: For vehicles with intermittent or very minor leaks, it is recommended to follow step 13<br />
by idling vehicle for one hour.<br />
14. Turn vehicle off and allow engine to cool for 1 hour.<br />
15. Remove radiator cap and drain system.<br />
16. Leave drain open and radiator cap off for 12 to 24 hours. If temperature is below freezing,<br />
vehicle must either be kept heated or immediately go to step 17.<br />
17. Flush entire cooling system and refill with manufacturer’s recommended antifreeze/water<br />
mixture.<br />
Bar’s Products, 10386 N. Holly Rd., Holly MI 48442 USA<br />
E-mail: info@barsproducts.com Web: www.barsleaks.com Phone: (800)345-6572