View GoPro hero2 HD Instruction Manual - AV Chicago
View GoPro hero2 HD Instruction Manual - AV Chicago
View GoPro hero2 HD Instruction Manual - AV Chicago

You also want an ePaper? Increase the reach of your titles
YUMPU automatically turns print PDFs into web optimized ePapers that Google loves.
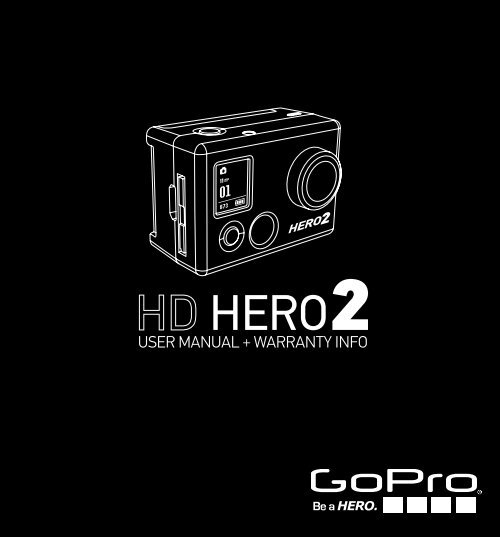
User <strong>Manual</strong> + Warranty Info
table of contents<br />
Join the <strong>GoPro</strong> party at facebook.com/goprocamera<br />
to see what other <strong>GoPro</strong> owners are capturing with<br />
their <strong>GoPro</strong>s. Share some of your own footage and<br />
contribute to the <strong>GoPro</strong> movement!<br />
Accessories 4<br />
Mounts 5<br />
<strong>HD</strong> HERO2 Features 6<br />
Firmware Update 8<br />
Basics 8<br />
Camera Modes 11<br />
Advanced Menu Settings 17<br />
Additional Menu Settings 24<br />
Storage/SD Cards 30<br />
System Requirements 31<br />
Transferring Files 32<br />
Battery Life 34<br />
Important Warning Messages 36<br />
Camera Assembly 37<br />
FCC Statement 43<br />
Warranty 44<br />
Customer Support 45<br />
2 3
WEAR it. mount it. love it.<br />
More at gopro.com<br />
Premium<br />
ACcessories<br />
Core<br />
ACcessories<br />
Mounts<br />
Floaty Backdoor<br />
Rechargeable Li-Ion Battery<br />
Helmet Front<br />
Mount<br />
Chest Mount<br />
Harness<br />
Handlebar Seatpost<br />
Mount<br />
Surf HERO<br />
Mounting Kit<br />
3D HERO ® System<br />
Anti-Fog Inserts<br />
Lens Replacement Kit<br />
<strong>HD</strong> Wrist Housing Head Strap Suction Cup Mount Vented Helmet<br />
Strap<br />
Replacement <strong>HD</strong> Housing<br />
LCD BacPac <br />
<strong>HD</strong> Skeleton Housing<br />
Roll Bar Mount Tripod Mount Military Helmet<br />
Mount<br />
Grab Bag of<br />
Mounts<br />
16GB SD Memory Card<br />
Battery BacPac <br />
32GB SD Memory Card<br />
Curved Adhesive<br />
Mounts<br />
Flat Adhesive<br />
Mounts<br />
4 5
<strong>HD</strong> HERO2 Features<br />
<strong>HD</strong> HERO2 Features<br />
1. LED Recording Lights<br />
2. SHUTTER/SELECT Button<br />
3. LCD Status Screen<br />
4. <strong>HD</strong>MI Port<br />
(cable not included)<br />
5. SD Card Slot<br />
6. POWER/MODE Button<br />
7. 2.5mm Composite Port<br />
(cable not included)<br />
8. Microphone<br />
9. HERO Port<br />
10. USB Port (file transfer/charging)<br />
11. Battery Door<br />
12. Buzzer<br />
(located on camera bottom)<br />
13. 3.5mm External Mic Input<br />
6 7
Firmware Update<br />
<strong>GoPro</strong> releases new camera features through firmware updates.<br />
Visit gopro.com/firmware to download the latest updates.<br />
USING YOUR <strong>HD</strong> HERO2: Basics<br />
Getting started<br />
Before using the <strong>HD</strong> HERO2 for first time:<br />
1. Insert a SD memory card into the SD card slot.<br />
Your <strong>HD</strong> HERO2 is compatible with SD + SDHC memory cards (Class 4 or<br />
higher rated cards are recommended).<br />
‣ See STORAGE/SD CARDS for more information.<br />
2. Install the battery into your <strong>HD</strong> HERO2 camera.<br />
3. Charge the battery.<br />
The lithium-ion battery included with your <strong>HD</strong> HERO2 ships only partially<br />
charged. For a full charge, use the USB cable to plug the camera into a power<br />
source such as a computer or USB charging device. No damage will occur to<br />
your battery if you are not able to charge it before using your camera.<br />
DEFAULT SETTINGs SNAPSHOT<br />
USING YOUR <strong>HD</strong> HERO2: BASICS<br />
Out of the box, your <strong>HD</strong> HERO2 camera is configured with the following featured<br />
default settings:<br />
Camera Mode:<br />
Video Resolution:<br />
Field of <strong>View</strong>:<br />
Still Photo Resolution:<br />
Time Lapse Interval:<br />
Power Up Mode:<br />
Video<br />
960p-30fps<br />
170º Wide<br />
11 Megapixels<br />
1 second<br />
Video<br />
‣ See SETTINGS MENU for more information on the camera’s default settings<br />
and instructions on how to change them.<br />
‣ See BATTERY LIFE for more information.<br />
8 9
USING YOUR <strong>HD</strong> HERO2: Basics<br />
Powering ON and OFF<br />
USING YOUR <strong>HD</strong> HERO2: camera modes<br />
overview<br />
Once the <strong>HD</strong> HERO2 is powered on, each press of will cycle through the camera’s<br />
recording modes and settings menu in the following order:<br />
viDEo<br />
Record video<br />
photo<br />
Take single photos<br />
burst<br />
Take 10 photos in 1 second<br />
To power ON the <strong>HD</strong> HERO2:<br />
Press and release . The LED Recording Light on the front of the camera will<br />
flash three times and the Buzzer will emit three short beeps.<br />
To power OFF the <strong>HD</strong> HERO2:<br />
Press and hold for two seconds. The LED Recording Light will flash seven<br />
times and the Buzzer will emit seven quick beeps.<br />
time lapse Take a photo every 0.5, 1, 2, 5, 10, 30, and 60 seconds<br />
self timer Take a single photo after a 10-second countdown<br />
Settings Change the camera’s configuration<br />
Each camera mode can be changed in the Settings menu.<br />
PRO<br />
TIP:<br />
You can change the <strong>HD</strong> HERO2 default settings to start in<br />
One Button Mode, which sets the camera to immediately<br />
begin recording once it is powered on.<br />
‣ See ONE Button MODE for more information.<br />
‣ See EntERing THE SETTINGS MENU for more information.<br />
10 11
USING YOUR <strong>HD</strong> HERO2: camera modes<br />
Recording Video<br />
Verify that the camera is in Video Mode, indicated by on the LCD. If not, press<br />
repeatedly until the camera displays the Video Mode icon.<br />
• To begin recording video:<br />
Press and release . The camera will emit one beep and the LED<br />
Recording Light will flash while recording continues.<br />
• To stop recording:<br />
Press and release . The LED Recording Light will flash three times and<br />
the camera will emit three beeps to indicate recording has stopped.<br />
<strong>HD</strong> HERO2 will automatically stop recording when either the SD card is full or the<br />
battery runs out of power. Your video will be saved before the camera powers off.<br />
USING YOUR <strong>HD</strong> HERO2: camera modes<br />
Taking Single Photos<br />
Verify that the camera is in Photo Mode, indicated by on the LCD. If not, press<br />
repeatedly until the camera displays the Photo Mode icon.<br />
To take a photo:<br />
Press and release . The camera will beep once and the LED<br />
Recording Light will flash once to indicate a photo has been taken.<br />
In Photo mode:<br />
The LCD screen will display your currently selected photo<br />
resolution (11MP, 8MP or 5MP), the number of photos stored on<br />
your SD card, and the number of photos that can be taken before<br />
the card is full.<br />
While recording video, the LCD will display the currently selected<br />
video resolution, lens field of view (FOV), the elapsed time of the<br />
current recording, and the remaining recording time determined<br />
by the free space on your SD card.<br />
When recording is stopped, the LCD shows the number of video<br />
files stored on the SD card in place of the elapsed recording time.<br />
PRO<br />
TIP:<br />
If you think your SD card will fill up before you are able to<br />
transfer your files, select the 5MP option under the Photo<br />
settings menu. 5MP files are smaller than 11MP files,<br />
allowing your SD card to store more photos.<br />
‣ See PHOTO REsolution MODES for more information.<br />
When the camera is set to One Button Mode, hold for<br />
PRO two seconds to enter the Settings screen, where you can<br />
TIP: quickly turn OFF One Button Mode.<br />
‣ See One Button Mode for more information.<br />
12 13
USING YOUR <strong>HD</strong> HERO2: camera modes<br />
Photo Burst Mode<br />
In Photo Burst Mode, the camera will take 10 photos in 1 second.<br />
• Verify the camera is in Burst Mode, indicated by on the LCD screen.<br />
If not, press repeatedly until the camera displays the Burst Mode icon.<br />
• Press and release once to take a photo burst of ten photos over one<br />
second. The LED Recording Light will flash and the camera will beep 10<br />
times to indicate the photos have been taken.<br />
PRO<br />
TIP:<br />
As in Photo Mode, the LCD screen will display your currently<br />
selected photo resolution (11MP, 8MP or 5MP), the number of<br />
photos stored on your SD card, and the number of photos that<br />
can be taken before the card is full.<br />
Compared to single Photo Mode, Burst Mode gives you 10<br />
times as many chances to capture that “can’t miss” moment.<br />
USING YOUR <strong>HD</strong> HERO2: camera modes<br />
Time Lapse Photo Mode<br />
Time Lapse Photo Mode is used to take a series of photos at 0.5, 1, 2, 5, 10,<br />
30 or 60 second intervals (when using 0.5 seconds, it is recommended to use a<br />
class 10 or higher SD card).<br />
‣ See TIME LAPSE PHOTO MODE in advanced settings for instructions on how<br />
to change the interval setting.<br />
• Verify the camera is in Time Lapse Mode, indicated by on the LCD<br />
screen. If not, press repeatedly until the camera displays the Time<br />
Lapse Mode icon.<br />
• Press the button once to begin taking Time Lapse photos. The LED<br />
Recording Light will flash each time a photo is taken.<br />
• Press once to stop taking Time Lapse photos. The LED Recording Light<br />
will flash three times and the camera will emit three beeps to indicate Time<br />
Lapse has stopped.<br />
As in Photo Mode, the LCD screen will display your currently<br />
selected photo resolution (11MP, 8MP or 5MP), the number of<br />
photos stored on your SD card, and the number of photos that<br />
can be taken before the card is full.<br />
14 15
USING YOUR <strong>HD</strong> HERO2: camera modes<br />
Self-Timer MODE<br />
In Self-Timer Mode, the <strong>HD</strong> HERO2 will take a single photo at the end of a<br />
10-second countdown.<br />
• Verify that the camera is in Self-Timer Mode, indicated by on the LCD. If<br />
not, press repeatedly until the camera displays the Self-Timer Mode icon.<br />
• To take a photo, press and release . The camera will beep and the LED<br />
Recording Light will flash during the countdown, ending with a series of<br />
rapid beeps and flashes just before the photo is taken.<br />
• To stop the countdown timer, press .<br />
As in Photo Mode, the LCD screen will display your currently<br />
selected photo resolution (11MP, 8MP or 5MP), the number of<br />
photos stored on your SD card, and the number of photos that<br />
can be taken before the card is full.<br />
ADVANCED Menu SETTINGS<br />
enterING the settings menu<br />
Using the Settings Menu, many of the functions of the <strong>HD</strong> HERO2 can<br />
be customized based on your shooting needs.<br />
To access your <strong>HD</strong> HERO2 settings:<br />
1. Make sure your camera is powered ON.<br />
2. Cycle through camera modes using until the LCD Status Screen shows<br />
the SETTINGS icon.<br />
3. To enter into the Settings Menu, press .<br />
4. Use to toggle through each camera setting mode.<br />
5. Every settings mode has a list of options. Press to enter into a specific<br />
mode. The option which is currently active will be highlighted. Press to<br />
toggle through the list. Press to select highlighted option and exit list.<br />
6. Press to cycle to the next camera setting mode or press to display<br />
current option list again.<br />
16 17
ADVANCED Menu SETTINGS<br />
Default Mode at Power Up<br />
Select which camera mode is active (or default) when you power on your camera.<br />
viDEo (Default) photo burst time Lapse<br />
Video Resolution Modes<br />
Your <strong>HD</strong> HERO2 camera shoots the following video resolutions:<br />
Resolution/ Field of <strong>View</strong> Screen Best Use<br />
FPS<br />
Resolution<br />
1080-30 170 º / 127 º 1920x1080 Highest resolution.<br />
960-48<br />
(Slow motion)<br />
960-30<br />
(Default)<br />
170 º<br />
wide angle<br />
170 º<br />
wide angle<br />
1280x960<br />
1280x960<br />
This resolution provides the widest<br />
top-to-bottom and side-to-side viewing<br />
area. Great for slow motion.<br />
This resolution provides the widest<br />
top-to-bottom and side-to-side<br />
viewing area.<br />
Resolution/<br />
FPS<br />
720-60<br />
(Slow motion)<br />
Video Resolution Modes : Cont’d<br />
Field of <strong>View</strong><br />
170 º<br />
wide angle<br />
720-30 170 º<br />
wide angle<br />
WVGA-120<br />
(Super slow<br />
motion)<br />
WVGA-60<br />
(Super slow<br />
motion)<br />
170 º<br />
wide angle<br />
170 º<br />
wide angle<br />
ADVANCED Menu SETTINGS<br />
Screen<br />
Resolution<br />
1280x720<br />
1280x720<br />
848x480<br />
848x480<br />
Best Use<br />
For mounting on vehicles or gear<br />
when a max side-to-side wide angle is<br />
desired but vertical viewing area is not<br />
as important. Great for slow motion.<br />
For mounting on vehicles or gear<br />
when a max side-to-side wide angle is<br />
desired but vertical viewing area is not<br />
as important.<br />
For smaller data files. This is standard<br />
definition resolution. Great for super<br />
slow motion.<br />
For smaller data files. This is<br />
standard definition resolution.<br />
Great for slow motion.<br />
When you are using the camera in Video Mode, the currently<br />
selected video resolution appears on the LCD Status Screen<br />
beneath the Video mode icon.<br />
PRO<br />
TIP:<br />
Consider using 960-48 when wearing camera on a helmet or<br />
a chest harness to see your handlebars when biking, or knees<br />
and skis when skiing.<br />
18 19
ADVANCED Menu SETTINGS<br />
Field of <strong>View</strong> Modes<br />
When recording video in 1080p, you can set the camera to shoot in the default<br />
wide-angle (170º) or a medium-wide angle (127º) field of view.<br />
‣ See VIDEO RESOLUTION MODES for more information.<br />
WIDE 170º (Default)<br />
MEDIUM 127º<br />
Photo Resolution Modes<br />
The <strong>HD</strong> HERO2 can take photos in either 11MP, 8MP or 5MP resolutions.<br />
Changing this setting effects photos taken in Photo, Burst, Self Timer and Time<br />
Lapse Modes.<br />
11MP (Default)<br />
8MP<br />
5MP<br />
When you are using the camera in one of the photo modes, the<br />
currently selected photo resolution appears on the LCD beneath<br />
the Photo Mode icon.<br />
Time Lapse Modes<br />
You can select a wide range of time intervals for your Time Lapse Mode photos.<br />
Choose between 0.5, 1 (Default), 2, 5, 10, 30 and 60 seconds.<br />
Upside Down Video/Image Mode<br />
If you need to mount your camera upside down, you can set the camera to save<br />
the photo or video upside down so that it appears right side up when you review<br />
it on your computer or TV. This eliminates the need to “flip” the photo or video<br />
later on your computer.<br />
(Default) Camera right side up<br />
Camera upside down<br />
Spot Meter Settings<br />
ADVANCED Menu SETTINGS<br />
Turn on the Spot Meter when you are filming from a dark space into a brighter<br />
setting, like when filming outdside a windshield from inside a car.<br />
OFF (Default)<br />
ON<br />
Note: The Spot Meter icon is displayed in the upper-right corner of the LCD<br />
when Spot Metering is on.<br />
20 21
ADVANCED Menu SETTINGS<br />
ADVANCED Menu SETTINGS<br />
One Button Mode<br />
One Button Mode forces the camera to automatically begin recording in its<br />
default power up mode once the camera is ON. When One Button Mode is ON,<br />
is disabled. To stop recording, you must turn your camera OFF.<br />
OFF<br />
ON<br />
(Default)<br />
To turn One Button Mode ON:<br />
1. Access the Settings Menu (‣ See ENTERING THE SETTINGS MENU for<br />
more information.)<br />
2. Use to cycle through the settings menus until the One Button Mode<br />
menu appears.<br />
One Button Mode (Cont’d):<br />
To turn One Button Mode OFF:<br />
1. While the camera is ON and recording, press and hold for two seconds<br />
until the settings icon appears.<br />
2. Enter the settings menu by pressing .<br />
3. Use to cycle through the settings menu until appears. Press to<br />
enter One Button Mode menu.<br />
4. Press once to select OFF and press to confirm selection.<br />
5. Press to cycle through the settings menu. Select and press EXIT.<br />
3. Press to access the One Button Mode menu.<br />
4. Press once to select ON and press once to confirm selection.<br />
5. Press to cycle through settings menu. Select and press EXIT.<br />
PRO<br />
TIP:<br />
In One Button Mode, the camera is either “on and recording” or<br />
powered OFF. This simplifies camera operation when loaning<br />
the camera to a friend or when you know you only want to shoot<br />
in one mode.<br />
22 23
ADditional Menu SETTINGS<br />
More Menu Settings<br />
To access additional settings, enter MORE<br />
settings are found in this subsection:<br />
delete<br />
Delete last file or delete all files and reformat SD card.<br />
cancel (Default)<br />
last<br />
all/Reformat<br />
menu. The following<br />
delete (Cont’d):<br />
ADditional Menu SETTINGS<br />
• LAST: To delete the last file saved, Press to select menu option. The<br />
LCD will display a confirmation menu. Within this menu you can toggle<br />
through the menu options using .<br />
The menu options are:<br />
NO: Press<br />
YES: Press<br />
to cancel and return to the main settings menu.<br />
to select yes. The last file saved will be deleted.<br />
To delete the last file saved:<br />
1. With the Delete settings menu screen displayed, press to enter into<br />
the delete list.<br />
2. Within the delete menu you can toggle through the list by using to<br />
choose one of the following options:<br />
• CANCEL: To cancel out of delete, Press<br />
settings menu.<br />
and return to the main<br />
• ALL/Format SD Card: To delete all files on the SD Card, press to select<br />
menu. The LCD will display a confirmation menu. Within this menu you can<br />
toggle through the menu options using .<br />
The menu options are:<br />
No: Press<br />
to cancel and return to the main settings menu<br />
YES: Press to select yes. All files will be deleted. During<br />
the delete all process, the LED lights will continue to blink<br />
until formatting is complete.<br />
24 25
ADditional Menu SETTINGS<br />
ntsc / PAL<br />
This setting controls both the video recording frame rate and playback of<br />
video from the camera when viewing on a TV. Select NTSC if viewing on a<br />
TV in North America. Choose PAL if viewing on a PAL TV (most televisions<br />
outside of North America) or if viewing on a PAL TV in any region.<br />
NTSC (Default)<br />
PAL<br />
On Screen Display (OSD)<br />
Select if you would like to display or hide the recording icons and information<br />
on your video screen (when displaying live video on a TV screen or using the<br />
LCD BacPac ). OFF will hide icons and ON will display icons.<br />
OFF (Default)<br />
ON<br />
LED Lights<br />
You can choose between having all 4 LED lights active, only 2 LED lights<br />
active (front and back) or turn OFF all the LED lights.<br />
4 (Default)<br />
2<br />
OFF<br />
Camera Sound<br />
ADditional Menu SETTINGS<br />
You can change volume level of the camera’s beep to be softer than the<br />
default or silent for stealth mode.<br />
100% (Default)<br />
70%<br />
OFF<br />
Auto Power Off<br />
Program the camera to automatically turn OFF after a specific period of<br />
inactivity (when no videos or photos are being taken and no buttons have been<br />
pressed). If you set the camera to MANUAL, you will need to manually turn your<br />
camera OFF.<br />
MANUAL (Default)<br />
60sec<br />
120sec<br />
300 sec<br />
26 27
ADditional Menu SETTINGS<br />
Date / Time / Month<br />
Exit Settings Menu<br />
ADditional Menu SETTINGS<br />
You can set the camera’s internal clock to ensure that your video and photo<br />
files are saved with the correct date/time information. You will need to adjust<br />
the date/time information if the battery is removed from the camera for an<br />
extended period of time.<br />
From the EXIT screen, press<br />
to return to the camera’s default camera mode.<br />
Month / Day / Year<br />
Hour / Minute<br />
1. Press repeatedly until Date/Time/Month appears on the LCD.<br />
2. Press to begin setting the date and time.<br />
3. The LCD will show the Date/Time/Month setting menu with the Month field<br />
highlighted. Press to access the list of months (1 to 12).<br />
4. Use to cycle through the list until the correct month is highlighted.<br />
5. Press to select the highlighted month.<br />
6. The Date/Time/Month setting menu will appear on the LCD. Press once to<br />
highlight the Day field and press to access the list of days (1 to 31).<br />
7. Again use to highlight the correct day and to select it.<br />
8. Repeat this process for the Year, Hour and Minute.<br />
PRO<br />
TIP:<br />
The Date/Time/Month fields are abbreviated. For example, the<br />
month is MM, day is DD, Year is YY, hour is HH, minute is MM.<br />
28 29
STORAGE/SD CARDS<br />
The <strong>HD</strong> HERO2 camera is compatible with 2GB, 4GB, 8GB, 16GB and 32GB<br />
capacity SD and SDHC memory cards. While all speed cards will work in the<br />
camera, <strong>GoPro</strong> recommends higher speed cards (labeled as Class 4 or higher)<br />
when shooting <strong>HD</strong> video. <strong>GoPro</strong> recommends using name brand SDHC cards for<br />
maximum reliability in high vibration activities.<br />
To insert a SD card:<br />
1. Insert SD card into the SD card slot<br />
with the SD card label facing the<br />
front of the camera.<br />
2. The SD card will click into place<br />
once it is fully inserted.<br />
To remove a SD card:<br />
1. Place your fingernail against the<br />
edge of the SD card and lightly<br />
press it further into the camera.<br />
2. The card will spring out from the<br />
camera far enough for you to<br />
pull it out.<br />
The <strong>HD</strong> HERO2 camera is compatible with Microsoft® Vista, 7 or later and Mac<br />
OS X 10.5 or later.<br />
System Requirements for full High Definition 1080p and 720p 60fps playback:<br />
Windows<br />
Microsoft Windows® Vista 7+<br />
3.2GHz Pentium 4 or faster<br />
DirectX 9.0c or later<br />
Video card with at least 128MB of RAM<br />
At least 2GB of system RAM<br />
PRO<br />
TIP:<br />
System Requirements<br />
Mac<br />
Mac OS® X 10.4.11 or later<br />
2.0GHz Intel Core Duo or faster<br />
At least 2GB of system RAM<br />
Video card with at least 128MB of RAM<br />
If you are having problems achieving smooth playback on your<br />
computer, the <strong>HD</strong> HERO2 camera can also plug directly into a<br />
High Definition TV with an <strong>HD</strong>MI port using a mini-<strong>HD</strong>MI cable or<br />
via composite cable (not included). The <strong>HD</strong> HERO2 camera itself<br />
provides very smooth playback on an <strong>HD</strong>TV.<br />
30 31
transferring files<br />
To transfer video and photo files to a computer<br />
On a PC:<br />
1. Connect the camera to a computer with the included USB cable.<br />
2. Turn on the camera by pressing .<br />
3. On your PC, double click My Computer and locate the “Removable Disk”<br />
icon. If you do not see it, close the My Computer folder and then reopen it.<br />
The “Removable Disk” icon should appear.<br />
4. Double click the “Removable Disk” icon.<br />
5. Double click the “DCIM” folder icon.<br />
6. Double click the “100GOPRO” icon.<br />
7. Your photo and video files will be in the “100GOPRO” folder.<br />
8. Copy/Move files to the computers hard drive and then select video/photo<br />
for playback from desktop/hard drive.<br />
On a Mac:<br />
1. Plug the camera into your Mac with the included USB cable.<br />
2. Turn on camera on by pressing .<br />
3. The Mac will recognize the camera as an external hard drive. Double click<br />
the icon for the external drive to access your video and photo files.<br />
4. Copy/Move files to the computers hard drive and then select video/photo<br />
for playback from desktop/hard drive.<br />
IMPORTANT TIP FOR MAC USERS: When deleting files from your SD card you<br />
must empty the trash before removing the SD card or unplugging the camera.<br />
If you do not empty your trash the photo and video files will not be completely<br />
erased from your SD card.<br />
transferring files<br />
to view Photos and Video on a TV or <strong>HD</strong>TV<br />
Using an <strong>HD</strong>MI cable (not included), plug your <strong>HD</strong> HERO2 camera into your TV. You<br />
can also use the composite port and a composite cable (not included).<br />
Once connected:<br />
With the camera powered ON, navigate to the Playback Setting<br />
using . Press to enter the Playback menu.<br />
Within the playback menu, use to toggle through the menu list. Use to<br />
select each item. The menu list options are:<br />
Video: Displays all video files on the SD card. During playback, volume<br />
adjustment can be made via the TV. Playback will begin automatically.<br />
Photo: Displays all photo files on the SD card.<br />
All (Default): Displays all photo and video files on the SD card.<br />
Exit: Exits the playback menu.<br />
PRO TIP:<br />
To Forward, press<br />
To Fast Forward, hold down<br />
To Reverse, press<br />
To Rewind, hold down<br />
To Exit playback at anytime, eject the To Navigate back to the menu list while in playback,<br />
<strong>HD</strong>MI/Composite cable from the camera hold down both and together for 3 seconds<br />
NOTE: Make sure your camera is set to the correct NTSC (North America)<br />
or PAL (outside North America) video settings or your camera will not work<br />
properly with your TV. You must also have an SD card with recorded information<br />
loaded into your <strong>HD</strong> HERO2 camera. If there are no video or photo files stored<br />
on your SD card you will see a No Video, No Photo, or No Files message.<br />
‣ See NTSC/PAL for more information.<br />
32 33
Battery Life<br />
Fully charged, the <strong>HD</strong> HERO2’s battery will provide approximately 2.5 hours<br />
of video recording time in 720p30. The LCD displays the battery meter in<br />
every camera mode so that you can monitor how much power remains in the<br />
battery. The battery meter will blink when the battery drops below 20% charge.<br />
Spare batteries and additional charging accessories are available at gopro.com<br />
and from authorized <strong>GoPro</strong> resellers.<br />
CHARGING BATTERY<br />
The LCD’s battery icon will blink when the battery drops below 20%. If you are<br />
recording when the battery reaches 0%, the camera will save the file and turn OFF.<br />
To charge the battery:<br />
Using the Camera While Charging<br />
Battery Life<br />
You can charge the camera’s battery while recording video or taking photos.<br />
Simply plug the camera into any USB-based wall, car, or phone charger to<br />
charge the <strong>HD</strong> HERO2 camera while recording video or photos. It is best to use<br />
<strong>GoPro</strong>’s 1 amp (1000mAh) charger for maximum charging performance while<br />
the camera is in use.<br />
Removing the Battery From the Camera<br />
The <strong>HD</strong> HERO2 battery is designed to have a very tight fit to maximize reliability in<br />
high vibration activities. In most cases it is not necessary to remove the battery.<br />
To remove the battery:<br />
1. Connect the camera to a computer<br />
or USB power supply with the<br />
included USB cable.<br />
2. LED remains ON while the battery<br />
is charging.<br />
3. LED will turn OFF when the battery<br />
is fully charged.<br />
The camera’s battery will charge to 80% charge in 1-2 hours and 100% in four<br />
hours (depending on USB power output). It will charge to 80% in one hour and<br />
100% in two hours when using <strong>GoPro</strong>’s 1000mAh USB-compatible wall or car<br />
charger. Learn more about <strong>GoPro</strong>’s 1000mAh chargers at gopro.com.<br />
1. Remove the battery door by placing your thumb on the indentation in the<br />
battery door (on the bottom of the camera) and firmly pressing it away from<br />
the camera.<br />
2. Squeeze both sides of the battery and pull it out of the camera. It is<br />
intentionally not easy to do, but the battery will come out.<br />
34 35
IMPORTANT WARNING MESSAGES<br />
“NO SD” message on the LCD<br />
“NO SD” indicates that there is no SD card present. The <strong>HD</strong> HERO2<br />
requires an SD card to record video or take photos.<br />
‣ See STORAGE/SD CARDS for more information.<br />
Assembling the Camera<br />
The <strong>HD</strong> HERO2 camera housing is waterproof to 197 feet / 60 meters and<br />
constructed of polycarbonate and stainless steel for ultimate durability.<br />
To assemble the camera into the housing:<br />
camera assembly<br />
File Repair Icon on the LCD<br />
If you see the File Repair icon, your video file was corrupted during<br />
recording for some reason. Press any button and the camera will<br />
repair the file.<br />
Temperature Warning Icon on the LCD<br />
The Temperature Warning icon will appear on the LCD when the<br />
camera has become too hot and needs to cool down. Simply let it sit<br />
and cool before attempting to use it again. Your camera will not allow<br />
itself to overheat —so do not worry, as no damage has occurred.<br />
1. Place the camera into the housing.<br />
2. Close the housing door.<br />
3. Hook latch under groove on the backdoor.<br />
4. Push down on thumb latch until it locks into place.<br />
36 37
camera assembly<br />
Your <strong>HD</strong> HERO2 housing comes with two types of backdoors—waterproof and<br />
skeleton. To swap out a backdoor, click the door off its hinge. To attach the other<br />
backdoor, click it back on the hinge.<br />
sWApping housing doors<br />
camera assembly<br />
Your <strong>HD</strong> HERO2 housing comes with two types of backdoors—waterproof<br />
and skeleton.<br />
To swap out a backdoor:<br />
Skeleton Backdoor<br />
The Skeleton backdoor (non-waterproof)<br />
provides better sound quality by allowing<br />
more sound to reach the camera’s<br />
microphone. It also reduces wind noise<br />
at speeds up to 100mph when mounted<br />
on helmets, motorcycles, bike and other<br />
fast-moving vehicles. Use this backdoor<br />
only when water damage is not a risk.<br />
This backdoor is also recommended for<br />
use inside vehicles.<br />
Waterproof Backdoor<br />
The waterproof backdoor makes<br />
the housing waterproof to 197<br />
feet / 60 meters. Use this door<br />
when you need to protect the<br />
camera from water and other<br />
environmental hazards.<br />
1. Open the backdoor of the housing so that it is hanging downwards.<br />
2. Pull downwards on the backdoor until it snaps free from the hinge.<br />
3. Line up replacement backdoor into the hinge opening.<br />
4. Push upwards on the backdoor until it clicks into place.<br />
PRO<br />
TIP:<br />
Apply RAIN-X or a similar anti-beading solution to the housing<br />
lens to prevent water-spots from forming when using your<br />
camera in rain or water. When RAIN-X is not available,<br />
periodically licking your lens is a good backup solution.<br />
38 39
camera assembly<br />
Preventing Water Damage to Your Camera<br />
The rubber seal that lines the camera housing forms a waterproof barrier that<br />
protects your <strong>HD</strong> HERO2 in wet and underwater conditions. You must keep<br />
the rubber seal of the camera housing clean. A single hair or grain of sand can<br />
cause a leak.<br />
Attaching your camera to Mounts<br />
camera assembly<br />
To attach your <strong>HD</strong> HERO2 camera to a mount, you will need an attachment<br />
buckle, thumb screw and other hardware depending on the mount you are<br />
using. For more information on mounts, visit gopro.com/support.<br />
After every use in salt water, you will need to rinse the outside of the housing<br />
with non-salt water and dry. Not doing this can eventually cause corrosion of<br />
the hinge pin and salt buildup in seal, which can cause failure.<br />
To clean the seal, rinse it in fresh water and shake it dry (drying with a cloth can<br />
cause lint to compromise the seal). Re-install it into the grooves in the backdoor<br />
of the housing.<br />
Attachment<br />
Buckle<br />
Thumb Screw Waterhousing Complete Unit<br />
WARNING: Failure to follow these steps each time you use your <strong>HD</strong> HERO2 can<br />
result in leaks that damage or destroy your camera. Your warranty does not<br />
cover water damage resulting from user error.<br />
Using Curved or Flat Adhesive Mounts<br />
The curved and flat adhesive mounts make it easy to attach the camera to<br />
curved and flat surfaces of helmets, vehicles and gear. With the attachment<br />
buckle the assembled camera housing can be clicked ON / OFF the secured<br />
adhesive mounts.<br />
Flat Adhesive Mount<br />
Curved Adhesive Mount<br />
40 41
camera assembly<br />
PRO TIPS: Attaching Adhesive Mounts<br />
Clean the surface first. Be sure to carefully clean the surface where you will<br />
be attaching your adhesive mount. Wax, oil, dirt and other debris will reduce<br />
adhesion, which can result in a weak bond and the risk of losing your camera<br />
if the bond fails.<br />
Only attach a mount in room temperature conditions. The mount’s adhesive<br />
will not bond properly if applied in cold or damp environments, though it is<br />
entirely safe to use in cold conditions. For best results, attach your mount 24<br />
hours before use in cold environments to ensure the strongest hold.<br />
Surfaces. The adhesive mounts can only be mounted to a smooth surface.<br />
Porous or textured surfaces will not provide for a proper bond. When<br />
applying the mount, firmly press mount into place ensuring full contact over<br />
entire surface area. Allow at least 24 hours for full bond strength.<br />
Drying time. For best results, attach your mount at a minimum of 24 hrs<br />
before use.<br />
FCC STATEMENT<br />
Modifications not approved by the party responsible for compliance could void<br />
user’s authority to operate the equipment. This equipment has been tested and<br />
found to comply with the limits for Class B digital device, pursuant to part 15 of<br />
the FCC Rules. These limits are designed to provide reasonable protection against<br />
harmful interference in a residential installation. This equipment generates and can<br />
radiate radio frequency energy and, if not installed and used in accordance with the<br />
instructions, may cause harmful interference to radio or television reception, which<br />
can be determined by turning the equipment on and off.<br />
The user is encouraged to try to correct the interference by one or more of the<br />
following measures:<br />
• Reorient or relocate the receiving antenna.<br />
• Increase the separation between the equipment and the receiver.<br />
• Connect the equipment into an outlet on a circuit different from that to<br />
which the receiver is connected.<br />
• Consult the dealer or an experienced radio/TV technician for help.<br />
locking plug<br />
This locking plug is designed for high impact sports like surfing<br />
or skiing where significant impact can occur. The locking plug<br />
locks the attachment buckle’s fingers in place, helping to prevent<br />
accidental housing release from mounts.<br />
42 43
Warranty<br />
This product is guaranteed against manufacturing defects for one (1) year<br />
from the original date of purchase. <strong>GoPro</strong>’s sole obligation in the event of such<br />
defects during this period is to repair or replace the defective part or product<br />
with a comparable part or product at <strong>GoPro</strong>’s sole discretion. Except for such<br />
replacement, the sale, or other handling of this product is without warranty,<br />
condition or other liability even though the defect or loss is caused by negligence<br />
or other fault. Damage resulting from use, accident, or normal wear and tear<br />
is not covered by this or any warranty. <strong>GoPro</strong> assumes no liability for any<br />
accident, injury, death, loss, or other claim related to or resulting from the use<br />
of this product. In no event shall <strong>GoPro</strong> be liable for incidental or consequential<br />
damages relating to or resulting from the use of this product or any of its parts.<br />
Because of possible user resealing error, this product is not warranted against<br />
water housing leakage or any resulting damage.<br />
Customer Support<br />
<strong>GoPro</strong> is dedicated to providing you with the best<br />
possible service. To contact <strong>GoPro</strong>’s Customer<br />
Support Team, visit: gopro.com/support<br />
Visit gopro.com for more information.<br />
44 45