Hyundai AH-3110 PVR User Manual - Freeviewshop.co.nz
Hyundai AH-3110 PVR User Manual - Freeviewshop.co.nz
Hyundai AH-3110 PVR User Manual - Freeviewshop.co.nz

Create successful ePaper yourself
Turn your PDF publications into a flip-book with our unique Google optimized e-Paper software.
Contents<br />
1. Introduction 4<br />
1.1 Overview 4<br />
1.2 Main Features 4<br />
2. Safety/Precaution 5<br />
2.1 Safety 5<br />
2.2 Precautions 6<br />
3. Check Points Before Use 7<br />
3.1 Acessories 7<br />
3.2 The Satellite dish 7<br />
4. Controls/Functions 8<br />
4.1 Front Panel 8<br />
4.2 VFD Display 9<br />
4.3 Rear Panel 10<br />
4.4 Remote Control Unit 11<br />
5. Using the Remote Control 13<br />
5.1 Batteries 13<br />
5.2 Range of Operation 13<br />
6. How To Connect 14<br />
7. Operation 17<br />
7.1 SERVICE 17<br />
7.1.1 TIME SHIFT 17<br />
7.1.2 SUBTITLE 17<br />
7.1.3 OSD(On Screen Display) LANGUAGE 18<br />
7.1.4 OSD TRANSPARENCY 18<br />
7.1.5 OSD TIME ADJUST 18<br />
7.1.6 SLEEP 18<br />
7.1.7 TIMER 19<br />
7.1.8 CI MODULE 20<br />
1. RECEIVING SCRAMBLE CHANNEL 20<br />
2. INSERT CA Module(s) and Smartcard(s) 21<br />
7.2 SETUP 22<br />
7.2.1 VIDEO 22<br />
1. DISPLAY TYPE 22<br />
2. DISPLAY MODE 23<br />
Contents<br />
1
Contents<br />
Contents<br />
3. ASPECT RATIO 23<br />
4. SCREEN MODE 23<br />
5. SCART OUT 24<br />
6. FRAME RATE 24<br />
7.2.2 AUDIO 25<br />
1. DIGITAL AUDIO 25<br />
2. MODE 25<br />
7.2.3 TERRESTRIAL 26<br />
1. AUTO SCAN 26<br />
2. MANUAL SCAN 26<br />
3. ANTENNA 5V 26<br />
7.2.4 SATELLITE 27<br />
1. LNB 27<br />
2. POSITIONER 30<br />
3.EDIT/SCAN 32<br />
7.2.5 SYSTEM 35<br />
1.TIME ADJUST 35<br />
2.FACTORY DEFAULT 36<br />
3.UPGRADE 36<br />
4.EXPORT/IMPORT CH LIST 37<br />
5.FIRMWARE VERSION 37<br />
7.3 PARENTAL GUIDE 38<br />
7.3.1 DVB AGE-BASED RATING 38<br />
7.3.2 USE PASSWORD 39<br />
7.3.3 MODIFY PASSWORD 39<br />
7.4 CONTENTS 40<br />
7.4.1 VIDEO LIST 40<br />
1.Set keep(Press RED) 40<br />
2.Rename(Press GREEN) 40<br />
3.Imageview/Listview(Press YELLOW) 41<br />
4.Delete(Press BLUE) 41<br />
5.Lock(Press ORANGE) 41<br />
6.Preview(Press WHITE) 41<br />
7.Start Playback(Press OK) 42<br />
8.Return(Press MENU) 42<br />
7.4.2 FOLDER NAVIGATOR 43<br />
1.Sort(Press RED) 43<br />
2.Rename(Press GREEN) 43<br />
3.Send(Press YELLOW) 44<br />
4.Delete(Press BLUE) 44<br />
5.Picture 44<br />
6.Music 45<br />
7.4.3 HDD INITIALIZATION 46<br />
7.5 PROGRAM LIST 47<br />
7.5.1 TV PROGRAM LIST 47<br />
1.TUNE 47<br />
2.FIND 48<br />
3.RETURN 48<br />
7.5.2 RADIO PROGRAM LIST 48<br />
7.5.3 FAVORITE PROGRAM LIST 49<br />
7.5.4 PROGRAM GUIDE 50<br />
7.6 EDIT PROGRAM 51<br />
7.6.1 EDIT TV PROGRAM 51<br />
1.Favorite(Press RED) 51<br />
2.Rename(Press GREEN) 52<br />
3.Skip(Press YELLOW) 52<br />
4.Delete(Press BLUE) 52<br />
5.Lock(Press ORANGE) 53<br />
6.Move(Press WHITE) 53<br />
7.Turn(Press ) 54<br />
8.Return(Press MENU) 54<br />
7.6.2 EDIT RADIO PROGRAM 54<br />
7.7 <strong>PVR</strong>(Personal Video Re<strong>co</strong>rd) 55<br />
7.7.1 RECORD 55<br />
1. Re<strong>co</strong>rd( ) 55<br />
2. Stop( ) 56<br />
7.7.2 TIME SHIFT 57<br />
7.7.3 PLAYBACK 58<br />
8. Trouble Shooting 60<br />
9. Specifications 61<br />
2 Contents<br />
Contents<br />
3
Introduction<br />
Safety/Precaution<br />
1.1 Overview<br />
This receiver is designed for DVB-S/S2 and DVB-T signals reception. Enjoy the wide choice of<br />
more than 8,000 different channels, broadcasting a large range of culture, sports, cinema,<br />
news, events, etc. This receiver is a technical masterpiece, assembled with the high quality<br />
electronic parts.<br />
2.1 Safety<br />
Be sure to read the user's manual<br />
before starting the operation of the<br />
unit.<br />
Do not touch the power <strong>co</strong>rd with wet<br />
hands as it may cause electric shock.<br />
1.2 Main Features<br />
Fully <strong>co</strong>mpliant with MPEG-2, H.264/AAC and DVB standards<br />
Combined Reception for DVB-S/S2 and DVB-T Signals<br />
Pre-programmed for Optus D1<br />
Integrated <strong>co</strong>mmon interface<br />
Multi-access with twin card reader for CI<br />
<strong>User</strong> friendly operating Menu and On-Screen Graphic Menu. (True <strong>co</strong>lor)<br />
Easy to use EPG(Electronic Program Guide) on screen<br />
Age protection lock function<br />
Tele-text en<strong>co</strong>ding<br />
Software downloading via USB<br />
DiSEqC 1.2 and Usals(1.3)<br />
MP3 and JPEG player over USB port.<br />
Manufactured under license from Dolby Laboratories “Dolby” and the double-D symbol<br />
are trademarks of Dolby Laboratories.<br />
Never open the <strong>co</strong>ver. It is very<br />
dangerous to touch inside of the unit<br />
due to possible electric shock.<br />
When you do not use this unit for a<br />
long time, make sure that power <strong>co</strong>rd<br />
is pulled out from the outlet. Also do<br />
not use a damaged power <strong>co</strong>rd as it<br />
may cause fire or electric shock.<br />
Place the unit in a well ventilated and<br />
no-heat environment.<br />
A professional installation is required.<br />
If reception is interrupted, <strong>co</strong>ntact your<br />
local service centre.<br />
4 Introduction<br />
Safety/Precaution<br />
5
Safety/Precaution<br />
Check Points before Use<br />
2.2 Precautions<br />
When installing the unit<br />
3.1 Accessories<br />
Accessories of the Unit<br />
Install the unit horizontally. Uneven<br />
installation may cause the unit to be<br />
damaged.<br />
Do not put heavy items such as TV on<br />
the unit. This may cause damage to<br />
the unit.<br />
<strong>User</strong>'s manual : 1 Remote <strong>co</strong>ntrol : 1<br />
<strong>User</strong>'s manual<br />
Batteries (AAA type) : 2<br />
RCA video/audio cable : 1<br />
Do not install the unit:<br />
Where it is subjected to vibrations<br />
Where it is exposed to direct sunlight<br />
Where there is humidity<br />
Where the temperature is too high or too low.<br />
Where there is no ventilation<br />
Moving the unit to a hot area from a<br />
<strong>co</strong>ld one will cause <strong>co</strong>ndensation.<br />
Do not operate the unit for one or two<br />
hours or until it has dried <strong>co</strong>mpletely.<br />
Optional accessory<br />
For MAINS powered apparatus and for apparatus producing internal voltages greater<br />
than 35V (peak) a.c. or d.c., having no protection against splashing water ac<strong>co</strong>rding to<br />
annex A, the instructions for use shall state that the apparatus shall not be exposed to<br />
dripping or splashing and that no objects filled with liquids, such as vases, shall be<br />
placed on the apparatus.<br />
HDMI cable : 1<br />
A HDMI cable an optional extra.<br />
3.2 The Satellite dish<br />
If any accessories listed above are<br />
missing, <strong>co</strong>ntact the sales<br />
representative where you<br />
purchased this unit.<br />
If you need optional accessory you<br />
can buy it.<br />
Your dish should be properly installed and azimuth and elevation must be precisely set up.<br />
This unit is working with DiSEqC on a <strong>co</strong>mpatible antenna positioner.<br />
Ask your dealer for more information.<br />
6 Safety/Precaution<br />
Check Points Before Use<br />
7
Controls/Functions<br />
Controls/Functions<br />
4.1 Front Panel<br />
4.2 VFD Display<br />
2<br />
3 4 7 6 11 12<br />
1<br />
3 4 5 6<br />
1 3 5 8 9 10<br />
13<br />
2 7 8<br />
1<br />
2<br />
POWER ON/OFF : To turn the receiver on/off.<br />
BLUE LED : This LED is illuminated blue to indicate that the STB is in standby mode, and off<br />
to indicate that the STB is in power on mode.<br />
3<br />
4<br />
REMOTE SENSOR : Receives signal from remote <strong>co</strong>ntrol.<br />
VFD Display : Displays information such as time, program number,name,and etc. For<br />
more information refer to page10.<br />
5 - 6 VOLUME : To adjust the volume level or change the value.<br />
7 - 8 CHANNEL : To change channel or move up & down on the application screen.<br />
9 MENU : To launch or exit menu application.<br />
10 SELECT : To activate a highlighted item or go to next level on hypertext menu or <strong>co</strong>nfirm<br />
the user’s action.<br />
11 USB(HOST) : To update program using USB-Storage.<br />
12 Smart Card Reader(OPTION) : Insert smart card for encrypted channel access.<br />
13 PCMCIA : To receive pay-TV channel, you need a CA-Module and smart card from the<br />
service provider.<br />
1<br />
2<br />
3<br />
4<br />
5<br />
6<br />
7<br />
8<br />
Standby LED : Flashing red in standby mode and no light in operation mode<br />
Remote Sensor LED : Flashing orange when it perceives the infrared signal from the<br />
Remote <strong>co</strong>ntrol<br />
PIC : Active when searching picture files stored in USB<br />
USB : Active when USB <strong>co</strong>nneting<br />
RADIO / MP3 : Active when listening to Radio channel or playing MP3 file<br />
HD : Acive when watching HD channel<br />
Information : Displays various information including channel Name, Date, Time, etc<br />
REC : Active when Re<strong>co</strong>rding<br />
8 Controls/Functions<br />
Controls/Functions<br />
9
Controls/Functions<br />
Controls/Functions<br />
4.3 Rear Panel<br />
1 3 5 8 11 14 18 19<br />
6 9<br />
2 4 7 10 13 12 15 16 17 20<br />
NO NAME CONNECTOR FUNCTION<br />
1 TV ANT IN 169-2 FEMALE Terrestrial stream input from aerial antenna to<br />
digital tuner<br />
2 LOOP OUT 169-2 MALE Terrestrial stream loop through out from digital<br />
tuner<br />
3 LNB INPUT 169-24 FEMALE IF input from LNB to digital tuner<br />
4 LOOP OUT 169-24 FEMALE IF loop through output form digital tuner<br />
5 Component Y RCA Cinch Component video Y<br />
6 Component Pb RCA Cinch Component video Pb<br />
7 Component Pr RCA Cinch Component video Pr<br />
8 Video RCA Cinch Composite video output<br />
9 Audio L RCA Cinch Composite left audio output<br />
10 Audio R RCA Cinch Composite right audio output<br />
11 Digital audio RCA Cinch Digital audio output<br />
12 Audio L RCA Cinch Composite left audio output<br />
13 Audio R RCA Cinch Composite right audio output<br />
14 TV SCART SCART SCART output to TV<br />
15 VCR SCART SCART SCART output to VCR, analog receiver or Hi-Fi<br />
16 Digital audio Optical Digital audio output<br />
17 HDMI HDMI <strong>co</strong>nnector HDMI video/audio output<br />
18 VGA D-SUB 15P VGA video output<br />
19 RS-232C DB-9 Low speed serial port<br />
20 USB(Host) USB Connect USB storage read/write<br />
4.4 Remote Control Unit<br />
1<br />
2<br />
3<br />
6<br />
4<br />
5<br />
7<br />
8<br />
9<br />
10<br />
13<br />
11<br />
12<br />
16 17<br />
14<br />
15<br />
18<br />
19<br />
1<br />
2<br />
3<br />
4<br />
5<br />
6<br />
7<br />
8<br />
9<br />
10<br />
11<br />
12<br />
13<br />
14<br />
15<br />
16<br />
17<br />
18<br />
19<br />
POWER : To turn the receiver on or standby<br />
mode.<br />
MUTE : To turn the sound on/off.<br />
V-FORMAT : To select the Resolution.<br />
When TV type is PAL, Resolution changes to<br />
1080i/720p /576p/576i. When TV type is NTSC,<br />
Resolution changes to 1080i/720p/480p/480i.<br />
TV/RADIO : To switch between TV and radio<br />
channels.<br />
TV : This key is not available.<br />
STB : To select the Screen Mode among “PAN<br />
AND SCAN”,”LETTER BOX” or “IGNORE”.<br />
Numeric Buttons(0~9) : To select channels /<br />
input channel numbers.<br />
SLEEP : To turn off the receiver automatically.<br />
(You can select from 5 to 90 minutes)<br />
AUX : To select the output mode of SCART<br />
<strong>co</strong>nnector.<br />
FAV(red button) : To display favorite group list<br />
RECALL(green button) : To return to the<br />
previous channel.<br />
AUDIO(yellow button) : To change the audio<br />
track.<br />
RATIO(blue button) : To change the Aspect<br />
Ratio to 4:3 or 16:9.<br />
TIMER(orange button) : To turn the power<br />
on/off automatically at the set time.<br />
TEXT(white button) : To see teletext service<br />
data.<br />
CH+/CH- : To change the channel.<br />
VOL+/VOL- : To adjust the volume.<br />
EPG(Electronic Program Guide) : To display<br />
Program Guide Menu.<br />
MENU : To enter/exit the main menu.<br />
10 Controls/Functions<br />
Controls/Functions<br />
11
VOL<br />
VOL<br />
Controls/Functions<br />
Using the Remote Control<br />
20<br />
22<br />
25<br />
24<br />
28<br />
29<br />
31<br />
32<br />
35<br />
36<br />
4.4 Remote Control Unit<br />
21<br />
23<br />
26<br />
27<br />
30<br />
34<br />
33<br />
38<br />
37<br />
CH<br />
CH<br />
20 / / : To move the cursor<br />
up/down or left/right To change the value of a<br />
selected item.<br />
21 OK : To select an item or to <strong>co</strong>nfirm a menu.<br />
To choose a channel from the channel list<br />
mode.<br />
22 INFO : To view parameters of current channel.<br />
23 EXIT : To return to previous status or menu. To<br />
exit from the menu.<br />
24 RECORD( ) : To start re<strong>co</strong>rding on external<br />
Hard Disk Drive.<br />
25 STOP( ) : To stop playback/to stop<br />
re<strong>co</strong>rding.<br />
26 PLAY( ) : To play the re<strong>co</strong>rded program.<br />
27 PAUSE( ) : To pause the playback.<br />
28 REWIND( ) : To rewind a re<strong>co</strong>rded program<br />
in normal or fast speed (x1, x2, x5, x20, x50,<br />
x300 times).<br />
29 FAST-FORWARD( ) : To fast forward a<br />
re<strong>co</strong>rded program in normal or fast speed<br />
(x2, x5, x20, x50, x300 times).<br />
30 SKIP( / ) : To jump forward or backward<br />
in re<strong>co</strong>rded program.<br />
31 BOOKMARK : To set a bookmark position<br />
(viewing point) on a re<strong>co</strong>rded programs.<br />
32 REPEAT : To playback specific part<br />
repeatedly.<br />
33 P.LIST : To show list of re<strong>co</strong>rded programs.<br />
34 JUMP : To jump to the next bookmark when<br />
during playback.)<br />
35 T-SHIFT : To start/stop time shift function.<br />
36 SUBTITLE : To enable or disable subtitles.<br />
37 ZOOM : To enlarge or zoom into the screen.<br />
38 F1 : This key is unavailable.(Reserved key)<br />
5.1 Batteries<br />
How to insert batteries<br />
Open the <strong>co</strong>ver.<br />
Insert two AAA type batteries(1.5V) to be aligned with appropriate +/-<br />
polarity.<br />
Close the <strong>co</strong>ver <strong>co</strong>mpletely.<br />
When to replace batteries<br />
If the Remote <strong>co</strong>ntrol doesn’t operate as well,it indicates batteries are<br />
almost out.<br />
Replace both batteries.<br />
How to replace batteries<br />
Check +/- polarities and insert batteries to be aligned with appropriate<br />
+/- polarity.<br />
Even if old and new batteries are the same type, do not use batteries<br />
from different makers.<br />
Accident prevention<br />
Do not recharge, heat or disassemble the battery. Do not cross +/-<br />
polarities.<br />
If remote <strong>co</strong>ntroller is not going to be used for a long time, take the<br />
batteries out.<br />
5.2 Range of Operation<br />
The remote <strong>co</strong>ntroller can be detected by the receiver within 30<br />
degrees to the left or right.<br />
The transmission distance of the remote <strong>co</strong>ntrol is 7m in direct line of<br />
sight.<br />
Notes :<br />
When the remote <strong>co</strong>ntrol is not operative<br />
Replace batteries with new ones and check AC power plug on the<br />
receiver.<br />
Abnormal operation<br />
Ensure that other products which might cause interference are placed<br />
further away from the receiver.<br />
Notes for handling<br />
If exposed to heat or water, the main body and the remote <strong>co</strong>ntrol may<br />
be damaged, so be careful.<br />
12 Controls/Functions<br />
Using the Remote Control<br />
13
How to Connect<br />
How to Connect<br />
6.1 When Connecting IRD to the Antenna<br />
6.3 When Connecting IRD to Digital TV with SCART Cable<br />
6.2 When Connecting IRD to Digital TV with AV Cable<br />
6.4 When Conneting IRD to Digital TV with Component Cable<br />
14 How To Connect<br />
How To Connect<br />
15
How to Connect<br />
Operation<br />
6.5 When Connecting IRD to Digital TV with HDMI or VGA Cable<br />
7.1 Service<br />
L<br />
R<br />
1. TIME SHIFT<br />
MENU>SERVICE>TIME SHIFT or Press T-SHIFT button.<br />
6.6 When Conneting IRD to Audio System<br />
You can set the Time Shift among “ON”, “OFF” or “CLEAR”. You can also press T-SHIFT button<br />
to turn on/off time shift. “CLEAR” will be initializing to time shift.<br />
Caution<br />
1. In order for time shift function to work properly, current local time should be set<br />
<strong>co</strong>rrectly.<br />
2. Maximum re<strong>co</strong>rding time is 90minutes, so you can re<strong>co</strong>rd only current 90minutes.<br />
3. Do not remove the USB cable or turn the power off suddenly while HDD (Hard Disk<br />
Drive) is running. It might cause wrong operation.<br />
2. SUBTITLE<br />
MENU>SERVICE>SUBTITLE or Press Subtitle button<br />
You can set the subtitle among “TXT”, “DVB” or “Off”. You can also press subtitle button.<br />
It is available only if the channel providers support this function.<br />
16 How To Connect<br />
Operation<br />
17
Operation<br />
Operation<br />
7.1 Service<br />
3. OSD (On Screen Display) LANGUAGE<br />
MENU>SERVICE>OSD Language<br />
You can change the OSD language. This receiver supports 14 Languages. Press<br />
<strong>co</strong>nfirm.<br />
to<br />
7.1 Service<br />
7. TIMER<br />
You can pre-set on/off time of your receiver. You can save 10 different timers.<br />
During your absence, you can re<strong>co</strong>rd programs on your USB-HDD or VCR. First, select a<br />
timer. Then go through these procedures.<br />
4. OSD TRANSPARENCY<br />
You can set the transparency of OSD. When you activate this option, menu screen will be<br />
transparent.<br />
5. OSD TIME ADJUST<br />
You can set the OSD maintenance time. This option lets you set up how long the<br />
information bar will remain on the screen. (3/5/10/30 sec or 5min or never)<br />
6. SLEEP<br />
You can set the sleep timer. you can set your receiver to turn-off automatically at the set<br />
time. (5 to 90 min)<br />
Program : Press , and “Select Program” window will pop up. Select a channel you<br />
CH<br />
CH<br />
want using / buttons and press .<br />
Start/Stop Time : You can set the start and stop time by pressing numerical buttons.<br />
(date/month/year)<br />
Type : You can set timer type among “RECORD (VCR)”, “RECORD(USB HDD)” or “WAKE<br />
UP”.<br />
When you select the “RECORD(USB HDD)”, KEEP TIME option will be activated.<br />
Keep Time : You can set the keep time among “24hour”,”48hour”,”1week”,”1month” or<br />
“Forever”<br />
It is activated only when TYPE is set to Re<strong>co</strong>rd (USB HDD)<br />
You can keep programs until the date you set in “Keep time”, but the date<br />
passes, the programs will be deleted automatically.<br />
Mode : You can set timer option among “ONCE”, “DAILY”, or “WEEKLY”.<br />
If you select “WEEKLY”, you can select specific days of the week.<br />
Note : 1. If you haven’t set the local time, this function cannot work properly.<br />
2. Even if the receiver is in standby mode, all scheduled timer will proceed.<br />
The scheduled timer is done, the receiver will go to standby mode<br />
automatically.<br />
3. If you want to re<strong>co</strong>rd on your VCR , you must set the re<strong>co</strong>rding time for the<br />
VCR seperately.<br />
18 Operation<br />
Operation<br />
19
Operation<br />
Operation<br />
7.1 Service<br />
8. CI MODULE<br />
You can check the status of CAM and smart card inserted in their slots.<br />
7.1 Service<br />
Note : 1. Insert the CAM fully into the slot so that the arrow marked on the CAM faces<br />
upwards and inwards.<br />
2. Insert the smart card fully into the CAM so that the microchip (gold <strong>co</strong>lor) faces<br />
upwards and inwards.<br />
If you want detailed information of the selected CAM, select slot number 1 or slot number<br />
CH<br />
CH<br />
2 with or and press button. Proceed with further instructions displayed on the<br />
screen, depending on the CAMs in use.<br />
1) RECEIVING SCRAMBLE CHANNEL<br />
With a DVB COMMON INTERFACE <strong>co</strong>mpatible CAM (Conditional Access Module) and a<br />
Smart card, you can receive relevant scrambled channels and/or encrypted channels.<br />
2) INSERT CA Module(s) and Smartcard(s)<br />
To receive pay-TV channels, you need a CA Module and a Smart card of your preference<br />
from the service provider (program distributor). If you receive services from more than one<br />
service provider, you need to change to a different smart card or even a different CA<br />
Module.<br />
Since smart card is <strong>co</strong>nnected to a single service provider, limited channels will be<br />
available. Without a CA Module and a smart card, you can only watch ‘Free-to-Air’<br />
programs.<br />
PIN-Code<br />
These cards are loaded with a 4-digit <strong>co</strong>de, or PIN <strong>co</strong>de (Personal Identification Number).<br />
Normally PIN <strong>co</strong>de is set to ‘0000’ or ‘1234’. PIN <strong>co</strong>de is necessary for the additional<br />
service offered by the service provider.<br />
Insert a CAM into one of the slots of your receiver.(You can insert two CAMs at the same<br />
time)<br />
The message, ‘PLUGGED CAM’, will appear on the screen.<br />
After the message, ‘PLUGGED CAM’, has disappeared, you can select the channel you<br />
want.<br />
20 Operation<br />
Operation<br />
21
Operation<br />
Operation<br />
7.2 Setup<br />
When you enter the “SETUP” menu, you will see the picture as illustrated below. You need to<br />
type in a password in order to setup. (If you would like to change the password, please refer<br />
to 7.4.3. After entering the password, press .<br />
Note : Default password is ‘0000’<br />
7.2 Setup<br />
2) DISPLAY MODE<br />
CH<br />
CH<br />
You can change the video resolution. Press / buttons to change the display<br />
mode, and press to select.<br />
Note : PAL - 1080i/720p/576p/576i , NTSC - 1080i/720p/480p/480i (or press ‘V-<br />
FORMAT’ button while watching the channel)<br />
CH<br />
CH<br />
Press / buttons to select Setup options and press button.<br />
1. VIDEO<br />
MENU >SETUP>VIDEO<br />
3) ASPECT RATIO<br />
You can change the aspect ratio ac<strong>co</strong>rding to your TV. Press / buttons to change<br />
among three options and press button to <strong>co</strong>nfirm<br />
4 X 3 When your TV is 4X3<br />
16 X 9 When your TV is 16X9<br />
AUTO This option automatically sets the aspect ratio<br />
4) SCREEN MODE<br />
You can change the screen mode. Press / buttons to move parameter and press<br />
button to select an item.<br />
For example:<br />
1) DISPLAY TYPE<br />
You can set <strong>co</strong>mponent video output mode. Press / buttons to choose between<br />
“COMPONENT” or “RGB”, and press button to select.<br />
22 Operation<br />
Operation<br />
23
Operation<br />
Operation<br />
CH<br />
CH<br />
7.2 Setup<br />
5) SCART OUT<br />
You can change the Scart video output mode. Press / buttons to select between<br />
options below and press .<br />
7.2 Setup<br />
2. AUDIO<br />
MENU >SETUP>AUDIO<br />
CVBS Video out signal from TV, AUX scart will be <strong>co</strong>mposite.<br />
Y/C Video out signal from TV, AUX scart will be Y, C.<br />
6) FRAME RATE<br />
You can change the video type. Press / buttons to select and Press <br />
Auto<br />
PAL<br />
NTSC<br />
When your TV is <strong>co</strong>mpatible with NTSC/PAL dual mode.<br />
When your TV is only for PAL reception. Regardless of the satellite signal, it<br />
will display in PAL format. The resolution can change 1080i / 720p / 576P/576i<br />
When your TV is only for NTSC reception. Regardless of the satellite signal, it will<br />
display in NTSC format. The resolution can change 1080i / 720p / 480p/480i<br />
Note : If the satellite signal and your TV type are mismatched, the TV picture may be<br />
distorted. Even in this case, MENU will be displayed as normal. (e.g. When you<br />
receive PAL satellite signal with NTSC TV type setting or vice versa)<br />
1) DIGITAL AUDIO<br />
CH<br />
CH<br />
You can enable Dolby Digital Audio. Press / buttons to select and press<br />
button.<br />
DOLBY DIGITAL<br />
PCM<br />
Dolby digital (AC-3) output enable<br />
Dolby digital (AC-3) output disable<br />
2) MODE<br />
You can set up Analog Audio. Press / buttons to select and press button.<br />
AUDIO LEFT<br />
AUDIO RIGHT<br />
STEREO<br />
Analog audio output is only mono left<br />
Analog audio output is only mono right<br />
Analog audio output is only stereo mode<br />
24 Operation<br />
Operation<br />
25
Operation<br />
Operation<br />
7.2 Setup<br />
3. TERRESTRIAL<br />
MENU > SETUP >TERRESTRIAL<br />
7.2 Setup<br />
4. SATELLITE<br />
1) AUTO SCAN<br />
You can search all terrestrial channels automatically.<br />
2) MANUAL SCAN<br />
You can search for specific frequency.<br />
1) LNB<br />
MENU > SETUP > SATELLITE > LNB<br />
Since your receiver has basic data of most satellites and channels, you can receive<br />
programs just by plugging in. But depending on the status of your antenna setup, you may<br />
have to modify the basic data of the satellites and/or channels.<br />
EDIT SATELLITE<br />
If you select a satellite and press<br />
button, you can edit the following satellite settings:<br />
3) ANTENNA 5V<br />
You can supply voltage for an active antenna. Press / buttons to select and press<br />
button.<br />
26 Operation<br />
Operation<br />
27
VOL<br />
VOL<br />
VOL<br />
VOL<br />
VOL<br />
VOL<br />
VOL<br />
VOL<br />
VOL<br />
VOL<br />
VOL<br />
VOL<br />
VOL<br />
VOL<br />
VOL<br />
VOL<br />
VOL<br />
VOL<br />
Operation<br />
Operation<br />
7.2 Setup<br />
- LNB Type : Switch LNB Type with / buttons.<br />
- High L.O. / Low L.O. : Switch LNB oscillator frequency with / buttons.<br />
- LNB Power : Switch LNB power with / buttons.<br />
- 0/22KHz : Set the path of 0/22KHz switch box with / buttons.<br />
Note : When you set the LNB type to “Universal” mode, “0/22KHz” will be set to “Auto”<br />
function automatically and can’t be revised.<br />
- DiSEqC 1.0 : Select the DiSEqC box settings with / buttons. You can choose the<br />
following options:<br />
NONE: without DiSEqC<br />
1/2, 2/2: two ports DiSEqC<br />
1/4, 2/4, 3/4, 4/4: 4 ports DiSEqC<br />
1/8, 2/8... 8/8: 8 ports DiSEqC<br />
1/16, 2/16... 16/16: 16 ports DiSEqC<br />
- DiSEqC 1.1 : Select the DiSEqC box settings with / buttons. You can choose the<br />
following options:<br />
NONE: without DiSEqC<br />
PORT #1... PORT #16 : 16 ports DiSEqC<br />
Notes : When you change each option, you need to know the exact frequency of LNB to<br />
modify L.O. (local oscillator).<br />
Notes : When you change settings for 22KHz and DiSEqC, you need to understand the<br />
environment of <strong>co</strong>nnecting the receiver and antenna.<br />
7.2 Setup<br />
a. Scan (Press BLUE from LNB window)<br />
You can get all channels in the pre-programmed TPs. This function can also be used to get<br />
the latest channel data while receiver is in use. Through this function, the receiver searches<br />
for all available channels and saves them.<br />
- Scan Mode : Press / buttons to switch Free or Free+Scrambled channels.<br />
a. Free : Searches only Free Channels.<br />
b. Free+Scrambled : Searches All Channels.<br />
- Scan Channel : Press / buttons to either search for TV only/Radio only/TV+Radio.<br />
- Network Search : You can search for channels with network information table.<br />
When you are finished, press button to start the channel search.<br />
New SAT(Press RED)<br />
You can add a new satellite. You have to set up for the new satellite.<br />
Rename(Press GREEN)<br />
You can change the name of the selected satellite ac<strong>co</strong>rding to your preference<br />
CH<br />
CH<br />
through this option. When you Press Yellow, virtual keyboard will pop up. Use / <br />
/ and to type in new name.<br />
Delete(Press BLUE)<br />
You can delete a satellite by pressing Green button. There will be a warning message to<br />
<strong>co</strong>nfirm. If you type in the password <strong>co</strong>rrectly, selected satellite will be deleted.<br />
28 Operation<br />
Operation<br />
29
VOL<br />
VOL<br />
VOL<br />
VOL<br />
VOL<br />
VOL<br />
VOL<br />
VOL<br />
VOL<br />
VOL<br />
VOL<br />
VOL<br />
Operation<br />
Operation<br />
7.2 Setup<br />
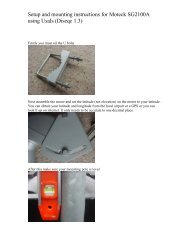
2) POSITIONER<br />
MENU > SETUP > SATELLITE > POSITIONER<br />
If it is necessary, you can set the position for the antenna.<br />
7.2 Setup<br />
b. USALS<br />
Positioner : Press / buttons to switch to “None / DiSEqC 1.2 / USALS.” If you have a<br />
DiSEqC Motor System, then you can use the DiSEqC 1.2/USALS functions.<br />
Satellite : Press / buttons to switch to different satellites (if there are more than one).<br />
Transponder : Press / buttons to switch transponder of a selected satellite.<br />
Command : If you select DiSEqC 1.2 or USALS, you have following options:<br />
a. DiSEqC 1.2<br />
I. Satellite Angle : Enter the angle using the numerical buttons and set the direction to<br />
East/West by using / buttons.<br />
II. My Longitude : Enter the longitude using the numerical buttons and set direction to<br />
East/West by using / buttons.<br />
III. My Latitude : Enter the latitude using the numerical buttons and set direction to<br />
North/South by using / buttons.<br />
IV. Go to 0˚ Clockwise/Counterclockwise : If you press button, the antenna will<br />
move to the set position.<br />
Note : Angle & direction automatically change ac<strong>co</strong>rding to setting value.<br />
V. Go to Reference Position : If you press button, The antenna will move back to the<br />
reference position.<br />
Edit/Scan : You can edit the current transponder settings and you can search for<br />
channels.<br />
Note : After setting all positioner menu, be sure that Quality bar is green <strong>co</strong>lor. If<br />
Quality bar is not green, you have to adjust antenna setting again.<br />
I. Start Motor Driving West/East : Select either East/West, and Press button to change<br />
the direction of a selected antenna.<br />
II. Halt Motor : Press to stop the antenna movement.<br />
III. Disable, West/East Limit : Limit the movement of your antenna to East/West and press<br />
button.<br />
IV. Save Present Positioner Settings : Save the current position as the reference position.<br />
V. Go to Reference Position : If you press button, Antenna will move to the reference<br />
position.<br />
30 Operation<br />
Operation<br />
31
Operation<br />
Operation<br />
7.2 Setup<br />
3) EDIT/SCAN<br />
MENU > SETUP > SATELLITE > EDIT/SCAN<br />
After setting up LNB and POSITIONER, you can edit and/or add certain TPs.<br />
7.2 Setup<br />
Move (Press RED AND ORANGE)<br />
You can change satellite search order by this function. Firstly, press “RED” button to<br />
select a satellite that you want to move (the selected satellite is shadowed) and<br />
se<strong>co</strong>ndly, locate the cursor where you want to put the selected satellite. Lastly press<br />
“ORANGE” button, then the satellite will be relocated.<br />
Transponder(Press WHITE)<br />
Press “WHITE” button to edit a transponder.<br />
If you want to change the satellite’s TP information, you should select a satellite and<br />
perform the following functions:<br />
Select(Press RED)<br />
You can select satellites you want. If you want to execute group scan/move/delete<br />
function, you can select more than one satellite by pressing Red.<br />
Scan(Press GREEN)<br />
You can search channels from currently saved satellite/TP by pressing Green button.<br />
Please refer to 7.2.4 SATELLITE 1. LNB EDIT SATELLITE a.Scan<br />
Scan All Satellites(Press YELLOW)<br />
Press “YELLOW” button to search channels from all satellites.<br />
Delete (Press BLUE)<br />
You can delete a Satellite. If you enter the password <strong>co</strong>rrectly, the transponder will be<br />
deleted.<br />
a. Select(Press RED)<br />
You can select transponders you want. If you want to execute group scan/delete<br />
function, you can select more than one transponder by pressing Red button.<br />
b. Scan(Press GREEN)<br />
You can search channels from selected TP by pressing Green button.<br />
Please refer to 7.2.4 SATELLITE 1. LNB EDIT SATELLITE a.Scan<br />
32 Operation<br />
Operation<br />
33
VOL<br />
VOL<br />
VOL<br />
VOL<br />
VOL<br />
VOL<br />
Operation<br />
Operation<br />
7.2 Setup<br />
c. Edit(Press YELLOW)<br />
You can search channels from selected TP and you can edit transponder’s settings.<br />
7.2 Setup<br />
5. SYSTEM<br />
I. Transponder : This is the name of the transponder. Press button to change the<br />
name.<br />
II. Frequency : Enter the frequency by using the numerical button.<br />
III. Symbol Rate : Enter the symbol rate by using the numerical button.<br />
IV. Polarity : Press / buttons to switch the signal polarity (horizontal or vertical).<br />
V. Modulation : Press / buttons to switch among DVB-S, DVB-S2/QPSK, DVB-S2/8PSK.<br />
When you select the DVB-S2, you can set FEC or Pilot.<br />
- Scan : Press “GREEN” button to go to the scan menu.<br />
Please refer to 7.2.4 SATELLITE 1. LNB EDIT SATELLITE a.Scan<br />
- Return : Press “MENU” button to go to the previous menu.<br />
Note : When you select DVB-S2, you must enter the FEC <strong>co</strong>rrectly<br />
Note : If the scanning process fails, please check whether your entered values are<br />
<strong>co</strong>rrect or signal reception is good or bad.<br />
Note : The Frequency, Symbol Rate, Polarity, Modulation(FEC, Pilot) mentioned above<br />
are very important for optimal satellite signal reception. We re<strong>co</strong>mmend you to<br />
get professional advice available.<br />
D. Delete (Press BLUE)<br />
You can delete a transponder. If you enter the password <strong>co</strong>rrectly, the transponder will<br />
be deleted.<br />
E. New TP (Press ORANGE)<br />
You can add a new transponder. Press “ORANGE” button, Edit window will pop up. After<br />
you put transponder information, press “RED” button to save it.<br />
1) TIME ADJUST<br />
MENU > SETUP > SYSTEM > TIME ADJUST<br />
You can change the settings for the time.<br />
SET : You can see the current time.<br />
Reference Program : You can set the receiver’s time to particular channel by pressing<br />
The time on your receiver depends on the channel’s time if<br />
you set this option.<br />
GMT OFFSET : You can press / buttons to switch “GMT Offset” value. The range is<br />
“-12:00 ~ +12:00”, increase each half hour progressively.<br />
DAYLIGHT SAVING : You can adjust daylight saving time when summer time is<br />
applicable by pressing <br />
Note : It is very important that you have to set reference program. local time base on<br />
reference program.<br />
Whenever you turn the AC power off/on, system received the time information<br />
from reference program.<br />
34 Operation<br />
Operation<br />
35
Operation<br />
Operation<br />
7.2 Setup<br />
2) FACTORY DEFAULT<br />
MENU > SETUP > SYSTEM > FACTORY DEFAULT<br />
You can reset all settings of the receiver to the factory settings.<br />
Press button. You need to enter the password. The default password is “0000.”<br />
After you type in the password <strong>co</strong>rrectly, all settings of the receiver will return to initial<br />
settings.<br />
You will see installation wizard after factory default. Since you cannot restore the previous<br />
settings, be careful when you are setting it back to factory default.<br />
3) UPGRADE<br />
MENU > SETUP > SYSTEM > UPGRADE > USB<br />
You can upgrade System Firmware by USB.<br />
7.2 Setup<br />
4) EXPORT/IMPORT CH LIST<br />
MENU > SETUP > SYSTEM > EXPORT/IMPORT CH LIST<br />
EXPORT CHANNEL LIST<br />
Export the channel list to USB memory.<br />
a. Insert USB memory to front panel USB port.<br />
b. Select “EXPORT CHANNEL LIST,” and pop up message will appear.<br />
c. Press button to start the export of all channel list. (File name : ah-3100_ch.txt)<br />
d. You can edit the channel list file using your PC. (delete, change channel order, etc..)<br />
IMPORT CHANNEL LIST<br />
Import the channel list from USB memory.<br />
a. First, you have to <strong>co</strong>py the new firmware in a USB memory stick.<br />
b. Insert the USB memory to front panel USB port.<br />
c. A pop up will appear showing the new F/W version.<br />
d. Press OK button. You will need to enter the password to <strong>co</strong>nfirm.<br />
e. Upgrade will start soon after you enter the password.<br />
f. After finishing the upgrade, receiver will be restarted.<br />
Note : 1. Updated firmware is available website below.<br />
UltraPower Technology website (http://ultrapower.<strong>co</strong>.<strong>nz</strong>) or HDT website<br />
(http://www.hdt.<strong>co</strong>.kr)<br />
2. Download <strong>AH</strong>-<strong>3110</strong> firmware in your USB memory.<br />
Caution<br />
Never turn the power off during the system upgrade. It brings about system fault.<br />
If there is unexpected power off during upgrade. You will see “check USB” message<br />
front display. The system will automatically be restored if you <strong>co</strong>nnect USB memory<br />
stick where Updated F/W is.<br />
a. First, <strong>co</strong>py the new channel list in USB memory<br />
b. Insert USB memory to front panel USB port.<br />
c. Select “IMPORT CHANNEL LIST,” and pop up message will appear.<br />
d. Enter the password to start the channel list import.<br />
e. After finishing the channel list import, receiver will be restarted.<br />
5) FIRMWARE VERSION<br />
MENU > SETUP > SYSTEM > FIRMWARE VERSION<br />
You can check the current F/W version.<br />
36 Operation<br />
Operation<br />
37
Operation<br />
Operation<br />
7.3 Parental Guide<br />
You can set the parental lock to protect your children from watching unsuitable channels.<br />
When you select “PARENTAL GUIDE” function, pop up will appear, and you will need to enter<br />
the password to proceed. If you type in the <strong>co</strong>rrect password, you will see the following page:<br />
7.3 Parental Guide<br />
2. USE PASSWORD<br />
This option enables you to lock “Setup menu” or “Lock Program.” Press to enable the<br />
lock.<br />
If you check “SETUP,” you will need to type in the password before entering the setup<br />
menu.<br />
If you check “LOCK PROGRAM,” you will need to type in the password before locking<br />
the channel.<br />
1. DVB AGE - BASED RATING<br />
Protect children from watching unsuitable programs. There are five check boxes.<br />
3. MODIFY PASSWORD<br />
Change the current password into a new one.<br />
CH<br />
CH<br />
Press / buttons to select age you want.<br />
Press button to check and Press “Menu” to return.<br />
NO BLOCK No age limit<br />
8 Without entering the password, programs are restricted to those who<br />
are over 8 years old.<br />
12 over 12 years old.<br />
15 over 15years old.<br />
18 over 18years old.<br />
If you select “MODIFY PASSWORD” function, popup window will appear to change the<br />
password.<br />
When you type in “OLD PASSWORD” <strong>co</strong>rrectly, you will need to enter “NEW<br />
PASSWORD.”<br />
After typing in 4 digit numbers, you will need to <strong>co</strong>nfirm by retyping the new password.<br />
If you have done everything <strong>co</strong>rrectly, there will be a popup window, “Password<br />
updated successfully.” If you enter the wrong password, popup window will say<br />
“Passwords do not match.”<br />
Press “EXIT” button, and popup will disappear.<br />
Note : ‘Age Limit’ can be applicable only for the signal which carries age limit<br />
information.<br />
38 Operation<br />
Operation<br />
39
VOL<br />
VOL<br />
Operation<br />
Operation<br />
7.4 Contents<br />
If you want to use this menu, an external hard disk or a USB memory must be <strong>co</strong>nnected to<br />
your receiver first.<br />
Note : The receiver may not re<strong>co</strong>gnize unauthorized or uncertified USB storage.<br />
Manufacturer re<strong>co</strong>mmends you to use well-known USB storage brand.<br />
7.4 Contents<br />
3) Imageview/Listview(Press YELLOW)<br />
Press “YELLOW” button to switch to “Imageview / Listview”.<br />
- Imageview : Program title will be shown with thumbnail image.<br />
Note : For a file that hasn’t been played before, only question mark is shown instead of<br />
thumbnail image.<br />
- Listview : Program title will be shown without thumbnail image.<br />
4) Delete(Press BLUE)<br />
Press “BLUE” button to delete a selected program.<br />
1. VIDEO LIST<br />
5) Lock(Press ORANGE)<br />
Press “ORANGE” button to make a “padlock” on the left side of the selected program.<br />
After setting this option, you will need to type in the password in order to watch the<br />
locked program.<br />
6) Preview(Press WHITE)<br />
Press “P.LIST” to see the re<strong>co</strong>rded program list. “R” mark means a current re<strong>co</strong>rding<br />
program, and “P” mark means a current playback program.<br />
1) Set keep(Press RED)<br />
Press “RED” button to change the keep time among “24hour, 48hour, 1week, 1month,<br />
Forever”.<br />
You can keep programs until the date you set in “Keep time”, but the date passes, the<br />
programs will be deleted automatically.<br />
2) Rename(Press GREEN)<br />
You can change program names using the virtual keyboard that appears on the screen<br />
when you press “GREEN”.<br />
It will be shown preview of the selected program. The preview shows thumbnail image<br />
every 5 minute of the selected<br />
program.<br />
CH<br />
CH<br />
Select : Press / , / buttons to select image.<br />
Play : Press button to start playback from selected image.<br />
Return : Press “MENU” button to return to the list.<br />
40 Operation<br />
Operation<br />
41
Operation<br />
Operation<br />
7.4 Contents<br />
7.4 Contents<br />
2. FOLDER NAVIGATOR<br />
MENU >CONTENTS>FOLDER NAVIGATOR<br />
When USB Memory/HDD is <strong>co</strong>nnected, you can explore the disk/memory.<br />
If you want to make a new folder, locate cursor on [..]. Then press Red button to create a<br />
new folder. You can name the new folder using virtual keyboard that appears when you<br />
press RED button.<br />
1. Program Title : a re<strong>co</strong>rded program name.<br />
(You have to type in the program name when you re<strong>co</strong>rd. If you don’t, it<br />
is set up to name it “channel name” as default.)<br />
2. Status : Current playback status.<br />
- Playback ( ) : Normal mode(x1) playback.<br />
- FastFoward ( ) : x2, x5, x20, x50, x300 times.<br />
- Rewind ( ) : x1, x2, x5, x20, x50, x300 times.<br />
3. Playing time : Current playback time.<br />
4. Progress bar : Current playback position.<br />
5. Preview time : Selected thumbnail image time.<br />
6. Re<strong>co</strong>rded time : Total re<strong>co</strong>rded time.<br />
7. Scroll bar : Up/Down scroll bar.<br />
7) Start Playback(Press OK)<br />
Start playback.<br />
1) Sort(Press RED)<br />
Press “RED” button to change the order of the <strong>co</strong>ntents. Press “RED” in order to sort by:<br />
a. Date : Sorting in order of date.<br />
b. Size : Sorting in order of file size<br />
c. Name : Sorting in order of name.<br />
2) Rename(Press GREEN)<br />
Press “GREEN” button to display the virtual keyboard and change channel/folder name<br />
ac<strong>co</strong>rding to your preference.<br />
8) Return(Press MENU)<br />
Return to previous status.<br />
42 Operation<br />
Operation<br />
43
VOL<br />
VOL<br />
VOL<br />
VOL<br />
Operation<br />
Operation<br />
7.4 Contents<br />
3) Send(Press YELLOW)<br />
Press “YELLOW” button to send to selected location.<br />
If you have selected the location, press “YELLOW” button to send.<br />
4) Delete(Press BLUE)<br />
Press “BLUE” button to delete a selected file/folder.<br />
5) Picture<br />
When you select JPEG file, you will see a picture as shown below.<br />
7.4 Contents<br />
CH<br />
CH<br />
CH<br />
CH<br />
a. Press / buttons to set the TIME INTERVAL of the SLIDE SHOW.<br />
Note : Time interval will be increased/decreased by 5 se<strong>co</strong>nds press /<br />
buttons.<br />
b. Press button to start the AUTO SLIDE SHOW.<br />
c. Press button to stop the slide show.<br />
d. Press “MENU” button to exit the slide show.<br />
Press button to hide menu bar.<br />
Press “MENU” button to return to file explorer.<br />
6) Music<br />
When you select MP3 file, you will see a picture as shown below.<br />
CH<br />
CH<br />
Press / buttons to see PREVIOUS/NEXT picture.<br />
Press button to activate AUTO SLIDE SHOW.<br />
AUTO SLIDE SHOW<br />
CH<br />
CH<br />
Press / buttons to go through the mp3 list.<br />
Press / buttons to change the play type(repeat/normal).<br />
Press “BLUE” button to pause the music.<br />
Press “GREEN” button to stop the music.<br />
Press “YELLOW” button to play the music.<br />
Press “MENU” button to return to the file explorer.<br />
44 Operation<br />
Operation<br />
45
Operation<br />
Operation<br />
7.4 Contents<br />
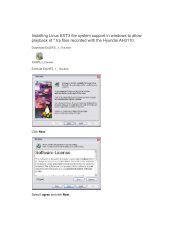
3. HDD INITIALIZATION<br />
You can initialize an external Hard Disk.<br />
You must make sure that the receiver is <strong>co</strong>nnected to the external HDD.<br />
7.5 Program List<br />
You can see the “TV/RADIO/FAVORITE PROGRAM” and “PROGRAM GUIDE”.<br />
Note : 1. If you initialize HDD, all of the stored data will be erased, and re<strong>co</strong>vering those<br />
data will be impossible.<br />
2. Initializing HDD by receiver is in ac<strong>co</strong>rdance with EXT-3 (Linux) file system.<br />
This file system is not supported MS windows. If you want to playback<br />
re<strong>co</strong>rded program on your PC, you have to format NTFS file system by your PC.<br />
But manufacturer re<strong>co</strong>mmends EXT-3 file system. We cannot guarantee<br />
stability for NTFS file system.<br />
3. If you want to use 2.5” external hard disk, manufacturer re<strong>co</strong>mmends that you<br />
<strong>co</strong>nnect the power adapter to the hard disk for the stable power supply.<br />
1. TV PROGRAM LIST<br />
MENU > PROGRAM LIST > TV PROGRAM LIST or Press<br />
button in full screen<br />
CH<br />
CH<br />
Press / buttons to select, and information of the selected channel will display<br />
on the right side of the screen.<br />
You can select/find a channel.<br />
1) TUNE<br />
Press<br />
button to watch the channel.<br />
46 Operation<br />
Operation<br />
47
VOL<br />
VOL<br />
VOL<br />
VOL<br />
VOL<br />
VOL<br />
VOL<br />
VOL<br />
VOL<br />
VOL<br />
Operation<br />
Operation<br />
7.5 Program List<br />
2) FIND<br />
Press “ORANGE” button to find a channel you want.<br />
CH<br />
CH<br />
There are three ways of sorting. You can press / buttons to select in the sorting<br />
method.<br />
Press / buttons to change the settings.<br />
7.5 Program List<br />
3. FAVORITE PROGRAM LIST<br />
MENU > PROGRAM LIST > FAVORITE GROUP LIST or Press “FAV” button<br />
You can see the channel of “FAVORITE GROUP”.<br />
CH<br />
CH<br />
a. TITLE : Channel will be searched alphabetically.<br />
I. Choose the first or se<strong>co</strong>nd letter using / buttons.<br />
II. You can change the letter using / buttons.<br />
Then all the channels with these alphabets will appear.<br />
b. TERRESTRIAL : You can include or exclude by setting this option. Use / button to<br />
change the settings. If you set it to “On,” terrestrial channels will appear<br />
as well.<br />
c. SATELLITE : You can select a satellite to search through channel list.<br />
I. Select among “all satellites/one satellite/satellite off” using / buttons.<br />
II. If you select one satellite, you will be selecting all transponders/each transponder<br />
using / buttons.<br />
When you find the channel you want, press button to go to the channel list.<br />
Press “GREEN” button to change the name of the selected favorite group.<br />
CH<br />
CH<br />
Press / buttons to select and press button. You can see all channel lists in<br />
the selected group. Press button to watch the channel.<br />
When favorite group has channels, favorite mark will be shown on the left of group<br />
name.<br />
To set favorite group, please refer to §7.6.1 Edit TV Program.<br />
If you watch a channel using this option, when you change the channel, you will tune to<br />
the next channel of the Favorite Group.<br />
After selecting “FAVORITE GROUP”, please refer to “7.5.1 TV PROGRAM LIST” for detail use.<br />
3) RETURN<br />
Press “MENU” button to Return to previous status.<br />
2. RADIO PROGRAM LIST<br />
Please refer to “7.5.1 TV PROGRAM LIST.”<br />
48 Operation<br />
Operation<br />
49
Operation<br />
Operation<br />
7.5 Program List<br />
4. PROGRAM GUIDE<br />
MENU > PROGRAM LIST > PROGRAM GUIDE or press “GUIDE” button<br />
The Program Guide shows the program schedule and information. This is only supported if<br />
the service provider provides the signal.<br />
7.6 Edit Program<br />
You can edit “TV/RADIO PROGRAM LIST”.<br />
CH<br />
CH<br />
Press / buttons to select channels and each program schedule will be shown.<br />
Press button to move to Schedule List and Press “MENU” button to move to TV<br />
Program List.<br />
1. EDIT TV PROGRAM<br />
MENU > EDIT PROGRAM > EDIT TV PROGRAM<br />
You can edit “TV PROGRAM LIST”.<br />
CH<br />
CH<br />
In the Schedule List, Press / buttons to select and program information of each<br />
program will be shown.<br />
If you press button in the schedule list, you can reserve automatic timer of the<br />
receiver.<br />
Note Please refer to “7.1.7 TIMER.”<br />
1) Favorite(Press RED)<br />
Press “RED” button to set your Favorite Group.<br />
CH<br />
CH<br />
Press / buttons to select a program you want, and press button to make<br />
“Favorite mark()” in the left side of the channel name.<br />
50 Operation<br />
Operation<br />
51
Operation<br />
Operation<br />
7.6 Edit Program<br />
Then you will select your favorite group. Sort the channel into the favorite group folder<br />
CH<br />
CH<br />
that you prefer using / and .<br />
Press “RED” button again under the favorite channel to cancel the mark.<br />
2) Rename(Press GREEN)<br />
Press “GREEN” button to display the virtual keyboard. You can change the channel name<br />
ac<strong>co</strong>rding to your preference.<br />
3) Skip(Press YELLOW)<br />
Press “YELLOW” button to make a “skip mark” in the left side of the highlighted<br />
channel.<br />
After exiting the “EDIT TV PROGRAM” menu, the channel will be skipped while user<br />
change the channel in the full screen.<br />
4) Delete(Press BLUE)<br />
Press “BLUE” button to go to the delete menu.<br />
7.6 Edit Program<br />
b. Move<br />
CH<br />
CH<br />
. Press / buttons to move up and down.<br />
. Press “WHITE” button. Selected channels will move to the chosen location.<br />
. After moving, the selected channels will be unselected.<br />
c. Delete : If you Press “BLUE” button, the selected channel will be deleted.<br />
Once you delete the channel, you cannot restore the channel unless you<br />
perform a channel search again.<br />
Press “MENU” button to go back to the previous menu.<br />
5) Lock(Press ORANGE)<br />
Press “ORANGE” button to make a “lock mark” on the left side of the selected channel<br />
name.<br />
After setting this option, you will need to type in the password in order to watch the<br />
locked channels.<br />
6) Move(Press WHITE)<br />
Press “WHITE” button to go to the move menu.<br />
You can select channels by using button. And select all channel by using “ORANGE”<br />
button.<br />
If you have selected channels, you can see the following options:<br />
a. Unselect : Under the selected channel, Press button to unselect the selected<br />
channel.<br />
You can select channels by using button. And select all channel by using “ORANGE”<br />
button.<br />
If you have selected channels, you can see the following options:<br />
A. Unselect : Under the selected channel, Press button to unselect the selected<br />
channel.<br />
52 Operation<br />
Operation<br />
53
VOL<br />
VOL<br />
Operation<br />
Operation<br />
7.6 Edit Program<br />
B. Move<br />
CH<br />
CH<br />
i. Press / buttons to move up and down.<br />
ii. Press “WHITE” button. Selected channels will move to the chosen location.<br />
iii. After moving, the selected channels will be unselected.<br />
C. Delete : If you Press “BLUE” button, the selected channel will be deleted.<br />
Press “MENU” button to go back to the previous menu.<br />
7) Tune(Press button)<br />
Press<br />
button to watch the channel.<br />
8) Return(Press MENU button)<br />
Press “MENU” button to Return to the previous status.<br />
7.7 <strong>PVR</strong>(Personal Video Re<strong>co</strong>rd)<br />
You can re<strong>co</strong>rd/playback a program you want to watch by using <strong>PVR</strong> function.<br />
Caution<br />
1. In order for <strong>PVR</strong> function to work properly, current local time should be set <strong>co</strong>rrectly.<br />
2. Do not remove the USB cable or turn the power off suddenly while HDD (Hard Disk<br />
Drive) is running. It might cause wrong operation.<br />
3. The manufacturer shall not be liable for any <strong>co</strong>rruption or data loss of External HDD<br />
caused by the carelessness of users or durability of HDD .<br />
1. RECORD<br />
1) Re<strong>co</strong>rd( )<br />
You can reserve a re<strong>co</strong>rding by using re<strong>co</strong>rd schedule.<br />
Press button, you will see a picture as shown below.<br />
2. EDIT RADIO PROGRAM<br />
Please refer to “7.7.1 EDIT TV PROGRAM LIST”.<br />
CH<br />
CH<br />
VOL<br />
VOL<br />
Press button again to start re<strong>co</strong>rd.<br />
(If you press “info” button while re<strong>co</strong>rding a program, information window will pop up<br />
along with re<strong>co</strong>rding status.)<br />
Press “MENU” buttons to return to the previous status.<br />
Timer : Timer will automatically be set up which is not using.<br />
TITLE : You can change the channel name ac<strong>co</strong>rding to you preference using virtual<br />
keyboard which appeard when you press button.<br />
PROGRAM : Press or / and “Select Program” window will pop up. Select a<br />
channel you want using / buttons and press .<br />
START TIME : Press / button to set start time.<br />
54 Operation<br />
Operation<br />
55
VOL<br />
VOL<br />
VOL<br />
VOL<br />
VOL<br />
VOL<br />
Operation<br />
Operation<br />
7.7 <strong>PVR</strong>(Personal Video Re<strong>co</strong>rd)<br />
DURATION : Press / button to set the duration time for re<strong>co</strong>rd. You can change the<br />
duration time for 10 minute interval.<br />
KEEP TIME : Press / button to set keep time among “24hour, 48hour, 1week,<br />
1month, forever”.<br />
You can keep programs until the date you set in “Keep time”, but the date<br />
passes, the programs will be deleted automatically.<br />
* Keep time is set to “forever” as default.<br />
If you press menu or other functions alike, i<strong>co</strong>n will appear on upper left <strong>co</strong>rner to<br />
remind you re<strong>co</strong>rding is in progress.<br />
* Note : If you want to watch another channel while re<strong>co</strong>rding, you can watch it but it has<br />
to be in the same TP as the program you are re<strong>co</strong>rding. (You can see the channels<br />
you can watch in pop up message).<br />
7.7 <strong>PVR</strong>(Personal Video Re<strong>co</strong>rd)<br />
2. TIME SHIFT<br />
MENU>SERVICE>TIME SHIFT or Press “T-SHIFT” button to start/stop time shift.<br />
While watching the channel, you can reverse or pause it by pressing trick buttons as if<br />
playing back a re<strong>co</strong>rded program.<br />
When you are using the time shift feature, the channel you are watching is being re<strong>co</strong>rded<br />
temporarily, and user use trick play to pause, rewind, fast forward, and etc.<br />
(If you press info button during timeshift function, timeshift window will appear.)<br />
2) Stop( )<br />
During re<strong>co</strong>rding, Press<br />
button, you will see a picture as shown below.<br />
This pop up message is shown the re<strong>co</strong>rd information.<br />
Press “ENTER” button to stop re<strong>co</strong>rding.<br />
Press “EXIT” buttons to return to the previous status.<br />
Status : current playback status.<br />
- Playback( ) : Normal mode(x1) playback.<br />
- FastFoward( ) : x2, x5, x20, x50, x300 times.<br />
- Rewind( ) : x1, x2, x5, x20, x50, x300 times.<br />
Play time : Current playback time.<br />
(-00:10:00 means you watching the scene which falls 10 minutes behind from the live<br />
channel.)<br />
Press / buttons to jump backward or forward by about 3 ~ 10s.<br />
Press / buttons to jump backward or forward by about 1min.<br />
Re<strong>co</strong>rd time : Up to now, total re<strong>co</strong>rded time of time shift.<br />
Total re<strong>co</strong>rded position of time shift.<br />
Current playback position.<br />
Live channel position.<br />
If you press menu or other functions alike, i<strong>co</strong>n will apper on upper left <strong>co</strong>rner to remind<br />
you timeshift is in progress.<br />
56 Operation<br />
Operation<br />
57
VOL<br />
VOL<br />
Operation<br />
Operation<br />
7.7 <strong>PVR</strong>(Personal Video Re<strong>co</strong>rd)<br />
3. PLAYBACK<br />
MENU>CONTENTS>VIDEO LIST or Press “P.LIST” button to see the re<strong>co</strong>rded program list.<br />
During the playback, press button to stop the playback.<br />
(If you press button while watching a re<strong>co</strong>rded program, as below window will pop up.)<br />
Status : Current playback status.<br />
- Playback( ) : Normal mode(x1) playback.<br />
- FastFoward( ) : x2, x5, x20, x50, x300 times.<br />
- Rewind( ) : x1, x2, x5, x20, x50, x300 times.<br />
Play time : Current playback time.<br />
Press / buttons to jump backward or forward by about 3 ~ 10s.<br />
Press / buttons to jump backward or forward by about 1min.<br />
By using numeric key(0~9), you can start the program at 0/10 ~ 9/10 point of re<strong>co</strong>rded<br />
program.<br />
Ex) You can play the program from 4/10 point of re<strong>co</strong>rded program by pressing “4”<br />
button.<br />
Progress bar : Current playback position.<br />
Re<strong>co</strong>rd time : Total re<strong>co</strong>rded time.<br />
Bookmark I<strong>co</strong>n : Blue i<strong>co</strong>n is a bookmark.<br />
a. While watching the re<strong>co</strong>rded program, press “BOOKMARK” button at a desired scene<br />
to add a bookmark. Then you will see a small blue mark at the bottom of progress<br />
bar.<br />
b. You can see book marked image and 2se<strong>co</strong>nd later playback position will jump to<br />
the selected bookmark by pressing “JUMP” button.<br />
c. If you want to remove the book mark, press “JUMP” button to the book mark you want<br />
to remove. Press “BOOKMARK” button again. Then selected bookmark will be<br />
removed.<br />
Repeat : You can playback repeatedly a certain part that you want.<br />
a. Move to the beginning scene you want to play repeatedly.<br />
b. Press “REPEAT” button, then you can see a yellow mark.<br />
c. Move to the end of scene you want to play repeatedly.<br />
d. Press “REPEAT” button, then make a yellow mark and you can see a repeat section.<br />
e. Press “REPEAT” button again, canceling a repeat section.<br />
If you press menu or other functions alike, i<strong>co</strong>n will appear on upper left <strong>co</strong>rner to<br />
remind you playing is in progress.<br />
58 Operation<br />
Operation<br />
59
Trouble Shooting<br />
Specifications<br />
There may be various reasons for the abnormal operation of the unit. Therefore, if the unit<br />
does not work properly, check it ac<strong>co</strong>rding to the procedures shown in the table below :<br />
Problem Possible causes Remedy<br />
LED or VFD on front<br />
panel does not light<br />
and display<br />
No Picture or sound.<br />
Black-and-white<br />
screen or V-Hold.<br />
The remote <strong>co</strong>ntrol is<br />
not working.<br />
Indicate “check usb”<br />
In front panel.<br />
AC power <strong>co</strong>rd<br />
dis<strong>co</strong>nnected.<br />
Wrong <strong>co</strong>nnection of the<br />
video/audio output to TV<br />
input terminal.<br />
Wrong <strong>co</strong>nnection of satellite<br />
antenna cable.<br />
Wrong direction of satellite<br />
antenna.<br />
No signal or weak signal.<br />
Wrong setting of channel<br />
information in MENU screen.<br />
Your TV mode is different<br />
from satellite broadcasting<br />
mode.<br />
Battery exhausted.<br />
Fluorescent light interfering<br />
with the remote <strong>co</strong>ntrol.<br />
Remote <strong>co</strong>ntroller is<br />
in<strong>co</strong>rrectly aimed.<br />
You must re-download<br />
main Firmware<br />
Connect power <strong>co</strong>rd properly into the<br />
power socket.<br />
Connect two terminals <strong>co</strong>rrectly with scart<br />
cable or RCA cable.<br />
Connect the antenna cable <strong>co</strong>rrectly.<br />
Adjust the direction of antenna.<br />
Check the cable <strong>co</strong>nnections,<br />
LNB and other equipment <strong>co</strong>nnected<br />
between the LNB and the receiver or adjust<br />
the antenna.<br />
Type the setting value <strong>co</strong>rrectly.<br />
Use TV of same mode.<br />
Use the NTSC/PAL <strong>co</strong>nverter <strong>co</strong>nnected to<br />
the receiver and TV.<br />
Change the batteries.<br />
Switch off the light.<br />
Aim the remote <strong>co</strong>ntrol at the receiver.<br />
Connect to UltraPower Technology website.<br />
(http://ultrapower.<strong>co</strong>.<strong>nz</strong>) or<br />
HDT website (http://hdt.<strong>co</strong>.kr)<br />
Download <strong>AH</strong>-<strong>3110</strong> Firmware in your<br />
memory.<br />
Insert the USB memory to front panel USB<br />
port.<br />
System capabilities Fully DVB <strong>co</strong>mpliant<br />
RF Front End for Connector IEC169-24, female<br />
Satellite Frequency range 950 ~ 2150 MHz<br />
Signal level<br />
-65dBm ~ -25dBm<br />
LNB supply<br />
13/18V, max 400mA<br />
LNB switch <strong>co</strong>ntrol<br />
22KHz<br />
DiSEqC<br />
VER 1.3(USALS) and below<br />
Demodulation<br />
DVB-S QPSK, DVB-S2 QPSK/8PSK<br />
Symbol rate<br />
DVB-S : 1~45 Msps<br />
DVB-S2 QPSK/LDPC/BCH : 20~30 Msps<br />
DVB-S2 8PSK/LDPC/BCH : 10~30 Msps<br />
SMPC and MCPC Capable<br />
Spectral Inversion<br />
Auto <strong>co</strong>nversion<br />
RF Front End for Connector IEC 169-2 female<br />
Terrestrial Frequency range VHF(174 ~ 230 MHz),<br />
UHF(470 ~ 862 MHz)<br />
Signal level<br />
-75dBm ~ -20dBm<br />
Demodulation<br />
DVB-T COFDM<br />
Channel bandwidth 7MHz, 8MHz<br />
Transfer mode<br />
2K, 8K. Auto<br />
Guard interval 1/4, 1/8, 1/16, 1/32<br />
System resource Processor 32bit processor(266MHz)<br />
DDR<br />
192MByte<br />
FLASH<br />
16MByte<br />
EEPROM<br />
2KByte<br />
Video De<strong>co</strong>der MPEG - 4 H.264/AVC,MPEG - 2<br />
Data Rate<br />
Up to 15Mbps<br />
Resolution<br />
1080i/ 720p/ 576p / 480p<br />
Video Format<br />
NTSC, PAL<br />
Aspect Ratio 4:3, 16:9<br />
60 Trouble Shooting<br />
Specifications<br />
61
Specifications<br />
Teletext<br />
MPEG Audio<br />
DVB <strong>co</strong>mpliant<br />
MPEG 1 layer I & II<br />
MPEG 2 layer II<br />
Dolby Digital<br />
Sampling rates<br />
32KHz, 44.1KHz and 48KHz<br />
Serial data interface Connector 9pin D-sub mail, Max 115bps<br />
Remote <strong>co</strong>ntrol CODE NEC-IR<br />
Operation <strong>co</strong>ndition<br />
Up to 7Meter<br />
Power supply Power Consumption Max 40W<br />
Supply Voltage<br />
Supply Frequency<br />
AC 98 ~ 240V<br />
47 ~ 63 Hz<br />
Rear panel Video out 1 x RCA cinch for CVBS<br />
Connectors<br />
Audio out<br />
Digital audio out<br />
Digital multimedia out<br />
Serial data<br />
Terrestrial ant input<br />
Loop out<br />
LNB input<br />
Loop out<br />
TV SCART<br />
VCR SCART<br />
USB Storage read/write<br />
3 x RCA cinch for Component<br />
15p D-sub female for VGA<br />
4 x RCA cinch<br />
1 x RCA cinch (<strong>co</strong>axial)<br />
1 x Optical<br />
1 x HDMI<br />
9pin D-sub<br />
IEC 169-2 type, female<br />
IEC 169-2 type, mail<br />
IEC 169-24 type, female<br />
IEC 169-24 type, female<br />
CVBS,Y/C,Audio L/R<br />
CVBS,Y/C,Audio L/R(fixed)<br />
1 x USB<br />
Physical Size (W x H x D) 335x267x58.5(mm)<br />
Specifications Weight (net) 2.42Kg<br />
62 Specifications