D.H. Lammlein PhD Dissertation - Vanderbilt University
D.H. Lammlein PhD Dissertation - Vanderbilt University
D.H. Lammlein PhD Dissertation - Vanderbilt University

You also want an ePaper? Increase the reach of your titles
YUMPU automatically turns print PDFs into web optimized ePapers that Google loves.
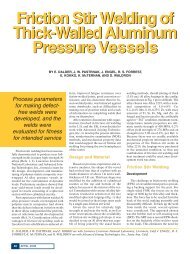
FRICTION STIR WELDING OF SPHERES, CYLINDERS, AND T-JOINTS: DESIGN,<br />
EXPERIMENT, MODELLING, AND ANALYSIS<br />
By<br />
David H. <strong>Lammlein</strong><br />
<strong>Dissertation</strong><br />
Submitted to the Faculty of the<br />
Graduate School of <strong>Vanderbilt</strong> <strong>University</strong><br />
in partial fulfillment of the requirements<br />
for the degree of<br />
DOCTOR OF PHILOSOPHY<br />
in<br />
Mechanical Engineering<br />
December, 2010<br />
Nashville, Tennessee<br />
Approved:<br />
Professor Alvin M. Strauss<br />
Professor George E. Cook<br />
Professor D. Greg Walker<br />
Professor Jon F. Edd<br />
Professor D. Mitch Wilkes
ACKNOWLEDGEMENTS<br />
Financial support for this work was provided by the NASA Tennessee Space Grant<br />
Consortium, <strong>Vanderbilt</strong> <strong>University</strong>, and Los Alamos National Laboratory. I would like to thank<br />
Prof. Alvin Strauss and Prof. George Cook for conceiving and directing this research. Prof. Greg<br />
Walker, Prof. Mitch Wilkes, and Prof. Jon Edd, I would like to thank for serving on my<br />
committee. I would like to acknowledge the machining and design expertise of Bob Patchin and<br />
John Fellenstein. I thank Kate Lansford for assistance in cross-sectioning weld samples and<br />
UTSI Tullahoma for use of their facility. I recognize the assistance of Robin Midgett in<br />
mechanical testing of weld samples. I would like to thank Dr. Paul Fleming, Dr. Dave DeLapp,<br />
Dr. Russ Longhurst, Jeff Bernath, Chase Cox, Brian Gibson, Dr. Dan Hartman, Thomas<br />
Bloodworth, Dr. Reginald Crawford, Dr. Thomas Lienert, Tracie Prater, and Matt Bement for<br />
research input. Completion of this work was made possible by research licenses from The<br />
Welding Institute of England (TWI) for use of the friction stir welding process and Edison<br />
Welding Institute (EWI) for use of a variable penetration tool.<br />
Lastly, I would like to thank Dr. David R. <strong>Lammlein</strong> for inspiration, and Presley and<br />
Fonda Carpenter for their boundless love and support. I dedicate this work to my mother, father,<br />
and brother; whose consistent guidance and support have made this possible.<br />
ii
TABLE OF CONTENTS<br />
TABLE OF FIGURES ....................................................................................................... vi<br />
LIST OF ABBREVIATIONS AND SYMBOLS ........................................................... xxii<br />
INTRODUCTION .............................................................................................................. 1<br />
CHAPTER I ........................................................................................................................ 5<br />
LITERATURE REVIEW: COMPUTATIONAL MODELING OF FRICTION STIR<br />
WELDING .......................................................................................................................... 5<br />
Introduction ..................................................................................................................... 5<br />
Friction Stir Welding .................................................................................................. 5<br />
Computational Modeling ............................................................................................ 6<br />
Process Models ............................................................................................................... 7<br />
Experimental and Analytical Bases for Assignment of Heat Input Boundary<br />
Conditions ................................................................................................................... 7<br />
Model Dependent Heat Generation .......................................................................... 14<br />
Heat Dissipation and Thermal Boundary Conditions ............................................... 15<br />
Material Thermo-Physical Properties ....................................................................... 20<br />
Analytical Models of Material Flow ......................................................................... 24<br />
Computational Modeling Studies ............................................................................. 28<br />
References: ................................................................................................................ 42<br />
CHAPTER II ..................................................................................................................... 47<br />
COMPUTATIONAL ANALYSIS OF FRICTION STIR WELDED T-JOINTS ............ 47<br />
FEA assessment of FSW Process Geometry for Seam Misalignment Detection ......... 47<br />
Imposed Axial Load FEA Analysis .............................................................................. 53<br />
FEA Appendix A: ..................................................................................................... 61<br />
iii
FEA Appendix B: ..................................................................................................... 64<br />
Imposed Axial Displacement FEA Analysis ................................................................ 66<br />
CFD Thermo-Plastic analysis of Friction Stir Welded T-joints under Lateral Offset .. 68<br />
Model Geometry ........................................................................................................... 70<br />
Results: ...................................................................................................................... 71<br />
References: ................................................................................................................ 79<br />
CHAPTER III ................................................................................................................... 81<br />
THE APPLICATION OF SHOULDERLESS CONICAL TOOLS IN FRICTION STIR<br />
WELDING: AN EXPERIMENTAL AND THEORETICAL STUDY ............................ 81<br />
Abstract ......................................................................................................................... 81<br />
Introduction ................................................................................................................... 81<br />
Conical Inclusive Angle Tests ...................................................................................... 85<br />
CFD Model of Conical Tool FSW ................................................................................ 96<br />
Conclusions ................................................................................................................. 103<br />
Acknowledgements ..................................................................................................... 105<br />
References: .............................................................................................................. 105<br />
CHAPTER IV ................................................................................................................. 107<br />
THE FRICTION STIR WELDING OF HEMISPHERES – A TECHNIQUE FOR<br />
MANUFACTURING HOLLOW SPHERES ................................................................. 107<br />
Abstract ....................................................................................................................... 107<br />
Introduction ................................................................................................................. 107<br />
Experimental Approach .............................................................................................. 109<br />
Force Control and Torque Control .............................................................................. 117<br />
Experimental weld matrix ........................................................................................... 121<br />
Fluent CFD Model ...................................................................................................... 138<br />
Conclusions ................................................................................................................. 146<br />
iv
Appendix ..................................................................................................................... 148<br />
References: .............................................................................................................. 150<br />
CHAPTER V .................................................................................................................. 153<br />
FRICTION STIR WELDING OF SMALL DIAMETER PIPE: AN EXPERIMENTAL<br />
AND NUMERICAL PROOF OF CONCEPT FOR AUTOMATION AND<br />
MANUFACTURING ..................................................................................................... 153<br />
Abstract ....................................................................................................................... 153<br />
Introduction ................................................................................................................. 153<br />
Experimental Setup ..................................................................................................... 155<br />
Weld Tests .................................................................................................................. 160<br />
Weld Results and Disscusion ...................................................................................... 161<br />
Modeling ..................................................................................................................... 178<br />
Conclusions ................................................................................................................. 196<br />
Appendix ..................................................................................................................... 197<br />
References: .................................................................................................................. 205<br />
CONCLUSION AND FUTURE WORK ....................................................................... 207<br />
Conclusion .................................................................................................................. 207<br />
Future Work ................................................................................................................ 209<br />
v
TABLE OF FIGURES<br />
Figure 1: Possible contact conditions, figure from [23]. .................................................. 10<br />
Figure 2: Schematic of tool surface variables. .................................................................. 10<br />
Figure 3: Tool surface inclination factors. ........................................................................ 11<br />
Figure 4: The heat transfer coefficient between the work and anvil is greater under the<br />
traveled path of the tool where heat and pressure have forced a more intimate bond.<br />
Figure from [22]................................................................................................................ 18<br />
Figure 5: Lateral cross sections of temperature contours at various rotational and travel<br />
speeds, figure from [52].................................................................................................... 21<br />
Figure 6: Thermophysical properties of Al-6061-T6, figure from [5].............................. 22<br />
Figure 7: Constitutive behavior of Al-7449 (T s -T m =50°C and T s =500°C), figure from<br />
[22].................................................................................................................................... 24<br />
Figure 8: Three flow fields a) rotation b) translation c) ring vortex; figure from [57].... 25<br />
Figure 9: Summation of three flow fields yields two flow currents, figure from [57]. .... 25<br />
Figure 10: Inverted x-ray radiography a) centerline marker dispersal (consistent with<br />
maelstrom flow path) b) retreating side marker dispersal (consistent with thru-current<br />
flow path), figure from [58].............................................................................................. 26<br />
Figure 11: Graphic depictions of Abregast metalworking FSW model, figure from [59].<br />
........................................................................................................................................... 27<br />
Figure 12: Horizontal cross-section taken at mid-plane of AA5083 plate with embedded<br />
pin after break test(v=2mm/s, ω =750, head tilt =3°), figure from [66]........................... 28<br />
Figure 13: Input/output flow diagram for the 2D and 3D models, figure from [60]. ....... 29<br />
Figure 14: Rotational flow diagrams from 2D model and corresponding weld<br />
macrosections. Welds made in AA2014 at 200mm/min (Left:1600rpm, Right:400rpm),<br />
figure from [60]................................................................................................................. 29<br />
vi
Figure 16: Left(FE streamline), Middle(analytical streamline),Right(CT). Figure from<br />
[61].................................................................................................................................... 31<br />
Figure 17: Finite element mesh and boundary conditions, figure from [62].................... 32<br />
Figure 18: Temperature contour over the plate(left), and in the vicinity of the tool(right),<br />
figure from [62]................................................................................................................. 33<br />
Figure 19: CFD and empirical weld parameters and average process force data, figure<br />
from [63]. .......................................................................................................................... 33<br />
Figure 20: Modeled temperature distributions without considering tool rotation, figure<br />
from [63]. .......................................................................................................................... 34<br />
Figure 21: Modeled temperature distributions without considering tool rotation, figure<br />
from [64]. .......................................................................................................................... 34<br />
Figure 22: Temperature distribution with consideration of tool rotation, figure from [64].<br />
........................................................................................................................................... 35<br />
Figure 26: Experimental(white) versus model predicted(gold) marker material dispersal.<br />
Depth in mm: a)0.0 b)0.6 c) 1.1 d)1.6 e)2.1 f)2.6; figure from[65]............................. 39<br />
Figure 28: Top view schematic of tunnel defect initiation, figure from [67]. .................. 41<br />
Figure 29: Dynamic pressure trend lines for spindle speed N and depth y at weld speed a)<br />
v=30mm/min b)90 mm/min. Figure from [67]................................................................. 42<br />
Figure 31: Blind type t-joint setup with no gap in clamps (untracked configuration). ..... 49<br />
Figure 30: Blind t-joint setup with squared gap (1/8”x1/8”) in clamps (tracked<br />
configuration). ................................................................................................................... 49<br />
Figure 32: Process forces and lateral offset for two separate welds using the untracked<br />
clamp geometry. ................................................................................................................ 50<br />
Figure 33: Process forces and lateral offset for two separate welds using the untracked<br />
clamp geometry (t=70s to t=130s). ................................................................................... 51<br />
Figure 34: A similar test using the tracked geometry (t=70s to t=130s). ......................... 52<br />
vii
Figure 35: Experimental Welds, Axial force (1000xN) vs. lateral offset(in) for tracked<br />
configuration. .................................................................................................................... 53<br />
Figure 36: FEA model geometry ...................................................................................... 54<br />
Figure 37: FEA boundary conditions (annotated). ........................................................... 55<br />
Figure 38: Global edge lengths for data FEA models....................................................... 56<br />
Figure 39: FEA boundary conditions (vectors). ............................................................... 56<br />
Figure 41: FEA results for untracked (gapless) geometry. ............................................... 58<br />
Figure 40: FEA results for tracked (squared gap) geometry............................................. 58<br />
Figure 40: Contour plot of deflection magnitude for 0.02 offset tracked geometry case. 59<br />
Figure 41: Contour plot of deflection magnitude for 0.02 offset tracked geometry case. 60<br />
Figure 42: Contour plot of von Mises stress (plotted over the displaced model) for 0.02<br />
offset tracked geometry case. ............................................................................................ 61<br />
Figure 43: Deformation contour for tracked (square gap) geometry with elements<br />
dedicated to steel spacer (front). ....................................................................................... 62<br />
Figure 44: Deformation contour for tracked (square gap) geometry with elements<br />
dedicated to steel spacer (iso). .......................................................................................... 63<br />
Figure 45: Deformation contour for tracked (square gap) geometry with elements<br />
dedicated to steel spacer (zoom)....................................................................................... 64<br />
Figure 46: Quarter-plate model for laterally centered case with tracked geometry<br />
boundary conditions (iso). ................................................................................................ 65<br />
Figure 47: Quarter-plate model for laterally centered case with tracked geometry<br />
boundary conditions (top). ................................................................................................ 66<br />
Figure 48: Axial force vs Lat. Offset plot with experimental and FEA data. ................... 66<br />
Figure 49: Contour plot of deflection magnitude for 0.02” offset tracked geometry case.<br />
........................................................................................................................................... 67<br />
Figure 50: Contour plot of von Mises stress for 0.02” offset tracked geometry case. ...... 67<br />
viii
Figure 51: A thermal camera image taken during the steady state weld period of a<br />
1000rpm, 4 ipm, blind-T weld .......................................................................................... 70<br />
Figure 52: Fluent CFD model zones. ................................................................................ 71<br />
Figure 53: Surface heat fluxes for CFD model faces. ....................................................... 71<br />
Figure 54: Thermal contour for laterally centered case. ................................................... 72<br />
Figure 55: Thermal contour of weld material at the interface for laterally centered case. 73<br />
Figure 56: Thermal contour for 0.05in advancing side lateral offset case........................ 73<br />
Figure 57: Thermal contour of weld material at the interface for 0.05in advancing side<br />
lateral offset case............................................................................................................... 74<br />
Figure 58: Thermal contour for 0.05in retreating side lateral offset case. ........................ 74<br />
Figure 59: Thermal contour of weld material at the interface for 0.05in retreating side<br />
lateral offset case............................................................................................................... 75<br />
Figure 60: Contour of total pressure for 0.05” advancing side offset case. ...................... 76<br />
Figure 61: Velocity vectors for 0.05” advancing side offset case. ................................... 77<br />
Figure 62: Contour of velocity magnitude for 0.05” advancing side offset case. ............ 77<br />
Figure 63: Contour of total pressure for 0.05” retreating side offset case. ....................... 78<br />
Figure 64: Velocity vectors for 0.05” retreating side offset case. .................................... 78<br />
Figure 65: Contour of velocity magnitude for 0.05” retreating side offset case. .............. 79<br />
Figure 66: A shoulder-less, conical tool (90º inclusive angle) used in the experiment .... 83<br />
Figure 67: XY plane force oscillations were typically present at low spindle head angles<br />
with conical welds, presumably due to the lack a horizontal, stabilizing shoulder. The<br />
experiment was therefore performed at a 4° angle where this problem did not exist. ...... 84<br />
Figure 68: Typical axial(Z-axis) force data. ..................................................................... 85<br />
Figure 69: Typical in plane force data. ............................................................................. 85<br />
Figure 70: Typical surface appearance for 90° conical tool welds on 1/8” thick butted<br />
6061 alloy aluminum plates. Typical conical surface defects are pointed out. ................ 86<br />
ix
Figure 71: 90° conical tool macrosections. Some 90°,Run2 welds were not<br />
macrosectioned. ................................................................................................................ 87<br />
Figure 72: 90° conical tool macrosections. Note: Run 3, 1600rpm, 4ipm, 90° was<br />
macrosectioned twice. ....................................................................................................... 87<br />
Figure 73: Run 1, 80° conical tool macrosections ............................................................ 88<br />
Figure 74: Run 2, 80° conical tool macrosections ............................................................ 88<br />
Figure 75: Run 3, 80° conical tool macrosections ............................................................ 89<br />
Figure 76: Macrosection of the strongest conical weld (90°,1600rpm, 4ipm, Run#1). A<br />
minimal penetration ligament is crucial to weld strength. Failure in the tensile coupon<br />
occurred along the retreating (right) side weld nugget boundary. .................................... 89<br />
Figure 77: Macrosection of the weakest 90° conical weld(90°,1400rpm, 4ipm, Run#1).<br />
Failure occurred at the jointline and along the retreating side weld nugget boundary. A<br />
significant lack of penetration (weld root) defect can be seen in this weld indicating a<br />
slight error in the automated zeroing process for this particular weld. Three welds at each<br />
parameter set were performed to distinguish such outliers. .............................................. 90<br />
Figure 78: A particularly revealing macrosection (90°,1400rpm, 5ipm, Run#1). A<br />
jointline remnant can be seen curving through the weld nugget center. In addition, the<br />
lack of consolidation near the cone tip which is typical of a cone weld can be seen clearly<br />
here. The lack of sufficient probe surface area, heating, and pressure at the cone tip result<br />
in a lack of consolidation there. ........................................................................................ 90<br />
Figure 79: (90º tool) Ultimate tensile strength of weld specimen over that of the parent<br />
plotted against spindle speed in rpm. Three welds were performed at each parameter set<br />
(ipm,rpm). ......................................................................................................................... 91<br />
Figure 80: (80º tool) Ultimate tensile strength of weld specimen over that of the parent<br />
plotted against spindle speed in rpm. Three welds were performed at each parameter set<br />
(ipm,rpm). ......................................................................................................................... 91<br />
Figure 81: (90º tool) Axial force magnitude for each weld plotted against spindle speed in<br />
rpm. Three welds were performed at each parameter set (ipm, rpm). 8000 N is typical<br />
x
for a similar conventional weld (3/4in. dia. shoulder, ½”-20 pin). Conical welds produce<br />
significantly lower axial force. ......................................................................................... 92<br />
Figure 82: (90º tool) Weld moment for each weld plotted against spindle speed in rpm.<br />
Three welds were performed at each parameter set (ipm, rpm.) 18 N·m is typical for a<br />
similar conventional weld (3/4in. dia. shoulder, ½”-20 pin). Conical welds produce<br />
significantly lower weld moment...................................................................................... 92<br />
Figure 83: (90º tool) Lateral force magnitude for each weld plotted against spindle speed<br />
in rpm. Three welds were performed at each parameter set (ipm, rpm). +2500 N Y is<br />
typical for a similar conventional weld (3/4in. dia. shoulder, ½”-20 pin). Conical welds<br />
produce significantly lower lateral force(change in sign due to clockwise vs. counterclockwise<br />
rotation). ........................................................................................................... 93<br />
Figure 84: (90º tool) Longitudinal force magnitude for each weld plotted against spindle<br />
speed in rpm. Three welds were performed at each parameter set (ipm, rpm). +2500N X<br />
is typical for a similar conventional weld (3/4in. dia. shoulder, ½”-20 pin). Conical<br />
welds produce significantly lower longitudinal force. Sign for a particular weld is<br />
dependent to clockwise vs. counter-clockwise rotation. All conical welds in this<br />
experiment were made with clockwise rotation................................................................ 93<br />
Figure 85: (80º tool) Axial force magnitude for each weld plotted against spindle speed in<br />
rpm. ................................................................................................................................... 94<br />
Figure 86: (80º tool) Weld moment for each weld plotted against spindle speed in rpm. 94<br />
Figure 87: (80º tool) Lateral force magnitude for each weld plotted against spindle speed<br />
in rpm. ............................................................................................................................... 95<br />
Figure 88: (80º tool) Longitudinal force magnitude for each weld plotted against spindle<br />
speed in rpm. ..................................................................................................................... 95<br />
Figure 89: Thermal camera data for 90º tool runs. .......................................................... 96<br />
Figure 90: Thermal camera data for 80º tool runs. ........................................................... 96<br />
Figure 91: CFD model geometry consisting of 510,299 tetrahedral elements. .............. 101<br />
Figure 92: Increasing element refinement towards the weld interface. .......................... 101<br />
xi
Figure 93: Thermal boundary conditions used in the model. ......................................... 102<br />
Figure 94: Temperature gradients in the vicinity of the weld interface. ......................... 102<br />
Figure 95: Lateral cross-section of the weld model showing contours of velocity<br />
magnitude in the material surrounding the tool. This outlines the so-called thermomechanically<br />
affected zone (TMAZ). The blackened area in the vicinity of the tool is<br />
outside the scale of this particular contour graph, which has been cropped to accentuate<br />
flow near the TMAZ boundary. ...................................................................................... 103<br />
Figure 96: Attempts a probe tapered retraction from 1/8” material full penetration welds<br />
at various parameters. The probe tends to ‘drag’ through the material near exit. ......... 105<br />
Figure 97: Experimental weld samples were machined from pipe with the external<br />
curvature of a sphere. These samples were halved and then joined in a butted<br />
configuration. .................................................................................................................. 111<br />
Figure 98: Bead protrusion type defect experienced in cupped shoulder (Ø 5/8”), threaded<br />
probe (Ø 0.20”) tool, bead-on-plate type welds made without a backing ring anvil.<br />
Surface quality was more difficult to maintain. (Ø = diameter). .................................... 112<br />
Figure 99: Split protrusion type defect experienced in cupped shoulder (Ø 5/8”), threaded<br />
probe (Ø 0.20”) welds made without a backing ring anvil at 50% material penetration in a<br />
butt weld configuration. This defect was present at all tested parameters with this weld<br />
depth and tooling. The unsupported portion of the experiment was therefore performed<br />
with a shoulder-less, conical tool. The conical tool experienced no visible deformation at<br />
the weld root at this weld depth over the parameters tested in butted configuration welds.<br />
(Ø = diameter) ................................................................................................................. 113<br />
Figure 100: Macrosection view of the split protrusion type defect experienced in cupped<br />
shoulder (Ø 5/8”), threaded probe (Ø 0.20”) tool weld made without a backing ring anvil<br />
at 50% material penetration in a butt weld configuration. .............................................. 114<br />
Figure 101: Surface appearance for a butt configuration weld made with a 100º conical<br />
tool (Ø 0.025” snub-nose and Ø 0.015” cupped nose recess). No backing ring anvil was<br />
used. ................................................................................................................................ 115<br />
xii
Figure 102: Tapered retraction procedure performed in a bead on plate configuration. A<br />
snubbed nose, cupped nose, 100º conical tool was used. The final segment of the<br />
retraction is essentially flush with the sphere surface (i.e. no indentation). ................... 116<br />
Figure 103: Tapered retraction procedure performed in a butted configuration after and<br />
over a full, circumferential weld ..................................................................................... 117<br />
Figure 104: Experimental setup for rotary FSW of hemispherical butted sections. ....... 117<br />
Figure 105: Dynamometer data for a butted configuration, sphere weld (1000rpm,<br />
10.4ipm, 0.095” depth) using a 100º conical tool (snub-cup). The top frame shows<br />
measured force(blue) and desired force (green). The desired force is presented for<br />
comparison and not used in the control algorithm. The middle panel shows measured<br />
torque(blue) and desired torque (green). Toque is highly sensitive to plunge depth. The<br />
desired depth is followed closely by maintaining weld torque via vertical adjustments of<br />
tool position. The weld is a full circumferential weld and the eccentricity of the setup can<br />
be seen in the lower frame which shows the vertical position of the tool relative to its<br />
initial calibration on the material surface. ....................................................................... 119<br />
Figure 106: Dynamometer data for a butted configuration, sphere weld (1000rpm,<br />
10.4ipm, 0.095” depth) using a 100º conical tool (snub-cup). The weld is a full<br />
circumferential weld and the eccentricity of the setup can be seen in the lower frame,<br />
which shows the vertical position of the tool relative to the machine stage. The<br />
eccentricity was generally around 0.02” but varied in its manifestation from weld to weld.<br />
The desired torque is closely maintained. From approximately 159 to 203 seconds the<br />
spinning tool is being gradually lowered (plunged) into the material at approximately<br />
0.002” per second. From 203 to 209 seconds the vertical and rotary (traverse) motors are<br />
stopped during a brief dwell period prior rotary motor engagement. Reductions in axial<br />
force from 188 to 203 seconds are due to material softening [27]. ................................ 120<br />
Figure 107: Surface appearance for full-penetration, supported welds made with the<br />
cupped shoulder, threaded probe tool. Samples are taken from the steady-state, steadydepth<br />
portion of each weld. ............................................................................................. 122<br />
xiii
Figure 108: Lateral macrosections for full-penetration, supported welds made with the<br />
cupped shoulder, threaded probe tool. Samples are taken from the steady-state portion of<br />
each weld. Bose's reagent was used for etching. ........................................................... 123<br />
Figure 109: Lateral macrosections for partial-penetration, unsupported welds made with<br />
the conical tool. Samples are taken from the steady-state portion of each weld. .......... 124<br />
Figure 110: (Supported, cupped tool) A plot of axial (z-direction) force showing an<br />
inverse relationship with rotation rate and a direct relationship with traverse speed. .... 125<br />
Figure 111: (Unsupported, conical tool) A plot of axial (z-direction) force showing an<br />
inverse relationship with rotation rate and a direct relationship with traverse speed. .... 126<br />
Figure 112: (Supported, cupped tool) A plot of moment (z-axis) showing an increased<br />
moment with increased traverse speed for all rotation rates. The moment was also<br />
generally reduced with increasing rotational speed. ....................................................... 127<br />
Figure 113: (Unsupported, conical tool) The moment decreased consistently with<br />
increasing rotational rate. Moment values were much lower for the partial penetration,<br />
conical tool portion of the experiment. ........................................................................... 128<br />
Figure 114: (Supported, cupped tool) The tool is deflected towards the advancing side at<br />
both traverse rate settings. At the higher travel speed setting the tool is deflected to the<br />
trailing side...................................................................................................................... 129<br />
Figure 115: (Unsupported, conical tool) The tool is deflected towards the advancing,<br />
trailing quadrant. ............................................................................................................. 130<br />
Figure 116: Explanation of true stress and apparent stress for partial penetration samples.<br />
All partial penetration welds were done in an anvil-less (unsupported) configuration. . 131<br />
Figure 117: A comparison of apparent stress in full penetration weld tensile samples and<br />
apparent and true stress in partial penetration tensile samples. One tenth inch is 50% of<br />
the material thickness and partial penetration welds were made with the conical tool and<br />
no backing ring anvil. ..................................................................................................... 132<br />
Figure 118: A comparison of apparent tensile strength in all unsupported, partial<br />
penetration experimental welds. The travel speed, penetration depth, and spindle rate<br />
xiv
setting are indicated. Note that strength continues to increase with depth beyond the<br />
matrix depth of 0.10” despite distortion at the base of the joint (see Figure 119 and Figure<br />
120). ................................................................................................................................ 134<br />
Figure 119: Macrosection view of an unsupported, butt configuration weld made with a<br />
100º conical tool (0.025” diameter snub-nose and 0.015” cupped nose recess) at 800rpm,<br />
5.2 ipm, and a penetration depth of 0.11”. ...................................................................... 135<br />
Figure 120: Macrosection view of an unsupported, butt configuration weld made with a<br />
100º conical tool (0.025” diameter snub-nose and 0.015” cupped nose recess) at<br />
1000rpm, 10.4ipm, and a penetration depth of 0.11”. At this depth, unsupported welds<br />
made with the conical tool begin to split and protrude at the root for some of the tested<br />
weld parameters. The initiation of protrusion and splitting in the weld root at 0.110” was<br />
deemed undesirable by the authors for the suggested applications. The experimental<br />
matrix was therefore performed at 0.100” where this did not occur. It should be noted<br />
however that the strength of the unsupported welds increased with depth beyond the<br />
experimental matrix depth of 0.100”. ............................................................................. 135<br />
Figure 121: Surface appearance of an unsupported, butt configuration weld made with a<br />
100º conical tool (0.025” diameter snub-nose and 0.015” cupped nose recess) at<br />
1000rpm, 10.4ipm, and a penetration depth of 0.11” (1/16 th inch demarcations). ........ 136<br />
Figure 122: Conical tool, unsupported, partial penetration welds were performed at four<br />
depths at the 10.8ipm and 1000rpm parameter setting and showed a consistent increase in<br />
axial force with penetration depth. .................................................................................. 137<br />
Figure 123: Weld moment was a better indicator of penetration depth for the conical tool<br />
and a torque based control method was used in the experiment to maintain penetration<br />
depth. ............................................................................................................................... 138<br />
Figure 124: (threaded tool) Tetrahedral mesh created in the Fluent preprocessor Gambit.<br />
......................................................................................................................................... 139<br />
Figure 125: (threaded tool) Geometry ............................................................................ 140<br />
Figure 126: (threaded tool) Contours of temperature in degrees Celsius. ...................... 141<br />
Figure 127: (threaded tool) Contours of temperature in degrees Celsius. ...................... 142<br />
xv
Figure 128: (conical tool) Geometry created in the Fluent preprocessor Gambit. ......... 143<br />
Figure 129: (threaded tool) Lateral contours of temperature (C) showing the heat affected<br />
zone (HAZ). .................................................................................................................... 144<br />
Figure 130: (threaded tool) Lateral contours of velocity magnitude (m/s) showing the<br />
thermo-mechanical affected zone (TMAZ). ................................................................... 144<br />
Figure 131: (threaded tool) Lateral macrosection corresponding (1000rpm, 7.8ipm) to<br />
the CFD simulated weld showing the TMAZ(bright), parent metal(dark), and transitional<br />
HAZ (intermediate). The HAZ region can be compared to isotherms in Figure 129 and<br />
the TMAZ or stirred zone can be compared to the velocity magnitude contour in Figure<br />
130................................................................................................................................... 145<br />
Figure 132: (conical tool) Lateral contours of temperature (C) showing the heat affected<br />
zone (HAZ). .................................................................................................................... 145<br />
Figure 133: (conical tool) Lateral contours of velocity magnitude (m/s) showing the<br />
thermo-mechanical affected zone (TMAZ). ................................................................... 146<br />
Figure 134: (conical tool) Lateral macrosection corresponding (1000rpm, 7.8ipm) to the<br />
CFD simulated weld showing the TMAZ(bright), parent metal(dark), and transitional<br />
HAZ (intermediate). Figure 132 and Figure 133 show the HAZ and TMAZ respectively<br />
forming transposed bowl shaped regions around the weld tool in the experimental model<br />
and this shape is verified in the macrosection. ............................................................... 146<br />
Figure 135: Tools used in the experiments ( from left: 90º conical tool; cupped shoulder<br />
(5/8” diameter), threaded probe (0.20” diameter) tool; snubbed nose, cupped nose, 100º<br />
conical tool; snubbed nose, 100º conical tool; 100º conical tool; 140º spiral-cut, conical<br />
tool(Edison Welding Institute test design) ). .................................................................. 148<br />
Figure 136:(from left: Tapered retraction over welded material (100º snub-cup); bead on<br />
plate tapered retraction (100º snub-cup); 0.09” depth weld made with a 140º spiral-cut,<br />
conical tool). ................................................................................................................... 149<br />
Figure 137: Anvil-less butt/lap type weld joining 3 material sections and not performed in<br />
the experiments presented in this work. The joint and materials could alternatively be<br />
configured with the lateral interface following the curvature of the top surface.<br />
xvi
Unsupported welds of this kind with a traditional FSW tool create a bead type defect on<br />
the underside. A shoulder-less, conical tool was used in unsupported welds in the<br />
experiment....................................................................................................................... 150<br />
Figure 138: The rotary welding apparatus used in this experiment is mounted to a<br />
standard FSW machine and rotates butted pipe sections below a stationary tool axis. .. 156<br />
Figure 139: A still image taken from video made during an experimental weld (top view).<br />
......................................................................................................................................... 156<br />
Figure 140: A closeup view of a tool used in the experiment and the butted weld<br />
specimens used in the experiment. The pipe sections are shown mounted in the welding<br />
apparatus. The experiment is started from this position. The tool probe was position was<br />
calibrated, or zeroed, against the surface of the work. The tool rotation is started and the<br />
probe is plunged into the material until the desired contact is achieved with the shoulder<br />
on the cylindrical surface of the work............................................................................. 158<br />
Figure 141: The expandable mandrel consists of slotted end caps which mate with the<br />
keyed axle of the rotary apparatus, a ring anvil with an expansion gap and inner taper, a<br />
spacer for centering the anvil, an expansion plug with an outer taper, and bolts (not<br />
pictured) to expand the mandrel by pulling the plug towards an end cap and into the taper<br />
of the anvil. ..................................................................................................................... 160<br />
Figure 142: Ultimate tensile strength (UTS) as a percentage of the parent material UTS<br />
vs. Traverse Rate for full-penetration butted pipe welds made with 5/8” diameter, scrolled<br />
shoulder and 0.18” length, threaded probe tools. Data is shown for both the<br />
3/16”(4.8mm) diameter probe tool and the 0.236”(6mm) diameter probe tool used in the<br />
experiment. Weld tensile strength is observed to increase with increasing process rates<br />
with the exception of the extreme cases. ........................................................................ 162<br />
Figure 143: The curvature of the pipe tensile coupons required the use of specialized<br />
clamps. The tensile jaws pictured above were designed to grip tensile coupons cut from<br />
welds of butted pipe and butted hemisphere sections. Each jaw uses six bolts to grip each<br />
coupon. Bolt tips are spiked, snubbed, or flat depending on the geometry gripped and the<br />
location contacted on the coupon. ................................................................................... 163<br />
xvii
Figure 144: Experimental axial forces plotted with traverse rate for butted pipe welds<br />
made with a 5/8” diameter scrolled shoulder and 6mm diameter threaded probe tool. .. 165<br />
Figure 145: CFD model axial forces plotted with traverse rate for butted pipe welds made<br />
with a 5/8” diameter scrolled shoulder and 6mm diameter threaded probe tool. ........... 166<br />
Figure 146: Axial force history recorded via a calibrated strain gauge array mounted to<br />
the spindle head for a weld performed with a 0.236”(6mm) diameter, threaded probe tool<br />
at 1600rpm and 15.7ipm. Recent equipment failure eliminated the force feedback control<br />
ability of the experimental FSW machine. Efforts were taken to ensure forces fluctuated<br />
within an acceptable range during the welding process.................................................. 168<br />
Figure 147: Axial force history for a weld performed with a 0.236”(6mm) diameter,<br />
threaded probe tool at 1600rpm and 15.7ipm. Force control was not used and axial<br />
values fluctuated within a range which did not affect weld appearance. To achieve this<br />
tolerance to weld contact pressure, a featured shoulder (scrolled) was used. ................. 169<br />
Figure 148: The 5/8” (15.9mm) diameter scrolled shoulder, 3/16” (4.8mm) probe<br />
diameter tool used in this experiment. The scrolled shoulder feature increased tolerance<br />
to variation in contact condition and improved weld appearance. .................................. 169<br />
Figure 149: The superficial appearance of a typical welded pipe specimen (close) ...... 170<br />
Figure 150: The superficial appearance of several pipes welded in the experiment. ..... 170<br />
Figure 151: Lateral macrosection view of welds made at 5.2 and 6.6ipm using a 5/8” dia.<br />
scrolled shoulder, 3/16” dia. threaded probe tool. Two of the weld images presented<br />
above were made by composition of two photos due to an equipment issue. ................ 171<br />
Figure 152: Macrosections of selected welds made with the narrow probe tool. ........... 172<br />
Figure 153: Lateral macrosection view of welds made at 5.2 and 6.6ipm using a 5/8” dia.<br />
scrolled shoulder, 0.236”(6mm) diameter threaded probe tool. ..................................... 172<br />
Figure 154: Macrosections of welds made at 7.9 and 9.2ipm with the wide probe tool. 173<br />
Figure 155: Macrosections of welds made at 10.5 and 11.8ipm with the wide probe tool.<br />
......................................................................................................................................... 173<br />
Figure 156: Macrosections of selected welds made with the wide probe tool. .............. 174<br />
xviii
Figure 157: A thermal camera image from thermal video taken during the experiment<br />
showing the region of interest on the tool shank. The emissivity of the tool shank was<br />
determined by observing the shank with the camera at several temperatures when the<br />
temperature of the shank was known. ............................................................................. 175<br />
Figure 158: Average tool shank temperature obtained via thermal camera over the steady<br />
state portion of welds made using the narrow probe tool. .............................................. 176<br />
Figure 159: Average tool shank temperature obtained via thermal camera over the steady<br />
state portion of welds made using the wide probe tool. .................................................. 177<br />
Figure 160: A chart showing the tool shank thermal history over the course of a selected<br />
weld from the experiment. This data was typical of weld thermal data taken during the<br />
experiment in that temperature continued to rise throughout the weld. ......................... 178<br />
Figure 161: Computer model geometry created in the Gambit preprocessor showing the<br />
inlet, outlet, and model zones. ........................................................................................ 180<br />
Figure 162: A closeup view of mesh refinement on the tool face. The featured shoulder<br />
and threaded probe can be seen. The mesh was finest at the interface. ......................... 181<br />
Figure 163: Modeled temperature contour (C) for the narrow 4.8mm(3/16”) diameter<br />
probe tool case (Iso view). .............................................................................................. 186<br />
Figure 164: Modeled temperature contour (C) for the narrow probe tool case<br />
(longitudinal view). ......................................................................................................... 187<br />
Figure 165: Modeled temperature contour (C) for the narrow probe tool case (front lateral<br />
view looking from the inlet). .......................................................................................... 188<br />
Figure 166: Modeled temperature contour (C) for the narrow probe tool case (top view of<br />
a slice taken at the middle of the probe). ........................................................................ 188<br />
Figure 167: Modeled temperature contour (C) for the wide 0.236”(6mm) diameter probe<br />
tool case (Iso view). ........................................................................................................ 189<br />
Figure 168: Modeled temperature contour (C) for the wide probe tool case (longitudinal<br />
view). .............................................................................................................................. 190<br />
xix
Figure 169: Modeled temperature contour (C) for the wide probe tool case (front lateral<br />
view looking from the inlet). .......................................................................................... 191<br />
Figure 170: Modeled temperature contour (C) for the wide probe tool case (top view of a<br />
slice taken at the middle of the probe). ........................................................................... 191<br />
Figure 171: Model pathlines for the narrow probe tool case (looking from the top,<br />
advancing side is red)...................................................................................................... 192<br />
Figure 172: Model pathlines for the wide probe tool case (looking from the top,<br />
advancing side is red)...................................................................................................... 193<br />
Figure 173: Model pathlines for the narrow probe tool case (looking from the inlet,<br />
advancing side is red)...................................................................................................... 194<br />
Figure 174: Model pathlines for the wide probe tool case (looking from the inlet,<br />
advancing side is red)...................................................................................................... 195<br />
Figure 175: Lateral contour of velocity magnitude (m/s) compared with experimental<br />
lateral macrosection for the wide (6mm diameter) probe case. The stirred zone (light,<br />
center), thermomechanically affected zone (TMAZ)(dark), and parent material (lightest)<br />
can be seen in the macrosection. The model shows significant material stirring in the<br />
stirred zone, minimal material stirring in the TMAZ, and no material stirring in the parent<br />
material. .......................................................................................................................... 195<br />
Figure 176: Zoom view of a macro taken from a full penetration butted pipe weld<br />
(1400rpm, 5.2ipm). The experimental tools had a 5/8” diameter, scrolled shoulder and<br />
0.18” length, threaded probe. The wide (0.236” diameter) probe tool created this weld.<br />
......................................................................................................................................... 197<br />
Figure 177: Zoom view of a macro taken from a wide probe weld (1400rpm, 5.2ipm).<br />
The advancing side of the weld is shown. ...................................................................... 198<br />
Figure 178: Zoom view of a macro taken from a wide probe weld (1400rpm, 5.2ipm).<br />
The retreating side of the weld is shown. ....................................................................... 199<br />
Figure 179: The superficial appearance of some of the pipes welded in the experiment<br />
and some additional pipe welding runs not presented in the experiment. The center and<br />
xx
ottom sample is a tungsten inert gas, TIG, weld made for comparison with filler type<br />
5356................................................................................................................................. 200<br />
Figure 180: The superficial appearance of some of the pipes welded in the experiment<br />
and some additional pipe welding runs not presented in the experiment. The top and<br />
center sample is a TIG weld. ........................................................................................... 201<br />
Figure 181: The superficial appearance of some of the pipes welded in the experiment<br />
and some additional pipe welding runs not presented in the experiment. Left and bottom<br />
is a TIG weld sample. ..................................................................................................... 202<br />
Figure 182: The rotary welding apparatus (grey, left), rotary bearing (black, center), and<br />
rotary motor (beige, right). .............................................................................................. 203<br />
Figure 183: Rotary welding apparatus with keyed shaft. ............................................... 204<br />
Figure 184: Left is a pipe sample used for tensile coupons of the parent material and<br />
geometry. Right are pipe sections joined in the experiment. .......................................... 204<br />
Figure 185: A diagram illustrating the tool offest with respect to the highest point of the<br />
rotating pipe sections. The offset is parallel to the weld seam and results in the desired<br />
contact condition. This offset configuration reduced vibration and improved weld quality<br />
in comparison to the case without offset. ........................................................................ 205<br />
xxi
LIST OF ABBREVIATIONS AND SYMBOLS<br />
γ& - shear strain-rate<br />
δ - contact state variable<br />
λ - time constant<br />
µ ∞ - infinite shear viscosity<br />
τ contact – contact shear<br />
σ e - equivalent steady state flow stress (Mpa)<br />
µ o - zero shear viscosity<br />
τ yield – yield shear stress or shear strength (Pa)<br />
“ – inches (e.g. 4” = 4 inches)<br />
µ - friction coefficient<br />
A – visco-plastic model material constant<br />
A horz – horizontal tool area<br />
AMP – Advanced Metal Products Inc.<br />
CFD – computational fluid dynamics<br />
C p – specific heat<br />
CT - computed tomography imaging<br />
EWI – Edison Welding Institute (Ohio)<br />
FE – finite element<br />
FEA - finite element analysis<br />
FSW - friction stir welding<br />
h – tool probe height<br />
HAZ – heat affected zone<br />
ipm – inches per minute<br />
K – kelvin (absolute temperature unit)<br />
m – meters (length unit)<br />
m - power law non-Newtonian fluid index<br />
mm – millimeters (length unit)<br />
mol - mole (SI base unit of amount of substance)<br />
MPa – megapascal<br />
xxii
N – newton (force unit)<br />
n - visco-plastic model material constant<br />
Ø – diameter<br />
ORNL – Oak Ridge National Lab<br />
P – weld power (Watts)<br />
Pa – pascal (pressure unit)<br />
Q - heat generation (Watts)<br />
Q n – heat generated by a narrow (3/16” or 4.8mm diameter) probe tool<br />
Q ps - probe side surface heat input<br />
Q s - total tool surface heat input<br />
Q ss - shoulder surface heat input<br />
Q v – volume heat contribution<br />
Q w - heat generated by a wide (0.246” or 6.0mm diameter) probe tool<br />
Q weld – weld heat input<br />
Q wp – heat dissipated to the weld plate<br />
r - radius<br />
R – the gas constant<br />
rad – radians (angular unit)<br />
r p ( or R p ) – tool probe (pin) radius<br />
rpm – revolutions per second<br />
RPT – retractable probe tool<br />
r s ( or R s ) – tool shoulder radius<br />
s – second (time unit)<br />
TIG - tungsten inert gas type fusion welding<br />
TMAZ – thermo-mechanically affected zone<br />
T o - reference temperature for Carreau equation<br />
TWI – The Welding institute of England (Cambridge)<br />
UAV – unmanned aerial vehicle<br />
UTS – ultimate tensile strength<br />
Vmatrix - velocity of the material adjacent to the tool surface<br />
VPT – variable penetration tool<br />
xxiii
W – watt (power unit)<br />
Z – the Zener-Hollomon parameter<br />
α - visco-plastic model material constant<br />
β (Beta) – power efficiency factor<br />
η (eta) – power efficiency factor<br />
ω (omega) - tool rotational speed (rad/s)<br />
Ω (Omega) - torque (N⋅m)<br />
xxiv
INTRODUCTION<br />
Friction Stir Welding, FSW, is a materials joining process with great potential as<br />
joint quality is exceptionally high and the process is very repeatable. Additionally, the<br />
process does not use fillers and, like fusion welding, eliminates the need for fasteners,<br />
which add weight to a structure. These attributes combined with its particular<br />
effectiveness on low-melting point alloys (which happen to be low-density) like<br />
aluminum and magnesium make FSW very applicable to vehicular applications where<br />
costs can easily be justified by increases in strength versus weight and high joint quality.<br />
One current limitation of the process is its range of application with respect to joint<br />
geometry.<br />
In this work, the FSW process is applied to butted hemispherical joints and butted<br />
pipe joints of small diameter (approximately 4 inches). These joints are nonstandard and<br />
the application of FSW to these geometries, with such small diameters, has not been<br />
presented in the literature. These cases present complications to the standard FSW<br />
process and equipment. These complications arise from the surface curvature of these<br />
geometries and from the circular nature of the weld path required to join them. The<br />
circular nature of the weld path means that either the tool (and the bulk of a spindle motor<br />
and control instrumentation) must orbit the work or that the work itself must be rotated<br />
on its axis. Either approach presents difficulties. An orbital tool requires a complicated<br />
and bulky orbital apparatus. The apparatus must be bulky enough to provide the large<br />
down-force required for weld consolidation and material containment in friction stir<br />
welding. In addition, this apparatus must be made to orbit smoothly around the pipe or<br />
sphere.<br />
Rotating the work presents its own difficulties. The primary difficulty is that the<br />
entirety of the work must be rotated about an axis. In the case of a pipe, the length of the<br />
sections to be joined is indefinite. In addition, the bulk of the work must be rotated<br />
smoothly about its axis, with the eccentricity of this rotation limited within the ability of a<br />
force feedback control system to compensate for changes in the height of the work<br />
surface with respect to the tool. In the case of an experimental testbed, the choice of a<br />
1
otating work, or rotary, type apparatus over an orbiting tool, or orbital, type apparatus is<br />
an easy one because the length of pipe sections can be limited to something easily<br />
managed. In an experimental setting it makes sense to rotate the work because the work<br />
sections are small specimens. In an industrial setting, the orbital option should be<br />
considered.<br />
The circular nature of the weld path presents a secondary complication. The weld<br />
initiation and weld termination sites must either be coincident or the weld tool must pass<br />
through the weld initiation site before weld termination. Regardless, the weld initiation<br />
site will be subjected to a secondary heating period. This secondary thermal input at near<br />
the weld initiation site will cause a rise in weld temperature as a warm weld initiation<br />
zone will be exposed to the thermal effects of the weld process for a second time.<br />
Because the thermal and mechanical aspects of the FSW process are highly coupled, this<br />
may adversely affect the qualities of the welded material unless compensated for with<br />
reduced weld thermal input in the latter stages of the circumferential weld.<br />
The most obvious complication associated with FSW of hemispheres and pipes is the<br />
curved nature of the work surface. In traditional FSW, a flat shoulder contacts a flat<br />
workpiece and provides frictional heating, downward pressure, and material containment.<br />
In the case of a pipe with surface curvature and a sphere with dual surface curvature; a<br />
flat, circular tool shoulder does not mate in an ideal fashion with the work surface. In the<br />
case of a sphere, it is logical to cup the tool shoulder in such a fashion to mate with the<br />
exterior of the spherical work. The effectiveness of this approach is demonstrated in this<br />
work. In the case of a pipe, a tool geometry in combination with an appropriate<br />
orientation relative to the work must be found, which produces acceptable welds joining<br />
two butted pipes. In this work an effective method of joining butted pipe sections by<br />
FSW is demonstrated.<br />
The problems presented in sphere and pipe welding by secondary heating, work<br />
rotational eccentricity, and surface curvature are exacerbated in the case of small<br />
diameter work. Work specimens with a small radius of curvature present a shorter<br />
circumferential weld path resulting in a smaller time period between primary heating at<br />
the weld initiation site and the secondary heating described earlier. Additionally, for<br />
small diameter work heat is more readily conducted throughout the workpiece because of<br />
2
educed conduction lengths. In small diameter, as compared to large diameter work, the<br />
radial velocity of the tool around the circular weld path is higher because the<br />
circumference of the work is smaller. This relationship results in more rapid changes in<br />
the work surface height relative to the tool for the same rotational eccentricity. Small<br />
diameter work also presents the most highly curved surface for FSW and creates the<br />
greatest difficulty in the problem of tool shoulder mating described earlier.<br />
The conical tool study presented attempts to address an additional issue associated<br />
with FSW of butted hemispheres and butted pipes. In traditional FSW, the weld tool<br />
leaves a defect at the weld termination site. This defect is either a tearing at the<br />
boundary of the work where the thermal and mechanical influences of the weld zone rip<br />
the tool out of the end of the material or, more commonly, a hole left by the tool probe<br />
when the tool traverse is stopped and the tool is vertically retracted from the work. Pipes<br />
and spheres present closed contours which do not provide a convenient location for weld<br />
termination. Unlike a linear weld, there is no abrupt boundary to the work material. The<br />
entirety of the pipe or sphere is critical and there is no location where a weld termination<br />
defect is acceptable. A method of weld termination must therefore be used that extracts<br />
the tool from the material with minimal defect. Complicated solutions to this problem<br />
exist, such as a retractable probe tool (RPT) and a runoff tab method. These solutions<br />
have significant drawbacks. The RPT adds significant cost and complication to the<br />
machine, and the runoff tab method requires that a tab be welded over the welded path<br />
during welding and before weld termination. A conical tool, or variable penetration tool<br />
(VPT), is potentially a simple and elegant solution to this problem.<br />
In addition to expanding the range of application of FSW to nonstandard joint<br />
configurations, this work seeks to join pieces at a high traverse rate for application to<br />
manufacturing and automation. Welding at a high traverse rate can increase the output of<br />
the FSW machine and justify the significant cost associated with the technology. In this<br />
work hemispheres and pipes are joined successfully at traverse rates of 10.4 and 17<br />
inches per minute respectively. At this speed, the full circumference of the pipe sections<br />
is joined in under 50 seconds.<br />
The studies presented here are accompanied by computational fluid dynamic<br />
(CFD) models which reliably predict the temperature fields present during welding, the<br />
3
flow of material during the process, and process forces. Significant expense is necessary<br />
for the design and implementation of a FSW experiment. The FSW machine is an<br />
expensive piece of equipment and the design of a FSW experiment is a significant<br />
undertaking. The weld tool, work geometry, and work fixturing must be designed and<br />
machine time must be used to perform the experiment. The difficulty of obtaining<br />
empirical data in FSW creates a need for a useful numerical tool for assessing a FSW<br />
environment prior to welding. The models presented use relatively simple process<br />
model equations and reliably predict the critical aspects of the FSW process for a wide<br />
variety of FSW process environments.<br />
4
CHAPTER I<br />
LITERATURE REVIEW: COMPUTATIONAL MODELING OF FRICTION STIR<br />
WELDING<br />
Introduction<br />
Friction Stir Welding<br />
Friction stir welding (FSW) is a relatively new, solid-state, metal joining process<br />
invented by Wayne Thomas et al. at the Welding Institute of England (now TWI) in 1991<br />
[1]. A FSW butt weld is made by following the joint-line of two butted pieces of material<br />
with a rotating tool while applying a significant down-force through the tool. Heating is<br />
provided at or near the tool-work interface by the rotating tool, traditionally a single piece<br />
comprised of a shoulder, which contacts the material surface, and a submerged probe. In<br />
addition to providing heat, the shoulder also serves to contain the deforming metal<br />
beneath it. The process is simple in that it involves only the movement of a nonconsumable<br />
tool through a joint. This apparent simplicity is however only superficial as<br />
the actual mechanisms of weld formation are complex and highly coupled.<br />
Most generally, a weld is formed via the mechanical deformation of a thin layer<br />
of plasticized work material surrounding the tool. Projected along the joint-line, this<br />
becomes a channel of welded material. During a weld, tool motion and pressure combine<br />
to create material strain along with viscous and frictional heating at or near the weld<br />
interface. The result is plasticity and large scale deformation. The work material in this<br />
region is deformed to such a degree that its deformation is frequently referred to as flow,<br />
despite minimal fluid-state material at welding parameters that are reasonable for a given<br />
material and tooling.<br />
5
Computational Modeling<br />
FSW is not unlike other industrial process in that its primary development has<br />
been made via empirical observation. Much can be learned about a process, particularly<br />
in its nascent stages, through the sometimes arbitrary adjustments to parameters and<br />
tooling. However, past advancements in our understanding of various other processes<br />
have been made with the aid of computational models and there is no doubt that this will<br />
more and more frequently be the case with computing power continually increasing.<br />
Computational modeling will likely guide task specific tool geometry selection and weld<br />
parameter optimization. Additionally, FSW computational modeling has potential for the<br />
determination of weld microstructure, residual stress, and defect formation [3].<br />
Computational, or numerical models as they are sometimes called, require process<br />
specific input data for the assignment of initial conditions, boundary conditions, and<br />
material properties. Input data is obtained from experiment and mathematical models of<br />
the various process mechanisms. These process models can be analytically based,<br />
empirically based, or based on some combination of the two. A common and acceptable<br />
approach is the use of an analytically developed equation containing parameters<br />
dependent on experimental results. This construct is often preferable to a purely<br />
empirical approach (e.g. curve fitting) as the researcher is left with more intuitively<br />
useful results. An example of one frequent application of this technique in FSW<br />
modeling is the representation of tool contact condition (particularly shoulder contact<br />
condition) for the calculation of heat input. Computational modeling is applied to a<br />
system of analytical equations whose complexity renders its solution by traditional means<br />
exceedingly tedious.<br />
Computational modeling of the FSW process involves an intense treatment of the<br />
thin region in the vicinity of the tool-work interface. FSW model complexity lies not in<br />
the geometry or kinematics of the tool, but in the mechanisms by which a weld is created<br />
in the work material. The material flow is limited to the region enveloping the tool and<br />
process variables in this region are coupled in a manner which excludes an independent<br />
treatment. Viscosity, for example, is strongly dependent on temperature and strain rate;<br />
which are themselves dependent on the frictional condition at the interface. The<br />
6
frictional condition at the interface is however highly dependent on material viscosity,<br />
creating a closed loop relationship. Viscous heating (or plastic dissipation) and frictional<br />
heating at or near the tool surface produce steep temperature gradients in both the work<br />
material and the tool itself near their interface. The steep process variable gradients in<br />
this region are contrasted with the lack of such gradients throughout the remainder of an<br />
FSW model.<br />
As discussed above, computational (or numerical) modeling is an evolved form of<br />
process modeling. The topic of process modeling in FSW can be subdivided into four<br />
somewhat distinct areas: heat generation, thermal boundary conditions, material thermophysical<br />
properties, and material flow. Heat generation or power input is arguably the<br />
starting point in any such modeling. Thermal boundary conditions are then necessary to<br />
establish a control volume. Material thermal properties in turn govern heat conduction<br />
within that volume and establish a temperature gradient. Material flow is obtained as a<br />
consequence of these forces and the tool motion. Tool motion drives the evolution of<br />
each of these concepts but is itself trivial.<br />
Process Models<br />
Experimental and Analytical Bases for Assignment of Heat Input Boundary<br />
Conditions<br />
The heat generated during the weld process is equivalent to the power input into<br />
the weld by the tool, minus some losses due to micro-structural effects [10] and<br />
potentially due to other effects. This total heat input or heat generation includes heat<br />
conducted up the tool and not simply into the weld material. Longitudinal travel of the<br />
tool can be neglected [2]. St-Georges et al. [63] report the tool travel contribution to be<br />
typically less than 5% for 6mm thick AA6061 plate. The power dissipated by the tool<br />
(power input) can be obtained experimentally from the weld moment and spindle speed<br />
[8-11, 19, 17, 29, 44, 63]:<br />
7
Power = P =ω⋅Ω<br />
+ F ⋅ ν (1.1)<br />
where P is the weld power (Watts), ω is the tool rotational speed (rad/s), Ω is the<br />
measured torque (N⋅m), F is the traverse force (N) and ν (m/s) is the traverse velocity.<br />
The heat generation (Watts) input near the interface is therefore:<br />
Q = Pη<br />
where η (sometimes β) is the fraction of power dissipated by the tool into the weld<br />
material and the tool that is directly converted into heat. This value is understood to be<br />
high. Santiago et al., [10], estimate this value to be 0.9 and De Vuyst et al. [65] quote a<br />
range of 0.9-1.0. Nandan et al. [7] refer to this as the power efficiency factor, C f . Most<br />
assume this value to be 1.0 and define the weld efficiency simply as weld power minus<br />
the portion of the heat dissipated via conduction through the tool [8,9, 23-26].<br />
Regardless, the percentage of mechanical work dissipated by the tool, which is converted<br />
to heat, is very high. The fraction of total heat dissipated through conduction up the tool<br />
shank is discussed extensively in the proceeding section on thermal boundary conditions.<br />
Analytical models of heat input estimate power input in the absence of weld<br />
moment data or predict heat input based on material properties and weld parameters.<br />
These models also address the contact conditions at the tool interface. The so-called<br />
friction model states that an incremental heat input contribution, dq, for a given area, dA,<br />
can be expressed in terms of the contact shear, τ contact , at a given centroid radius, r:<br />
dq = ω⋅τ contact ⋅r⋅ dA (1.2)<br />
The above form was developed by [13] for friction welding and has since been frequently<br />
used as the basis for obtaining values of heat input at tool surfaces for FSW<br />
[10,12,14,18,19,21, 28].<br />
One can see that an analytical prediction of the total heat input is dependent on<br />
the tool contact condition. Of consideration are the total area of contact and the nature of<br />
8
contact. The contact area can include all or part of the surface and the nature of this<br />
contact can be stick, slip, or stick/slip.<br />
In the case of a stick condition (µ=1), the power is equivalent to that necessary for<br />
interfacial shearing of the material in the vicinity of the tool. For a finite area dA at the<br />
tool surface at a centroid radius, r, from the tool rotational axis; the corresponding, heat<br />
input is:<br />
dq = ω⋅τ yield ⋅r ⋅dA (1.3)<br />
where ω is the radial velocity of the tool and τ yield is the shear strength of the weld<br />
material. The shear strength of the material is obtained from the yield strength of the<br />
material by applying the von Mises yield criterion in uniaxial tension and pure shear (as<br />
is the case for the weld material at the tool surface):<br />
=<br />
σ yield<br />
τ<br />
yield 3<br />
The yield strength is strongly dependent on temperature and to a lesser extent, strain rate.<br />
This relationship will be discussed to a great extent in the material thermal properties<br />
section.<br />
For a slip or frictional (µτ yield , one must differ to the first case as interfacial shearing will occur.<br />
Schmidt et al. define an additional variable, the contact state variable (δ), for the<br />
slip/stick contact condition:<br />
δ = Vmatrix / Vtool<br />
9
where Vmatrix represents the velocity of the material adjacent to the tool surface. These<br />
three cases from the following contact condition table [23]:<br />
Figure 1: Possible contact conditions, figure from [23].<br />
The matrix velocity and coefficient of friction, and therefore the contact state variable<br />
and frictional shear respectively, must be adjusted to obtain an agreement with<br />
experiment. An intense debate exists over the predominant nature of the contact<br />
condition.<br />
The sum of the heat contributions of all incremental interface surfaces is equal to<br />
the total heat input from the tool and is some large fraction of the experimentally<br />
determined weld power:<br />
Q = dq 1 + dq 2 +…. (1.5)<br />
The surface of a tool with radial symmetry can be divided into horizontal sections (e.g.<br />
shoulder, cylindrical probe bottom), vertical sections (e.g. cylindrical probe wall), and<br />
inclined sections.<br />
Figure 2: Schematic of tool surface variables.<br />
10
For horizontal sections, a heat input value can be obtained via (1.2):<br />
2π<br />
R2<br />
2<br />
Qhorizontal<br />
∫0<br />
∫ ω ⋅ Τ R<br />
contact<br />
⋅<br />
r r<br />
1<br />
= ∂ ∂θ<br />
2<br />
3 3<br />
= π<br />
Τ contact ω ( R2 − R1<br />
) (1.6)<br />
3<br />
And for vertically oriented tool faces:<br />
2π<br />
H wall<br />
2<br />
vertical ωΤ<br />
0 0<br />
contact wall<br />
∫ ∫<br />
Q = R ∂z∂θ<br />
= Τ ω (1.7)<br />
2<br />
2π<br />
Τcontact ωR<br />
wallH<br />
wall<br />
In the case of faces inclined with respect to the horizontal axis by an angle less<br />
than 45 degrees, Schmidt et al. introduce an inclination factor. The inclination factor<br />
treats the heat contribution as a summation of the vertical and horizontal contributions of<br />
the surface. The factor is applied to shallow angle (
The inclination factor is applied as follows to equation(1.6):<br />
2<br />
3 3<br />
Q∝ = π<br />
Τ contact<br />
ω ( R2 − R1<br />
) tan(1 +<br />
∝ ) for α ≤ 45° off horizontal plane(1.8)<br />
3<br />
This form of approximation can presumably be extended to faces inclined by an angle<br />
greater than 45° with respect to the horizontal axis by applying the same inclination<br />
factor formulation with respect to off-vertical inclinations of less than 45°. An<br />
inclination with respect to the vertical axis could be applied to the heat generation<br />
equation for vertical surfaces, equation (1.7):<br />
2<br />
Q∝ = 2π<br />
Τ contact ω R<br />
wallH<br />
wall<br />
tan(1 +<br />
∝ ) for α ≤ 45° off vertical plane(1.9)<br />
These approximations are clearly overestimations of the effective surface<br />
area of the inclined face. In addition, the author points out the limitation of the face heat<br />
contribution approach only to surfaces with rotational symmetry. This excludes the<br />
direct treatment of threads or flutes with this approach. Simplifications must be made to<br />
the calculations for these surfaces and things such as effective surface area, radial<br />
distance, and facial orientation may need to be approximated.<br />
Tool tilt angle, θ, is accounted for with the introduction of an additional<br />
factor expressed in terms of the tilt angle [18]. This factor is applied to equation (1.6).<br />
2<br />
Q = π<br />
Τ<br />
ω<br />
( R − R )( 1 )<br />
3<br />
cosθ<br />
3 3 3<br />
tilt _ surf contact 2 1<br />
(1.10)<br />
With this factor, heat generation is increased at increasing tool tilt angles. The factor<br />
assumes that the shoulder plunge depth is adjusted to maintain shoulder contact on the<br />
leading edge of the weld as tool tilt angle increases.<br />
Colegrove et al. [17] estimate the ratio of heat generated by a cylindrically<br />
threaded probe to be 20% of the heat generated by the shoulder and probe using the<br />
following formulation of equation (1.7):<br />
12
(1.11)<br />
where r p is the probe (pin) radius, h is the probe height, is the average shear stress<br />
over the probe surface, µ is the coefficient of friction, F is the translational force during<br />
welding, and λ is the thread helix angle. The remaining terms are defined as follows:<br />
Russell et al. [12] estimate the contribution of the probe to the total heat<br />
generation near the interface to be approximately 2% using equation (1.7) and assuming<br />
the contact shear stress to be 5% of its room temperature value (taking into account<br />
material softening with temperature and strain). Simar et al. [8] estimate 12% for this<br />
same value. These analytically calculated probe contributions are tool geometry,<br />
material, and parameter dependent, as are the empirical values.<br />
Debate exists over the predominant nature of the tool interface contact<br />
condition, particularly for the shoulder, and how best to model it. Schmidt et al. [24]<br />
assume full shoulder contact with a constant frictional coefficient over the shoulder<br />
surface. Under these conditions, slip occurs where the frictional shearing does not<br />
exceed the shear yield strength of the material, and stick occurs elsewhere. Colgrove et<br />
al. [22] use a stick condition with an artificially small contact radius and achieve good<br />
agreement with experiment. The authors however concede this approach to be physically<br />
unrealistic. Its use is justified as a simplification. The authors state that a slip condition<br />
13
likely predominates near the shoulder edge but the corresponding interfacial shear stress<br />
is too difficult to estimate.<br />
In addition to the torque based method of empirical heat input estimation, the<br />
heat input into weld material has been estimated via inspection of the width of the weld<br />
heat affected zone (HAZ) [20]. Others have used a combination of imbedded<br />
thermocouples readings and HAZ size measurements [14, 15, 16, 19]. Although<br />
individually these studies cover a narrow range of parameters, together they show a<br />
strong correlation between heat input to the weld and the size of the HAZ. Heurtier et al.<br />
successfully correlate microhardness readings with weld temperature [21].<br />
These experimental measurements are required in the implementation of a<br />
realistic computational model. Heat generation and heat dissipation must be tuned and<br />
balanced to obtain agreement with experimental temperature data. This process will be<br />
discussed in more detail in the proceeding section on thermal boundary conditions.<br />
Model Dependent Heat Generation<br />
In each of the methods above, either the heat input or the temperature of the<br />
shoulder and pin surfaces are obtained via analytical and empirical means outside of the<br />
model and applied as a boundary condition to the model. Schmidt et al. [25], De Vuyst et<br />
al. [65] and Santiago et al. [10] apply model dependent plastic dissipation heat<br />
generation. The region of volumetric type heating is experimentally confirmed and<br />
agreed upon in literature to occur in the so-called thermomechanically heat affected zone<br />
(TMAZ) where plastic dissipation occurs. The minimum extent of the TMAZ is the<br />
width of the shoulder at the material surface and the width of the pin at the weld root [4,<br />
36-38]. Plastic dissipation heating is applied to each element of the model as the product<br />
of the deviatoric stress tensor, s<br />
ij<br />
, the plastic strain tensor (also called deformation rate),<br />
pl<br />
ε&<br />
ij<br />
, [43] and a plastic energy dissipation efficiency term, η<br />
pd<br />
:<br />
q<br />
= η s & ε (1.12)<br />
pl<br />
vol pd ij ij<br />
14
This efficiency term, η<br />
pd<br />
, is know in some fields as the Taylor-Quinney coefficient, β. Its<br />
value is typically between 0.9 and 1.0 [65]. Here the efficiency term is adjusted within<br />
the model to conform with the experimentally observed thermal gradient. He et al. [27]<br />
apply an identical formulation but do not mention the use of an efficiency term.<br />
Frictional heating on the surface of the material cannot be applied in a model dependent<br />
fashion as the pressure and frictional coefficient terms (and thus contact shear stress) in<br />
equation (1.4) are difficult to reliably reproduce in model.<br />
Heat Dissipation and Thermal Boundary Conditions<br />
The discussion of heat generation above applies to the thermal boundary<br />
conditions at the weld interface. For the establishment of a control volume, thermal<br />
boundary conditions must be established on all the model external surfaces in addition to<br />
heat input at and near the interface. Heat loss occurs via conduction to the tool, the<br />
backing plate, and any unmodeled portion of the weld material. Convective heat loss to<br />
the surrounding atmosphere also occurs. The heat lost through convection is considered<br />
negligible and has been shown in numerous studies to have no effect on temperatures<br />
within the weld plate [3].<br />
Of the total heat generated near the welding interface, a majority is<br />
dissipated by way of the plate as opposed to via the tool shank. Knowing the temperature<br />
at two points along the length of the tool, the heat flux in Watts dissipated through its<br />
shank can be calculated:<br />
Q<br />
tool<br />
= λ<br />
tool<br />
( T1 −T2<br />
)<br />
(1.13)<br />
d<br />
where λ<br />
tool<br />
is the thermal conductivity (e.g. W/m⋅K) of the tool shank, T 1 is the<br />
temperature at a position near the shoulder, T 2 is the temperature at a position further up<br />
15
the shank, and d is the distance along the height of the shank from thermocouple position<br />
one to two. Again, convective losses associated with the rotating tool in air are believed<br />
to be negligible, but may be modeled using a surface convective coefficient. The heat<br />
dissipated through the tool can be compared with some calculated value of total heat<br />
input to produce a ratio some call the weld efficiency [8, 9, 25, 29] (η weld_thermal is used<br />
here for clarity):<br />
η<br />
weld _ thermal<br />
Q + Q Q Q<br />
= = =<br />
Q + Q + Q Q η P<br />
shoulder probe weld weld<br />
shoulder probe tool _ shank total power _ to _ heat dissipated _ mechanical<br />
This ratio will vary with variations in the experimental setup and parameters. Schmidt et<br />
al. [25] estimate the fraction of total heat input transferred to the work piece to be<br />
approximately 75% in a particular set of experimental welds. Simar et al. [8] arrive at a<br />
value of 95% and Dickerson et al. [29] at a value of 92% by placing thermocouples on<br />
the tool shank and throughout the weld plate.<br />
The weld heat input, Q weld , can be divided into surface and volume heat<br />
contributions due to frictional or viscous (plastic dissipation) heating respectively. Simar<br />
et al. [9] introduce a term, γ, for this purpose:<br />
Q<br />
v<br />
= γ Q<br />
weld<br />
Q<br />
s<br />
= (1 − γ ) Q<br />
weld<br />
where Q v is the volume heat contribution and Q s is the total tool surface heat<br />
contribution. In [9], it is concluded that a value of γ =0, corresponding to pure slip,<br />
produces best agreement with experimental thermal data for thermal computational<br />
models which take into account fluid flow. This is presumed to be due to both the thin<br />
nature of the deforming layer around the tool and the decreasing rates of strain and<br />
deformation occurring as one moves away from the tool.<br />
16
The heat input on the tool surface is typically treated by defining a constant<br />
heat flux (e.g. W/m 2 ) over the interface surface or one which varies with some spatial<br />
parameter, typically radius. While frictional heating does occur essentially at the<br />
interface, the assignment of the viscous dissipation heating contribution to the interface is<br />
an approximation based on the assumption that the layer of dissipation surrounding the<br />
tool is reasonably thin. Again, this assumption can generally be made without loss of<br />
model accuracy for thermal-fluid models. The heat generation in both the pin and<br />
shoulder is typically treated as axis-symmetric since tool rotation and circumferential<br />
material flow around the tool largely render this to be the case. The following<br />
formulation for shoulder surface heat flux input, Q ss , distribution over the tool shoulder is<br />
commonly used [8,9,26].<br />
q<br />
ss<br />
⎛ 3 ⎞⎛<br />
Q ⋅r<br />
⎞<br />
= ⎜ ⎟ with R<br />
⎝ 2π<br />
⎠ ⎜ R − R ⎟ p ≤ r ≤ R s (1.14)<br />
⎝ ⎠<br />
ss<br />
( r )<br />
3 3<br />
s<br />
p<br />
Shoulder heat input per unit area increases with radial distance from the probe surface as<br />
the tangential velocity increases. The probe side surface heat flux input, Q ps , is<br />
distributed as an even heat flux over its height:<br />
(1.15)<br />
Simar et al. [9] neglect the probe tip surface heat flux input distributing the full probe<br />
heat contribution over its side surface. A probe tip surface distribution could be<br />
formulated in the manner of equation (1.14) (with R p =0, R s = R p , and Q probe_tip in place of<br />
Q ss ) if desired. Q ss , Q ps , and Q probe_tip can be found analytically via equations (1.6), (1.7),<br />
and again (1.6) respectively. Heat generation in the pin can be modeled as a uniform,<br />
volume heat source (i.e. W/m 3 ) without loss of model accuracy.<br />
The majority of heat of heat is dissipated ultimately through the backing<br />
plate (through the clamps, un-modeled plate portions of the plate, and directly through<br />
the backing plate) as opposed to the tool shank and surface convection of the plate in air<br />
17
[3]. The primary method [22] of achieving good agreement with experimental thermal<br />
gradients is the method of adjustment of model heat input and backing plate heat<br />
dissipation used by [30-35, 16, 17]. Heat transfer between the backing plate and work<br />
material is often modeled using a uniform heat transfer coefficient over the interface.<br />
Colegrove et al. [22, 3] note however that the contact condition under the tool is more<br />
intimate than elsewhere at the backing plate and weld plate interface due to the pressure<br />
and heat present. In addition, during a full penetration weld the thermomechanically heat<br />
affected zone (TMAZ) extends to the backing plate resulting in a more intimate contact in<br />
the region passed over by this zone. Weld material fills microscale scratches and notches<br />
in the backing plate and as a result there exists a higher conductance over the interface in<br />
this area. Based on these observations two improvements over the uniform interfacial<br />
conductance have been suggested. The first method is to assign a temperature dependant<br />
conductance at the backing plate top surface. In some numerical models it may be a<br />
simple matter to increase thermal coupling with temperature at the interface. The second<br />
method is to assign one coefficient of conductance to the general interface and a larger<br />
coefficient to the area under the tool and the tool path behind the tool:<br />
Figure 4: The heat transfer coefficient between the work and anvil is greater under the<br />
traveled path of the tool where heat and pressure have forced a more intimate bond.<br />
Figure from [22].<br />
The heat transfer coefficient between the work and anvil is greater under the traveled path<br />
of the tool where heat and pressure have forced a more intimate bond [22].<br />
18
The added complication of these methods is warranted due to the importance of the heat<br />
removal of the backing plate.<br />
Conduction losses to the weld plate are accounted for within the model by<br />
assigning a uniform heat transfer coefficient over the modeled/unmodeled weld plate<br />
boundary. This boundary is generally greater than one shoulder diameter from the tool<br />
axis of rotation and where the approximation of a uniform conductance is acceptable due<br />
to small temperature gradients. The heat loss over a cylindrical boundary surrounding the<br />
weld tool can be approximated in a radial fashion with temperature, T, at some radial<br />
distance, r, is defined by:<br />
Q R<br />
2π kh r<br />
wp<br />
( ) = T + ln<br />
T r<br />
o<br />
o<br />
where Q wp is the heat dissipated to the weld plate, T 0 is the temperature at a distance R o<br />
from the axis of rotation of the tool (average temperature on an interior cylindrical face,<br />
e.g. interface temperature at probe radius), k is the thermal conductivity of the weld<br />
metal, and h is the height of the cylindrical conduction zone (usually height of the pin or<br />
the thickness of the weld plate). Knowing the temperature at the interior and exterior<br />
surface boundaries, the total heat loss over the exterior surface and to the unmodeled<br />
weld plate can be calculated:<br />
Q<br />
wp<br />
≅<br />
2π<br />
kh T<br />
Ro<br />
ln<br />
R<br />
( −T<br />
)<br />
o<br />
where R is the radius of the exterior cylindrical surface (i.e. modeled/unmodeled plate<br />
boundary).<br />
Heat loss from the weld plate top surface to the surroundings is governed by<br />
radiation and convection. The heat loss per unit area on the top of the plate can be<br />
approximated using the following equation:<br />
19
q T T h T T<br />
4 4<br />
top<br />
= σε ( −<br />
a<br />
) +<br />
t<br />
( −<br />
a<br />
)<br />
where σ is the Stefan-Boltzmann constant, ε is the emissivity of the plate, T is the<br />
temperature of the plate top surface, T a is the ambient temperature, h t is the convective<br />
heat transfer coefficient of the plate in air. As discussed earlier in this section, the heat<br />
lost in this way is low and is often ignored.<br />
Material Thermo-Physical Properties<br />
Heat flow within the modeled volume is dependent on material flow around<br />
the tool and on material thermal properties. It is governed by Fourier's Law:<br />
T<br />
where k is thermal conductivity, T is the temperature gradient, and Q & is the heat flux.<br />
The temperature gradient is nearly symmetric (radial) about the tool axis of rotation as a<br />
consequence of material flow. Heurtier et al. [21] note a slight asymmetry about the weld<br />
line with the higher temperatures found on the advancing side. The traverse direction<br />
opposes tool motion on the advancing side resulting in a vortex velocity field. It is noted<br />
that a material element spends more time on the advancing side due to the complicated<br />
nature of the flow on this side as compared to the retreating side where material flow is<br />
largely in the direction of tool motion. Crawford et al. [52] note a similar asymmetry in<br />
Fluent CFD models of threaded pins. Higher rotational speeds are also seen to shift the<br />
HAZ further towards the advancing side.<br />
20
Figure 5: Lateral cross sections of temperature contours at various rotational and travel<br />
speeds, figure from [52].<br />
Conductive heat flow is governed by thermal conductivity (k or λ), specific<br />
heat (c p ), and density (ρ). These properties are each dependent on temperature and, for<br />
alloys, microstructure evolution [3]. The dependence on temperature for aluminum<br />
alloys is known in the absence of other effects. (Table from [5])<br />
21
Figure 6: Thermophysical properties of Al-6061-T6, figure from [5].<br />
The complex and chaotic evolution of weld microstructure including the dissolution of<br />
precipitates and local melting has a significant effect on the thermal properties of the<br />
metal. A number of studies [40–42, 45–48] show that precipitates are significantly<br />
coarsened in the HAZ in comparison to those in the unaffected base plate and weld<br />
nugget. Su et al. [50] report on precipitate evolutions occurring in AA7050 FSW. Their<br />
findings showed a coarsening of precipitates from the base plate into the TMAZ, with<br />
increasing dissolution and re-precipitation occurring from the TMAZ to the interior weld<br />
nugget. Sato et al. [49] looked at a number of locations in the HAZ and the weld nugget<br />
of AA6063 FSW and observed that the precipitates experienced increasing dissolution<br />
toward the weld center.<br />
The computational cost of modeling the effect of microstructure evolution is<br />
however too high and its effects are therefore not modeled. This unmodeled contribution<br />
is masked by comparable uncertainties elsewhere in the model [3]. Temperature<br />
dependent values like in the table above are often used. Colegrove et al. [22] report<br />
better agreement with thermocouple temperature gradients using a constant thermal<br />
conductivity value, noting that data book values represent an equilibrium state rather than<br />
the rapid thermal cycles present in FSW.<br />
22
Flow stress in aluminum alloys is dependent on temperature and strain-rate.<br />
Sellars and Tegart [6] proposed an initial formulation which represented the TMAZ<br />
region as a rigid, visco-plastic fluid. Sheppard and Wright [39] modified their<br />
formulation into the following commonly used form:<br />
Z<br />
Q<br />
= & ε exp( ) = A(sin ασ ) n<br />
e<br />
RT<br />
or equivalently [43]<br />
⎡ ⎤<br />
1 − ⎢⎛<br />
Z 1<br />
⎞ n<br />
1<br />
= ⎜ ⎟ ⎥<br />
⎛ Q ⎞<br />
σ<br />
e<br />
sinh<br />
Z = ε& exp⎜<br />
⎟<br />
α ⎢⎝<br />
A ⎠ ⎥<br />
⎝ RT ⎠<br />
⎣ ⎦<br />
where α, A, n are material constants (α = 0.045 (Mpa) -1 , Q = 145 kJ mol -1 , A = 8.8632E6<br />
s -1 , n = 3.55), σ e is the equivalent steady state flow stress (Mpa), R the gas constant (R =<br />
8.314 mol -1 K -1 ), T the absolute temperature (K), Q is the activation energy (J mol -1 ) and Z<br />
is the Zener-Hollomon parameter. The material constants used are determined using a<br />
standard compression test. The material viscosity is defined in the following manner:<br />
σ<br />
e<br />
µ =<br />
3 & ε<br />
The visco-plastic model holds at temperatures reasonably below the metals solidus<br />
temperature. As the material approaches the solidus temperature significant softening<br />
occurs. Seidel and Reynolds [51] proposed reducing the flow strength in a linear fashion<br />
from its value at some arbitrary temperature, T m , to zero at the solidus temperature, T s .<br />
[51] and [22] define the so-called empirical softening regime by setting T m at 50°C below<br />
the solidus temperature.<br />
23
Figure 7: Constitutive behavior of Al-7449 (T s -T m =50°C and T s =500°C), figure from<br />
[22].<br />
Increasing the range of the empirical softening regime is found to have the effect of<br />
increasing the size of the TMAZ in thermo-mechanical models. A Carreau viscosity<br />
model is employed by Atharifar et al. [67] and is discussed later with computational<br />
modeling studies.<br />
Analytical Models of Material Flow<br />
Schnieder and Nunes [57] attempt to dissect the FSW metal flow into three<br />
separate incompressible flow fields:<br />
24
Figure 8: Three flow fields a) rotation b) translation c) ring vortex; figure from [57]<br />
It is postulated that the summation of these three fields results in a thru-current on the<br />
retreating side and a maelstrom current surrounding the probe:<br />
Figure 9: Summation of three flow fields yields two flow currents, figure from [57].<br />
The downward spiral exhibited in the maelstrom current is said to be a result of the ringvortex<br />
which is in turn a consequence of the downward effects of probe threading (lefthand<br />
threaded probe spun clockwise or right-hand threaded probe spun<br />
25
counterclockwise). This downward forcing is claimed to be reversible with opposite<br />
threading. One consequence of this deconvolution model is that material in the<br />
advancing side flow current resides in the flow region longer than that on the retreating<br />
side. The model further attempts to explain the onion ring surface microtextures and the<br />
entrained oxide film defect found.<br />
An inverted x-ray tomography study [58] provides some confirmation of the<br />
two flow theory. Figure 10 shows the post-weld distribution of two streams of lead<br />
marker material placed in two positions parallel to the weld line. The marker material<br />
along the center of the weld line is deposited in a chaotic fashion behind the tool whereas<br />
the marker material placed further to the retreating side is deposited in a linear fashion<br />
consistent with the thru-current flow path.<br />
Figure 10: Inverted x-ray radiography a) centerline marker dispersal (consistent with<br />
maelstrom flow path) b) retreating side marker dispersal (consistent with thru-current<br />
flow path), figure from [58].<br />
Abregast [59] presents a metalworking model of FSW flow dividing the<br />
process into five sequential processes: preheat, initial deformation, extrusion, forging,<br />
26
and post-weld cool-down. This model has the probe forcing material downward during<br />
the initial deformation zone except near the shoulder where it is initially forced upward.<br />
The material is then rotated around the pin and deposited in the cavity behind the moving<br />
tool during the extrusion period. The forging period encompasses consolidation of the<br />
extruded material by the downward pressure of the shoulder heel.<br />
Figure 11: Graphic depictions of Abregast metalworking FSW model, figure from [59].<br />
Chen et al. [66] use a probe breaking technique to observe in-process weld<br />
dynamics. The author notes that this technique results in the probe slowing to a stop over<br />
some unknown number of revolutions after breaking from the shoulder.<br />
27
Figure 12: Horizontal cross-section taken at mid-plane of AA5083 plate with embedded<br />
pin after break test(v=2mm/s, ω =750, head tilt =3°), figure from [66].<br />
It can be seen that shear layers are deposited sequentially along the trailing edge of the<br />
weld from the retreating side to the advancing side. The author uses the rotational speed<br />
of the tool, the travel speed, and the distance traveled by each successive shear layer to<br />
calculate the shear velocity. The shear velocity is calculated to be ~16mm/s while the<br />
periphery of the pin is traveling at ~235mm/s. This results in a shear/pin periphery<br />
velocity of 0.07 (where 0.0 is pure slip and 1.0 is pure stick). The authors, therefore,<br />
conclude a slip condition to be dominant in this situation. It is mentioned that this ratio<br />
compares well with results obtained by Schmidt et al. [24] who arrive at a values in the<br />
range of 0.1-0.3. The authors of [66] further contend that a liquid film exists at the shear<br />
interface which facilitates the slip condition.<br />
Computational Modeling Studies<br />
28
Williams et al. [60] use a 2D-axisymmetric flow model coupled with a 3D<br />
translating thermal model and COSMOL multi-physics software to simulate the FSW<br />
process. The figure below depicts their methodology.<br />
Figure 13: Input/output flow diagram for the 2D and 3D models, figure from [60].<br />
Using a slip condition at the shoulder interface, a good agreement was made with<br />
experimental macrosections on the extent of the TMAZ.<br />
Figure 14: Rotational flow diagrams from 2D model and corresponding weld<br />
macrosections. Welds made in AA2014 at 200mm/min (Left:1600rpm, Right:400rpm),<br />
figure from [60].<br />
The paper further attempts to integrate a residual stress, microstructure development, and<br />
hardness prediction submodels within the same software package. It is concluded by the<br />
authors that this technique has the potential for streamlining FSW modeling by obtaining<br />
many outputs related to weld performance from a single input/output process.<br />
Schmidt and Hattel [61] use computational tomography (CT) to observe the<br />
flow of marker material around the tool and varying depths and compare this with a CFD<br />
model of flow paths. The weld is stopped mid-process and the weld sample is sliced<br />
horizontally. The deflection of marker material towards advancing side behind the probe<br />
29
in is note in slices near the shoulder (first slice is just below the shoulder an slice depth<br />
increases successively). The slices show a reduced shoulder influence with depth.<br />
Figure 15: 2D overhead CT scans of horizontal slices showing the dispersal of marker<br />
material by a FSW tool. The inner and outer rings represent the outline of the pin and<br />
shoulder respectively. Slices are in order of increasing depth from shoulder and are in<br />
0.25mm increments, figure from [61].<br />
Experimental results are compared with an analytical streamline model and a COSMOL<br />
3.2 FE model streamline. A good agreement is found between the three data sets:<br />
30
Figure 16: Left(FE streamline), Middle(analytical streamline),Right(CT). Figure from<br />
[61].<br />
Sato et al. [62] use Acusolve TM CFD software based on the Galerkin/Least-<br />
Squares FE method to obtain temperature and velocity field data at various parameters<br />
for a self reacting FSW tool. An Eulerian (or ALE) framework is used. A visco-plastic<br />
model is used along with a slip-stick boundary condition at the shoulder. A schematic of<br />
the model mesh is shown below with increasing refinement with tool proximity.<br />
31
Figure 17: Finite element mesh and boundary conditions, figure from [62].<br />
A rotating mesh is used around the tool with a sliding interface at the mesh exterior<br />
surface. Temperature contours are presented over a horizontal cross-section in the<br />
vicinity of the tool and over the modeled portion of the A6NO1 alloy aluminum plate.<br />
32
Figure 18: Temperature contour over the plate(left), and in the vicinity of the tool(right),<br />
figure from [62].<br />
St.Georges et al. [63] use CosmosFlow CFD code to develop a thermal-fluid<br />
model of FSW in 6mm thick Al-6061 plates. A liquid with temperature dependent<br />
viscosity is used with adjustment based on experimental material behavior. Other<br />
material properties (ρ, c p , k) are assigned constant values. Model temperature<br />
distributions are presented for the weld conditions below. Tool rotation is initially not<br />
considered.<br />
Figure 19: CFD and empirical weld parameters and average process force data, figure<br />
from [63].<br />
33
Figure 20: Modeled temperature distributions without considering tool rotation, figure<br />
from [63].<br />
Temperature contours produced by Song and Kovacevic [64] using identical parameters<br />
and similar process forces using a different CFD model are presented for comparison:<br />
Figure 21: Modeled temperature distributions without considering tool rotation, figure<br />
from [64].<br />
It is noted in [63] that CFD models presented in [63] and [64] achieve similar results.<br />
St.Georges et al. [64] goes on to present temperature contours with consideration for tool<br />
rotation:<br />
34
Figure 22: Temperature distribution with consideration of tool rotation, figure from [64].<br />
De Vuyst et al. [65] use MORFEO finite element software and an Eulerian<br />
formulation with mixed velocity-pressure discretization for the fluid flow. A the work<br />
material is modeled with a visco-plastic fluid law. Empirical studies of embedded copper<br />
foil and wire marker material are used for model validation. A simplification of the<br />
Norton-Hoff material law is used:<br />
1<br />
s 2 K ( 3 ε ) m −<br />
ε<br />
= & & Norton-Hoff Material Law<br />
where m=1 results in a Newtonian fluid of viscosity K, s is viscosity, and ε& is the strain<br />
rate. For this model, K and m are chosen as constant values averaged over the full<br />
temperature range. This results in a weak coupling between the flow and temperature<br />
fields. The temperature field is dependent only on viscous dissipation and thus on the<br />
flow field. The flow field is however independent of temperature in this model.<br />
The authors have a supercomputer available to them (28 Intel Itanium 2<br />
processors with 2GB per processor RAM memory and 1.4TB available disk space) and<br />
35
their mesh is composed of nearly 1.5 million linear tetrahedral mesh elements and<br />
250,000 nodes. Nonetheless a simplified approach is used with respect to the tool<br />
features (shoulder scroll and probe threading). It was determined that explicit modeling<br />
of tool features would be to computationally costly. Unique boundary conditions are<br />
therefore established within predefined feature zones. A boundary zone is therefore<br />
created around the tool as shown:<br />
Figure 23: Finite element mesh with boundary zone around tool surface, figure from<br />
[65].<br />
An approach used by Ulysse et al. [43] is applied to the tool boundary zone<br />
to account for the effect of tool the tool features. In this technique the velocity field<br />
component of the feature effects is added to the velocity field in these zones to account<br />
for the downward forcing of the tool threads and the inward radial forcing of the shoulder<br />
scrolling. The velocity profile around the tool mesh is presented:<br />
36
Figure 24: Lateral velocity contour (RS on left), figure from [65].<br />
The authors note a larger velocity magnitudes on the retreating side of the weld<br />
(parameters are not given).<br />
Figure 25: Temperature contour at the weldline (longitudinal cross-section with weld<br />
travel direction to the left), figure from [65].<br />
37
The models are compared with a series of marker material imbedded<br />
horizontal weld slices. This is similar to the experiments run in [61] with the difference<br />
here being the lateral orientation of the marker material plane. Here the method of<br />
analysis is specified as metallographic (i.e. macrosections) as opposed to CT scans. The<br />
horizontal slices are presented in order of increasing depth (distance below shoulder<br />
plane) and the model predicted marker dispersal is superimposed (gold) over the<br />
experimental marker material (white).<br />
38
Figure 26: Experimental(white) versus model predicted(gold) marker material dispersal.<br />
Depth in mm: a)0.0 b)0.6 c) 1.1 d)1.6 e)2.1 f)2.6; figure from[65].<br />
As in [61] one sees the decreased shoulder influence with depth in a reduced deflection of<br />
marker material. The authors note a good agreement with experiment.<br />
The following lateral macrosections show the dispersal of marker material<br />
imbedded parallel to the weld-line (longitudinally) compared with three model based<br />
predictions:<br />
39
Figure 27: Model prediction (top left) without the threading vertical velocity effect, (top<br />
right) without the vertical or the radial scrolling velocity effect, (bottom) with both<br />
vertical and radial velocity effects imposed, figure from [65].<br />
The authors present these macrographs as evidence for the necessity of a 3D<br />
thermo-fluid model (as opposed to 2D) which includes some accounting for feature<br />
effects. It is noted that the model that does not include imposed velocity fields to account<br />
for feature effects results in the simulated longitudinal marker material being deposited in<br />
a simple linear fashion, similar to its pre-welded position.<br />
Atharifar, Lin and Kovacevic [67] use Fluent CFD software to identify the<br />
occurrence of a downstream stagnation point. The downstream stagnation point has been<br />
indicated by Shinoda [68] as the likely point of initiation of the tunnel-like defect in<br />
FSW.<br />
40
Figure 28: Top view schematic of tunnel defect initiation, figure from [67].<br />
viscosity:<br />
The authors use the Carreau model for pseudo-plastics to assign material<br />
where λ is the time constant, m is the power law non-Newtonian fluid index, µ ∞ and µ o<br />
are the infinite and zero shear viscosities, γ& is the shear strain-rate, and T o is a reference<br />
temperature. The Carreau viscosity model is found as an embedded function in Fluent.<br />
The required constants have been obtained through experiment by Sheppard and Jackson<br />
[69]. A stick condition is used at the tool interface and a uniform heat flux is assigned to<br />
the interface surface. The heat input is calculated using equation (2.4).<br />
The downstream dynamic pressure along the traversing direction of the tool<br />
is examined at various heights relative to the shoulder for welds at various parameters.<br />
Experimental welds are performed to verify the occurrence of tunnel-like defects and to<br />
record the depth at which the defects occur (on the surface or submerged at some depth,<br />
y). The dynamic pressure trend lines below represent welds and weld heights which do<br />
and do not contain defects.<br />
41
Figure 29: Dynamic pressure trend lines for spindle speed N and depth y at weld speed<br />
a) v=30mm/min b)90 mm/min. Figure from [67].<br />
Defects can be identified in the trend lines above by spikes, which correspond to<br />
perturbations. In chart a) defects occur in experimental welds of N=900 and N=1400 at a<br />
depth of y=3.5. In chart a) defects occur in experimental welds of N=900 at y=3.5 and<br />
N=1400 from y=3.5 to the surface. By correlating defects in experimental welds with<br />
dynamic pressure trend lines from Fluent CFD models the authors are able to accurately<br />
predict the parameters at which a tunnel-defect occurs for a given tooling and material<br />
along with the depth at which the defect occurs.<br />
References:<br />
[1] Thomas W.M., et al. 1991, Friction Stir Butt Welding. International Patent<br />
Application # PCT/GB92/02203, GB Patent Application #9125978.8, and GB Patent #<br />
2,306,366.<br />
[2] Shercliff HR, Colegorve PA; "Modelling of friction stir welding", In Mathematical<br />
Modelling of Weld Phenomena, 6th Edition. H. Cerjak and H. Bhadeshia, Maney<br />
Publishing, London, UK, pp. 927-974.<br />
[3] Shercliff HR, Colegrove PA; Chapter 10: Process Modeling. In Friction Stir Welding<br />
and Processing, Rajiv SM, Mahoney MW (Editors), ASM International, 2007.<br />
[4] Threadgill PL; Terminology in friction stir welding; Sci. Technol. Weld. Join., 2007,<br />
12, (4), 357-360.<br />
42
[5] Taylor RE, Groot H, Goerz T, Ferrier J, Taylor DL: Measurement of the electric<br />
resistivity of metals up to and above the melting temperature; High Temp-High<br />
Pressures, 30 (1998) 269-275.<br />
[6] Sellars CM, Tegart WJM; Hot workability; Int. Metall. Rev., 1972, 17, 1-24<br />
[7] R. Nandan, G. G. Roy, and T. Debroy, "Numerical Simulation of Three-Dimensional<br />
Heat Transfer and Plastic Flow During Friction Stir Welding," Metallurgical and<br />
Materials Transactions, vol. 37A, pp. 1247-1259, April 2006.<br />
[8] Simar A, Pardoen T, de Meester B; Influence of friction stir welding parameters on<br />
the power input and temperature distribution on friction stir welding; Proc. of the 5th<br />
International Symposium on Friction Stir Welding, 2004.<br />
[9] Simar A, Pardoen T, de Meester B; Effect of rotational material flow on temperature<br />
distribution in friction stir welds; Science and Technology of Welding and Joining,<br />
Vol.12, No.4, p324, 2007.<br />
[10] Santiago DH, Lombera G, Santiago U; Numerical modeling of welded joints by the<br />
friction stir welding process; Materials Research, Vol.7, Num.4, p569, 2004.<br />
[11] Pew JW, Nelson TW, Sorensen CD; Torque based weld power model for friction stir<br />
welding; Science and Technology of Welding and Joining,Vol.12, Num.4, p341, 2007.<br />
[12] Russell MJ, Shercliff HR; Analytical modeling of microstructure development in<br />
friction stir welding; Proc. of the 1st International Symposium on Friction Stir Welding,<br />
Session 08, 1999.<br />
[13] Milding OT, Grong O; A process model for friction welding of Al-Mg-Si alloys and<br />
Al-SiC metal matrix composites; Acta Metall. Mater, 42 (5), 1994, p1595.<br />
[14] Frigaard O, Grong O, Bjorneklett B, Midling OT; Modelling of thermal and<br />
microstructure fields during friction stir welding of aluminium alloys; Proc. of the 1st<br />
International Symposium on Friction Stir Welding, Session 08, 1999.<br />
[15] Gould JE, Feng Z; Heat flow model for friction stir welding of aluminum alloys;<br />
Journal of Materials Processing and Manufacturing Science, 7, p185, 1998.<br />
[16] Song M, Kovacevic R, Ouyang J, Valant M; A detailed three-dimensional transient<br />
heat transfer model for friction stir welding; 6 th International Trends in Welding<br />
Research Conference Proc., p212, 2002.<br />
[17] Colegrove P, Painter M, Graham D, Miller T; 3 Dimensional flow and thermal<br />
modelling of the friction stir welding process; Proc. of the 2nd International Symposium<br />
on Friction Stir Welding, 2001.<br />
[18] Chen H-B, Yan K, Lin T, Chen S-B, Jiang C-Y, Zhao Y; The investigation of a<br />
typical welding defects for 5456 aluminum alloy friction stir welds; Materials Science<br />
and Engineering A, 433, p64, 2006.<br />
[19] Linder K, Khandahar Z, Khan J, Tang W, Reynolds AP; Rationalization of hardness<br />
distribution in alloy 7050 friction stir welds based on weld energy, weld power, and<br />
time/temperature history; Proc. of the 6 th International Symposium on Friction Stir<br />
Welding, 2007.<br />
[20] Midling OT, Rorvik G; Effect of tool shoulder material on heat input during friction<br />
stir welding; Proc. of the 1st International Symposium on Friction Stir Welding, 1999.<br />
[21] Heurtier P, Jones MJ, Desrayaud C, Driver JH, Montheillet F, Allehaux D;<br />
Mechanical and thermal modeling of friction stir welding; Journal of Materials<br />
Proccessing Technology, 171, p348, 2006.<br />
43
[22] Colegrove PA, Shercliff HR, Zettler R; Model for predicting heat generation and<br />
temperature in friction stir welding form the material properties; Science and Technology<br />
of Welding and Joining, Vol.12, No.4, p284, 2007.<br />
[23] Schmidt H, Hattel J, Wert J; An analytical model for the heat generation in friction<br />
stir welding; Modelling Simul. Mater. Sc. Eng. 12 (2004) 143-157.<br />
[24] Schmidt H, Dickerson T, Hattel JH; Material flow in butt friction stir welds in<br />
AA2024-T3; Acta Materialia (2005).<br />
[25] Schmidt H, Hattel J; A local model for the thermomechanical conditions in friction<br />
stir welding; Modelling and Simulation in Materials Science and Engineering, 13 (2005)<br />
77-93.<br />
[26] Shi Q-Y, Dickerson T, Shercliff HR; Thermomechanical FE modeling of friction stir<br />
welding of al-2024 including tool loads; Proc. of the 4 th International Symposium on<br />
Friction Stir Welding, 2003.<br />
[27] Y. He, D. E. Boyce, and P. R. Dawson, "Three-Dimensional Modeling of Void<br />
Growth in Friction Stir Welding of Stainless Steel," in NUMIFORM '07, 2007.<br />
[28] Chao YJ, Qi X; Heat transfer and thermo-mechanical analysis of friction stir joining<br />
of AA6061-T6 plates; Proc. of the 1st International Symposium on Friction Stir Welding,<br />
1999.<br />
[29] Dickerson TL, Shi Q-Y, Shercliff HR; Heat flow into friction stir welding tools;<br />
Proc. of the 4 th International Symposium on Friction Stir Welding, 2003.<br />
[30] Song M, Kovacevic R: A new heat transfer model for friction stir welding; Trans.<br />
NAMRI/SME, XXX, 562-572, 2002.<br />
[31] Song M, Kovacevic R: Numerical and experimental study of the heat transfer<br />
process in friction stir welding; Proc. Inst. Mech Eng. B, J. Eng. Manuf.; 217B, 73-85,<br />
2003.<br />
[32] Song M, Kovacevic R: Numerical simulation and experimental analysis of heat<br />
transfer process in friction stir welding; Proc. Inst. Mech Eng. B, J. Eng. Manuf., 218B,<br />
17-33, 2003.<br />
[33] Chao YJ, Qi X; Thermal and thermo-mechanical modeling of friction stir welding of<br />
aluminum alloy 6061-T6; J. Mater. Process Maunf. Sci., 1998, 7, (2), 163-172.<br />
[34] G. Buffa, J. Hua, R. Shivpuri, and L. Fratini, "A continuum based fem model for<br />
friction stir welding--model development," Materials Science and Engineering A, vol.<br />
419, pp. 389-396, 2006.<br />
[35] Vilaca P, Quintino L, dos Santos JF: iSTIR- Analytical thermal model for fricitno<br />
stir welding; J. Mater. Process. Technol., 169, (3), 452-465, 2005.<br />
[36] Askari A, Silling ST, London B, Mahoney M: Proc. Semin. On ‘FSW flow<br />
visualisation and modelling’, Geesthacht, Germany, Feb. 2003, GKSS.<br />
[37] Dong P, Lu F, Hong JK, Cao Z: Coupled thermomechanical analysis of friction stir<br />
welding process using simplified models; Sci. Technol Weld. Join., 6, (5), 281-287, 2001.<br />
[38] Lambrakos SG, Fonda RW, Milewski JO, Mitchell JE: Analysis of friction stir welds<br />
using thermocouple measurements; Sci. Technol. Weld. Join., 8, (5), 385-390, 2003.<br />
[39] Sheppard T and Wright D: Determination of flow stress: Part 1 constitutive equation<br />
for aluminum alloys at elevated temperatures; Met. Technol., 6, 215-223, June 1979.<br />
[40] Mahoney M.W., Rhodes C.G., Flintoff J.G., Spurling R.A., Bingel, W.H.: Properties<br />
of friction-stir-welded 7075 T651 aluminum; Metall. Mater. Trans. A., 29A, 1955-64,<br />
July 1998.<br />
44
[41] Heinz B., Skrotzki B., Eggler G.: Microstructural and mechanical characterization of<br />
friction stir welded Al-alloy; Mater. Sci. Forum., 331–337, 1757-62, 2000.<br />
[42] Svensson, L.E., Karlsson, L., Larsson, H., Karlsson, B., Fazzini, M. and Karlsson, J.:<br />
Microstructural and mechanical properties of friction stir welded aluminum alloys with<br />
special reference to AA 5083 and AA 6082; Sci. Technol. Welding Joining, 5, 285-296,<br />
2000.<br />
[43] Ulysse P.: Three-dimensional modeling of the friction stir-welding process;<br />
International Journal of Machine Tools & Manufacture., 42, 1549–1557, 2002.<br />
[44] Nunes A.C., Bernstien E.L., McClure J.C.: A rotating plug model for friction stir<br />
welding; Proc. of the 81 st American Welding Society Annual Convention, Chicago, IL,<br />
2000.<br />
[45] Murr L.E., Liu G., McClure, J.C.: A TEM study of precipitation and related<br />
microstructures in friction-stir welded 6061 aluminum; Mater. Sci., 33, 1243-1251, 1998.<br />
[46] Rhodes C.G., Mahoney M.W, Bingel W.H., Spurling R.A., Bampton C.C.: Effects<br />
of friction stir welding on microstructure of 7075 aluminum; Scripta Mater., 36, 69-75,<br />
1997.<br />
[47] Jata K.V., Sankaran K.K., Ruschau J.J: Frictio-stir welding effects on microstructure<br />
and fatigue of aluminum alloy 7075-T7451; Metall. Mater. Trans.A, 31A, 2181-2192,<br />
Sept. 2000.<br />
[48] Liu, G., Murr, L.E., Niou, C.S., McClure, J.C. and Vega, F.R.; Microstructural<br />
aspects of the friction-stir welding of 6061-T6 Aluminum; Scripta Metall., 37, 355-361,<br />
1997.<br />
[49] Sato Y.S., Kokawa H., Enomoto M., Jogan, S.: Microstructural evolution of 6063<br />
aluminum during friction-stir welding; Metall. Mater. Trans. A, 30A, 2429-2437, 1999.<br />
[50] Su J.-Q., Nelson T.W., Mishra R., Mahoney, M.: Microstructural investigation of<br />
friction-stir welded 7075-T651 aluminum; Acta Mater., 51, 713-729, 2003.<br />
[51] Seidel TU, Reynolds AP: A 2-D friction stir process model based on fluid<br />
mechanics; Sci. Technol. Weld. Join., 8, (3), 175-183, 2003.<br />
[52] R. Crawford, G. E. Cook, A. M. Strauss, D. A. Hartman, and M. A. Stremler,<br />
"Experimental defect analysis and force prediction simulation of high weld pitch friction<br />
stir welding " Science and Technology of Welding & Joining, vol. 11, pp. 657-665, 2006.<br />
[53] Reynolds A. P., Deng X., Seidel T. and Xu S.: Recent advancements in FSW process<br />
physics; Proc. Joining of Advanced and Specialty Materials (St Louis, MO, ASM<br />
International) pp 172–177, 2000.<br />
[54] Guerra M., Schmidt C., McClure J.C., Murr L.E., Nunes A.C.; Flow patterns during<br />
friction stir welding; Materials Characterization., 49, 95-101, 2003.<br />
[55] Colligan K.: Material flow behavior during friction stir welding of aluminum; Weld.<br />
Res. Suppl., 6, 229 –237, July 1999.<br />
[56] Zhao Y.-H., Lin S.-B., Qu F.-X., Wu L.: Influence of pin geometry on material flow<br />
in FSW processing; Materials Science and Technology, 22 (1), 45-50, 2006.<br />
[57] Schnieder JA, Nunes AC: Characterization of plastic flow and resulting<br />
microtextures in a friction stir weld; Metallurgical and Materials Transactions B,<br />
Volume 35B (2004), 777-783.<br />
45
[58] Schnieder JA, Beshears R, Nunes AC; Interfacial sticking and slipping in the friction<br />
stir welding process, Mater. Sci. Eng. A, Vol 435-436 (2006) 297-304.<br />
[59] Arbegast WJ; Modeling friction stir joining as a metal working process: Hot<br />
Deformation of Aluminum Alloys, (editor Z. Jin), TMS (2003).<br />
[60] Williams SW, Colegrove PA, Shercliff H, Prangell P; Intergrated modeling of the<br />
friction stir welding process: Proc. of the 6 th International Symposium on Friction Stir<br />
Welding, 2007.<br />
[61] Schmidt H, Hattel J; Analysis of the velocity field in the shear layer: Proc. of the 6 th<br />
International Symposium on Friction Stir Welding, 2007.<br />
[62] Sato T, Otsuka D, Watanabe Y; Designing of friction stir weld parameters with finite<br />
element flow simulation: Proc. of the 6 th International Symposium on Friction Stir<br />
Welding, 2007.<br />
[63] St-Georges L, Dasylva-Raymond V, Kiss LI, Perron AL; Prediction of optimal<br />
parameters of friction stir welding: Proc. of the 6 th International Symposium on Friction<br />
Stir Welding, 2007.<br />
[64] Song M, Kovacevic R; Thermal modeling of friction stir welding in a moving<br />
coordinate system and its validation: Materials Science Forum 2002, (346-402) 1537-<br />
1542.<br />
[65] De Vuyst T, Magotte O, Robineau A, Goussian J-C, Alvise LD; Multi-physics<br />
simulation of the material flow and temperature field around FSW tool: Proc. of the 6 th<br />
International Symposium on Friction Stir Welding, 2007.<br />
[66] Chen ZW, Pasang T, Qi R, Perris R; Tool-workpiece interface and shear layer<br />
formed during friction stir welding: Proc. of the 6 th International Symposium on Friction<br />
Stir Welding, 2007.<br />
[67] Atharifar H, Lin DC, Kovacevic R; Studying tunnel-like defect in friction stir<br />
welding process using computational fluid dynamics: Mat. Sci. Tech. 2007, Detroit MI.<br />
[68] Shinoda T, Kondo Y; Friction stir welding of aluminum plate: Welding Int., 11(3)<br />
(1997), p179-184.<br />
[69] Sheppard T, Jackson A; Constitutive equations for use in prediction of flow stress<br />
during extrusion of aluminum alloys: Mat. Sci. Tech. 13(3) (1997), p203-209.<br />
46
CHAPTER II<br />
COMPUTATIONAL ANALYSIS OF FRICTION STIR WELDED T-JOINTS<br />
Computational Analysis of Friction Stir Welded T-Joints; D. H. <strong>Lammlein</strong>, P. A.<br />
Fleming, D. M. Wilkes, George E. Cook, A. M. Strauss, D. R. DeLapp, and D. A.<br />
Hartman; Inter-Institutional Report, <strong>Vanderbilt</strong> <strong>University</strong> and Los Alamos National<br />
Lab, 2008<br />
Misalignment Detection and Enabling of Seam Tracking for Friction Stir Welding; P. A.<br />
Fleming, D. H. <strong>Lammlein</strong>, D. M. Wilkes, G. E. Cook, A. M. Strauss, D. R. DeLapp, and<br />
D. A. Hartman; Science and Technology of Welding and Joining, Vol. 14, #1, 2008.<br />
Note: This chapter presents the entirety of the former document. Additionally, the<br />
portions of the latter relevant to the chapter title are presented.<br />
FEA assessment of FSW Process Geometry for Seam Misalignment Detection<br />
In friction stir welding (FSW), it is commonly know that the process forces<br />
transmitted through the tool are dependent on process parameters and process geometries.<br />
A threshold level of variation in one or more of these process factors during a given weld<br />
will produce a discernible change in the weld process forces. Fleming et al. [1,2] have<br />
demonstrated that, for certain process geometries, weld process force feedback can be<br />
utilized for online weld seam misalignment detection. Seam misalignment detection in<br />
FSW is the estimation, based on some feedback signal, of the lateral tool position with<br />
respect to the weld jointline. It is the belief of the authors that weld process forces differ<br />
based on lateral tool position wherever the conditions beneath the tool vary with lateral<br />
tool position. In the case of the blind type T-joint setup depicted in Figure 30, the<br />
geometry of the welded material and fixturing beneath the tool change drastically with<br />
lateral tool position and these changes are readily detectable in process force data. This<br />
work presents finite element analysis (FEA) as a tool for determining the viability of a<br />
given weld process geometry for seam misalignment detection. Using a simple finite<br />
47
element model of the process geometry, an evaluation for lateral tool position estimation<br />
can be made prior to fabrication, setup, and welding.<br />
Welds were performed at 1000 rpm and 4 in/min using 6061 aluminum in the two<br />
fixturing configurations depicted in Figure 30 and Figure 31. The configuration in Figure<br />
30 produced the laterally dependent process force variations necessary for seam<br />
misalignment detection while the configuration in Figure 31 did not. These<br />
configurations will be referred to as the tracked and the untracked configurations<br />
respectively.<br />
48
Figure 30: Blind t-joint setup with squared gap (1/8”x1/8”) in clamps<br />
(tracked configuration).<br />
Figure 31: Blind type t-joint setup with no gap in clamps (untracked configuration).<br />
For the untracked configuration, two test welds were performed during which the<br />
tool lateral position was adjusted in step movements. In the first weld the tool begins<br />
offset to the advancing side and ends on the retreating side. A second weld was<br />
performed with an initial retreating side offset and final advancing side offset. This<br />
49
procedure ensures that process force variations are not somehow related to transient<br />
heating effects or some unforeseen longitudinally varying factor. Figure 32 shows solid<br />
block data from these trails. No observable trend can be seen in the process forces.<br />
Figure 32: Process forces and lateral offset for two separate welds using the untracked<br />
clamp geometry.<br />
In Figure 32, the period between 40 and 70 seconds immediately follows the<br />
dwell period of the weld and transient effects are seen. The final 5 to 10 seconds of each<br />
weld are affected by the ending of the weld plate. Figure 33 represents the most useful<br />
portion of the solid block data, and again shows no useful trend in the untracked case.<br />
Figure 34 shows data from a weld made using the tracked geometry. The data seen for<br />
the tracked data shows useful force changes with corresponding changes in lateral<br />
position.<br />
50
Figure 33: Process forces and lateral offset for two separate welds using the untracked<br />
clamp geometry (t=70s to t=130s).<br />
51
Figure 34: A similar test using the tracked geometry (t=70s to t=130s).<br />
Substantial data was collected for the tracked configuration as this geometry<br />
proved useful for seam misalignment detection. For the tracked configuration welds, the<br />
axial force was shown to have the greatest change in magnitude with lateral offset, in<br />
addition to being several fold the largest process force in magnitude. The remaining<br />
process forces showed more complicated and less pronounced variations with lateral<br />
position and are thus neglected in this analysis. Fig. 5 shows data collected from 10<br />
separate welds using the tracked geometry. Each point is represents a single weld and is<br />
the average axial force value over the steady state weld period where transient effects are<br />
minimal.<br />
52
Figure 35: Experimental Welds, Axial force (1000xN) vs. lateral offset(in) for tracked<br />
configuration.<br />
The tracked configuration shows generally higher axial forces near the jointline.<br />
For effective seam misalignment detection, a substantive axial force trend must hold<br />
within a narrow range of offsets near the jointline. Relationships between lateral offset<br />
and the X, Y, and moment forces are believed to be secondary effects of the axial force<br />
variation combined with tool rotation and travel. Changes in the axial force with lateral<br />
offset can be attributed to changes in material geometry and composition below and in<br />
the vicinity of the shoulder.<br />
Imposed Axial Load FEA Analysis<br />
The following FEA analysis uses the same axial force applied to the tool for all<br />
cases and examines the subsequent material deflection beneath the shoulder with<br />
geometry and offset changes. By considering only axial force, the total number of<br />
elements in the offset models can be halved with a symmetry plane. A preliminary<br />
53
analysis which dedicated elements to the steel spacers is presented in appendix A. This<br />
analysis shows that the regions of significant deflection are confined to the 6061<br />
aluminum near the tool and not present in the steel spacers of roughly thrice the modulus.<br />
The boundaries of the weld material that contact the steel spacers are therefore treated as<br />
rigid walls. The model geometry and boundary conditions are shown in Figures 6, 7 and<br />
8. The tracked and untracked boundary conditions differ in the corner region where the<br />
gap is present in the spacer of the tracked geometry. For the tracked geometry this region<br />
is treated as a free boundary, and for the untracked geometry it is treated as a rigid wall.<br />
Figure 36: FEA model geometry<br />
54
Figure 37: FEA boundary conditions (annotated).<br />
55
Figure 39: FEA boundary conditions (vectors).<br />
Figure 38: Global edge lengths for data FEA models.<br />
56
A 4500 N axial force is applied evenly over the horizontal surfaces of the tool for<br />
all models and weld process geometry stiffnesses are analyzed. Six offset conditions are<br />
created for each geometry configuration starting from a centered case and moving in<br />
increments of one hundredth of an inch out to 0.05 inches of offset. The centered case is<br />
symmetric about the longitudinal (traverse) weld axis as well as the lateral axis. A<br />
preliminary model was therefore created using one quarter of the tool and two planes of<br />
symmetry for mesh validation and is presented in appendix B. For consistency an<br />
identical mesh seed, shown in Figure 38, was used for all twelve offset and geometry<br />
cases including the laterally centered cases of the two geometries. The geometry cases<br />
differ in the treatment of the boundary condition in the corner region. The standard<br />
model contains approximately 75,000 nodes and 430,000 4-node tetrahedral elements.<br />
For each case, the maximum advancing side and retreating side deflection<br />
magnitudes were found in the simulated aluminum weld material. Plots of maximum<br />
deflection versus lateral offset are presented in Figure and Figure for the tracked case<br />
and the untracked case respectively. An equivalent range is used for the y-axis of each<br />
graph to allow for comparison of the tracked and untracked geometry cases.<br />
57
Figure 40: FEA results for tracked (squared gap) geometry.<br />
Figure 41: FEA results for untracked (gapless) geometry.<br />
The tracked geometry shows a larger range of maximum deflections, 3.6E-6 in as<br />
opposed to 0.6E-6in. This result corresponds to the tool experiencing larger changes in<br />
58
axial force with lateral offset during welding because the stiffness conditions beneath the<br />
tool are changing more drastically with lateral offset. Laterally dependent, changes in x,<br />
y, and moment process forces are believed to be dependent on variations in the<br />
magnitude of the axial force and its center of application. The difference in the<br />
maximum deflection on the advancing side versus that on the retreating side indicates a<br />
shift in the center of application of the axial tool pressure. The tracked configuration<br />
shows a range of 6.5E-6in as opposed to 2.5E-6in. In addition, the untracked<br />
configuration shows little differentiation in deflection results near the center of the<br />
jointline. Contour results are presented for the two hundredth offset, tracked geometry<br />
case:<br />
Figure 40: Contour plot of deflection magnitude for 0.02 offset tracked geometry case.<br />
59
Figure 41: Contour plot of deflection magnitude for 0.02 offset tracked geometry case.<br />
60
Figure 42: Contour plot of von Mises stress (plotted over the displaced model) for 0.02<br />
offset tracked geometry case.<br />
FEA Appendix A:<br />
Contours taken from the tracked (square gap) geometry with elements dedicated to steel<br />
spacer are presented. Note that major displacements and stresses are confined to the<br />
vertical and horizontal aluminum members (top and left) and minimal in the steel spacer<br />
(lower right).<br />
61
Figure 43: Deformation contour for tracked (square gap) geometry with elements<br />
dedicated to steel spacer (front).<br />
62
Figure 44: Deformation contour for tracked (square gap) geometry with elements<br />
dedicated to steel spacer (iso).<br />
63
Figure 45: Deformation contour for tracked (square gap) geometry with elements<br />
dedicated to steel spacer (zoom).<br />
FEA Appendix B:<br />
Contours taken from the quarter-plate model for laterally centered case with tracked<br />
geometry boundary conditions are presented. Results were similar to the standard halfplate<br />
model presented.<br />
64
Figure 46: Quarter-plate model for laterally centered case with tracked geometry<br />
boundary conditions (iso).<br />
65
Figure 47: Quarter-plate model for laterally centered case with tracked geometry<br />
boundary conditions (top).<br />
Imposed Axial Displacement FEA Analysis<br />
The following FEA analysis uses a constant vertical tool displacement (plunge<br />
depth) applied to the FEA plate geometry for all cases and examines the subsequent axial<br />
force on the tool with geometry and offset changes. The axial deflection applied to the<br />
material interface for both configurations and all offset cases is 0.0001 in. This<br />
deflection value obtained axial force values close to those found experimentally. For<br />
simplicity, the local plasticization near the tool is ignored and a constant Young’s<br />
modulus for 6061 alloy Aluminum is used. Geometry and boundary conditions are<br />
otherwise identical to the imposed force FEA analysis presented earlier. Results for this<br />
analysis are presented below along with experimentally determined values.<br />
Figure 48: Axial force vs Lat. Offset plot with experimental and FEA data.<br />
66
Figure 49: Contour plot of deflection magnitude for 0.02” offset tracked geometry case.<br />
Figure 50: Contour plot of von Mises stress for 0.02” offset tracked geometry case.<br />
67
CFD Thermo-Plastic analysis of Friction Stir Welded T-joints under Lateral Offset<br />
The Eulerian, finite volume, CFD solver, Fluent was used with the implicit<br />
formulation. The weld material viscosity function was set by user-defined function and<br />
defined according to the visco-plastic model of Sheppard and Wright [3,] modified from<br />
the initial formulation proposed by Sellars and Tegart[4]. Flow stress is defined as an<br />
inverse hyperbolic sine function of the local strain rate magnitude and absolute<br />
temperature in this following commonly used form:<br />
Q<br />
Z = & ε exp( ) = A(sin ασ ) n<br />
e<br />
RT<br />
or equivalently,<br />
⎡ ⎤<br />
1 − ⎢⎛<br />
Z 1<br />
⎞ n<br />
1<br />
= ⎜ ⎟ ⎥<br />
⎛ Q ⎞<br />
σ<br />
e<br />
sinh<br />
Z = ε& exp⎜<br />
⎟<br />
α ⎢⎝<br />
A ⎠ ⎥<br />
⎝ RT ⎠<br />
⎣ ⎦<br />
where α, A, n are material constants (α = 0.045 (Mpa) -1 , Q = 145 kJ mol -1 , A = 8.8632E6<br />
s -1 , n = 3.55), σ e is the equivalent steady state flow stress (Mpa), R the gas constant (R =<br />
8.314 mol -1 K -1 ), T the absolute temperature (K), Q is the activation energy (J mol -1 ) and Z<br />
is the Zener-Hollomon parameter. The material constants used are determined using a<br />
hot compression test. The material viscosity is defined in the following manner:<br />
σ<br />
e<br />
µ =<br />
3 & ε<br />
The visco-plastic model holds at temperatures reasonably below the metal’s<br />
solidus temperature. As the material approaches the solidus temperature significant<br />
softening occurs. A variable slip shear condition was set at the weld interface [14]. The<br />
tool rotational velocity was set to %70 of the experimental parameter and a pure stick<br />
condition was used. This simple boundary condition was used because the actual<br />
relationship is unknown.<br />
The total heat input was calculated via the weld power method [5-13]:<br />
P =ω⋅Ω<br />
Q = P⋅β<br />
68
where P is the weld power (W), Q is the heat input to the tool and weld material (W), ω is<br />
the tool rotational speed (rad/s), Ω is the measured torque (N⋅m), and β is the fraction of<br />
mechanical work dissipated as heat into the tool shank and the weld. Chao et al.[15]<br />
arrive at a β value of approximately 0.8 under similar conditions using a boundary value<br />
approach and determine that approximately 5% of this dissipated heat is dissipated via<br />
the tool shank. For the models presented here a heat input of 1591.6 Watts is obtained<br />
using an experimentally determined weld moment of 19.0 N⋅m. {Q = (104.72 rad/s)*(19<br />
N⋅m)*(0.8) }<br />
Weld moment was found experimentally via a rotating cutting force dynamometer<br />
and the spindle speed setting was verified by optical interrupters. This calculated total<br />
heat input was then applied in the model at the tool-material interface via a user-defined<br />
function which varies heat input over the tool surface according to the local tangential<br />
velocity magnitude. Heat input is therefore highest near the tool shoulder edge and zero<br />
at the center of the probe tip with the total heat input equal to the weld power. Heat input<br />
to the tool shank is determined by imposing the local weld material temperature at the<br />
interface onto the corresponding local tool surface element via a user-defined function. A<br />
heat transfer coefficient of 10 W/m 2 ⋅K is used for the exposed surface of the toolshank.<br />
This is appropriate for a the rotating tool steel on air interface [15,16]. A value of 30<br />
W/m 2 ⋅K [15, 16] is used for the exposed aluminum surface and a value of 2000 W/m 2 ⋅K<br />
is used for the remaining boundaries which involve intimate metal-metal contact due to<br />
material clamping or at continuous metal boundaries[17].<br />
The model temperature field was verified by a Flir SC500 Thermacam model<br />
thermal camera. The thermal camera was calibrated to the emissivity of the tool shank<br />
surface. The experimental temperature on the tool near the material surface was<br />
determined to be 396˚C (669) K and was calculated by taking the average temperature<br />
from a rectangular area on the tool shank surface for each image. Ten images at one<br />
second intervals were used and those were then averaged to produce an approximation of<br />
the temperature on the cone surface during the steady-state portion of the weld. It should<br />
be noted that the temperature continued to creep upward even during the steady state<br />
period. In addition, welds made later in the day (when the machine, fixturing, and<br />
backing plate were warm) were noticeably warmer (as much as 20°C).<br />
69
Figure 51: A thermal camera image taken during the steady state weld period of a<br />
1000rpm, 4 ipm, blind-T weld<br />
Model Geometry<br />
Two model geometries were creating representing a centered tool case and an<br />
offset case of 0.05 inches to the advancing and retreating side. The tool rotation is varied<br />
in the latter to simulate offsets to the retreating and to the advancing side of the weld.<br />
The mesh was created in a mesh generation and preprocessing program called Gambit.<br />
The model was divided into several continuum zones to account for material type. The<br />
models contain approximately 960,000 tetrahedral elements. The work material has been<br />
divided into a refined zone of plastic aluminum behavior around the tool and zones of<br />
solid aluminum and steel behavior away from the tool where only heat conduction<br />
equations are solved. The zone immediately in front and the zone immediately behind<br />
the central refined zone are also modeled using a plastic aluminum formulation to create<br />
a stabilized flow into and out of the zone of interest around the tool. A velocity inlet set<br />
to the traverse rate and an outflow boundary condition are used to establish a relative<br />
velocity between the tool and workpiece.<br />
70
Figure 52: Fluent CFD model zones.<br />
Results:<br />
Figure 53: Surface heat fluxes for CFD model faces.<br />
71
Figure 54: Thermal contour for laterally centered case.<br />
72
Figure 55: Thermal contour of weld material at the interface for laterally centered case.<br />
Figure 56: Thermal contour for 0.05in advancing side lateral offset case.<br />
73
Figure 57: Thermal contour of weld material at the interface for 0.05in advancing side<br />
lateral offset case.<br />
Figure 58: Thermal contour for 0.05in retreating side lateral offset case.<br />
74
Figure 59: Thermal contour of weld material at the interface for 0.05in retreating side<br />
lateral offset case.<br />
75
Figure 60: Contour of total pressure for 0.05” advancing side offset case.<br />
76
Figure 61: Velocity vectors for 0.05” advancing side offset case.<br />
Figure 62: Contour of velocity magnitude for 0.05” advancing side offset case.<br />
77
Figure 63: Contour of total pressure for 0.05” retreating side offset case.<br />
Figure 64: Velocity vectors for 0.05” retreating side offset case.<br />
78
Figure 65: Contour of velocity magnitude for 0.05” retreating side offset case.<br />
References:<br />
[1] P. A. Fleming, D. H. <strong>Lammlein</strong>, G. E. Cook, D. M. Wilkes, A. M. Strauss,<br />
D. DeLapp and D. A. Hartman: Through the tool tracking for friction stir<br />
welding. US Patent May 30, 2008. Serial No. 12/130,622.<br />
[2] Paul A. Fleming, David H. <strong>Lammlein</strong>, D. M. Wilkes, George E. Cook,<br />
Alvin M. Strauss, David R. DeLapp, Daniel A. Hartman. “Misalignment<br />
detection and enabling of seam tracking for friction stir welding." Science<br />
and Technology of Welding and Joining. Ref# 0209522-US0, submitted July<br />
2008.<br />
[3] Sheppard T and Wright D: Determination of flow stress: Part 1 constitutive equation<br />
for aluminum alloys at elevated temperatures; Met. Technol., 6, 215-223, June 1979.<br />
[4] Sellars CM, Tegart WJM; Hot workability; Int. Metall. Rev., 1972, 17, 1-24<br />
[5] Simar A, Pardoen T, de Meester B; Influence of friction stir welding parameters on<br />
the power input and temperature distribution on friction stir welding; Proc. of the 5th<br />
International Symposium on Friction Stir Welding, 2004.<br />
[6] Simar A, Pardoen T, de Meester B; Effect of rotational material flow on temperature<br />
distribution in friction stir welds; Science and Technology of Welding and Joining,<br />
Vol.12, No.4, p324, 2007.<br />
[7] Santiago DH, Lombera G, Santiago U; Numerical modeling of welded joints by the<br />
friction stir welding process; Materials Research, Vol.7, Num.4, p569, 2004.<br />
79
[8] Pew JW, Nelson TW, Sorensen CD; Torque based weld power model for friction stir<br />
welding; Science and Technology of Welding and Joining,Vol.12, Num.4, p341, 2007.<br />
[9] Colegrove P, Painter M, Graham D, Miller T; 3 Dimensional flow and thermal<br />
modelling of the friction stir welding process; Proc. of the 2nd International Symposium<br />
on Friction Stir Welding, 2001.<br />
[10] Linder K, Khandahar Z, Khan J, Tang W, Reynolds AP; Rationalization of hardness<br />
distribution in alloy 7050 friction stir welds based on weld energy, weld power, and<br />
time/temperature history; Proc. of the 6 th International Symposium on Friction Stir<br />
Welding, 2007.<br />
[11] Dickerson TL, Shi Q-Y, Shercliff HR; Heat flow into friction stir welding tools;<br />
Proc. of the 4 th International Symposium on Friction Stir Welding, 2003.<br />
[12] Nunes A.C., Bernstien E.L., McClure J.C.: A rotating plug model for friction stir<br />
welding; Proc. of the 81 st American Welding Society Annual Convention, Chicago, IL,<br />
2000.<br />
[13] St-Georges L, Dasylva-Raymond V, Kiss LI, Perron AL; Prediction of optimal<br />
parameters of friction stir welding: Proc. of the 6 th International Symposium on Friction<br />
Stir Welding, 2007.<br />
[14] Liechty B.C., Webb B.W., Modeling the frictional boundary conditions in friction<br />
stir welding: International Journal of Machine Tools & Manufacture, 2008,<br />
doi:10.1016/j.ijmachtools.2008.04.005<br />
[15] Chao Y., Qi X., Heat Transfer in FSW: Experimental and Numerical Studies;<br />
Journal of Manufacturing Science and Engineering, February 2003, Vol. 125, 145<br />
[16] R. Nandan, G. G. Roy and T. DebRoy, Numerical Simulation of Three Dimensional<br />
Heat Transfer and Plastic Flow during Friction Stir Welding of Aluminum Alloys,<br />
Metallurgical and Materials Transactions A, 2006, vol. 37A, pp. 1247-1259<br />
[17] Fourment L., Guerdoux S., Numerical Simulation of the Friction Stir Welding<br />
Process using Lagrangian, Eulerian and ALE Approaches. Proceedings of the 5th<br />
International Friction Stir Welding Symposium, TWI, Metz, France (2004)<br />
80
CHAPTER III<br />
THE APPLICATION OF SHOULDERLESS CONICAL TOOLS IN FRICTION STIR<br />
WELDING: AN EXPERIMENTAL AND THEORETICAL STUDY<br />
<strong>Lammlein</strong>, D. H., DeLapp, D.R., Fleming, P.A., Strauss, A.M., and Cook, G.E., “The<br />
application of shoulderless conical tools in friction stir welding: An experimental and<br />
theoretical study,” Materials and Design, 30 (2009), 4012-4022.<br />
Abstract<br />
A friction stir welding (FSW) tool geometry, consisting of a shoulderless conical probe,<br />
is investigated for application to closed contour welding, variable thickness welding, and<br />
open loop control welding. By use of a tapered retraction procedure and a ramped<br />
rotational velocity, a conical tool may facilitate material disengagement with minimal<br />
surface defects in applications that do not permit weld termination defects (e.g. pipes,<br />
pressure vessels, fuselages, nosecones). In addition, because the vertical position of the<br />
tool relative to the material surface is less critical with a conical tool than with other tool<br />
designs, it can be used in an open-loop fashion (i.e. without process force feedback<br />
control) and on materials whose thicknesses are highly variable. The use of a conical<br />
probe without a shoulder is not documented in the literature, and the aim of this work is<br />
to establish the conditions for mechanically sound welds. Effective tool geometries and<br />
process variables are found via experimental analysis. Thermal, tensile, macrosection,<br />
and process force data are presented along with a computational fluid dynamics (CFD)<br />
process model. It is concluded that this type of tooling is capable of producing<br />
acceptable welds when applied to butted aluminum plates and that similar methods would<br />
likely be effective in the applications described previously.<br />
Introduction<br />
81
The conical tool design is potentially a simple solution to the problem of closure<br />
in friction stir welding (FSW). In FSW, a defect is left at the removal site of the tool and<br />
this defect is unacceptable in applications where the entire workpiece is critical.<br />
According to Trapp, Fischer, and Bernath of the Edison Welding Institute(EWI) in U.S.<br />
Patent #7234626, the appropriate conical inclusive angle can contain weld material<br />
regardless of cone penetration depth and during tapered retraction [1,2]. The conical tool<br />
(Figure 66) in conjunction with the tapered retraction procedure and spindle velocity<br />
ramping could therefore be used to weld closed contours such as cylinders and spheres<br />
(e.g. pipes, pressure vessels, fuselages, nosecones) without leaving a defect or hole where<br />
the tool exits the material. The conical tool design is especially attractive because it is an<br />
easily manufacturable and durable design. The conical tool is potentially a simple and<br />
elegant solution to the seemingly complex closure welding problem in FSW. A current<br />
solution to the retraction problem that NASA and a number of manufacturers have<br />
adopted is an exceedingly complex, hydraulically actuated retractable pin tool apparatus<br />
[3]. The conical tool can be used for in-process adjustment of penetration depth for<br />
application to variable thickness welds. Additionally, the use of a conical tool does not<br />
require force control as with a conventional friction stir weld tool where appropriate<br />
shoulder contact with the material is critical. These welds can be performed in an openloop<br />
manner without process force feedback based adjustment of the tool’s vertical<br />
position. The conical tool can passively accommodate variation in the height of the<br />
material surface relative to the tool, due to material thickness variations in linear welds or<br />
system eccentricities in rotary welds.<br />
82
Figure 66: A shoulder-less, conical tool (90º inclusive angle) used in the experiment<br />
As no published literature exists on the design and application of shoulderless<br />
conical tools, the primary aim of this work is to find a tool geometry and weld parameter<br />
set that produces mechanically acceptable welds. An experimental weld matrix has been<br />
performed on 1/8”(0.32cm) thick, butted 6061 alloy aluminum plates. A suitable<br />
inclusive angle for FSW was found by testing a range of tool angles (60º, 80º, 90º, and<br />
120º). Suitable weld parameters were established and a 36 weld matrix was performed<br />
with the 80º and 90º tools. For these welds, characteristic weld forces were determined<br />
via a dynamometer, achievable weld strengths via tensile testing, weld structure and<br />
appearance via etching of macrosections, and approximate shoulder edge temperature via<br />
thermal camera images. To avoid both collision of the tool with the backing anvil and<br />
weld root defect formation, a penetration ligament of 0.01”(0.25mm) was selected for the<br />
experiment.<br />
Welds made at a low spindle head angle (0º-2º) resulted in unacceptable force<br />
oscillations in the XY plane. Figure 67 shows the XY plane oscillations in the<br />
dynamometer force data for a particular weld at 0° spindle head angle. The experiment<br />
was therefore conducted at a head angle off 4º where the problem did not arise. The<br />
oscillations at low spindle head angles can be attributed to physical tool deflection and a<br />
lack of stiffness in the experimental setup. This problem is not perceptible with<br />
83
conventional tooling and it must therefore be concluded that the conical tool geometry<br />
exacerbates XY plane tool deflection and induces force oscillations. The lack of the<br />
stabilizing influence of a horizontal shoulder on the material surface is believed to<br />
contribute to this deflection. In addition, as compared to conventional tooling, the<br />
dynamometer data showed axial (Z) forces (Figure 68) that were lower in magnitude<br />
relative to the XY plane forces (Figure 69). The result of this periodic tool deflection<br />
was a coarse surface banding as opposed to a fine surface finish. The problem is<br />
alleviated at a 4° spindle head angle.<br />
Figure 67: XY plane force oscillations were typically present at low spindle head angles<br />
with conical welds, presumably due to the lack a horizontal, stabilizing shoulder. The<br />
experiment was therefore performed at a 4° angle where this problem did not exist.<br />
84
Figure 68: Typical axial(Z-axis) force data.<br />
Figure 69: Typical in plane force data.<br />
Conical Inclusive Angle Tests<br />
The 80º and 90º conical tools were selected for the experimental weld matrix<br />
because they produced the highest quality welds based on surface appearance. Conical<br />
welds typically produced advancing side flash and a trough-like surface defect on the<br />
85
etreating side (Figure 70). These defects were reduced to acceptable levels using the 80º<br />
and 90º conical inclusive angle tools. Macrosections were made for each weld using<br />
Boss’s reagent for etching. A complete table of macrosections is included in Figure 71<br />
thru Figure 78. Despite a similar superficial appearance and similar weld macrosections,<br />
welds made with the 80º tool were vastly inferior in strength (Figure 79 & Figure 80) to<br />
those made with the 90º tool at all parameter values and for all runs. Welds made with<br />
the 80º tool do however show a pronounced, crack-like defect extending from the root of<br />
the weld to the weld nugget center. This defect is less pronounced or absent in the 90º<br />
weld macrosections. Typical process forces for this tool type are lower in magnitude to<br />
those of a similar conventional weld (Figures 8a-h). The ratio of in-plane force to axial<br />
force (i.e. ( x 2 + y 2 ) / z ) is however higher for this process which is believed to increase<br />
vibration and process instability.<br />
Figure 70: Typical surface appearance for 90° conical tool welds on 1/8” thick butted<br />
6061 alloy aluminum plates. Typical conical surface defects are pointed out.<br />
86
Figure 71: 90° conical tool macrosections. Some 90°,Run2 welds were not<br />
macrosectioned.<br />
Figure 72: 90° conical tool macrosections. Note: Run 3, 1600rpm, 4ipm, 90° was<br />
macrosectioned twice.<br />
87
Figure 73: Run 1, 80° conical tool macrosections<br />
Figure 74: Run 2, 80° conical tool macrosections<br />
88
Figure 75: Run 3, 80° conical tool macrosections<br />
Figure 76: Macrosection of the strongest conical weld (90°,1600rpm, 4ipm, Run#1). A<br />
minimal penetration ligament is crucial to weld strength. Failure in the tensile coupon<br />
occurred along the retreating (right) side weld nugget boundary.<br />
89
Figure 77: Macrosection of the weakest 90° conical weld(90°,1400rpm, 4ipm, Run#1).<br />
Failure occurred at the jointline and along the retreating side weld nugget boundary. A<br />
significant lack of penetration (weld root) defect can be seen in this weld indicating a<br />
slight error in the automated zeroing process for this particular weld. Three welds at<br />
each parameter set were performed to distinguish such outliers.<br />
Figure 78: A particularly revealing macrosection (90°,1400rpm, 5ipm, Run#1). A<br />
jointline remnant can be seen curving through the weld nugget center. In addition, the<br />
lack of consolidation near the cone tip which is typical of a cone weld can be seen clearly<br />
here. The lack of sufficient probe surface area, heating, and pressure at the cone tip<br />
result in a lack of consolidation there.<br />
90
Figure 79: (90º tool) Ultimate tensile strength of weld specimen over that of the parent<br />
plotted against spindle speed in rpm. Three welds were performed at each parameter set<br />
(ipm,rpm).<br />
Figure 80: (80º tool) Ultimate tensile strength of weld specimen over that of the parent<br />
plotted against spindle speed in rpm. Three welds were performed at each parameter set<br />
(ipm,rpm).<br />
91
Figure 81: (90º tool) Axial force magnitude for each weld plotted against spindle speed<br />
in rpm. Three welds were performed at each parameter set (ipm, rpm). 8000 N is<br />
typical for a similar conventional weld (3/4in. dia. shoulder, ½”-20 pin). Conical welds<br />
produce significantly lower axial force.<br />
Figure 82: (90º tool) Weld moment for each weld plotted against spindle speed in rpm.<br />
Three welds were performed at each parameter set (ipm, rpm.) 18 N·m is typical for a<br />
similar conventional weld (3/4in. dia. shoulder, ½”-20 pin). Conical welds produce<br />
significantly lower weld moment.<br />
92
Figure 83: (90º tool) Lateral force magnitude for each weld plotted against spindle speed<br />
in rpm. Three welds were performed at each parameter set (ipm, rpm). +2500 N Y is<br />
typical for a similar conventional weld (3/4in. dia. shoulder, ½”-20 pin). Conical welds<br />
produce significantly lower lateral force(change in sign due to clockwise vs. counterclockwise<br />
rotation).<br />
Figure 84: (90º tool) Longitudinal force magnitude for each weld plotted against spindle<br />
speed in rpm. Three welds were performed at each parameter set (ipm, rpm). +2500N<br />
X is typical for a similar conventional weld (3/4in. dia. shoulder, ½”-20 pin). Conical<br />
welds produce significantly lower longitudinal force. Sign for a particular weld is<br />
dependent to clockwise vs. counter-clockwise rotation. All conical welds in this<br />
experiment were made with clockwise rotation.<br />
93
Figure 85: (80º tool) Axial force magnitude for each weld plotted against spindle speed<br />
in rpm.<br />
Figure 86: (80º tool) Weld moment for each weld plotted against spindle speed in rpm.<br />
94
Figure 87: (80º tool) Lateral force magnitude for each weld plotted against spindle speed<br />
in rpm.<br />
Figure 88: (80º tool) Longitudinal force magnitude for each weld plotted against spindle<br />
speed in rpm.<br />
The thermal camera was calibrated to the emissivity of the conical tool surface.<br />
The weld temperatures listed in the charts below in Figure 89 and Figure 90 were<br />
calculated by taking the average temperature from a rectangular area on the tool surface<br />
just above the weld material surface at increments in time. Ten images at one second<br />
intervals were used from the thermal camera video and those were then averaged to<br />
produce an approximation of the temperature on the cone surface during the steady-state<br />
portion of the weld. It should be noted that the temperature continued to creep upward<br />
even during the steady state period. In addition, welds made later in the day (when the<br />
95
machine, fixturing, and backing plate were warm) were noticeably warmer (as much as<br />
20º C).<br />
Figure 89: Thermal camera data for 90º tool runs.<br />
Figure 90: Thermal camera data for 80º tool runs.<br />
CFD Model of Conical Tool FSW<br />
96
The Eulerian, finite volume, CFD solver, Ansys FLUENT was used with the<br />
implicit formulation. The weld material viscosity function was set by user-defined<br />
function and defined according to the visco-plastic model of Sheppard and Wright [4] as<br />
modified from the initial formulation proposed by Sellars and Tegart [5] Flow stress is<br />
defined as an inverse hyperbolic sine function of the local strain rate magnitude and<br />
absolute temperature in this following commonly used form:<br />
Q<br />
Z = & ε exp( ) = A(sin ασ ) n<br />
e<br />
RT<br />
or equivalently,<br />
⎡ ⎤<br />
1 − ⎢⎛<br />
Z 1<br />
⎞ n<br />
1<br />
= ⎜ ⎟ ⎥<br />
⎛ Q ⎞<br />
σ<br />
e<br />
sinh<br />
Z = ε& exp⎜<br />
⎟<br />
α ⎢⎝<br />
A ⎠ ⎥<br />
⎝ RT ⎠<br />
⎣ ⎦<br />
where α, A, n are material constants (α = 0.045 (Mpa)-1, Q = 145 kJ mol -1 , A = 8.8632E6<br />
s -1 , n = 3.55), σe is the equivalent steady state flow stress (Mpa), R the gas constant (R =<br />
8.314 mol -1 K -1 ), T the absolute temperature (K), Q is the activation energy (J mol -1 ) and<br />
Z is the Zener-Hollomon parameter. The material constants used are determined using a<br />
hot compression test. The material viscosity is defined in the following manner:<br />
σ<br />
e<br />
µ =<br />
3 & ε<br />
The visco-plastic model is valid at temperatures reasonably below the metal’s solidus<br />
temperature. As the material approaches the solidus temperature significant softening<br />
occurs.<br />
The total heat input was calculated via the weld power method [6-14]:<br />
P =ω⋅M<br />
Q = P⋅ β<br />
where P is the weld power (W), Q is the heat input to the tool and weld material (W), ω is<br />
the tool rotational speed (rad/s), M is the measured torque (N⋅m), and β is the fraction of<br />
mechanical work dissipated as heat into the tool shank and the weld. Chao et al. [15]<br />
arrive at a β value of approximately 0.8 under similar conditions using a boundary value<br />
approach and determine that approximately 5% of this dissipated heat is dissipated via<br />
the tool shank. Those ratios are found to be reasonable in the current study. The weld<br />
97
moment was found experimentally by means of a rotating cutting force dynamometer and<br />
the spindle speed setting was verified by optical interrupters. This calculated total heat<br />
input was then applied in the model at the tool-material interface via a user-defined<br />
function which varies heat input over the tool surface according to the local tangential<br />
velocity magnitude. Heat input is therefore highest near the tool shoulder edge and zero<br />
at the center of the probe tip with the total heat input equal to the weld power. Heat input<br />
to the tool shank is determined by imposing the local weld material temperature at the<br />
interface onto the corresponding local tool surface element via a user-defined function. A<br />
variable slip shear condition was set at the weld interface [16]. The tool rotational<br />
velocity was set to 70% of the experimental parameter and a pure stick condition was<br />
used. This simple boundary condition was used because the actual relationship is<br />
unknown and unwarranted complexity is not desired in the model.<br />
Figure 91 shows the CFD model geometry consisting of 510,299 tetrahedral elements.<br />
The tool traverse was imposed in the model by leaving the tool at the model origin and<br />
establishing a velocity inlet and pressure outlet for the aluminum plate.<br />
98
Figure 92 shows the increasing element refinement towards the weld interface.<br />
99
Figure 93 shows the thermal boundary conditions used in the model. The resulting<br />
temperature gradients can also be seen. Figure 94 shows the temperature gradients in the<br />
vicinity of the weld interface. Figure 95 is a lateral cross-section of the weld model<br />
showing contours of velocity magnitude in the material surrounding the tool. This type<br />
of graph outlines the thermomechanically affected zone (TMAZ). The model shows a<br />
lack of stirring at the tip of the conical probe. This agreed with experimental<br />
observations in the weld macrosections and in the manner of tensile coupon failure.<br />
Porosity, lack of consolidation, and crack-like defects can be seen in some of the<br />
macrosections, particularly those from weaker weld runs. In addition, the line of failure<br />
in tensile samples intersected the weld root in almost all cases, indicating weakness near<br />
the probe’s tip as indicated by the lack of stirring seen in the CFD model.<br />
100
Figure 91: CFD model geometry consisting of 510,299 tetrahedral elements.<br />
Figure 92: Increasing element refinement towards the weld interface.<br />
101
Figure 93: Thermal boundary conditions used in the model.<br />
Figure 94: Temperature gradients in the vicinity of the weld interface.<br />
102
Figure 95: Lateral cross-section of the weld model showing contours of velocity<br />
magnitude in the material surrounding the tool. This outlines the so-called thermomechanically<br />
affected zone (TMAZ). The blackened area in the vicinity of the tool is<br />
outside the scale of this particular contour graph, which has been cropped to accentuate<br />
flow near the TMAZ boundary.<br />
Conclusions<br />
The conical tool reduces the process forces drastically (particularly the<br />
vertical). In this experiment the 90º tool welds retained a reasonable percentage of parent<br />
material strength (50-60%). The lack of the stabilizing influence of the shoulder results in<br />
increased tool deflection in XY plane but the difficulty can be alleviated with a large (4º<br />
here) spindle head angle. Weld line following was found to be more critical with a<br />
103
conical tool because the decreasing diameter of the cone near its tip leaves little room for<br />
tool to weld line alignment errors. This sort of lateral misalignment will result in a socalled<br />
weld root defect.<br />
The 90º tool was shown to work better than the 60º, 80º, or 120º tools. Small<br />
cone inclusive angles require higher spindle speeds and create more flash while large<br />
angles produce larger processed and heat affected zones. Failures typically occurred at<br />
the jointline (appropriate penetration ligament and jointline following are critical) and<br />
along the retreating side boundary of the weld nugget where a lack of consolidation (dark<br />
line) could sometimes be seen in macrosections.<br />
Full probe tapered retraction proved to be difficult. Pictured below in the<br />
appendix are some preliminary attempts at this using various retraction rates, spindle<br />
speeds, and traverse rates (Figure 96). The cone tip tends to drag through the material<br />
towards the end of the retraction when probe surface area, probe tangential velocity, heat,<br />
and pressure are insufficient for proper FSW consolidation. Pin tapered retraction from a<br />
full penetration weld is likely achievable with an aggressive increase in spindle speed as<br />
the tool retracts. A shallow dimple in the material surface would however be difficult to<br />
eliminate. Application to variable depth welding and open-loop control welding are<br />
trivial tasks. From this experiment it can be concluded that a conical FSW tool could<br />
produce high quality, full penetration welds without the assistance of force control in<br />
materials which vary in thickness over their length.<br />
104
Figure 96: Attempts a probe tapered retraction from 1/8” material full penetration welds<br />
at various parameters. The probe tends to ‘drag’ through the material near exit.<br />
Acknowledgements<br />
Completion of this chapter was made possible by a research license from the<br />
Edison Welding Institute (EWI) for use of a Variable Penetration Tool (VPT). This work<br />
was funded by the NASA Space Grant Consortium of Tennesse and by <strong>Vanderbilt</strong><br />
<strong>University</strong>. The authors would like to thank Kate Lunsford and UTSI for assitance in<br />
etching and microscopy. The authors would like to thank Bob Patchin and John<br />
Fellenstein for assistance in the design and machining of tools and fixturing. In addition,<br />
the authors would like to acknowledge valuable advice and expertise provided by Jeff<br />
Bernath and Michelle Laverty of EWI.<br />
References:<br />
[1] Trapp, Fischer, and Bernath; Edison Welding Institute(EWI); U.S. Patent #7,234,626<br />
[2] Bernath J, Friction Stir Welding Technology Engineering Team Leader, Edison<br />
Welding Institute(EWI), (personal communication, Nov. 10, 2008)<br />
105
[3] Ding J (1996). The Hydraulic Controlled Auto-Adjustable Pin Tool for Friction Stir<br />
Welding; The U.S. Government through the National Aeronautics and Space<br />
Administration; U.S. Patent #5,893,507.<br />
[4] Sheppard T and Wright D: Determination of flow stress: Part 1 constitutive equation<br />
for aluminum alloys at elevated temperatures; Met. Technol., 6, 215-223, June 1979.<br />
[5] Sellars CM, Tegart WJM; Hot workability; Int. Metall. Rev., 1972, 17, 1-24<br />
[6] Simar A, Pardoen T, de Meester B; Influence of friction stir welding parameters on<br />
the power input and temperature distribution on friction stir welding; Proc. of the 5th<br />
International Symposium on Friction Stir Welding, 2004.<br />
[7] Simar A, Pardoen T, de Meester B; Effect of rotational material flow on temperature<br />
distribution in friction stir welds; Science and Technology of Welding and Joining,<br />
Vol.12, No.4, p324, 2007.<br />
[8] Santiago DH, Lombera G, Santiago U; Numerical modeling of welded joints by the<br />
friction stir welding process; Materials Research, Vol.7, Num.4, p569, 2004.<br />
[9] Pew JW, Nelson TW, Sorensen CD; Torque based weld power model for friction stir<br />
welding; Science and Technology of Welding and Joining,Vol.12, Num.4, p341, 2007.<br />
[10] Colegrove P, Painter M, Graham D, Miller T; 3 Dimensional flow and thermal<br />
modelling of the friction stir welding process; Proc. of the 2nd International Symposium<br />
on Friction Stir Welding, 2001.<br />
[11] Linder K, Khandahar Z, Khan J, Tang W, Reynolds AP; Rationalization of hardness<br />
distribution in alloy 7050 friction stir welds based on weld energy, weld power, and<br />
time/temperature history; Proc. of the 6th International Symposium on Friction Stir<br />
Welding, 2007.<br />
[12] Dickerson TL, Shi Q-Y, Shercliff HR; Heat flow into friction stir welding tools;<br />
Proc. of the 4th International Symposium on Friction Stir Welding, 2003.<br />
[13] Nunes A.C., Bernstien E.L., McClure J.C.: A rotating plug model for friction stir<br />
welding; Proc. of the 81st American Welding Society Annual Convention, Chicago, IL,<br />
2000.<br />
[14] St-Georges L, Dasylva-Raymond V, Kiss LI, Perron AL; Prediction of optimal<br />
parameters of friction stir welding: Proc. of the 6th International Symposium on Friction<br />
Stir Welding, 2007.<br />
[15] Chao YJ, Qi X; Heat transfer and thermo-mechanical analysis of friction stir joining<br />
of AA6061-T6 plates; Proc. of the 1st International Symposium on Friction Stir Welding,<br />
1999.<br />
[16] Liechty B.C., Webb B.W., Modeling the frictional boundary conditions in friction<br />
stir welding: International Journal of Machine Tools & Manufacture, 2008,<br />
doi:10.1016/j.ijmachtools.2008.04.005<br />
[17] D. <strong>Lammlein</strong>, P. A. Fleming, A. M. Strauss, G. E. Cook, T. Lienert, M. Bement, D.<br />
Hartman;" Shoulder-less Conical FSW Tools: An Evaluation on 1/8” Thickness Al-6061<br />
Butt Welds," in Presentation: American Welding Society 2007, Chicago IL, 2007.<br />
106
CHAPTER IV<br />
THE FRICTION STIR WELDING OF HEMISPHERES – A TECHNIQUE FOR<br />
MANUFACTURING HOLLOW SPHERES<br />
D.H. <strong>Lammlein</strong>, W.R. Longhurst, D.R. DeLapp, P.A. Fleming, A.M. Strauss, G.E. Cook.<br />
The Friction Stir Welding of Hemispheres - A technique for Manufacturing Hollow<br />
Spheres. International Journal of Pressure Vessels and Piping, Submitted August 4,<br />
2010.<br />
Abstract<br />
In this work, thin walled, small radius, aluminum 6061 hemispheres are joined using<br />
friction stir welding (FSW). Hollow spheres are used extensively and in a wide range of<br />
applications, primarily as pressure vessels. FSW of spheres presents challenges<br />
associated with tooling, system eccentricity, internal support, and the method of weld<br />
termination. FSW is an improvement on fusion welding in terms of strength, reliability,<br />
and surface finish. Additionally, a welded solution is preferred for weight considerations<br />
to joining by flange, gasket, and fasteners; this is particularly true in aluminum alloys<br />
selected for their low density. Here, FSW is adapted to the joining of small diameter<br />
hemispheres using two separate approaches. The first approach assumes the use of an<br />
interior supporting anvil is acceptable and a series of full penetration welds are made<br />
using a cupped shoulder, threaded probe tool. A second approach assumes the use of<br />
internal support is unacceptable because this anvil cannot be retrieved. Here, unsupported<br />
welds are made with a shoulder-less, conical tool at partial penetration. For analysis,<br />
lateral macrosections, tensile tests, process force data, and computational fluid models<br />
(CFD) are presented.<br />
Introduction<br />
Friction stir welding (FSW) is a proven solid state joining technology with a<br />
growing range of application [1]. To accommodate a wider variety of engineering<br />
structures, FSW must be adapted to highly curved surfaces and surfaces with dual<br />
107
curvature. These geometries are used extensively in aerospace vehicles, in nautical<br />
vessels, and in pressure vessels. In this work, friction stir welding is applied to the joining<br />
of two small diameter, thin-walled, hollow hemispheres. This geometry presents a case of<br />
practical significance with both a high degree of curvature (relative to the dimensions of<br />
the tool and work material) and dual curvature. FSW of small diameter hemispheres is<br />
not present in the literature, although a collaboration led by Lawrence Livermore<br />
National Lab has joined pairs of aluminum alloy hemispherical forgings of approximately<br />
40” diameter by FSW [2]. In the work presented here, the radius of curvature is an order<br />
of magnitude smaller and the surface curvature is correspondingly greater.<br />
The sphere has less surface area than that of any equivalent geometric volume.<br />
The hollow sphere can withstand both external and internal pressures (as a spherical<br />
pressure vessel) more efficiently than any other geometry, and consequently fuel tanks,<br />
gas storage vessels, pneumatic reservoirs, and submarine vessels often utilize this shape.<br />
Metal spheres are additionally used as precision bearings in mass properties test<br />
equipment and aerospace attitude control system testing equipment [3,4].<br />
The applications of spherical pressure vessels are manifold and pervasive. They<br />
are found in industrial applications (oil refineries, petrochemical plants [5], nuclear<br />
power plants, communication satellites [6], and propane tanks), space vehicles<br />
(propellant tanks [6], oxygen tanks, and water tanks), underwater applications (submarine<br />
vehicles, flotation elements, tanks, and buoys), and military applications (UAV's,<br />
projectiles, torpedoes, ships, aircraft, and nosecones [8]). Spherical pressure vessels are<br />
commonly made of steel, titanium, aluminum, inconel, fiber reinforced polymer (e.g.<br />
carbon fiber reinforced polymer [9] or kevlar reinforced polymer), or some combination<br />
of these materials. Ceramics and glass are also used for applications subject to external<br />
compression [10].<br />
In the case of metals, the geometry does not permit a single forged, cast, or<br />
machined piece of material and the sections must be joined together by some secondary<br />
means. In the case of steel, sections are welded together by conventional means or joined<br />
by fastener and gasket [11,12,13]. Fastener and gasket joining can be used in applications<br />
where weight and size are not a consideration, as fasteners and flanges add considerable<br />
weight and bulk to the vessel. Despite its high cost, titanium is used heavily in aerospace<br />
108
applications for its high strength and low density. Titanium partial sphere sections can be<br />
made by spin forming, blow forming, or machining. The titanium pieces are then joined<br />
by Tungsten Inert Gas (TIG) welding or solid-state diffusion bonding [14]. Although<br />
aluminum has a lower yield strength than titanium, it is also used extensively in<br />
aerospace due to its low density and moderate cost.<br />
Carbon fiber reinforced polymer vessels have a high tensile strength to weight<br />
ratio but limited impact resistance, durability, and compressive strength. Compressive<br />
strength is required in deep sea applications [15]. Additionally, the shape of a carbon<br />
fiber vessel is limited by the ability of a fiber winding machine to accommodate the<br />
chosen geometry. Some radial and axial asymmetries can be accommodated but<br />
concavities in the part cannot. The process is further limited by the necessity of an inner<br />
supporting boss for winding.<br />
Often, a layered approach is taken in the design of pressure vessels in order to<br />
meet all design requirements [16,17]. One example is winding a kevlar reinforced<br />
polymer outer layer for tensile strength and low weight around an aluminum inner sphere<br />
for stiffness and leakage reduction. Leakage via material voids and diffusion is lowest in<br />
metal vessels or vessels with some metallic layer. Aluminum spheres are low leakage,<br />
lightweight, stiff, durable, and moderate cost vessels with applicability to external and<br />
internal compression applications. The results reported here demonstrate that Friction<br />
Stir Welding is an efficient and effective method for manufacturing spherical aluminum<br />
pressure vessels. The techniques developed here can also be applied to manufacturing<br />
steel, titanium, and other metallic spheres.<br />
Experimental Approach<br />
In friction stir welding, a large magnitude force is directed vertically downward<br />
through the tool, the workpiece, and into an anvil which traditionally opposes the tool<br />
axial force. The anvil is necessary in full penetration welds to support the region around<br />
the weld root and prevent material expulsion and failure on the underside of the weld. In<br />
the case of a highly curved surface with dual curvature, the interior of the workpiece is<br />
109
often an inaccessible area (e.g. spherical pressure vessel) or an area where setup and<br />
fixturing is difficult (e.g. nosecone). In these cases the insertion or removal of interior<br />
support is complicated. In this work, cases with and without an anvil are tested to<br />
accommodate both applications where an anvil can be used and those situations where an<br />
anvil cannot be used. It is shown in this work that FSW of spheres can be accomplished<br />
at partial penetration without an interior supporting apparatus. This sort of weld<br />
capability can also be used in making full penetration welds with minimal interior<br />
support. The latter case would differ slightly in geometry from the case presented here, as<br />
it would be a butted and lapped weld with two butted sections welded over and joined to<br />
a separate sheet of underlying material (see Appendix, Figure 137). In airframes, this<br />
configuration is used when an outer skin is joined to an interior skin or a supporting<br />
member (e.g. rib).<br />
Partial penetration type welds of butted joints, where some unwelded interface is<br />
left below the weld nugget, are useful in situations where the tensile loading is<br />
significantly less than the compressive loading [18-21]. The particular experimental<br />
geometry in this work; that of a two hemispherical shells joined by a partial penetration<br />
weld (50%), is useful in external compression applications (e.g. submersibles [Yano, et<br />
al.]). Research has shown that in external compression applications the effectiveness of<br />
the vessel is negligibly reduced by decreases in weld penetration [22].<br />
The flat shoulder geometry of a traditional FSW tool is not ideal for spherical<br />
applications and in this work two alternative tool geometries are tested: one consisting of<br />
a cupped shoulder and threaded probe for supported welds, and the other consisting of<br />
only a conical probe with a snubbed, cupped nose (see Appendix, Figure 135) for<br />
unsupported welds [23-25]. For the experiment, sections of 0.20” thickness, 4.5”<br />
diameter, Al-6061-T6 pipe were machined into rings with the external surface curvature<br />
of a sphere. These samples, depicted in Figure 97, are intended to represent a sphere (or<br />
when halved, two hemispheres).<br />
110
Figure 97: Experimental weld samples were machined from pipe with the external<br />
curvature of a sphere. These samples were halved and then joined in a butted<br />
configuration.<br />
Full penetration welds of butted hemispheres were performed with an internal<br />
supporting ring-anvil. Additionally, welds at 50% penetration depth were made with a<br />
shoulder-less, less, conical tool and without the use of an internal supporting ring-anvil. The<br />
full penetration portion of the experiment was performed with a cupped shoulder,<br />
threaded cylindrical probe tool. The cupped shoulder was designed to mate with the<br />
spherical curvature of the sample surface. When a ring-anvil backing was used, sound<br />
welds with good surface appearance were achieved. It was found that welds made with<br />
the threaded probe tool and without a backing anvil at various penetration depths<br />
(adjusting the length of the probe accordingly) approaching 50% of the material thickness<br />
produced a bead-like protrusion defect, shown in Figure 98, in the interior of the sample<br />
in bead on plate type welds and a more serious protrusion and splitting type defect in<br />
butted hemisphere welds, shown in Figure 99 and Figure 100. During cupped shoulder<br />
(5/8” diameter), threaded probe (0.20” diameter) tool welds made with a backing ring<br />
anvil in a butt weld configuration, on, the material below the probe is deformed by heat and<br />
pressure, and presses against the ring anvil. In this case the ring anvil must be forcibly<br />
removed with a press.<br />
111
Figure 98: Bead protrusion type defect experienced in cupped shoulder (Ø 5/8”),<br />
threaded probe (Ø 0.20”) tool, bead-on-plate type welds made without a backing ring<br />
anvil. Surface quality was more difficult to maintain. (Ø = diameter).<br />
112
Figure 99: Split protrusion type defect experienced in cupped shoulder (Ø 5/8”),<br />
threaded probe (Ø 0.20”) welds made without a backing ring anvil at 50% material<br />
penetration in a butt weld configuration. This defect was present at all tested parameters<br />
with this weld depth and tooling. The unsupported portion of the experiment was<br />
therefore performed with a shoulder-less, less, conical tool. The conical tool experienced no<br />
visible deformation at the weld root at this weld depth over the parameters tested in<br />
butted configuration welds. (Ø = diameter)<br />
113
Figure 100: Macrosection view of the split protrusion type defect experienced in cupped<br />
shoulder (Ø 5/8”), threaded probe (Ø 0.20”) tool weld made without a backing ring anvil<br />
at 50% material penetration in a butt weld configuration.<br />
It was concluded that the large, flat surface of the probe bottom contributed most<br />
significantly to this weld material distortion and an alternative probe geometry had to be<br />
selected for successful welding without an internal ring-anvil. It was found that a tool<br />
consisting of only a simple 100º conical probe (no shoulder) redirected weld forces in<br />
such a way as to eliminate the protrusion or splitting defect on the backside of the<br />
material at penetration depths approaching 60% of the material thickness in both bead on<br />
plate and butted weld configurations. Additionally, a conical tool geometry with a small<br />
diameter (0.025”) snub nose was desired for use in a taper retraction or tapered extraction<br />
type weld disengagement procedure. It was found that a 0.015” diameter hemispherical<br />
cup cut into the snub of the tool relieved influences on the weld material root to an extent<br />
which allowed a 50% (0.10”) penetration weld in a butted configuration without the<br />
assistance of an inner anvil ring. No protrusion or splitting was experienced at this depth<br />
and with this tooling within the parameter range tested. Figure 101 shows the typical<br />
appearance of a sample welded with this tool geometry. It was found that without a<br />
cupped recess in the snubbed nose of the tool that deformation occurred at the base of the<br />
joint in the weld material at some parameters. The conventional probe tool was not tested<br />
114
with a cupped recess. It is however the belief of the authors that a cupped recess in the<br />
probe bottom of the conventional probe tool would allow for unsupported welding<br />
without deformation at the material base at some shallow penetration depth, possibly<br />
15% of the material thickness.<br />
Figure 101: Surface appearance for a butt configuration weld made with a 100º conical<br />
tool (Ø 0.025” snub-nose and Ø 0.015” cupped nose recess). No backing ring anvil was<br />
used.<br />
Subsequently, the applicability of various tool extraction procedures was tested<br />
using the cone-snub-cup tool, initially in a bead on plate weld configuration. The goal<br />
was disengagement from the weld material without a serious defect. The procedure<br />
involved a steady state weld period at the desired weld depth followed by a gradual<br />
decrease in the tool depth via a computer controlled vertical motor. In some cases the<br />
rotation rate (analogous to traverse rate) of the weld hemispheres was decreased to some<br />
lower but constant value when the retraction procedure was triggered. Additionally, the<br />
spindle speed is increased during the tapered retraction, in some instances at multiple<br />
instants during the retraction (e.g. from 900 rpm to 2000rpm in 100rpm increments on<br />
some time interval). It was found the extraction could be performed rather cleanly and<br />
leaving essentially no indentation as shown in Figure 102.<br />
115
Figure 102: Tapered retraction procedure performed in a bead on plate configuration. A<br />
snubbed nose, cupped nose, 100º conical tool was used. The final segment of the<br />
retraction is essentially flush with the sphere surface (i.e. no indentation).<br />
A tapered retraction procedure was then performed in a butted configuration after<br />
and over a full, circumferential weld. A snubbed nose, cupped nose, 100º conical tool<br />
was used. The retraction begins at the weld surface mark on the far right in Figure 103<br />
(the mark is due to the change in rotational rate of the sphere, analogous to traverse rate).<br />
The result here is not as clean as the retractions over unwelded material. It is believed<br />
that this drawback can be overcome by performing the tapered retraction in a direction<br />
perpendicular to the original weld path, either by rotating the sphere about a new axis or<br />
by translating the sphere in a perpendicular direction. The latter is slightly different<br />
geometrically as it could be done without engaging the vertical motor because the sphere<br />
curves away in the lateral direction as well. It is the belief of the authors, however, that<br />
this type of tapered retraction (via translation of the sphere perpendicular to the weld path<br />
or equivalently translating the tool in a direction perpendicular to the weld path) should<br />
be accompanied by vertical motor action in the direction opposite to the former method<br />
116
of tapered retraction (i.e. move the sphere up relative e to the tool during extraction). This<br />
will allow for a more extended retraction zone and a more gradual disengagement.<br />
Figure 103: Tapered retraction procedure performed in a butted configuration after and<br />
over a full, circumferential weld<br />
Figure 104: Experimental setup for rotary FSW of hemispherical butted sections.<br />
Force Control and Torque Control<br />
117
For full circumferential welds, the eccentricity of the experimental setup, shown<br />
in Figure 104, is approximately 0.02”. This level of eccentricity results in significant and<br />
unacceptable changes in the vertical position of the sphere surface relative to the tool, and<br />
thus unacceptable variations in weld depth. An in-process, force feedback control<br />
algorithm was therefore employed for the conical tool experiments as a means of<br />
maintaining a constant penetration depth around the entire sphere. The vertical position<br />
was adjusted based on torque signals received from a rotating cutting force dynamometer<br />
oriented in series with the tool. For the conical type tools it was found that desired<br />
position was better maintained if torque, rather than force, was used as the input in the<br />
decision making algorithm. An auto-zeroing procedure is performed over the start of the<br />
weld to determine the height of the material surface here relative to the tool. The tool is<br />
then plunged to the assigned penetration depth and the weld traverse is started. After 1”<br />
of weld traverse the measured torque from the dynamometer is set as the desired torque<br />
and from this point forward this torque value is maintained by vertical adjustments of tool<br />
position using the weld machine's vertical axis motor. Figure 123 in a later section shows<br />
the weld torque increasing with penetration depth at the 1000rpm, 10ipm parameter<br />
setting. The relationship between weld depth and process forces will be discussed later.<br />
Figure 105 and Figure 106 below demonstrate the torque control process for two welds<br />
runs(1000rpm, 10.4ipm, 0.095” weld depth). In the upper frame the axial force (blue)<br />
and desired axial force (green) are shown. The desired axial force is not used in the<br />
control algorithm and is shown for comparison with the measured axial force and the<br />
torque panel below. Torque was found to be a more reliable indicator of depth. These<br />
relationships are discussed later. The middle panels in Figure 105 and Figure 106 show<br />
the measured torque (blue) and desired torque (green). It can be seen in the figures that<br />
the desired torque, set after 1” of weld traverse, is followed closely. The bottom panel of<br />
the two figures is the vertical position of the tool relative to the height of the material<br />
surface at the weld plunge site (weld start). A linear encoder is used to track movements<br />
relative to this initial calibration. In this manner the vertical adjustments made by the tool<br />
to maintain the desired torque can be seen. As torque is highly sensitive to plunge depth<br />
and a constant torque is closely maintained throughout the weld traverse, it can be<br />
concluded that tool penetration depth is closely maintained throughout the weld traverse.<br />
118
The adjustments in vertical position in the bottom panel of the figures therefore shows the<br />
eccentricity of the setup or how the material surface height at the tool engagement site<br />
changes relative to its initial measurement as the weld piece is rotated. Additional details<br />
and description of the torque control method used in these experiments can be found in<br />
Longhurst et al. [26].<br />
Figure 105: Dynamometer data for a butted configuration, sphere weld (1000rpm,<br />
10.4ipm, 0.095” depth) using a 100º conical tool (snub-cup). The top frame shows<br />
measured force(blue) and desired force (green). The desired force is presented for<br />
comparison and not used in the control algorithm. The middle panel shows measured<br />
torque(blue) and desired torque (green). Toque is highly sensitive to plunge depth. The<br />
desired depth is followed closely by maintaining weld torque via vertical adjustments of<br />
tool position. The weld is a full circumferential weld and the eccentricity of the setup can<br />
be seen in the lower frame which shows the vertical position of the tool relative to its<br />
initial calibration on the material surface.<br />
119
Figure 106: Dynamometer data for a butted configuration, sphere weld (1000rpm,<br />
10.4ipm, 0.095” depth) using a 100º conical tool (snub-cup). The weld is a full<br />
circumferential weld and the eccentricity of the setup can be seen in the lower frame,<br />
which shows the vertical position of the tool relative to the machine stage. The<br />
eccentricity was generally around 0.02” but varied in its manifestation from weld to<br />
weld. The desired torque is closely maintained. From approximately 159 to 203 seconds<br />
the spinning tool is being gradually lowered (plunged) into the material at approximately<br />
0.002” per second. From 203 to 209 seconds the vertical and rotary (traverse) motors<br />
are stopped during a brief dwell period prior rotary motor engagement. Reductions in<br />
axial force from 188 to 203 seconds are due to material softening [27].<br />
Accounting for system eccentricity in the experimental setup for the cupped<br />
shoulder, threaded probe tool was done by mapping the eccentricity prior to the weld via<br />
a series of auto-zeroing procedures as both force and torque control proved to be<br />
inconsistent for this particular tool. The relative height of the butted hemisphere surface<br />
to the system was obtained at 60° intervals for each weld sample prior to the weld and a<br />
vertical position path was programmed into the computer for welding at the desired<br />
depth. The tool was brought from the current vertical position to the desired vertical<br />
position (moving from calibration point to calibration point around the sphere) via a<br />
linear function with parabolic blends as described in Chapter 7 of Craig [28]. In these<br />
120
manners the assigned depth was maintained around the entire weld within a tolerance of<br />
several thousandths of an inch for the experimental welds presented.<br />
Experimental weld matrix<br />
A 6 weld matrix (7.8ipm, 10.4ipm; 800rpm, 900rpm, 1000rpm) was performed<br />
using cupped shoulder ( Ø 5/8” ), threaded probe (Ø 0.20”), tool at full penetration with<br />
backing ring anvil. The surface finish and lateral macrosections for this portion of the<br />
experimental welds are shown in Figure 107 and Figure 108. With a probe length of<br />
0.178”, a shoulder plunge of 0.006”, and a material thickness after bisection of<br />
approximately 0.198”; the desired penetration ligament of 0.014” was reached. A more<br />
ideal penetration ligament would be something like 0.007”, but with the eccentricity of<br />
the experimental setup it was feared that the probe would frequently collide with the<br />
backing anvil and the larger clearance was used in the experiments. With the knowledge<br />
gained in these experiments, a second iteration of the experiments could be performed<br />
with a smaller penetration ligament using the pre-programmed path control method<br />
described earlier or some force feedback control algorithm. Reducing the penetration<br />
ligament would strengthen the welds to some degree.<br />
121
Figure 107: Surface appearance for full-penetration, supported welds made with the<br />
cupped shoulder, threaded probe tool. Samples are taken from the steady-state, steadydepth<br />
portion of each weld.<br />
122
Figure 108: Lateral macrosections for full-penetration, supported welds made with the<br />
cupped shoulder, threaded probe tool. Samples are taken from the steady-state portion<br />
of each weld. Bose's reagent was used for etching.<br />
Additionally, a matrix of 6 welds was performed at parameters identical to the full<br />
penetration experiment at 50% material penetration and without interior support to the<br />
material. A shoulder-less, 100°conical tool with a snub nose (Ø 0.025”) and<br />
hemispherical cup indentation (Ø 0.015”) was used. Welds were performed using the<br />
desired torque weld control method described above to maintain the desired depth<br />
throughout the weld process. Lateral macrosections for this portion of the experiment are<br />
shown in Figure 109.<br />
123
Figure 109: Lateral macrosections for partial-penetration, unsupported welds made with<br />
the conical tool. Samples are taken from the steady-state portion of each weld.<br />
The axial force data, presented in Figure 110 and Figure 111, shows Z direction<br />
force decreasing with increasing rotational speed and an increasing with increasing<br />
traverse speed. Increased rotational speed can to soften the material (reduce viscosity)<br />
due to increased heat input (if torque remains somewhat constant) and increased shearing<br />
forces. A higher traverse rate means a colder weld and reduced axial force. It should be<br />
noted that the axial force was significantly lower for all parameters with the conical tool<br />
in unsupported welds.<br />
124
Figure 110: (Supported, cupped tool) A plot of axial (z-direction) force showing an<br />
inverse relationship with rotation rate and a direct relationship with traverse speed.<br />
125
Figure 111: (Unsupported, conical tool) A plot of axial (z-direction) force showing an<br />
inverse relationship with rotation rate and a direct relationship with traverse speed.<br />
Figure 112 and Figure 113 show the weld moment about the vertical, z-axis<br />
plotted against rotational speed for each weld. The torque input consistently increased<br />
with increasing traverse speed for the cupped tool and the opposite relationship held for<br />
the conical tool, somewhat inexplicably. The relationship between torque and rotational<br />
rate for the cupped tool and supported setup was not consistent but shows a general<br />
tendency towards reduced torque at higher rotational speeds. For the conical tool this<br />
relationship was seen more reliably. Figure 113 shows that torque reduced in all cases<br />
with increased rotational speed for the conical tool. The reduction in measured torque is<br />
due to material softening at higher rotational speeds but this is mitigated somewhat by the<br />
fact that were the tool spun in a medium of constant viscosity, higher rotational speeds<br />
would result in a larger moment on the tool.<br />
126
Figure 112: (Supported, cupped tool) A plot of moment (z-axis) showing an increased<br />
moment with increased traverse speed for all rotation rates. The moment was also<br />
generally reduced with increasing rotational speed.<br />
127
Figure 113: (Unsupported, conical tool) The moment decreased consistently with<br />
increasing rotational rate. Moment values were much lower for the partial penetration,<br />
conical tool portion of the experiment.<br />
The xy-plane force direction and magnitude data for the cupped tool, supported<br />
setup is presented in Figure 114. It can be seen that increasing the traverse rate has the<br />
consistent and intuitive effect of pushing the tool more forcefully in the direction<br />
opposite the tool travel. Figure 115 shows the xy-plane force vectors for the conical tool,<br />
unsupported welds. In all cases for the conical tool the tool is being pushed towards the<br />
advancing side and against the direction of travel. For both the cupped and conical tools,<br />
the tool is pushed towards the advancing side in all cases. This is because the leading<br />
edge of the tool is moving towards the retreating side and it is at the tool leading edge<br />
where cooler and undisturbed metal is encountered.<br />
128
Figure 114: (Supported, cupped tool) The tool is deflected towards the advancing side at<br />
both traverse rate settings. At the higher travel speed setting the tool is deflected to the<br />
trailing side.<br />
129
Figure 115: (Unsupported, conical tool) The tool is deflected towards the advancing,<br />
trailing quadrant.<br />
For a valid comparison of partial and full penetration welds, both the apparent<br />
stress and the true stress of the partial penetration welds must be considered in the<br />
analysis. The true stress differs significantly from the apparent stress in the case of a<br />
partial penetration weld because the depth of the weld nugget differs significantly from<br />
the thickness of the material. Figure 116 defines the true and apparent stress of the weld<br />
samples. In the case of full penetration welds, the difference between true and apparent<br />
stress is small and is due an indentation left at the weld surface which was approximately<br />
0.008” in depth. The apparent strength is of more practical significance because the<br />
entire thickness of the butted surfaces is available for joining and any indentation at the<br />
material surface or lack of penetration at the weld root is not desired. Tensile results are<br />
presented in Figure 117. The partial penetration, unsupported welds reached a maximum<br />
130
apparent strength of 26% parent while the full penetration welds achieved a maximum of<br />
68% parent.<br />
The tensile testing results show that the true strength of the partial penetration<br />
welds is approximately equal to the apparent strength of the full penetration welds. The<br />
partial penetration welds are slightly reduced in strength (approximately 10%) in a<br />
proportional comparison, or true stress comparison, with the full penetration welds. This<br />
is likely due to the stress concentration factor presented by the crack-like, unwelded<br />
portion of the jointline. However, the effects of tooling cannot be ruled out.<br />
Figure 116: Explanation of true stress and apparent stress for partial penetration<br />
samples. All partial penetration welds were done in an anvil-less (unsupported)<br />
configuration.<br />
131
Figure 117: A comparison of apparent stress in full penetration weld tensile samples and<br />
apparent and true stress in partial penetration tensile samples. One tenth inch is 50% of<br />
the material thickness and partial penetration welds were made with the conical tool and<br />
no backing ring anvil.<br />
For the partial penetration portion of the experiment, the experimental matrix<br />
depth was determined based on the depth at which weld root failure began to occur.<br />
Figure 119 a lateral macrosection view of an unsupported, butt configuration weld made<br />
132
with a 100º conical tool (0.025” diameter snub-nose and 0.015” cupped nose recess) at<br />
800rpm, 5.2 ipm, and a penetration depth of 0.11”. Figure 120 shows a similar weld<br />
made at 1000rpm, 10.4ipm, and a penetration depth of 0.11”. At this depth, unsupported<br />
welds made with the conical tool begin to split and protrude at the root for some of the<br />
tested weld parameters. The initiation of protrusion and splitting in the weld root at<br />
0.110” was deemed undesirable by the authors for the some suggested applications<br />
(under external compression the strength is maintained only when the full butted jointline<br />
is undeformed). The experimental matrix was therefore performed at 0.100” where this<br />
did not occur. It should be noted however that the strength of the unsupported welds<br />
increased with depth beyond the experimental matrix depth of 0.100”. This can be seen<br />
in Figure 118 which shows the apparent tensile strength of all conical tool, partial<br />
penetration, unsupported welds performed.<br />
133
Figure 118: A comparison of apparent tensile strength in all unsupported, partial<br />
penetration experimental welds. The travel speed, penetration depth, and spindle rate<br />
setting are indicated. Note that strength continues to increase with depth beyond the<br />
matrix depth of 0.10” despite distortion at the base of the joint (see Figure 119 and<br />
Figure 120).<br />
134
Figure 119: Macrosection view of an unsupported, butt configuration weld made with a<br />
100º conical tool (0.025” diameter snub-nose and 0.015” cupped nose recess) at<br />
800rpm, 5.2 ipm, and a penetration depth of 0.11”.<br />
Figure 120: Macrosection view of an unsupported, butt configuration weld made with a<br />
100º conical tool (0.025” diameter snub-nose and 0.015” cupped nose recess) at<br />
1000rpm, 10.4ipm, and a penetration depth of 0.11”. At this depth, unsupported welds<br />
made with the conical tool begin to split and protrude at the root for some of the tested<br />
weld parameters. The initiation of protrusion and splitting in the weld root at 0.110”<br />
was deemed undesirable by the authors for the suggested applications. The experimental<br />
matrix was therefore performed at 0.100” where this did not occur. It should be noted<br />
however that the strength of the unsupported welds increased with depth beyond the<br />
experimental matrix depth of 0.100”.<br />
135
Figure 121: Surface appearance of an unsupported, butt configuration weld made with a<br />
100º conical tool (0.025” diameter snub-nose and 0.015” cupped nose recess) at<br />
1000rpm, 10.4ipm, and a penetration depth of 0.11” (1/16 th inch demarcations).<br />
In addition to the primary experimental matrix conical tool, unsupported, partial<br />
penetration welds were performed at four depths at the 10.8ipm and 1000rpm parameter<br />
setting to determine the effect on weld strength as well as to determine moment and axial<br />
force relationships with depth for control purposes. Figure 122 and Figure 123 show that<br />
both axial force and weld moment increase in a somewhat linear fashion with respect to<br />
weld depth at this parameter setting. Note in these charts that the relationship between<br />
depth and moment is a more reliable one and it is for this reason that a torque based<br />
feedback control algorithm was used to maintain constant depth around the<br />
circumference of the sphere. Both axial force and torque based control algorithms were<br />
tried and it was found that the torque method was more reliable for this particular setup<br />
136
and tooling. Torque is highly dependent on the surface area of the weld interface (or the<br />
tool contact area) and this value increases in a reliable fashion with penetration depth for<br />
a conical tool. For this reason, torque is a reliable indicator of penetration depth and a<br />
torque based control algorithm is especially effective for reliably following the desired<br />
depth path with a conical tool.<br />
Figure 122: Conical tool, unsupported, partial penetration welds were performed at four<br />
depths at the 10.8ipm and 1000rpm parameter setting and showed a consistent increase<br />
in axial force with penetration depth.<br />
137
Figure 123: Weld moment was a better indicator of penetration depth for the conical tool<br />
and a torque based control method was used in the experiment to maintain penetration<br />
depth.<br />
Fluent CFD Model<br />
A computational fluid dynamics (CFD) model was made for the tool used in the<br />
supported experiment and the tool used in the unsupported experiment. The Eulerian,<br />
finite volume, CFD solver, Ansys FLUENT was used with the implicit formulation. The<br />
weld material viscosity function was set by user-defined function and defined according<br />
to the visco-plastic model used by Sheppard and Wright [29,30]. Fluent separates the<br />
weld interface into a surface and shadow surface. Heat energy was input at the weld<br />
interface into the material as defined by a user-defined function which applied heat<br />
138
locally in proportion to the local tool velocity. Another user defined function input heat<br />
at the interface on the tool side by equating the temperature in these cells to the<br />
temperature of adjacent cells on the material side of the interface. The total heat input at<br />
the interface (both sides included) was defined by the weld power method as the product<br />
of tool radial velocity (rad/s), weld torque (N·m), and some weld efficiency factor (β). In<br />
the models presented, it was assumed that all mechanical energy from the tool was<br />
converted to heat input into the tool and weld material (β=1) [31]. A rotational velocity<br />
of 1000rpm and traverse speed of 7.8ipm were used in the presented model. The tool<br />
rotational axis remained stationary while a velocity inlet and an outflow boundary<br />
condition (BC) were used to simulate a traverse speed. Thermal BC's are defined as<br />
follows (W/(m 2·K)): surface, 10; bottom unsupported, 8; bottom supported 50; shank, 15;<br />
tool-top, 30. Figure 124 shows the geometry and mesh (584,401 tetrahedral cells) of the<br />
threaded probe tool and the weld material created in the preprocessor Gambit. The mesh<br />
was created by finely meshing the interface and establishing a mesh growth rate in the<br />
tool and material volumes. The mesh was thus finest at the interface where temperature<br />
and momentum gradients were highest and most course near the model boundaries.<br />
Figure 125 shows the threads of this geometry created in gambit.<br />
Figure 124: (threaded tool) Tetrahedral mesh created in the Fluent preprocessor<br />
Gambit.<br />
139
Figure 125: (threaded tool) Geometry<br />
Figure 126 shows the resulting temperature contours around the surface of the<br />
tool for the threaded geometry. The temperature is highest on the shoulder of the tool<br />
and where the probe meets the shoulder. Figure 127 shows the temperature field over the<br />
material surface reported by the model for the threaded tool and supported geometry.<br />
140
Figure 126: (threaded tool) Contours of temperature in degrees Celsius.<br />
141
Figure 127: (threaded tool) Contours of temperature in degrees Celsius.<br />
A similar model containing 363971 tetrahedral cells was created for the conical<br />
tool geometry and setup. The discrepancy in cell count is justified by the relative<br />
complexities of the two geometries. The complicated geometry of the threaded tool<br />
called for a finer mesh than the relatively trivial conical geometry. The thermal boundary<br />
condition on the bottom side of the material was reduced from 50 to 8 W/(m 2·K) for the<br />
unsupported geometry to reflect the absence of an internal steel anvil. The conical tool,<br />
unsupported geometry is shown in Figure 128.<br />
142
Figure 128: (conical tool) Geometry created in the Fluent preprocessor Gambit.<br />
The CFD model contours of temperature across the lateral cross section are shown<br />
in Figure 129 and Figure 132 and can be used to predict the appearance of the heat<br />
affected zone in experimental welds. The model temperature contours which are taken at<br />
the same orientation as the experimental macrosections, shown in Figure 131 and Figure<br />
134, can be compared to the heat affected zone visible in experimental macrosections.<br />
The macrosections show three distinct regions: the central, bright thermo-mechanically<br />
affected zone (TMAZ) containing the weld nugget; the darker, parent metal; and a<br />
transition region of intermediate appearance, the HAZ. Good agreement in the shape and<br />
size of the HAZ can be seen when lateral section temperature contours are compared with<br />
the macrosections from the experiment. Additionally, contours of velocity magnitude<br />
taken across a lateral cross section in the CFD model, shown in Figure 130 and Figure<br />
133, can be compared to the shape and size of the TMAZ. Again, comparison with the<br />
macrosections shows good agreement.<br />
143
Figure 129: (threaded tool) Lateral contours of temperature (C) showing the heat<br />
affected zone (HAZ).<br />
Figure 130: (threaded tool) Lateral contours of velocity magnitude (m/s) showing the<br />
thermo-mechanical affected zone (TMAZ).<br />
144
Figure 131: (threaded tool) Lateral macrosection corresponding (1000rpm, 7.8ipm) to<br />
the CFD simulated weld showing the TMAZ(bright), parent metal(dark), and transitional<br />
HAZ (intermediate). The HAZ region can be compared to isotherms in Figure 129 and<br />
the TMAZ or stirred zone can be compared to the velocity magnitude contour in Figure<br />
130.<br />
Figure 132: (conical tool) Lateral contours of temperature (C) showing the heat affected<br />
zone (HAZ).<br />
145
Figure 133: (conical tool) Lateral contours of velocity magnitude (m/s) showing the<br />
thermo-mechanical affected zone (TMAZ).<br />
Figure 134: (conical tool) Lateral macrosection corresponding (1000rpm, 7.8ipm) to the<br />
CFD simulated weld showing the TMAZ(bright), parent metal(dark), and transitional<br />
HAZ (intermediate). Figure 132 and Figure 133 show the HAZ and TMAZ respectively<br />
forming transposed bowl shaped regions around the weld tool in the experimental model<br />
and this shape is verified in the macrosection.<br />
Conclusions<br />
146
The results presented here show that aluminum alloy hemispheres can be reliably<br />
joined by FSW. Additionally, the control techniques used in this experiment show that<br />
system eccentricities can be accounted for via multiple methods. The relative height of<br />
the material surface can be taken at various points around the circumference of the sphere<br />
and a preplanned path can be taken by the tool to maintain the appropriate penetration<br />
depth. The unique geometry of the conical tool can be used advantageously in torque<br />
based feedback control of weld penetration depth, as measured weld toque proved to be a<br />
strong and reliable indicator of weld depth. Additionally, it was shown that for cases<br />
where the interior of the vessel is inaccessible and internal support is not possible, partial<br />
penetration welds of similar proportional strength can be achieved without compromising<br />
the material interior surface. A lack of material distortion at the joint base is required for<br />
external compression applications.<br />
The conical tool produced, 50% penetration welds in an unsupported<br />
configuration which ranged from 20-26% parent material strength in a practical<br />
comparison using their apparent stress. The cupped shoulder tool produced full<br />
penetration welds with interior support which ranged from 54-68% of the parent material<br />
strength comparing apparent stress. The maximum strength could be improved by testing<br />
a wider range of parameters, as welds made with both setups were stronger at higher<br />
travel and rotational settings. Additionally, a penetration ligament of 0.014” was used in<br />
the full-penetration portion of the experiment. A more aggressive penetration ligament<br />
(i.e. one closer to 0.006”) would likely increase weld strength by eliminating any joint<br />
remnant at the weld root. Partial penetration welds continued to increase in strength with<br />
depth outside the matrix depth of 0.10”, however with the introduction of some distortion<br />
at the weld root. In this experiment it was assumed that this distortion was unacceptable<br />
and the experiment was done at a depth where no distortion occurred. Future work could<br />
explore the depth to which this relationship continues to hold should a suitable<br />
application be identified.<br />
Additionally, modifications to the tooling used in the experiment would likely<br />
result in strength increases as only a single tool geometry was considered for each case.<br />
A more complicated probe geometry and scrolled shoulder design could improve test<br />
strengths for the supported welds. Adjustments to the inclusive angle of the conical tool<br />
147
and the addition of features (e.g. spiraled groove) to its surface would likely improve<br />
strengths in the unsupported welds. It should also be considered that in the supported<br />
setup the joint material could be welded to the anvil with a sufficiently long probe if<br />
removal of the interior anvil was considered unnecessary. The anvil could be composed<br />
of an identical or dissimilar alloy. The resulting joint would then be of high extrinsic<br />
strength.<br />
Appendix<br />
Figure 135: Tools used in the experiments ( from left: 90º conical tool; cupped shoulder<br />
(5/8” diameter), threaded probe (0.20” diameter) tool; snubbed nose, cupped nose, 100º<br />
conical tool; snubbed nose, 100º conical tool; 100º conical tool; 140º spiral-cut, conical<br />
tool(Edison Welding Institute test design) ).<br />
148
Figure 136:(from left: Tapered retraction over welded material (100º snub-cup); bead on<br />
plate tapered retraction (100º snub-cup); 0.09” depth weld made with a 140º spiral-cut,<br />
conical tool).<br />
149
Figure 137: Anvil-less butt/lap type weld joining 3 material sections and not performed<br />
in the experiments presented in this work. The joint and materials could alternatively be<br />
configured with the lateral interface following the curvature of the top surface.<br />
Unsupported welds of this kind with a traditional FSW tool create a bead type defect on<br />
the underside. A shoulder-less, conical tool was used in unsupported welds in the<br />
experiment.<br />
References:<br />
[1] Friction-stir butt welding; GB Patent No. 9125978.8, International patent application<br />
No. PCT/GB92/02203; W M Thomas, E D Nicholas, J C Needham, M G Murch, P<br />
Temple-Smith, C J Dawes; 1991<br />
[2] Bobbin-Tool Friction-Stir Welding of Thick-Walled Aluminum Alloy Pressure<br />
Vessels; E N Dalder, J W Pastrnak, J Engel, R S Forrest, E Kokko, K Mc Ternan, D Waldron;<br />
Welding Journal (AWS), April 2008, 40-44<br />
[3] Website: Space Electronics LLC, http://www.spaceelectronics.com/Products/air_bearings.php<br />
[4] Personal comunication with Dan Otlowski Space Electronics LLC<br />
[5] Stress and strain analysis of the spherical pressure vessel: analytical and numerical<br />
approach: J Sertić, D Kozak; Int Conf on Adv Tech for Developing Countries, Jun 28-30,<br />
2006 Rijeka, Croatia<br />
[6] Spin dynamics of the LAGEOS satellite in support of a measurement of the earth’s<br />
Gravitomagnetism; S Habib, D E Holz; Phys. Rev. D 50, 6068 - 6079 (1994)<br />
[7] Website: Armadillo Aerospace,<br />
http://www.armadilloaerospace.com/n.x/Armadillo/Home/News?news_id=330<br />
http://www.armadilloaerospace.com/n.x/armadillo/home/news?news_id=309<br />
150
[8] Metallurgical analysis of ablated aluminum alloy hemispheres; G J Fischer, R Maciag<br />
; Internal Report, Polytechnic Inst of Brooklyn NY, Jul 1962<br />
[9] Numerical analysis of the nonlinear deformation of a spherical pressure vessel made<br />
of laminated glass-plastic; Y M Grigorenko, A T Vasilenko, N N Kryukov, and T V<br />
Krizhanovskaya; Prikladnaya Mekhanika, Vol. 23, No ii, pp. 27-32, November, 1987<br />
[10] Experimental study of shape imperfections and the load-carrying capacity of<br />
hemispherical glass shells; P F Zolotarev; Problemy Prochnosti, No. I0, pp. 91-95,<br />
October, 1981<br />
[11] Cryoformed stainless steel pressure vessels for space applications; A Faure, L<br />
Gourgeon; Proc Eur Conf on Spacecraft Struc, Mat and Mech Testing, Braunschweig<br />
Germany, 4-6 Nov 1998<br />
[12] Estimating the carrying capacity of spherical vessels from dynamic loading data; I V<br />
Belinskii, E I Zharkov, N A Zvonarev; Fizika Goreniya i Vzryva, Vol. 28, No. 5, pp. 117-<br />
119, Sep-Oct, 1992<br />
[13] Elastic analysis for thick cylinders and spherical pressure vessels made<br />
of functionally graded materials; Y.Z. Chen, X.Y. Lin; Comp Mat Sci, 44 (2008) 581–<br />
587<br />
[14] A study on failure characteristic of spherical pressure vessel; H S Lee, J H Yoon, J S<br />
Park, Y M Yi; Journal of Mat Processing Tech 164–165 (2005) 882–888<br />
[15] Study on spherical pressure vessel of ceramics for deep-sea buoyancy module<br />
applications; Y Yano, S Takagawa; Japan Agency for Marine-Earth Science and<br />
Technology (JAMSTEC); Oceans 2004 MTS, 1554- 1559 Vol.3<br />
[16] Design and development of an aluminum lined composite overwrapped spherical<br />
pressure vessel; R Veys, A Cederberg, D B Tiller; Brunswick Corporation, Defense<br />
Division, Lincoln Nb, Internal Report AIAA-89-2642, 1989<br />
[17] Design and development of a carbon overwrapped aluminum lined spherical<br />
pressurant tank; D B Tiller, C F Murray, R B Veys; Brunswick Corporation, Defense<br />
Division, Lincoln Nb, Internal Report, 1990<br />
[18] Behavior and ultimate tensile strength of partial penetration groove welds; D P<br />
Gagnon, D J Kennedy, 1987<br />
[19] Evaluation and tensile strength of partial penetration butt welded joints by ultrasonic<br />
testing; H Matsuura, A Kaji; Jpn Soc Mech Eng , Vol 66, No 647, A, 1419-1424, 2000<br />
[20] The Effect of Mismatch on the Collapse Strength of Machined Hemispherical Shells;<br />
M G Costello; Naval Ship Research and Development Center, Washington DC, Internal<br />
Report Ad0874760, 1970<br />
[21] A new, highly efficient deep water ROV buoyancy system; E M Patton, T S<br />
Rennick; Offshore Technology Conference, 3 May-6 May 1999, Houston Tx<br />
[22] Partial-penetration welded connections for aluminum compression members; J H<br />
Jennison, R S Gill; Naval Ordinance Test Station, China Lake Ca, Internal Report<br />
AD0602361, 1964<br />
[23] Method of friction stir welding and retractable shoulderless variable penetration<br />
friction stir welding tool; US Patent #7,234,626; T Trapp, J Fischer, J Bernath; Edison<br />
Welding Institute (EWI), 2007<br />
[24] Retractable shoulderless variable penetration friction stir welding tool; US Patent<br />
#7,404,510; T Trapp, J Fischer, J Bernath; Edison Welding Institute (EWI), 2007<br />
151
[25] The application of shoulderless conical tools in friction stir welding: An<br />
experimental and theoretical study; D H <strong>Lammlein</strong>, D R DeLapp; Mat. And Design,<br />
Volume 30, Issue 10, 4012-4022, Dec 2009<br />
[26] Torque control of friction stir welding for manufacturing and automation; W R<br />
Longhurst, A M Strauss, G E Cook, P A Fleming; International Journal of Advanced<br />
Manufacturing Technology; .Submitted June 17, 2009 and under review.<br />
[27] Experimental investigation of the influence of the FSW plunge processing<br />
parameters on the maximum generated force and torque; S Zimmer, L Langlois, J Laye,<br />
R Bigot; Int J Adv Manuf Technol, July 2009<br />
[28] Introduction to Robotics: Mechanics and Control (3rd Edition); J J Craig<br />
[29] Determination of flow stress: Part 1 constitutive equation for aluminum alloys at<br />
elevated temperatures.; T Sheppard, D Wright; Met Technol 1979, Jun 6, 215–23<br />
[30] Hot workability; C M Sellars, W J M Tegar; Int Metall Rev 1972; 17:1–24<br />
[31] Torque based weld power model for friction stir welding J W Pew, T W Nelson, C D<br />
Sorensen; Sci Technol Weld Join 2007;12(4):341<br />
152
CHAPTER V<br />
FRICTION STIR WELDING OF SMALL DIAMETER PIPE: AN EXPERIMENTAL<br />
AND NUMERICAL PROOF OF CONCEPT FOR AUTOMATION AND<br />
MANUFACTURING<br />
D.H. <strong>Lammlein</strong>, B. T. Gibson, D. R. DeLapp, C. Cox, A. M. Strauss, G. E. Cook.<br />
Friction Stir Welding of Small Diameter Pipe: An Experimental and Numerical Proof of<br />
Concept for Automation and Manufacturing. Proceedings of the Institution of<br />
Mechanical Engineers, Part B: Journal of Engineering Manufacture, Submitted July 15,<br />
2010.<br />
Abstract<br />
Friction stir welding (FSW) is a powerful joining process which is limited by its range of<br />
application and processing rate. Here the range of application is extended to small<br />
diameter butted pipe sections and high processing rates are applied for increased<br />
productivity in manufacturing. Full penetration friction stir welds are performed on<br />
butted sections of aluminum alloy 6061-T6 pipe. These pipe sections are relatively small<br />
in diameter, 4.2 inches, and relatively thin walled, 0.2 inches. The small radius of<br />
curvature distinguishes this weld configuration geometrically from a butted plate<br />
configuration and presents unique challenges. This work confronts these challenges<br />
using experimental and numerical methods. A FSW process method producing<br />
acceptable pipe joints is demonstrated.<br />
Introduction<br />
Friction stir welding (FSW) is an effective and consistent materials joining<br />
technology which produces high strength and high integrity joints, particularly in<br />
aluminum alloys (Thomas, 1991). FSW is also attractive because it is a solid-state<br />
process, with temperatures not exceeding the melting point of the work material. Its use<br />
is limited primarily by the combined expense of the FSW machine itself and the lack of<br />
an operating knowledge base. However, superb joint quality and low continuing<br />
153
operating costs for the machine mean this initial expense can often be justified,<br />
particularly in vehicular applications (aerospace, automotive, and rail). FSW has been<br />
demonstrated on standard geometries like butted, lapped, and t-oriented joints. Its<br />
implementation on small diameter pipes could extend its use to the petroleum,<br />
petrochemical, and natural gas industries where high weld volume would justify the<br />
upfront costs of FSW.<br />
Additionally, FSW at a high rate of travel would increase output for<br />
manufacturing and further reduce the energy expended per unit length of weld. High<br />
traverse rates are tested in this work with good results. By increasing the rate of travel,<br />
the time spent by the work at elevated temperatures is reduced and the total heat input<br />
into the pipe sections is reduced. Excessive heat is undesirable, as it causes detrimental<br />
changes in the material properties of the parent material.<br />
Fusion welds are performed commonly on small diameter aluminum pipe (Kou &<br />
Le) (Na & Lee). The high heat input and temperatures present in fusion welding are the<br />
primary drawback to this approach, particularly in small diameter pipes. Groove type,<br />
gas shielded arc welding is the most common fusion welding method performed on<br />
aluminum alloy pipes. The primary drawback of this method is the high temperatures<br />
and heat input result in a softening of the surrounding base metal. In these welds the heat<br />
affected zone (HAZ) controls the as-welded tensile strength of the joint in most cases<br />
(Newell, Sperko, Mannings, Anderson, & Connell). This problem is exacerbated in small<br />
diameter pipes and the reduced heat and solid-state nature of FSW makes it an attractive<br />
alternative in this application.<br />
In this work, full penetration friction stir welds are performed on butted sections<br />
of aluminum alloy 6061-T6 pipe. These pipe sections are relatively small in diameter,<br />
4.2 inches, and relatively thin walled, 0.2 inches. The small radius of curvature<br />
distinguishes this weld configuration geometrically from a butted plate configuration and<br />
presents unique challenges. These challenges necessitate the use of specialized<br />
techniques and specialized equipment. Friction stir welded joints of this type are not<br />
presented in academic literature, although FSW of large diameter steel pipe sections is<br />
being done at a research level.<br />
154
Collaboration between Advanced Metal Products Inc., Oak Ridge National Lab,<br />
and Megastir Technologies has produced an orbital welding apparatus for joining X65<br />
steel (Feng, Steel, Packer, & David) (Defalco & Steel, 2009) (Packer & Matsunaga,<br />
2004). The test device is designed to produce full penetration welds on 12” diameter,<br />
0.25” wall thickness pipe. This device revolves the tool about the stationary pipe and<br />
uses a hydraulic internal support fixture. Additionally, ExxonMobil has conducted<br />
research on FSW of linepipe steels (Fairchild, Kumar, Ford, & Nissley, 2009).<br />
Experimental Setup<br />
In the present experiment, an experimental apparatus was designed, shown in<br />
Figure 138 and Figure 139, which rotates the pipe sections beneath a stationary tool axis.<br />
The apparatus is mounted to a FSW machine and belt driven by a computer controlled<br />
motor. The experimental apparatus has also been used by the authors to join small<br />
diameter, butted Al-6061 hemispheres (<strong>Lammlein</strong>, Longhurst, Delapp, Flemming,<br />
Strauss, & Cook, 2010). The internal support fixture, or mandrel, used in the present<br />
experiment serves an identical purpose to that used with the AMP/ORNL/Megastir<br />
orbital apparatus, but is of a different, manually actuated design.<br />
155
Figure 138: The rotary welding apparatus used in this experiment is mounted to a<br />
standard FSW machine and rotates butted pipe sections below a stationary tool axis.<br />
Figure 139: A still image taken from video made during an experimental weld (top view).<br />
The cylindrical work geometry presents a number of challenges that must be<br />
addressed. In addition to the obvious issue of tool geometry, the issues of secondary<br />
heating at the end of the weld, variation in the height of the work surface due to system<br />
156
eccentricity, the method of interior support, and the method of tool disengagement must<br />
be addressed. In this work, the significance of these issues are determined based on<br />
experimental and numerical results, and solutions are presented with applications to<br />
manufacturing.<br />
It is apparent that the contact condition between a traditional, flat shoulder tool<br />
and small diameter cylindrical work differs significantly from that of butted plate<br />
welding. Figure 140 shows the experimental tool and cylindrical work. The flat, circular<br />
shoulder cannot be sit flush with the work surface and, at a reasonable plunge depth, the<br />
shoulder must hang over the front of the cylinder, over the back of the cylinder, or both<br />
depending on the tool’s offset from the work axis of rotation. This creates potential<br />
problems for the shoulder in its material containment role. It must be demonstrated<br />
experimentally that this issue is not significant in pipe welding if a traditional shoulder is<br />
to be used. In this work, the tool is offset 6.0mm forward of the work to create the<br />
plowing effect common in FSW. This effect means the trailing edge of the shoulder is the<br />
portion deepest in the work. This plowing effect is achieved on flat work by tilting the<br />
tool and creating a so called angle of attack. The method presented in this work results in<br />
a similar contact condition and acceptable results.<br />
157
Figure 140: A closeup view of a tool used in the experiment and the butted weld<br />
specimens used in the experiment. The pipe sections are shown mounted in the welding<br />
apparatus. The experiment is started from this position. The tool probe was position was<br />
calibrated, or zeroed, against the surface of the work. The tool rotation is started and the<br />
probe is plunged into the material until the desired contact is achieved with the shoulder<br />
on the cylindrical surface of the work.<br />
The circular nature of the weld path in a butted pipe configuration results in a<br />
secondary heating at the end of the weld. To complete a full, circumferential weld, the<br />
tool must cross over the weld initiation site which remains warm for a small diameter<br />
pipe. This additional heat affects the steady state portion of the weld and the weld<br />
termination. The highly coupled nature of the thermal and mechanical phenomena in<br />
FSW means this thermal effect can affect the weld mechanical properties. In this work,<br />
welds are observed by thermal camera and the effect of secondary heating is seen in the<br />
thermal data and the CFD model contours. The shank temperature is observed to<br />
increase throughout the weld. A similar problem is observed by Kou et al. in autogenous<br />
158
gas tungsten arc welding of small diameter Al-6061 pipe (Kou & Le). The authors<br />
conclude that computer model and experiment show a uniform fusion zone girth during<br />
seam welding and a continually increasing fusion zone girth under the same conditions in<br />
circumferential welds on small diameter pipe. The authors propose a preprogrammed<br />
reduction in weld power during the weld to reduce fusion zone growth during the<br />
process. Lee et al. used a state-space optimization method of process parameters to<br />
successfully maintain weld pool geometry around the circumference of small diameter<br />
Al-6061 pipe (Na & Lee). Weld pool geometry was maintained but it was noted that the<br />
450°C isotherm continued to expand.<br />
In a butted pipe configuration, the cylindrical work must be rotated about its axis<br />
and this presents three issues which complicate the ability to maintain a constant contact<br />
condition between the work and shoulder. Eccentricity in the rotation of the pipe<br />
combined with eccentricity in the circumference of the pipe sections and variations in<br />
pipe thickness result in varying height of the work surface at the tool contact location. If<br />
this variation is significant, it can be accounted for by mapping the system eccentricity<br />
prior to welding by touching the tool to the work surface at various locations around the<br />
circumference. A mapped height path can then be followed during welding.<br />
Additionally, process force feedback control can be used to compensate for system<br />
eccentricity by adjusting vertical tool position or weld parameters based on axial force,<br />
torque, or both (Longhurst, Strauss, Cook, Cox, Hendricks, & Gibson, Investigation of<br />
force controlled friction stir welding for manufacturing and automation, 2010)<br />
(Longhurst, Strauss, & Cook, Identification of the key enablers for force control of<br />
friction stir welding) (Longhurst, Strauss, & Cook, Enabling Automation of Friction Stir<br />
Welding: The Modulation of Weld Seam Input Energy by Traverse Speed Force Control,<br />
2009) (Longhurst, Strauss, Cook, & Fleming, Torque control of friction stir welding for<br />
manufacturing and automation, April 28, 2010).<br />
In this work an expandable inner mandrel is used to support and locate the pipe<br />
sections during welding. A photo of this setup is shown in Figure 141. Screws force an<br />
interior plug with an outer diameter taper into the ring anvil which has an inner diameter<br />
taper. A gap cut in the ring anvil allows the ring (or c-shape) to expand against the<br />
interior of the pipe sections. An expandable mandrel, as opposed to a press fit or<br />
159
interference fit mandrel, allows for insertion and removal of the mandrel without damage<br />
to the interior of the pipe. Additionally, this mandrel type can be adjusted to exert the<br />
desired degree of support to the interior of the pipe. It was found that a tight inner<br />
mandrel both prevented the expulsion or distortion of work material at the root of the<br />
weld and more significantly, forced the pipe sections into a more uniformly circular<br />
shape. When the pipe sections are forced against one another by the clamping system<br />
and inner mandrel is expanded, the inner circumferences of the two pipe sections are<br />
forced to mate and the outer circumferences are mated within the tolerance of the pipe<br />
wall thickness. This is important because pipe sections will not be perfectly cylindrical<br />
and allowing a greater error tolerance reduces costs and setup time. The precise nature of<br />
this clamping methodology readies the pipe sections for the friction stir welding process.<br />
Figure 141: The expandable mandrel consists of slotted end caps which mate with the<br />
keyed axle of the rotary apparatus, a ring anvil with an expansion gap and inner taper, a<br />
spacer for centering the anvil, an expansion plug with an outer taper, and bolts (not<br />
pictured) to expand the mandrel by pulling the plug towards an end cap and into the<br />
taper of the anvil.<br />
Weld Tests<br />
160
Full penetration welds of 4.2” (107mm) diameter, 0.2” (5.1mm) thickness butted<br />
aluminum alloy (6061-T6) pipe sections were made with two 5/8” (15.9mm) diameter<br />
scrolled shoulder, 0.18” length, threaded probe tools of differing probe diameter.<br />
Parameters for a 3/16” (4.8mm) probe diameter tool were determined based on the<br />
superficial appearance, lateral macrosection appearance, and tensile strength of<br />
preliminary test welds. Adjustments to all aspects of the setup were then made with<br />
emphasis on improving tensile strength. A matrix of welds were then performed with the<br />
3/16” (4.8mm) probe diameter tool. Process forces were recorded along with the tool<br />
shank temperature using a thermal camera. Tensile tests and macrosections were then<br />
performed. Based on these results, a second matrix of welds was performed with a<br />
0.236” (6.0mm) diameter tool. A CFD Fluent model was creating for each geometry to<br />
compliment the experimental results and establish a numerical basis for estimating axial<br />
force (<strong>Lammlein</strong>, DeLapp, Fleming, Strauss, & Cook, 2009) (Atharifar, Lin, &<br />
Kovacevic, Studying Tunnel-like Defect in Friction Stir Welding Process Using<br />
Computational Fluid Dynamics, 2007).<br />
Weld Results and Disscusion<br />
The tensile strengths of the experimental welds are presented in Figure 142. The<br />
ultimate tensile strength (UTS) is plotted as a percentage of the parent UTS. Because of<br />
the large number of tested parameters, each data point represents the strength of a single<br />
tested tensile coupon. The parent strength (314.6MPa) was determined by averaging<br />
five samples. Generally, the results show an increase in weld strength with increasing<br />
traverse rate and rotation rate. This trend holds for all welds with the exception of<br />
several at the fastest parameter settings, where increasing speed results in weaker welds.<br />
The strength appears to be largely independent of which probe diameter was used. In<br />
addition to reduced strength, weld appearance was inconsistent and of reduced quality for<br />
the 1400rpm by 13.1ipm and 1600 by 17.0ipm cases. The reduced weld appearance<br />
quality experienced at these high traverse rate settings limited the range of tested<br />
161
parameters. Specially designed clamps were used to hold the pipe section tensile<br />
coupons. The tensile test setup is shown in Figure 143.<br />
Figure 142: Ultimate tensile strength (UTS) as a percentage of the parent material UTS<br />
vs. Traverse Rate for full-penetration butted pipe welds made with 5/8” diameter,<br />
scrolled shoulder and 0.18” length, threaded probe tools. Data is shown for both the<br />
3/16”(4.8mm) diameter probe tool and the 0.236”(6mm) diameter probe tool used in the<br />
experiment. Weld tensile strength is observed to increase with increasing process rates<br />
with the exception of the extreme cases.<br />
162
Figure 143: The curvature of the pipe tensile coupons required the use of specialized<br />
clamps. The tensile jaws pictured above were designed to grip tensile coupons cut from<br />
welds of butted pipe and butted hemisphere sections. Each jaw uses six bolts to grip each<br />
coupon. Bolt tips are spiked, snubbed, or flat depending on the geometry gripped and the<br />
location contacted on the coupon.<br />
The axial force was recorded for welds done with the 6mm diameter probe tool<br />
via strain gauges mounted to the cast-iron spindle head of the welding machine. An FEA<br />
model of the spindle head was used to determine strain gauge locations which maximized<br />
the influence of axial force and minimized the influence of in-plane (x & y direction)<br />
forces on the strain gauge array output. The strain gauge setup was calibrated using a<br />
load cell and it was determined that output mapped directly to axial force with negligible<br />
cross-influence from in-plane forces. Figure 144 plots the average axial force during the<br />
steady state portion of the weld against traverse rate, for welds made with the scrolled<br />
shoulder and 6mm dia. threaded probe tool. The plot clearly shows axial force increasing<br />
with traverse rate and a strong correlation between the two. Additionally, forces are more<br />
163
often reduced with increasing rotation rate, however, this association is very loose over<br />
the parameter range tested. The highest average axial force occurred at a parameter<br />
setting of 1600rpm and 17.0ipm. This parameter setting should be considered as on the<br />
edge, or outside of, the parameter window which defines acceptable welds as ideal<br />
surface appearance was not be maintained throughout the weld, particularly in the initial<br />
portion of the weld where the weld temperature was the lowest. The abrupt jump in axial<br />
force at this setting indicates both a lack of plastization and that additional heating is<br />
needed to prevent a breakdown of the FSW process.<br />
Computational fluid models (CFD) have been used with some success to predict<br />
the expected axial force encountered during the FSW process based on work material,<br />
tool and work geometry, and process parameters (Atharifar, Lin, & Kovacevic,<br />
Numerical and Experimental Investigations on the Loads Carried by the Tool During<br />
Friction Stir Welding, 2009). Figure 145 shows corresponding axial force values obtained<br />
from the Fluent CFD models presented later. The numerical results provide a reasonable<br />
estimate of the axial force values seen during the experiment.<br />
164
Figure 144: Experimental axial forces plotted with traverse rate for butted pipe welds<br />
made with a 5/8” diameter scrolled shoulder and 6mm diameter threaded probe tool.<br />
165
Figure 145: CFD model axial forces plotted with traverse rate for butted pipe welds<br />
made with a 5/8” diameter scrolled shoulder and 6mm diameter threaded probe tool.<br />
Efforts were made to ensure that following proper depth and seating of the tool<br />
shoulder at the weld initiation site, forces would subsequently fluctuate within an<br />
acceptable range during the weld traverse. Figure 146 and Figure 147 show the axial<br />
force history of selected experimental welds. Keeping force fluctuations within an<br />
acceptable range was done by means of several techniques.<br />
The parent pipe sections were machined from their received condition on their<br />
inner diameter and outer diameter. After this preprocessing, the wall thickness varied<br />
from the approximate thickness of 0.19” by a maximum of 0.005”. This tolerance limit<br />
was maintained on each pipe section, and between each pipe section, ensuring near<br />
uniform thickness around the circumference of each section and well matched wall<br />
thicknesses between pipe sections.<br />
The use of the expanding mandrel, described earlier, forced pipe sections into a<br />
more perfect circular shape and aligned the inner diameter of the pipe sections.<br />
166
Together, a fine wall thickness tolerance and a tightly adjusted expanding inner mandrel<br />
served to align the joint in the geometric configuration most favorable to joining by FSW.<br />
With the use of force control and an expanding mandrel it would be possible to allow a<br />
greater wall thickness tolerance and the preprocessing step could be eliminated from the<br />
welding procedure (Longhurst, <strong>Dissertation</strong>: Force control in friction stir welding, 2009).<br />
The shoulder of both of the tools used in the experiment used a scroll to force<br />
material inward from the edge of the shoulder during welding as the tool rotates. The<br />
scrolled shoulder is shown in Figure 148. This feature increased the tolerance of the tool<br />
to tool-work contact variations. Figure 149 and Figure 150 show the superficial<br />
appearance of the welds. Preliminary welds performed with an unfeatured shoulder tool<br />
showed consistent poor surface quality, producing either surface void defects or flash<br />
(material expulsion). It proved to be very difficult to produce superficially acceptable<br />
welds without a tool with shoulder features.<br />
Finally, the tool was offset 6mm ahead of the geometric center of the work along<br />
the traverse direction. This created a plowing effect which reduced tolerance to vertical<br />
positioning error. This offset was arrived via experimental trial. It was found that<br />
positioning the tool directly over the high point of the pipe (i.e. no offset) resulted in<br />
buffeting and an unstable weld condition. Taking these steps meant the experiment could<br />
be performed without force control despite the difficulties of system eccentricity and<br />
secondary heating present in small diameter pipe FSW.<br />
167
Figure 146: Axial force history recorded via a calibrated strain gauge array mounted to<br />
the spindle head for a weld performed with a 0.236”(6mm) diameter, threaded probe tool<br />
at 1600rpm and 15.7ipm. Recent equipment failure eliminated the force feedback control<br />
ability of the experimental FSW machine. Efforts were taken to ensure forces fluctuated<br />
within an acceptable range during the welding process.<br />
168
Figure 147: Axial force history for a weld performed with a 0.236”(6mm) diameter,<br />
threaded probe tool at 1600rpm and 15.7ipm. Force control was not used and axial<br />
values fluctuated within a range which did not affect weld appearance. To achieve this<br />
tolerance to weld contact pressure, a featured shoulder (scrolled) was used.<br />
Figure 148: The 5/8” (15.9mm) diameter scrolled shoulder, 3/16” (4.8mm) probe<br />
diameter tool used in this experiment. The scrolled shoulder feature increased tolerance<br />
to variation in contact condition and improved weld appearance.<br />
169
Figure 149: The superficial appearance of a typical welded pipe specimen (close)<br />
Figure 150: The superficial appearance of several pipes welded in the experiment.<br />
170
The weld macrosections show complete penetration of the weld nugget through<br />
the work. Figure 151 shows the appearance of lateral-cross sections of welds made at<br />
low rates using the 3/16” dia. probe (narrow probe) tool. Frames were taken looking<br />
down the weld with the retreating side on the left. Weld samples were first mounted,<br />
then sanded over silicon carbide discs at various grits finishing with P1500, polished<br />
using 0.5µ alumina suspension, and finally etched by 1 minute bath in Keller’s reagent.<br />
Figure 152 shows lateral views of remaining welds made using the narrow probe tool.<br />
Increasing the width of the probe predictably increases the width of the weld nugget.<br />
Figure 153, Figure 154, Figure 155, and Figure 156 show the lateral macrosection<br />
appearance of welds made using the 6mm dia. probe (wide probe) tool at 5.2 to 17ipm,<br />
and at 1200 to 1600rpm.<br />
Figure 151: Lateral macrosection view of welds made at 5.2 and 6.6ipm using a 5/8” dia.<br />
scrolled shoulder, 3/16” dia. threaded probe tool. Two of the weld images presented<br />
above were made by composition of two photos due to an equipment issue.<br />
171
Figure 152: Macrosections of selected welds made with the narrow probe tool.<br />
Figure 153: Lateral macrosection view of welds made at 5.2 and 6.6ipm using a 5/8” dia.<br />
scrolled shoulder, 0.236”(6mm) diameter threaded probe tool.<br />
172
Figure 154: Macrosections of welds made at 7.9 and 9.2ipm with the wide probe tool.<br />
Figure 155: Macrosections of welds made at 10.5 and 11.8ipm with the wide probe tool.<br />
173
Figure 156: Macrosections of selected welds made with the wide probe tool.<br />
A FLIR thermal camera was used to make thermal videos of the full weld cycle.<br />
The camera was calibrated to the emissivity of the tool shank. Figure 157 shows a<br />
thermal image from thermal video taken during the experiment showing the region of<br />
interest on the tool shank. The curved outer surface of the aluminum pipe sections were<br />
too reflective to give reliable emissivity calibration, thus the tool shank was used. Figure<br />
158 shows the average tool shank temperature over the steady state portion of welds<br />
made using the narrow probe tool and Figure 159 shows the corresponding data for welds<br />
made with the wide probe tool. The charts show shank temperature decreasing<br />
predictably with increasing traverse rate. Higher rotation rates generally resulted in<br />
higher temperatures but this relationship was not as consistent in the data. The charts<br />
show the wide probe welds to be slightly hotter than the narrow probe welds. The<br />
experimental shank temperature agrees closely with the CFD model results at the<br />
modeled parameter (1000rpm, 5.2ipm) for both geometry cases.<br />
174
Figure 157: A thermal camera image from thermal video taken during the experiment<br />
showing the region of interest on the tool shank. The emissivity of the tool shank was<br />
determined by observing the shank with the camera at several temperatures when the<br />
temperature of the shank was known.<br />
175
Figure 158: Average tool shank temperature obtained via thermal camera over the<br />
steady state portion of welds made using the narrow probe tool.<br />
176
Figure 159: Average tool shank temperature obtained via thermal camera over the<br />
steady state portion of welds made using the wide probe tool.<br />
Figure 160 shows the typical temperature history of the tool shank surface during<br />
welding. Temperature on the tool shank surface increases gradually as the probe is<br />
plunged into the material and then more rapidly as the shoulder contact condition is<br />
established. When the shoulder is at the desired position and the traverse is triggered, the<br />
temperature increases less rapidly. The issue of secondary heating can be seen during the<br />
weld proper in the presented temperature charts. The tool must pass over the weld<br />
initiation site, which has been previously subjected to the weld thermal environment, to<br />
complete a full circumferential weld. A steady state temperature is never reached and<br />
temperature increases throughout the weld cycle. In the presented experiment, this climb<br />
in temperature did not adversely affect weld quality. However, the temperature increase<br />
over the circumference of the weld is significant in small diameter pipes and could affect<br />
weld quality under other conditions. During welding of butted plates a similar problem<br />
can be encountered when the tool nears the end of the plate and the edge of the plate<br />
177
presents a barrier for heat conduction. This situation near the end of a weld on butted<br />
plates is less severe, yet still presents a problem under certain conditions that must be<br />
addressed.<br />
Figure 160: A chart showing the tool shank thermal history over the course of a selected<br />
weld from the experiment. This data was typical of weld thermal data taken during the<br />
experiment in that temperature continued to rise throughout the weld.<br />
Modeling<br />
A numerical model was created for both tool geometries using Ansys Fluent<br />
software. Fluent is an Eulerian, finite volume, computational fluid dynamics (CFD)<br />
program. The mesh geometries for each tool were created in the preprocessing program,<br />
Ansys Gambit. The narrow probe geometry contained 221,887 tetrahedral cells and<br />
465,690 triangular faces, and the wide probe geometry contained 224,689 cells and<br />
178
471,146 faces. The meshes are fine at the interface. A growth rate was established from<br />
the interface, creating tool and material volumes which are increasingly coarse with<br />
distance from the interface. The mesh is finest in the work near the interface because<br />
temperature and velocity gradients are highest in the vicinity of the tool. Figure 161<br />
shows the mesh refinement and geometry. Figure 162 shows the mesh over the tool<br />
geometry, created in gambit. The meshes for both cases were then exported and loaded<br />
in Fluent.<br />
179
Figure 161: Computer model geometry created in the Gambit preprocessor showing the<br />
inlet, outlet, and model zones.<br />
180
Figure 162: A closeup view of mesh refinement on the tool face. The featured shoulder<br />
and threaded probe can be seen. The mesh was finest at the interface.<br />
The implicit formulation was used in Fluent with the laminar viscosity setting.<br />
The Presto pressure solver for highly rotating flows was selected due to the relatively<br />
high rotation rate with respect to traverse rate. The weld material viscosity function was<br />
set by user-defined function and defined using the Carreau viscosity model:<br />
1 exp <br />
<br />
<br />
<br />
<br />
<br />
where µ ∞ is the infinite shear viscosity, µ 0 is the zero shear viscosity, is the local shear<br />
strain-rate, λ is the time constant, T 0 is the reference temperature, T is the local<br />
temperature, and n is the power law index. In the weld zone (see Figure 161), Carreau<br />
181
constants derived from analytical experiments in Al-6061-T6 were taken (µ ∞ =0,<br />
µ 0 =1e8m 2 /s, λ=10, n=1, T 0 =300K) (Tello, Gerlich, & Mendez). For the inlet and outlet<br />
zones, a reduced µ 0 of 100m 2 /s was used to aid in solution convergence as flow was not<br />
critical in these regions. The total heat input at the interface was determined using the<br />
Schmidt heat generation equation.<br />
Schmidt’s analytical equation for heat generation approximates the heat generated<br />
by the tool based on a sliding contact condition at the interface (Schmidt, Hattel, & Wert,<br />
2004):<br />
Qτ contact ωAd where τ contact µP<br />
Where Q is heat generated by area, A, whose centroid is distance, D, from the axis of<br />
rotation; and is the contact shear stress, µ is the frictional coefficient, P is the<br />
contact pressure, ω is the radial velocity of the tool. For a simple tool with a cylindrical<br />
probe the equation becomes:<br />
Q total 2 3 πτ contactωR 3 3r 2 h<br />
where R is the radius of the shoulder, r is the radius of the probe, and h is the height of<br />
the probe. For the present case the equation must be slightly modified to account for the<br />
portion of the shoulder not in contact with the work. This portion of the shoulder is a<br />
circular section on the shoulder defined by an inclusive angle of approximately 100º. The<br />
area of this non-contact, circular section is calculated by:<br />
1 2 sin 1 2 5<br />
16 " <br />
1.745 sin 1.745 0.037 <br />
2.40 5 <br />
where R is the shoulder radius in inches, and θ is the inclusive angle which defines the<br />
circular section (100º), in radians. The centroid of this non-contact area is located a<br />
distance, , from the tool axis of rotation:<br />
182
4 2<br />
<br />
3 4 5<br />
16<br />
<br />
<br />
" 1.745<br />
2<br />
0.246" 0.0063<br />
31.745 sin1.745<br />
where R is the shoulder radius, in inches, and theta is the angle which defines the circular<br />
section, in radians. The contact pressure, P, can be calculated by dividing the axial force<br />
by the horizontal tool area:<br />
<br />
<br />
<br />
<br />
<br />
Using the experimental axial force for the 1000rpm, 5.2ipm parameter, the setting<br />
contact pressure, P, can be calculated for the width probe and narrow probe tools. Axial<br />
force readings were not taken during the narrow probe welds so the value obtained for the<br />
wide probe will be used for both cases. The calculated contact pressure for both<br />
experimental tools at the 1000rpm, 5.2ipm setting is:<br />
,. <br />
<br />
2880.5<br />
<br />
. 0079 2.40 5 1.66 7 <br />
<br />
For the experimental contact condition the general Schmidt equation becomes:<br />
µPω 2 3 πR3 3r 2 h <br />
For the 1000rpm, 5.2ipm setting and the narrow probe tool using a frictional coefficient<br />
of 0.5 the heat generated by the narrow probe tool, , :<br />
0.71.66 7104.72 2 3 π. 00793 ‐3.0024 2 . 0046 2.4e 5. 0063<br />
=1,287 Watts<br />
where 0.7 is the friction coefficient, 1.66e-7Pa is the contact pressure,<br />
1000rpm(104.72rad/s) is the tool rotation rate, 5/16”(0.0079m) is shoulder radius,<br />
3/32”(0.0024m) is the probe radius, 0.18”(0.0046m) is the probe height, 0.037in 2 (2.4e-<br />
183
5m 2 ) is the non-contact area, and 0.246”( 0.0063m) is the non-contact centroid distance.<br />
For the wide probe tool this equation gives:<br />
0.71.66 7104.72 2 3 π. 00793 ‐3.003 2 . 0046 2.4e 5. 0063<br />
=1,403 Watts<br />
where only the radius of the wide probe tool, 0.118” (0.003m), is substituted from the<br />
previous calculation. The slightly increased surface area of the probe and the slightly<br />
higher relative velocity of the probe wall result in higher heat input for the fat probed tool<br />
at identical parameters.<br />
Although torque values for this experiment were not obtained, a secondary<br />
estimate of weld thermal input can be obtained via the weld power method by using a<br />
torque value taken from a similar experiment under similar conditions. A value of 10.56<br />
N·m is taken from an experiment performed on butted spheres of identical (0.2”)<br />
thickness using the same rotary welding apparatus. The tool shoulder from this case was<br />
of the same 5/8” diameter but was cupped in geometry to mate with the spherical work.<br />
Like the present case this value was taken over a 1000rpm weld, however, the lowest<br />
traverse rate recorded during the analog spherical experiment at the 1000rpm rotation rate<br />
was 7.8ipm, so an extrapolated value is taken. The probe was 3/16” diameter and<br />
threaded and therefore will be compared with the 3/16” diameter probe calculation.<br />
Using the weld power method (Pew, Nelson, & Sorensen, 2007):<br />
, 10.56 104.7 <br />
1106 1287 <br />
<br />
An upper limit weld power can be calculated using an upper limit weld torque<br />
obtained by applying the measured axial load at the very edge of the tool shoulder. For<br />
the wide probe modeled case this yields:<br />
, 2880.5. 0079 104.7 <br />
2394 Watts<br />
<br />
For the presented models, the Q n and Q w heat rate or power values are used for the<br />
narrow probe and wide probe models respectively. Heat was distributed across the weld<br />
interface and input into the work material as defined by a user-defined function which<br />
184
applied heat locally in proportion to the local tool velocity. This results in highest energy<br />
input at the edge of the shoulder where the local tool velocity is highest. A second user<br />
defined function was used to impose the temperature on the work side of the interface<br />
onto the adjacent interface cells on the tool side of the interface. This formulation<br />
resulted in 5.1% of the total weld power entering the tool in the narrow probe case and<br />
6.6% entering the tool in the wide probe case. The total heat input into cells on both<br />
sides of the interface was equal to the values obtained by the Schmidt formula. A<br />
rotational velocity of 1000rpm and traverse speed of 5.2ipm were used in the presented<br />
models of the narrow probe and wide probe geometries. Additionally, cases were run for<br />
the wide probe geometry at all parameters used experimentally in order to provide a<br />
numerical estimation of axial force for comparison with experiment.<br />
In Fluent, the tool rotational axis is maintained stationary while velocity inlet type<br />
boundary conditions are used at the inlet and outlet boundaries to establish material flow<br />
past the tool, as when traversing. The outlet boundary condition (BC) can be defined as a<br />
velocity inlet with negative magnitude because the flow far from the tool in the work is<br />
known to be the traverse rate. A pressure outlet or outflow boundary condition at the<br />
outlet would not take advantage of this knowledge and would instead force fluent to<br />
arrive at some flow profile. Thermal BC's are defined as 10 W/(m 2·K) for exposed<br />
surfaces and 150 W/(m 2·K) for intimate metal to metal contact. The rotating and exposed<br />
surface of the tool was defined as 50 W/(m 2·K). Additionally, a wall emissivity of 0.2<br />
was applied to exposed aluminum surfaces and 0.5 to exposed steel surfaces.<br />
The FSW environment presents an extreme fluid case for Fluent software.<br />
Temperature and velocity gradients are steep in the vicinity of the tool and the tool<br />
rotational velocity is high with respect to the traverse speed. Iterating the models starting<br />
with the full zero shear viscosity and tool rotational velocity results in divergence errors.<br />
In CFD software it is best practice that best guess initial conditions be provided to<br />
simplify arrival at a solution. The models presented were initialized using the full<br />
experimental traverse speed. From this point, it was found that a solution was best<br />
reached in the presented models by successive increases in tool rotational velocity and<br />
zero shear viscosity from a small fraction of their desired values to, eventually, their<br />
185
desired values. Using this method, each solution has a good guess solution from which to<br />
converge on a subsequent solution using the updated parameters.<br />
Figure 163: Modeled temperature contour (C) for the narrow 4.8mm(3/16”) diameter<br />
probe tool case (Iso view).<br />
186
Figure 164: Modeled temperature contour (C) for the narrow probe tool case<br />
(longitudinal view).<br />
187
Figure 165: Modeled temperature contour (C) for the narrow probe tool case (front<br />
lateral view looking from the inlet).<br />
Figure 166: Modeled temperature contour (C) for the narrow probe tool case (top view<br />
of a slice taken at the middle of the probe).<br />
188
Figure 167: Modeled temperature contour (C) for the wide 0.236”(6mm) diameter probe<br />
tool case (Iso view).<br />
189
Figure 168: Modeled temperature contour (C) for the wide probe tool case (longitudinal<br />
view).<br />
190
Figure 169: Modeled temperature contour (C) for the wide probe tool case (front lateral<br />
view looking from the inlet).<br />
Figure 170: Modeled temperature contour (C) for the wide probe tool case (top view of a<br />
slice taken at the middle of the probe).<br />
191
Figure 171: Model pathlines for the narrow probe tool case (looking from the top,<br />
advancing side is red).<br />
192
Figure 172: Model pathlines for the wide probe tool case (looking from the top,<br />
advancing side is red).<br />
193
Figure 173: Model pathlines for the narrow probe tool case (looking from the inlet,<br />
advancing side is red).<br />
194
Figure 174: Model pathlines for the wide probe tool case (looking from the inlet,<br />
advancing side is red).<br />
Figure 175: Lateral contour of velocity magnitude (m/s) compared with experimental<br />
lateral macrosection for the wide (6mm diameter) probe case. The stirred zone (light,<br />
195
center), thermomechanically affected zone (TMAZ)(dark), and parent material (lightest)<br />
can be seen in the macrosection. The model shows significant material stirring in the<br />
stirred zone, minimal material stirring in the TMAZ, and no material stirring in the<br />
parent material.<br />
Conclusions<br />
Fusion welding experiments performed on this material and geometry<br />
demonstrated that process parameter adjustment was required around the circumference<br />
of the weld to maintain acceptable weld quality throughout. Heat input had to be reduced<br />
continually to avoid significant and undesirable expansion of the weldpool. It was shown<br />
in this study that the reduced welding temperature of the FSW interface minimized this<br />
problem and acceptable welds could be produced over a range of parameters. Although a<br />
steady rise in temperature was observed, it was not sufficient to require any reduction in<br />
weld power during the weld. Additionally, it was shown that a traditional FSW tool<br />
geometry could be used on a small diameter pipe provided that a scrolled shoulder was<br />
used and the tool was offset some distance from the center of the cylindrical work in the<br />
direction of traverse as described earlier.<br />
Ideally a force feedback control system would be used to account for variation in<br />
the thickness of the pipe sections and rotational eccentricities in the setup. However it<br />
was demonstrated in this experiment that FSW of small diameter pipe can be performed<br />
without the luxury of force feedback control, provided that pipe sections were<br />
preprocessed to reduce wall thickness variation and an expanding inner mandrel was<br />
used. The expanding inner mandrel served to align the inner diameters of the pipe<br />
section and force the sections into a more uniform circular shape.<br />
Welds presented in the experiment were of high tensile strength and sound<br />
internal and superficial appearance. This experiment demonstrated that FSW can be<br />
performed on this geometry at a wide range of parameters using at various traditional tool<br />
geometries. Additionally, it was shown that a high welding rate can be achieved. In this<br />
experiment, the highest tensile strength was achieved at travel speed of 15.7 inches per<br />
minute and travel speeds up to 17 inches per minute were tested with good results. At the<br />
196
later speed setting, the tool welds the full circumference of the 4.2” diameter pipe<br />
sections in less than 50 seconds. The ability to weld at high traverse speeds increases the<br />
output of a FSW machine and increases the likelihood that the costs of the machine can<br />
be justified in a specific manufacturing setting.<br />
It was also shown that the FSW process is well understood and simple CFD<br />
models can be used to reliably predict the thermal conditions and material flow during<br />
FSW of a given geometry. It was also shown that CFD can give a reasonable prediction<br />
of the axial forces that should be expected under various FSW conditions. The large<br />
startup costs associated with FSW make the predictive capabilities and understanding<br />
provided by a CFD model more valuable.<br />
Appendix<br />
Figure 176: Zoom view of a macro taken from a full penetration butted pipe weld<br />
(1400rpm, 5.2ipm). The experimental tools had a 5/8” diameter, scrolled shoulder and<br />
0.18” length, threaded probe. The wide (0.236” diameter) probe tool created this weld.<br />
197
Figure 177: Zoom view of a macro taken from a wide probe weld (1400rpm, 5.2ipm).<br />
The advancing side of the weld is shown.<br />
198
Figure 178: Zoom view of a macro taken from a wide probe weld (1400rpm, 5.2ipm).<br />
The retreating side of the weld is shown.<br />
199
Figure 179: The superficial appearance of some of the pipes welded in the experiment<br />
and some additional pipe welding runs not presented in the experiment. The center and<br />
bottom sample is a tungsten inert gas, TIG, weld made for comparison with filler type<br />
5356.<br />
200
Figure 180: The superficial appearance of some of the pipes welded in the experiment<br />
and some additional pipe welding runs not presented in the experiment. The top and<br />
center sample is a TIG weld.<br />
201
Figure 181: The superficial appearance of some of the pipes welded in the experiment<br />
and some additional pipe welding runs not presented in the experiment. Left and bottom<br />
is a TIG weld sample.<br />
202
Figure 182: The rotary welding apparatus (grey, left), rotary bearing (black, center), and<br />
rotary motor (beige, right).<br />
203
Figure 183: Rotary welding apparatus with keyed shaft.<br />
Figure 184: Left is a pipe sample used for tensile coupons of the parent material and<br />
geometry. Right are pipe sections joined in the experiment.<br />
204
Figure 185: A diagram illustrating the tool offest with<br />
respect to the highest point of the rotating pipe sections. The offset is parallel to the weld<br />
seam and results in the desired contact condition. This offset configuration reduced<br />
vibration and improved weld quality in comparison to the case without offset.<br />
References:<br />
Atharifar, H., Lin, D. C., & Kovacevic, R. (2009). Numerical and Experimental Investigations on the<br />
Loads Carried by the Tool During Friction Stir Welding. Journal of Materials Engineering and<br />
Performance .<br />
Atharifar, H., Lin, D. C., & Kovacevic, R. (2007). Studying Tunnel-like Defect in Friction Stir<br />
Welding Process Using Computational Fluid Dynamics. Materials Science and Technology , 375-<br />
391.<br />
Defalco, J., & Steel, R. (2009, May). Friction stir process now welds steel pipe. The Welding<br />
Journal , pp. 44-48.<br />
Fairchild, D., Kumar, A., Ford, S., & Nissley, N. (2009). Research Concerning the Friction Stir<br />
Welding of Linepipe Steels. Trends in Welding Research , 371-380.<br />
Feng, Z., Steel, R., Packer, S., & David, S. Friction Stir Welding of API Grade X65 Steel Pipes. OAK<br />
RIDGE NATIONAL LABORATORY, U. S. DEPARTMENT OF ENERGY.<br />
Kou, S., & Le, Y. Heat Flow during the Autogenous GTA Welding of Pipes. METALLURGICAL<br />
TRANSACTIONS A; VOLUME 15A, JUNE 1984, p1171.<br />
<strong>Lammlein</strong>, D. H., DeLapp, D. R., Fleming, P. A., Strauss, A. M., & Cook, G. E. (2009). The<br />
application of shoulderless conical tools in friction stir welding: An experimental and theoretical<br />
study. Materials and Design 30 , 4012–4022.<br />
205
<strong>Lammlein</strong>, D. H., Longhurst, W. H., Delapp, D. R., Flemming, P. A., Strauss, A. M., & Cook, G. E.<br />
(2010). The Friction Stir Welding of Hemispheres – A technique for Manufacturing Hollow<br />
Spheres. Journal of Advanced Manufacturing .<br />
Longhurst, W. R. (2009). <strong>Dissertation</strong>: Force control in friction stir welding. <strong>Vanderbilt</strong> <strong>University</strong>.<br />
Longhurst, W. R., Strauss, A. M., & Cook, G. E. (2009). Enabling Automation of Friction Stir<br />
Welding: The Modulation of Weld Seam Input Energy by Traverse Speed Force Control.<br />
American Society of Mechanical Engineers Journal of Dynamic Systems Measurement and<br />
Control .<br />
Longhurst, W. R., Strauss, A. M., & Cook, G. E. (n.d.). Identification of the key enablers for force<br />
control of friction stir welding. American Society of Mechanical Engineers Journal of<br />
Manufacturing Science and Engineering , 2009.<br />
Longhurst, W. R., Strauss, A. M., Cook, G. E., & Fleming, P. A. (April 28, 2010). Torque control of<br />
friction stir welding for manufacturing and automation. International Journal of Advanced<br />
Manufacturing Technology .<br />
Longhurst, W. R., Strauss, A. M., Cook, G. E., Cox, C. D., Hendricks, C. E., & Gibson, B. T. (2010).<br />
Investigation of force controlled friction stir welding for manufacturing and automation.<br />
Proceedings of the Institution of Mechanical Engineers, Part B, Journal of Engineering<br />
Manufacturing., Volume 224 .<br />
Na, S. J., & Lee, H. J. A study on parameter optimization in the circumferential GTA welding of<br />
aluminium pipes using a semi-analytical. Journal of Materials Processing Technology; 57, 1996,<br />
95- 102.<br />
Newell, W. F., Sperko, W. J., Mannings, D. C., Anderson, T., & Connell, D. D10 COMMITTEE ON<br />
PIPE AND TUBE WELDING. p32: American Welding Society.<br />
Packer, S. M., & Matsunaga, M. (2004). Friction Stir Welding Equipment and Method for Joining<br />
X65 Pipe. Proceedings of the 14th Intl. Offshore and Polar Eng. Conf. Toulon, France.<br />
Pew, J. W., Nelson, T. W., & Sorensen, C. D. (2007). Torque based weld power model for friction<br />
stir welding. Sci Technol Weld Join 12(4) , 341.<br />
Schmidt, H., Hattel, J., & Wert, J. (2004). An analytical model for the heat generation in friction<br />
stir welding. Modelling Simul. Mater. Sci. Eng. 12 , 143–157.<br />
Tello, K. E., Gerlich, A. P., & Mendez, P. F. Constants for hot deformation constitutive. Science<br />
and Technology of Welding and Joining; 2010, VOL 15, NO 3.<br />
Thomas, W. M. (1991). Friction stir butt welding. International Patent Application No<br />
PCT/GB92/02203.<br />
206
CONCLUSION AND FUTURE WORK<br />
Conclusion<br />
The research presented is expected to expand the range of application of the FSW<br />
process. The use of force feedback control of weld seam alignment permits the use of<br />
FSW in an automated, manufacturing setting on blind type t-joints. Experimental and<br />
computational data demonstrated that the vertical member of the t-joint can be followed<br />
based on process force feedback. This will allow a FSW machine tool to follow ribs<br />
under large metal sheets without tedious alignment and tool path determination. In the<br />
case of serpentine ribs, this research will permit the application of FSW to a geometry<br />
which was previously not feasible.<br />
In this work, the FSW was shown for the first time to be capable of welding small<br />
diameter butted hemisphere type joints. It was shown that a cupped shoulder tool in<br />
conjunction with internal support can be used to effectively join two hemispheres at a<br />
high percentage of the parent material strength. Additionally, it was shown that for cases<br />
where internal support is not permissible that a conical type tool can be used to obtain<br />
welds exceeding 50% penetration. In a practical measure of strength where these partial<br />
penetration welds are compared to the strength of the full thickness of the parent material,<br />
these unsupported welds achieved strengths exceeding 25%. These strengths were<br />
achieved using the limited weld parameter permutations attempted experimentally and<br />
can likely be increased. A partial penetration weld of butted hemispheres without the<br />
use of an internal support has applications to external compression vessels. Additionally,<br />
the use of a conical tool in FSW at partial penetration without anvil support applies to<br />
other situations where the underside of the work is inaccessible and the use of an<br />
underside support device is unfeasible.<br />
The joining of butted hemispheres with full weld penetration was demonstrated<br />
successfully with weld strengths exceeding 70% over the limited parameter range tested.<br />
207
In demonstrating the effectiveness of FSW on small diameter hemispheres, this<br />
experiment has shown that FSW is applicable to highly curved surfaces and surfaces with<br />
curvature in two degrees of freedom like a sphere. The demonstration of FSW on this<br />
particularly difficult geometry extends the range of FSW application. This has<br />
applications to things like aerospace structures and pressure vessels.<br />
Although the small diameter butted hemisphere joint presents a FSW case with<br />
many intrinsic difficulties, in one way it is possibly less difficult than it could be. The<br />
sphere is curved equally in two degrees of freedom allowing it to mate ideally with a<br />
cupped tool even as the cupped tool is rotated about the long axis of the tool as in<br />
welding. This is not the case with a pipe where there is no tool shoulder geometry which<br />
maintains this ideal tool to work mate when the tool is rotated. The pipe therefore<br />
presents another important FSW situation with inherent difficulties.<br />
In this work it was demonstrated that small diameter pipe sections can be joined<br />
effectively with a simple FSW tool. The scrolled shoulder and threaded probe tool was<br />
used to make full penetration welds on 4.2” diameter and wall 0.2” thickness pipes. The<br />
welds were exceptional superficially and achieved tensile strengths in excess of 70% of<br />
the parent material over the limited parameter range tested. The work done here extends<br />
the use of FSW to small diameter pipe with a wide range of application such as in the<br />
petroleum industry.<br />
Finally, it was shown that the FSW is well understood in that equations governing<br />
the process are refined to the extent that they can reliably produce what is seen<br />
experimentally. CFD models utilizing process governing equations of limited complexity<br />
can be used to reliably model and predict the relevant aspects of the FSW process. This<br />
was demonstrated over a wide variety of FSW work geometries including t-joints, butted<br />
plates, butted hemispheres, and butted pipes. Additionally, a variety of tool geometries<br />
were tested including conically shaped FSW tools, tools with scrolled shoulders, and<br />
tools with threaded probes. It was demonstrated that the thermal contours of the tool and<br />
work can be reliably produced in CFD. It was also demonstrated the flow field in the<br />
work around the FSW tool can be reliably shown in CFD models. The FSW process<br />
forces were also predicted using CFD with a reasonable degree of accuracy. These<br />
process equations and CFD models are valuable because the experimental evaluation of a<br />
208
new FSW process environment is resource intensive. CFD models provide a quick and<br />
effective means of evaluating an FSW process situation prior to making an actual weld.<br />
Future Work<br />
The cylindrical and spherical weld geometries presented required a circular weld<br />
path. The circular weld path resulted in a secondary heating effect which was<br />
exacerbated by the small radius of the work and correspondingly reduced conduction<br />
lengths within the work. The sum of these effects resulted in a significant increase in<br />
temperature throughout each experimental weld. This steady increase in temperature<br />
during the weld cycle is undesirable as the properties of the welded material will vary<br />
according to temperature around the circumference of the weld. It is desirable to reach a<br />
welding temperature at some point early in the weld and maintain this temperature<br />
throughout the weld. This can be achieved by either a reduction in the rotational velocity<br />
of the tool, an increase in the traverse rate of the tool, or by the implementation of a heat<br />
dissipation system.<br />
A reduction in tool rotational velocity or an increase in traverse rate will generally<br />
result in a reduction in the power input at the weld seam and the rate of heat dissipation<br />
into the tool and work. If a particular FSW process and environment is well<br />
characterized, then a predetermined reduction in weld power can be programmed into the<br />
weld cycle. This solution is simple and effective but requires prior knowledge of how the<br />
FSW process environment will behave thermally.<br />
A thermal (or temperature) based feedback control system could alternatively be<br />
implemented which adjusts weld parameters in real time in response to a measured<br />
temperature exceeding the desired value. This sort of system would require an<br />
instrument which provides real time temperature data to the weld controller. One<br />
example of this would be a thermal camera calibrated to the emissivity of the tool shank.<br />
The thermal camera computer could then send live temperature data from the region of<br />
interest on the tool shank to the weld controller. Another example would be a<br />
thermocouple in the tool or in the work.<br />
209
When the measured temperature exceeded the desired temperature the weld<br />
controller would adjust the tool rotational velocity or traverse rate based to reduce heat<br />
input. Alternatively the weld controller could trigger a heat dissipation system when the<br />
measured temperature exceeded the desired temperature. This heat dissipation system<br />
could be a heat exchanger in the tool or work. It has also been suggested that a jet of<br />
compressed air could be focused on the work behind the traveling tool during rotary<br />
welding to eliminate the secondary heating effect.<br />
A temperature based feedback control system for controlling thermal conditions<br />
in conjunction with an axial force or torque based feedback control system for controlling<br />
axial force would be effective methods of controlling weld quality in FSW. The<br />
temperature based controller would likely adjust tool rotational velocity to control the<br />
weld temperature while the force based controller adjusted tool vertical position to<br />
control axial force and the downward pressure excreted by the tool. The FSW is sensitive<br />
to axial force and the temperature in the vicinity of the tool. Although FSW can be done<br />
without feedback control, control systems reduce the necessary preparation time, increase<br />
the tolerance error, and increase the reliability of the system. In a manufacturing<br />
environment where a robust and flexible process is required, these feedback control<br />
systems are likely necessary.<br />
210