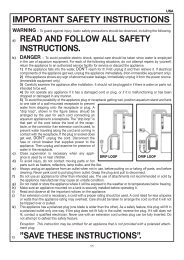
important safety instructions read and follow all ... - aquarium line
important safety instructions read and follow all ... - aquarium line
important safety instructions read and follow all ... - aquarium line

You also want an ePaper? Increase the reach of your titles
YUMPU automatically turns print PDFs into web optimized ePapers that Google loves.
Examine the wet/dry floater compartment to make sure it is<br />
securely attached to the filter canister: the upper connection<br />
must be firmly inserted into the canister; the two lower<br />
locking pins must be closed so that the slots are each in<br />
a horizontal position (horizontal = closed, vertical = open).<br />
Easy access to the locking pins is provided by the enclosed<br />
locking key.<br />
ATTENTION: Before the integrated double tap connector is<br />
inserted into the pump head of the filter, examine <strong>all</strong> three o-<br />
rings for damage <strong>and</strong> correct fitting. Lightly grease the o-<br />
rings with Vase<strong>line</strong> to help inst<strong>all</strong>ation.<br />
Fully insert the integrated double tap connector, with the<br />
locking clamp in an upright position, into the opening on the<br />
pump head. To fasten the locking clamp into its sealed position,<br />
push the h<strong>and</strong>le downwards.<br />
Tubing Inst<strong>all</strong>ation<br />
Shut off the integrated double tap connector by shifting the<br />
two levers to the OFF position.<br />
Slightly lubricate the o-ring of the output pipe <strong>and</strong> insert it<br />
firmly into the pump cover. Examine the sealing gasket on the<br />
pump head of the filter for clean<strong>line</strong>ss <strong>and</strong> proper fit.<br />
With the output pipe inserted into the intake of the impeller<br />
lid, place the pump head onto the filter canister, so that the<br />
output pipe is guided through the openings of the media containers<br />
<strong>and</strong> fits correctly into the wet/dry connection at the<br />
bottom of the canister. Close <strong>all</strong> four EZ clips.<br />
on<br />
off<br />
off<br />
on<br />
Push the enclosed tubing onto the corresponding tubing<br />
openings of the adaptor as far as they will go, starting with the<br />
sm<strong>all</strong>est tube diameter. If this is difficult to do, soak the hoses<br />
in warm water beforeh<strong>and</strong> to make them softer.<br />
It is very <strong>important</strong> to use original EHEIM hoses only.<br />
17