

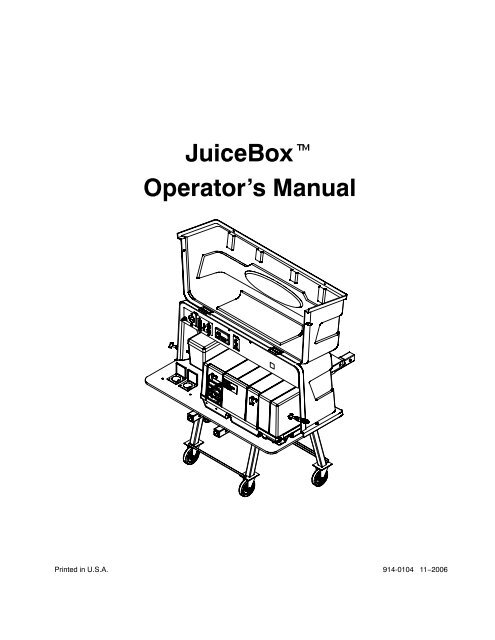
JuiceBoxt Operator's Manual - Cummins Onan
JuiceBoxt Operator's Manual - Cummins Onan
JuiceBoxt Operator's Manual - Cummins Onan

You also want an ePaper? Increase the reach of your titles
YUMPU automatically turns print PDFs into web optimized ePapers that Google loves.
JuiceBox<br />
Operator’s <strong>Manual</strong><br />
Printed in U.S.A.<br />
914-0104 11−2006
Table of Contents<br />
TITLE<br />
SAFETY PRECAUTIONS<br />
PAGE<br />
. . . . . . . . . . . . . . . . . . . . . . . . . . . . . . . . . . . . . . . . . . iii<br />
SECTION 1. INTRODUCTION . . . . . . . . . . . . . . . . . . . . . . . . . . . . . . . . . . . . 1-1<br />
About This <strong>Manual</strong> . . . . . . . . . . . . . . . . . . . . . . . . . . . . . . . . . . . . . . . . . . . . . . 1-1<br />
How to Obtain Service . . . . . . . . . . . . . . . . . . . . . . . . . . . . . . . . . . . . . . . . . . . 1-1<br />
Overview . . . . . . . . . . . . . . . . . . . . . . . . . . . . . . . . . . . . . . . . . . . . . . . . . . . . . . . 1-2<br />
SECTION 2. TRANSPORTATION AND OPERATION . . . . . . . . . . . . . . . . 2-1<br />
Hitch Requirements . . . . . . . . . . . . . . . . . . . . . . . . . . . . . . . . . . . . . . . . . . . . . 2-1<br />
Transporting the JuiceBox . . . . . . . . . . . . . . . . . . . . . . . . . . . . . . . . . . . . . . . . 2-1<br />
Installing the Hitch Spline . . . . . . . . . . . . . . . . . . . . . . . . . . . . . . . . . . . . 2-1<br />
Installing the JuiceBox . . . . . . . . . . . . . . . . . . . . . . . . . . . . . . . . . . . . . . . 2-2<br />
Removing the JuiceBox and Hitch Spline from the Vehicle/Trailer . . . . . . 2-3<br />
JuiceBox Setup . . . . . . . . . . . . . . . . . . . . . . . . . . . . . . . . . . . . . . . . . . . . . . . . . 2-4<br />
Gasoline Fuel System . . . . . . . . . . . . . . . . . . . . . . . . . . . . . . . . . . . . . . . 2-4<br />
Propane Fuel System . . . . . . . . . . . . . . . . . . . . . . . . . . . . . . . . . . . . . . . . 2-6<br />
Preparing the JuiceBox for Transportation (Pack-Up) . . . . . . . . . . . . . . . . 2-7<br />
Gasoline Fuel System . . . . . . . . . . . . . . . . . . . . . . . . . . . . . . . . . . . . . . . 2-7<br />
Propane Fuel System . . . . . . . . . . . . . . . . . . . . . . . . . . . . . . . . . . . . . . . . 2-7<br />
Operation . . . . . . . . . . . . . . . . . . . . . . . . . . . . . . . . . . . . . . . . . . . . . . . . . . . . . . 2-8<br />
Genset Control . . . . . . . . . . . . . . . . . . . . . . . . . . . . . . . . . . . . . . . . . . . . . 2-8<br />
Remote Control . . . . . . . . . . . . . . . . . . . . . . . . . . . . . . . . . . . . . . . . . . . . . 2-8<br />
Battery Charger . . . . . . . . . . . . . . . . . . . . . . . . . . . . . . . . . . . . . . . . . . . . . 2-8<br />
SECTION 3. PARTS INFORMATION . . . . . . . . . . . . . . . . . . . . . . . . . . . . . . 3-1<br />
i
THIS PAGE INTENTIONALLY BLANK<br />
ii
Safety Precautions<br />
Thoroughly read this manual and the generator<br />
set Operator’s <strong>Manual</strong>, Battery Charger <strong>Manual</strong>s,<br />
and EC-15W Instruction Sheet before using<br />
the JuiceBox or operating the generator set.<br />
Safe operation and top performance can be obtained<br />
only when equipment is operated and<br />
maintained properly.<br />
The following symbols in this manual alert you to potential<br />
hazards to the operator, service person and<br />
equipment.<br />
DANGER alerts you to an immediate hazard<br />
which will result in severe personal injury or<br />
death.<br />
WARNING alerts you to a hazard or unsafe<br />
practice which can result in severe personal injury<br />
or death.<br />
CAUTION alerts you to a hazard or unsafe<br />
practice which can result in personal injury or<br />
equipment damage.<br />
Electricity, fuel, exhaust, moving parts, and batteries<br />
present hazards which precautions must be taken<br />
to prevent severe personal injury or death.<br />
GENERAL PRECAUTIONS<br />
When used in conjunction with a recreational<br />
vehicle, a functional CO detector is strongly<br />
recommended.<br />
Keep children away from the JuiceBox and the<br />
generator set.<br />
Keep multi-class ABC fire extinguishers handy.<br />
Class A fires involve ordinary combustible materials<br />
such as wood and cloth; Class B fires,<br />
combustible and flammable liquid fuels and<br />
gaseous fuels; Class C fires, live electrical<br />
equipment. (ref. NFPA No. 10).<br />
Benzene and lead found in some gasolines<br />
have been identified by some state and federal<br />
agencies as causing cancer or reproductive<br />
toxicity. Do not to ingest, inhale, or contact gasoline<br />
or its vapors.<br />
Used engine oil has been identified by some<br />
state and federal agencies as causing cancer<br />
or reproductive toxicity. Do not ingest, inhale, or<br />
contact used oil or its vapors.<br />
Do not store anything on the generator set,<br />
such as oil cans, oily rages, chains, or wooden<br />
bocks. A fire could result or operation could be<br />
adversely affected.<br />
Keep the genset and its compartment clean.<br />
Excess oil can catch fire. Dirt and gear stowed<br />
in the compartment can restrict cooling air.<br />
Do not work on the genset when mentally or<br />
physically fatigued or after consuming alcohol<br />
or drugs.<br />
ENGINE EXHAUST IS DEADLY!<br />
Operate the generator set outdoors only. Stay<br />
away from the exhaust outlet.<br />
Make sure the generator set exhaust will not<br />
enter windows, doors, vents, or air intakes of<br />
adjacent vehicles, buildings, or boats.<br />
NEVER USE THE GENERATOR SET INSIDE<br />
a home, garage, crawl space, barn, shed, cabin,<br />
boat, boat house, RV, or tent. Never use the<br />
generator set in a confined outdoor space such<br />
as an alley, ditch, parking garage, or courtyard,<br />
or in any other space where exhaust can accumulate.<br />
Note that HAZARDOUS CARBON<br />
MONOXIDE LEVELS FROM ENGINE EX-<br />
HAUST CAN ACCUMULATE INDOORS<br />
EVEN WHEN ALL WINDOWS AND DOORS<br />
ARE OPEN AND FANS ARE RUNNING.<br />
iii
FUEL IS FLAMMABLE AND EXPLOSIVE!<br />
Gasoline and LPG are highly flammable and<br />
explosive and can cause severe personal injury<br />
or death. Do not smoke or turn electrical<br />
switches ON or OFF where fuel fumes, tanks or<br />
equipment are present. Keep flames, sparks,<br />
pilot lights, arc-producing equipment and<br />
switches and all other sources of ignition well<br />
away. Keep a type ABC fire extinguisher handy.<br />
Refill the fuel tank outdoors only.<br />
Never fill the fuel tank while it is connected to<br />
the generator set.<br />
DO NOT fill the fuel tank while the engine is running.<br />
A hot engine can ignite the fuel.<br />
Static electric sparks caused by fuel flowing<br />
through a service station pump nozzle can ignite<br />
gasoline. Set the fuel tank on the ground<br />
and slowly fill it.<br />
Do not smoke or allow an open flame near the<br />
generator set. Keep flame, sparks, pilot lights,<br />
arc-producing equipment and switches and all<br />
other sources of ignition well away.<br />
Fuel lines must be secured, free of leaks, and<br />
separated or shielded from electrical wiring.<br />
Leaks can lead to explosive accumulations of<br />
gas. LPG sinks when released and can accumulate<br />
inside housings and basements and<br />
other below-grade spaces. Prevent leaks and<br />
the accumulation of gas.<br />
GENERATOR VOLTAGE IS DEADLY!<br />
DO NOT CONNECT THE GENERATOR SET<br />
DIRECTLY TO ANY BUILDING ELECTRICAL<br />
SYSTEM OR ANY OTHER SOURCE OF<br />
ELECTRICAL POWER. Back-feed could<br />
cause electrocution of utility line workers and<br />
damage to equipment. An approved switching<br />
device must be used to prevent interconnections.<br />
A trained and experienced electrician<br />
must make electrical connections when the<br />
generator set is used for emergency power.<br />
Never operate the generator set in rain or snow<br />
or when it is sitting on wet ground.<br />
Make sure clothing, shoes, and skin are dry<br />
when handling electrical equipment.<br />
Use caution when working on live electrical<br />
equipment. Remove jewelry, make sure clothing<br />
and shoes are dry, stand on a dry wooden<br />
platform or rubber insulating mat and use tools<br />
with insulated handles.<br />
MOVING PARTS CAN CAUSE SEVERE<br />
PERSONAL INJURY OR DEATH<br />
Before performing any maintenance on the<br />
generator set, disconnect the negative (−)<br />
cable from the battery and disconnect the remote<br />
harness cable at the genset to prevent accidental<br />
starting.<br />
Do not wear loose clothing or jewelry while servicing<br />
the generator set. Loose clothing and<br />
jewelry can become caught in moving parts.<br />
Jewelry can short out electrical contacts, causing<br />
sparks, flame, and electrical shock.<br />
Keep hands away from moving parts.<br />
Keep guards in place over fans, belts, pulleys,<br />
and other moving parts.<br />
Make sure that fasteners and clamps on the<br />
generator set are tight. Keep guards in position<br />
over fans, rotors, etc.<br />
BATTERY GAS IS EXPLOSIVE<br />
Wear safety glasses when servicing batteries.<br />
Do not smoke.<br />
To reduce arcing when disconnecting or reconnecting<br />
battery cables, always disconnect the<br />
negative (−) battery cable first and reconnect it<br />
last.<br />
iv
Section 1. Introduction<br />
ABOUT THIS MANUAL<br />
This manual provides information for operating and<br />
maintaining the JuiceBox.<br />
A separate genset Operator’s <strong>Manual</strong> is included<br />
with each unit. It contains information on operating<br />
and maintaining the generator set. Separate documents<br />
are also included for the Energy Command<br />
ED-15W wireless remote control and the battery<br />
charger. Study all manuals carefully and comply<br />
with all warnings and cautions before disconnecting/connecting<br />
the JuiceBox from/to the vehicle’s<br />
hitch or operating the equipment inside of the Juice-<br />
Box.<br />
Because the JuiceBox includes an installed generator<br />
set, this manual supersedes the installation instructions<br />
included in the genset Installation <strong>Manual</strong>.<br />
NOTE: When checking the oil level in the generator,<br />
make sure the generator is level to get the<br />
most accurate reading. Checking the oil level<br />
when the JuiceBox is setting on an uneven<br />
surface or when it is connected to the<br />
vehicle’s hitch and lifted off of the ground will<br />
not give an accurate reading and may result<br />
in oil running out of the dipstick hole. If the<br />
JuiceBox is connected to the vehicle’s hitch<br />
and lifted off of the ground, move the vehicle<br />
to a location with the appropriate incline so<br />
that the generator is level before checking<br />
the oil level.<br />
See Section 3 of this manual for parts identification<br />
numbers and required quantities and for exploded<br />
views of the JuiceBox subassemblies. Genuine<br />
<strong>Onan</strong>® replacement parts are recommended for<br />
best results.<br />
HOW TO OBTAIN SERVICE<br />
When the JuiceBox or the generator set requires<br />
service, contact your nearest dealer or distributor.<br />
Factory-trained Parts and Service representatives<br />
are ready to handle all your service needs.<br />
A copy of the warranty form is in the literature package<br />
included with each unit. A generator service<br />
manual is available on special order through an<br />
<strong>Onan</strong> dealer or distributor.<br />
When contacting an authorized service center concerning<br />
genset parts or service issues, supply the<br />
complete model number and serial number listed<br />
on the nameplate (Figure 1-1).<br />
WARNING Improper service or replacement of<br />
parts can lead to severe personal injury or death<br />
and to damage to equipment and property. Service<br />
personnel must be qualified to perform<br />
electrical and mechanical service.<br />
[THE ENGINE FAMILY DESIGNATION, ENGINE DISPLACEMENT,<br />
STATEMENT OF COMPLIANCE WITH THE APPLICABLE EPA<br />
AND / OR CALIFORNIA EMISSIONS REGULATIONS, INCLUDING<br />
THE COMPLIANCE PERIOD OR CATEGORY, APPEAR IN THIS<br />
BLOCK ON THE ACTUAL NAMEPLATE ON THE GENSET.]<br />
Copyright 2006 <strong>Cummins</strong> Power Generation. All rights reserved.<br />
<strong>Onan</strong> is a registered trademark of <strong>Cummins</strong> Inc.<br />
JuiceBox is a trademark of <strong>Cummins</strong> Inc.<br />
FIGURE 1-1. TYPICAL NAMEPLATE<br />
1-1
OVERVIEW<br />
The JuiceBox (see Figure 1-2) is a self-contained,<br />
hitch-mounted towable portable power source that<br />
includes the following.<br />
• MicroQuiet 4000 KY (gasoline) or 3600 KY<br />
(LP) Generator Set − Refer to the separate<br />
generator set Owner’s <strong>Manual</strong> for details.<br />
The JuiceBox includes a genset that uses<br />
either gasoline or liquid propane.<br />
• Fuel System − Includes a fuel line and one of<br />
the following.<br />
− Gasoline Tank<br />
− Propane Regulator, Hose, and Propane<br />
Cylinder Holder<br />
• Battery Box secured with a strap<br />
• Cable Hatches − One hatch is to be used for<br />
the fuel line and the other one is to be used<br />
for all electrical connections.<br />
• JuiceBox Enclosure − Includes the hitch assembly<br />
and cable hatches.<br />
• Telescoping Legs (Landing Gear) − Short<br />
and long versions<br />
• Hitch Assembly − Includes the hitch spline<br />
and the hitch frame subassemblies.<br />
• Control Panel − Includes the following (see<br />
Figure 1-3).<br />
− 30 amp receptacle<br />
− Two 20 amp 120 volt GFI protected outlets<br />
− Two 20 amp 120 volt outlets<br />
− Circuit breaker<br />
− Genset Start/Stop switch<br />
− Hour meter<br />
− 5 amp DC breaker (EC-15W)<br />
− 30 amp DC breaker (charger)<br />
− 6 amp battery charger<br />
− EC-15W remote start<br />
− Grounding terminal (Connection for<br />
Earth ground/bonding)<br />
The following components are not supplied with the<br />
JuiceBox.<br />
• Group 26 with 525 CCA battery<br />
• Propane tank (for propane gensets)<br />
1-2
GASOLINE<br />
TANK<br />
CONTROL<br />
PANEL<br />
BATTERY BOX<br />
AND BATTERY<br />
ENCLOSURE<br />
HATCHES<br />
HITCH<br />
ASSEMBLY<br />
PROPANE<br />
CYLINDER<br />
HOLDER<br />
GENERATOR<br />
SET<br />
TELESCOPING<br />
LEGS<br />
FIGURE 1-2. JUICEBOX<br />
30 AMP<br />
OUTLET FOR<br />
TRAILER CORD<br />
CIRCUIT<br />
BREAKER<br />
GENSET<br />
START/STOP<br />
SWITCH<br />
5 AMP<br />
DC BREAKER<br />
(REMOTE)<br />
BATTERY<br />
CHARGER<br />
STATUS LEDs<br />
GROUND<br />
TERMINAL<br />
20 AMP 120<br />
VOLT GFI<br />
PROTECTED<br />
OUTLETS<br />
20 AMP<br />
120 VOLT<br />
OUTLETS<br />
HOUR<br />
METER<br />
30 AMP<br />
DC BREAKER<br />
(CHARGER)<br />
FIGURE 1-3. CONTROL PANEL<br />
1-3
THIS PAGE INTENTIONALLY BLANK<br />
1-4
Section 2. Transportation and Operation<br />
HITCH REQUIREMENTS<br />
The following hitch criteria requirements must be<br />
met prior to installing the JuiceBox on a travel<br />
trailer or 5 th wheel.<br />
• Verify with your trailer manufacturer prior to<br />
use that the JuiceBox can safely be used to<br />
transport the weight of the JuiceBox (360 lbs)<br />
when it is mounted on the rear of the trailer.<br />
• Consult with a professional hitch installer to<br />
verify that proper tongue weight for trailers<br />
and 5 th wheel hitch weights can be maintained<br />
when towing.<br />
• The trailer or 5 th wheel must be at minimum<br />
26 feet long.<br />
• The trailer or 5 th wheel must weigh a minimum<br />
of 6000 pounds.<br />
• A 2-inch receiver Class III hitch is properly<br />
installed. If a 2-inch receiver hitch is not<br />
installed, consult a professional hitch installer<br />
to have one installed.<br />
CAUTION Due to the wide variety of RV frame<br />
configurations and materials of construction, it<br />
is the buyer’s responsibility to verify that both<br />
the hitch installer and the towable manufacturer<br />
validate that the structural integrity of the hitch<br />
installation as suitable to support a 360-lb load.<br />
The failure to make that determination can result<br />
in property damage and/or personal injury.<br />
TRANSPORTING THE JUICEBOX<br />
The JuiceBox is designed to be transported behind<br />
a vehicle or trailer. The hitch assembly fits a 2-inch<br />
size receiver style hitch and requires a minimum of<br />
a Class III tow rating.<br />
Before the JuiceBox can be transported, the hitch<br />
spline must be installed on the hitch and then the<br />
JuiceBox must be installed on the hitch spline.<br />
Installing the Hitch Spline<br />
The Silent Hitch Pins included with the hitch frame<br />
assembly are designed to prevent inherent rattle<br />
that can occur when placed into the receiver hitch.<br />
One hitch pin secures the hitch spline assembly<br />
(see Figure 2-1) to the receiver hitch and the pin clip<br />
is used to secure the pin. The other hitch pin assembly<br />
secures the hitch spline assembly to the hitch<br />
frame assembly. Both Silent Hitch Pin assemblies<br />
must be properly installed before transporting the<br />
JuiceBox.<br />
FIGURE 2-1. THE HITCH SPLINE<br />
WARNING Separation of the JuiceBox from<br />
the vehicle’s hitch while transporting it can result<br />
is severe personal injury or death and<br />
equipment damage. Always make sure that the<br />
JuiceBox hitch assembly is securely attached<br />
to the vehicle’s hitch before transporting the<br />
JuiceBox. The Silent Hitch Pins must be firmly<br />
tightened to work properly. Make sure you use<br />
the hex head Silent Hitch Pin to attach the shank<br />
to the receiver hitch and use a wrench to securely<br />
tighten it.<br />
1. Orient the shank with the two 5/8” holes toward<br />
the receiver hitch on the vehicle.<br />
2. Insert the spring nut from the Silent Hitch Pin<br />
assembly into the shank and line it up with the<br />
selected shank hole (see Figure 2-2),<br />
NOTE: Use the bolt hole in the shank that<br />
places the hitch frame assembly as<br />
close to your vehicle as possible. If<br />
more clearance is needed, use the last<br />
hole in the shank.<br />
JuiceBox and Energy Command are trademarks of <strong>Cummins</strong> Inc.<br />
Silent Hitch Pin is a trademark of Let’sGoAero Gear Management<br />
Solutions.<br />
2-1
SHANK<br />
RUB TOP, SIDES,<br />
AND CORNERS WITH<br />
PARAFFIN WAX<br />
FIXED TUBES<br />
SPRING<br />
NUT<br />
USE THE SECOND<br />
HOLE UNLESS MORE<br />
CLEARANCE IS REQUIRED<br />
BETWEEN THE JUICEBOX AND<br />
THE REAR OF THE VEHICLE<br />
FIGURE 2-2. INSTALLING THE SPRING NUT<br />
3. Slide the shank with the installed spring nut into<br />
the vehicle hitch and line up the shank’s bolt<br />
holes with the hole in the hitch (see Figure 2-3).<br />
Make sure the washer is on the Silent Hitch Pin<br />
and thread it into the threaded spring nut.<br />
PIN CLIP<br />
SHANK<br />
RECEIVER<br />
HITCH<br />
WASHER<br />
SILENT<br />
HITCH PIN<br />
FIGURE 2-3. INSTALLING THE HITCH PIN AND PIN<br />
CLIP<br />
FIGURE 2-4. APPLYING PARAFFIN WAX<br />
2. Adjust the height of the telescoping legs until<br />
the JuiceBox hitch assembly aligns with the vehicle<br />
hitch receiver.<br />
CAUTION Lifting the JuiceBox can result<br />
in personal injury or equipment damage.<br />
The JuiceBox weighs approximately 360<br />
pounds. Use lifting equipment to lift and<br />
move the JuiceBox.<br />
3. Slide the JuiceBox onto the hitch spline (see<br />
Figure 2-5).<br />
4. If desired, adjust the position of the enclosure<br />
along the telescoping tubes. The enclosure<br />
can be moved an additional six inches from<br />
your vehicle (see Figure 2-6). Before transporting<br />
the JuiceBox, always position the JuiceBox<br />
as close to the vehicle as possible.<br />
4. Use a wrench to securely tighten the Silent<br />
Hitch Pin to 30−60 ft-lbs (41−81 Nm) of torque.<br />
5. Install the pin clip on the end of the Silent Hitch<br />
Pin.<br />
Installing the JuiceBox<br />
1. Rub the top, sides, and corners of the spine’s<br />
fixed tubes with Paraffin wax (see Figure 2-4).<br />
This reduces friction, provides telescope<br />
smoothness, and protects the powder coated<br />
paint from wear. Applying Paraffin wax results<br />
in clean, hassle-free operation. Once applied,<br />
it stays put and stays clean.<br />
6 3/4”<br />
TELESCOPE<br />
9 1/4”<br />
REAR CLEAR<br />
INSTALLED<br />
STANDARD LEG VERSION = 14−20 INCHES<br />
SHORT LEG VERSION = 10−16 INCHES<br />
FIGURE 2-5. INSTALLING THE JUICEBOX<br />
2-2
SILENT HITCH<br />
PIN ASSEMBLY<br />
PIN CLIP<br />
SILENT<br />
HITCH PIN<br />
6” RANGE OF MOTION<br />
ALONG TUBE TO ADJUST<br />
REAR CLEARANCE<br />
FIGURE 2-6. ADJUSTING THE JUICEBOX<br />
POSITION<br />
5. Make sure the holes of the spine tubes line up<br />
with the mating telescope safety pin hole of the<br />
telescope tubes (see Figure 2-7).<br />
NYLON<br />
BUSHING<br />
FIGURE 2-8. SECURING THE JUICEBOX<br />
TELESCOPE<br />
TUBES<br />
SPLINE ASSEMBLY<br />
TUBES<br />
FIGURE 2-9. INSTALLING THE SAFETY CABLE<br />
HOLES MUST ALIGN<br />
FIGURE 2-7. TUBE ALIGNMENT<br />
WARNING Separation of the JuiceBox<br />
from the hitch spline while transporting it<br />
can result is severe personal injury or death<br />
and equipment damage. The hand-tighten<br />
Silent Hitch Pin must be firmly secured in<br />
the telescope safety pin hole before transit.<br />
6. Secure the frame assembly to the spline assembly<br />
using the Silent Hitch Pin assembly<br />
(hitch pin, nylon bushing, and pin clip − see Figure<br />
2-8). Thread the Hand Tighten Silent Hitch<br />
Pin into the spring nut and install the pin clip.<br />
7. Attach the safety cable from the V-plate to the<br />
cable retainer (see Figure 2-9).<br />
8. Retract, fold, and secure the telescoping legs.<br />
WARNING Fuel presents the hazard of fire<br />
or explosion that can result in severe personal<br />
injury or death. Do not store or transport<br />
fuel inside a vehicle, inside the Juice-<br />
Box, or behind a vehicle/RV bumper.<br />
9. Make sure all loose items (fuel tank, etc.) are<br />
secured in a safe location, in compliance with<br />
DOT requirements.<br />
REMOVING THE JUICEBOX AND HITCH<br />
SPLINE FROM THE VEHICLE/TRAILER<br />
Landing Gear legs with swivel casters are designed<br />
to provide temporary support during transfer of the<br />
JuiceBox assembly from an RV to another vehicle<br />
or when storing the JuiceBox. Use of the landing<br />
gear should be on a hard, level surface such as a<br />
driveway. Four swivel casters enable good maneuverability<br />
for transfer through narrow passageways<br />
and orientation for hitch alignment. Be sure to move<br />
the unit slowly with particular attention to wheel<br />
position.<br />
2-3
CAUTION Moving the JuiceBox improperly<br />
when the telescoping legs are extended and it is<br />
detached from the vehicle can result in equipment<br />
damage and/or personal injury. To avoid<br />
tipping the unit, make sure the wheels are turning<br />
in the intended direction before pushing or<br />
pulling the unit. Do not push or pull the Juice-<br />
Box in a direction at right angles to the wheel<br />
alignment. Make gradual turns. Do not attempt<br />
to roll the JuiceBox over loose gravel, sand, debris,<br />
or turf. Once in the desired location, chock<br />
the wheels to prevent accidental movement.<br />
A video that demonstrates the recommended Landing<br />
Gear procedure is available on www.onan.com/<br />
onan/rvgenerators/juiceboxdemo.jsp.<br />
The JuiceBox can be left on the vehicle or trailer for<br />
usage. The following steps are necessary only if<br />
you wish to move the JuiceBox to another location.<br />
1. Park your vehicle close to where you wish to<br />
operate the JuiceBox.<br />
2. Extend and unfold the telescoping legs. Lock<br />
them into position. Insert one or both of the provided<br />
leg handle(s) and use it/them to lower the<br />
legs to ground level to take the weight off of the<br />
hitch.<br />
FIGURE 2-10. LEG ADJUSTMENT<br />
3. Disconnect the safety cable from the cable retainer<br />
(see Figure 2-9).<br />
4. Remove the Silent Hitch Pin assembly securing<br />
the frame assembly to the spline assembly<br />
(see Figure 2-8).<br />
CAUTION Lifting the JuiceBox can result<br />
in personal injury or equipment damage.<br />
The JuiceBox weighs approximately 360<br />
pounds (162 kg). Use lifting equipment to<br />
lift and move the JuiceBox.<br />
WARNING Severe personal injury or death<br />
can result from breathing carbon monoxide.<br />
Make sure the JuiceBox is not placed<br />
near any vehicle, building, or any confined<br />
space.<br />
5. Slide the JuiceBox off of the hitch spline and<br />
position it on a flat dry surface.<br />
6. Remove the pin clip from the end of the Silent<br />
Hitch Pin securing the hitch spline to the receiver<br />
hitch.<br />
7. Remove the Silent Hitch Pin and washer.<br />
8. Remove the hitch spline assembly.<br />
JUICEBOX SETUP<br />
WARNING Severe personal injury or death can<br />
result from breathing carbon monoxide. Exhaust<br />
heat can ignite fuel, resulting in severe<br />
personal injury or death and equipment damage.<br />
Before The JuiceBox can be used, some items<br />
must be assembled. Depending on your fuel system,<br />
follow the steps listed on the following page.<br />
When you are ready to transport the JuiceBox,<br />
these items must be disconnected and safely<br />
stored away.<br />
WARNING The JuiceBox is designed to be<br />
transported from one location to another. It is<br />
not intended for home use or continuous use at<br />
one location. Do not make any permanent fuel<br />
connections. Do not make any permanent electrical<br />
(AC/DC) connections between the vehicle<br />
and the JuiceBox.<br />
Gasoline Fuel System<br />
1. Open the JuiceBox cover.<br />
2. Install an Earth-grounding rod and wire in accordance<br />
to national and local codes. Connect<br />
a 12 gauge wire from the ground terminal on<br />
the control panel, through the electrical hatch<br />
(see Figure 2-11), to a rod that is driven into the<br />
ground.<br />
2-4
ELECTRICAL<br />
HATCH<br />
FUEL<br />
HATCH<br />
FIGURE 2-11. ELECTRICAL AND FUEL HATCHES<br />
3. If not already installed, install a Group 26 with<br />
525 CCA battery in the battery box. Connect<br />
the genset battery cables to the battery, cover<br />
the box, and use the strap to secure the battery<br />
box.<br />
CAUTION Make sure the battery is secured<br />
to the deck inside the Juice Box. Failure<br />
to securely strap the battery can result<br />
in damage to several internal components<br />
and the clamshell enclosure.<br />
NOTE: The battery is not supplied with the JuiceBox.<br />
4. Run the gas line through the fuel hatch in the<br />
enclosure base (see Figure 2-11).<br />
5. Connect the fuel line to the gas container using<br />
the quick connect (see Figure 2-12).<br />
FIGURE 2-12. FUEL CONNECTION<br />
2-5
WARNING Fuel presents the hazard of fire<br />
or explosion that can result in severe personal<br />
injury or death. Make sure the fuel<br />
tank is placed as far away from the Juice-<br />
Box as the fuel hose will allow. Do not place<br />
the fuel tank under the JuiceBox enclosure<br />
where exhaust heat can ignite the fuel!<br />
6. Place the fuel tank to the left of the fuel hatch.<br />
7. Open the vent on the fuel tank.<br />
8. Run the electrical cable(s) from the RV or appliances<br />
through the electrical hatch and plug<br />
them into the appropriate outlets (see Figure<br />
2-13).<br />
9. The generator can be started or stopped<br />
manually or with the EC-15W remote control.<br />
10. Close the JuiceBox cover when the generator<br />
is running.<br />
FIGURE 2-13. ELECTRICAL CONNECTION<br />
Propane Fuel System<br />
1. Open the JuiceBox cover.<br />
2. Install an Earth-grounding rod and wire in accordance<br />
to national and local codes. Connect<br />
a 12 gauge wire from the ground terminal on<br />
the control panel, through the electrical hatch<br />
(see Figure 2-11), to a rod that is driven into the<br />
ground.<br />
3. If not already installed, install a Group 26 with<br />
525 CCA battery. Connect the genset battery<br />
cables to the battery, cover the box, and use<br />
the strap to secure the battery box.<br />
CAUTION Make sure the battery is secured<br />
to the deck inside the Juice Box. Failure<br />
to securely strap the battery can result<br />
in damage to several internal components<br />
and the clamshell enclosure.<br />
NOTE: The battery is not supplied with the<br />
JuiceBox.<br />
4. Run the propane line through the fuel hatch in<br />
the enclosure base (see Figure 2-11).<br />
CAUTION Liquid propane tanks can tip<br />
over easily, resulting in personal injury and<br />
equipment damage. Make sure the LP tank<br />
is secured from tipping over when in use.<br />
5. Set the propane cylinder holder on a flat surface<br />
and secure the customer-supplied propane<br />
tank in the propane cylinder holder.<br />
6. Connect the propane regulator to the tank.<br />
WARNING Fuel presents the hazard of fire<br />
or explosion that can result in severe personal<br />
injury or death. If any leaks are detected,<br />
have them corrected immediately.<br />
Do not start the generator set until fuel and<br />
fumes are purged from the area.<br />
7. Connect the propane hose to the tank using the<br />
quick connect.<br />
8. Open the propane valve.<br />
9. Check for any fuel leaks and, if needed, correct<br />
them.<br />
NOTE: Propane tanks have an automatic shutoff<br />
when tipped on the side.<br />
10. Run the electrical cable(s) from the RV or appliances<br />
through the electrical hatch and plug<br />
them into the appropriate outlets.<br />
11. The generator can be started or stopped<br />
manually or with the EC-15W remote control.<br />
12. Close the JuiceBox cover when the generator<br />
is running.<br />
NOTE: When propane is not being used, turn off the<br />
valve on the LPG tank.<br />
2-6
PREPARING THE JUICEBOX FOR TRANSPORTATION (PACK-UP)<br />
Gasoline Fuel System<br />
1. Open the JuiceBox cover.<br />
2. Turn the generator off, either manually or with<br />
the EC-15W remote control.<br />
3. Disconnect all power cords/cables from the<br />
outlets and pull them out through the electrical<br />
hatch.<br />
4. Close the vent on the fuel tank.<br />
5. Disconnect the fuel line from the gas container.<br />
Pull the fuel line up through the fuel hatch and<br />
store it inside the JuiceBox.<br />
6. Uninstall the Earth-grounding rod and wire.<br />
7. Close both hatches.<br />
WARNING Storing loose items inside of<br />
the JuiceBox can result in serious personal<br />
injury or death and equipment damage. Do<br />
not store fuel, rags, or any other loose<br />
items inside the JuiceBox.<br />
8. Remove all loose items from inside of the JuiceBox.<br />
9. Close and use both latches to secure the Juice-<br />
Box cover.<br />
10. If the JuiceBox was removed from the vehicle<br />
or trailer,<br />
a. Install the hitch spline on the vehicle or<br />
trailer as described on page 2-1.<br />
b. Move the JuiceBox as close to the vehicle<br />
hitch receiver as possible and follow the<br />
JuiceBox installation procedure on page<br />
2-2.<br />
Propane Fuel System<br />
1. Open the JuiceBox cover.<br />
2. Turn the generator off, either manually or with<br />
the EC-15W remote control.<br />
3. Disconnect all power cords/cables from the<br />
outlets and pull them out through the electrical<br />
hatch.<br />
4. Close the propane valve on the LPG tank.<br />
5. Disconnect the hose from the propane tank.<br />
6. Disconnect the propane regulator from the<br />
tank.<br />
7. Cover the hose ends to keep out dirt.<br />
8. Pull the hose up through the fuel hatch and<br />
store it inside the JuiceBox.<br />
9. Uninstall the Earth-grounding rod and wire.<br />
10. Close both hatches.<br />
WARNING Storing loose items inside of<br />
the JuiceBox can result in serious personal<br />
injury or death and equipment damage. Do<br />
not store fuel, rags, or any other loose<br />
items inside the JuiceBox.<br />
11. Remove all loose items from inside of the<br />
JuiceBox.<br />
12. Close and use both latches to secure the Juice-<br />
Box cover.<br />
13. If the JuiceBox was removed from the vehicle<br />
or trailer,<br />
a. Install the hitch spline on the vehicle or<br />
trailer as described on page 2-1.<br />
b. Move the JuiceBox as close to the vehicle<br />
hitch receiver as possible and follow the<br />
JuiceBox installation procedure on page<br />
2-2.<br />
2-7
OPERATION<br />
WARNING Engine exhaust is deadly! Severe<br />
personal injury or death can result from breathing<br />
carbon monoxide. Make sure your recreational<br />
vehicle/trailer is equipped with a functioning<br />
CO detector.<br />
CAUTION Generator set exhaust, contact with<br />
electricity, and contact with hot components<br />
can cause personal injury and equipment damage.<br />
Do not allow children to play under or near<br />
the JuiceBox.<br />
• Charging − This LED is lit when the battery is<br />
charging.<br />
NOTE: In order to maintain an appropriate charge<br />
on the battery, avoid multiple short-run<br />
durations with the generator. Let the generator<br />
run for a minimum of 10 to 15 minutes at<br />
a time to allow the starting battery to recharge.<br />
Follow the battery manufacturer’s<br />
recommendations on maintaining the battery.<br />
It is strongly recommended that there is a functioning<br />
CO detector within a recreational vehicle (living<br />
quarters) when using the JuiceBox.<br />
Once the JuiceBox is set up, the trailer’s shore cord<br />
can be plugged into the JuiceBox, appliances can<br />
be plugged in, and the JuiceBox can be used. Bring<br />
all wire connections up through the electrical hatch<br />
before plugging them into an outlet.<br />
NOTE: Do not put any wiring through the fuel hatch.<br />
Genset Control<br />
FIGURE 2-14. GENSET CONTROL<br />
The genset control consists of a Start/Stop/Prime<br />
switch and an hour meter (see Figure 2-14). For<br />
more information, refer to the generator set Operator’s<br />
<strong>Manual</strong>.<br />
Remote Control<br />
The Energy Command 15W (EC-15W) remote<br />
control consists of a receiver that is wired to the<br />
genset and a detached transmitter (see Figure<br />
2-15) that is used to remotely start and stop the genset.<br />
For more information, see Instruction Sheet<br />
C690.<br />
LED<br />
STOP<br />
BUTTON<br />
START<br />
BUTTON<br />
NOT USED<br />
Battery Charger<br />
To use the six amp battery charger, plug it into one<br />
of the 120 volt outlets. Three LEDs on the control<br />
panel are available to indicate the charging status<br />
(see Figure 2-16). For more information, see the<br />
manufacturer’s battery charger Owner’s <strong>Manual</strong>.<br />
FIGURE 2-15. REMOTE CONTROL TRANSMITTER<br />
• Full Charge − This LED is lit when the battery<br />
is fully charged. Unplug the battery charger.<br />
• Check Connection − This LED lights if there<br />
are any problems with charging the battery.<br />
Check for loose connections. If it will not<br />
charge, replace the battery.<br />
FIGURE 2-16. BATTERY CHARGER LEDS<br />
2-8
Section 3. Parts Information<br />
1<br />
7<br />
2<br />
4<br />
3<br />
5<br />
14<br />
13<br />
FIGURE 5-1. JUICEBOX ENCLOSURE<br />
REF PART QTY PART REF PART QTY PART<br />
NO. NO. USED DESCRIPTION NO. NO. USED DESCRIPTION<br />
1 019−01010 1 Enclosure<br />
2 019−01016 1 Control Panel (See Figure 5-3)<br />
3 1 Mounting System (See Figure<br />
5-2)<br />
019−01014 1 Short Leg Version<br />
019−01015 1 Long Leg Version<br />
4 Genset<br />
002−00023 1 4KYFA26100 − Gasoline<br />
002−00011 1 3.6KYFA26120 − LP<br />
5 019−01019 1 Fuel Tank<br />
6 019−01017 1 LPG Fuel System<br />
7 019−00118 1 Channel, Mounting<br />
8 019−00105 2 Hinge<br />
9 019−00119 1 Seal, Rubber<br />
10 019−00107 2 Latch<br />
11 050−00032 2 Fitting, Kwik Connect − Fuel<br />
(1/4 Inch)<br />
12 038−00152 1 Hose, Gasoline Fuel (54 Inch)<br />
13 019−00122 2 Leg Adjustment Handle<br />
14 019−00145 1 Holder, Propane Cylinder<br />
3-1
3<br />
4<br />
1<br />
5<br />
2<br />
5<br />
FIGURE 5-2. MOUNTING SYSTEM<br />
REF PART QTY PART REF PART QTY PART<br />
NO. NO. USED DESCRIPTION NO. NO. USED DESCRIPTION<br />
1 019−01011 1 Base, Enclosure (Deck)<br />
2 019−01018 1 Shield, Heat (Exhaust)<br />
3 019−00137 1 Box, Battery<br />
4 019−00111 2 Hatch, Cable<br />
5 Hitch Spline and Landing<br />
Gear Assembly<br />
019−01015 1 With Standard Legs<br />
019−01014 1 With Short Legs<br />
3-2
4<br />
1<br />
12<br />
7<br />
7<br />
2<br />
16<br />
14<br />
9<br />
15<br />
5 3<br />
8<br />
7<br />
6<br />
13 10<br />
11<br />
13<br />
18<br />
17<br />
FIGURE 5-3. CONTROL PANEL<br />
REF PART QTY PART REF PART QTY PART<br />
NO. NO. USED DESCRIPTION NO. NO. USED DESCRIPTION<br />
1 019−00103 1 Panel, Display<br />
2 019−00112 1 Label, Control Panel<br />
3 019−00102 1 Bracket, Battery Charger<br />
4 019−00101 1 Guard, Electrical<br />
5 019−00109 1 Circuti Breaker, 5 Amp<br />
6 019−00110 1 Circuit Breaker, 30 Amp<br />
7 019−00150 10 Nut, SEMS w/ ET (#10−32)<br />
8 019−00136 1 Charger, Battery<br />
9 320−1321 1 Breaker, Circuit − 20 Amp<br />
10 019−00156 2 Washer, Flat<br />
11 019−00153 4 Screw, Machine − Round<br />
Head (6-32 x 3/8”)<br />
12 019−00147 1 Outlet, Shore Power<br />
13 019−00155 6 Screw, Machine −Slotted<br />
Round Head (10-32 x 1/2”)<br />
14 019−00160 1 Outlet, Duplex (20 Amp GFI)<br />
15 019−00161 1 Outlet, Duplex<br />
16 332−1572 1 Terminal, Solderless (Ground)<br />
17 028−00020 1 Panel, Control<br />
18 019−00169 1 Kit, Remote Control (EC-15W)<br />
19 044−00003 1 Harness, Remote<br />
3-3
THIS PAGE INTENTIONALLY BLANK<br />
3-4
<strong>Cummins</strong> Power Generation<br />
1400 73rd Avenue N.E.<br />
Minneapolis, MN 55432<br />
763-574-5000<br />
Fax: 763-528−7229<br />
<strong>Cummins</strong> and <strong>Onan</strong> are registered trademarks of <strong>Cummins</strong> Inc.


