TRUTH CAM 60 Instruction Booklet.indd - SuperJagd
TRUTH CAM 60 Instruction Booklet.indd - SuperJagd
TRUTH CAM 60 Instruction Booklet.indd - SuperJagd

You also want an ePaper? Increase the reach of your titles
YUMPU automatically turns print PDFs into web optimized ePapers that Google loves.
Before Operation<br />
Quick Start<br />
Initial Camera Setup<br />
Camera Menu Options<br />
(Detailed Description)<br />
Other Features/<br />
Functions<br />
Recommended<br />
Accessories<br />
Operating Tips<br />
! PLEASE READ CAREFULLY BEFORE USE<br />
Additional information on this product and<br />
answers to frequently asked questions<br />
can be found at www.primos.com<br />
Customer Service &<br />
Warranty<br />
© 2010 Primos ® Hunting Calls
IMPORTANT<br />
For your protection, please carefully read these warnings, precautions and safety/operating<br />
instructions completely before operating the camera. Follow these instructions closely and<br />
keep this manual for future reference.<br />
WARNING<br />
To reduce the risk of fire, electrical shock or product damage/failure,<br />
- Do not expose unit with the door open to rain, moisture, dripping or splashing. Do not open<br />
or close the camera door with wet hand. Completely wipe off water on camera and camera<br />
door before opening.<br />
- Do not lay product on moist ground or submerge in water (this unit is designed for vertical,<br />
upright outdoor use)<br />
- DO NOT OPEN CASE HOUSING. UNINSULATED, ‘DANGEROUS VOLTAGE’ WITHIN PRODUCTS<br />
ENCLOSURE. DO NOT REMOVE FRONT OR BACK HOUSING COVER. THERE ARE NO USER<br />
- SERVICEABLE PARTS INSIDE, REFER SERVICING TO PRIMOS ® CUSTOMER SERVICE.<br />
- Only use batteries as specified in this user manual and install according to correct<br />
polarization. Failure to follow may result in leaking or exploding batteries, damage to camera,<br />
fire or personal injury. Do not handle damaged or leaking batteries.<br />
- Do not expose to extreme heat. Do not leave product and/or batteries exposed in direct<br />
sunlight inside a vehicle, or other contained environment for a long period of time.<br />
- Only use accessories as recommended in this manual<br />
CARE & CAUTION<br />
- Transport and handle with care. Do not strongly shake, bump, hit, drop or otherwise<br />
cause impact to the camera – can result in camera malfunction, damage to lens, sensor,<br />
LCD screen, or other key components. Additionally, damage to the case could result in<br />
imperfections to water-resistant properties.<br />
- Take extra care when handling or using camera in places with sand and dust. Sand, dust and<br />
foreign substances exposed to camera lens, PIR sensor, LED array and/or the internal door<br />
panel components may result in poor picture quality or malfunction of camera. If exposed to<br />
any of these elements, please carefully wipe off completely before continued use.<br />
MODIFICATION WARNING<br />
You are cautioned that any changes or modifications not expressly approved in this manual<br />
could void your warranty of this equipment.<br />
OPERATING TEMPERATURE<br />
- Recommended storage temperature range 20 0 F to 100 0 F<br />
- Recommended operating temperature range -10 0 F to 130 0 F<br />
IMPORTANT RETURN POLICY<br />
Please contact the Primos ® Customer Service Team with any comments, questions,<br />
problems or return requests. Call (<strong>60</strong>1) 879-9323 or email service@primos.com.<br />
RETURN THIS PRODUCT TO PRIMOS ® HUNTING CALLS <br />
DO NOT SEND BACK TO THE STORE<br />
TIP: Visiting www.primos.com/TruthCam and watching<br />
our <strong>Instruction</strong>al Video Clips is the “easiest way” to<br />
learn “How To Use” your <strong>TRUTH</strong> ® Camera!<br />
(Note: Also available is frequently asked questions and answers,<br />
as well as any updates.)<br />
<strong>Instruction</strong>s<br />
Simple to Use<br />
Simple to Understand<br />
Video Clips<br />
www.primos.com/TruthCam
Before Operation<br />
Table of Contents<br />
Needed to Operate 1<br />
Select SD Card Size 1<br />
Help Selecting Photo or Video Settings 2<br />
Identify Parts 3<br />
Understand Button Functions 4<br />
Quick Start - Initial Camera Setup<br />
Easy 6 Step Setup 5<br />
Camera Settings Backup Battery 6<br />
Camera Status Lights 7<br />
Camera Menu Options<br />
Initial “PRIMOS” Menu Screen 8<br />
Camera or Video 8<br />
Number of LED’s 9<br />
Delay 9<br />
Burst 10<br />
Camera Sensitivity 10<br />
Time/Date 11<br />
Format 11<br />
Other Features/Functions<br />
Viewing/Retrieving Image 12<br />
Clearing SD Card 13<br />
Power Saving Sleep State 13<br />
Powering Unit Off 13<br />
Image Stamp 13<br />
Recommended Accessories<br />
Primos ® <strong>TRUTH</strong> ® <strong>CAM</strong> Accessories 14<br />
Other Accessories 14<br />
Operating Tips<br />
Important Notes 15<br />
Customer Service & Warranty<br />
Contact Info 19<br />
Warranty Protection 19<br />
Introduction<br />
Our goal at Primos ® is to provide products for hunters that are reliable and<br />
“Simple to Use”. Our <strong>TRUTH</strong> ® cameras have been built with that in mind.<br />
<strong>TRUTH</strong> ® cameras are “Simple to Use” and are reliable. They have the features<br />
that we as hunters expect: Infrared LED’s that don’t spook game, fast trigger<br />
speed, good photo images, extended night range and a SD memory capacity<br />
of up to 8GB. In effect it has all the features you want in a trail camera that<br />
is “Simple to Use”.
Included:<br />
1. <strong>TRUTH</strong> ® Camera (1)<br />
2. 72” Mounting Strap (1)<br />
3. <strong>Instruction</strong> Manual<br />
4. Warranty Registration Card<br />
Needed to Operate:<br />
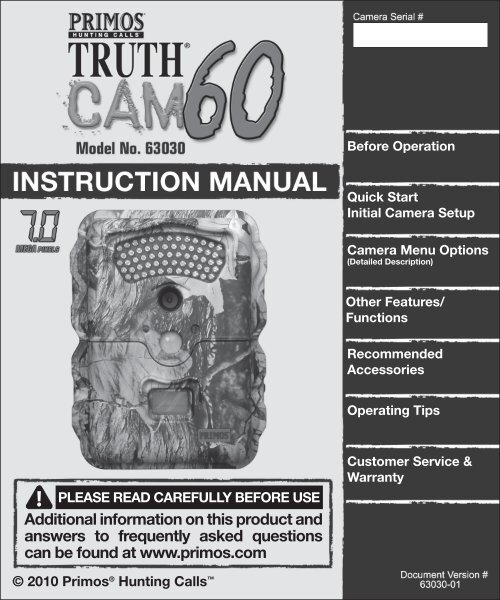
<strong>TRUTH</strong> ® <strong>CAM</strong> <strong>60</strong><br />
INSTRUCTION MANUAL<br />
1. Four (4) “D” size Alkaline or Rechargeable Batteries<br />
2. One or more SD Memory Cards<br />
(Camera will support up to 8GB SD or SDHC Cards)<br />
Note: If no SD Card is installed ‘NO SD’ will display on initial menu screen<br />
3. SD Memory Card Reader or other device to view image/video files<br />
on SD Card. (Many computers have a SD Memory Card slot built-in)<br />
Select sd card size<br />
This chart allows you to see the<br />
approximate capacity of 1GB, 2GB,<br />
4GB & 8GB SD Memory Cards. Check<br />
to see what [megapixel] photos or<br />
[resolution] videos that will be best for<br />
your SD Card.<br />
** Recommended for general<br />
use and optimal battery life.<br />
(See Operating Tips for more info.)<br />
Before Operation<br />
**<br />
**<br />
*Photo/Video SD Card Storage Capacity<br />
1GB 2GB 4GB 8GB<br />
Photo 7MP 540 1090 2180 4370<br />
Photo 5MP 700 1410 2830 5670<br />
Photo 3.1MP 820 1650 3300 6610<br />
Photo 2MP 1420 2850 5710 11420<br />
Video 15S High Res 40 90 180 3<strong>60</strong><br />
Video 15S Low Res 280 570 1140 2280<br />
Video 30S High Res 20 40 90 180<br />
Video<br />
30S Low Res 140 280 570 1140<br />
Video <strong>60</strong>S Low Res 70 140 280 570<br />
*Approximation - photo/video sizes vary based on individual image details<br />
Help Selecting Photo or Video Settings:<br />
Default<br />
X<br />
Resolution<br />
(Image/File Size)<br />
7MP<br />
5MP<br />
3.1MP<br />
2MP<br />
Resolution<br />
(Video/File Size)<br />
30s High Res<br />
15s High Res<br />
<strong>60</strong>s Low Res<br />
30s Low Res<br />
15s Low Res<br />
Larger<br />
Smaller<br />
Photo<br />
Usage Guidelines<br />
Best image quality - finer details when<br />
zooming in for a closer look. Use for<br />
chance of capturing photo of a lifetime<br />
if you think the 'big trophy' is in the<br />
area. Great for printing large-scale,<br />
photo quality images.<br />
Better image quality and a balance of<br />
benefits between lower and higher MP.<br />
For good image quality and recording a<br />
large number of images. Faster to save,<br />
transfer and e-mail. Recommended for<br />
standard everyday use.<br />
Video<br />
Usage Guidelines<br />
Larger size videos, but really large file<br />
size and will fill up the SD Memory<br />
Larger card much faster than low resolution.<br />
640 x 480 Better for expanding/maximizing on<br />
your computer screen so you can see<br />
the important action!<br />
Smaller size videos, but can store 7<br />
times more than high resolution for the<br />
Smaller same length! Good for seeing what is<br />
320 x 240 going on in your area, but not great for<br />
expanding/maximizing on your<br />
computer screen.<br />
Storage/<br />
# of Recovery<br />
Images Speed<br />
Less<br />
More<br />
# of<br />
Videos<br />
Less<br />
More<br />
Slower<br />
Faster<br />
Storage/<br />
Recovery<br />
Speed<br />
Slower<br />
Faster<br />
Battery<br />
Life<br />
Shorter<br />
Longer<br />
Battery<br />
Life<br />
Shorter<br />
Longer<br />
1<br />
2
Identify Parts<br />
UNDERSTAND BUTTON FUNCTIONS<br />
ON/OFF PROGRAM<br />
SET<br />
RUN/WAKE<br />
Infrared LED Lights<br />
CLOSE UP VIEW OF <strong>CAM</strong>ERA BUTTONS<br />
Status Indication Lights<br />
Camera Lens<br />
Door Latch with<br />
Optional Pad Locking Hole<br />
PIR Motion Sensor<br />
On/Off - Hold down for 2 seconds to turn camera ON or OFF.<br />
ON/OFF PROGRAM<br />
SET<br />
RUN/WAKE<br />
“D” Battery<br />
Compartments<br />
- Use to navigate (scroll up or down) to see all MENU options.<br />
External LCD<br />
Viewing Window<br />
Program/Set - Press to change any active menu setting; Use<br />
to adjust setting & press Program/Set again to save.<br />
buttons<br />
Through Housing<br />
Security Cable Hole<br />
Mounting Strap Slots<br />
RUN/WAKE - When menu is on, press to quickly exit menu and turn camera<br />
into active RUN mode; 30 second countdown will begin. (Note: If the LCD menu is<br />
left inactive [no buttons are pushed] for 30 seconds, the camera will go into Power Saving Mode,<br />
the LCD display will turn off and the camera is ready to start taking pictures/video.)<br />
Brass Inserts<br />
(For optional<br />
Attachment Accessories)<br />
RUN/WAKE - When camera is in sleep mode, press to wake up LCD menu<br />
screen. (Note: screen will not wake up while green indication light is illuminated or blinking)<br />
SD Card Slot<br />
Rubber SD Card Cover<br />
External Battery Port<br />
(Optional 6V DC)<br />
Tree Gripping Teeth<br />
Bottom View<br />
Back View<br />
3<br />
4
Easy 6 Step Setup<br />
QUICK START INITIAL <strong>CAM</strong>ERA SETUP<br />
1. Install Batteries - Uses four (4) “D”<br />
size Alkaline or Rechargeable batteries.<br />
(Note: Camera identifies fully charged rechargeable<br />
batteries, such as NiMH, as less than 99% on battery<br />
indication level. Rechargeable batteries run on<br />
different voltage and cause this variation. Most fully<br />
charged rechargeable batteries will show 50-<strong>60</strong>%.)<br />
SD Card<br />
5. Setup-Time and Date - Navigate through menu options to find Time and<br />
Date screens. While on respective screen, press Program/Set button and<br />
then buttons to adjust selected field.<br />
2. Install up to 8GB SD Memory Card (not included) into the card slot<br />
on the bottom of the camera. If SD Card is not installed, camera will display<br />
“NO SD” on Initial Primos Menu Screen. (Note: SD Card Slot is protected by rubber<br />
seal [plug]. Open door of the camera and gently rotate seal from slot. After SD Memory Card is<br />
installed, replace rubber seal in original position to prevent moisture and elements from entering<br />
camera and possibly causing malfunction.)<br />
3. Secure Camera to Tree or Pole using included Mounting Strap<br />
(must thread strap through Mounting Strap Slots on back of camera).<br />
4. Turn On Camera and Review Default Settings on by holding down<br />
ON/OFF button for 2 seconds. The LCD screen will turn on and show the<br />
Camera Menu. Push UP or DOWN arrows to navigate through all Menu<br />
options. For convenience and simplicity, your camera has the following<br />
DEFAULT SETTINGS:<br />
DEFAULT SETTINGS:<br />
Camera Menu Default Other Settings<br />
Camera or Video<br />
5<br />
5MP<br />
Camera - 7MP, 3.1MP<br />
Video - High Res - 15s, 30s<br />
Video - Low Res - 15s, 30s, <strong>60</strong>s<br />
Number LED's <strong>60</strong>LED 36LED<br />
Delay 1 Minute 5s, 10s, 30s, 30M, <strong>60</strong>M<br />
Burst 1 Picture 3 Picture, 5 Picture<br />
Sensing Level Normal High, Low<br />
Time N/A User needs to set<br />
Date N/A User needs to set<br />
MP - Megapixel s - Seconds M - Minutes<br />
6. Your camera is ready to use! Press RUN/WAKE button to quickly exit<br />
menu and turn camera into active RUN mode. After 30 seconds the Truth ®<br />
Camera will be armed and ready to take pictures whenever the Motion Sensor<br />
detects motion or movement. (NOTE: TEST camera before placing in field/woods. Run<br />
camera in live “On/Run” mode and make sure Photos/Videos are being saved on SD Card. Can<br />
view number of Photos/Videos being saved from external window.)<br />
Camera Settings Backup Battery<br />
*** This Truth ® Camera is equipped with an internal rechargeable backup<br />
battery that is dedicated to saving the date, time and menu settings when the<br />
main D-cell batteries are removed. This internal backup battery can preserve<br />
your settings for up to 6 months when fully charged. (NOTE: With first use or after<br />
a long period of time without camera use, internal battery may initially take up to 30 hours to fully<br />
charge - charges only when “D” batteries are installed when camera is turned ON.)<br />
6
Camera Status Lights<br />
Your Truth ® Camera is equipped with 2 LED status indication lights on<br />
the front of the camera (located right above door opening on each side<br />
of PIR Motion Sensor).<br />
<strong>CAM</strong>ERA MENU OPTIONS<br />
Initial PRIMOS ® Menu Screen - displays<br />
camera status, number of pictures ‘0074’,<br />
time, battery life and date.<br />
Example: Camera Menu is on and 74 picture/videos<br />
are on SD Memory Card<br />
Green Light<br />
Red Light<br />
If SD Memory Card is NOT installed,<br />
screen will display “NO SD” instead of<br />
4-digit ‘0000’ picture count.<br />
PLEASE INSERT SD CARD<br />
If SD Memory Card is FULL, screen<br />
will display “SD FULL” instead of 4-<br />
digit ‘0000’ picture count.<br />
PLEASE REPLACE SD CARD<br />
RED LIGHT<br />
Lights up when the camera detects motion. After you close camera door<br />
and are standing in front of the camera, visibility of this light is indication that<br />
ON/OFF PROGRAM RUN/WAKE<br />
your camera is ON and working.<br />
SET<br />
(TIP: Walk in front of the camera and look for the red light to illuminate when you are detected.<br />
You can do this to verify your camera is pointing in the correct direction. Remember there is a<br />
30 second delay from the time the camera is turned on till it is ready to take pictures.)<br />
GREEN LIGHT<br />
Lights up when the camera takes photo or is recording a video. The green light<br />
stays on while the photo/video is being stored on the SD Memory Card.<br />
(NOTE: Do not remove SD Memory Card when the green light is blinking – this could cause you<br />
to lose all data on memory card!)<br />
(NOTE: The LCD menu will not wake up from ON/RUN mode [Power Saving State] while the<br />
Green Status Light is on. Wait until after Green Light turns off to WAKE up LCD screen by pushing<br />
the WAKE button.)<br />
Camera or Video (<strong>CAM</strong>_VID) - Select camera MP (Megapixel) setting or<br />
video length in S (seconds). For help selecting camera or video settings see<br />
(pg. 2)<br />
Example: 5.0 Megapixel photos will be taken<br />
Example: 30 second High Res videos will be recorded<br />
7<br />
8
Number of LED’s (NUM_LED) - Choose<br />
to use all LED’s for longer night vision or<br />
less LED’s to save battery power when<br />
the longer distance is not needed.<br />
Burst - Number of pictures taken each<br />
triggering event (only relevant if in camera mode).<br />
Example: Camera will take 3 rapid photos in a row<br />
Example: 46 LED’s will be used at night<br />
More LED’s<br />
Less LED’s<br />
Camera Sensitivity (Sensing) - Motion<br />
Detector Sensitivity. Use ‘Normal’ as default.<br />
You can adjust the sensitivity of the Passive Infrared<br />
(PIR) Motion Sensor on your camera. The PIR<br />
sensor detects motion AND the difference between<br />
body heat and the outdoor temperature. Therefore,<br />
adjusting the sensor affects the DISTANCE and<br />
HEAT SENSITIVITY of the detection.<br />
Advantage<br />
• Longer Night Illumination<br />
• Brighter and Clearer Pictures<br />
Drawback<br />
• More Power Consumption<br />
(shorter battery life)<br />
• Greater Chance of Deer<br />
Recognizing “Red LED Glow”<br />
DELAY - The pre-set amount of time you<br />
desire between photo/video recordings.<br />
Example: Camera will wait 1 minute between<br />
photo/video recordings with motion<br />
Advantage<br />
• Less Power Cosumption (longer battery life)<br />
• Less Chance of Deer<br />
Recognizing “Red LED Glow”<br />
Drawback<br />
• Shorter Night Illumination<br />
• Pictures not as Bright<br />
Primos ® recommends using versatility of selectable LED Number to your advantage<br />
depending on the situation. If you know where the game is going to be and can setup<br />
the camera closer, it probably it probably makes sense to enjoy the advantages of<br />
Less LED’S. However, when you are uncertain or need the extended night range, you<br />
can use all of the high-output LED’s!<br />
TIP: It may not always be best to use ‘high sensitivity’ to see how far away you can capture<br />
images of game. If the game is closer when the camera is triggered, you will end up with better<br />
pictures/videos. You can learn what is best for your situation; here is a summary of the settings:<br />
High Sensitivity<br />
• Use when trying to detect game at further distances (in fields or open areas with long-range visibility)<br />
• May use in warmer months or high heat climates so it is easier for sensor to detect difference<br />
between body heat and outdoor temperature.<br />
• May use when trying to capture photos of smaller game.<br />
Normal Sensitivity<br />
• Optimized to work best in most conditions and for normal use<br />
Low Sensitivity<br />
• May use if you have the camera setup in a location that is getting a lot of ‘empty’ photos<br />
(false triggers)<br />
• May use if you are getting a lot of hard-to-see long range photos of game (more likely in colder<br />
temperatures or with larger game) and would like game to get closer before camera captures images.<br />
9<br />
10
Time/Date – Time/Date setting in camera will be displayed on pictures<br />
and video.<br />
Viewing / Retrieving Images<br />
Explore these various methods for viewing Truth ® Camera photos/videos:<br />
1. Remove SD Memory Card from slot in bottom of camera.<br />
2. Replace with separate, fresh SD Card if you want camera to continue working.<br />
How to View Images/Videos<br />
1. View images/videos with SD Card<br />
directly in computer.<br />
If available you can view images/videos by inserting SD Card<br />
directly in SD memory card reader slot in computer.<br />
Format - Formats SD Memory Card<br />
installed in camera – this DELETES<br />
ALL PHOTOS OR VIDEO or any other<br />
data on memory card!!!<br />
(NOTE: When using a computer you can view and delete images<br />
directly from SD card or you can copy and store files to your<br />
computer. Once files are safely stored on computer, you can<br />
delete from SD Card to clear the space for next camera use.)<br />
2. External USB memory card reader<br />
SD<br />
To proceed with formatting:<br />
1. Change field from NO to YES and hit<br />
Program/Set (STEP 1)<br />
2. The camera will ask you ‘Sure?’<br />
3. Press Program/Set to format card. Press buttons to if you’re NOT<br />
SURE and want to CANCEL. (STEP 2)<br />
4. Camera should display ‘DONE’ when formatting complete and take you<br />
back to initial PRIMOS ® screen and display ‘0000’ pictures on card.<br />
Step 1 Step 2<br />
If your computer doesn’t have an SD Card reader built in,<br />
you can view images/videos by attaching USB memory<br />
card reader to your computer.<br />
3. Game Camera Viewer.<br />
You can view images/videos using a portable device<br />
designed specifically for game cameras.<br />
4. Other portable handheld devices<br />
If convenient you may try viewing images/videos using<br />
other portable handheld devices such as: digital cameras,<br />
GPS, etc...<br />
SD<br />
SD<br />
SD<br />
GAME <strong>CAM</strong>ERA VIEWER<br />
(NOTE: Many digital devices with viewing screens will display<br />
pictures taken by the Truth ® Camera. You can try these<br />
alternative viewing devices at your own risk -- not all devices<br />
with SD Memory card slots will read the Truth ® Cam video<br />
and/or photos.)<br />
11<br />
12
Clearing SD Memory Card<br />
Formatting the SD Card erases all images and data.<br />
To clear photos using <strong>TRUTH</strong> ® Cam, see ‘FORMAT’ under<br />
‘<strong>CAM</strong>ERA MENU OPTIONS’. (Page 11)<br />
Power Saving State<br />
When the <strong>TRUTH</strong> ® Camera is powered on, the LCD menu screen will<br />
automatically turn on. If menu is left inactive (no settings changed or button<br />
pushed) for 30 seconds, the camera will automatically switch to “RUN/ON”<br />
mode and LCD screen will enter a power saving state.<br />
(NOTE: The camera is active and ready to take photos/video when LCD is in a power saving<br />
sleep state.)<br />
The LCD screen can be awakened by pressing the RUN/WAKE button.<br />
(NOTE: The LCD menu will not wake up from Power Saving State while the Green Status Light<br />
is on. Wait until after Green Light turns off to WAKE up LCD screen.)<br />
Powering Unit OFF<br />
***LCD MENU MUST BE ON TO TURN OFF <strong>CAM</strong>ERA<br />
1. Wake up LCD screen from power saving mode by hitting RUN/WAKE<br />
button (screen will not come on when Green Status Light is illuminated)<br />
2. After the LCD menu screen is on, press and hold the ON/OFF button for<br />
2 seconds. Screen should say PWR OFF before turning off.<br />
Step 1 (Wake Up LCD Screen)<br />
Image Stamp<br />
13<br />
Step 2 (Powering Unit Off)<br />
Primos ® <strong>TRUTH</strong> ® Cam Accessories<br />
1. <strong>TRUTH</strong> ® Cam Pivoting Mount<br />
2. Camera Glove Protective Case<br />
1.<br />
ReCOMMeNDeD ACCeSSORIeS<br />
• Pivoting Camera Mount<br />
• Fits on all <strong>TRUTH</strong> ® <strong>CAM</strong> Models<br />
• Allows You to Mount Camera<br />
on ANY TREE and at virtually<br />
ANY ANGLE<br />
2. Camera Glove Protective Case<br />
• Stretch Fit Neoprene<br />
• Works with all<br />
<strong>TRUTH</strong> ® <strong>CAM</strong> Models<br />
• Accessory Pouch and<br />
SD Card Pocket<br />
Other Accessories<br />
1. Padlock for door latch to prevent tampering camera settings or memory<br />
2. Locking Security Cable to run through case and around tree. Master Lock ®<br />
Python Adjustable Locking Cable is convenient and highly recommended.<br />
3. 6V DC External Battery for those needing extended battery life for remote<br />
or extremely active locations (plug into bottom of camera)<br />
14
IMPORTANT NOTES<br />
OPERATING TIPS<br />
Learning to use your Truth ® Cam – Visiting www.primos.com/TruthCam and<br />
watching our <strong>Instruction</strong>al Video Clips is the ‘easiest way’ to learn ‘how to use’ your<br />
Truth ® Camera!<br />
Troubleshooting or Questions – Before calling customer service, visit www.primos.<br />
com/TruthCam to find troubleshooting tips, frequently asked questions and answers, as<br />
well as any updates<br />
Camera ‘Menu’ Mode or Camera ‘On/Run’ Mode - Your Truth ® Cam only has two<br />
modes when powered on.<br />
Menu Mode - If the LCD screen is on displaying the menu or text, the camera is in ‘Menu’<br />
mode and will not take pictures/videos during this time. If the LCD menu is left inactive<br />
(no buttons are pushed) for 30 seconds, the camera will automatically go into a power<br />
saving state.<br />
ON/RUN Mode - The LCD display will turn off and the camera has switched to ‘On/Run’<br />
mode and is ready to start taking pictures/video. You can also press the Run/Wake button<br />
to quickly exit menu and turn camera into active ‘On/Run’ mode (30 second countdown<br />
will begin). When the camera is in the ‘On/Run’ mode, you must exit the power saving<br />
state by hitting the Run/Wake button to enter back into the camera ‘menu’ mode.<br />
Waking Up LCD Menu – The LCD menu will not wake up from ‘On/Run’ mode (power<br />
saving state) while the Green Status Light is on or blinking. Wait until after Green Light<br />
turns off to WAKE up LCD screen.<br />
Trouble Turning Camera Off – The OFF button will only work when the camera is in<br />
‘Menu’ Mode. In other words, make sure the LCD screen is displaying the menu and<br />
then hold the OFF button for 2 seconds. LCD screen will display ‘PWROFF’ as it is<br />
turning off.<br />
Battery Level on Display - Camera identifies fully charged rechargeable batteries, such<br />
as NiMH, as less than 99% on battery indication level. Rechargeable batteries run on<br />
different voltage and cause this variation. Most fully charged rechargeable batteries will<br />
show 50-<strong>60</strong>%.<br />
15<br />
Battery Life – Long battery life is one of the most important requirements for convenient<br />
and enjoyable game camera use. There are several variables that will determine the battery<br />
life including type of batteries, temperature outside, image/video settings and frequency<br />
of camera activity. Colder temperatures, more advanced image/video settings and high<br />
photo frequency (low camera delay) will result in shorter battery life. Different brands of<br />
batteries may also perform much better than others, so please experiment to find what<br />
works best for you. Primos ® has included a Image/Video Selection Guide in this manual to<br />
help pick the best camera settings for higher performance or better battery life.<br />
Internal Rechargeable Backup Battery - With first use or after a long time period or<br />
camera storage, internal battery may initially take up to 30 hours to fully charge (charges<br />
only when “D” batteries are installed when camera is turned ON). Once charged, this<br />
backup battery is dedicated to saving the date, time and menu settings when the main<br />
D-cell batteries are removed.<br />
Camera Mounting Direction – The red status light illuminates when camera detects<br />
motion. To verify your camera is pointing in the correct direction, you can walk in front of<br />
the camera after it is setup and look for the red light to illuminate when you are detected<br />
– the camera will take pictures/videos when motion is detected according to your settings.<br />
The Truth ® Cam Pivoting Mount makes mounting easier and allows photo capture from<br />
the angle of your choice (versus relying on the tree).<br />
Camera Mounting Height – Three feet from the ground is usually a good height to mount<br />
the camera, but it depends on the type of game and ground terrain. The Truth ® Cam<br />
Pivoting Mount makes mounting easier and allows photo capture from the angle of your<br />
choice (versus relying on the tree).<br />
Blurry Image Quality – Primos ® takes pride in the quality of images captured by the<br />
Truth ® Cam. However, this is an outdoor product that will be constantly exposed to<br />
different/changing conditions that can affect the quality level. Blurry images typically result<br />
from objects causing interference between the camera and the intended focal point (game<br />
too close, brush, trees, etc). Blurry images may also be the result of direct sunlight, fog,<br />
condensation (dew), water droplets, snow/ice, dirt, dust or other debris on the camera<br />
lens. Carefully cleaning the camera lens window, making sure there are no scratches and/<br />
or placing the camera in a different location may solve this type of problem.<br />
16
Blurry Image Quality – Motion – Primos ® takes pride in the quality of images captured<br />
by the Truth ® Cam. With available technology, there was no way to eliminate the potential<br />
of photos with blur caused by game moving (motion) too quickly. We have optimized the<br />
Truth ® Cam to limit the number of motion blurred images and provide as many clear,<br />
quality photos as possible.<br />
Dark or Light Image Quality – Primos ® takes pride in the quality of images captured<br />
by the Truth ® Cam. As daylight transitions back-and-forth between light and dark, the<br />
camera changes settings to optimize the picture. Some ‘lighter’ or ‘darker’ photos may be<br />
captured during the camera transition process – this should be a limited amount of photos<br />
with the optimization of our software. Also, please try to avoid setting up the camera in<br />
situations where the sunlight will shine directly into camera lens. With any photo capturing,<br />
taking pictures directly into sunlight produces less than desirable results.<br />
Inside Camera Operation – The camera is designed for outdoor use. It is ok to test the<br />
camera indoors for operation, but please note the indoor lighting and reflection may not<br />
be optimal for correct photo exposure and video recording.<br />
Selecting Image Size/Video Quality - More and bigger is not always better. See Help<br />
Selecting Photo or Video Settings under ‘Before Your Operation’ guide.<br />
Keep Clear of Debris - Keep the small water drainage hole on the camera door (running<br />
from top lip to external window) clear of debris. This drainage hole allows any water that<br />
happens to get on top of the door lid escape. If this hole is plugged and not allowed to<br />
drain, the water can possibly enter the inside of the door (even when closed) and cause<br />
permanent damage to the camera.<br />
Empty Photos/False Triggers – If there are a large number of photos taken with no<br />
game present in the frame, first make sure your camera is mounted at the correct height<br />
and in the right direction. If there are limited, random photos with no game present, the<br />
following scenarios are most likely 1) an animal ran through the picture extremely fast or<br />
2) a smaller animal/bird is around the camera/sensor but is not in the camera field of view<br />
or 3) the sunlight or heat in combination with moving elements (trees, brush, shadows)<br />
is causing a false trigger. The first two scenarios are hard to prevent, but the sunlight/<br />
heat should not cause many false triggers as the camera has been optimized to sense<br />
and distinguish for correct triggering. To prevent potential false triggers, try not to setup<br />
the camera directly in the sunlight. You may also change the Camera Sensitivity Setting<br />
according to your situation.<br />
Camera Doesn’t Save Photos/Video – The SD Memory Card may be locked. Please<br />
look closely at the card and make sure the card is in the ‘unlocked’ position. If photos/<br />
videos are still not saved by camera activity, the SD Memory Card may be corrupt or<br />
damaged. You can try to reformat the card on a computer and try it again, or simply try<br />
replacing it with a different/new SD Memory Card.<br />
Storing Camera – Do not store in extreme heat, cold, moist or humid conditions. Remove<br />
batteries when storing for periods for longer than one week without use.<br />
Operating Temperature - Recommended storage temperature range is 20 0 F to 100 0 F<br />
and recommended operating temperature range -10 0 F to 130 0 F<br />
17<br />
18
CUSTOMeR SeRVICe & WARRANTY<br />
WARRANTY<br />
You MUST register your Truth ® Cam to receive warranty protection!<br />
Up to 1 YEAR LIMITED WARRANTY<br />
Primos ® Hunting Calls (“Primos”) warrants the <strong>TRUTH</strong> ® Cam to be free from defects in workmanship<br />
and materials, under normal use and conditions, for the time periods and terms as set forth below.<br />
According to this Limited Warranty Primos ® will, at its discretion, (a) repair the production using new<br />
or refurbished parts or (b) replace the product with a new or refurbished product (product that has<br />
been returned to its original specifi cations). In the event of a defect, these are the exclusive remedies<br />
available to the original consumer purchaser only and is not assignable or transferable.<br />
Terms: You must register your <strong>TRUTH</strong> ® Cam to receive warranty protection. You may<br />
register via postcard or on-line, but not both. If you register on-line you will receive<br />
a longer warranty period. You MUST keep a receipt for “Proof of Purchase” for any<br />
warranty claims on your <strong>TRUTH</strong> ® Cam. More details below.<br />
If registered via the enclosed postcard, you will receive a – Limited 180 Day Warranty*<br />
For a period of 180 days from original date of purchase Primos ® will repair or replace the product, at<br />
its discretion, if service is required for any reason of any defect or malfunction.<br />
*The included Warranty Registration Card must be fi lled out completely and returned to Primos ®<br />
within fourteen (14) days after the purchase date of the product.<br />
If registered on-line, you will receive a – Limited 1 YEAR WARRANTY**<br />
For a period of 1 year from original date of purchase Primos ® will repair or replace the product, at its<br />
discretion, if service is required for any reason of any defect or malfunction.<br />
**Go online to www.primos.com/registration and complete the Online Product Registration within<br />
fourteen (14) days of the purchase date of the product.<br />
Limitations: This warranty is valid only if the product is used for the purpose for which it was designed.<br />
It does not cover: 1) products which have been damaged by negligence/misuse (including, but not<br />
limited to, improper storage, battery leakage and water damage caused by submersion), accident or<br />
which have been modifi ed or repaired by unauthorized persons; 2) cracked or broken housing of units<br />
damaged by excess heat or impact/force; 3) damage caused by wild animals 4) the cost of shipping<br />
this product to the factory for service and its return to you. This warranty is valid only in the United<br />
States of America. Any applicable implied warranties are also limited to 180 days, and Primos ® will<br />
NOT be liable for consequential damages.<br />
<strong>Instruction</strong>s:<br />
In the event warranty service is needed, please contact Primos ® Customer Service to obtain a Return<br />
Merchandise Authorization (RMA) number. Once you have secured a RMA number, you will be required to:<br />
1. Write RMA number in large print on outside of package.<br />
2. Remove SD memory card and batteries from product and pack in well-padded or highly protective<br />
box. Primos ® will NOT be responsible for damage incurred in returning product for repair.<br />
3. Include Proof of Purchase and $20 for handling and return packing/shipping. Do NOT send cash.<br />
Enclose your credit card number and expiration date, check or money order payable to Primos ® Hunting<br />
Calls for the sum of $20.<br />
4. Send product prepaid to: Primos ® Hunting Calls , Customer Service Department, <strong>60</strong>4 First Street,<br />
Flora, MS 39071.<br />
19<br />
fCC STATeMeNT<br />
This equipment has been tested and found to comply with the limits for a<br />
Class B digital device, pursuant to part 15 of the FCC Rules. These limits are<br />
designed to provide reasonable protection against harmful interference in<br />
a residential installation. This equipment generates, uses and can radiate<br />
radio frequency energy and, if not installed and used in accordance with<br />
the instructions, may cause harmful interference to radio communications.<br />
However, there is no guarantee that interference will not occur in a particular<br />
installation. If this equipment does cause harmful interference to radio or<br />
television reception, which can be determined by turning the equipment off<br />
and on, the user is encouraged to try to correct the interference by one or<br />
more of the following measures:<br />
Reorient or relocate the receiving antenna.<br />
Increase the separation between the equipment and receiver.<br />
Connect the equipment into an outlet on a circuit different from that to<br />
which the receiver is connected.<br />
Consult the dealer or an experienced radio/TV technician for help<br />
<strong>TRUTH</strong> ® <strong>CAM</strong> <strong>60</strong><br />
Model No. 63030<br />
DISCLAIMeRS<br />
Primos ® makes no representations or warranties, either expressed or implied, by<br />
or concerning any content of these written materials or software, or for damages<br />
resulting from the use of the information contained therein. Primos ® reserves the right<br />
to alter the features and contents of this publication, hardware or software without<br />
obligation or advance notice.<br />
Warranty does not extend to any accessories used with the camera.<br />
Primos ® is not responsible if you use the <strong>TRUTH</strong> ® Cam for illegal purposes.<br />
Primos ® shall not be obligated to perform preventative maintenance, installation,<br />
deinstallation, or maintenance.<br />
The illustrations in this manual are for instructional purposes only and may not<br />
represent actual product exactly.<br />
20
<strong>60</strong>4 First Street, Flora, MS 39071 • Office <strong>60</strong>1-879-9323<br />
• Orders 1-800-523-2395 • Fax <strong>60</strong>1-879-9324 • primos.com<br />
Printed in China