
Create successful ePaper yourself
Turn your PDF publications into a flip-book with our unique Google optimized e-Paper software.
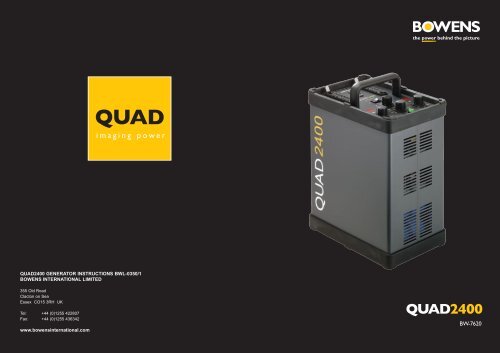
QUAD<br />
imaging power<br />
QUAD<strong>2400</strong> GENERATOR INSTRUCTIONS BWL-0350/1<br />
BOWENS INTERNATIONAL LIMITED<br />
355 Old Road<br />
Clacton on Sea<br />
Essex CO15 3RH UK<br />
Tel: +44 (0)1255 422807<br />
Fax: +44 (0)1255 436342<br />
www.bowensinternational.com<br />
QUAD<strong>2400</strong><br />
BW-7620
Table of Contents<br />
Specifications<br />
Description<br />
Page<br />
Introduction and Safety Notes 3<br />
Control Panel Guide 4 – 5<br />
2<br />
2 (1 per channel)<br />
Manual Selection - Channel A = Symmetric<br />
2 f-stops in one-stop increments<br />
3 f-stops in 1 /3-stop increments on each channel<br />
<strong>2400</strong>w/s Channel A only or split 1200W-s Channel A + 1200W-s Channel B<br />
37 to <strong>2400</strong>w/s (6-stops)<br />
640 (feet/100 ISO) with UV-coated tube<br />
Flash and Modelling Function Overview 6 – 7<br />
Fast:
Introduction<br />
Dear Valued Customer,<br />
QUAD<strong>2400</strong><br />
Number of Channels<br />
Number of Head Sockets<br />
Symmetric/Asymmetric<br />
Master Power Control<br />
Independent Channel Variators<br />
Stored Energy (Max.)<br />
Flash Power Control Range<br />
Guide Number<br />
(Full power, 50° Keylite, ISO 100)<br />
Typical Recycle Time<br />
(Full Power)<br />
Flash Colour Temperature<br />
Flash Duration (t=0.5)<br />
(One Head, Max. Variator)<br />
Power Level Display<br />
Flash Voltage Stabilization<br />
Supply Voltage<br />
Flash Ready Indication<br />
Overload Protection<br />
Sync Voltage (Max.)<br />
Photocell<br />
Audio Ready Signal<br />
Modelling Lamps<br />
Modelling Modes<br />
Recommended Flash Head<br />
Dimensions (l x w x h)<br />
Weight<br />
Thank you for choosing the <strong>Bowens</strong> QUAD<strong>2400</strong> professional flash system.<br />
Accurate, ergonomic, powerful and simple to use, the QUAD<strong>2400</strong> power pack was designed by<br />
working closely with photographers to develop a flash that meets the standards demanded in<br />
professional studios today.<br />
Heads and accessories from the QUAD range can be used with the QUAD<strong>2400</strong> power packs. For<br />
details of all related products, please contact your local distributor, a list of which can be found at<br />
www.bowensinternational.com.<br />
In order to obtain the full benefit from your purchase, please take a few moments to familiarise<br />
yourself with this user manual.<br />
Thank you.<br />
<strong>Bowens</strong> International Ltd.<br />
Safety Notes<br />
DO NOT:<br />
• Use in an environment where moisture or flammable vapor is likely to come in contact with the<br />
pack or the flash heads.<br />
• Plug or unplug flash heads without first switching power off.<br />
• Restrict air vents while in use.<br />
• Use a unit with damaged housing, moldings, flash tube or modelling lamp.<br />
If the unit is dropped or damaged in any way, always have it checked out before using.<br />
• Operate the unit without a safe grounded AC supply.<br />
DO:<br />
• Switch power off and disconnect from the supply before changing modelling bulb or flash tube.<br />
• Observe the AC power supply requirements.<br />
• Ensure that the flash head cable locking rings at the power pack or adapters are fully<br />
locked before use.<br />
• Avoid placing cables where they can be tripped over. Protect from heavy, sharp or hot objects,<br />
which may cause damage and replace damaged cables immediately.<br />
• Unplug the power pack from the electrical outlet when not in use.<br />
• Remove the power cord by gripping the plug. NEVER pull the cord.<br />
• Ensure that any extension cord used has a suitable current rating to prevent overheating.<br />
NEVER use coiled extension cords.<br />
• ALWAYS remove the flash head covers before using.<br />
10<br />
www.bowens.co.uk<br />
www.bowens.co.uk<br />
3
Control Panel Guide<br />
Warnings Signs and Troubleshooting<br />
Top Control Panel<br />
Sync Sockets<br />
If the unit appears to have developed a problem, first establish that it is a genuine internal problem and<br />
not a case of normal operation such as overheating. Carry out the following checks to eliminate any<br />
external causes. If no obvious problem can be found and replacement of the modelling lamp, flash tube<br />
or flash head fuse does not eliminate the problem, then it is likely that an internal problem has<br />
developed. Always return the unit to an authorized service centre if a problem is suspected after these<br />
checks. UNDER NO CIRCUMSTANCES SHOULD YOU ATTEMPT ANY REPAIR YOURSELF.<br />
Head<br />
Socket ‘A’<br />
Fast/Slow<br />
Switch<br />
(Under Handle)<br />
Channel A<br />
Power Level<br />
Display<br />
Modelling<br />
Mode Selector<br />
Channel A<br />
Variator<br />
Head<br />
Socket ‘B’<br />
Carry Handle<br />
Channel B<br />
Power Level<br />
Display<br />
Overall Power<br />
Selector<br />
Channel B<br />
Variator<br />
• Overheat Warning<br />
The power pack is fitted with a thermostatically controlled fan, but under extreme conditions of use the<br />
power pack may still overheat, even with the fan running. Flashing less frequently and/or using the<br />
Slow Charge Mode will normally help prevent this from happening.<br />
Overheat protection is provided to inhibit charging until the unit has cooled sufficiently to operate<br />
normally. The Power Level Displays will flash “Overheat” warning while the overheat condition exists.<br />
NOTE: The overheat condition remains until the power pack reaches a safe operating temperature or<br />
the unit is turned off and allowed to cool.<br />
• Control Panel Does Not Light Up<br />
If the Control Panel does not light up when the unit is switched on, first check the AC power-cord<br />
connections and check to make sure the AC outlet is working. Under exceptional conditions of use or<br />
component failure, the Internal Fuse may blow. This is designed to protect the unit. Report the problem<br />
to your local service agent. DO NOT ATTEMPT TO LOCATE AND REPLACE THE INTERNAL FUSE<br />
YOURSELF.<br />
• Control Panel Lights Up But Ready Indicator Does Not Light Up<br />
If this happens, first confirm that the AC-line voltage is adequate and within the prescribed limits.<br />
Confirm that the Flash Thermal Reset Button on the Rear Panel is pushed in. Under exceptional<br />
conditions of use, this may trip. Switch the unit off, wait a minute, push the button in and then switch<br />
power on again.<br />
• Modelling Lamps Are Not Working<br />
If all of the modelling lamps are not working, first check to see if the Modelling Thermal Reset Button<br />
on the Rear Panel is out. If this is the case, DO NOT RESET IT until you have checked the head(s) for<br />
blown bulbs and/or fuses.<br />
• Power Pack Triggers Erratically<br />
Check to see if the power pack is being triggered by another flash source by turning the photocell off.<br />
Audio Switch<br />
and LED<br />
Test Button and<br />
Ready Indicator<br />
Photocell<br />
Window<br />
Photocell<br />
Switch and LED<br />
4 www.bowens.co.uk<br />
www.bowens.co.uk 9
Getting Started<br />
Control Panel Guide<br />
Before first using your power pack or after an extended storage period, it is recommended that the unit be<br />
checked for basic operation as follows:<br />
Rear Panel<br />
1. Remove the packaging and ensure that the unit is switched off.<br />
2. Set up a flash head. Be sure the protective cap is removed and the modelling lamp is fitted and switched<br />
on.<br />
3. Plug the head into the socket of Channel A.<br />
4. Set the Overall Power Selector to Symmetric/<strong>2400</strong> and the Channel A Variator to Full.<br />
5. Set the Modelling Mode Selector to Intermittent/Proportional.<br />
6. Set Audio Switch to On, Photocell Switch to Off and Fast/Slow Switch to Slow.<br />
7. Connect the power pack to a 230V AC, 50/60Hz outlet using the power cord.<br />
8. Set the Power On/Off Switch to On. The unit will show “<strong>2400</strong>” on the Channel A display. The pack will now<br />
charge to this setting.<br />
9. Confirm after a few seconds that the Ready Indicator lights up, the Audio Ready Signal beeps and the<br />
flash head’s Modelling Light is on at Full brightness.<br />
10. Use the Test Button to discharge the set power into the head.<br />
11. Confirm that the head flashes, the power pack recycles and Ready Indicator lights up.<br />
12. Repeat steps 8 and 9 with the Overall Power Selector set to Symmetric/1200, Symmetric/600,<br />
Asymmetric/1200, Asymmetric/600 and Asymmetric/300. Confirm that there is an appropriate change of<br />
light output with each change of setting. Use a flash meter if possible.<br />
13. Reduce the Channel A Variator setting to -3.0 and confirm that the Modelling Light has dimmed.<br />
14. Confirm that the head flashes, the power pack recycles and Ready Indicator lights up.<br />
15. Switch the power pack off. Plug the head into channel B.<br />
16. Set the Overall Power Selector to Asymmetric/1200 and both Channel Variators to Full.<br />
17. This time both numeric displays will show “1200.” The power pack will now charge to this setting.<br />
18. Confirm after a few seconds that the Ready Indicator lights up, the Audio Ready Signal beeps, and the<br />
flash head’s Modelling Light is on at Full brightness.<br />
19. Use the Test Button to discharge the set power into the head.<br />
20. Confirm that the head flashes, the power pack recycles and the Ready Indicator lights up.<br />
21. Repeat steps 16 to 19 with the Overall Power Selector set to Asymmetric/600 and Asymmetric/300.<br />
Confirm that there is an appropriate change of light output with each change of setting.<br />
Use a flash meter if possible.<br />
You are now ready to begin using the generator.<br />
Power On/Off Switch<br />
AC Inlet 230VAC 50/60Hz 16A<br />
Modelling Thermal Reset Button<br />
Flash Thermal Reset Button<br />
NOTES:<br />
1 The QUAD<strong>2400</strong> displays the power<br />
available to each channel in watt-seconds on<br />
the two red numeric Power Level Displays<br />
marked Channel A and Channel B.<br />
2 Beneath the Channel Power Level Displays<br />
are the Channel Variators. These control the<br />
individual power available from the Head<br />
Sockets A and B in 1 /3 stop increments.<br />
NOTE: The individual Channel Variators and<br />
Power Level Displays are aligned with the<br />
associated socket.<br />
3 The Fast/Slow Switch, Overall Power<br />
Selector and Modelling Mode Selector are<br />
common to both channels.<br />
NOTE: If the unit has been left unused for six months or predominantly used with low power settings,<br />
it is recommended that the Power Level be increased to Maximum and the unit left switched on for<br />
at least 30 minutes occasionally to help preserve the life of the capacitors.<br />
The AC Inlet, On/Off Switch and Thermal Reset<br />
Buttons are mounted on the rear panel.<br />
8 www.bowens.co.uk<br />
www.bowens.co.uk 5
Function Overview<br />
Function Overview<br />
Flash Power Control<br />
The power pack is divided into two channels, A and B, and each is fitted with one head socket. An LED<br />
display for each channel indicates the available power in watt/seconds available at the head fitted to that<br />
channel.<br />
A single Overall Power Selector reduces the pack’s total power by one or two f/stops and individual<br />
Channel Variator controls reduce each channel’s power by a further three f/stops in 1 /3-stop steps. The<br />
Overall Power Selector has settings for both Asymmetric (A/B) and Symmetric (A+B) modes.<br />
The selected power in Asymmetric mode is available independently from each channel whether or not<br />
any head is fitted in the other channel. The power available is controllable by using the appropriate<br />
Channel Variator and the associated display.<br />
The full selected power in Symmetric mode is only available from Channel A, providing that no head is<br />
fitted in the Channel B socket. The total power available is shown on the Channel A Power Level<br />
Display and is controllable by means of the Channel A Variator only.<br />
In general, the Overall Power Selector should be set to the lowest setting and the Channel Variator(s)<br />
set to the highest, consistent with the flash power and the distribution between heads required. This<br />
method provides the shortest flash duration for a given power output.<br />
Whenever the power levels are changed, the pack automatically dumps any excess energy. The Test<br />
Button will flash while this is occurring. The time for the Ready Indicator to light up can be reduced by<br />
using the Test Button to flash the pack.<br />
Modelling Control<br />
The Modelling Mode Selector provides a common control for the modelling lamps of all fitted heads.<br />
Note that most heads are fitted with a modelling lamp On/Off Switch that overrides the control on the<br />
power pack. As well as Off, the pack provides three modelling modes, each available with Intermittent<br />
flash indication:<br />
Test Button and Ready Indicator Light<br />
The green Test Button is lit whenever the power pack reaches 100% charge and is ready to be<br />
triggered. This light flashes when the pack is automatically dumping excess energy after a power-level<br />
adjustment.<br />
Press the Test Button to:<br />
1. Trigger the power pack for test purposes whenever the Test Button is lit.<br />
2. Dump excess energy quickly while the Test Button is flashing. This avoids having to wait a few<br />
seconds for the pack to automatically dump energy.<br />
Audio Indicator<br />
An Audio Ready Signal is provided to beep when the generator is 100% recycled. Turn the Audio<br />
Switch On with the rocker switch. The red LED lights up when the Audio is on.<br />
Photocell<br />
A Photocell is provided to trigger the power pack from another flash source or IR Trigger. Turn the<br />
Photocell On with the rocker switch. The red LED lights up when the Photocell is on.<br />
Fast/Slow Charge<br />
The power pack has the facility to adjust the charging times. Turn the Fast/Slow Switch to Slow if:<br />
1. Only a poor quality AC supply is available.<br />
2. Several power packs are to share the same supply.<br />
3. Fast recycling is not required.<br />
Using the Slow setting whenever possible will prolong the life of the power supply.<br />
Triggering System<br />
1. Off turns all lamps off.<br />
2. Intermittent extinguishes the lamps when the pack is fired and turns them back on again when the<br />
pack is 100% recycled and Ready Indicator lights up. This provides a visual indication that the pack<br />
has been successfully triggered and has recycled.<br />
3. Continuous turns the Intermittent mode off.<br />
4. Proportional sets the lamp brightness in proportion to the appropriate Channel Variator setting.<br />
5. MAX sets all lamps to full brightness.<br />
6. Automatic 100% sets the modelling lamps of the head plugged into the channel with the highest flash<br />
power setting to 100% and the modelling lamps of the head plugged into the other channel in<br />
proportion to its variator setting.<br />
HINT:<br />
The unit can be set to display power in terms of a decimal reading where 10.0 represents full<br />
power. This display mode can be set by holding down the test button at switch on.<br />
The power pack may be triggered from the following sources:<br />
1. An external sync source plugged into either of the Sync Sockets. This will trigger the power pack if<br />
the Ready Indicator is lit. The Sync Socket line is nominally +5V and designed for low voltage<br />
camera operation. These sockets may also be used with radio and IR triggers to provide a<br />
synchronised trigger.<br />
2. The Test Button will fire the power pack only if the unit is charged and the Ready Indicator is either lit<br />
or flashing.<br />
3. When the Photocell is switched on, the power pack will trigger in response to an external flash of<br />
light, if the Ready Indicator is lit. For best results, be sure that the red Photocell window is clearly<br />
exposed to the triggering light source.<br />
6 www.bowens.co.uk<br />
www.bowens.co.uk 7