RC3 user guide TOPSnew:RC3 user guide - bowens
RC3 user guide TOPSnew:RC3 user guide - bowens
RC3 user guide TOPSnew:RC3 user guide - bowens

You also want an ePaper? Increase the reach of your titles
YUMPU automatically turns print PDFs into web optimized ePapers that Google loves.
Changing the IR Channel<br />
Number Remotely<br />
This function is only available on the Esprit DX and the<br />
Esprit 750PRO.<br />
The channel number of any Esprit DX or 750PRO can be<br />
changed remotely providing the REMOTE function is<br />
switched ON. Use this facility with care as remote control<br />
of individual units may be lost, requiring the channel<br />
number to be set manually. It should be remembered that<br />
if more than one unit(s) is set to the same channel number<br />
as the <strong>RC3</strong> or if the <strong>RC3</strong> is set to ALL, then all units within<br />
range will be simultaneously altered.<br />
To change the IR channel number remotely set the <strong>RC3</strong><br />
to the channel number of the Esprit DX or 750PRO you<br />
want to change. Press the remote control function button<br />
until Channel ‘X’ is displayed (X being the channel you<br />
wish to you use), then use the MASTER + or MASTER -<br />
buttons to change the channel number. If no further<br />
adjustments are attempted within 4 seconds then the<br />
display will revert to the default ‘FLASH’ mode. The new<br />
channel number will now be selected.<br />
Other Functions<br />
The <strong>RC3</strong> also allows the <strong>user</strong> to reset either the Esprit DX<br />
or 750PRO to their default settings. To do this the <strong>RC3</strong><br />
must be set to the correct IR channel. Point the <strong>RC3</strong> at<br />
the unit to be reset and press and release the SELECT<br />
button. Then within 2 seconds, press the POWER<br />
(RESET) button. All of the units functions will be reset to<br />
the conditions stated. See table below:<br />
FUNCTION STATE AFTER RESET<br />
Cell<br />
Off<br />
Bracketing<br />
Off<br />
Sound<br />
Off<br />
Flash Power<br />
Min<br />
Power 750<br />
Lamp Independent<br />
Min<br />
Int / Cont.<br />
Off<br />
Lamp<br />
Off<br />
Pulsar / Litelink Remote Trigger<br />
Radio Transmitter<br />
The <strong>RC3</strong> will also act as a Pulsar or Litelink Radio<br />
Transmitter to enable remote triggering of one or more<br />
flash units or a camera equipped with a Pulsar or Litelink<br />
receiver. The camera or other flash trigger source such<br />
as a light meter should be connected to the <strong>RC3</strong> via the<br />
jack socket using the supplied sync cord. If the <strong>RC3</strong> is<br />
being used with a Litelink then the <strong>RC3</strong> must always be<br />
set to Studio ‘F’.<br />
Radio Trigger Restrictions<br />
Due to the way radio signals are transmitted, moving a<br />
few centimetres in any direction can affect the signal. If<br />
difficulty occurs in a signal being transmitted / received<br />
try experimenting with the positioning of the units and the<br />
<strong>RC3</strong>.<br />
Radio systems are far less directional than IR and can<br />
work reliably with a number of units that are spaced far<br />
apart but well within range. At greater distances or where<br />
there are walls in between, or metal objects close by then<br />
the operation / signal may not be as reliable.<br />
Using Channel & Studio Settings<br />
(Assumes all Pulsars / Litelinks are in range and switched<br />
to ‘Receive’).<br />
The Studio setting can be used to isolate <strong>user</strong>s /<br />
equipment within a single or separate studios. It can also<br />
be used to set up a number of completely different<br />
lighting options within a single set-up by changing the<br />
studio select switch.<br />
An <strong>RC3</strong> with the channel set to ‘ALL’ will trigger any<br />
Pulsar regardless of its channel setting providing the<br />
studio setting is the same as the <strong>RC3</strong>.<br />
An <strong>RC3</strong> set to a specific channel will only trigger a Pulsar<br />
set to the same channel or ‘ALL’, providing the studio<br />
setting is the same as the <strong>RC3</strong>.<br />
- 6 - - 7 -<br />
Summary of IR Remote Control<br />
Channel Operation<br />
The following summary assumes that ‘REMOTE’ on all<br />
compatible units has been switched ‘ON’ and that they<br />
are all within range of the <strong>RC3</strong>.<br />
IR Remote Control<br />
1, 2, 3, 4<br />
ALL<br />
Specifications<br />
Part Code<br />
Recommended<br />
Batteries<br />
(x2)<br />
Expected Battery Life<br />
(Average Life)<br />
Typical IR<br />
Control Range<br />
Typical Radio<br />
Control Range<br />
Dimensions<br />
Weight<br />
Description of Operation<br />
Controls ALL units that<br />
are within range and set<br />
to the same channel as the<br />
<strong>RC3</strong> or set to ALL/0.<br />
Controls ALL units within<br />
range of <strong>RC3</strong> regardless<br />
of channel number.<br />
BW-7805<br />
High quality, 1.5V,<br />
Single Use,<br />
(Non-rechargeable)<br />
Alkaline, Size AA/R6<br />
12 - 24 Months<br />
10m<br />
10m<br />
Length - 175mm<br />
Width - 65mm<br />
Height - 30mm<br />
100g<br />
Due to our policy of constant product improvement Bowens Int Ltd reserves the<br />
right to change equipment specification at anytime and without notice.<br />
<strong>RC3</strong> REMOTE CONTROL INSTRUCTIONS<br />
BWL-0435/1 (07/07)<br />
BOWENS INTERNATIONAL LIMITED<br />
355 Old Road<br />
Clacton on Sea<br />
Essex CO15 3RH UK<br />
Tel: +44 (0)1255 422807<br />
Fax: +44 (0)1255 436342<br />
www.<strong>bowens</strong>.co.uk<br />
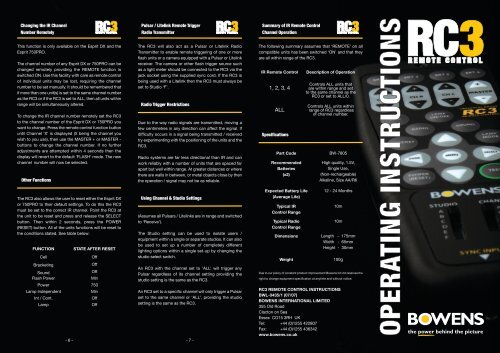
OPERATING INSTRUCTIONS
Control Panel Guide<br />
Testing the Control<br />
IR Remote Control Restrictions<br />
IR Control of QuadX & Esprit DX<br />
A<br />
B<br />
D<br />
F<br />
H<br />
I<br />
M<br />
O<br />
R<br />
S<br />
A. Transmit Indicator B. Socket 1 - 4<br />
C. Master + & - D. Channel A - C<br />
E. Lamp On / Off F. Cell<br />
G. Sound H. Radio<br />
I. Bracket J. Lamp Mode<br />
K. Menu L. Select<br />
M. Done N. Directional Pad<br />
O. Power (Reset) P. Test<br />
Q. Channel Selector R. Studio Selector<br />
S. Sync Input<br />
C<br />
E<br />
G<br />
J<br />
L<br />
N<br />
K<br />
P<br />
Q<br />
Your <strong>RC3</strong> Digital Remote Control, will have been fitted<br />
with new batteries at the factory. Bowens cannot accept<br />
liability for the condition of the batteries which may<br />
require replacement before use.<br />
Check that the control operates by pressing any button<br />
and confirming the Transmit Indicator flashes.<br />
N.B. Although this indicates that the remote control is<br />
operational it cannot guarantee that the unit being<br />
operated has received the transmission.<br />
If the Transmit Indicator flashes slowly three times after a<br />
key is released or does not light at all then the batteries<br />
should be changed at the earliest opportunity. Batteries<br />
in a poor condition will result in the <strong>RC3</strong> having a reduced<br />
operational range.<br />
Battery Fitting<br />
See specifications for recommended battery type.<br />
To fit new batteries remove the rear cover by removing<br />
the 4 fixing screws with a suitable sized pozidrive<br />
screwdriver. Hold the PCB within the top cover and<br />
carefully prise the old batteries out of the battery holder<br />
and dispose of them responsibly. Always fit new batteries<br />
in pairs. Never mix new and used batteries or use<br />
different makes and types together. Clip the two new<br />
batteries into the battery holder ensuring that they are<br />
fitted with the correct polarity. Reassemble the remote<br />
control taking care not to over tighten the fixing screws.<br />
The control is now ready for use.<br />
Functions Summary<br />
The <strong>RC3</strong> is able to control Bowens Infra Red (IR) Remote<br />
capable units, Bowens Radio Trigger capable units and<br />
separate Bowens Pulsar and Litelink Radio Triggers. The<br />
following assumes that you are familiar with the operation<br />
of the equipment being controlled. Read the unit manual<br />
in conjunction with this <strong>user</strong> <strong>guide</strong> if you are unsure about<br />
the use of any of the controls. Accessible functions vary<br />
with the unit type.<br />
Ensure that the target unit(s) you wish to operate are<br />
switched on. Set REMOTE on all the units to ON. When<br />
using the IR remote always point the unit towards the<br />
control panel of the target unit.<br />
Any IR system tends to be directional and although the IR<br />
signal can be ‘bounced’ off certain objects or walls, it<br />
may not work reliably with a number of units that are<br />
spaced far apart. Whenever possible always point the<br />
remote control directly towards the control panel of the<br />
target unit or units requiring adjustment.<br />
N.B. The Photocell flash detector on units is very<br />
sensitive and can be activated by the <strong>RC3</strong>, if used at<br />
close range (typically