

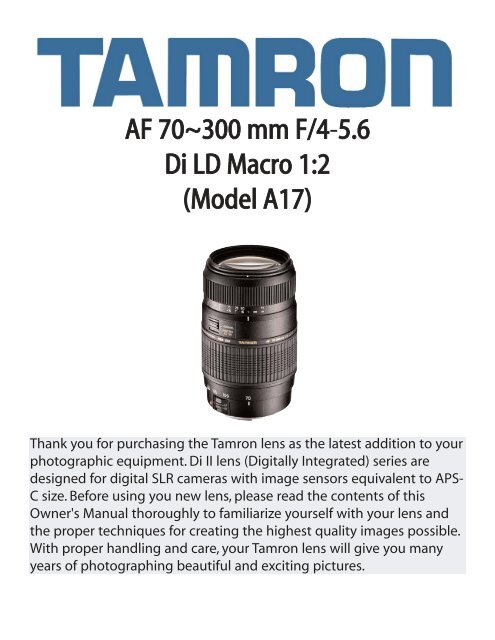
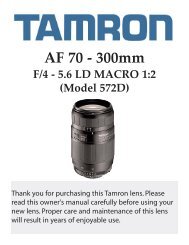
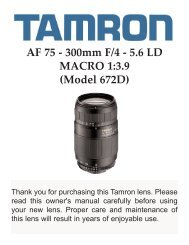
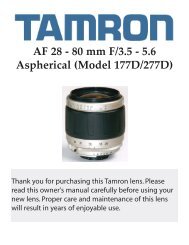
AF 70~300 mm F/4-5.6 Di LD Macro 1:2 (Model A17) - Tamron
AF 70~300 mm F/4-5.6 Di LD Macro 1:2 (Model A17) - Tamron
AF 70~300 mm F/4-5.6 Di LD Macro 1:2 (Model A17) - Tamron

You also want an ePaper? Increase the reach of your titles
YUMPU automatically turns print PDFs into web optimized ePapers that Google loves.
<strong>AF</strong> <strong>70~300</strong> <strong>mm</strong> F/4-<strong>5.6</strong><br />
<strong>Di</strong> <strong>LD</strong> <strong>Macro</strong> 1:2<br />
(<strong>Model</strong> <strong>A17</strong>)<br />
Thank you for purchasing the <strong>Tamron</strong> lens as the latest addition to your<br />
photographic equipment. <strong>Di</strong> II lens (<strong>Di</strong>gitally Integrated) series are<br />
designed for digital SLR cameras with image sensors equivalent to APS-<br />
C size. Before using you new lens, please read the contents of this<br />
Owner's Manual thoroughly to familiarize yourself with your lens and<br />
the proper techniques for creating the highest quality images possible.<br />
With proper handling and care, your <strong>Tamron</strong> lens will give you many<br />
years of photographing beautiful and exciting pictures.
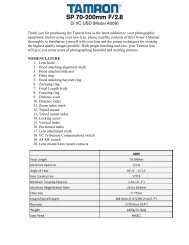
NOMENCLATURE<br />
1. Lens Hood<br />
2. Hood attaching alignment mark<br />
3. Hood attaching indicator<br />
4. Filter Ring<br />
5. Hood attaching bayonet ring<br />
6. <strong>Di</strong>stance index<br />
7. <strong>Di</strong>stance scale<br />
8. Focusing ring<br />
9. Zooming ring<br />
10. Focal length scale<br />
11. Zoom index mark<br />
12. Zoom lock switch<br />
13. Lens mount/Lens mount contacts (Nikon)<br />
14. <strong>AF</strong>-MF altering switch (Canon Fig 5 & 6)<br />
15. Lens attachment mark<br />
16. AE (minimum aperture) lock<br />
17. Aperture scale<br />
18. Aperture index<br />
19. F-number index mark for long focal lengths (Nikon, Pentax)<br />
20. F-number scale for finder display (Nikon)<br />
21. Aperture ring<br />
22. <strong>Macro</strong> selector switch<br />
SPECIFICATIONS<br />
<strong>A17</strong><br />
Focal Length<br />
70-300<strong>mm</strong><br />
Maximum Aperture<br />
F/4-<strong>5.6</strong><br />
Angle of View 34 21'-8 15'<br />
Lens Construction 9/13<br />
Minimum Focus <strong>Di</strong>stance 1.5m<br />
Max. Magnifications Ratio 1:3.9<br />
Filter Size<br />
62<strong>mm</strong><br />
Length<br />
116.5<strong>mm</strong><br />
<strong>Di</strong>ameter<br />
76.6<strong>mm</strong><br />
Weight<br />
435g<br />
Hood<br />
D<strong>A17</strong><br />
* Lengths and weights listed in lens specifications are for lenses with Nikon mounts.<br />
* Features and cosmetic designs of lenses listed in this owner's manual may be revised<br />
without notice.
ATTACHING AND REMOVING THE LENS<br />
How to mount the lens<br />
Remove the rear cap of the lens. Align the lens attachment mark (15) on the lens barrel with<br />
its counterpart on the camera mount and insert the lens. Rotate the lens clockwise until it<br />
click-locks. For Nikon, Sony and Pentax models, align the lens attachment mark on the camera<br />
and zoom index (11) on the lens to attach the lens. For Nikon models, align the lens<br />
attachment mark with the dot on the camera and rotate the lens counter-clockwise until it<br />
click-locks.<br />
How to detach the lens<br />
Pressing the lens release button on the camera down, turn the lens counter-clockwise (in<br />
case of Nikon lens, clockwise), and lift the lens off the camera's lens mount.<br />
For further details, please read the instruction manual of your camera.<br />
FOCUSING (Autofocus) (Ref. Figs 1 & 2)<br />
Switch the focusing mode switch of the camera to Auto focusing mode (<strong>AF</strong>) in case of<br />
Nikon, Sony, or Pentax. In case of Canon camera, switch the <strong>AF</strong>/MF switch (14) on the lens to<br />
<strong>AF</strong>. (Fig. 5). Press the shutter button lightly while viewing through the camera's viewfinder,<br />
the lens focuses automatically. An in-focus mark will light when the lens focuses on the<br />
main subject sharply. Press the shutter button further to photograph.<br />
When set on <strong>AF</strong> mode, interfering with focusing ring (8) may cause serious damage to the lens<br />
mechanism.<br />
For further details, please read the instruction manual of your camera.<br />
FOCUSING (Manual focus) (Ref. Figs 1, 2 & 6)<br />
Switch the focusing mode switch of the camera to manual focusing mode (MF) in case of<br />
Nikon, Sony, or Pentax. In case of Canon camera, switch the <strong>AF</strong>/MF switch (14) on the lens to<br />
MF. (Fig. 6). Focus manually by rotating the focusing ring while viewing through the camera’s<br />
viewfinder. The main subject in the viewfinder will be sharp when the lens is focused<br />
correctly.<br />
Even in the MF mode, turing the focusing ring (8) while pressing the shutter button halfway the<br />
focus aid function lamp lights up when the picture is in focus.<br />
At infinity, make sure the image in the viewfinder appears sharp. The infinity position is made with<br />
certain allowances to insure proper focus under a variety of conditions.<br />
For further details, please read the instruction manual of your camera.
ZOOMING (Ref. Figs.1 & 2)<br />
Rotate zooming ring (9) of the lens while viewing through the camera's viewfinder and<br />
compose your image at the chosen focal length.<br />
LENS APERTURE AND AE MODE (Ref. Figs. 1, 7, & 8)<br />
Setting lens f-numbers with Canon & Sony cameras<br />
Set the f-number with aperture setting device of the camera body in accordance with the<br />
selected photographing mode.<br />
For further details, please read the instruction manual of your camera.<br />
Setting lens f-numbers with Nikon & Pentax cameras<br />
Photographing in a progra<strong>mm</strong>ed-AE or a shutter-speed-priority-AE mode. Rotate the lens<br />
aperture ring (21) to the minimum aperture position, in case of Nikon camera, and set on<br />
the “A” position in case of a Pentax camera. The aperture ring will be locked in position<br />
automatically. When shooting in an aperture-priority-AE or manual-exposure mode, release<br />
the lens aperture ring lock button.<br />
The lens aperture varies with zooming movement. Cameras read the different lens openings<br />
and automatically adjust the exposure properly.<br />
For further details, please read the instruction manual of your camera.<br />
If your camera is a Nikon F401 or F50, you can set the aperture to any desired f-number, leaving the<br />
aperture ring at the minimum opening position.
Lens Hood (Ref. Figs. 1, 12 to 17)<br />
When attaching and detaching the lens hood for the <strong>A17</strong>, be sure to set your camera or lens to MF<br />
mode. The hood attaching bayonet ring (5) turns as the the focusing ring (8) turns. Trying to attach the lens<br />
hood when the camera or lens is set in <strong>AF</strong> mode forces the focusing ring (8) to turn and will damage the<br />
camera or lens.<br />
Attaching the Lens Hood (Ref. Figs. 12 & 13)<br />
1. For Nikon, Sony, or Pentax cameras, set the camera to the MF mode. For Canon cameras,<br />
set the <strong>AF</strong>-MF switch (14) on the lens to the MF position.<br />
2. Align the hood attaching alignment mark (2) on the hood with the corresponding index<br />
mark (5) or the top of the index line of the distance scale on the lens. Press the hood lightly<br />
onto the hood attaching bayonet ring (Fig. 12) and then rotate it clockwise to secure (Fig.<br />
12). The lens hood will be securely held as the mark (TAMRON O) comes to the top (Fig. 13).<br />
When attaching the lens hood, hold the focusing and zoom control rings so that they are<br />
not rotated unintentionally.<br />
Detaching the lens hood<br />
1. For Nikon, Sony, and Pentax cameras, set the camera to the MF position. For Canon<br />
cameras, set the <strong>AF</strong>-MF switch (14) on the lens to the MF position.<br />
2. Secure the focusing ring (8) from moving while turning the lens hood (1) counterclockwise,<br />
until the hood is released from the lens.<br />
Stowing lens hood on the lens (Ref. Fig. 14)<br />
*The lens hood can be reverse-mounted for easy storage.<br />
1. For Nikon, Sony, and Pentax cameras, set the camera to the MF mode. For Canon cameras,<br />
set the <strong>AF</strong>-MF switch (14) to the MF position.<br />
2. Reverse the lens hood. Point the lens toward to opening, then align the hood (5) on the<br />
lens with the (TAMRON O) alignment on the hood (3).<br />
3. Turn the hood clockwise until the alignment mark is at the top to set it. (Fig. 14)<br />
Detaching the stored lens hood from the lens (Ref. Fig. 15 to 17)<br />
1. For Nikon, Sony, and Pentax cameras, set the camera to the MF mode. For Canon cameras,<br />
set the <strong>AF</strong>-MF switch (14) to the MF position.<br />
2. Set the zoom index mark (11) at 300<strong>mm</strong> on the zooming ring (9).<br />
3. Hold the extended portion of the focusing ring (8) to secure from moving while turning<br />
the hood (1) counter-clockwise until the hood is released.
Switching to <strong>Macro</strong> Photography (Ref. Figs. 1, 18 to 21)<br />
The model <strong>A17</strong> allows macro photography by operating the macro selector switch.<br />
Switching to <strong>Macro</strong> Photography<br />
First, turn the zoom ring to align the zoom between 180-300<strong>mm</strong>. Next, slide the macro<br />
switch (22) from the Normal to the <strong>Macro</strong> position. The lens is now switched to macro<br />
photography mode.<br />
The macro selector switch (22) cannot be operated unless the zooming ring (9) is between 180<strong>mm</strong>,<br />
and 300<strong>mm</strong>. Always make sure to align the zoom ring between 180<strong>mm</strong> and 300<strong>mm</strong> before operating the<br />
macro selector switch.<br />
When in the macro photography mode, the zoom ring can only be rotated over the range of 180-<br />
300<strong>mm</strong>.<br />
When in the macro photography mode, the focusing ring rotates continuously from infinity to the<br />
minimum focus distance of 0.95m.<br />
The maximum magnification ratio in the macro photography mode is 1:2 (f=300<strong>mm</strong>, 0.95m)<br />
Cancellation of <strong>Macro</strong> Photography<br />
First, check that the focusing ring (8) is aligned to 1.5m or farther (1.5 - infinity). Next, slide<br />
the macro selector switch (22) from the <strong>Macro</strong> position to the normal position. The macro<br />
photography mode is now cancelled.<br />
The macro selector switch (22) cannot be operated unless the focusing ring (8) is set to a distance<br />
between 1.5m and infinity. Always make sure to align the focus ring is set between 1.5m and infinity<br />
before operating the macro selector switch.<br />
The focus ring can only be turned between infinity and 1.5m when the macro selector switch is set<br />
to the Normal position (when macro photography is cancelled.) It cannot be turned to a distance closer<br />
than 1.5m.<br />
PRECAUTIONS IN SHOOTING<br />
The optical design for <strong>Di</strong>-II takes into consideration the various features of digital<br />
single reflex cameras. However, due to the configuration of the digital SLR cameras, even<br />
when the Autofocus accuracy is within specifications, the focal point may be a little forward<br />
or behind the optimum point when shooting with auto focus under some conditions.
The image circles of <strong>Di</strong>-II lenses are designed to match the digital SLR cameras using<br />
the image sensors equivalent to APS-C (approx. 15.5 x 23.2<strong>mm</strong>). Do not use <strong>Di</strong>-II lenses with<br />
such cameras as it may cause vignetting on the image.<br />
<strong>A17</strong> employs an internal focusing (IF) system. Because of the characteristics of this<br />
optical design, the angles of view at distances other than infinity are wider than that of the<br />
lenses applying an ordinary focusing system.<br />
When the built-in flash on the camera is used, adverse photographic phenomena<br />
such as corner illumination, fall-off, or vignetting at the bottom part of the image may be<br />
observed, especially with wide angle ranges. This is due to the inherent limitation of the<br />
coverage of the built-in flash, and/or the relative position of the flash to the edge of the lens<br />
barrel which causes shadows on the image. It is strongly reco<strong>mm</strong>ended to use a suitable<br />
separate flash unit provided by the camera manufacturer for all flash photography.<br />
When using the lens in the telephoto focal range, please be careful with the camera<br />
shake. Effective way to avoid the camera shake is using an ISO setting of higher numbers.<br />
Using a tripod or monopod is also effective.<br />
When set on <strong>AF</strong> mode, interfering with the focusing ring may cause serious damage to the<br />
lens mechanism.<br />
Certain camera models may indicate the maximum and minimum aperture values of<br />
the lenses appropriate numbers. This is inherent to the design of the camera and not an<br />
indication of error.<br />
When using a special filter such as a PL filter on the A16, use low-profile filters. The<br />
thick rim of a normal filter may cause vignetting.<br />
TO ENSURE LONG-TERM SATISFACTION<br />
Avoid touching the glass element surface. Use a photographic lens cloth or a blower<br />
to remove dust from the lens element surface. When not using the lens, always place a lens<br />
cap on it for protection.<br />
Use a lens cleaning tissue or lint cloth with a drop of cleaning solution to remove fingerprints<br />
or dirt on the glass lens surface with a rotary motion from the center to the edges.<br />
Use a silicon cloth to clean your lens barrel only.<br />
Mildew is an enemy of your lens. Clean the lens after shooting near water or in any<br />
humid place. Store your lens in a clean, cool, dry place. When storing your lens in a lens case,<br />
store it with co<strong>mm</strong>ercially available drying agents such as silica gel, and change the agent<br />
occasionally. If you find mildew on your lens, consult an authorized repair shop or nearby<br />
photographic store.<br />
Do not touch the lens-camera interface contacts since dust, dirt and/or stains may<br />
cause a contact failure between the lens and camera.<br />
When using your equipment in an environment where the temperature changes from<br />
one extreme to another, make sure to put your equipment temporarily in a case or a plastic<br />
bag for a length of time in order for the equipment to go though a gradual temperature,<br />
this will reduce potential equipment trouble.

![SP AF 300mm F/2.8 LD [IF] for Canon (Model 360EE) - Tamron](https://img.yumpu.com/27036206/1/190x245/sp-af-300mm-f-28-ld-if-for-canon-model-360ee-tamron.jpg?quality=85)
![SP AF17-50mm F/2.8 XR Di LD Aspherical [IF] - Tamron](https://img.yumpu.com/27036204/1/190x245/sp-af17-50mm-f-28-xr-di-ld-aspherical-if-tamron.jpg?quality=85)
![AF 18~250 mm F/3.5-6.3 Di-II LD Aspherical [IF] - Tamron](https://img.yumpu.com/27036201/1/190x245/af-18250-mm-f-35-63-di-ii-ld-aspherical-if-tamron.jpg?quality=85)
![AF28-300mm F/3.5-6.3 XR Di LD Aspherical [IF] Macro ... - Tamron](https://img.yumpu.com/27036194/1/190x245/af28-300mm-f-35-63-xr-di-ld-aspherical-if-macro-tamron.jpg?quality=85)
![SP AF 14mm F/2.8 Aspherical [IF] (Model 69E) - Tamron](https://img.yumpu.com/27036192/1/190x245/sp-af-14mm-f-28-aspherical-if-model-69e-tamron.jpg?quality=85)
![SP AF 17~50 mm F/2.8 XR Di-II LD Aspherical [IF] (Model ... - Tamron](https://img.yumpu.com/27036181/1/190x245/sp-af-1750-mm-f-28-xr-di-ii-ld-aspherical-if-model-tamron.jpg?quality=85)