

![SP AF 14mm F/2.8 Aspherical [IF] (Model 69E) - Tamron](https://img.yumpu.com/27036192/1/500x640/sp-af-14mm-f-28-aspherical-if-model-69e-tamron.jpg)
SP AF 14mm F/2.8 Aspherical [IF] (Model 69E) - Tamron
SP AF 14mm F/2.8 Aspherical [IF] (Model 69E) - Tamron
SP AF 14mm F/2.8 Aspherical [IF] (Model 69E) - Tamron

You also want an ePaper? Increase the reach of your titles
YUMPU automatically turns print PDFs into web optimized ePapers that Google loves.
<strong>SP</strong> <strong>AF</strong> <strong>14mm</strong> F/<strong>2.8</strong><br />
<strong>Aspherical</strong> [<strong>IF</strong>]<br />
(<strong>Model</strong> <strong>69E</strong>)<br />
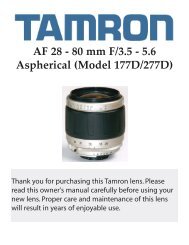
Thank you for purchasing this <strong>Tamron</strong> lens. You are now a proud owner<br />
of the TAMRON <strong>SP</strong> <strong>AF</strong> <strong>14mm</strong> F/<strong>2.8</strong> A<strong>SP</strong>HERICAL (<strong>IF</strong>) (<strong>Model</strong> <strong>69E</strong>), an<br />
ultra wide-angle lens featuring excellent optical performance and useful<br />
in a variety of photographic situations. This lens is compatible with<br />
Canon, Minolta, Nikon and Pentax autofocus, single-lens-reflex cameras.<br />
Read these instructions carefully to be sure you get the most out of<br />
what this lens has to offer. In addition, to ensure longevity, be sure to<br />
handle and clean the lens properly.
NOMENCLATURE<br />
1. Focusing Ring<br />
2. Distance Scale<br />
3. Focusing & aperture index<br />
4. Infrared index<br />
5. Depth-of-field Scale<br />
6. Lens-attachment index<br />
7. Aperture ring<br />
8. Aperture scale<br />
9. AE (Min. aperture) lock button<br />
10. Built-in Hood<br />
11. Gelatin filter holder<br />
* 6 is for Canon and Minolta models only<br />
* 7~9 are for Nikon and Pentax models only<br />
<strong>SP</strong>EC<strong>IF</strong>ICATIONS<br />
Focal Length<br />
Maximum Aperture<br />
<strong>69E</strong><br />
<strong>14mm</strong><br />
F/<strong>2.8</strong><br />
Angle of View 113.8º<br />
Optical Construction (Groups/Elements) 12/14<br />
Minimum Focusing Distance<br />
0.20 m/0.66 ft<br />
Maximum Magnification Ratio 1:6.5<br />
Diameter<br />
Filter<br />
Weight<br />
Length<br />
86.5mm / 3.41 in.<br />
Gelatin filter holder in back<br />
675g / 23.8 oz.<br />
87mm / 3.43 in.<br />
* Length and weight indicated are for the Nikon model.<br />
* Specifications and design are subject to changes without notice.
MOUNTING / REMOVING LENS (Fig. 2)<br />
Mounting<br />
After removing the rear lens cap, align the lens mount index mark with that of the camera<br />
body (on Canon/Minolta/Pentax models) and rotate the lens clockwise until it click-locks.<br />
For the Nikon model, align the lens mount index mark with the dot on the camera and<br />
rotate counter-clockwise until it click-locks.<br />
Removal<br />
Push in and hold the lens release button on the camera body while rotating the lens counter-clockwise<br />
(clockwise in case of Nikon model) and lift the lens off the camera body.<br />
* Refer to the instruction manual of your camera for additional information.<br />
FOCUSING (Fig. 2 and 3)<br />
Switching between <strong>AF</strong> & MF modes<br />
Nikon and Canon models: Simply move the focusing ring forward (to <strong>AF</strong>) and backward (to<br />
MF) to change the focusing mode between autofocus (<strong>AF</strong>) and manual focus (MF).<br />
Minolta and Pentax models: Move the focusing ring forward (to <strong>AF</strong>) and backward (to MF)<br />
and at the same time, set the <strong>AF</strong>/MF selector switch of the camera body to the coinciding<br />
focusing mode (<strong>AF</strong> or MF).<br />
Mount<br />
<strong>AF</strong>/MF Switching Operation<br />
Nikon <strong>AF</strong>-D<br />
Minolta<br />
Canon<br />
Pentax<br />
Move focusing ring only.<br />
Move and switch both focusing ring and<br />
selector of camera body.<br />
Move focusing ring only.<br />
Move and switch both focusing ring and<br />
selector of camera body.<br />
* Carefully read "Autofocus" and "Manual focus" sections below and operate the camera and<br />
lens accordingly. In addition, please refer to the instructions related to focusing operations<br />
of your camera.<br />
AUTOFOCUS (<strong>AF</strong>)<br />
The camera focuses automatically in the <strong>AF</strong> mode, provided both focusing ring of the lens<br />
and the <strong>AF</strong>/MF selector switch of the camera body are set to the autofocus mode (<strong>AF</strong>). The<br />
focusing ring does not rotate when set in the <strong>AF</strong> mode since the coupling mechanism of<br />
the focusing ring is disconnected from the autofocus mechanism. Therefore, the focus ring<br />
itself will rotate freely when manually turned, but will have no effect on focus adjustment.
CAUTION WHEN OPERATING MINOLTA AND PENTAX MODELS<br />
When the focusing ring is set in the manual focus position while the camera is set in<br />
the <strong>AF</strong> mode, the focusing ring rotates as if it were in autofocus mode. Turning of the focus<br />
ring in this instance may cause damage to the lens and/or the camera.<br />
Do not force the focusing ring when it is set in the manual focus mode. Manual rotation<br />
of the focus ring when the camera is still set in the autofocus mode (<strong>AF</strong>) will cause<br />
mechanical damage to the lens and/or to the camera body.<br />
MANUAL FOCUS (MF)<br />
Nikon and Canon models: Simply move the focusing ring backward to the MF position.<br />
Minolta and Pentax models: Switch the <strong>AF</strong>/MF selector switch on the camera body to MF<br />
mode then, slide the focusing ring backward to the MF position.<br />
MANUAL FOCUSING OPERATIONS<br />
Rotate the focusing ring manually while looking through the viewfinder until the image in<br />
the finder comes into sharp focus.<br />
When the focusing ring is set to the <strong>AF</strong> position, the focusing ring rotates freely and<br />
you cannot adjust focus.<br />
If you use the lens in the manual focus mode on an autofocus camera, rotate the<br />
focusing ring while holding the shutter release button depressed halfway. The focus confirmation<br />
indicator will light when subject comes into focus.<br />
The focusing ring of this lens of this lens rotated beyond the infinity position in order<br />
to properly focus to infinity under a variety of environmental conditions. When manually<br />
focusing, make sure the subject at infinity is sharp in the viewfinder.<br />
APERTURE (Fig. 4 and 5)<br />
Canon and Minolta models<br />
Lens apertures are set and controlled by the camera by the camera according to the mode<br />
set on the camera body.<br />
Nikon and Pentax models<br />
When photographing in the programmed AE or the shutter-speed-priority AE mode, rotate<br />
the aperture ring to the minimum opening (f/22) position on the Nikon model and to AE<br />
position on the Pentax model by depressing the AE lock button. The aperture ring will automatically<br />
lock in position. To switch to the aperture-priority AE or manual-exposure-control<br />
mode, rotate the aperture ring to any desired f-number by depressing AE (minimum aperture)<br />
lock button. In case of the Nikon F401 and/or F50 series cameras, the aperture can be<br />
set on the camera body when the lens aperture ring is set in the minimum aperture position.
INFRARED INDEX (Fig. 4)<br />
Special focus adjustment is required when using infrared black and white film with an<br />
infrared filter attached to the lens. Set the lens and the camera in manual focus mode and<br />
focus normally. Then adjust the focusing scale to the infrared index and attach the infrared<br />
filter to begin photographing. A critical focus may be obtained through test shooting(s).<br />
LENS HOOD<br />
A lens hood is built in as a part of this lens. In order to eliminate unnecessary and harmful<br />
stray light rays from outside the ultra-wide angle of view of the lens, the lens hood is built in<br />
as an inseparable part of the lens barrel. This built-in lens hood design also protects the<br />
front convex lens element, which has an extremely large curvature.<br />
CHECKING DEPTH OF FIELD (Refer to depth-of-field table)<br />
The depth-of-field table shows aperture values horizontally at top and ranges of focus vertically<br />
at left. If, for example, the aperture is set at f/4 and the distance to the subject is 1 m<br />
(3.3ft), the depth-of-focus value is 0.67 - 2.24m (2.2 - 7.39 ft.)as read in the table where f/4 in<br />
the horizontal column and 1m (3.3ft) in the vertical column intersect.<br />
* Refer to the instruction manual of your camera for additional information.<br />
* If your camera has a depth-of-field preview mechanism, the depth-of-field effect can<br />
be confirmed in the viewfinder. For further details on the preview mechanism, refer to the<br />
instruction manual of your camera.<br />
FILTER (Fig. 6)<br />
Due to the nature of this lens's ultra-wide angle of view, a filter cannot be attached to the<br />
front of the lens barrel. A sheet type of filter, such as a gelatin filter, may be cut using the<br />
template provided and inserted in the filter slot in the rear of the lens.<br />
* Cut and trim a sheet-type filter to the size of the template. If the template is not followed<br />
exactly, the filter may bend or, in some cases, snap out of position by the focusing movement<br />
of the lens and therefore may not work effectively.<br />
* Set the lens to the infinity position in order to insert or extract a filter from the filter slot of<br />
the lens.
PRECAUTIONS<br />
Generally, an ultra-wide lens is susceptible to optical flare and ghost images due to its<br />
ultra-wide angle of view. Check the images carefully through the camera's viewfinder to<br />
make sure there is no adverse flare, glare, or ghost image in the frame.<br />
An ordinary flash device cannot cover the entire angle of view of this lens. Therefore,<br />
unless you are intentionally using a single on-camera flash unit, it is best to photograph in<br />
natural lighting or in extremely broad and flat lighting with multiple lighting units. The<br />
built-in flash unit of a camera may cast a semi-circular shadow of the extending lens barrel<br />
in a photograph.<br />
Refer to the instruction manual of your camera relating to the built-in flash unit.<br />
Set the focusing ring in the <strong>AF</strong> position when shooting in the <strong>AF</strong> mode. The ring set at<br />
the MF position in the <strong>AF</strong> mode may cause damage to the lens and/or camera.<br />
Certain camera models may indicate the maximum and minimum aperture values of<br />
this lens in approximate numbers. This is inherent to the design of the camera and not an<br />
indication of error.<br />
If you use the data-memory card of the Minolta card system, the focal length of this<br />
lens is registered as 15mm. Such a focal length registration is due to the memory system of<br />
the camera and is not an indication of error.<br />
When using the Pentax MZ-10 in the auto-picture-program mode, you may not be<br />
able to set the camera to the "portrait" mode. The camera judges the appropriateness of the<br />
set picture mode gathering data such as the focal length of the lens, the image magnification<br />
and so on. When determined not appropriate, set picture mode is cancelled<br />
TO ENSURE LONG-TERM SATISFACTION<br />
1.Avoid touching the glass element surface. Use a photographic lens cloth or blower<br />
brush to remove dust from the lens element surface. When not using the lens, always place<br />
the supplied lens cap on it for protection.<br />
2.Use a lens cleaning tissue or lint cloth with a drop of cleaning solution to remove<br />
fingerprints or dirt on the glass lens surface with a rotary motion from the center to edge.<br />
Use a silicon cloth to clean your lens barrel only.<br />
3. Mildew is an enemy of your lens. Clean the lens after shooting near water or in any<br />
humid place. Store your lens in a clean, cool and dry place. If you find mildew on your lens,<br />
consult a repair shop or nearby photographic store immediately.<br />
4.Do not touch the lens-camera interface contacts since dust, dirt and/or stains may<br />
cause contact failure between the lens and camera.<br />
5.When using your equipment [camera(s) and lens(es)] in an environment where the<br />
temperature changes from one extreme to another, make sure to put your equipment temporarily<br />
in a case or plastic bag for a period of time to allow the equipment to gradually<br />
adjust to the temperature shift. This will reduce potential equipment trouble.


![SP AF 300mm F/2.8 LD [IF] for Canon (Model 360EE) - Tamron](https://img.yumpu.com/27036206/1/190x245/sp-af-300mm-f-28-ld-if-for-canon-model-360ee-tamron.jpg?quality=85)
![SP AF17-50mm F/2.8 XR Di LD Aspherical [IF] - Tamron](https://img.yumpu.com/27036204/1/190x245/sp-af17-50mm-f-28-xr-di-ld-aspherical-if-tamron.jpg?quality=85)
![AF 18~250 mm F/3.5-6.3 Di-II LD Aspherical [IF] - Tamron](https://img.yumpu.com/27036201/1/190x245/af-18250-mm-f-35-63-di-ii-ld-aspherical-if-tamron.jpg?quality=85)
![AF28-300mm F/3.5-6.3 XR Di LD Aspherical [IF] Macro ... - Tamron](https://img.yumpu.com/27036194/1/190x245/af28-300mm-f-35-63-xr-di-ld-aspherical-if-macro-tamron.jpg?quality=85)

![SP AF 17~50 mm F/2.8 XR Di-II LD Aspherical [IF] (Model ... - Tamron](https://img.yumpu.com/27036181/1/190x245/sp-af-1750-mm-f-28-xr-di-ii-ld-aspherical-if-model-tamron.jpg?quality=85)