visio.lign - Bredent
visio.lign - Bredent
visio.lign - Bredent

You also want an ePaper? Increase the reach of your titles
YUMPU automatically turns print PDFs into web optimized ePapers that Google loves.
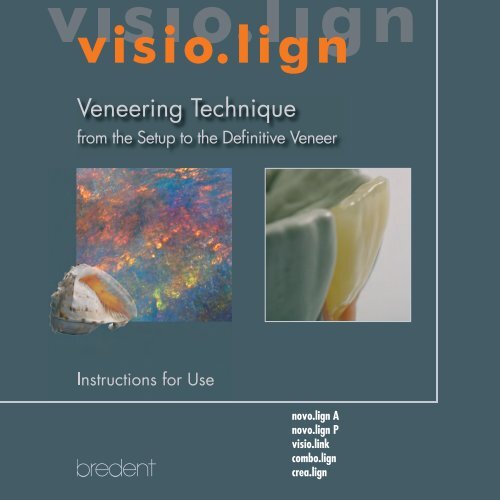
<strong>visio</strong>.<strong>lign</strong><br />
Veneering Technique<br />
from the Setup to the Definitive Veneer<br />
Instructions for Use<br />
novo.<strong>lign</strong> A<br />
novo.<strong>lign</strong> P<br />
<strong>visio</strong>.link<br />
combo.<strong>lign</strong><br />
crea.<strong>lign</strong>
Contents<br />
3 Introduction and product description / <strong>visio</strong>.<strong>lign</strong><br />
5 System components<br />
7 Indications and application areas<br />
9 Veneer-up<br />
11 Esthetic try-in<br />
13 Framework design and conditioning<br />
15 Conditioning the veneers<br />
17 Luting<br />
19 Individualizing<br />
21 Finishing and polishing<br />
23 Thermoplastic forming<br />
24 Bonding tests of the University of Jena<br />
26 List of materials<br />
2
Introduction and product description<br />
<strong>visio</strong>.<strong>lign</strong>, the veneering system with guarantee for aesthetics. It<br />
comprises of multi-layer veneers, developed from natural teeth and<br />
a bonding system in perfectly matched shades. Additional tooth<br />
and gingiva materials complete the system.<br />
Discover the wide indication range of <strong>visio</strong>.<strong>lign</strong> which will facilitate<br />
your daily work routines in the laboratory and support you during<br />
the fabrication of aesthetic restorations. There will be no limits to<br />
your creativity!<br />
<strong>visio</strong>.<strong>lign</strong><br />
Veneering system with naturally layered veneers - novo.<strong>lign</strong> A<br />
(anteriors) and novo.<strong>lign</strong> P (posteriors) - in anatomical designs.<br />
• shade stability, resistance to plaque and abrasion<br />
• efficient, thanks to rational processing<br />
• reliable shade results in the classic A-D shades with perfectly<br />
matched bonding via <strong>visio</strong>.link with combo.<strong>lign</strong> and crea.<strong>lign</strong><br />
• finishing, supplementing and individualizing using the nanofilled<br />
composite crea.<strong>lign</strong><br />
• neo.<strong>lign</strong> full denture tooth with identical shades and designs<br />
ideal for implant prosthetics and fixed/removable restorations<br />
3
S46<br />
novo.<strong>lign</strong> A<br />
S46<br />
neo.<strong>lign</strong> A<br />
I47<br />
I47<br />
D38<br />
D38<br />
G3<br />
novo.<strong>lign</strong> P<br />
G3<br />
neo.<strong>lign</strong> P<br />
<strong>visio</strong>.link<br />
G3<br />
G3<br />
The final shade of neo.<strong>lign</strong> A and P is obtained<br />
after bonding (luting) with combo.<strong>lign</strong>.<br />
combo.<strong>lign</strong><br />
crea.<strong>lign</strong>
System components<br />
novo.<strong>lign</strong> A/P<br />
neo.<strong>lign</strong> A/P<br />
<strong>visio</strong>.link<br />
combo.<strong>lign</strong><br />
crea.<strong>lign</strong><br />
Veneers made of high impact PMMA composite in anatomical<br />
designs for anterior and posterior veneers. Available in the classic<br />
A-D shades. Natural esthetics for all indications.<br />
Anatomical full denture teeth with identical shades and designs<br />
for implant and fixed/removable restorations made of high impact<br />
PMMA composite. The system-spanning occlusal design has been<br />
developed for all common occlusion concepts.<br />
PMMA and Composite Primer for bonding highly cross-linked<br />
novo.<strong>lign</strong> A and novo.<strong>lign</strong> P veneers and prefabricated teeth.<br />
For conditioning composites, denture base materials and the<br />
biocompatible, thermoplastic Bio XS material.<br />
Dentine-colored adhesive composite (dual-hardening) for reliable<br />
bonding of novo.<strong>lign</strong> A and novo.<strong>lign</strong> P veneers in the classic A-D<br />
shades.<br />
Nanofilled composite for individualizing, completing and finishing.<br />
For the free-layering technique and perfect red-white esthetics and<br />
for the fabrication of laboratory-made inlays, onlays and non-prep<br />
veneers.<br />
5
Implant restoration<br />
fixed tension-free on<br />
SKY UVE abutments<br />
Removable restoration<br />
on telescopic<br />
crowns with novo.<br />
<strong>lign</strong> A<br />
Implant-supported<br />
bar with novo.<strong>lign</strong><br />
veneers in the<br />
anterior region and<br />
neo.<strong>lign</strong> teeth in the<br />
posterior region<br />
3-unit anterior<br />
bridge with novo.<br />
<strong>lign</strong> veneers<br />
Combined restoration<br />
with<br />
novo.<strong>lign</strong> veneers<br />
Anterior zirconium<br />
dioxide bridge<br />
veneered with<br />
<strong>visio</strong>.<strong>lign</strong>
Indications and application areas<br />
Veneer-up<br />
• Use of the veneers to support planning and transfer of the<br />
situation to the definitive restoration<br />
• Selection of esthetic shade, shape and tooth position<br />
in line with the patients’ wishes<br />
Temporary restorations<br />
Permanent veneering<br />
• Laboratory-made temporaries based on impression and<br />
wax-up<br />
• Veneer on SKYtemp (bredent medical) as immediate<br />
restoration after placement of the implant<br />
Composite veneering for fixed and removable restorations:<br />
• Telescopic and conical crowns<br />
• CoCr clasp restorations<br />
• Crowns and bridges<br />
• Attachment work<br />
• Implant restorations<br />
• Coverdenture technique<br />
7
Teamwork - dentist<br />
and dental technicians<br />
satisfy the<br />
individual patient‘s<br />
requests.<br />
selected tooth shade and design<br />
The esthetic try-in<br />
supportsplanning and<br />
transferring and …<br />
… is the basis for perfect modelling of the<br />
framework and ensures…<br />
...individual restorations for patients.
Veneer-up<br />
The novo.<strong>lign</strong> A and novo.<strong>lign</strong> P veneers support planning and the<br />
transfer and are used for the definitive veneer. The same veneers are<br />
used for the working steps starting with the set-up and the esthetic<br />
try-in, to orientation during waxing up the framework until the<br />
preparation of the definitive restoration.<br />
Tooth shade, tooth size and tooth position as well as some esthetic<br />
aspects are already determined when selecting the right tooth from<br />
the assortment of different designs and shades.<br />
Dentist and dental technician are able to fulfill the individual wishes<br />
of their patients and involve them in the design process of their<br />
future restorations.<br />
The prepared veneer-up is the basis for the esthetic appearance<br />
and the function. It supports dentists and dental technicians in their<br />
communication and preparation efforts for the entire prosthetic<br />
restoration. Wishes of patients are fulfilled and future corrections are<br />
avoided.<br />
The central task is the check of the set-up of the teeth under esthetic,<br />
functional and phonetic aspects which can be carried out on the<br />
prepared stumps or after the fabrication of the primary crowns.<br />
9
Determining<br />
the suitable<br />
design for the<br />
physiognomy<br />
and the<br />
residual teeth<br />
The position<br />
of the anterior<br />
veneers is<br />
marked<br />
The veneers are<br />
fixed using<br />
tooth-colored<br />
wax, for<br />
example<br />
beauty setup<br />
Based on bite<br />
registration,<br />
the anterior<br />
and posterior<br />
veneers are<br />
completed<br />
for the esthetic<br />
try-in<br />
Completed esthetic set-up<br />
Try-in, check and correction if required
Esthetic try-in<br />
A vacuum formed splint is used as a carrier of the esthetic try-in.<br />
Just like in the <strong>visio</strong>.<strong>lign</strong> film „The Movie“, the base of bite registration<br />
can be used for the set-up of the esthetic try-in.<br />
The cervical margin of the novo.<strong>lign</strong> anterior and posterior veneers<br />
is ground to adapt their length and preparation border to the space<br />
available.<br />
Adequate space for the framework design must be ensured before<br />
fixing the veneers. To create a perfect shade, a joint of 0.2 mm is<br />
required.<br />
The veneers are set up on the base using tooth-colored wax and the<br />
wax-up is completed.<br />
During try-in of the restoration, bite position, tooth shape, tooth<br />
position, tooth shade and phonetics are checked and if necessary,<br />
corrections are performed.<br />
A silicone key is used to fix the set-up. The veneers are removed<br />
from the base of the esthetic restoration and placed into the silicone<br />
key. Then the space available for the secondary structure is<br />
checked.<br />
11
Veneers support planning and<br />
the transfer of the wax-up of<br />
the framework. Phonetic and<br />
esthetic aspects are the basis<br />
for the optimization of the<br />
wax-up.<br />
Cast secondary<br />
structure<br />
Conditioning<br />
with metal<br />
primer<br />
Applying<br />
opaque<br />
material<br />
Polymerizing<br />
opaque<br />
material
Framework design and conditioning<br />
The set-up obtained from the esthetic try-in facilitates framework<br />
design considerably. Retentions can be perfectly placed onto the<br />
veneering surface of the framework to save space and ensure the<br />
function. A slender design of the wax-up is required for the metal<br />
framework to meet the requirements of phonetics and esthetics.<br />
Dimensions of 0.2 - 0.3 mm for the application of the opaque<br />
material and the adhesive joint must be adhered to.<br />
After casting, finishing, fitting and polishing, the position of the<br />
veneer in the key in front of the framework is checked and necessary<br />
corrections are performed.<br />
Use Al 2<br />
O 3<br />
(110 - 125 µm) to sandblast the framework at a pressure<br />
of 2.5 to 3.5 bars. Then the metal surface is conditioned with the<br />
Silano-Pen or metal primer. The instructions of the respective manufacturer<br />
must be observed!<br />
Apply opaque material and polymerize in accordance with the instructions<br />
for use; if required apply several thin layers until the metal<br />
substructure is completely covered.<br />
When using tooth-colored framework materials, such as Bio XS<br />
(thermopress 400), <strong>visio</strong>.link is used for conditioning. Silano-Pen is<br />
used for conditioning zirconium dioxide frameworks and the bonding<br />
agent is applied subsequently.<br />
The use of retention beads results in improved mechanical bonding<br />
and ensures the durability of the restoration.<br />
13
Grind the<br />
veneer at an<br />
obtuse angle<br />
Sandblast<br />
the inside<br />
of the<br />
veneers<br />
across the<br />
border area<br />
Apply <strong>visio</strong>.link<br />
thinly to the<br />
inner side of the<br />
veneer beyond<br />
the margins<br />
<strong>visio</strong>.link<br />
application areas:<br />
PMMA-, composite<br />
primer and bonder.<br />
UV-curing<br />
Polymerize <strong>visio</strong>.<br />
link with UV light<br />
The silky-mat luster allows to verify conditioning.<br />
Do not apply <strong>visio</strong>.link too thickly and not twice
Conditioning the veneers<br />
These processing steps are referred to several times within these<br />
instructions for use; they must be completed correspondingly.<br />
• sandblast novo.<strong>lign</strong> veneers with Al2O3 (110 µm) at a pressure<br />
of 2.5 – 3.5 bars or roughen the surface using a tungsten<br />
carbide bur (enlarge the surface).<br />
• apply <strong>visio</strong>.link<br />
primer and polymerize in the Uni XS unit /<br />
Heraeus Kulzer for 90 sec or in the UV light-curing unit (e.g.<br />
Polylux) for 4 min.<br />
Note:<br />
Polymerization is completed when the <strong>visio</strong>.link<br />
primer has dried<br />
after exposure to UV light, i.e. the sticky coat/layer has been<br />
removed. Required wavelength range: 370 - 400 nm.<br />
LED devices without UVA rays are not suitable.<br />
Refer to the instructions of the manufacturer on the exchange<br />
intervals for the light-curing units; these intervals must be adhered to.<br />
When bonding, it must be ensured that all surfaces which are to be<br />
bonded using resin/composite later on, need to be sandblasted and<br />
conditioned with <strong>visio</strong>.link.<br />
It is recommended to apply <strong>visio</strong>.link slightly beyond the sandblasted<br />
surface. <strong>visio</strong>.link is removed from the surfaces which have not been<br />
sandblasted when finishing the restoration.<br />
Note:<br />
Bonding can only be achieved by sandblasting or roughening and<br />
by the subsequent application of <strong>visio</strong>.link and polymerization in the<br />
light-curing unit.<br />
15
Apply combo.<br />
<strong>lign</strong> to the<br />
conditioned<br />
inner side of<br />
the veneer<br />
If opaque material<br />
for matrices<br />
is used, holes<br />
are drilled into<br />
the matrix<br />
Excess material<br />
obtained by<br />
pressing on the<br />
matrix does not<br />
need to be discarded.<br />
It can be<br />
used to prepare<br />
a bonding layer<br />
to the crea.<strong>lign</strong><br />
finishing material<br />
combo.<strong>lign</strong> is<br />
hardened<br />
selectively and<br />
the veneer<br />
is fixed. The<br />
matrix can be<br />
removed.<br />
From the labial<br />
side, the veneers<br />
are fixed by the<br />
transparent<br />
<strong>visio</strong>.sil matrix<br />
material.<br />
The matrix is<br />
removed for fi<br />
nal hardening<br />
(polymerization)<br />
In the cervical<br />
and approximal<br />
areas,<br />
combo.<strong>lign</strong><br />
which is still<br />
paste-like, is<br />
removed with<br />
an instrument
Luting<br />
combo.<strong>lign</strong> is applied to the veneer in a way to wet the entire<br />
conditioned surface and to achieve maximum adhesion. Luting can<br />
be carried out in the following way:<br />
• During manual luting, affix the veneer to the framework, carefully<br />
remove excess material and then polymerize with the light-curing<br />
unit, for example bre.Lux Power Unit (desktop unit) - 180 seconds.<br />
• Radiation with a suitable light-curing unit (e.g. bre.Lux N (hand<br />
lamp)) for approx. 10 sec are sufficient for fixation. If an opaque silicone<br />
is used, a hole of 2-3 m in the matrix (key) is prepared to fix<br />
the veneers. Final polymerization is carried out in the bre.Lux Power<br />
unit or another suitable light-curing unit, see list of units.<br />
• If luting is to be completed in a single step, it is recommended to<br />
use <strong>visio</strong>.sil as a transparent material. Fixation is carried out using<br />
the hand lamp bre.Lux LED N or another suitable light-curing unit.<br />
combo.<strong>lign</strong><br />
• is a dual-hardening composite. It hardens chemically and by<br />
exposure to light. Subsequent polymerization is required to reach<br />
the final hardness.Required wavelength range: 370-500 nm.<br />
• is suitable for composite joints or adhesive layers of 40 µm to 2 mm.<br />
Bonding results, see page 24.<br />
• The processing time span is approx. 5-6 min (at 20° C).<br />
Recommended polymerization in the Uni XS unit / Heraeus<br />
Kulzer or in the bre.Lux Power unit 180 sec. or other units with<br />
a wavelength range of 370-500 nm.<br />
17
After bonding,<br />
crea.<strong>lign</strong><br />
is applied<br />
approximally<br />
crea.<strong>lign</strong> is use<br />
for contouring in<br />
the palatal...<br />
...and the<br />
cervical<br />
areas<br />
Individual<br />
contouring also<br />
in the red-white<br />
area<br />
Layer application of<br />
crea.<strong>lign</strong> with<br />
intermediate<br />
polymerization for<br />
ensuing final<br />
polymerization. A<br />
handlamp can be<br />
used for intermediate<br />
polymerization or<br />
fixation of the layers.<br />
crea.<strong>lign</strong> Gum and<br />
Modifier allow<br />
individual contouring<br />
in the redwhite<br />
area
Finishing and individualizing<br />
It is recommended to use the microfilled and elastic composite crea.<br />
<strong>lign</strong> for shaping the approximal and cervical areas, which ensures<br />
homogeneous color transitions and lasting resistance to plaque and<br />
discoloration.<br />
crea.<strong>lign</strong> is used for final shaping and the definitive design. The<br />
material can be applied directly from the syringe or using a brush.<br />
The use of crea-<strong>lign</strong> Modelling Liquid facilitates the application<br />
with the brush and optimizes contouring of the interproximal spaces.<br />
Bonding of the individual layers is ensured by the „smear layer“<br />
(inhibition layer). If this layer is missing, conditioning must be<br />
carried out with <strong>visio</strong>.link. This applies also to the transitions to the<br />
veneer if they have not yet been conditioned.<br />
The inhibition layer can be removed with isopropanol, which avoids<br />
penetration into the surface and hence causes discoloration.<br />
All crea.<strong>lign</strong> shades can be mixed with one another. Varios<br />
incisal, neck, dentine and gingiva materials are available for<br />
individualizing.<br />
Note:<br />
After modelling and intermediate polymerization, final polymerization<br />
must be carried out for at least 6 minutes in the Uni XS /<br />
Heraeus Kulzer or the bre.Lux Power unit.<br />
19
Finishing with<br />
a tungsten<br />
carbide bur<br />
Prepolishing of<br />
crea.<strong>lign</strong><br />
Prepolishing with<br />
a goat-hair brush<br />
and Acrypol<br />
or pumice<br />
crea.<strong>lign</strong> Modelling<br />
Liquid reduces the<br />
inhibition layer and<br />
serves as a modifier<br />
(with regard to<br />
viscosity and modulus<br />
of elasticity)<br />
(e.g. PMMA)<br />
Modelling Liquid for<br />
reducing the inhibition<br />
layer and enhanced<br />
applying and modelling<br />
of crea.<strong>lign</strong><br />
<strong>visio</strong>.<strong>lign</strong><br />
Toolkit
Finishing and completing<br />
When applying the material, the layer thickness of crea.<strong>lign</strong> should<br />
not exceed 1 mm (without intermediate polymerization). To ensure<br />
maximum bond strength of veneers with a thickness of more than<br />
2 mm, combo.<strong>lign</strong> is applied from the basal direction.<br />
We recommend tungsten carbide burs for finishing and grinding.<br />
Diamond-coated rotary tools cause irreversible roughness on the<br />
surfaces and are not recommended.<br />
A soft goat-hair brush with pumice or Acrypol must be used for the<br />
first polishing process. The speed should not be above 3000 rpm<br />
(handpiece).<br />
Use Abraso-Starglanz and a soft cotton or leather buff for final<br />
polishing. The speed should not be above 5000 rpm (handpiece).<br />
The inhibition layer can be removed with isopropanol to avoid<br />
penetration into the surface. Inhition layer residues may cause<br />
discoloration.<br />
The elimination of oxygen, for example with gel, crea.<strong>lign</strong><br />
Modelling Liquid or final polymerization in the <strong>visio</strong>.Beta unit<br />
reduces or avoids the formation of an inhibition layer.<br />
Note:<br />
To achieve long-term resistance to plaque, the addition composite<br />
needs to be polymerized completely and polished subsequently.<br />
<strong>visio</strong>.<strong>lign</strong> Toolkit – ideal for finishing and polishing<br />
REF VLTOOLKIT<br />
21
Thermo-Pen.<br />
Hot air device with piezo technology<br />
without open flame<br />
...produces the required temperature of 250° C<br />
on the inner side of the veneer<br />
In the thermoplastic<br />
condition the<br />
veneer is expanded<br />
using a conical tool.<br />
before<br />
after
Thermoplastic forming<br />
novo.<strong>lign</strong> veneers consist of highly abrasion-resistant, high-impact<br />
PMMA and<br />
are suitable for thermoplastic forming.<br />
The required forming temperature is approx. 250 °C and should<br />
be supplied uniformly across and somewhat beyond the entire<br />
forming area.<br />
Transblock is used to protect regions not to be formed.<br />
Use: Set the Thermo-Pen to level 4 and heat for approx. 10-15 sec<br />
while keeping a distance of approx. 1 cm to the veneer. The inner<br />
side of the veneer should be heated.<br />
Use a round tool or primary element to obtain the desired width or<br />
size of the veneer.<br />
Note:<br />
Do not use an open flame to heat the veneers and make sure that<br />
the temperature will not exceed 280 °C!<br />
Improper handling will affect the product characteristics.<br />
23
Bonding test - combo.<strong>lign</strong><br />
Result of bonding tests of the University of Jena 2004-2008<br />
Compression shear strength in MPa without mechanical retention<br />
30<br />
25<br />
20<br />
15<br />
10<br />
5<br />
1 day 37° C<br />
25.000 *TC<br />
C C C C C C C C C C C C C C C C<br />
0<br />
EMF (NPM)<br />
Silano-Pen &<br />
Opaker combo.<strong>lign</strong><br />
(bredent)<br />
PMF (NPM)<br />
Metall Primer II<br />
& Gradia<br />
Opaker (GC)<br />
Electroplated gold<br />
ML-Primer &<br />
Ceramage<br />
Opaker (Shofu)<br />
Degunorm<br />
(PM) / ML-<br />
Primer &<br />
Ceramage<br />
Opaker (Shofu)<br />
PMF (NPM)<br />
SR Link & SR<br />
Adoro Opaker<br />
(Ivoclar)<br />
Zirconium oxide<br />
Silano-Pen<br />
(bredent)<br />
Bio XS<br />
<strong>visio</strong>.link<br />
(bredent)<br />
novo.<strong>lign</strong><br />
<strong>visio</strong>.link<br />
(bredent)<br />
Framework materials / Bonding (composite) system<br />
C = Cohesion fracture<br />
*Thermocycling 5° C / 55° C
Metal-composite bonding systems:<br />
Metal-composite bonding systems:<br />
After testing the compression shear strength, the following bonding<br />
systems have been released for use (polymerization in the Uni XS<br />
unit):<br />
Precious metal (PM):<br />
Silano-Pen or MKZ-Primer (bredent) with Gradia Opaker<br />
combo.<strong>lign</strong>, Metall Primer II (GC) with Gradia Opaker, Rocatec<br />
(ESPE) with Gradia Opaker, M.L. Primer and Ceramage Opaker<br />
(Shofu).<br />
Precious metal-free (PMF) or non-precious metal (NPM):<br />
Silano-Pen or MKZ-Primer (bredent) with Gradia Opaker<br />
combo.<strong>lign</strong>, Metall Primer II (GC) with Gradia Opaker, Rocatec<br />
(ESPE) with Gradia Opaker, SR Link + SR Adoro Opaker (Ivoclar<br />
Vivadent).<br />
Electroplated gold:<br />
M.L. Primer and Ceramage Opaker (Shofu), Metall Primer II (GC)<br />
with Gradia Opaker.<br />
Metal-free framework materials:<br />
After testing the compression shear strength, the following bonding<br />
systems have been released:<br />
• Silano-Pen oder MKZ-Primer (bredent) on zirconium oxide<br />
• <strong>visio</strong>.link Primer on Bio XS (thermopress 400, bredent)<br />
• Veneering of CAD/CAM manufactured frameworks made from<br />
PMMA or composite as long-term temporaries<br />
25
Polymerization units and polymerization times<br />
Polymerization times for<br />
<strong>visio</strong>.link, combo.<strong>lign</strong> and crea.<strong>lign</strong><br />
<strong>visio</strong>.link<br />
requires a wavelength of 370 to 400 nm,<br />
units without UVA light are not suitable<br />
combo.<strong>lign</strong> requires a wavelength of 370 to 500 nm,<br />
pure UVA units (such as Polylux) are not suitable<br />
crea.<strong>lign</strong> requires a wavelength of 370 to 500 nm,<br />
pure UVA units (such as Polylux) are not suitable<br />
Manufacturer Product name Wavelength Polymerizations Polymerization Polymerization<br />
in nm * time - <strong>visio</strong>.link time - combo.<strong>lign</strong> time - crea.<strong>lign</strong><br />
bredent bre.Lux Power Unit 370 - 500 90 s 180 s 6 min<br />
Dentsply / Triat, Triat 2000 400 - 500 3 min 6 min 10 min<br />
Degudent Eclipse k.A. 60 s 180 s 6 min<br />
Heraeus Kulzer Dentacolor XS, Uni XS 320 - 520 90 s 180 s 6 min<br />
Heraflash 320 - 520 90 s 180 s 6 min<br />
GC GC Laboligth LV-III 380 - 490 2 min 5 min 10 min<br />
Ivoclar Vivadent Targes Power furnace 400 - 580 4 min 180 s 8 min<br />
Lumanat 100 400 - 580 4 min 180 s 6 min<br />
Schütz Dental Spektra 2000 310 - 500 2 min 180 s 6 min<br />
Shofu Dental Solitilite EX 400 - 550 90 s 180 s 6 min<br />
Kuraray Dental CS 110 k.A. 2 min 5 min 8 min<br />
Hager & Werken Speed Labolight 320 - 550 90 s 180 s 8 min<br />
3M ESPE Visio BETA (new P1 - P4) 400 - 500 > 4 min (P2) 7 min (P2) 15 min (P1)<br />
* manufacturer’s data<br />
** new set of lamps is recommended<br />
Visio BETA (old U0 - U3)** 400 - 500 7 min (U1, U3) 15 min (U0) 15 min (U0)<br />
26
Important!<br />
Adhere to the instructions for use of the respective product. The<br />
data provided are reference values and based on units in perfect<br />
condition. Lamps/light sources need to be checked in accordance<br />
with the manufacturer’s instructions and replaced if necessary; see<br />
the following self-testing:<br />
Note:<br />
Polymerization of <strong>visio</strong>.link<br />
has been completed when the <strong>visio</strong>.<br />
link primer is dry<br />
after exposure to UV light, i.e. the sticky layer is<br />
removed.<br />
Although combo.<strong>lign</strong> is a dual-curing material, polymerizing<br />
with light is required to achieve utmost bonding strength. To check<br />
whether a unit provides the required wavelength range, cure<br />
combo.<strong>lign</strong> for approx. 10 sec. to see if the surface has hardened.<br />
A layer with a thickness of 2 mm (test plate) should have<br />
cured from both sides after 90 to 120 sec.<br />
crea.<strong>lign</strong> should be checked with the GUM pink shade; full curing<br />
of a test plate (thickness of 1 mm) should be achieved after 3 min.<br />
or at least within half of the polymerization time given.<br />
27
Enamel and transpa layer - novo.<strong>lign</strong><br />
Dentine -- novo.<strong>lign</strong><br />
<strong>visio</strong>.link (on sandblasted veneer)<br />
combo.<strong>lign</strong><br />
Opaque material<br />
Metal primer on metal framework<br />
Metal framework<br />
GmbH & Co.KG · 89250 Senden · Germany · Tel. (+49) 0 73 09 / 8 72-4 40 · Fax (+49) 0 73 09 / 8 72-4 44 · www.<strong>visio</strong>-<strong>lign</strong>.com · e-mail info@bredent.com<br />
Subject to changes 07/11 234 GB 5