Kroma Telecom, Manual TW7000
Kroma Telecom, Manual TW7000
Kroma Telecom, Manual TW7000

Create successful ePaper yourself
Turn your PDF publications into a flip-book with our unique Google optimized e-Paper software.
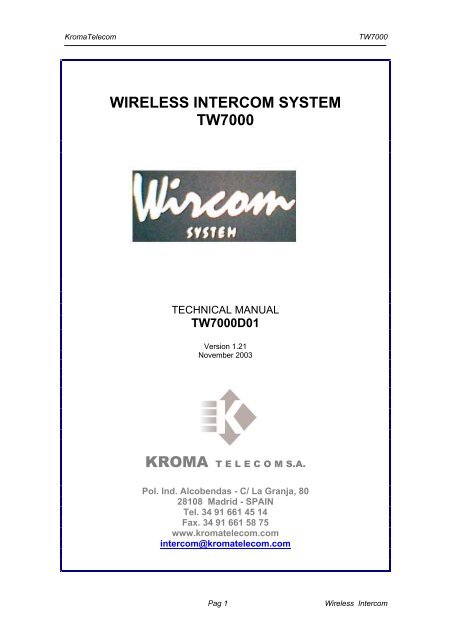
<strong>Kroma</strong><strong>Telecom</strong><br />
<strong>TW7000</strong><br />
WIRELESS INTERCOM SYSTEM<br />
<strong>TW7000</strong><br />
TECHNICAL MANUAL<br />
<strong>TW7000</strong>D01<br />
Version 1.21<br />
November 2003<br />
KROMA T E L E C O M S.A.<br />
Pol. Ind. Alcobendas - C/ La Granja, 80<br />
28108 Madrid - SPAIN<br />
Tel. 34 91 661 45 14<br />
Fax. 34 91 661 58 75<br />
www.kromatelecom.com<br />
intercom@kromatelecom.com<br />
Pag 1<br />
Wireless Intercom
<strong>Kroma</strong><strong>Telecom</strong><br />
<strong>TW7000</strong><br />
INDEX:<br />
0. HISTORICAL REVISON............................................................. 3<br />
1. DESCRIPTION OF THE SYSTEM ............................................. 4<br />
1.1.OPERATION WAYS:............................................................... 4<br />
1.2.FIXED BASE STATION........................................................... 5<br />
1.3.PORTABLE BELTPACK.......................................................... 6<br />
2. <strong>TW7000</strong>R01 BASE STATION ................................................... 8<br />
3. <strong>TW7000</strong>R02 BELTPACK.......................................................... 13<br />
4. SUBSCRIPTION MODE........................................................... 16<br />
5. KEYS CONFIGURATION......................................................... 20<br />
5.1.DIGITAL SYSTEM................................................................. 20<br />
5.2.ANALOG SYSTEM................................................................ 22<br />
5.3.INDEPENDENT SYSTEM ..................................................... 23<br />
6. STATUS OF THE SYSTEM ..................................................... 25<br />
7. ELECTRICAL DIAGRAMS ....................................................... 26<br />
Pag 2<br />
Wireless Intercom
<strong>Kroma</strong><strong>Telecom</strong><br />
<strong>TW7000</strong><br />
0. HISTORICAL REVISON<br />
This literature modifies and improves the previous version “Preliminar” in the<br />
following sections:<br />
V1.21: It modifies previous version V1.01.<br />
[New subscription Mode that combines the “Mute” button and the number keys]<br />
V1.01: It modifies the “Preliminary” version.<br />
[It adds to the mode subscription of beltpacks under Network Ethernet by means<br />
of protocol IP]<br />
[It modifies the configuration of the keys by means of Software Indico and<br />
through protocol IP]<br />
[It adds the information of the state of beltpacks through LAN]<br />
Pag 3<br />
Wireless Intercom
<strong>Kroma</strong><strong>Telecom</strong><br />
<strong>TW7000</strong><br />
1. DESCRIPTION OF THE SYSTEM<br />
Digital Wireless Intercom based on standard technology DECT. It has<br />
four independent channels, which allows up to four individual communications<br />
between the portable equipments. It has a small matrix of 4x4 crosspoints<br />
whose map is configurated by the user via software.<br />
The number of beltpacks in the system can increase over four if<br />
associations in the subscription take place or on the connection with other base<br />
stations as a coverage way. Each fixed module (up to 4 in the base station) is<br />
able to subscribe until with 5 portable modules (beltpacks), and as well, a<br />
beltpack is able to subscribe until with 4 fixed modules.<br />
There is also possibility of subscribing any other standard terminal DECT<br />
with protocol GAP as if a beltpack were, using the numeric keyboard as<br />
crosspoint key mode.<br />
A passive antenna is integrated inside the equipments. Coverage of 300<br />
meters in open spaces (TV Studios and OB Vans) and 30 meters through<br />
material structures that screen RF transmission (concrete walls).<br />
The system employs TDMA, with frequencies in the range 1880,064 Mhz to<br />
1898,208 Mhz, and guard bands of 1,728 Mhz. Modulation is standard GFSK<br />
with BxT=0.5 and m=288 KHz, Frequency Offset of +/- 50 Khz.<br />
1.1. OPERATION WAYS:<br />
The system has three different ways of operation depending on integration with<br />
another type of intercoms: working with a Digital Intercom System Indico<br />
TB7000, working with an Analog Intercom System TB6000 or independent<br />
operation without interconnection to any other intercom.<br />
The characteristics of each way of operation are:<br />
a) Independent System It is an independent system, it consist of a<br />
Base Station and Wireless Beltpacks. The communication settles<br />
down among different beltpacks from the system, assigning the<br />
configuration of each key, by means of the connection to network<br />
Ethernet through a navigator with a IP direction assigned.<br />
b) System connected to TB7000 The Wireless Intercom is<br />
connected to the Digital Intercom by means of 4 independent ports,<br />
being totally integrated at level of audio and data. The configuration of<br />
the keys in the Wireless Beltpacks is done directly by the user with<br />
the Indico Software, registering the ports where they are associated in<br />
the digital matrix.<br />
Pag 4<br />
Wireless Intercom
<strong>Kroma</strong><strong>Telecom</strong><br />
<strong>TW7000</strong><br />
c) System connected to TB6000 The Wireless Intercom is<br />
connected to the Analog Intercom by means of 4 independent ports,<br />
being totally integrated at level of audio and data. The configuration of<br />
the keys in the Wireless Beltpacks is made directly by the user with<br />
the configuration software of the matrix Map6000.<br />
1.2. FIXED BASE STATION<br />
This equipment is provided with up to 4 internal fixed modules for the<br />
individual connection of up to 4 beltpacks, allowing to have up to 4<br />
simultaneous and independent conversations. It is built-in a small modular 4x4<br />
matrix so that the different crosspoints can be made that the user demands<br />
according to the combination of pressed keys.<br />
It is possible to be interconnected to the Indico Digital Intercom System<br />
TB7000 via RJ45, with 4 independent ports per each beltpack. The<br />
configuration is direct from the Indico software. The Analog Intercom System<br />
TB6000 can be interconnected via SUBD-9, settling down in this case the<br />
configuration of keys by means of the software of the own analog matrix.<br />
In case the system is configurated as independent, the configuration of<br />
the keys and the subscription of beltpacks are made through local area network<br />
by means of IP addressing.<br />
In order to obtain the maximum possible coverage the base station must<br />
be located within the area of the work perimeter, with which an aerial fixation is<br />
due to make or in front panel, when the antenna is integrated inside the<br />
equipments.<br />
The base station is powered by an isolated power supply of +15v, with an<br />
option for redundant power supply, that can be located in a lateral receptacle<br />
that arranges the equipment. It has a weight of 3,2 kg with standard dimension<br />
of rack, in case of front positioning 3 UR width height and 19” rack mounting.<br />
Pag 5<br />
Wireless Intercom
<strong>Kroma</strong><strong>Telecom</strong><br />
<strong>TW7000</strong><br />
1.3. PORTABLE BELTPACK<br />
It is a wireless beltpack with technology DECT for the connection with its<br />
corresponding fixed module DECT of the base station . It is possible to be<br />
subscribed to four different fixed modules or another fixed module where there<br />
were another beltpack subscribed, but only can be operative simultaneously in<br />
only one of them.<br />
The passive antenna is integrated inside, and the coverage will depend<br />
on the distance to the fixed base station. The ‘ACTV’ led in the front panel<br />
informs about the coverage level. In its normal state it will be off, but when the<br />
coverage begins to diminish, this LED flickers until the minimum level of work<br />
recovers again, or it light permanently informing that there is no coverage at all<br />
and that it has lost the connection with its fixed module from the base station.<br />
It has four keys of crosspoints configurable by the user via software, with<br />
the functionality of Talk, Listen or Talk&Listen. For each key there are two<br />
associated leds for signaling of the commands. The local volume control is<br />
made by the control from the front, with mute button integrated in this control. A<br />
short keystroke conducts the battle of mic mute illuminating the LED associated<br />
to the control.<br />
A long keystroke (6 seconds) in this key ‘mic mute’, followed by the<br />
pressing of “0”, “1”, “2” and “3” keys, makes the beltpack to be in a<br />
subscription mode, remaining totally non-operative until again it is<br />
registered in the system.<br />
The audio input and output is via Tiny Q-C connector located at the rear<br />
back. The microphone input is electrect type with polarization of +3v at a level<br />
of –30dBu. The headset output is of differential type, with 600Ω impedance.<br />
Pag 6<br />
Wireless Intercom
<strong>Kroma</strong><strong>Telecom</strong><br />
<strong>TW7000</strong><br />
The beltpack is powered by three batteries of 1800 mAh, type AA1.2v,<br />
including in the equipment, with an average operating time of 16 hours of use,<br />
continuous working hours. The time of recharge is three hours, with full load<br />
indicator.<br />
The weight is 400 gr., its external dimensions are 11,5 cm height, 8 cm<br />
width and 3cm depth.<br />
Pag 7<br />
Wireless Intercom
<strong>Kroma</strong><strong>Telecom</strong><br />
<strong>TW7000</strong><br />
2. <strong>TW7000</strong>R01 BASE STATION<br />
It is the equipment where DECT fixed modules are located, responsible<br />
to provide coverage to the different beltpacks that they hang from the system.<br />
Each fixed module establishes a digital channel of connection with each<br />
beltpack, which determines that the communications of audio settle down of<br />
individual form.<br />
The number of fixed DECT modules in the base station is configured by<br />
the user at the moment of the purchase, being expandable the system any<br />
other moment. The configurations can vary from 1 fixed module to 4 modules in<br />
the base station, which will respectively determine the use from 1 beltpack<br />
(portable module) up to 4 beltpacks.<br />
Although the system is thought to associate a fixed module to a portable<br />
beltpack, another type of configurations also are possible. For example two<br />
beltpacks to a same fixed module can be subscribed, establishing crossed<br />
audio between them. The disadvantage is that the audio one is not independent<br />
and both beltpacks are in communication at the same time, in a same port in<br />
the system. Also standard DECT telephones can be subscribed, that<br />
incorporate protocol GAP as if a beltpack it were.<br />
The control and state of the system is made via software that will depend<br />
on the system mode of configuration, according to the commented previously in<br />
section 1.1. In the case of connection to the Indico system (TB7000) or to the<br />
analog intercom system(TB6000), it is used the own software of crosspoint of<br />
the matrix. Only in the case of independent way of operation it is configurated<br />
via local IP network.<br />
If the system is operated in digital or independent mode, each analog<br />
port of the rear back of the station is associate to the fixed module of that<br />
number of port, passing to be an auxiliary input/output of analog audio, so, it<br />
can be used to sent/receive audio from each beltpack.<br />
The location of this station bases on its place of work, will have to give<br />
coverage to the portable modules (beltpacks). The area is 300 meters in open<br />
spaces (TV Studios and OB Vans) and 30 meters through material structures<br />
that screen RF transmission (concrete walls). For TV studies it is advisable to<br />
locate the base station on the central part of the ceiling, or on an angle of corner<br />
of the wall.<br />
The base station is powered by an external power supply +15v, with an<br />
option for redundant power supply. In addition, there are two positioning for<br />
placing both power supplies.<br />
The system has some indicative leds that inform to the user about the<br />
different devices real state:<br />
Pag 8<br />
Wireless Intercom
<strong>Kroma</strong><strong>Telecom</strong><br />
<strong>TW7000</strong><br />
• Ethernet Set of 3 green leds located at the rear back, informing:<br />
• TX Transmission from the base station towards ethernet<br />
network.<br />
• RX Data Reception from network to the base station.<br />
• COL Collision between RX and TX at level of ethernet frame.<br />
• POWER Set of 5 green leds that visualize the different existing voltages<br />
in the motherboard. In correct operation all of them must be<br />
illuminated/lighting. (+12v, -12v, +3.3v, +2.5v, +5v).<br />
• Control signing Diodes and ports. They are located in the front of the<br />
equipment, next to those of power, such as is showed in the previous figure.<br />
• ACT Green Led indicating that the microcontroller has started and<br />
is operative. In its correct state it must flicker to constant frequency.<br />
• ERROR Red Led of error of initial configuration.It informs that there<br />
is an initialize error and the equipment become nonoperative.It is<br />
recommended to switch off and switch off in case the error was<br />
temporaty. In normal operation this led is off.<br />
• PORT[3..0] Red Leds associated to each one of the 4 available<br />
ports, with different functions:<br />
Pag 9<br />
Wireless Intercom
<strong>Kroma</strong><strong>Telecom</strong><br />
<strong>TW7000</strong><br />
<br />
<br />
<br />
<br />
Off -> It Informs that the port is connected to the Digital matrix and<br />
the beltpack is not subscribed.<br />
Normal Flicker -> It Informs that the port is connected to the Digital<br />
matrix and the beltpack is subscribed.<br />
Fast Flicker -> It Informs that the port is not connected to the<br />
Digital matrix and the beltpack is subscribed.<br />
On -> It Informs that the port is not connected to the Digital matrix<br />
and the beltpack is not subscribed.<br />
At the rear back of the base station are the connectors for access to<br />
other system and control. Below we can see a picture:<br />
The analog connection is via SUBD9 male connector existing by each<br />
fixed module DECT, a port (numbered connector). Through this one, also could<br />
be used as integration of <strong>Kroma</strong> analog intercom TB6000, using audio and<br />
data. The Pinout of this connector is the following one:<br />
SUBD9 MALE AUDIO <strong>TW7000</strong><br />
1 DataControl-<br />
2 DataControl+<br />
3 GND<br />
4 OUT analog audio -<br />
5 OUT analog audio +<br />
6 GND<br />
7 IN analog audio -<br />
8 IN analog audio +<br />
9 GND<br />
For the connection with a Digital intercom TB7000, there are 4 available<br />
digital links via RJ45 (maximum 300m), corresponding each port to a fixed<br />
DECT module, with the numeration that shows the figure. If the user wants to<br />
have the 4 DECT links (configuration of 4 beltpacks in the system), it is due to<br />
Pag 10<br />
Wireless Intercom
<strong>Kroma</strong><strong>Telecom</strong><br />
<strong>TW7000</strong><br />
take four cables to the base station (one per port). In the Indico software will be<br />
register per each port, configuring each beltpack of individual form.<br />
For special functions of software engineering, a port of control for the<br />
connection to PC by means of RS232 has been qualified. The connector is a<br />
SUBD9 female with connection, with following pinout:<br />
SUBD9 FEMALE RS232 <strong>TW7000</strong><br />
1 -<br />
2 TX data<br />
3 RX data<br />
4 -<br />
5 GND<br />
6 -<br />
7 -<br />
8 -<br />
9 -<br />
The wire that connects the serial port of the PC (COM) to the serial port<br />
of the equipment <strong>TW7000</strong> is of pin-to-pin type.<br />
For the control and supervision of the system, it must be connected a<br />
cable of network Ethernet in the female RJ45 at the rear back, labeled ‘net’. The<br />
system supports a connection to 10Mb/s by means of IP addressing. The IP<br />
address of the fixed base station is provided by defect with the equipment<br />
(192.168.8.222) and will depend on the user to modify in his network LAN, the<br />
mask of subnet necessary to be able to give visibility to him.<br />
This IP address may be modified through the connection with the control<br />
port RS232 via Windows hiperterminal. A new connection should be opened via<br />
the serial port (e.g. COM1), assigning the following values:<br />
Pag 11<br />
Wireless Intercom
<strong>Kroma</strong><strong>Telecom</strong><br />
<strong>TW7000</strong><br />
After configuring the port with the abovementioned valued, we can open the<br />
connection. Then press Enter so as a menu appears, showing the different<br />
options of <strong>TW7000</strong>. Shouldn´t this menu appear, please check the wire and<br />
hiperterminal connection.<br />
Once the menu is onscreen, we will choose Option 4 (Boot Mode), typing<br />
the password (3210). Then we choose Option 9 (IP Change). Once the new IP<br />
address has been introduced and without switching off the equipment, we<br />
should pass to the Option 5 (User Mode) so as it can work with the new<br />
assigned IP.<br />
Pag 12<br />
Wireless Intercom
<strong>Kroma</strong><strong>Telecom</strong><br />
<strong>TW7000</strong><br />
3. <strong>TW7000</strong>R02 BELTPACK<br />
It is a portable wireless beltpack with DECT technology able to subscribe<br />
any standard base with protocol GAP. It admits configuration of keys of its front<br />
panel, having a total integration with the Analog and Digital <strong>Kroma</strong> intercom<br />
systems.<br />
The subscription is made of simple form, with a sequence of pulsation<br />
made in the ‘mic mute’ key of its front, which allows to do fast modifications<br />
without any type of external controller.<br />
A Beltpack can be subscribed until with four fixed modules of a base<br />
station, which can be used to give it of discharge in different systems and to<br />
make it work as a coverage, with brief times of establishment of the new<br />
assigned channel.<br />
In its front part it has four configurables keys that they allow a direct<br />
selection of up to four interlocutors, with leds multifunction of state of the<br />
communication (talk or listen), mute key and volume control of the outputs<br />
headset. In addition it has LED of power and coverage state.<br />
The functionality of the keys is similar to the <strong>Kroma</strong> Intercom panels,<br />
allowing of this form a greater flexibility at the time of directing the<br />
communications between users.<br />
The beltpack is powered by three baterries NimH to 1.2v, that they are<br />
loaded through an external source of 15v, having in the front part a LED of low<br />
battery, that warns the user with its flickering.<br />
Average operating time of 16 hours of use, the total time of load is 3<br />
hours approximately. In addition the beltpack has the possibility of being<br />
operative while the batteries are being loaded (selection by hardware).<br />
Pag 13<br />
Wireless Intercom
<strong>Kroma</strong><strong>Telecom</strong><br />
<strong>TW7000</strong><br />
In the following figure we can see the the beltpack with the different<br />
connection elements from connection, commented from left to right:<br />
<br />
<br />
<br />
<br />
The beltpack power switch.<br />
Headset Connector.<br />
Red Led of load that it is switched on durind the load. If the led is<br />
switched off during the charge, the external source must be<br />
unpluged. The total load is 3 hours.<br />
Power Jack for batteries load.<br />
In the front there are some keys and some informative command leds for<br />
the user:<br />
<br />
<br />
<br />
<br />
Multi-turn for the headset local volume control.<br />
Mic mute key incorporated in the previous control. With a short<br />
keystroke “the microphone is in mute mode” and the yellow led is<br />
illuminated, informing about this state. If this control stays pressed<br />
during 6 seconds followed by the pressing of “0”, “1”, “2” and “3” keys<br />
in that order, the beltpack become in subscriptions mode and start to<br />
be in a nonoperative state, until it is register again.<br />
Green Led of power. In its normal state, it is on, and when there is low<br />
battery detection, it begins to flicker.<br />
Red Led for coverage information. Three states:<br />
- To be off Beltpack subscribed and with coverage.<br />
- To be on Beltpack no subscribed.<br />
- Flickering Beltpack subscribed but without coverage.<br />
Pag 14<br />
Wireless Intercom
<strong>Kroma</strong><strong>Telecom</strong><br />
<strong>TW7000</strong><br />
Four assignable keys to crosspoint, with signing of the state of the<br />
communication by means of two leds.<br />
- Fixed Illuminated Green Command achieve indication. The<br />
keystroke has been recognized.<br />
- Fixed Illuminated Red Established channel associated to the Talk<br />
command indication. (It is possible to talk).<br />
- Green Flickering Call establishment indication.<br />
- Red Flickering Incoming call indication (Listen).<br />
When the green LED ‘Power’ (located in the front) is flickering, it must<br />
be connected the power supply to recharge the batteries, since the equipment<br />
can begin to have badly operation and to cause cuts in the audio.<br />
Once connected the external power, the equipment automatic becomes<br />
disconnected and starts it in recharge mode (configuration by defect). The red<br />
LED ‘Charge’ (located at the rear back) will remains illuminated while this<br />
situation lasts. When the LED is off, the cycle of load will have finalized and is<br />
advisable to disconnect the beltpack from the external power.<br />
Pag 15<br />
Wireless Intercom
<strong>Kroma</strong><strong>Telecom</strong><br />
<strong>TW7000</strong><br />
4. SUBSCRIPTION MODE<br />
So that the portable modules (beltpacks) can be used in the system,<br />
previously they have to be registered, making an univocal correspondence<br />
between a fixed module and a portable module. This association is<br />
denominated subscription and will have to be carried out when the user wants<br />
to do new subscriptions or to cancel some subscriptions in the system.<br />
NOTE: Beltpacks go out of KROMA already being subscribed and are<br />
therefore operative when they are delivered to the clients.<br />
When a beltpack is switched on (Switch “ON”), begins a search process<br />
and a channel identification with the base station. This situation is visualized in<br />
beltpack with the activity red LED (ACTV) and flickering at constant form.<br />
If the beltpack previously were subscribed with some fixed module of the<br />
base station and is within the coverage radius, this LED will be OFF and the<br />
beltpack would be ready to operate. If it were not subscribed previously, this<br />
LED would constantly remain ON and the beltpack would not be operative. If<br />
beltpack were subscribed but it did not have coverage, the activity LED would<br />
flicker and the beltpack would be nonoperative, waiting to reach some<br />
coverage.<br />
In this way of work, the configuration of keys and the subscription of beltpacks<br />
are made via local area network Ethernet with IP address. The base station<br />
presents/displays a Web page, through a IP direction that settles down by<br />
defect from <strong>Kroma</strong> (Example: 192,168,8,221) where the user can assign the<br />
wished configuration, as it shows the following figure:<br />
Pag 16<br />
Wireless Intercom
<strong>Kroma</strong><strong>Telecom</strong><br />
<strong>TW7000</strong><br />
In the main page a configuration menu appears, where the user can choose the<br />
action to do, depend on how the user press the left button of the mouse on the<br />
emphasized option. In order to be able to operate in the system, one user must<br />
be identified via ‘password’. By defect the user is‘KROMA’ and the password is<br />
‘3210’ that it will have to be typing in order to accede to the configuration<br />
menus, according to sample the figure:<br />
The first submenu is the beltpack keys configuration, that will be seen in<br />
section 5.2. The second submenu does the management of subscriptions, as it<br />
is in the following figure:<br />
Pag 17<br />
Wireless Intercom
<strong>Kroma</strong><strong>Telecom</strong><br />
<strong>TW7000</strong><br />
Pressing in the buttons of subscribe/unsubscribe of each beltpack (BP) it<br />
is possible to be registered to them or to cancel a registration in the system. If<br />
any of the associated buttons to the beltpack is active, it means that there is not<br />
any fixed module in the base station to configure (It was not acquired in the<br />
purchase of the equipment).<br />
In order to be able to subscribe a beltpack, previously the fixed module<br />
that is going to be associated must be available. This situation is visualized in<br />
the subscriptions management page where the “ Subscribe” button must be<br />
active. Selecting this button a search begins from the fixed module of the base<br />
station associated to that channel, in order to find the portable module DECT<br />
that is desired to subscribe (to register), showing the following page:<br />
Pag 18<br />
Wireless Intercom
<strong>Kroma</strong><strong>Telecom</strong><br />
<strong>TW7000</strong><br />
If the beltpack is found, it is informed of such event and it is subscribed<br />
immediately. If it is not, the user is informed that it has not been subscribed after<br />
30 seconds of search, so, a new try has to be done again updating this page.<br />
The steps to follow to register a subscription are:<br />
- To switch on the beltpack and to keep pressed the mute button during<br />
6 seconds (till the yellow led begins to flicker). Then, we´ll press the<br />
following keys: “0”. “1”, “2” and “3”, in that order. The yellow led will<br />
begin to flicker more slowly informing that it is in subscription mode<br />
and the red led of activity must be switched on of constant form.<br />
- From the subscriptions management menu, select an available<br />
beltpack and click on the `Subscription’ button. In that way a<br />
searching protocol will begin between the fixed module of the base<br />
station and the portable module (or beltpack).<br />
- If the beltpack is found, the yellow led of mute and the red led are<br />
extinguished, informing that the subscription from the beltpack has<br />
finished (via a message on screen). If the subscription has not been<br />
possible after 30 seconds, the user will be informed with a message,<br />
having to reload the page and to repeat the previous process.<br />
NOTE: Having to repeat the process may occur. Please do it till an<br />
available channel is assigned between the fixed module and the beltpack.<br />
In order to cancel a beltpack subscription, its subscription can be<br />
eliminated from the same previous page of management, but this time the<br />
“Unsubscribe” button is selected.<br />
If doing this action the beltpack is switched on, immediately the red led of<br />
activity is canceled in the system, passing to be the red led of activity to<br />
constant illumination. If on the contrary it was done with the beltpack switched<br />
Pag 19<br />
Wireless Intercom
<strong>Kroma</strong><strong>Telecom</strong><br />
<strong>TW7000</strong><br />
off, when it is swiched on later, the red led of activity, informing that does not<br />
find its fixed module associated.<br />
If already being subscribed a beltpack and being switching on, we keep<br />
the mute key pressed during 6 seconds and the we press the keys “0”, “1”, “2”<br />
and “3” in that same order, this will cause an automatic cancelation of<br />
subscription in the beltpack and in the base station, then the red led of activity<br />
will be illuminated of permanent form.<br />
5. KEYS CONFIGURATION<br />
The allocation of crosspoints to the keys of beltpacks by means of the<br />
commands known as talk&listen is made of different way, depending that it is<br />
configurated as system to work with digital intercom, analog intercom or<br />
independent system.<br />
5.1. DIGITAL SYSTEM<br />
In the case of interconnecting the fixed base station to the Digital Intercom<br />
system <strong>Kroma</strong> Indico, the configuration of the keys will be directly done from the<br />
own software of the matrix, registering the ports that will occupy in this system,<br />
as if a panel was.<br />
Pag 20<br />
Wireless Intercom
<strong>Kroma</strong><strong>Telecom</strong><br />
<strong>TW7000</strong><br />
By each beltpack that registers in the digital intercom system, it will<br />
occupy a port of the matrix, where the commands of crosspoints will be able to<br />
be assigned to the keys, as it shows the following figure.<br />
Pag 21<br />
Wireless Intercom
<strong>Kroma</strong><strong>Telecom</strong><br />
<strong>TW7000</strong><br />
In order to determine the form of how to assign the commands to the<br />
keys, is requested to resort to the Software Indico <strong>Manual</strong> (Digital Intercom<br />
TB7000)<br />
5.2. ANALOG SYSTEM<br />
In the Analog System TB6000 there is not possibility to register the<br />
beltpack like so, since it is not defined in the list of panels available, it will have<br />
to be “emulated” as if it was another model of definable panel.<br />
For that reason, it is going to be registered by each beltpack, a panel<br />
TP6008 and we are going to assign crosspoints on their first four keys, to make<br />
them coincide with the keys of the front of beltpack.<br />
Pag 22<br />
Wireless Intercom
<strong>Kroma</strong><strong>Telecom</strong><br />
<strong>TW7000</strong><br />
In order to determine the form of how to assign the commands to the<br />
keys, is requested and neccesary to resort to the TB6000 Analog Intercom<br />
Software <strong>Manual</strong>.<br />
5.3. INDEPENDENT SYSTEM<br />
In this type of configuration, the asignation of the crosspoints to the keys<br />
is done through network Ethernet on IP protocol. The IP Direction of the base<br />
station is fixed by defect on <strong>Kroma</strong> facilities and the customer is informed<br />
about it for giving visibility in its network LAN.<br />
Once one we are on main menu page, it must be selected the link “Keys<br />
Configuration” introducing the user name: “KROMA” and the password “3210”.<br />
The following page of configuration must appear:<br />
Pag 23<br />
Wireless Intercom
<strong>Kroma</strong><strong>Telecom</strong><br />
<strong>TW7000</strong><br />
In the first place, we must select the number of beltpack to configure<br />
(from number 0 to the 3, up to 4 beltpacks the system can have) and next, and<br />
by each key, we must choose the the wished command (Talk, Listen and<br />
Talk&Listen) that it is wanted to execute in the key.<br />
In each command, we must select the destiny of the action, since the<br />
origin always will be the beltpack that is being configurated. When finalizing the<br />
configuration of the four keys is due to store it activating the button “Apply<br />
Configuration”, appearing a message of commands stored from correct form.<br />
Pag 24<br />
Wireless Intercom
<strong>Kroma</strong><strong>Telecom</strong><br />
<strong>TW7000</strong><br />
6. STATUS OF THE SYSTEM<br />
Through connection IP it is possible to visualize the state of the<br />
beltpacks which they are in the system, it is just as informative mode since<br />
actions can not be done in this submenu. In order to be able to accede we must<br />
select the “Status system” option from the main menu, appearing the following<br />
page:<br />
Each beltpack (BP) is identified with a number (from 0 to 3), showing the<br />
present state in which it is, with its fixed module associated from the base<br />
station. The different options from their state are:<br />
- OUT OF RANGE Subscribed Beltpack but is not in coverage or it<br />
is switched off.<br />
- IN RANGE Subscribed Beltpack and it is in coverage radius (it is<br />
operative).<br />
- NOT SUBSCRIBED Beltpack nonsubscribed. We must go to the<br />
subscriptions menu and to register it.<br />
- LOCKED Blocked fixed module. It has not been acquired the<br />
“operation link/connection” option, in the system, being available for<br />
future increases.<br />
- NOT PRESENT Unblocked fixed module but it is not located in the<br />
base station (not physically inserted).<br />
Pag 25<br />
Wireless Intercom
<strong>Kroma</strong><strong>Telecom</strong><br />
<strong>TW7000</strong><br />
7. ELECTRICAL DIAGRAMS<br />
Below you will find material lists and electrical diagrams of the <strong>TW7000</strong>:<br />
For the <strong>TW7000</strong>R01:<br />
-Assembly of the main board of the fixed station (<strong>TW7000</strong>P03)<br />
-Electrical circuit of the fixed station (<strong>TW7000</strong>E03)<br />
For the <strong>TW7000</strong>R02:<br />
-Assembly of the main board of the beltpack (<strong>TW7000</strong>P01-02)<br />
-Electrical circuit of the main board of the beltpack (<strong>TW7000</strong>E01-02)<br />
-Assembly of the front keyboard of the beltpack (<strong>TW7000</strong>P02-02)<br />
-Electrical circuit of the front keyboard of the beltpack (<strong>TW7000</strong>E02-02)<br />
Pag 26<br />
Wireless Intercom