Makita - JN1600 - Electric Nibbler
Makita - JN1600 - Electric Nibbler
Makita - JN1600 - Electric Nibbler
Create successful ePaper yourself
Turn your PDF publications into a flip-book with our unique Google optimized e-Paper software.
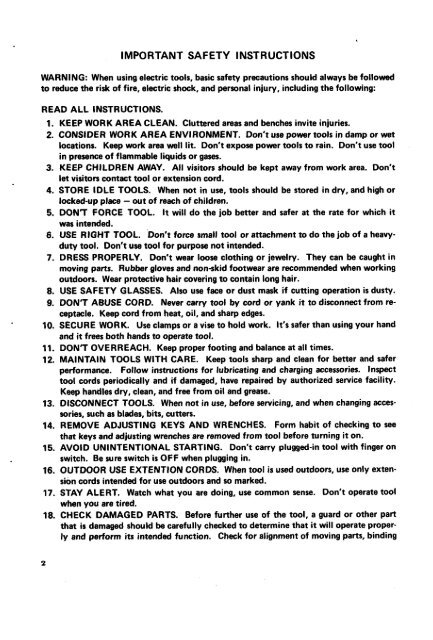
I M PO R TAN T SAFETY I NST R UCT IO NS<br />
WARNING: When using electric tools, basic safety precautions should always be followed<br />
to reduce the risk of fire, electric shock, and personal injury, including the following:<br />
READ ALL INSTRUCTIONS.<br />
1. KEEP WORK AREA CLEAN. Cluttered areas and benches invite injuries.<br />
2. CONSIDER WORK AREA ENVIRONMENT. Don't use power tools in damp or wet<br />
locations. Keep work area well lit. Don't expose power tools to rain. Don't use tool<br />
in presence of flammable liquids or gases.<br />
3. KEEP CHILDREN AWAY. All visitors should be kept away from work area. Don't<br />
let visitors contact tool or extension cord.<br />
4. STORE IDLE TOOLS. When not in use, tools should be stored in dry, and high or<br />
locked-up place - out of reach of children.<br />
5. DON'T FORCE TOOL. It will do the job better and safer at the rate for which it<br />
was intended.<br />
6. USE RIGHT TOOL. Don't force small tool or attachment to do the job of a heavyduty<br />
tool. Don't use tool for purpose not intended.<br />
7. DRESS PROPERLY. Don't wear loose clothing or jewelry. They can be caught in<br />
moving parts. Rubber gloves and non-skid footwear are recommended when working<br />
outdoors. Wear protective hair covering to contain long hair.<br />
8. USE SAFETY GLASSES. Also use face or dust mask if cutting operation is dusty.<br />
9. DON'T ABUSE CORD. Never carry tool by cord or yank it to disconnect from receptacle.<br />
Keep cord from heat, oil, and sharp edges.<br />
10. SECURE WORK. Use clamps or a vise to hold work. It's safer than using your hand<br />
and it frees both hands to operate tool.<br />
11. DON'T OVERREACH. Keep proper footing and balance at all times.<br />
12. MAINTAIN TOOLS WITH CARE. Keep tools sharp and clean for better and safer<br />
performance. Follow instructions for lubricating and charging accessories. Inspect<br />
tool cords periodically and if damaged, have repaired by authorized service facility.<br />
Keep handles dry, clean, and free from oil and grease.<br />
13. DISCONNECT TOOLS. When not in use, before servicing, and when changing accessories,<br />
such as blades, bits, cutters.<br />
14. REMOVE ADJUSTING KEYS AND WRENCHES. Form habit of checking to see<br />
that keys and adjusting wrenches are removed from tool before turning it on.<br />
15. AVOID UNINTENTIONAL STARTING. Don't carry plugged-in tool with finger on<br />
switch. Be sure switch is OFF when plugging in.<br />
16. OUTDOOR USE EXTENTION CORDS. When tool is used outdoors, use only extension<br />
cords intended for use outdoors and so marked.<br />
17. STAY ALERT. Watch what you are doing, use common sense. Don't operate tool<br />
when you are tired.<br />
18. CHECK DAMAGED PARTS. Before further use of the tool, a guard or other part<br />
that is damaged should be carefully checked to determine that it will operate properly<br />
and perform its intended function. Check for alignment of moving parts, binding<br />
2
of moving parts, breakage of parts, mounting, and other conditions that may affect<br />
its operation. A guard or other part that is damaged should be properly repaired or<br />
replaced by an authorized service center unless otherwise indicated elsewhere in this<br />
instruction manual. Have defective switches replaced by authorized service center.<br />
Don't use tool if switch does not turn it on and off.<br />
19. GUARD AGAINST ELECTRIC SHOCK. Prevent body contact with grounded surfaces.<br />
For example; pipes, radiators, ranges, refrigerator enclosures.<br />
20. REPLACEMENT PARTS. When servicing, use only identical replacement parts.<br />
SAVE THESE INSTRUCTIONS.<br />
VOLTAGE WARNING: Before connecting the tool to a power source (receptacle, outlet, etc.) be sure<br />
the voltage supplied is the same as that specified on the nameplate of the tool. A power source with<br />
voltage greater than that specified for the tool can result in SERIOUS INJURY to the user - as well as<br />
damage to the tool. If in doubt, DO NOT PLUG IN THE TOOL. Using a power source with voltage<br />
less than the nameplate rating is harmful to the motor.<br />
<strong>Nibbler</strong> & Standard Equipment<br />
Tool body<br />
Punch<br />
3
How to use<br />
0 Before cutting with the nibbler<br />
Coat the cutting line with machine oil when cutting mild steel or stainless; use light oil<br />
when cutting aluminum.<br />
.Switch operation<br />
First, turn the safety lock to the FREE<br />
position. Then squeeze the switch lever<br />
(paddle switch) to put on the tool; release<br />
it to put it off.<br />
Note: The switch lever (paddle switch)<br />
does not work with the safety<br />
lock in the LOCK position.<br />
Do not try to work the switch<br />
lever (paddle switch) with the<br />
safety lock on. Not using the tool,<br />
put on the safety lock.<br />
L<br />
Switch lever (Paddle switch)<br />
FLOCK condition)<br />
I<br />
0 Permissible cutting thickness<br />
The groove in the end of the die serv s as<br />
the gauge for allowable cutting thickness.<br />
Do not attempt to cut any plate that will<br />
not fit into this groove.<br />
mild steel:<br />
Statinless:<br />
1.6 mm (1116") I I 1.2 mm (3/64")<br />
4
0 Cutting method<br />
Smooth cutting is achieved by holding<br />
the tool perpendicular to the material<br />
and moving it gently in the cutting direction.<br />
Apply machine oil to the punch and<br />
die about every 10 meters (33 ft) in order<br />
to assure clean cutting action.<br />
.Cutting corrugated metals<br />
To cut corrugated sheet metals (with<br />
wave-like surfaces), change die orientation<br />
and hold the tool so that the cutting<br />
head is at an angle (as shown at right) for<br />
smooth cutting action.<br />
.To change die orientation<br />
Use the hex wrench provided to loosen<br />
the hold-down screw over the die. This<br />
enables you to turn the die either 90" or<br />
180". Once you have change the die<br />
orientation, align the small hole on the<br />
outer edge of the die with the centerline<br />
of the hold-down screw, then fasten securely.
0 Blade replacement<br />
To replace the blade, use the hex wrench<br />
provided to loosen the hold-down screw<br />
and remove the die. Then, use the wrench<br />
to turn the screw to the left and remove.<br />
Next, lift off the punch.<br />
Hold-down screw<br />
To install the blade, secure the screw and<br />
hold-down screw carefully.<br />
I<br />
I<br />
@I Revolving hold-down screw<br />
@ Punch<br />
0 Screw<br />
@ Die<br />
UJU4’<br />
‘4<br />
*Following each use of the tool, clean off the cutter head, and lubricate with machine<br />
oil, while revolving the head a few times. Not using the tool, put on the safety lock.<br />
6
Maintenance<br />
0 Carbon brushes<br />
Replace carbon brushes when they wear<br />
down to about 3 mm (1/8") or sparking<br />
will occur. Both brushes should be<br />
changed at the same time.<br />
To replace the carbon brushes, use a<br />
minus (-1 head screwdriver to remove the<br />
brush holder cap.<br />
(-) Screwdrlver<br />
Brush holder cap<br />
I<br />
/ I<br />
7


